engine MERCEDES-BENZ V-CLASS MPV 2021 Owners Manual
[x] Cancel search | Manufacturer: MERCEDES-BENZ, Model Year: 2021, Model line: V-CLASS MPV, Model: MERCEDES-BENZ V-CLASS MPV 2021Pages: 337, PDF Size: 9.88 MB
Page 5 of 337
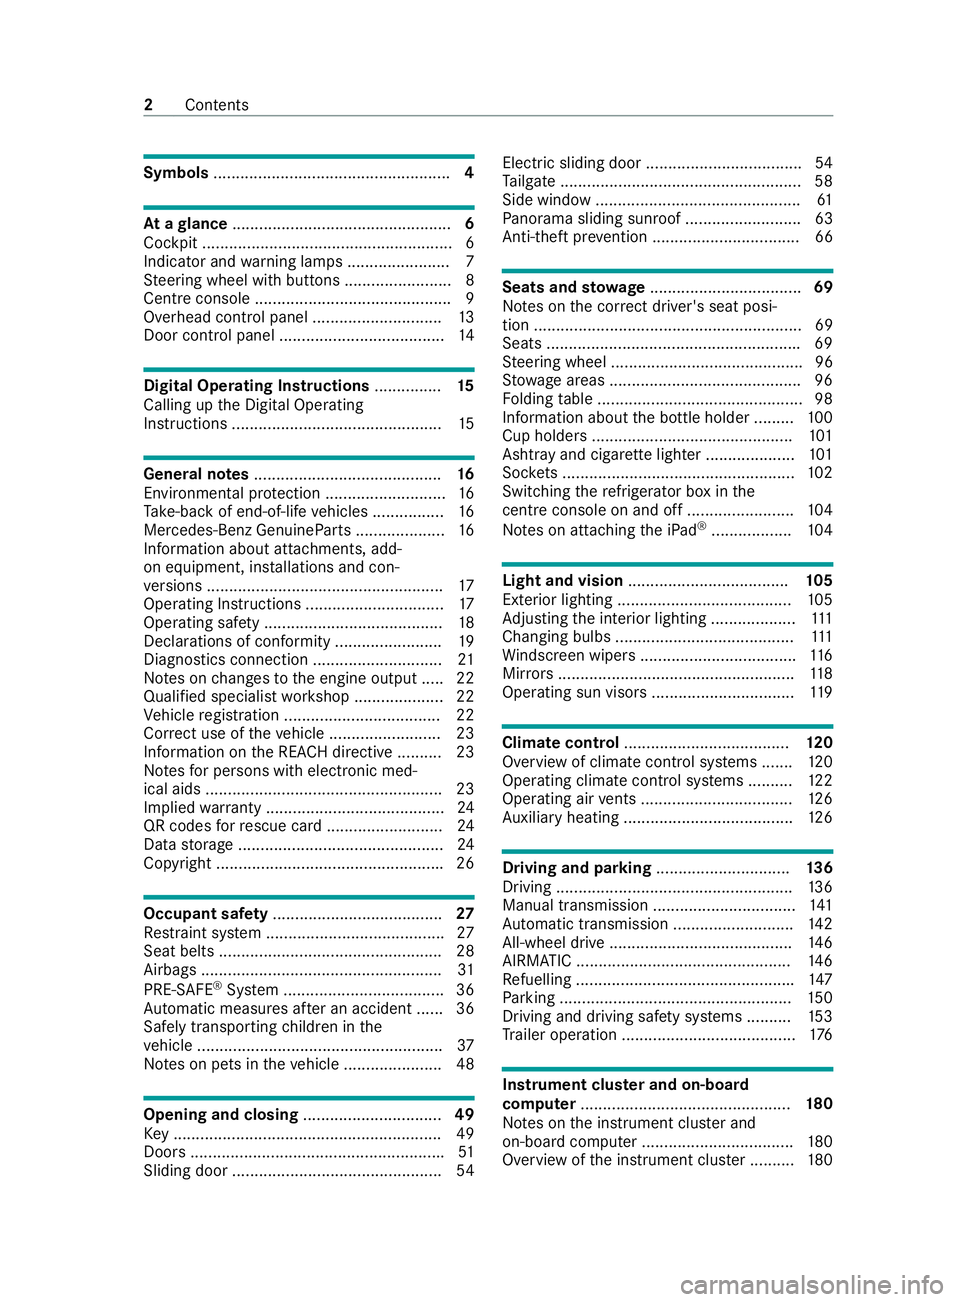
Symbols
..................................................... 4At
agl ance ................................................. 6
Cockpit ........................................................ 6
Indica tor and warning lamps ...................... .7
St eering wheel with buttons ........................ 8
Centre console ............................................ 9
Overhead control panel ............................. 13
Door control panel .................................... .14Digital Operating Instructions
...............15
Calling up the Digital Operating
Instructions ............................................... 15Genera
l notes.......................................... 16
Environmental pr otection ........................... 16
Ta ke -ba ckof end-of-life vehicles ................16
Mercedes-Benz GenuineParts .................... 16
Information about attachments, add-
on equipment, ins tallations and con‐
ve rsions .................................................... .17
Operating Instructions ...............................17
Operating saf ety ........................................ 18
Declarations of conformity ........................ 19
Diagno stics connection ............................ .21
No tes on changes tothe engine output ..... 22
Qualified specialist workshop .................... 22
Ve hicle registration ................................... 22
Cor rect use of theve hicle .........................23
Information on the REA CHdirective .......... 23
No tesfo r persons with electronic med‐
ical aids .....................................................23
Implied warranty ........................................ 24
QR codes forre scue card .......................... 24
Data storage ..............................................24
Copyright .................................................. .26Occupant saf
ety...................................... 27
Re stra int sy stem ........................................27
Seat belts .................................................. 28
Airbags ...................................................... 31
PRE-SAFE ®
Sy stem .................................... 36
Au tomatic measure s after an accident ...... 36
Safely transporting children in the
ve hicle .......................................................37
No tes on pets in theve hicle ......................48 Opening and closing
...............................49
Ke y ............................................................ 49
Doors ........................................................ .51
Sliding door ............................................... 54Electric sliding door ...................................
54
Ta ilgate ...................................................... 58
Side window .............................................. 61
Pa norama sliding sunroof .......................... 63
Anti-theft pr evention ................................. 66 Seats and
stowage .................................. 69
No tes on the cor rect driver's seat posi‐
tion ............................................................ 69
Seats ........................................................ .69
St eering wheel ...........................................96
St ow age areas .......................................... .96
Fo lding table .............................................. 98
Information about the bottle holder ......... 100
Cup holders ............................................ .101
Ashtr ayand cigar ette lighter .................... 101
Soc kets .................................................... 102
Switching there frigerator box in the
centre console on and off ........................ 104
No tes on attaching the iPad ®
.................. 104 Light and vision
.................................... 105
Exterior lighting ....................................... 105
Ad justing the interior lighting ...................1 11
Changing bulbs ........................................ 111
Wi ndsc reen wipers ................................... 11 6
Mir rors ..................................................... 11 8
Operating sun visors ................................ 11 9 Climate control
..................................... 12 0
Overview of climate contro l systems .......1 20
Operating clima tecontrol sy stems ..........1 22
Operating air vents .................................. 12 6
Au xilia ryheating ...................................... 12 6 Driving and pa
rking .............................. 13 6
Driving .................................................... .136
Manual transmission ................................ 141
Au tomatic transmission ........................... 14 2
All-wheel drive ........................................ .146
AIRMATIC ................................................ 14 6
Re fuelling ................................................ .147
Pa rking .................................................... 15 0
Driving and driving sa fety sy stems ..........1 53
Tr ailer operation ...................................... .176 Instrument clus
ter and on-board
co mp uter ............................................... 18 0
No tes on the instrument clus ter and
on-board computer .................................. 180
Overview of the instrument clus ter .......... 180 2
Contents
Page 6 of 337
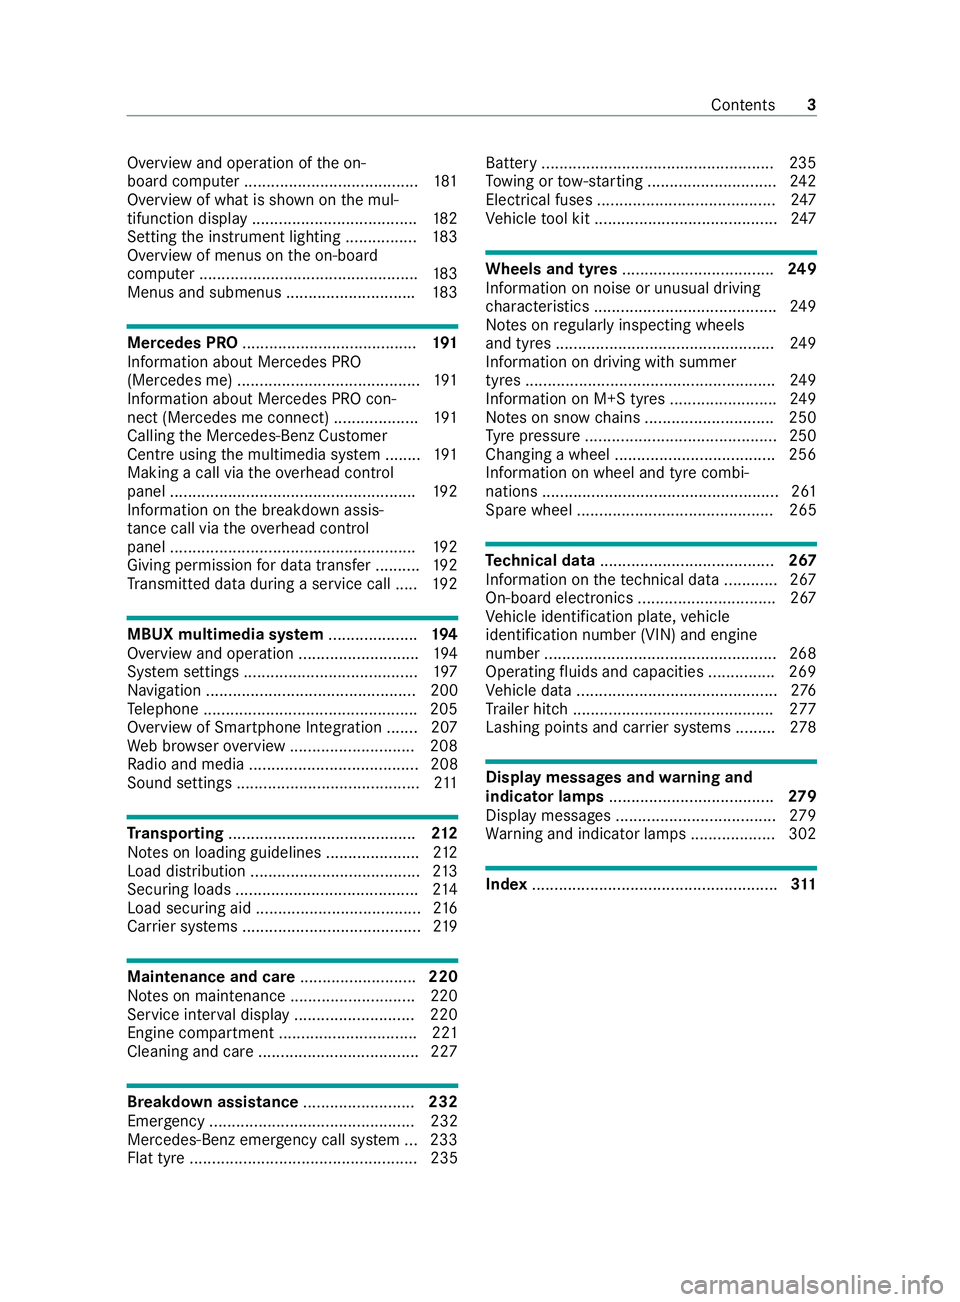
Overview and operation of
the on-
board computer ....................................... 181
Overview of what is shown on the mul‐
tifunction display .....................................1 82
Setting the instrument lighting ................1 83
Overview of menus on the on-board
computer .................................................1 83
Menus and submenus ............................ .183 Mercedes PRO
....................................... 191
Information about Mercedes PRO
(Mercedes me) ......................................... 191
Information about Mercedes PRO con‐
nect (Mercedes me connect) ................... 191
Calling the Mercedes-Benz Cus tomer
Centre using the multimedia sy stem ........ 191
Making a call via theove rhead control
panel .......................................................1 92
Information on the breakdown assis‐
ta nce call via theove rhead control
panel .......................................................1 92
Giving permission for data transfer .......... 19 2
Tr ansmit ted data during a service call .....1 92MBUX multimedia sy
stem .................... 194
Overview and operation ........................... 194
Sy stem settings ....................................... 197
Na vigation ............................................... 200
Te lephone ................................................ 205
Overview of Smartphone Integration ...... .207
We b br owser overview ............................ 208
Ra dio and media ...................................... 208
Sound settings .........................................2 11Tr
anspo rting .......................................... 212
No tes on loading guidelines ..................... 212
Load distribution ...................................... 213
Secu ring loads ......................................... 214
Load securing aid ..................................... 216
Car rier sy stems ........................................2 19Maintenance and care
..........................220
No tes on maintenance ............................2 20
Service inter val display .......................... .220
Engine compartment ............................... 221
Cleaning and care ................................... .227 Breakdown assistance
.........................232
Emergency .............................................. 232
Mercedes-Benz eme rgency call sy stem ... 233
Flat tyre ................................................... 235 Battery ....................................................2
35
To wing or tow- starting ............................ .242
Electrical fuses ........................................ 247
Ve hicle tool kit ......................................... 247 Wheels and tyres
.................................. 249
Information on noise or unusual driving
ch aracteristics ........................................ .249
No tes on regular lyinspecting wheels
and tyres ................................................ .249
Information on driving with summer
tyres ........................................................ 24 9
Information on M+S tyres ........................ 24 9
No tes on snow chains ............................ .250
Ty re pressure ...........................................2 50
Changing a wheel ................................... .256
Information on wheel and tyre combi‐
nations ..................................................... 261
Spare wheel ............................................ 265 Te
ch nical data ....................................... 267
Information on thete ch nical da ta............ 267
On-board electronics ............................... 267
Ve hicle identification plate, vehicle
identification number (VIN) and engine
number ....................................................2 68
Operating fluids and capacities .............. .269
Ve hicle data ............................................. 276
Tr ailer hit ch............................................. 277
Lashing points and car rier sy stems ......... 278 Display messages and
warning and
indicator lamps ..................................... 279
Displ aymessa ges .................................... 279
Wa rning and indicator lamps .................. .302 Index
....................................................... 311 Con
tents 3
Page 10 of 337
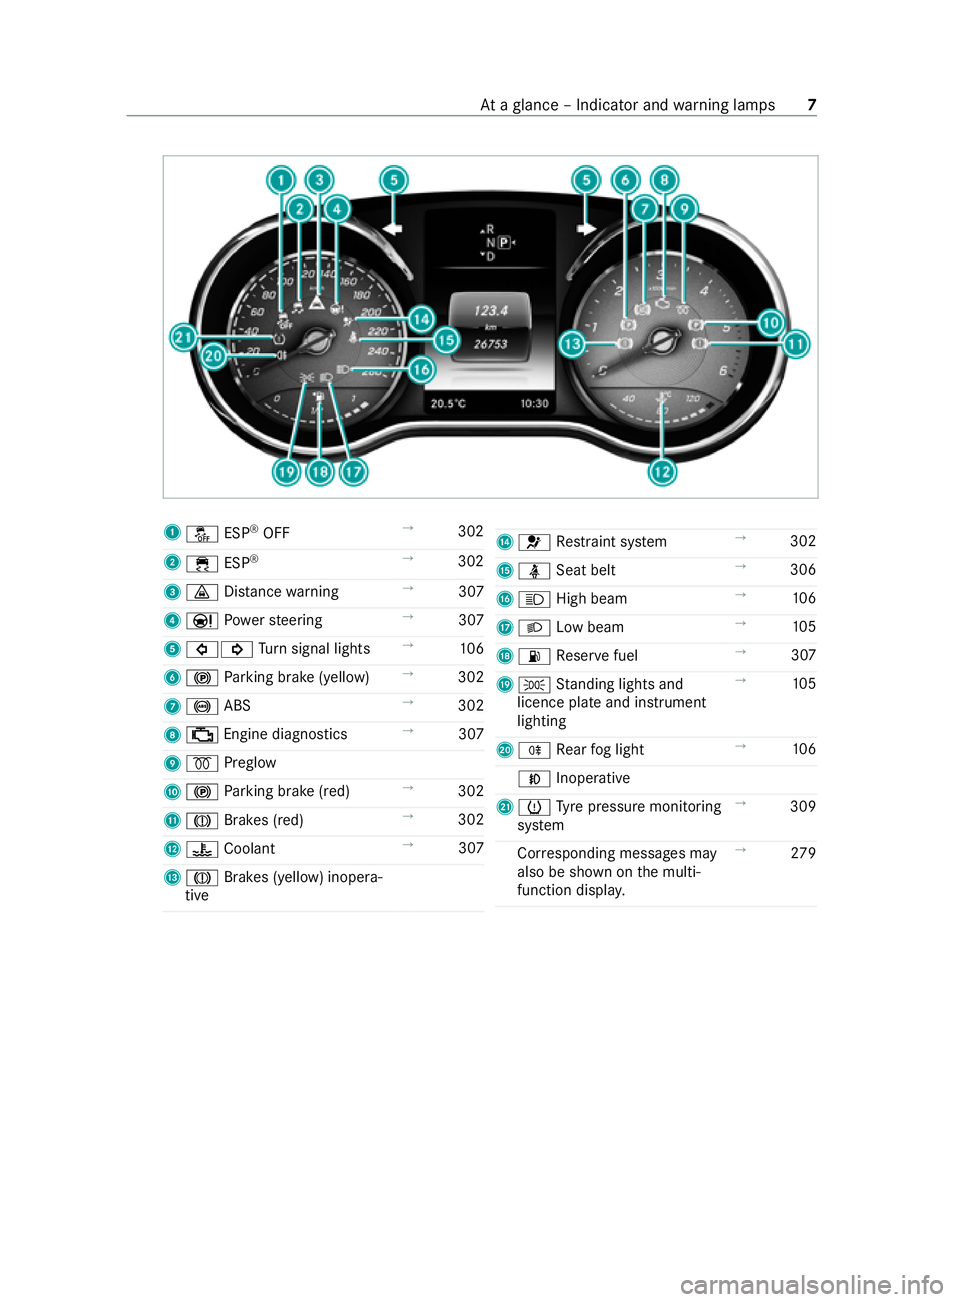
1
00BB ESP®
OFF →
302
2 00E5 ESP®
→
302
3 00BA Distance warning →
307
4 00CC Powe rst eering →
307
5 003E003D Turn signal lights →
106
6 0024 Parking brake (yellow) →
302
7 0025 ABS →
302
8 00B9 Engine diagnostics →
307
9 0028 Preglow
A 0024 Parking brake (red) →
302
B 004D Brakes (red) →
302
C 00AC Coolant →
307
D 004D Brakes (yellow) inopera‐
tive E
0075 Restra int sy stem →
302
F 00E9 Seat belt →
306
G 0057 High beam →
106
H 0058 Low beam →
105
I 00B4 Reser vefuel →
307
J 0060 Standing lights and
licence plate and instrument
lighting →
105
K 005E Rear fog light →
106
005A Inoperative
L 0077 Tyre pressure monitoring
sy stem →
309
Cor responding messages may
also be shown on the multi‐
function displa y. →
279 At
aglance – Indicator and warning lamps 7
Page 19 of 337
Environmental pr
otection
+ ENVIRONMENTAL
NOTEEnvironmental
damage due tooperating conditions and
personal driving style The pollutant emission of
theve hicle is
directly related totheve hicle's operation.
Operate theve hicle in an environmentally
re sponsible manner tomake a contribution to
environmen tal pr otection. Todo this, obser ve
th efo llowing recommendations on opera ting
conditions and your personal driving style.
Operating conditions: #
Make sure that the tyre pressures are
alw ays cor rect. #
Do not transport any unnecessa ry
we ight (e.g. a roof rack which is no lon‐
ge rre qu ired). #
Obser vethe service inter vals.
A regularly serviced vehicle will contri b‐
ute toenvironmen tal pr otection. #
Always ha vemaintenance workcar ried
out at a qualified specialist workshop.
Pe rsonal driving style: #
Do not depress the accelera tor pedal
when starting the engine. #
Do not warm upthe engine while sta‐
tionar y. #
Drive carefully and maintain a su fficient
dis tance to ot hervehicles. #
Avoid frequent, sudden acceleration and
braking. #
Shift gears in good time and use each
ge ar only up to00C3 of its maximum
engine speed. #
Switch off the engine in stationary traf‐
fi c, e.g. use the ECO start/ stop func‐
tion. #
Drive in a fuel-ef ficient manne r.Pay
attention tothe ECO display for a fuel-
ef ficient driving style. Ta
ke -back of end-of-life vehicles
EU countries onl y:
Mercedes-Benz will take back your end-of-life
ve hicle for environment-friendly disposal in accordance with
the European Union (EU) End-Of-
Life Vehicles Directive.
A network of vehicle take -ba ckpoints and dis‐
mantlers has been es tablished foryo uto return
yo ur vehicle. You can lea veit at any of these
points free of charge . This makes an impor tant
contribution toclosing there cycling circle and
conserving resources.
Fo r fur ther information about there cycling and
disposal of end-of-life vehicles, and theta ke -ba ck
conditions, please visit the national
Mercedes-Benz website foryo ur countr y. Mercedes-Benz GenuineParts
+ ENVIRONMENTAL
NOTEEnvironmental
damage caused bynot using recycled
re conditioned components Mercedes‑Benz
AGoffers recycled recondi‐
tioned components and pa rts with the same
qu ality as new parts. The same entitlement
from the implied warranty is valid as for new
parts. #
Recycled reconditioned components
and pa rts from Mercedes‑Benz AG. *
NO
TEImpairment of the operating ef fi‐
ciency of there stra int sy stems from
ins talling accessory parts or from repairs
or we lding Airbags and seat belt
tensioners, as well as
control units and sensors forth ere stra int
sy stems, may be ins talled in thefo llowing
areas of your vehicle:
R doors
R door pillars
R door sills
R seats
R cockpit
R instrument clus ter
R centre console #
Do not ins tall accessories such as audio
sy stems in these areas. #
Do not car ryout repairs or welding. #
Have accesso ryparts retrofitted at a
qu alified specialist workshop. 16
General no tes
Page 20 of 337

If
yo u use parts, tyres, wheels or saf ety-re leva nt
accesso ries which ha venot been appr ovedby
Mercedes-Benz, the operating saf ety of theve hi‐
cle may be jeopardised. Saf ety-re leva nt sy stems,
e.g. the brake sy stem, may malfunction. Use only
ge nuine Mercedes-Benz GenuineParts or pa rts of
equal quality. Use only tyres, wheels and acces‐
sory parts that are appr ovedfo ryo ur vehicle
model.
Mercedes-Benz tests original parts, con version
parts and accessory parts that ha vebeen
appr ovedfo ryo ur vehicle model forre liability,
saf ety and suitabilit y.Despite ongoing ma rket
re sear ch, Mercedes-Benz is unable toassess
ot her parts. Mercedes-Benz accepts no responsi‐
bility forth e use of such parts in Mercedes-Benz
ve hicles, even if they have been appr oved of fi‐
cially or independently byate sting centre.
Cer tain parts are only of ficially appr ovedfor
ins tallation or modification if they comply wi th
legal requirements. All genuine Mercedes-Benz
GenuineParts meet there gistration requirements.
The use of non-appr oved parts may in validate the
ve hicle's general ope rating pe rmit.
This is the case in thefo llowing situations:
R theve hicle type changes from that stated in
th ege neral ope rating pe rmit.
R other road users could be endangered.
R theex haust gas or noise le vels are adversely
af fected.
Alw ays specify theve hicle identification number
(VIN) and engine number when ordering genuine
Mercedes-Benz GenuineParts (/ page 268). Information about attachments, add-on
equipment, installations and conve
rsions
Note s on body/equipment mounting direc‐
tives
Fo r saf etyre asons, ha veadd-on equipment pro‐
duced and fitted in accordance wi th theva lid
Mercedes-Benz body/equipment mounting direc‐
tives. These body/equipment mounting directives
ensure that thech assis and add-on equipment
fo rm one unit and that the greatest possible le vel
of operational and driving saf ety is achie ved.
Bo th vehicle manufacturers and body manufac‐
turers must alw ays ensure that the products they
manufacture come into circulation only in a safe
st ate and do not pose any risks topeople. Other‐
wise, there may be consequences under civil,
criminal or public la w.All manu facturers are re
sponsible forth e products that they have man‐
ufactured. Manufacturers of attachments, add-on
equipment, ins tallations and con versions must
guarantee compliance with Directive
2001/95/EC on general product sa fety.
Mercedes-Benz recommends thefo llowing proce‐
dure for saf etyre asons:
R Do not make any other changes totheve hi‐
cle.
R Obtain appr oval from Mercedes-Benz in the
eve nt of deviations from the appr oved body/
equipment mounting directives.
Ac cep tance tests per form ed bypublic test bodies
or of ficial appr ovals do not rule out saf etyrisks.
Comply with the information about Mercedes-
Benz genuine pa rts (/ page16).
Yo u will find the Mercedes-Benz body/equipment
mounting directives online on the https://bb-
por tal.me rcedes-benz.com/de/GLOBAL
Yo u will also find information about the PIN
assignment and changing the fuse there.
% Yo
u can obtain fur ther information at a quali‐
fi ed specialist workshop. &
WARNING Risk of accident and injury in
th eeve nt of improper con versions or
ch anges totheve hicle
Con versions or changes totheve hicle can
pr ev ent sy stems or components from func‐
tioning proper lyand/or jeopardise theve hi‐
cle's operational saf ety. #
Always ha vecon versions or changes to
th eve hicle car ried out at a qualified
wo rkshop. Note
s onthera diator
Even seeming lyminor changes totheve hicle,
such as attaching a radiator grille in winter, are
not permitted. Do not co verth era diator. Do not
use any thermal mats, insect pr otection co vers
et c.
Otherwise, theva lues of theve hicle's diagnostic
sy stem will be dis torted. In some count ries, the
re cording of engine diagnostics da tais prescri‐
bed bylaw and must be verifiable and cor rect at
all times. Operating In
structions
These Operating In stru ctions describe all models,
as well as standard and optional equipment of Gene
ral no tes 17
Page 25 of 337

#
Alwaysfit th efloor mats securely and as
prescribed in order toensure that there
is alw ays suf ficient room forth e pedals. #
Do not use loose floor mats and do not
place floor mats on top of one ano ther. *
NO
TEBattery discharging from using
devices connec tedto the diagnostics
connection Using devices at
the diagnostics connection
drains the batter y. #
Check thech arge leve l of the batter y. #
Ifth ech arge leve l is lo w,charge the bat‐
te ry, e.g. bydriving a considerable dis‐
ta nce. The connection and use of ano
ther device on the
diagnostics connection can ha vethefo llowing
ef fects:
R Malfunctions in theve hicle sy stem
R Perm anent damage tovehicle components
Please referto thewa rranty term s and conditions
re ga rding this.
In addition, connecting equipment tothe diagnos‐
tics connection can lead toemissions monitoring
information being reset, forex ample. This may
lead totheve hicle failing tomeet therequ ire‐
ments of the next emissions inspection during
th e main inspection. Note
s onchanges tothe engine output
Output inc reases can:
R Change the emission values.
R Lead tomalfunctions.
R Result in consequential damage.
The operating saf ety of the engine is not guaran‐
te ed in all situations.
If th eve hicle's engine output is increased:
R Tyres, suspension, brake sy stem and engine
cooling sy stem must be adap tedto the
inc rease engine output.
R Vehicle must be recertified.
R Report changes in output tothe accident
insurance body.
This will otherwise lead tothe in validation of the
ve hicle's general ope rating pe rmit and its insur‐
ance co verage.
If yo u sell theve hicle, inform the buyer of any
alterations totheve hicle's engine output. This
may constitute a punishable of fence under
national legislation. Qualified speciali
stwo rkshop
A qu alified specialist workshop has the necessary
special skills, tools and qualifications tocor rectly
car ryout any necessary workon your vehicle.
This particularly applies towo rkreleva nt to
saf ety.
Alw ays ha vethefo llowing workon theve hicle
car ried out at a qualified specialist workshop:
R Safety-re leva nt wo rks
R Service and maintenance work
R Repair work
R Modifications as well as ins tallations and con‐
ve rsions
R Workon electronic components
Mercedes-Benz recommends that you use a
Mercedes-Benz service centre forth is purpose. Ve
hicle registration
Mercedes-Benz may ask its service centres to
car ryout tech nical inspections on cer tainve hi‐
cles. The quality or saf ety of theve hicle is
impr oved as a result of the inspection.
Mercedes-Benz can only inform you about vehicle
ch ecks if it has your registration data. 22
General no tes
Page 39 of 337
re
mains off, depending on there sult of the
classi fication.
- Ifth ePA SSENGER AIR BAG OFF indicator
lamp is off: mo vethe co-driver seat as far
back as possible, or the person of smaller
st ature should use a rear seat.
- Ifth ePA SSENGER AIR BAG OFF indicator
lamp is lit continuously: the person of
smaller stature should not use the co-
driver seat. &
WARNING Risk of injury or death when
th ePA SSENGER AIR BAG OFF indicator
lamp is lit
If th ePA SSENGER AIR BAG OFF indicator
lamp remains lit af terth e self-test, the front
passenger airbag is disabled.
If th e front passenger seat is occupied,
alw ays ensure that:
R The classification of the person in the
front passenger seat is cor rect and the
front passenger airbag is enabled or disa‐
bled in accordance with the person in the
front passenger seat.
R The person is seated properly with a cor‐
rectly fastened seat belt.
R The front passenger seat has been mo ved
as far back as possible. Be sure
toalso obse rveth efo llowing fur ther rela‐
te d subjects:
R Child restra int sy stem on the co-driver seat
(/ page 46).
R Suitable positioning of thech ild restra int sys‐
te m (/ page 40). PRE-SAFE
®
Sy stem Fu
nction of PRE-SAFE ®
(anticipatory occupant
pr otection) PRE-
SAFE®
can de tect cer tain hazardous situa‐
tions and take pre-em ptive measures toprotect
th eve hicle occupants.
PRE-SAFE ®
can implement thefo llowing meas‐
ures independently of each other:
R Tightening the seat belts on the driver's seat
and co-driver seat.
R Closing the side windo ws. R
Vehicles with a sliding sunroof: closingthe
sliding sunroof.
R Vehicles with memory function: adjusting
th e co-driver seat toa more favo urable seat
position.
* NO
TEDama gecaused byobjects in the
fo ot we ll or behind the seat The automatic adjustment of
the seat posi‐
tion may result in damage tothe seat and/or
th e object. #
Stow objects in a suitable place. Re
versing the PRE- SAFE®
sy stem measures If an accident did not occur,
the pre-em ptive
measures that we retak en are reve rsed.
Yo u will need tomake cer tain adjustments your‐
self. #
Ifth e seat belt pre-tensioning is not reduced,
mo vethe seat backrest back slightl y.
The locking mechanism releases. Au
tomatic measures af ter an accident
Depending on the type and se verity of the acci‐
dent, and depending on theve hicle's equipment,
th efo llowing measures can be implemente d,for
ex ample:
R activating the hazard warning lights
R triggering an automatic emer gency call
(/ page 233)
R switching off the engine
To restart theve hicle, switch the ignition off
and switch it back on (/ page136). Depend‐
ing on the type and se verity of the accident, it
may possible that theve hicle can no longer
be star ted.
R switching off the fuel supply
R unlocking theve hicle doors
R lowe ring the front side windo ws
R switching on the interior lighting 36
Occupant saf ety
Page 54 of 337
#
Press emer gency key2 into the opening in
th eke y in the direction of the ar row until bat‐
te ry compa rtment co ver1 opens. When
doing so, do not hold battery compartment
co ver1 shut. #
Tapth eke y again stthe palm of your hand so
th at battery 3falls out of the battery com‐
partment. #
Insert the new battery into the battery tr ay
with the positive pole facing up wards. Use a
lint-free clo thtodo so. #
Fit battery compartment co ver1 tothekey
casing wi th the front lugs firs t and push it
closed. #
Slide emergency key2 back into thekey
( / page 50). Re
ctifying problems with thekey It is no longer possible
tolock theve hicle
using theke y.
Po ssible causes:
R The doors are not closed proper ly.
R The centra l locking sy stem has malfunc‐
tioned. #
Close the doors properly and lock theve hicle
again. #
Lock theve hicle using the emer gency key
( / page 50) or press down the locking pins
and then close the doors. #
Have the cent ral locking sy stem checked as
soon as possible at a qualified specialist
wo rkshop.
Yo u cann otlock or unlock theve hicle any‐
more.
Po ssible causes:
R The key bat tery iswe ak or dischar ged.
R The key is faulty. #
Check the battery using the indicator lamp
and replace the batter y,if necessary
(/ page 49). #
Use the emer gency key element tolock and
unlock theve hicle (/ page 50). #
Have theke ych ecked at a qualified specialist
wo rkshop.
The engine cannot be star ted using the key.
Po ssible causes:
R The on-board electrical sy stem voltage is too
lo w. #
Switch off non-essential consumers, such as
interior lighting, and try tostart the engine
again.
If th is does not work: #
Check thest ar ter battery and charge it, if
necessary (/ page 237).
or #
Jump-s tart theve hicle.
or #
Consult a qualified specialist workshop.
Yo u ha velost a key. #
Have theke y deacti vated at a qualified spe‐
cialist workshop. #
Report the loss immediately totheve hicle
insurers. #
If necessar y,ha ve the loc kschanged as well. Doors
Un
locking and opening the door from inside Door handle (e
xamp le: driver's door) #
Pull door handle 2.
Locking pin 1pops up when the door is
unloc ked. Opening and closing
51
Page 61 of 337

#
Press and hold the sliding door button until
th e sliding door has opened or closed.
The sliding door mo ves with increased forc e.
Obser vethat in such circum stances, the
bloc kage detection is less sensitive. Tostop
th e mo vement, release the sliding door but‐
to n. #
Remo vethe cause of the bloc kage atthe ear‐
liest opportunity. Ta
ilgate Opening and closing
the tailgate &
DANG ER Risk of exhaust gas poisoning
Combustion engines emit poisonous exhaust
ga ses such as carbon monoxide. Exhaust
ga ses can enter theve hicle interior if theta il‐
gate is open when the engine is running,
especially if theve hicle is in motion. #
Always switch off the engine before
opening theta ilgate. #
Never drive with theta ilgate open. *
NO
TEDama getotheta ilgate caused by
obs tacles ab ovetheve hicle The
tailgate swings rear wa rds and upwards
when it is opened. #
Make sure that there is suf ficient space
behind and ab ovetheta ilgate. %
Yo
u will find de tails of theta ilgate opening
dimensions under "Technical data"
(/ page 276). #
Toopen: push button 1onthe handle and
ra ise theta ilgate. #
Toclose: pulltheta ilgate firm ly down wards
by loop 2and close it from outside.
Opening the tailgate in an emer gency
If th e battery voltage is low or thevo ltage supply
is inter rupte d,theta ilgate cannot be opened.
In an emer gency, you can open theta ilgate using
th ere lease cat chfor service purposes. #
Prise off the co ver on the lo wer part of the
ta ilgate with a suitable tool, e.g. the scr ew‐
driver from theve hicle tool kit. #
Insert the scr ewdriver into the opening and
mo vethere lease le ver until theta ilgate
unloc ksand opens. #
Lift theta ilgate upwards. EAS
Y-PA CK tailgate Note
s onthe EAS Y-PA CK tailgate &
DANG ER Risk of exhaust gas poisoning
Combustion engines emit poisonous exhaust
ga ses such as carbon monoxide. Exhaust
ga ses can enter theve hicle interior if theta il‐
gate is open when the engine is running,
especially if theve hicle is in motion. #
Always switch off the engine before
opening theta ilgate. #
Never drive with theta ilgate open. *
NO
TEDama getotheta ilgate caused by
obs tacles ab ovetheve hicle The
tailgate swings rear wa rds and upwards
when it is opened. #
Make sure that there is suf ficient space
behind and ab ovetheta ilgate. %
Yo
u will find de tails of theta ilgate opening
dimensions under "Technical data"
(/ page 276). 58
Opening and closing
Page 63 of 337

Inter
rupting automatic operation #
Press button 1inthe handle again.
or #
Press closing button 2intheta ilgate again.
or #
Press the008C button on theke y again for
longer than 0.5 seconds.
Ad justing the opening angle of the tail gate
Setting the end position
Yo u can set the opening angle of theta ilgate by
saving the desired position as the end position. #
Open theta ilgate and stop automatic opera‐
tion in the desired position.
or #
Open theta ilgate and manually swing it into
th e desired position. #
Press and hold the closing button 008Con
th eta ilgate until the confirmation tone
sounds once.
The cur rent position of theta ilgate has been
sa ve d as the end position.
Re setting tothe maximum opening angle #
Open theta ilgate. #
Press and hold the closing button 008Con
th eta ilgate until the confirmation tone
sounds twice.
The sa ved end position has been dele ted and
th eta ilgate opens again tothe maximum
ex tent.
Re setting the tailgate
Yo u must reset theta ilgate if there has been a
malfunction or an inter ruption in thevo ltage sup‐
ply. #
Ifth eta ilgate is open: close theta ilgate by
hand. #
Brief lypress the button in the handle of the
ta ilgate, step out of the swinging range of the
ta ilgate and open thetai lgate. #
When theta ilgate is fully open, press the
008C closing button in theta ilgate and step
out of the swinging range of theta ilgate.
The tailgate closes. When thetai lgate is fully
closed, it is reset and operational.
% When the008C button of theke y is prog ram‐
med for operating theta ilgate (/ page61),
yo u can also use theke yto open and close
th eta ilgate. Opening and closing
there ar window &
DANG ER Risk of poisoning from exhaust
ga ses
Combustion engines emit poisonous exhaust
ga ses, such as carbon monoxide. Exhaust
ga ses can enter theve hicle interior if there ar
wind owis open when the engine is running,
especial lyifth eve hicle is in motion. #
Always switch off the engine before
opening there ar wind ow. #
Never drive with there ar wind owopen. Re
quirements
R The vehicle or load compartment is unloc ked
and theta ilgate is closed.
R To
open using theke y:
- The vehicle is equipped with an EAS Y-
PA CK tailgate and the008C button on the
ke y is prog rammed toopen there ar win‐
dow (/ page61) or theve hicle is
equipped with the Bunk Package.
Opening #
Press the008C button on thekey.
or #
Press button 1onthe handle on there ar
wind ow.
Closing #
Swing there ar wind owdown and push it
closed. 60
Opening and closing