headlamp Mercury Mercury Cougar 2002 Owner's Manual
[x] Cancel search | Manufacturer: MERCURY, Model Year: 2002, Model line: Mercury Cougar, Model: Mercury Mercury Cougar 2002Pages: 216, PDF Size: 4.04 MB
Page 1 of 216

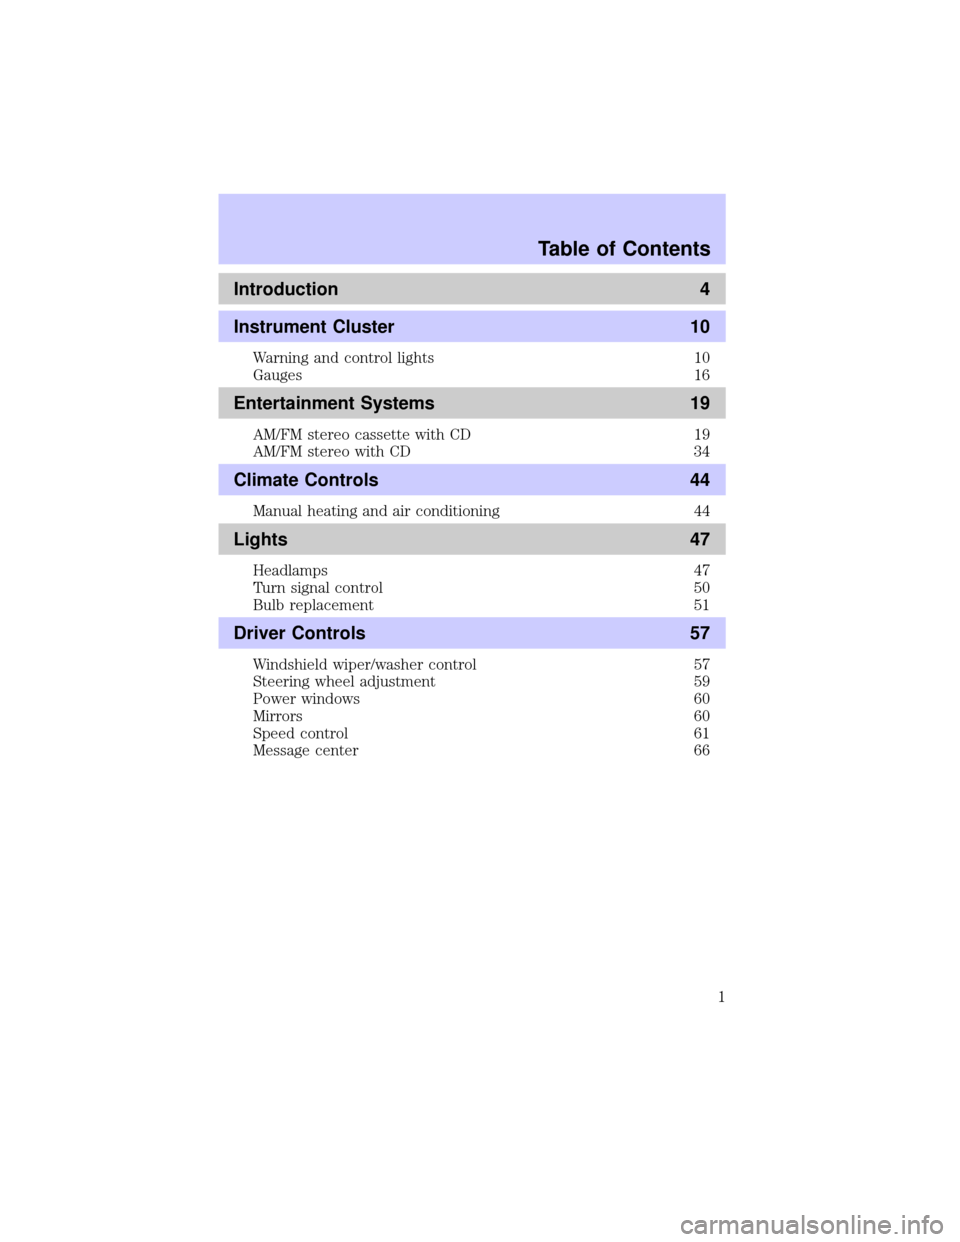
Introduction 4
Instrument Cluster 10
Warning and control lights 10
Gauges 16
Entertainment Systems 19
AM/FM stereo cassette with CD 19
AM/FM stereo with CD 34
Climate Controls 44
Manual heating and air conditioning 44
Lights 47
Headlamps 47
Turn signal control 50
Bulb replacement 51
Driver Controls 57
Windshield wiper/washer control 57
Steering wheel adjustment 59
Power windows 60
Mirrors 60
Speed control 61
Message center 66
Table of Contents
1
Page 14 of 216

High beams
Illuminates when the high beam
headlamps are turned on.
Foglamps
Illuminates when the foglamps are
turned on.
Refer toFoglamp controlin the
Lightschapter.
OVERHEAD WARNING LIGHTS (if equipped)
These lights illuminate briefly to ensure the systems are functional.
Service intervals
Illuminates to indicate that routine
service should be performed. Check
your maintenance schedule to
determine the routine service to be
completed.
To reset the light, hold the SELECT
and UNITS controls on the trip
computer for five seconds. The light
will be illuminated and then extinguish after approximately four seconds.
Frost warning
Illuminates when ambient air
temperatures are between 0É C (32É
F) and 4É C (39É F). Theyellow
light warns of possible ice on the
roads.
Instrument Cluster
14
Page 15 of 216

Danger of ice warning
Illuminates when ambient air
temperature is 0É C (32É F) and
below. Theredlight warns of an
increased danger of icy roads.
The absence of a light in cold
temperatures does not necessarily mean that there is no risk of ice on
the road.
Low washer fluid
Illuminates when the windshield
washer fluid is low.
Door ajar
Illuminates when any door or
liftgate is open.
Safety belt warning chime
Sounds to remind you to fasten your safety belts.
BeltMinderYchime
Sounds intermittently to remind you to fasten your safety belts.
Supplemental restraint system (SRS) warning chime
Sounds when a malfunction in the supplemental restraint system (front
or side airbags) has been detected. Have the supplemental restraint
system inspected immediately.
Headlamps on warning chime
Sounds when the headlamps or parking lamps are on, the key is removed
from the ignition and the driver's door is opened.
Instrument Cluster
15
Page 47 of 216

HEADLAMP CONTROL
Rotate the headlamp control to the
first position to turn on the parking
lamps.
Rotate to the second position to
turn on the headlamps.
Foglamp control (if equipped)
The headlamp control also operates
the foglamps. The foglamps can be
turned on when the headlamp
control is in the
or
the
position and the high
beams are not turned on.
Pull headlamp control towards you
to turn foglamps on. The foglamp
indicator light
will illuminate.
Daytime running lamps (DRL) (if equipped)
Turns the headlamps on with a reduced output.
To activate:
²the ignition must be in the ON position and
²the headlamp control is in the OFF or Parking lamps position.
Always remember to turn on your headlamps at dusk or during
inclement weather. The Daytime Running Lamp (DRL) system
does not activate with your tail lamps and generally may not provide
adequate lighting during these conditions. Failure to activate your
headlamps under these conditions may result in a collision.
Lights
47
Page 48 of 216

High beams
Push the lever toward the
instrument panel to activate. Pull
the lever towards you to deactivate.
Flash to pass
Pull toward you slightly to activate
and release to deactivate.
PANEL DIMMER CONTROL
Use to adjust the brightness of the
instrument panel during parklamp,
headlamp, and autolamp operation.
²Rotate up to brighten.
²Rotate down to dim.
²Rotate fully up to turn on the
interior lights.
Lights
48
Page 49 of 216

AIMING THE HEADLAMPS
The headlamps on your vehicle are properly aimed at the assembly plant.
If your vehicle has been aimed in an accident the alignment of your
headlamps should be checked by a qualified service technician.
Each headlmap may be properly aimed in the vertical (up/down)
direction only. THE HORIZONTAL (left/right) AIM IS PRESET BY THE
HEADLAMP MANUFACTURER AND DOES NOT NEED TO BE
RE-AIMED.
Adjusting the vertical aim
1. Park the vehicle on a level
surface.
2. The vertical indicator is located
on top of the headlamp assembly;
the adjusting screw is located
behind the headlamp assembly.
3. Turn the vertical adjusting screw
until the bubble aligns with the ª0º
reference mark when viewed from
directly above. The ª0º reference
mark is the middle of the three (3)
bold graduation marks.
Lights
49
Page 51 of 216

BULBS
Replacing exterior bulbs
Check the operation of the following lamps frequently:
²Headlamps
²Tail lamps
²Brakelamps
²High-mount brakelamp
²Turn signal lamps
²Backup lamps
²License plate lamp
Do not remove lamp bulbs unless they will be replaced immediately. If a
bulb is removed for an extended period of time, contaminants may enter
the lamp housings and affect performance.
Using the right bulbs
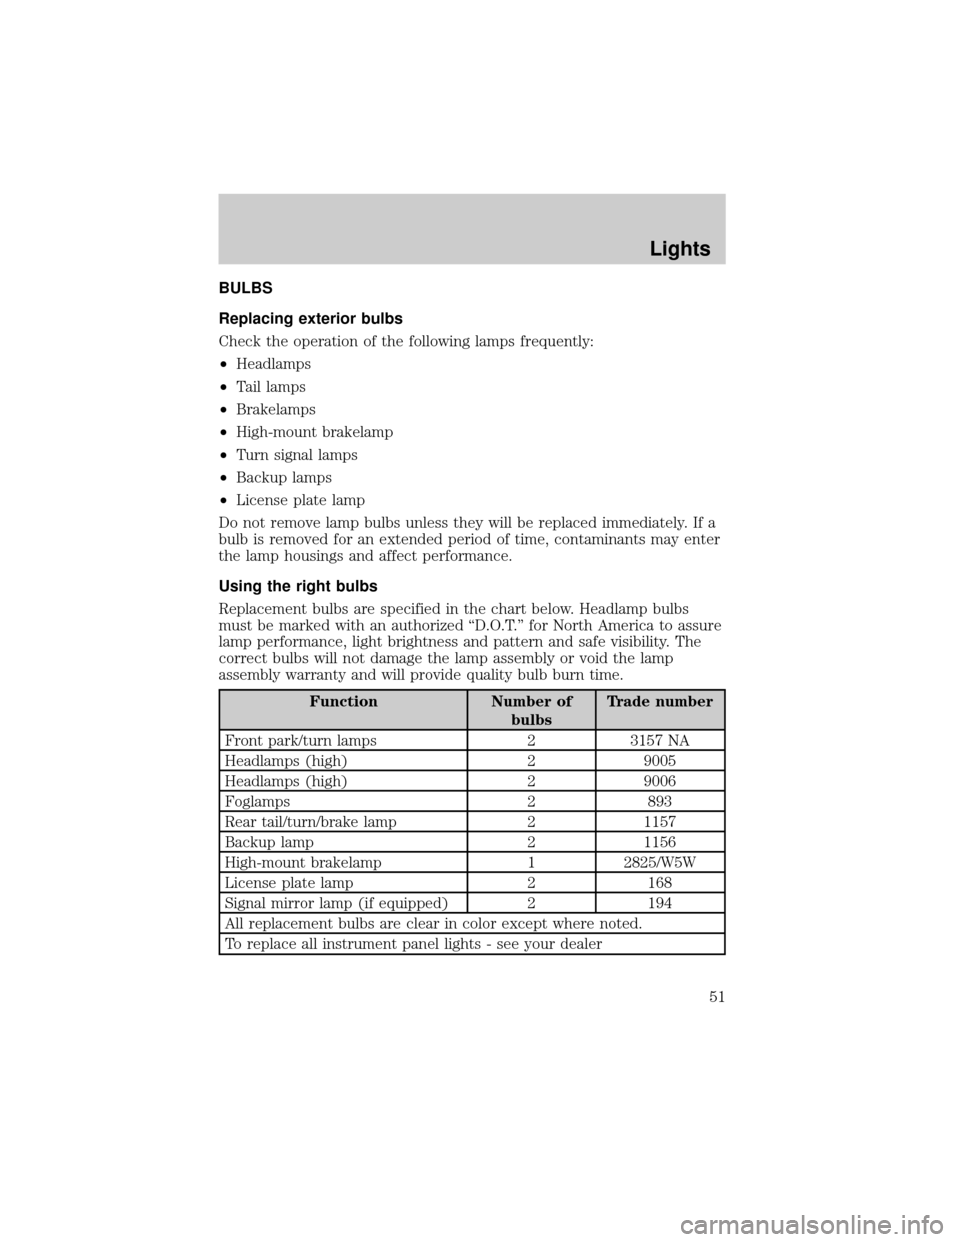
Replacement bulbs are specified in the chart below. Headlamp bulbs
must be marked with an authorized ªD.O.T.º for North America to assure
lamp performance, light brightness and pattern and safe visibility. The
correct bulbs will not damage the lamp assembly or void the lamp
assembly warranty and will provide quality bulb burn time.
Function Number of
bulbsTrade number
Front park/turn lamps 2 3157 NA
Headlamps (high) 2 9005
Headlamps (high) 2 9006
Foglamps 2 893
Rear tail/turn/brake lamp 2 1157
Backup lamp 2 1156
High-mount brakelamp 1 2825/W5W
License plate lamp 2 168
Signal mirror lamp (if equipped) 2 194
All replacement bulbs are clear in color except where noted.
To replace all instrument panel lights - see your dealer
Lights
51
Page 52 of 216

Replacing headlamp bulbs
Make sure the headlamp switch is in the OFF position.
To remove the high or low beam headlamp bulb:
1. Lift the hood and release the wire
clip on the rear of the headlamp
assembly and remove the cover.
2. Disconnect the electrical
connector by turning the bulb
holder counterclockwise.
3. Pull the bulb holder straight out
to remove the bulb.
To install the new bulb:
Handle a halogen headlamp bulb carefully and keep out of
children's reach. Grasp the bulb by only its plastic base and do
not touch the glass. The oil from your hand could cause the bulb to
break the next time the headlamps are operated.
Note:If the bulb is accidentally touched, it should be cleaned with
rubbing alcohol before being used.
1. Install the new bulb in the lamp assembly by pushing it straight in and
turning to lock it in position. You may need to turn the bulb slightly to
align the grooves in the plastic base with the tabs in the lamp assembly.
Lights
52
Page 53 of 216

2. Connect the electrical connector to the bulb.
3. Install the protective cover and secure it with the wire clips.
4. Turn the headlamps on and make sure they work properly. if the
headlamp was correctly aligned before you changed the bulb, you need
to align it again.
Replacing front parking lamp/turn signal bulbs
1. Remove the headlamp assembly
cover.
2. Turn the bulb holder counter
clockwise.
3. Remove the bulb socket by
pulling it straight out from the lamp
assembly.
4. Pull the bulb straight out of the
socket and press in the new bulb.
5. Install the bulb socket into the
lamp assembly by turning clockwise.
Replacing side marker lamps
1. Push the complete light assembly
to the front and pull it out.
2. Remove the socket from the
assembly by turning it counter
clockwise.
3. Pull the bulb straight out and
replace it.
4. Install the bulb socket into the
assembly by turning it clockwise.
Replacing brake/turn signal/tail/backup lamps
The brake, turn signal, tail and backup lamps bulbs are located in the
same portion of the tail lamp assembly. Follow the same steps to replace
either bulb.
Lights
53
Page 91 of 216

Reasons given... Consider...
ªI have an air bagº Air bags offer greater protection when
used with safety belts. Frontal airbags
are not designed to inflate in rear and
side crashes or rollovers.
ªI'd rather be thrown clearº Not a good idea.Peoplewho are
ejected are 40 times more likely
to DIE.Safety belts help prevent
ejection, WE CAN'T ªPICK OUR
CRASHº.
Do not sit on top of a buckled safety belt to avoid the Belt
Minder chime. Sitting on the safety belt will increase the risk of
injury in an accident. To disable (one-time) or deactivate the Belt
Minder feature please follow the directions stated below.
One time disable
Any time the safety belt is buckled and then unbuckled during an
ignition ON cycle, BeltMinder will be disabled for that ignition cycle only.
Deactivating/activating the BeltMinder feature
Read steps1-9thoroughly before proceeding with the
deactivation/activation programming procedure.
The BeltMinder feature can be deactivated/activated by performing the
following procedure:
Before following the procedure, make sure that:
²The parking brake is set.
²The gearshift is in P (Park) (automatic transmission) or the neutral
position (manual transmission).
²The ignition switch is in the OFF position.
²All vehicle doors are closed.
²The driver's safety belt is unbuckled.
²The parklamps/headlamps are in OFF position (If vehicle is equipped
with Autolamps, this will not affect the procedure).
To reduce the risk of injury, do not deactivate/activate the Belt
Minder feature while driving the vehicle.
Seating and Safety Restraints
91