turn signal Mercury Mercury Cougar 2002 Owner's Manual
[x] Cancel search | Manufacturer: MERCURY, Model Year: 2002, Model line: Mercury Cougar, Model: Mercury Mercury Cougar 2002Pages: 216, PDF Size: 4.04 MB
Page 1 of 216

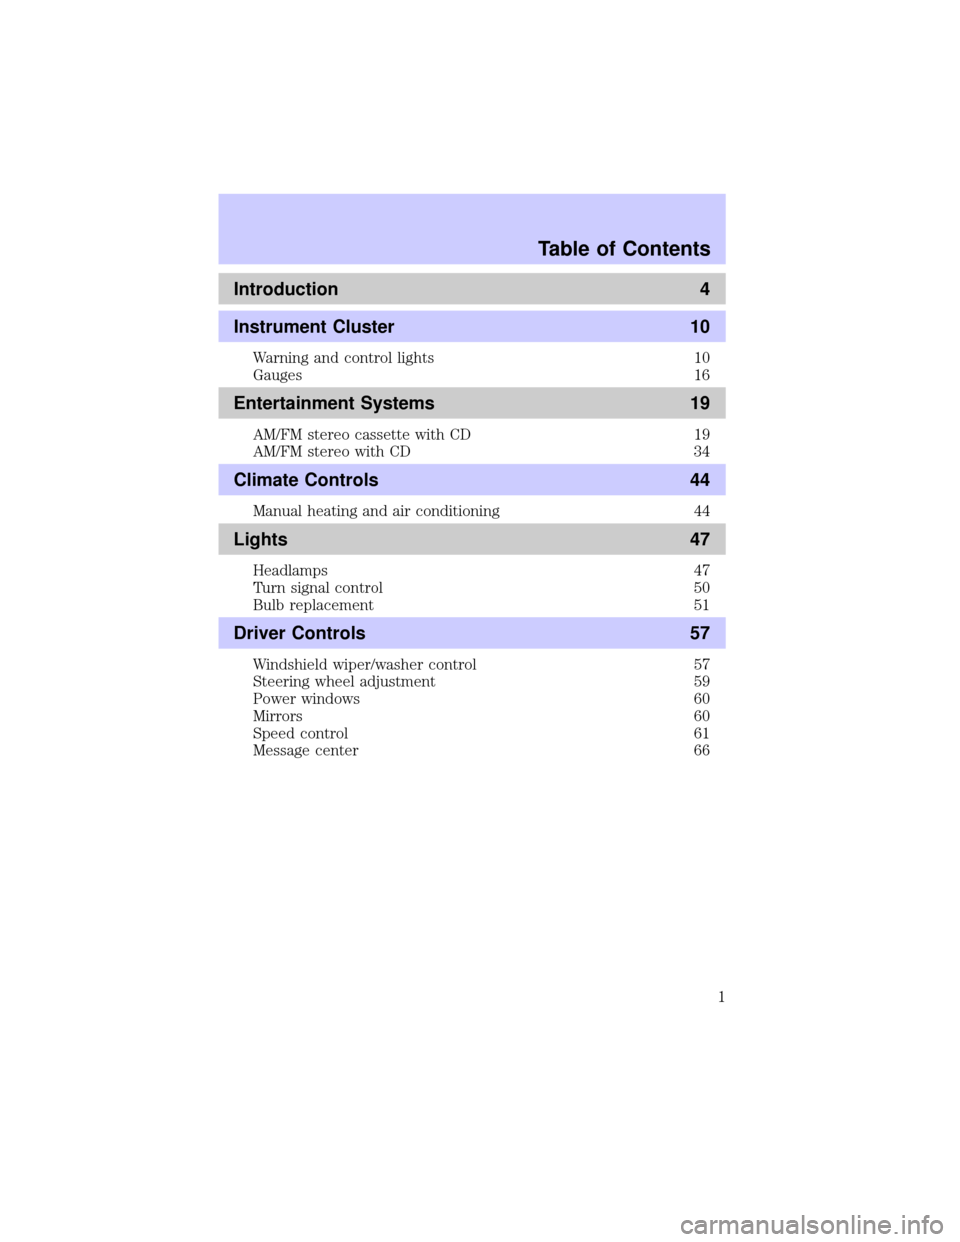
Introduction 4
Instrument Cluster 10
Warning and control lights 10
Gauges 16
Entertainment Systems 19
AM/FM stereo cassette with CD 19
AM/FM stereo with CD 34
Climate Controls 44
Manual heating and air conditioning 44
Lights 47
Headlamps 47
Turn signal control 50
Bulb replacement 51
Driver Controls 57
Windshield wiper/washer control 57
Steering wheel adjustment 59
Power windows 60
Mirrors 60
Speed control 61
Message center 66
Table of Contents
1
Page 13 of 216

Traction ControlYactive
Illuminates when the Traction
Controlysystem is active. It will be
lit for a minimum of four seconds or
for the duration of the Traction
Controlyevent.
For more information, refer to theDrivingchapter.
Low fuel
Illuminates when the fuel level in
the fuel tank is at, or near, empty
(refer toFuel gaugein this chapter
for more information). When
refueling, after the light comes on,
the amount of fuel that is added will
be less than the advertised capacity
since there is fuel still in the tank.
O/D off (if equipped)
Illuminates when the overdrive
function has been turned OFF using
the Transmission Control Switch
(TCS) on end of gearshift. If the
light does not come on or the light
flashes steadily, have your vehicle serviced as soon as possible, as
damage to the transmission could occur.
Speed control (if equipped)
Illuminates when the speed control
is activated.
Turn signal
Illuminates when the turn signals or
the hazard lights are turned on. If
the lights stay on continuously or
flash faster, check for a burned-out bulb.
Instrument Cluster
13
Page 23 of 216

Turn the volume control (VOL) up
or down to the desired setting.
Bass adjust
The bass adjust control allows you
to increase or decrease the audio
system's bass output.
Press the BASS/ TREB control until BASS appears in the display.
Turn the volume control (VOL) up
or down to the desired setting.
Speaker fade adjust (if equipped)
Speaker sound can be adjusted
between the front and rear
speakers.
Press the FADE/BAL until FADE appears in the display.
Turn the volume (VOL) control to adjust the sound from the front
speakers to the rear speakers.
Speaker balance adjust
Speaker sound distribution can be
adjusted between the right and left
speakers.
Press the FADE/BAL until BAL appears in the display.
Turn the volume (VOL) control to adjust the sound between the right
and left speakers.
Stereo indicator (ST)
The stereo indicator (ST) appears in the display whenever a stereo
signal is received.
FADE/BALBASS/TREB
FADE/BALBASS/TREB
FADE/BALBASS/TREB
Entertainment Systems
23
Page 43 of 216

RADIO RECEPTION FACTORS
Three factors can affect radio reception:
²Distance/strength.The further an FM signal travels, the weaker it is.
The listenable range of the average FM station is approximately 40 km
(24 miles). This range can be affected by ªsignal modulation.º Signal
modulation is a process radio stations use to increase their
strength/volume relative to other stations.
²Terrain.Hills, mountains and tall buildings between your vehicle's
antenna and the radio station signal can cause FM reception problems.
Static can be caused on AM stations by power lines, electric fences,
traffic lights and thunderstorms. Moving away from an interfering
structure (out of its ªshadowº) returns your reception to normal.
²Station overload.Weak signals are sometimes captured by stronger
signals when you pass a broadcast tower. A stronger signal may
temporarily overtake a weaker signal and play while the weak station
frequency is displayed.
The audio system automatically switches to single channel reception if it
will improve the reception of a station normally received in stereo.
AUDIO SYSTEM WARRANTIES AND SERVICE
Refer to theWarranty Guidefor audio system warranty information.
If service is necessary, see your dealer or a qualified technician.
Entertainment Systems
43
Page 50 of 216

TURN SIGNAL CONTROL
²Push down to activate the left
turn signal.
²Push up to activate the right turn
signal.
²In vehicles equipped with daytime
running lights, use of the turn
signals will shut off the
highbeams in daytime driving.
INTERIOR LAMPS
The interior lamps have three
switch positions: door delay, off and
on.
When the control is switched to
door delay, the interior light stays
on for 12 seconds after the doors
are closed with the ignition off.
Reading lamps (if equipped)
The reading lamps are operated by
separate on/off switches and can be
adjusted to point in the desired
direction.
Lights
50
Page 51 of 216

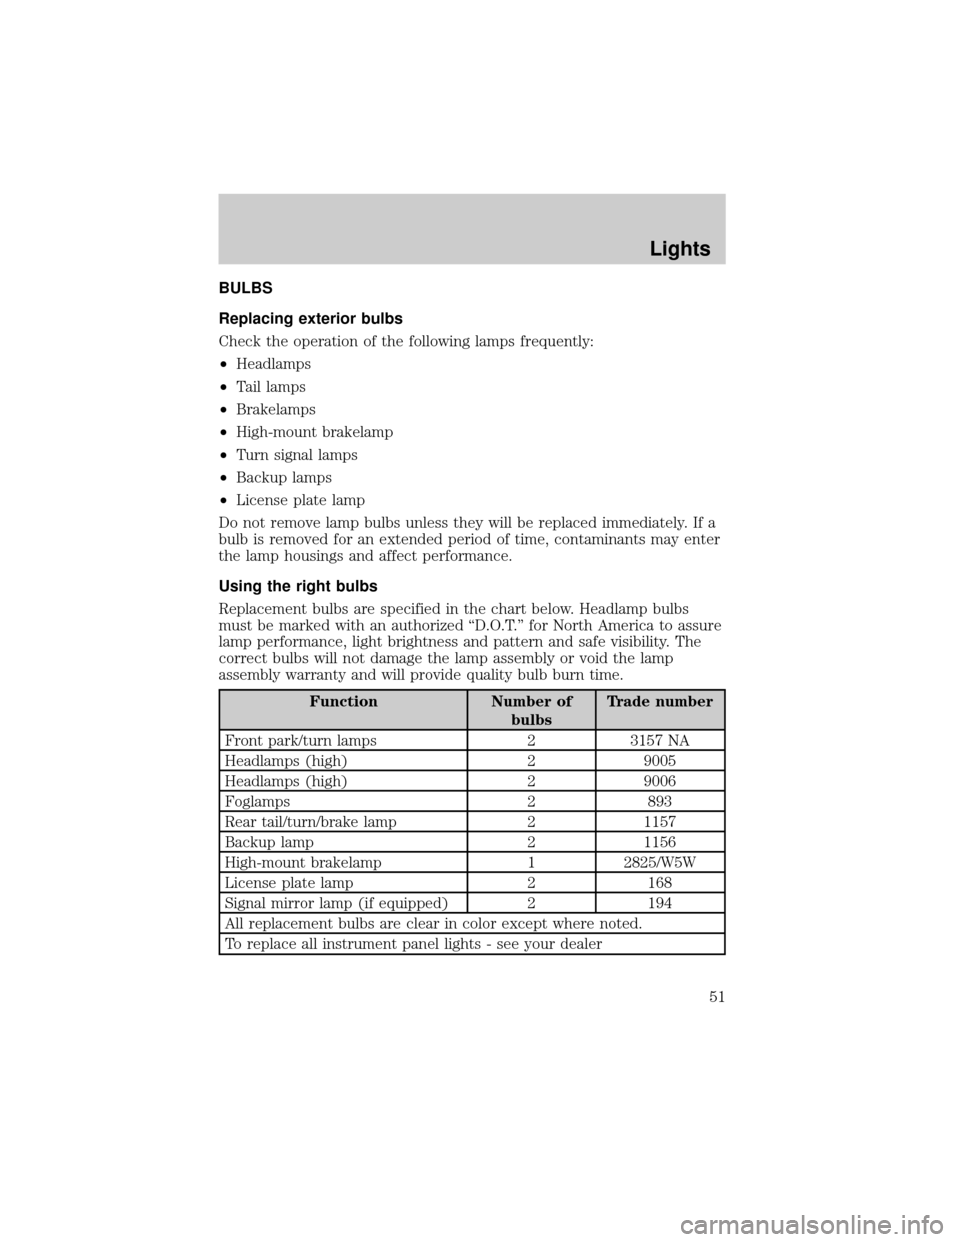
BULBS
Replacing exterior bulbs
Check the operation of the following lamps frequently:
²Headlamps
²Tail lamps
²Brakelamps
²High-mount brakelamp
²Turn signal lamps
²Backup lamps
²License plate lamp
Do not remove lamp bulbs unless they will be replaced immediately. If a
bulb is removed for an extended period of time, contaminants may enter
the lamp housings and affect performance.
Using the right bulbs
Replacement bulbs are specified in the chart below. Headlamp bulbs
must be marked with an authorized ªD.O.T.º for North America to assure
lamp performance, light brightness and pattern and safe visibility. The
correct bulbs will not damage the lamp assembly or void the lamp
assembly warranty and will provide quality bulb burn time.
Function Number of
bulbsTrade number
Front park/turn lamps 2 3157 NA
Headlamps (high) 2 9005
Headlamps (high) 2 9006
Foglamps 2 893
Rear tail/turn/brake lamp 2 1157
Backup lamp 2 1156
High-mount brakelamp 1 2825/W5W
License plate lamp 2 168
Signal mirror lamp (if equipped) 2 194
All replacement bulbs are clear in color except where noted.
To replace all instrument panel lights - see your dealer
Lights
51
Page 53 of 216

2. Connect the electrical connector to the bulb.
3. Install the protective cover and secure it with the wire clips.
4. Turn the headlamps on and make sure they work properly. if the
headlamp was correctly aligned before you changed the bulb, you need
to align it again.
Replacing front parking lamp/turn signal bulbs
1. Remove the headlamp assembly
cover.
2. Turn the bulb holder counter
clockwise.
3. Remove the bulb socket by
pulling it straight out from the lamp
assembly.
4. Pull the bulb straight out of the
socket and press in the new bulb.
5. Install the bulb socket into the
lamp assembly by turning clockwise.
Replacing side marker lamps
1. Push the complete light assembly
to the front and pull it out.
2. Remove the socket from the
assembly by turning it counter
clockwise.
3. Pull the bulb straight out and
replace it.
4. Install the bulb socket into the
assembly by turning it clockwise.
Replacing brake/turn signal/tail/backup lamps
The brake, turn signal, tail and backup lamps bulbs are located in the
same portion of the tail lamp assembly. Follow the same steps to replace
either bulb.
Lights
53
Page 78 of 216

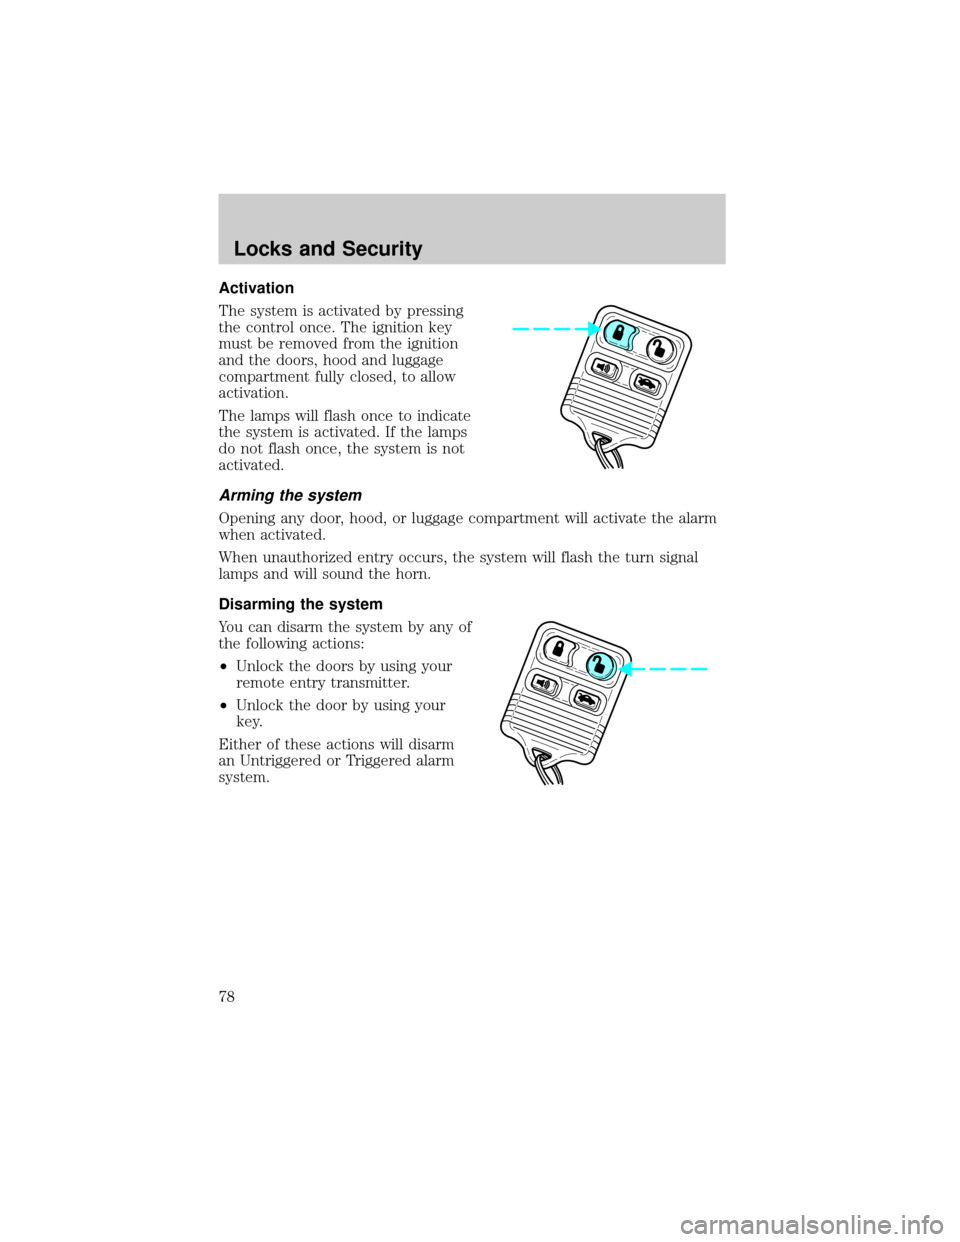
Activation
The system is activated by pressing
the control once. The ignition key
must be removed from the ignition
and the doors, hood and luggage
compartment fully closed, to allow
activation.
The lamps will flash once to indicate
the system is activated. If the lamps
do not flash once, the system is not
activated.
Arming the system
Opening any door, hood, or luggage compartment will activate the alarm
when activated.
When unauthorized entry occurs, the system will flash the turn signal
lamps and will sound the horn.
Disarming the system
You can disarm the system by any of
the following actions:
²Unlock the doors by using your
remote entry transmitter.
²Unlock the door by using your
key.
Either of these actions will disarm
an Untriggered or Triggered alarm
system.
Locks and Security
78
Page 138 of 216

The fuses are coded as follows:
Fuse/Relay
LocationFuse Amp
RatingPassenger Compartment Fuse
Panel Description
19 7.5A Mirror heater
20* 10A Wipers
21 40A Power moonroof, Power windows
22 7.5A ABS/TCS
23 15A Turn signal lamps, Backup lamps,
Speed control. Gearshift lever,
A/C clutch, Blower motor
24 15A Stop lamps, Speed control
25 20A Alarm system, Locking system
26 7.5A High beam, Low beam
27 15A Cigar lighter
28 30A Power seats
29 30A Rear window defroster
Roadside Emergencies
138
Page 210 of 216

Inspection/maintenance (I/M)
testing ........................................190
Instrument panel
cleaning ...................................164
cluster ........................................10
lighting up panel and
interior .......................................48
J
Jack ............................................142
positioning ...............................142
storage .....................................142
Jump-starting your vehicle ......145
K
Keys .......................................74±76
key in ignition chime ...............16
positions of the ignition .........112
L
Lamps
bulb replacement
specifications chart ..................51
cargo lamps ...............................48
daytime running light ...............47
fog lamps ...................................47
headlamps .................................47
headlamps, flash to pass ..........48
instrument panel, dimming .....48
interior lamps ...........................50
replacing bulbs .........................51
Lane change indicator
(see Turn signal) ........................50
Lights, warning and indicator ....10
air bag ........................................12
anti-lock brakes (ABS) ....11, 117
brake ..........................................11
charging system ........................12check coolant ............................12
check engine .............................10
cruise indicator .........................13
door ajar ....................................15
high beam .................................14
low fuel ......................................13
low washer fluid .......................15
oil pressure ...............................12
overdrive off ..............................13
safety belt .................................12
speed control ............................65
traction control active ..............13
turn signal indicator .................13
Load limits .................................129
GAWR ......................................129
GVWR ......................................129
trailer towing ..........................129
Locks
doors ..........................................70
Lubricant specifications ...200±201
M
Manual transaxle
fluid capacities ........................199
lubricant specifications ..........201
reverse .....................................127
Manual transmission .................125
Message center ...........................66
Mirrors
side view mirrors (power) .......60
Moon roof ....................................65
Motorcraft parts ........................198
O
Octane rating ............................185
Odometer .....................................17
Oil (see Engine oil) ..................172
Index
210