clock Mercury Milan 2009 s User Guide
[x] Cancel search | Manufacturer: MERCURY, Model Year: 2009, Model line: Milan, Model: Mercury Milan 2009Pages: 317, PDF Size: 2.67 MB
Page 68 of 317
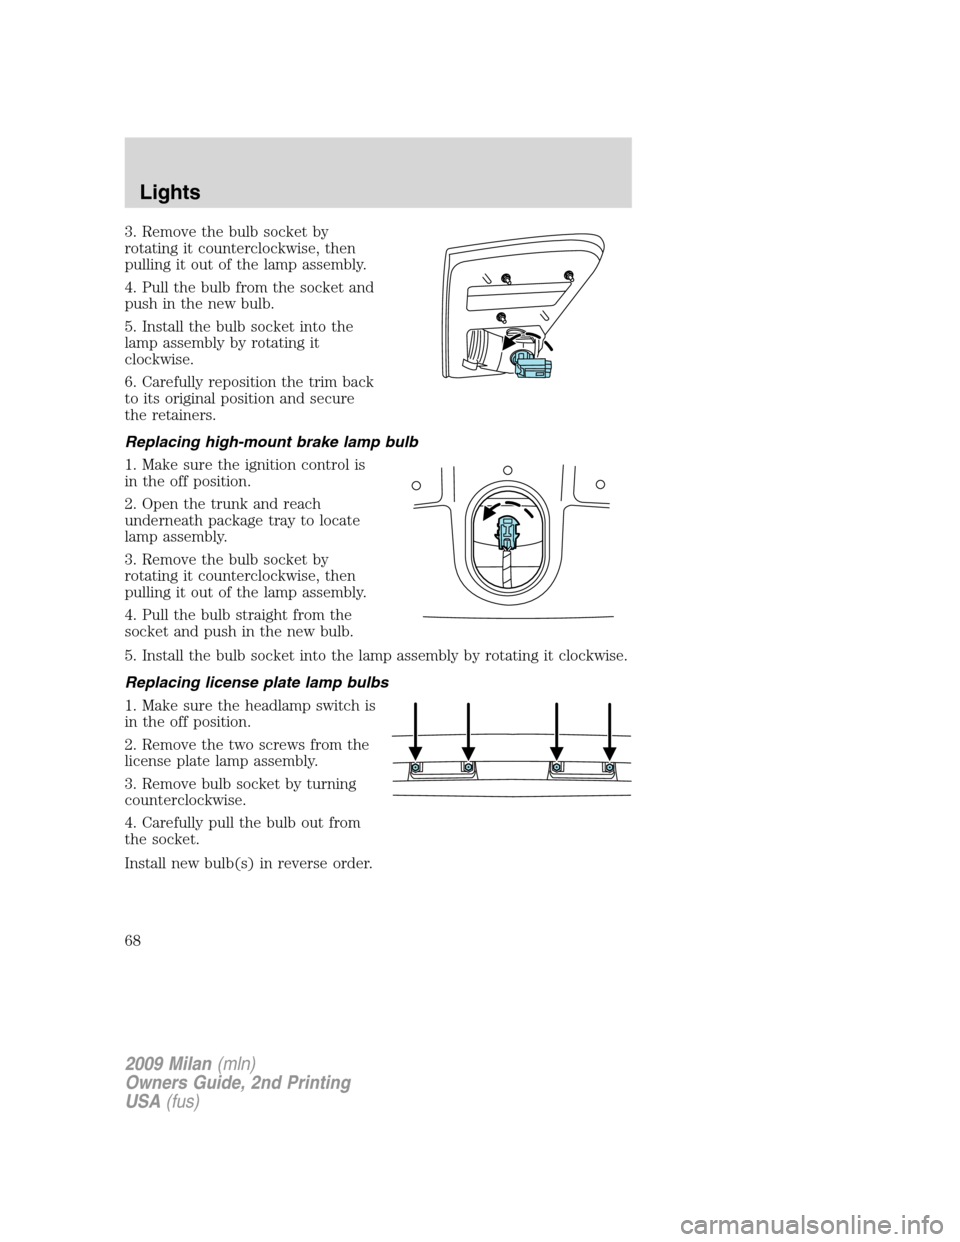
3. Remove the bulb socket by
rotating it counterclockwise, then
pulling it out of the lamp assembly.
4. Pull the bulb from the socket and
push in the new bulb.
5. Install the bulb socket into the
lamp assembly by rotating it
clockwise.
6. Carefully reposition the trim back
to its original position and secure
the retainers.
Replacing high-mount brake lamp bulb
1. Make sure the ignition control is
in the off position.
2. Open the trunk and reach
underneath package tray to locate
lamp assembly.
3. Remove the bulb socket by
rotating it counterclockwise, then
pulling it out of the lamp assembly.
4. Pull the bulb straight from the
socket and push in the new bulb.
5. Install the bulb socket into the lamp assembly by rotating it clockwise.
Replacing license plate lamp bulbs
1. Make sure the headlamp switch is
in the off position.
2. Remove the two screws from the
license plate lamp assembly.
3. Remove bulb socket by turning
counterclockwise.
4. Carefully pull the bulb out from
the socket.
Install new bulb(s) in reverse order.
2009 Milan(mln)
Owners Guide, 2nd Printing
USA(fus)
Lights
68
Page 69 of 317

Replacing fog lamp bulbs (if equipped)
1. Make sure the fog lamp switch is
in the off position.
2. From underneath the vehicle,
partially remove the tire splash
shield by removing four drive
screws.
After removing to allow free access
to the front fog lamp bulb and
electrical wire harness, the splash shield flap should be able to be
repositioned.
3. Rotate the harness/bulb assembly
counterclockwise, to remove from
the fog lamp.
4. Carefully disconnect the bulb
from the harness assembly by
releasing the two snap clips.
Install the new bulb in reverse order.
2009 Milan(mln)
Owners Guide, 2nd Printing
USA(fus)
Lights
69
Page 73 of 317

CLOCK
Press the right (+) control to move
the time display forwards.
Press the left (-) control to move
the time display backwards.
INSTRUMENT PANEL STORAGE COMPARTMENT
The storage compartment may be
used to secure sunglasses or similar
sized objects. Press the button to
open the storage compartment.
AUXILIARY POWER POINT (12VDC)
Power outlets are designed for accessory plugs only. Do not insert
any other object in the power outlet as this will damage the
outlet and blow the fuse. Do not hang any type of accessory or
accessory bracket from the plug. Improper use of the power
outlet can cause damage not covered by your warranty.
The auxiliary power points are
located on the instrument panel and
in the center console utility
compartment.
Do not use the power point for
operating the cigarette lighter
element (if equipped).
To prevent the fuse from being
blown, do not use the power
point(s) over the vehicle capacity of
2009 Milan(mln)
Owners Guide, 2nd Printing
USA(fus)
Driver Controls
73
Page 77 of 317
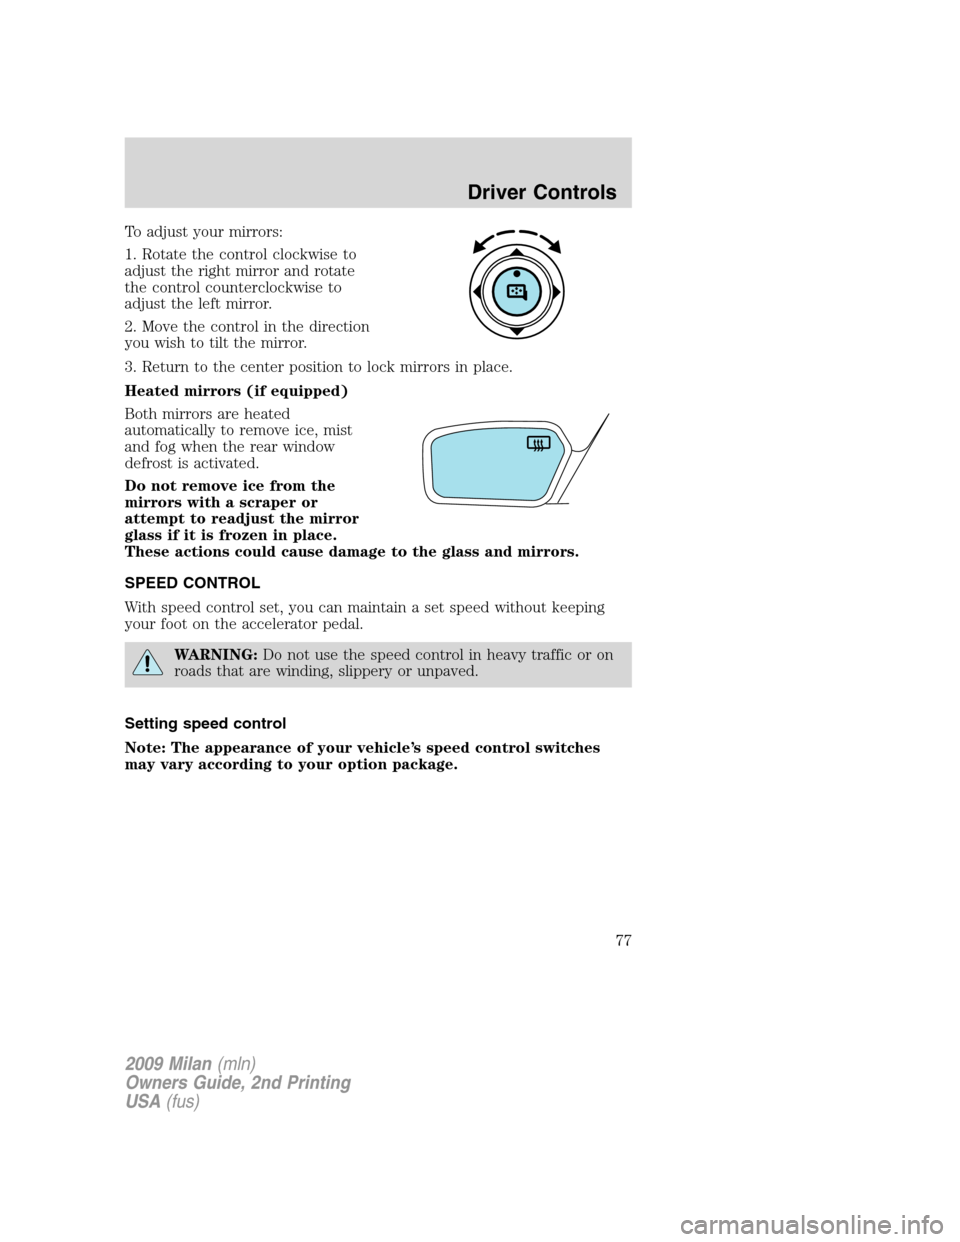
To adjust your mirrors:
1. Rotate the control clockwise to
adjust the right mirror and rotate
the control counterclockwise to
adjust the left mirror.
2. Move the control in the direction
you wish to tilt the mirror.
3. Return to the center position to lock mirrors in place.
Heated mirrors (if equipped)
Both mirrors are heated
automatically to remove ice, mist
and fog when the rear window
defrost is activated.
Do not remove ice from the
mirrors with a scraper or
attempt to readjust the mirror
glass if it is frozen in place.
These actions could cause damage to the glass and mirrors.
SPEED CONTROL
With speed control set, you can maintain a set speed without keeping
your foot on the accelerator pedal.
WARNING:Do not use the speed control in heavy traffic or on
roads that are winding, slippery or unpaved.
Setting speed control
Note: The appearance of your vehicle’s speed control switches
may vary according to your option package.
2009 Milan(mln)
Owners Guide, 2nd Printing
USA(fus)
Driver Controls
77
Page 232 of 317

Fuse/Relay
LocationFuse Amp
RatingProtected Circuits
12 7.5A Delay accessories: Radio head
units, Moon roof, Lock switch
illumination, Electrochromatic
mirrors, Ambient lighting
13 7.5A Cluster, Analog clock, Climate
control head units
14 15A Washer pump
15 20A Cigar lighter
16 15A Door lock actuator, Decklid lock
solenoid
17 20A Subwoofer
18 20A Radio head units, OBDII connector
19 7.5A Not used (Spare)
20 7.5A Power mirrors, Satellite radio
module, All wheel drive
21 7.5A Stop lamps, CHMSL
22 7.5A Audio
23 7.5A Wiper relay coil, Cluster logic
24 7.5A OCS (Passenger’s seat), PAD
indicator
25 7.5A RCM
26 7.5A PATS Transceiver, Brake shift
interlock solenoid, Brake pedal
switch, Automatic transmission
relay coil, Reverse switch (back-up
lamps for manual transmission)
27 7.5A Cluster, Climate control head units
28 10A ABS/Traction Control, Heated
seats, Compass, Reverse sensing
system
C/B 30A Circuit
BreakerMoon roof power, Delayed
accessory (SJB fuse 12, power
window)
2009 Milan(mln)
Owners Guide, 2nd Printing
USA(fus)
Roadside Emergencies
232
Page 238 of 317
•Wet weather driving capability
•All-Wheel driving capability (if applicable)
•Load leveling adjustment (if applicable)
When driving with the full-size dissimilar spare tire/wheel additional
caution should be given to:
•Towing a trailer
•Driving vehicles equipped with a camper body
•Driving vehicles with a load on the cargo rack
Drive cautiously when using a full-size dissimilar spare tire/wheel and
seek service as soon as possible.
Stopping and securing the vehicle
1. Park on a level surface, set the parking brake and activate the hazard
flashers.
2. Place the gearshift lever in P (Park) (automatic transmission) or R
(Reverse) (manual transmission) and turn the engine off.
Removing the spare tire and jack
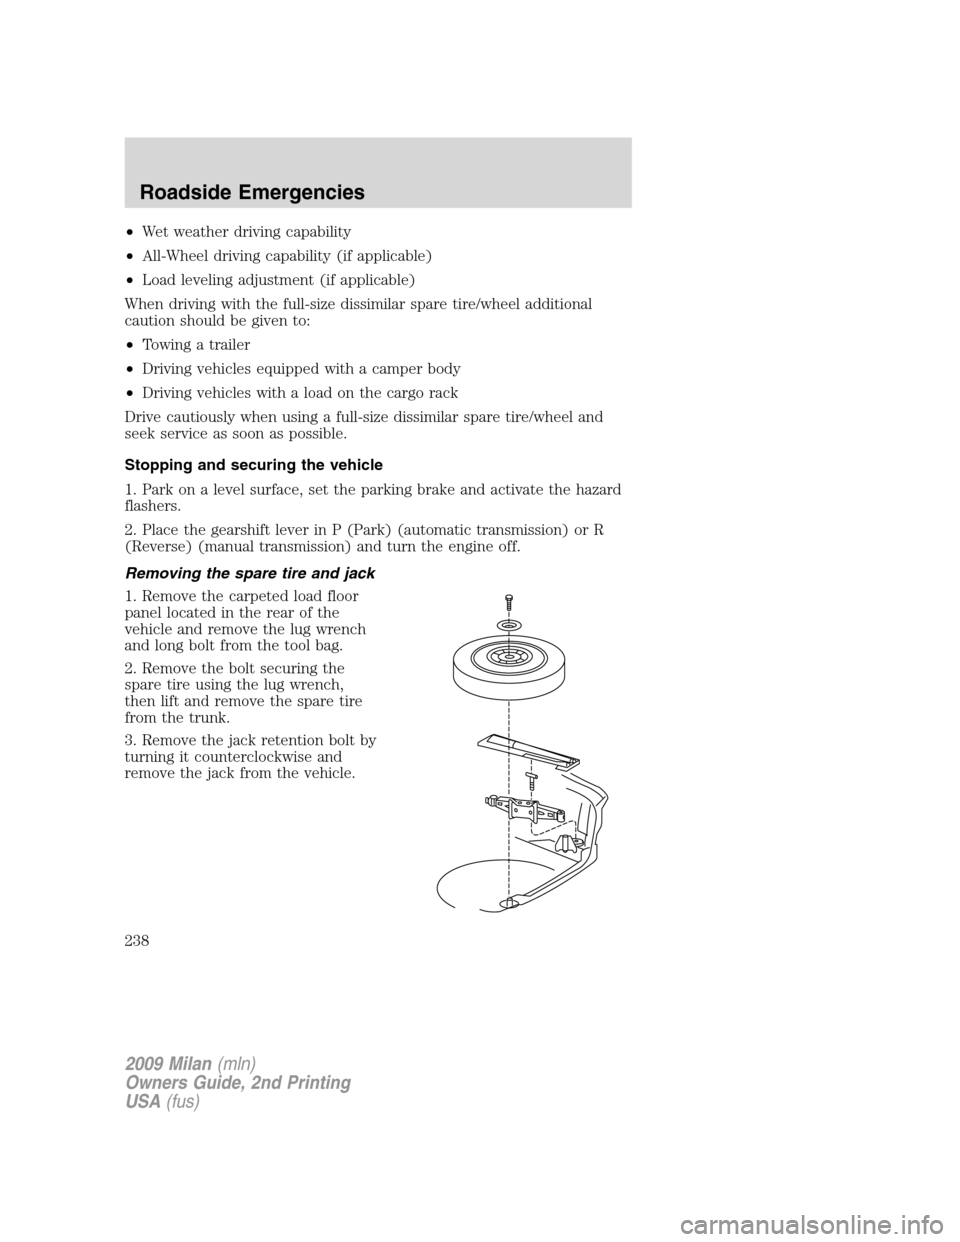
1. Remove the carpeted load floor
panel located in the rear of the
vehicle and remove the lug wrench
and long bolt from the tool bag.
2. Remove the bolt securing the
spare tire using the lug wrench,
then lift and remove the spare tire
from the trunk.
3. Remove the jack retention bolt by
turning it counterclockwise and
remove the jack from the vehicle.
2009 Milan(mln)
Owners Guide, 2nd Printing
USA(fus)
Roadside Emergencies
238
Page 239 of 317
Tire change procedure
WARNING:To help prevent the vehicle from moving when you
change a tire, be sure the parking brake is set, then block (in
both directions) the wheel that is diagonally opposite (other side and
end of the vehicle) to the tire being changed.
WARNING:If the vehicle slips off the jack, you or someone else
could be seriously injured.
WARNING:Do not attempt to change a tire on the side of the
vehicle close to moving traffic. Pull far enough off the road to
avoid the danger of being hit when operating the jack or changing the
wheel.
Note:Passengers should not remain in the vehicle when the vehicle is
being jacked.
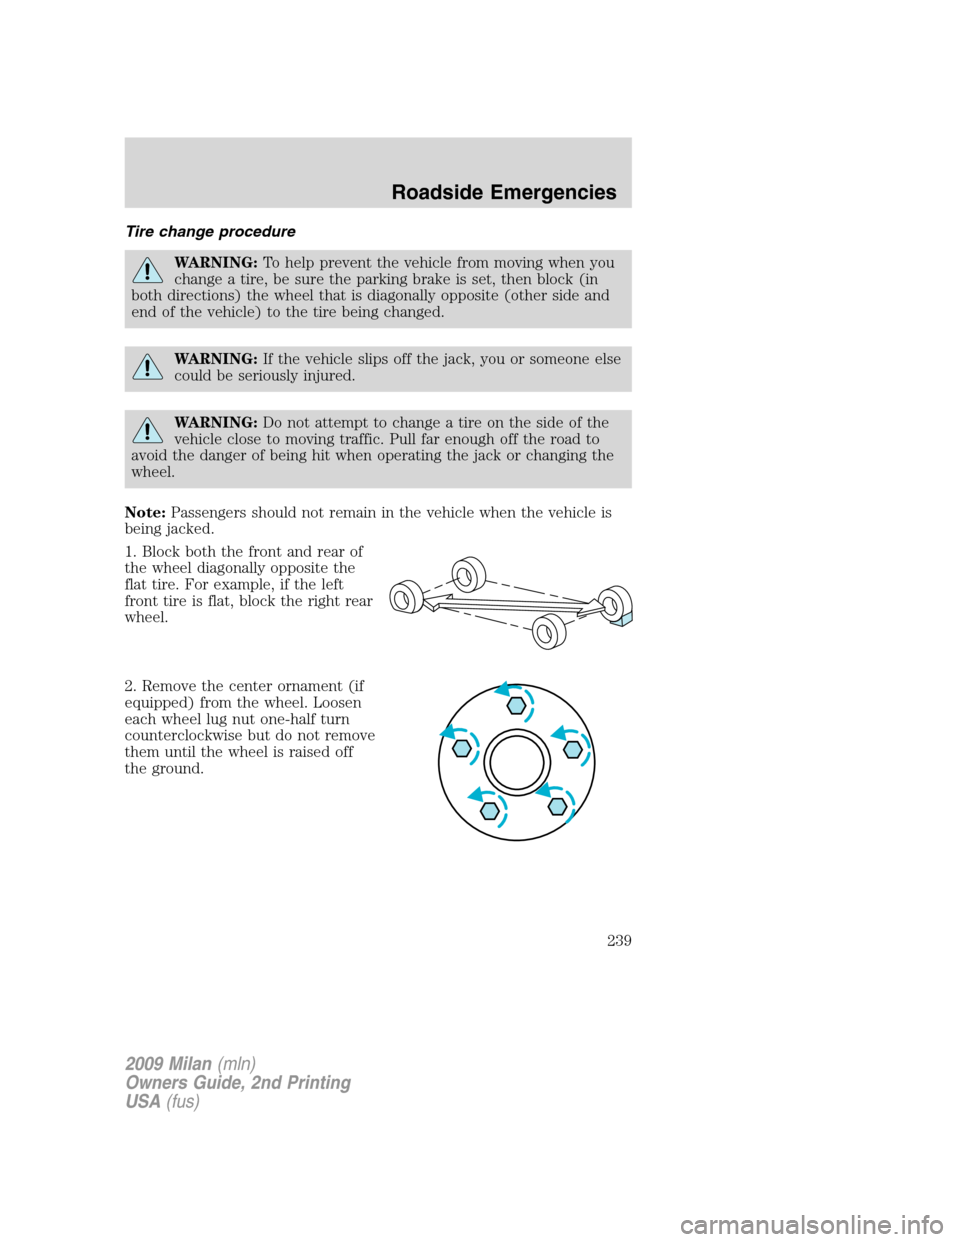
1. Block both the front and rear of
the wheel diagonally opposite the
flat tire. For example, if the left
front tire is flat, block the right rear
wheel.
2. Remove the center ornament (if
equipped) from the wheel. Loosen
each wheel lug nut one-half turn
counterclockwise but do not remove
them until the wheel is raised off
the ground.
2009 Milan(mln)
Owners Guide, 2nd Printing
USA(fus)
Roadside Emergencies
239
Page 240 of 317

3. Put the jack in the jack locator
next to the tire you are changing.
Turn the jack handle clockwise until
the wheel is completely off the
ground.
Note:To avoid structural damage to
the vehicle, ensure that the jack is
centered between the two markings
(1) on the bottom of the rocker
flange.
WARNING:To lessen the
risk of personal injury, do
not put any part of your body
under the vehicle while changing a
tire. Do not start the engine when
your vehicle is on the jack. The
jack is only meant for changing
the tire.
4. Remove the lug nuts with the lug wrench.
5. Replace the flat tire with the spare tire, making sure the valve stem is
facing outward. Reinstall lug nuts until the wheel is snug against the hub.
Do not fully tighten the lug nuts until the wheel has been lowered.
If you are using the temporary tire, the lug nut washers will not appear
to be flush with the rim. This is normal only when using the temporary
spare tire.
6. Lower the wheel by turning the jack handle counterclockwise.
2009 Milan(mln)
Owners Guide, 2nd Printing
USA(fus)
Roadside Emergencies
240
Page 274 of 317

Adding engine oil
1. Check the engine oil. For instructions, refer toChecking the engine
oilin this chapter.
2. If the engine oil level is not within the normal operating range, add
only certified engine oil of the recommended viscosity. Remove the
engine oil filler cap and use a funnel to pour the engine oil into the
opening.
3. Recheck the engine oil level. Make sure the oil level is not above the
normal operating range on the engine oil level dipstick.
4. Install the dipstick and ensure it is fully seated.
5. Fully install the engine oil filler cap by turning the filler cap clockwise
until it stops.
To avoid possible oil loss, DO NOT operate the vehicle with the
engine oil level dipstick and/or the engine oil filler cap removed.
Engine oil and filter recommendations
Look for this certification
trademark.
Use SAE 5W-20 engine oil
Only use oils “Certified For Gasoline Engines” by the American
Petroleum Institute (API). An oil with this trademark symbol conforms
to the current engine and emission system protection standards and fuel
economy requirements of the International Lubricant Standardization and
Approval Committee (ILSAC), comprised of U.S. and Japanese
automobile manufacturers.
To protect your engine and engine’s warranty, use Motorcraft SAE 5W-20
or an equivalent SAE 5W-20 oil meeting Ford specification
WSS-M2C930-A.SAE 5W-20 oil provides optimum fuel economy and
durability performance meeting all requirements for your
vehicle’s engine.
2009 Milan(mln)
Owners Guide, 2nd Printing
USA(fus)
Maintenance and Specifications
274
Page 277 of 317
3. Run the engine until it reaches normal operating temperature.
4. Allow the engine to idle for at least one minute.
5. Turn the A/C on and allow the engine to idle for at least one minute.
6. Drive the vehicle to complete the relearning process.
•The vehicle may need to be driven 10 miles (16 km) or more to
relearn the idle and fuel trim strategy.
•If you do not allow the engine to relearn its idle trim, the idle
quality of your vehicle may be adversely affected until the idle
trim is eventually relearned.
When the battery is disconnected or a new battery installed, the
transmission must relearn its adaptive strategy. As a result of this, the
transmission may shift firmly. This operation is considered normal and
will not affect function or durability of the transmission. Over time the
adaptive learning process will fully update transmission operation to its
optimum shift feel.
If the battery has been disconnected or a new battery has been installed,
the clock and the preset radio stations must be reset once the battery is
reconnected.
•Always dispose of automotive
batteries in a responsible manner.
Follow your local authorized
standards for disposal. Call your
local authorized recycling center
to find out more about recycling
automotive batteries.
ENGINE COOLANT
Checking engine coolant
The concentration and level of engine coolant should be checked at the
intervals listed inscheduled maintenance information.The coolant
concentration should be maintained at 50/50 coolant and distilled water,
which equates to a freeze point of -34°F (-36°C). Coolant concentration
testing is possible with a hydrometer or antifreeze tester (such as the
Rotunda Battery and Antifreeze Tester, 014–R1060). The level of coolant
should be maintained at the “FULL COLD” level or within the “COLD
L
E
A
D
RETURN
RECYCLE
2009 Milan(mln)
Owners Guide, 2nd Printing
USA(fus)
Maintenance and Specifications
277