clock Mercury Milan Hybrid 2010 Owner's Manuals
[x] Cancel search | Manufacturer: MERCURY, Model Year: 2010, Model line: Milan Hybrid, Model: Mercury Milan Hybrid 2010Pages: 329, PDF Size: 2.39 MB
Page 48 of 329
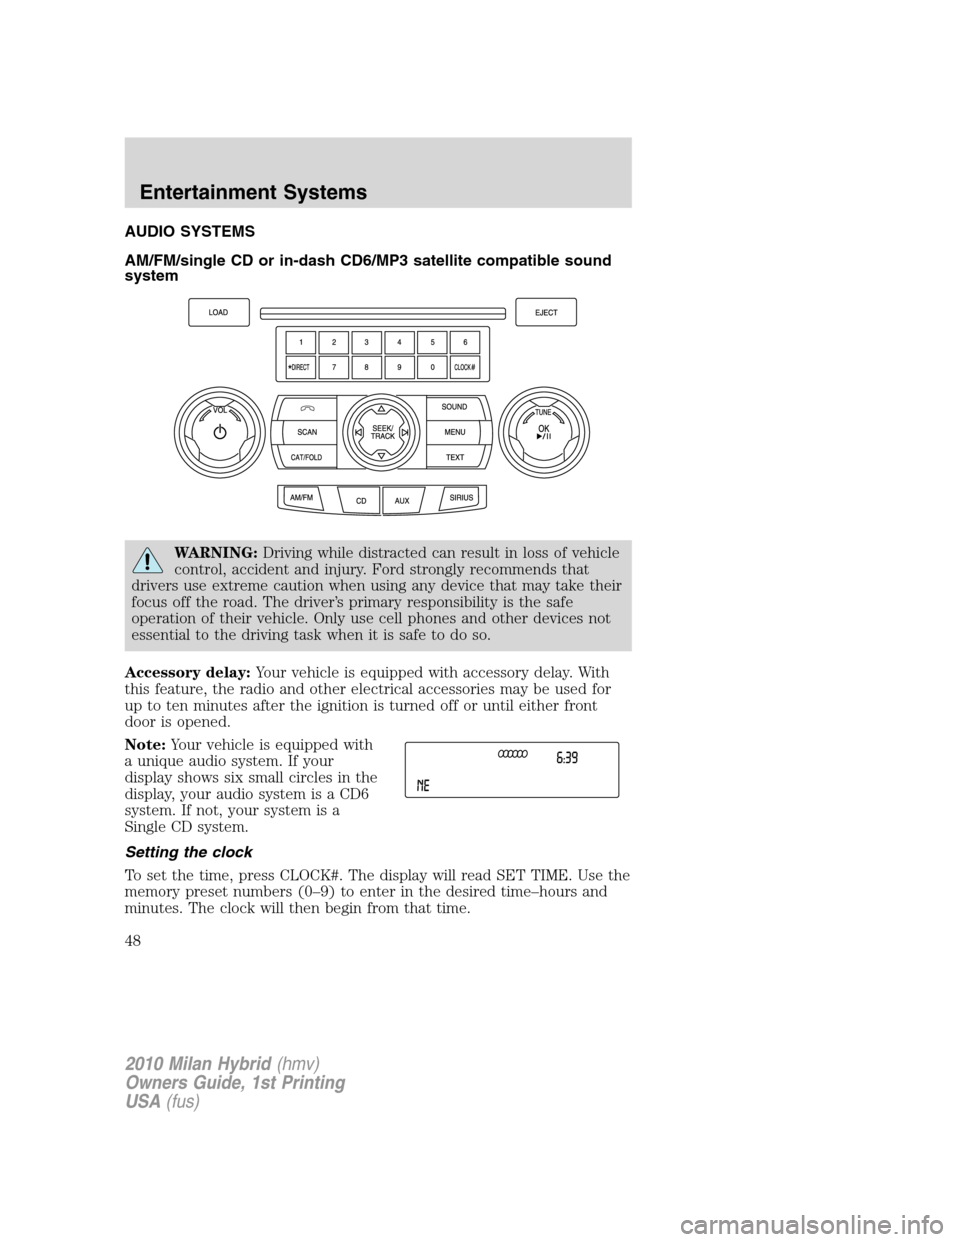
AUDIO SYSTEMS
AM/FM/single CD or in-dash CD6/MP3 satellite compatible sound
system
WARNING:Driving while distracted can result in loss of vehicle
control, accident and injury. Ford strongly recommends that
drivers use extreme caution when using any device that may take their
focus off the road. The driver’s primary responsibility is the safe
operation of their vehicle. Only use cell phones and other devices not
essential to the driving task when it is safe to do so.
Accessory delay:Your vehicle is equipped with accessory delay. With
this feature, the radio and other electrical accessories may be used for
up to ten minutes after the ignition is turned off or until either front
door is opened.
Note:Your vehicle is equipped with
a unique audio system. If your
display shows six small circles in the
display, your audio system is a CD6
system. If not, your system is a
Single CD system.
Setting the clock
To set the time, press CLOCK#. The display will read SET TIME. Use the
memory preset numbers (0–9) to enter in the desired time–hours and
minutes. The clock will then begin from that time.
2010 Milan Hybrid(hmv)
Owners Guide, 1st Printing
USA(fus)
Entertainment Systems
48
Page 76 of 329
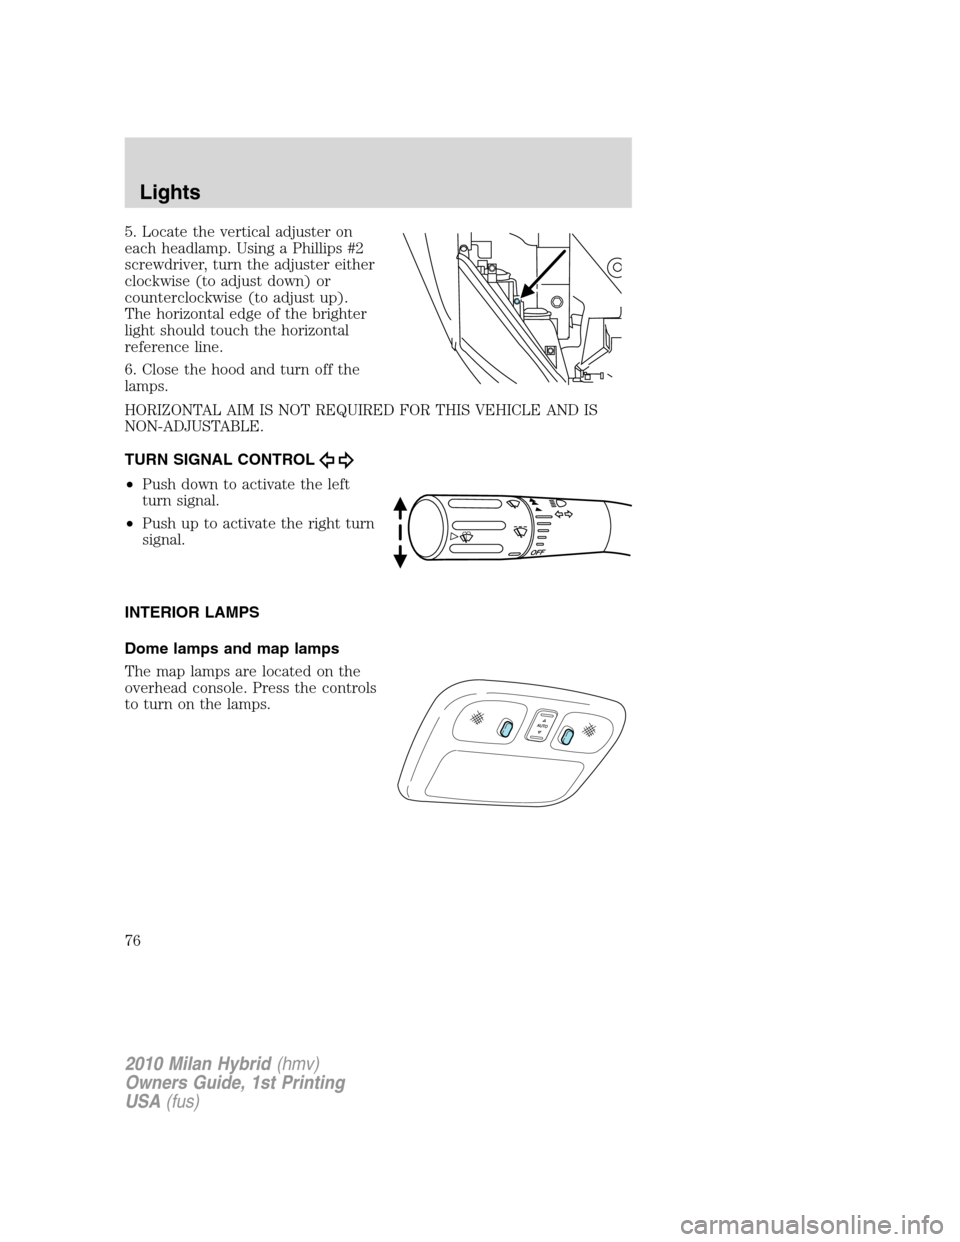
5. Locate the vertical adjuster on
each headlamp. Using a Phillips #2
screwdriver, turn the adjuster either
clockwise (to adjust down) or
counterclockwise (to adjust up).
The horizontal edge of the brighter
light should touch the horizontal
reference line.
6. Close the hood and turn off the
lamps.
HORIZONTAL AIM IS NOT REQUIRED FOR THIS VEHICLE AND IS
NON-ADJUSTABLE.
TURN SIGNAL CONTROL
•Push down to activate the left
turn signal.
•Push up to activate the right turn
signal.
INTERIOR LAMPS
Dome lamps and map lamps
The map lamps are located on the
overhead console. Press the controls
to turn on the lamps.
2010 Milan Hybrid(hmv)
Owners Guide, 1st Printing
USA(fus)
Lights
76
Page 79 of 329
Replacing exterior bulbs
Check the operation of all the bulbs frequently.
Replacing headlamp bulbs
For bulb replacement, see your authorized dealer.
Replacing front parking lamp/turn signal bulbs
For bulb replacement, see your authorized dealer.
Replacing stop/tail/turn and side marker bulbs
Your vehicle is equipped with a rear lamp that has a stop/tail/turn and
side marker lamp module containing integral multiple light emitting
diodes (LED). If one or more LEDs burn out, the complete lamp module
has to be replaced. See your authorized dealer for the replacement LED
module.
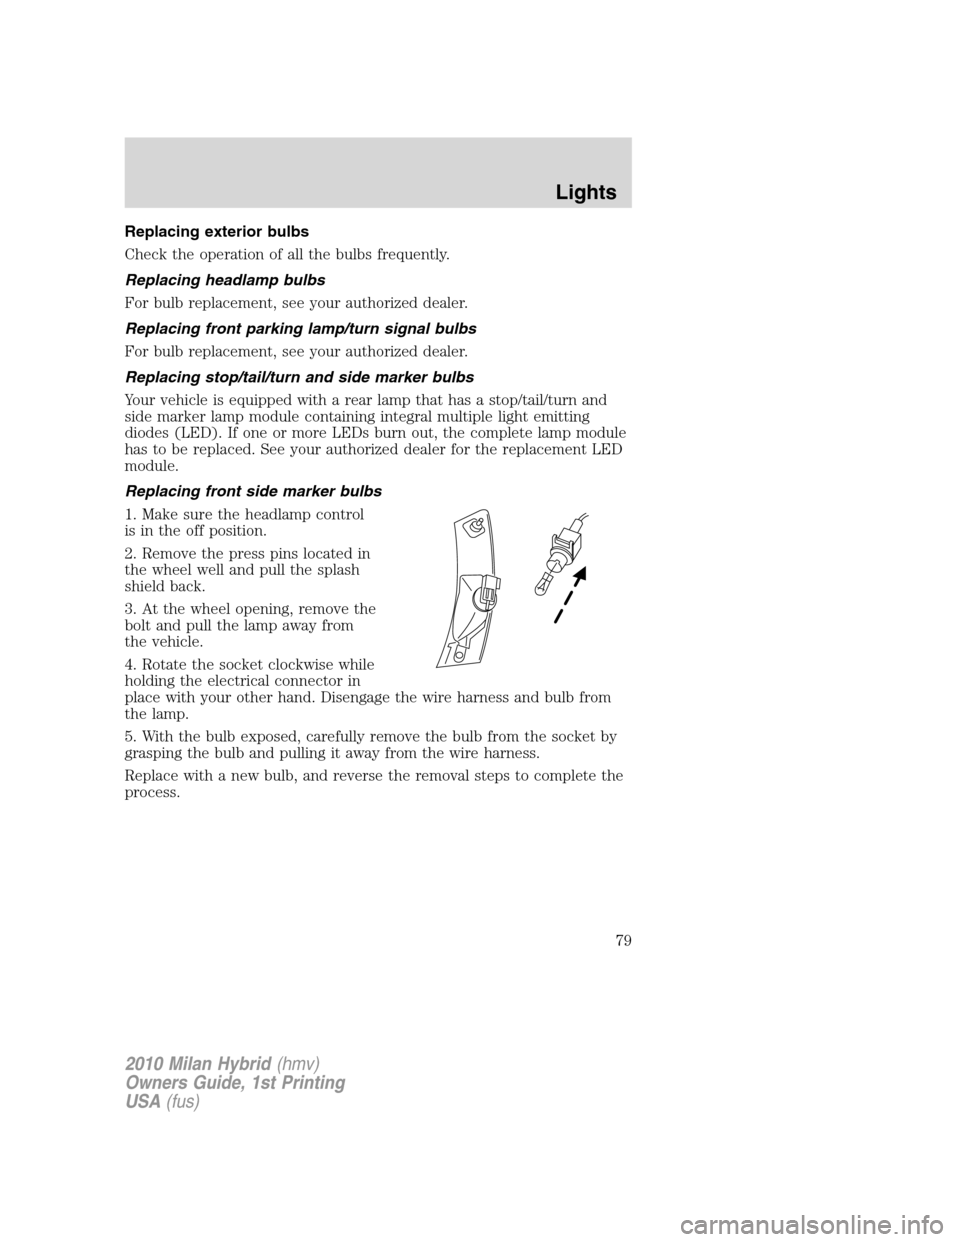
Replacing front side marker bulbs
1. Make sure the headlamp control
is in the off position.
2. Remove the press pins located in
the wheel well and pull the splash
shield back.
3. At the wheel opening, remove the
bolt and pull the lamp away from
the vehicle.
4. Rotate the socket clockwise while
holding the electrical connector in
place with your other hand. Disengage the wire harness and bulb from
the lamp.
5. With the bulb exposed, carefully remove the bulb from the socket by
grasping the bulb and pulling it away from the wire harness.
Replace with a new bulb, and reverse the removal steps to complete the
process.
2010 Milan Hybrid(hmv)
Owners Guide, 1st Printing
USA (fus)
Lights
79
Page 80 of 329
Replacing rear turn signal bulbs
1. Make sure the headlamp switch is in the off position and open the
trunk.
2. Lift out trunk floor carpeting panel to access a luggage scuff plate
(hard molding) shingles and a trunk side panel (dark grey, soft
wheelhouse side trim panel) at the lamp area.
3. Carefully pull/push the trunk side panel (dark grey, soft wheelhouse
side trim panel) outboard to expose the lamp assembly. The most
effective point to grasp the trunk side panel when pulling it out from the
luggage scuff plate is at it’s bottom edge where that edge meets the
exposed sheet metal of the trunk floor.
Note:Do not allow the trunk side panel to remain bent and untucked
from the luggage scuff plate (hard molding) for a long period of time.
Doing so may result in permanent deformation.
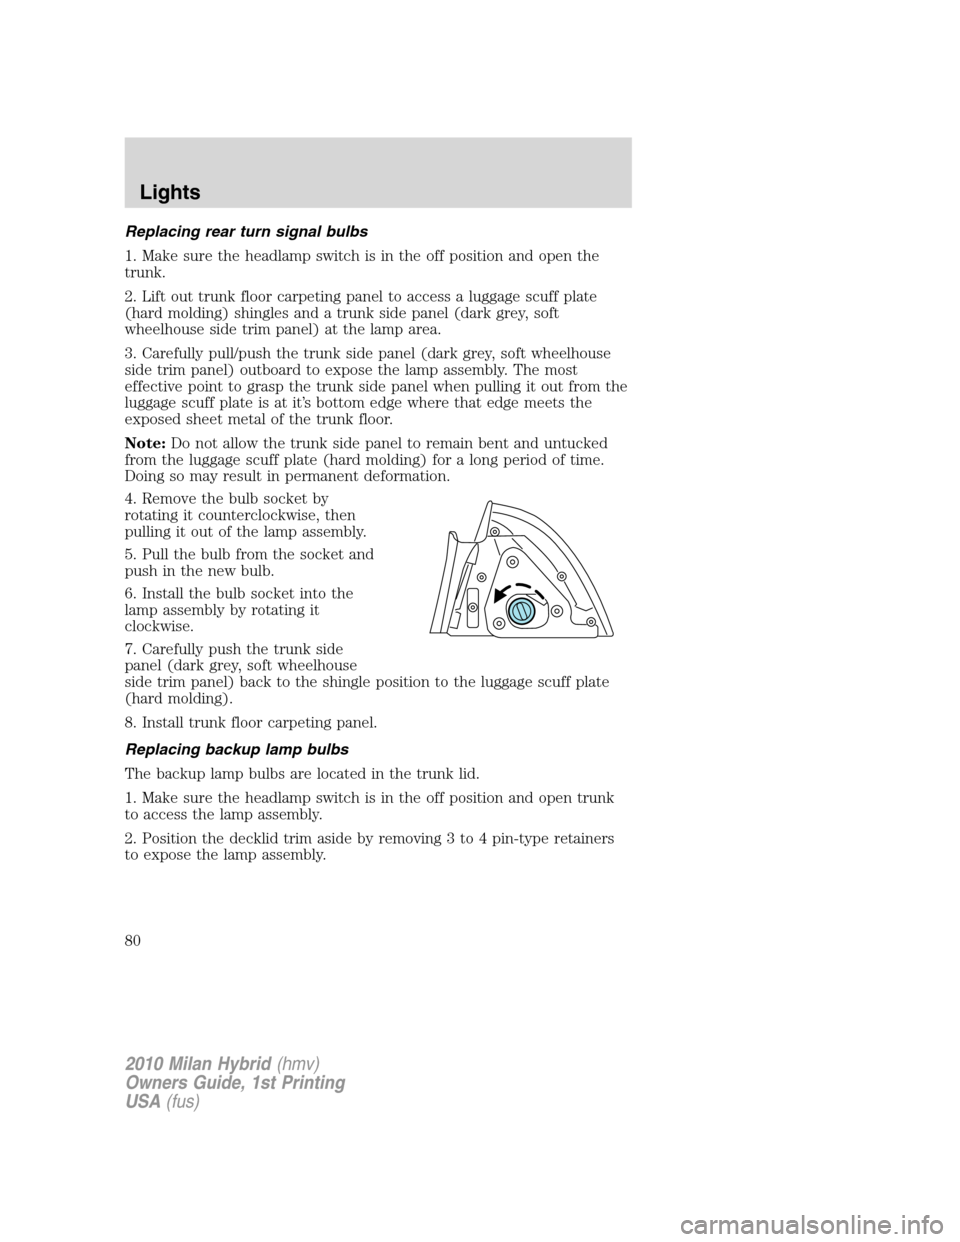
4. Remove the bulb socket by
rotating it counterclockwise, then
pulling it out of the lamp assembly.
5. Pull the bulb from the socket and
push in the new bulb.
6. Install the bulb socket into the
lamp assembly by rotating it
clockwise.
7. Carefully push the trunk side
panel (dark grey, soft wheelhouse
side trim panel) back to the shingle position to the luggage scuff plate
(hard molding).
8. Install trunk floor carpeting panel.
Replacing backup lamp bulbs
The backup lamp bulbs are located in the trunk lid.
1. Make sure the headlamp switch is in the off position and open trunk
to access the lamp assembly.
2. Position the decklid trim aside by removing 3 to 4 pin-type retainers
to expose the lamp assembly.
2010 Milan Hybrid(hmv)
Owners Guide, 1st Printing
USA(fus)
Lights
80
Page 81 of 329
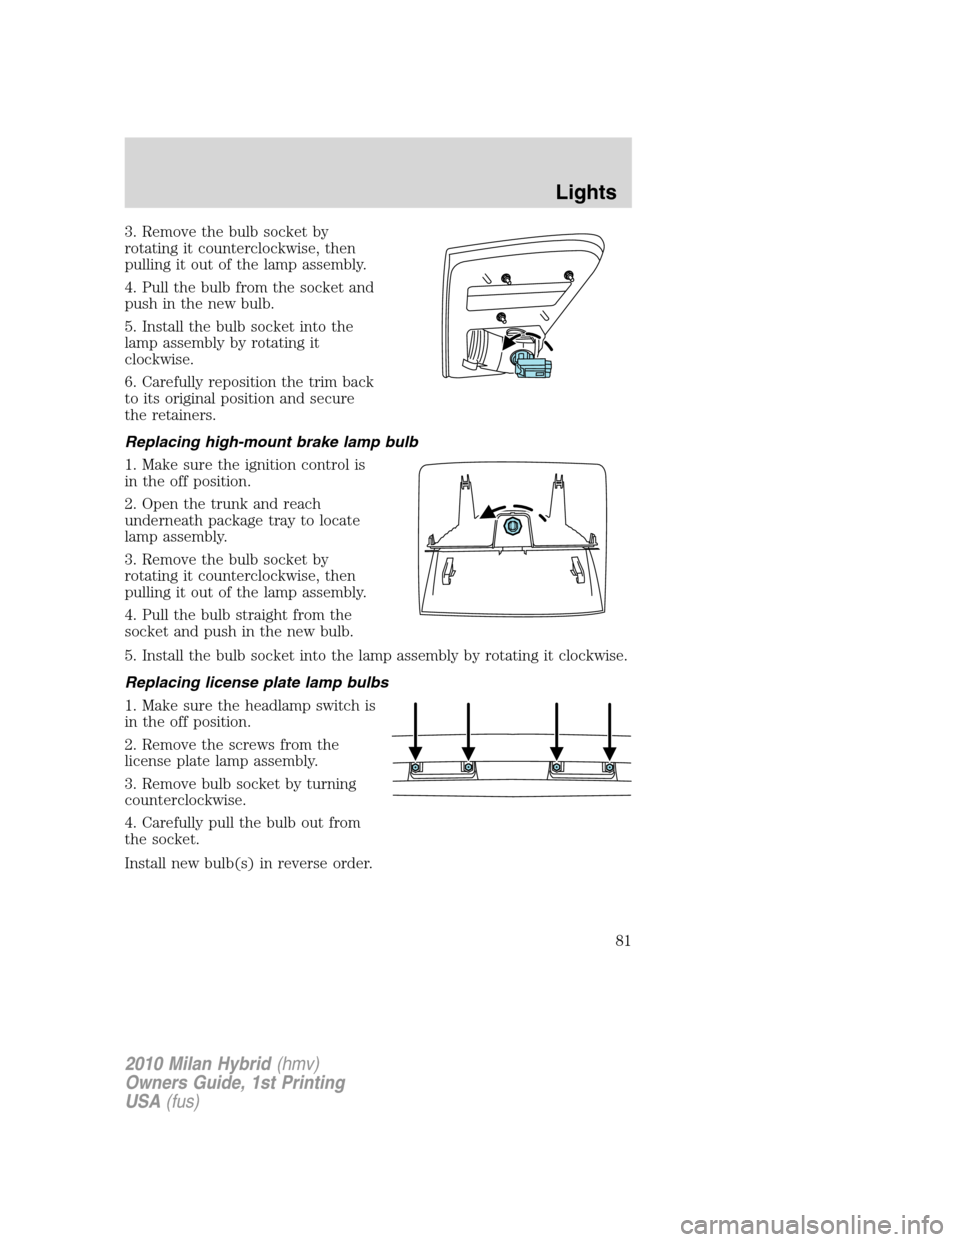
3. Remove the bulb socket by
rotating it counterclockwise, then
pulling it out of the lamp assembly.
4. Pull the bulb from the socket and
push in the new bulb.
5. Install the bulb socket into the
lamp assembly by rotating it
clockwise.
6. Carefully reposition the trim back
to its original position and secure
the retainers.
Replacing high-mount brake lamp bulb
1. Make sure the ignition control is
in the off position.
2. Open the trunk and reach
underneath package tray to locate
lamp assembly.
3. Remove the bulb socket by
rotating it counterclockwise, then
pulling it out of the lamp assembly.
4. Pull the bulb straight from the
socket and push in the new bulb.
5. Install the bulb socket into the lamp assembly by rotating it clockwise.
Replacing license plate lamp bulbs
1. Make sure the headlamp switch is
in the off position.
2. Remove the screws from the
license plate lamp assembly.
3. Remove bulb socket by turning
counterclockwise.
4. Carefully pull the bulb out from
the socket.
Install new bulb(s) in reverse order.
2010 Milan Hybrid(hmv)
Owners Guide, 1st Printing
USA(fus)
Lights
81
Page 82 of 329
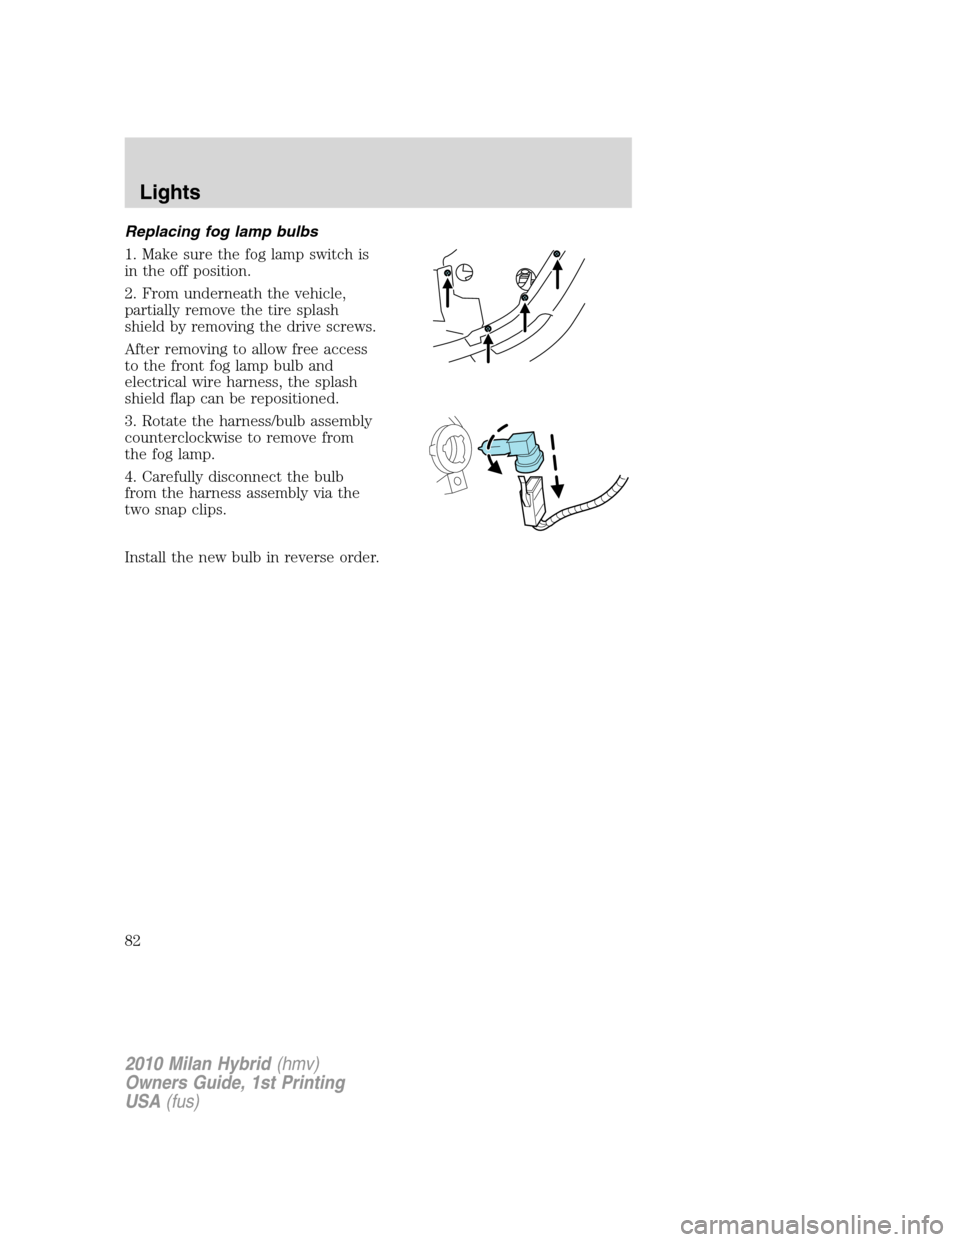
Replacing fog lamp bulbs
1. Make sure the fog lamp switch is
in the off position.
2. From underneath the vehicle,
partially remove the tire splash
shield by removing the drive screws.
After removing to allow free access
to the front fog lamp bulb and
electrical wire harness, the splash
shield flap can be repositioned.
3. Rotate the harness/bulb assembly
counterclockwise to remove from
the fog lamp.
4. Carefully disconnect the bulb
from the harness assembly via the
two snap clips.
Install the new bulb in reverse order.
2010 Milan Hybrid(hmv)
Owners Guide, 1st Printing
USA(fus)
Lights
82
Page 93 of 329
Note:If equipped with a rear view camera system, a video image will be
displayed in the mirror or the Navigation system display (if equipped)
when the vehicle is put in (R) reverse. Refer toRear view camera
systemin theDrivingchapter.
EXTERIOR MIRRORS
Power side view mirrors
WARNING:Do not adjust the mirror while the vehicle is in
motion.
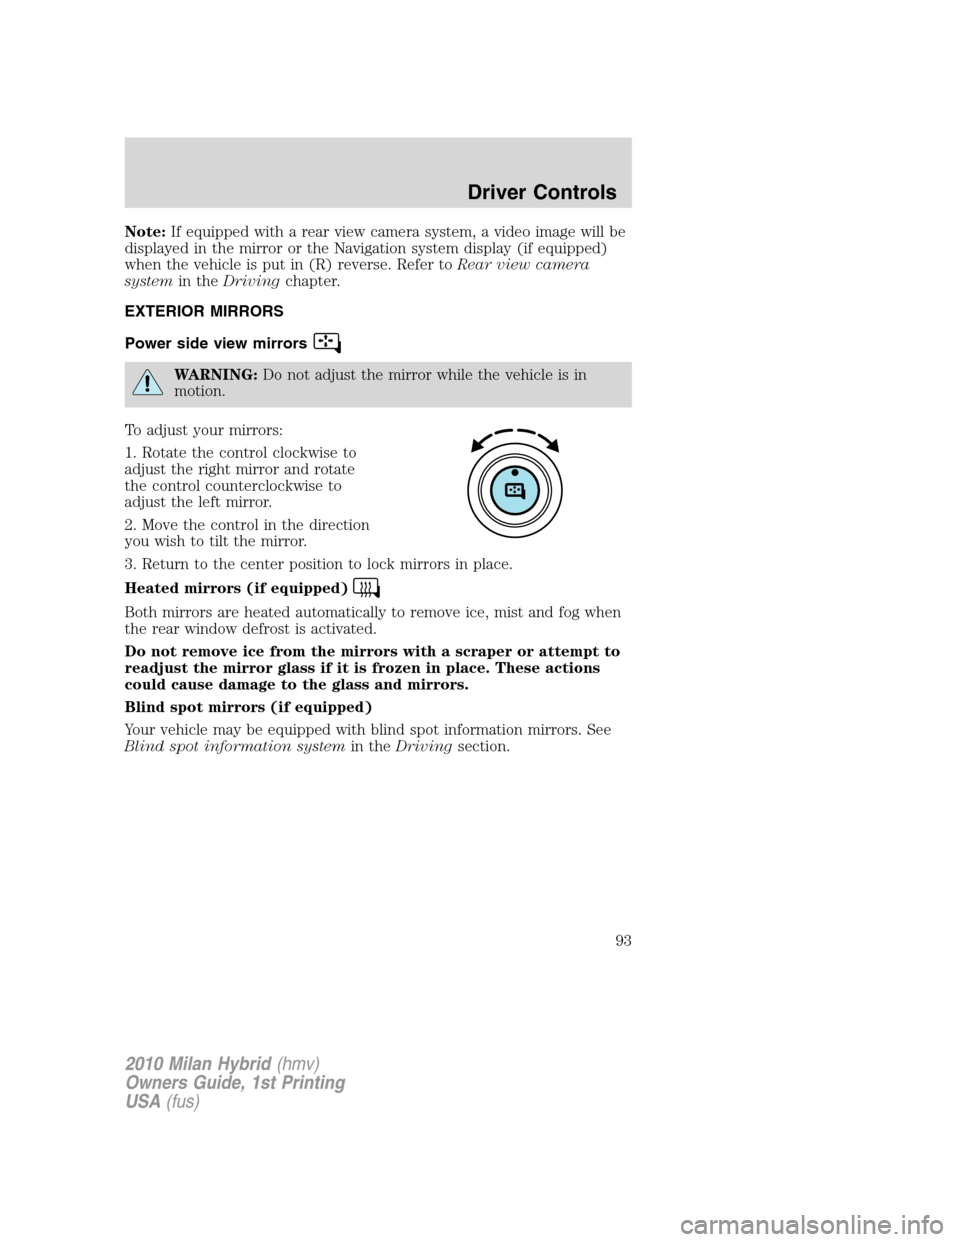
To adjust your mirrors:
1. Rotate the control clockwise to
adjust the right mirror and rotate
the control counterclockwise to
adjust the left mirror.
2. Move the control in the direction
you wish to tilt the mirror.
3. Return to the center position to lock mirrors in place.
Heated mirrors (if equipped)
Both mirrors are heated automatically to remove ice, mist and fog when
the rear window defrost is activated.
Do not remove ice from the mirrors with a scraper or attempt to
readjust the mirror glass if it is frozen in place. These actions
could cause damage to the glass and mirrors.
Blind spot mirrors (if equipped)
Your vehicle may be equipped with blind spot information mirrors. See
Blind spot information systemin theDrivingsection.
2010 Milan Hybrid(hmv)
Owners Guide, 1st Printing
USA(fus)
Driver Controls
93
Page 249 of 329
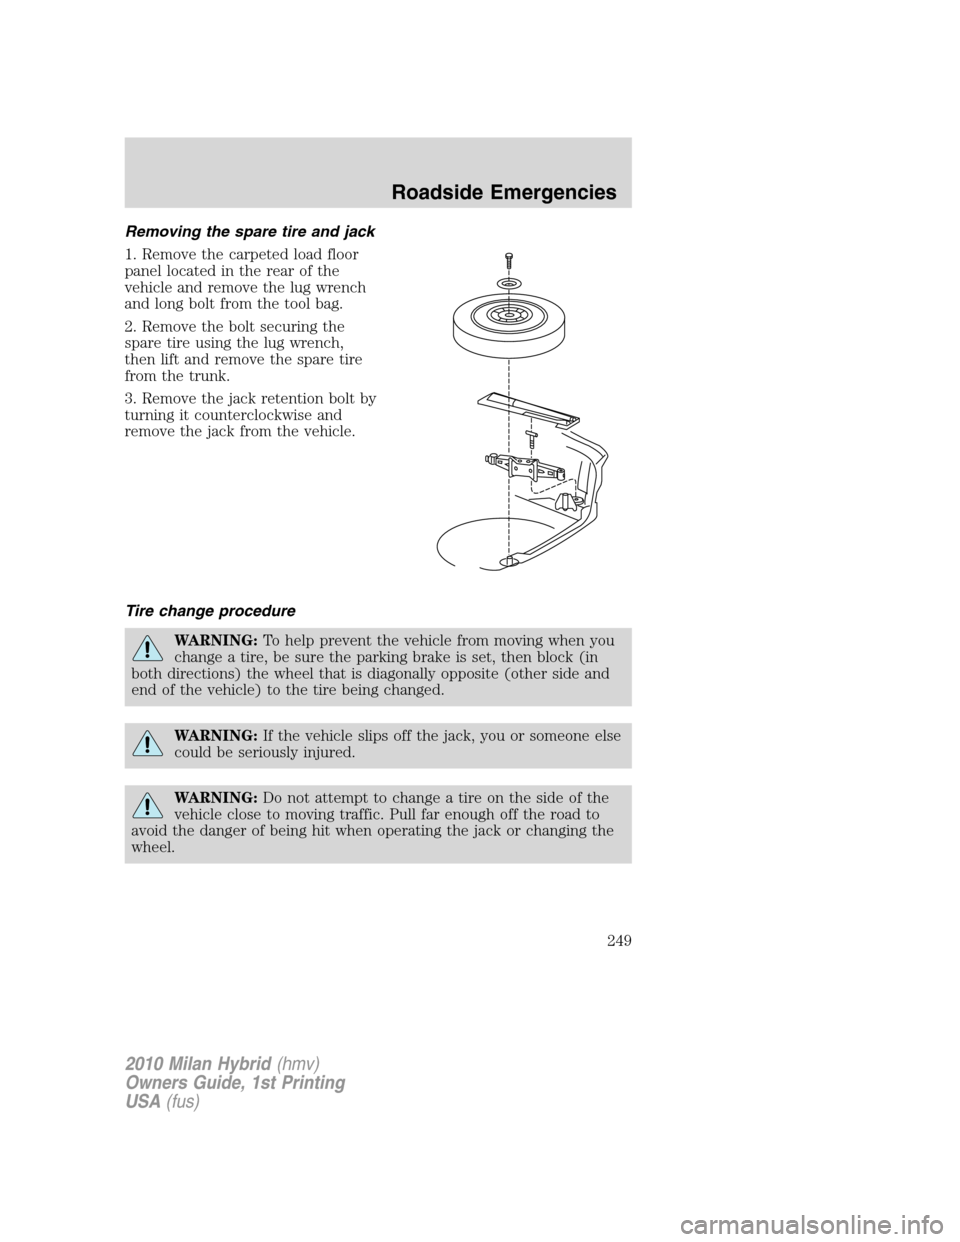
Removing the spare tire and jack
1. Remove the carpeted load floor
panel located in the rear of the
vehicle and remove the lug wrench
and long bolt from the tool bag.
2. Remove the bolt securing the
spare tire using the lug wrench,
then lift and remove the spare tire
from the trunk.
3. Remove the jack retention bolt by
turning it counterclockwise and
remove the jack from the vehicle.
Tire change procedure
WARNING:To help prevent the vehicle from moving when you
change a tire, be sure the parking brake is set, then block (in
both directions) the wheel that is diagonally opposite (other side and
end of the vehicle) to the tire being changed.
WARNING:If the vehicle slips off the jack, you or someone else
could be seriously injured.
WARNING:Do not attempt to change a tire on the side of the
vehicle close to moving traffic. Pull far enough off the road to
avoid the danger of being hit when operating the jack or changing the
wheel.
2010 Milan Hybrid(hmv)
Owners Guide, 1st Printing
USA(fus)
Roadside Emergencies
249
Page 250 of 329

Note:Passengers should not remain in the vehicle when the vehicle is
being jacked.
1. Block both the front and rear of
the wheel diagonally opposite the
flat tire. For example, if the left
front tire is flat, block the right rear
wheel.
2. Remove the center ornament (if
equipped) from the wheel. Loosen
each wheel lug nut one-half turn
counterclockwise but do not remove
them until the wheel is raised off
the ground.
3. Put the jack in the jack locator
next to the tire you are changing.
Turn the jack handle clockwise until
the wheel is completely off the
ground.
Note: To avoid structural damage to
the vehicle, ensure that the jack is
centered between the two markings
(1) on the bottom of the rocker
flange.
2010 Milan Hybrid(hmv)
Owners Guide, 1st Printing
USA(fus)
Roadside Emergencies
250
Page 251 of 329
WARNING:To lessen the risk of personal injury, do not put any
part of your body under the vehicle while changing a tire. Do not
start the engine when your vehicle is on the jack. The jack is only
meant for changing the tire.
4. Remove the lug nuts with the lug wrench.
5. Replace the flat tire with the spare tire, making sure the valve stem is
facing outward. Reinstall lug nuts until the wheel is snug against the hub.
Do not fully tighten the lug nuts until the wheel has been lowered.
If you are using the temporary tire, the lug nut washers will not appear
to be flush with the rim. This is normal only when using the temporary
spare tire.
6. Lower the wheel by turning the jack handle counterclockwise.
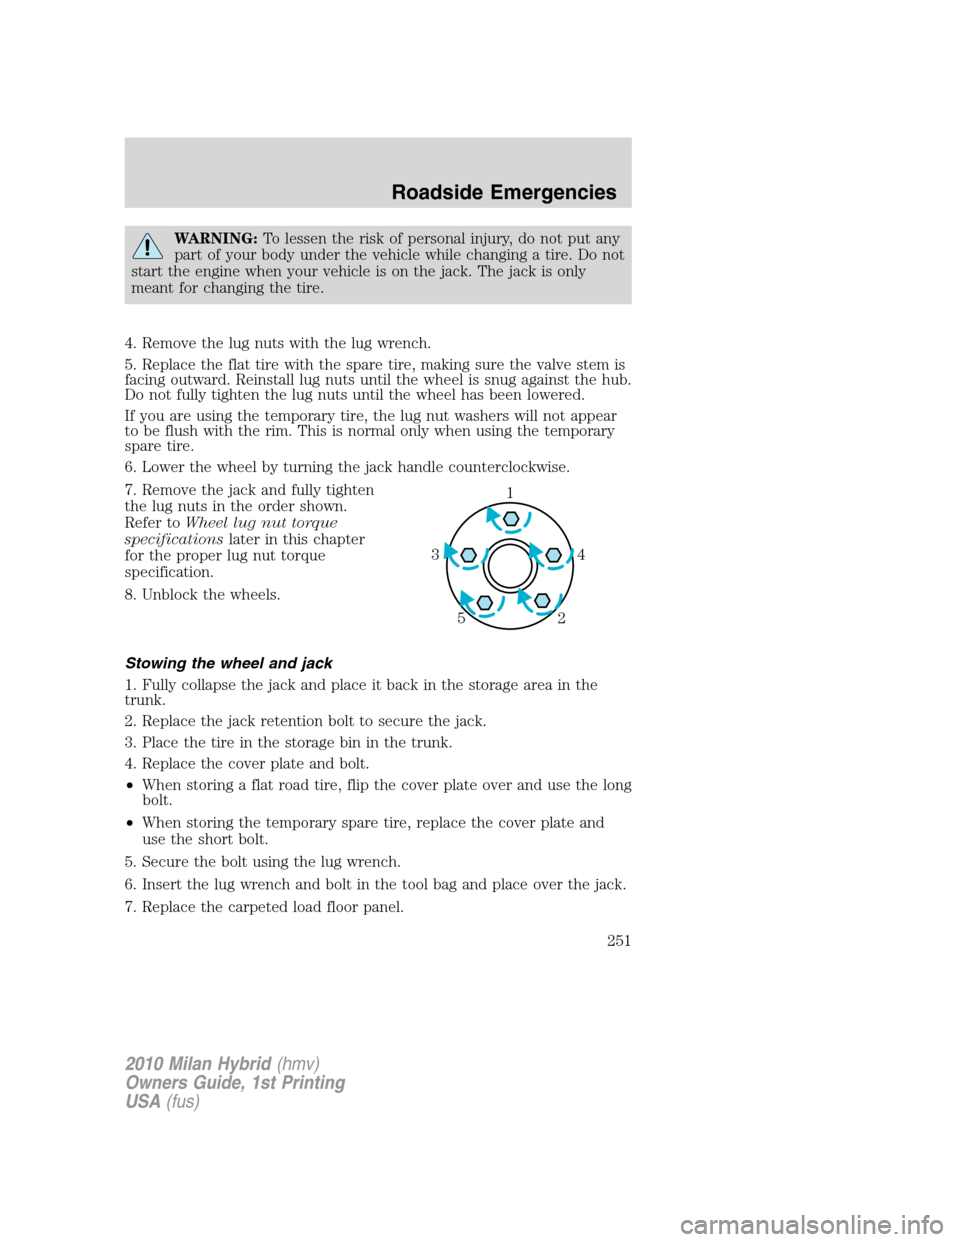
7. Remove the jack and fully tighten
the lug nuts in the order shown.
Refer toWheel lug nut torque
specificationslater in this chapter
for the proper lug nut torque
specification.
8. Unblock the wheels.
Stowing the wheel and jack
1. Fully collapse the jack and place it back in the storage area in the
trunk.
2. Replace the jack retention bolt to secure the jack.
3. Place the tire in the storage bin in the trunk.
4. Replace the cover plate and bolt.
•When storing a flat road tire, flip the cover plate over and use the long
bolt.
•When storing the temporary spare tire, replace the cover plate and
use the short bolt.
5. Secure the bolt using the lug wrench.
6. Insert the lug wrench and bolt in the tool bag and place over the jack.
7. Replace the carpeted load floor panel.
1
4 3
2 5
2010 Milan Hybrid(hmv)
Owners Guide, 1st Printing
USA(fus)
Roadside Emergencies
251