lock Mercury Monterey 2004 s Repair Manual
[x] Cancel search | Manufacturer: MERCURY, Model Year: 2004, Model line: Monterey, Model: Mercury Monterey 2004Pages: 272, PDF Size: 4.29 MB
Page 189 of 272
Removing the spare tire
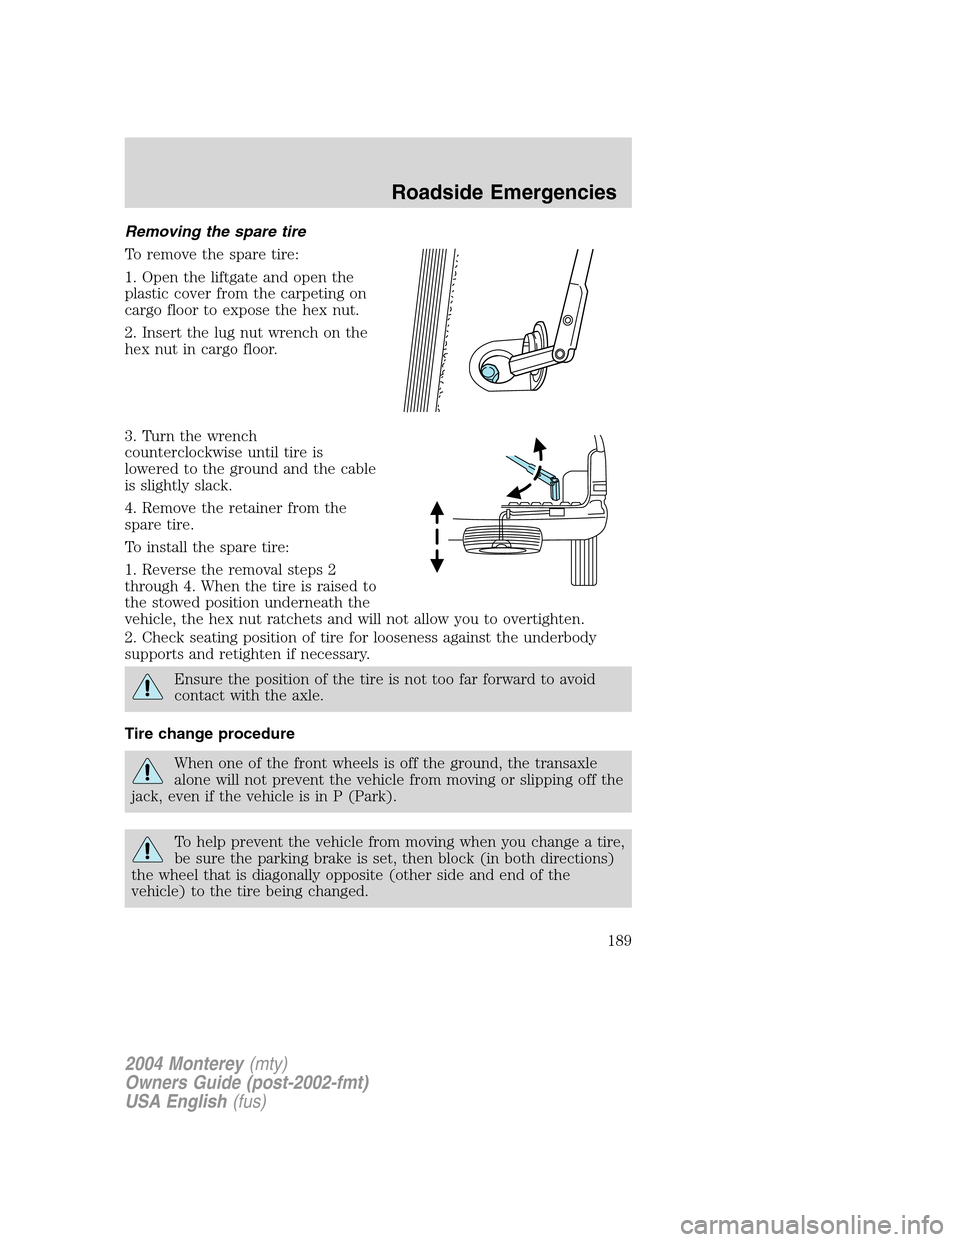
To remove the spare tire:
1. Open the liftgate and open the
plastic cover from the carpeting on
cargo floor to expose the hex nut.
2. Insert the lug nut wrench on the
hex nut in cargo floor.
3. Turn the wrench
counterclockwise until tire is
lowered to the ground and the cable
is slightly slack.
4. Remove the retainer from the
spare tire.
To install the spare tire:
1. Reverse the removal steps 2
through 4. When the tire is raised to
the stowed position underneath the
vehicle, the hex nut ratchets and will not allow you to overtighten.
2. Check seating position of tire for looseness against the underbody
supports and retighten if necessary.
Ensure the position of the tire is not too far forward to avoid
contact with the axle.
Tire change procedure
When one of the front wheels is off the ground, the transaxle
alone will not prevent the vehicle from moving or slipping off the
jack, even if the vehicle is in P (Park).
To help prevent the vehicle from moving when you change a tire,
be sure the parking brake is set, then block (in both directions)
the wheel that is diagonally opposite (other side and end of the
vehicle) to the tire being changed.
2004 Monterey(mty)
Owners Guide (post-2002-fmt)
USA English(fus)
Roadside Emergencies
189
Page 190 of 272
If the vehicle slips off the jack, you or someone else could be
seriously injured.
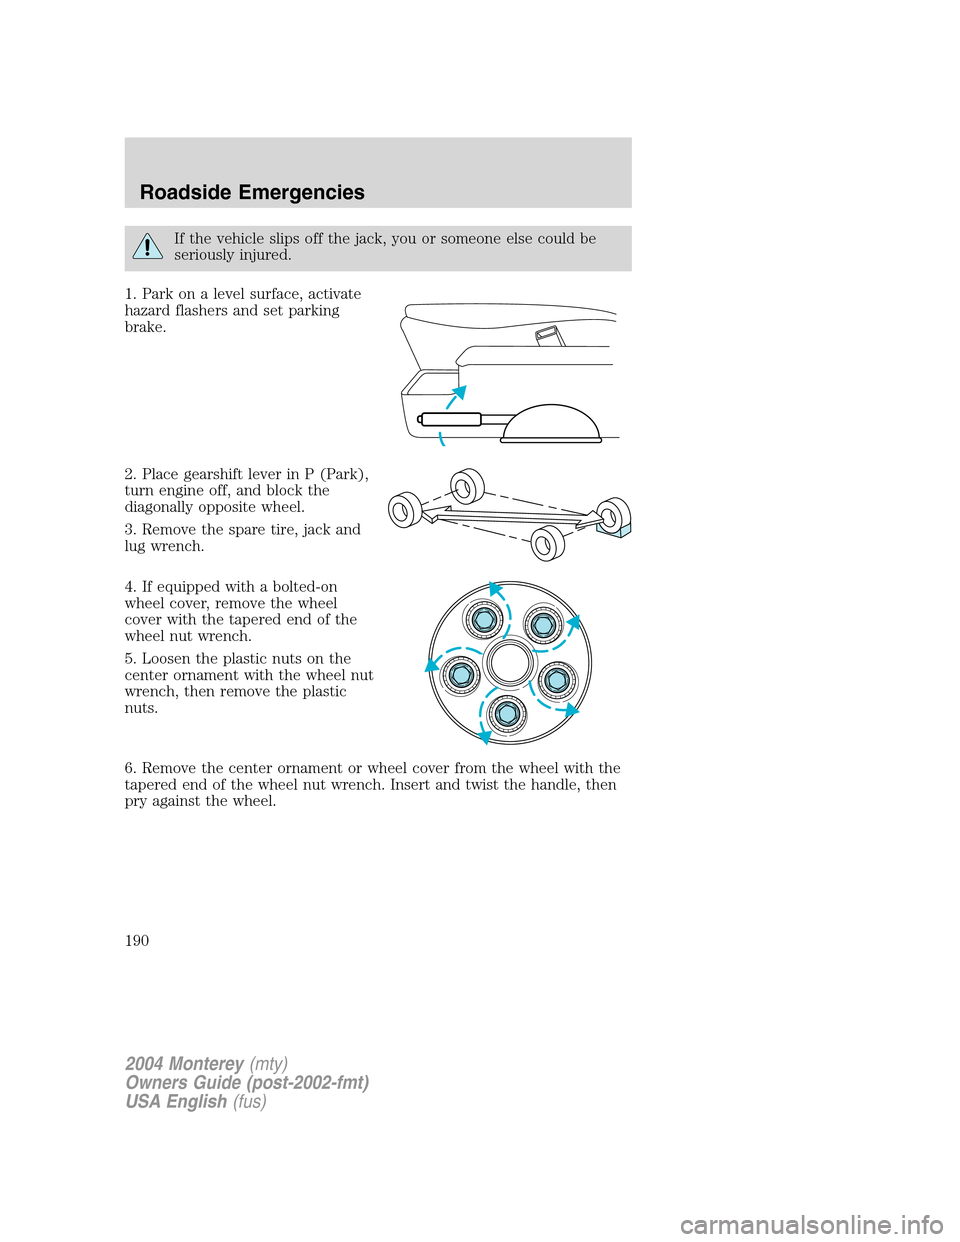
1. Park on a level surface, activate
hazard flashers and set parking
brake.
2. Place gearshift lever in P (Park),
turn engine off, and block the
diagonally opposite wheel.
3. Remove the spare tire, jack and
lug wrench.
4. If equipped with a bolted-on
wheel cover, remove the wheel
cover with the tapered end of the
wheel nut wrench.
5. Loosen the plastic nuts on the
center ornament with the wheel nut
wrench, then remove the plastic
nuts.
6. Remove the center ornament or wheel cover from the wheel with the
tapered end of the wheel nut wrench. Insert and twist the handle, then
pry against the wheel.
2004 Monterey(mty)
Owners Guide (post-2002-fmt)
USA English(fus)
Roadside Emergencies
190
Page 191 of 272
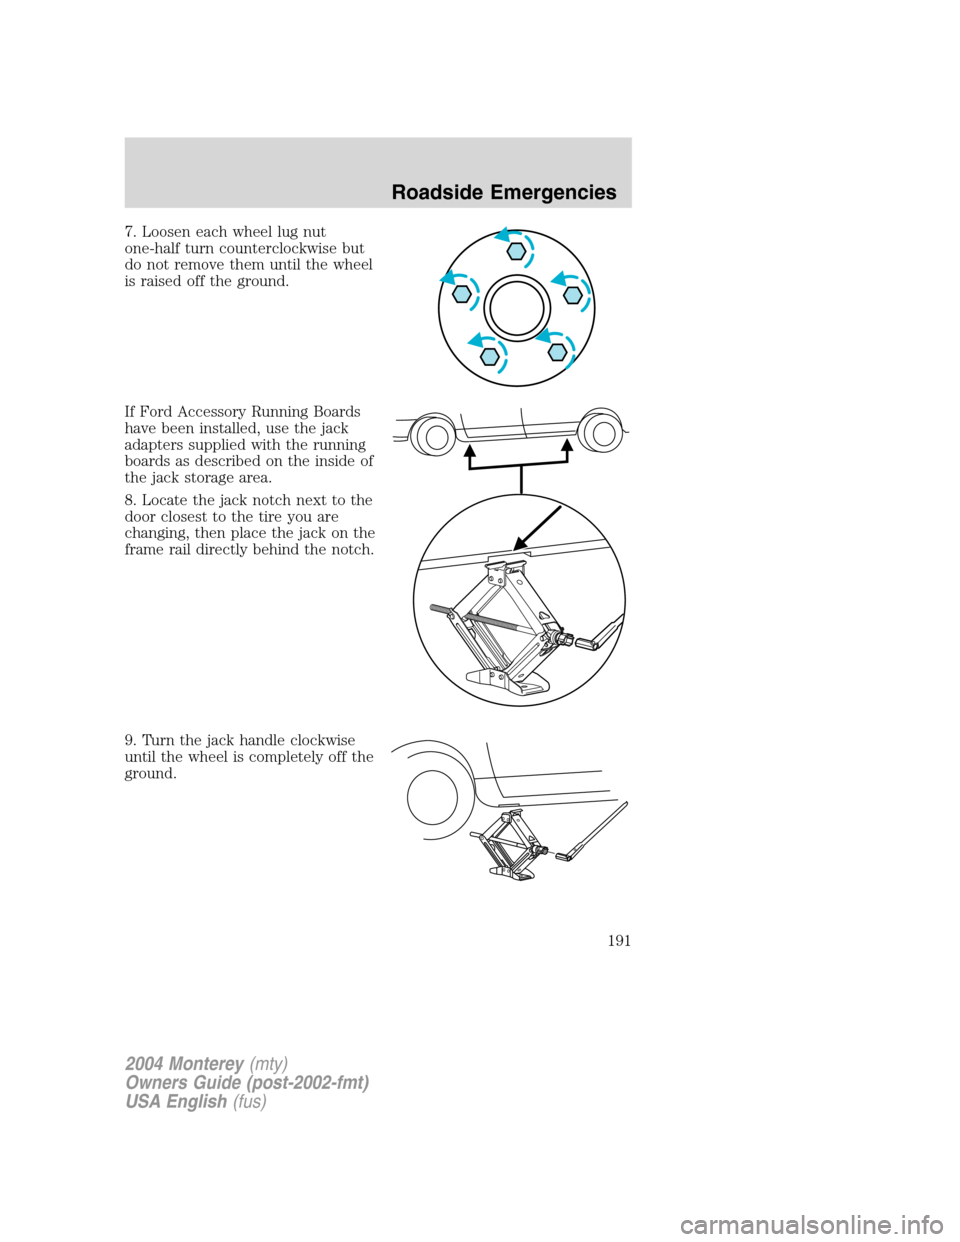
7. Loosen each wheel lug nut
one-half turn counterclockwise but
do not remove them until the wheel
is raised off the ground.
If Ford Accessory Running Boards
have been installed, use the jack
adapters supplied with the running
boards as described on the inside of
the jack storage area.
8. Locate the jack notch next to the
door closest to the tire you are
changing, then place the jack on the
frame rail directly behind the notch.
9. Turn the jack handle clockwise
until the wheel is completely off the
ground.
2004 Monterey(mty)
Owners Guide (post-2002-fmt)
USA English(fus)
Roadside Emergencies
191
Page 192 of 272
To lessen the risk of personal injury, do not put any part of your
body under the vehicle while changing a tire. Do not start the
engine when your vehicle is on the jack. The jack is only meant for
changing the tire.
10. Remove the lug nuts with the lug wrench.
11. Replace the flat tire with the spare tire, making sure the valve stem
is facing outward. Reinstall lug nuts until the wheel is snug against the
hub. Do not fully tighten the lug nuts until the wheel has been lowered.
12. Lower the wheel by turning the jack handle counterclockwise.
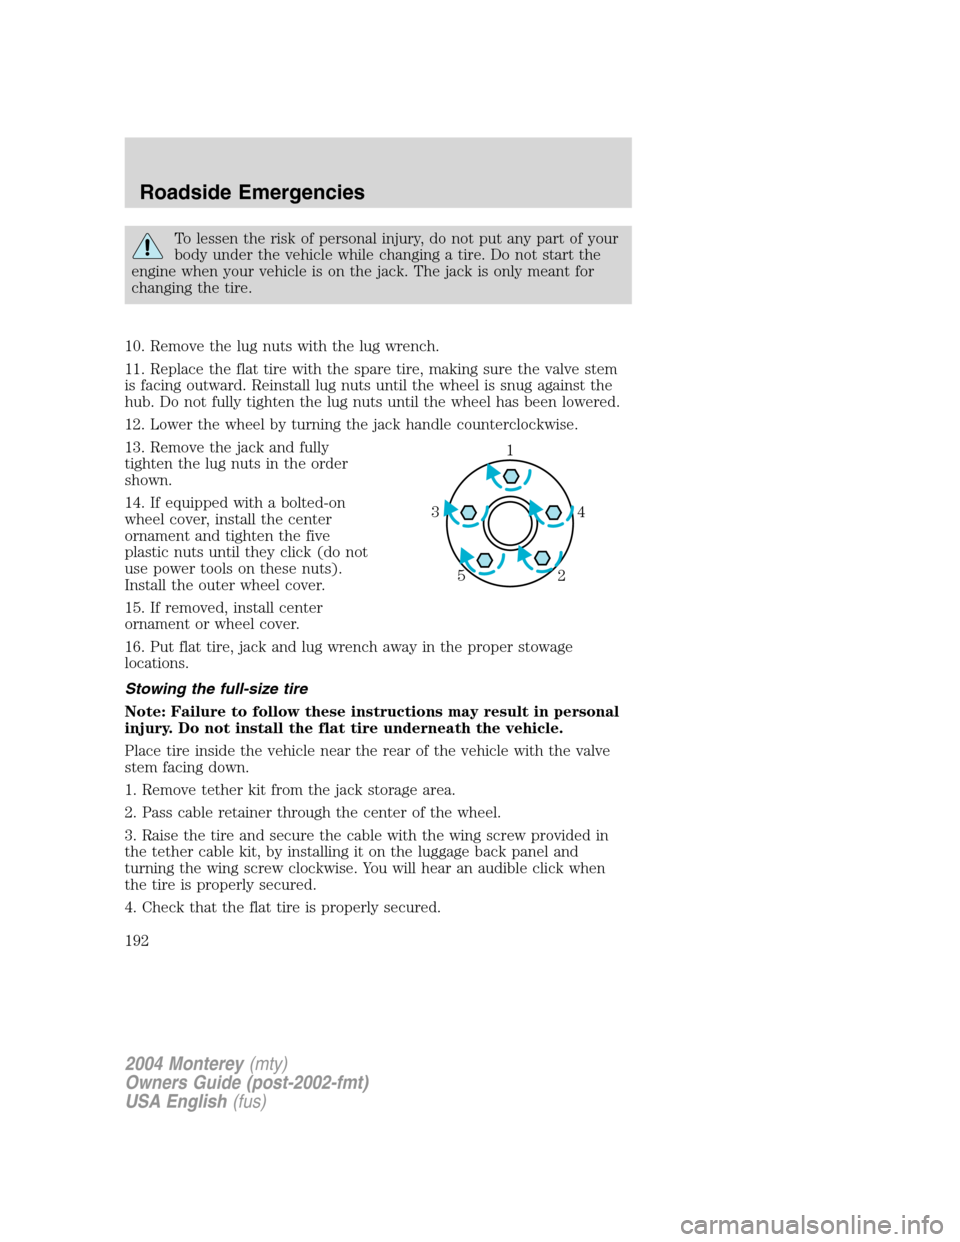
13. Remove the jack and fully
tighten the lug nuts in the order
shown.
14. If equipped with a bolted-on
wheel cover, install the center
ornament and tighten the five
plastic nuts until they click (do not
use power tools on these nuts).
Install the outer wheel cover.
15. If removed, install center
ornament or wheel cover.
16. Put flat tire, jack and lug wrench away in the proper stowage
locations.
Stowing the full-size tire
Note: Failure to follow these instructions may result in personal
injury. Do not install the flat tire underneath the vehicle.
Place tire inside the vehicle near the rear of the vehicle with the valve
stem facing down.
1. Remove tether kit from the jack storage area.
2. Pass cable retainer through the center of the wheel.
3. Raise the tire and secure the cable with the wing screw provided in
the tether cable kit, by installing it on the luggage back panel and
turning the wing screw clockwise. You will hear an audible click when
the tire is properly secured.
4. Check that the flat tire is properly secured.
1
4 3
2 5
2004 Monterey(mty)
Owners Guide (post-2002-fmt)
USA English(fus)
Roadside Emergencies
192
Page 193 of 272
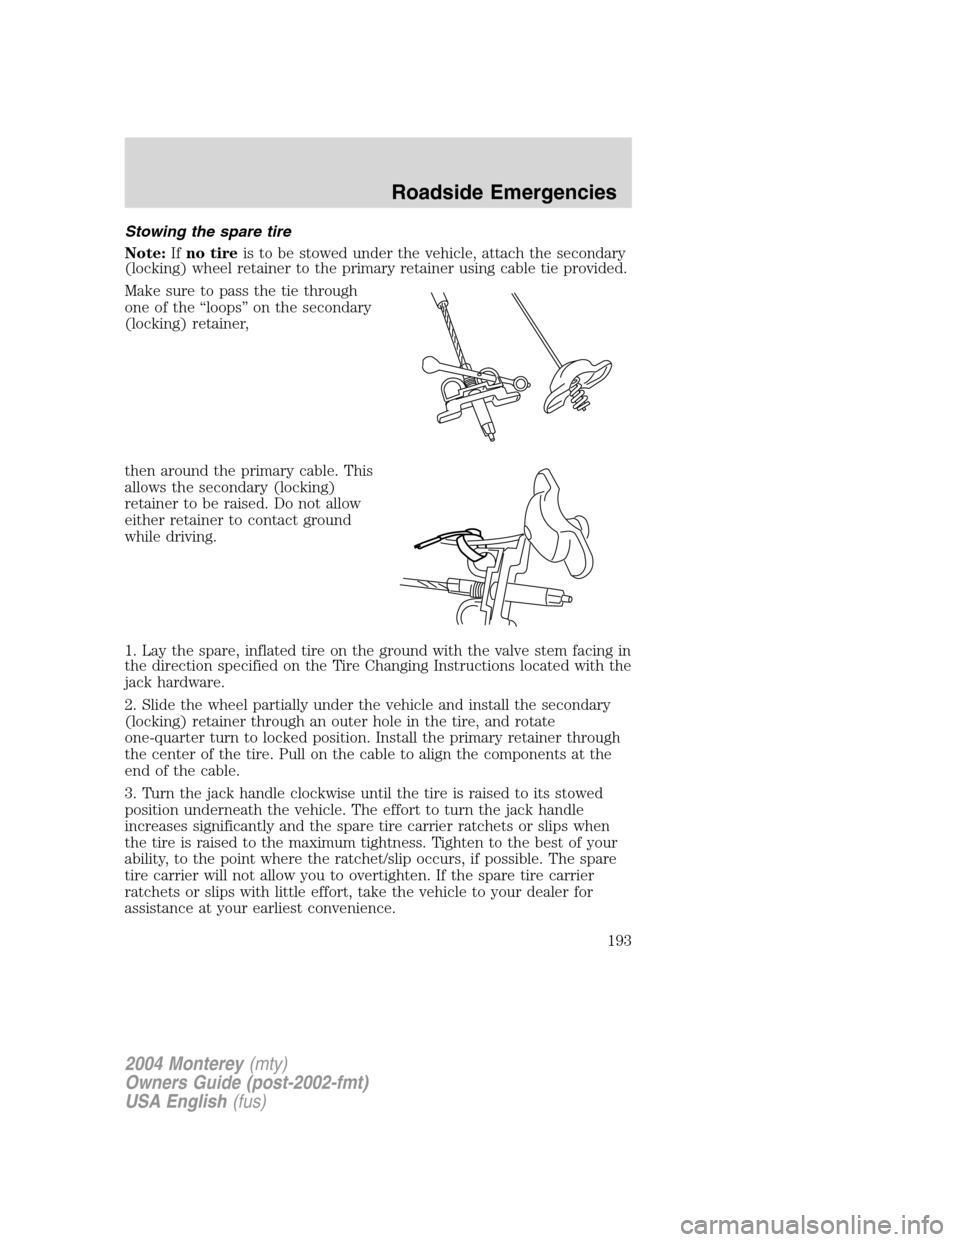
Stowing the spare tire
Note:Ifno tireis to be stowed under the vehicle, attach the secondary
(locking) wheel retainer to the primary retainer using cable tie provided.
Make sure to pass the tie through
one of the“loops”on the secondary
(locking) retainer,
then around the primary cable. This
allows the secondary (locking)
retainer to be raised. Do not allow
either retainer to contact ground
while driving.
1. Lay the spare, inflated tire on the ground with the valve stem facing in
the direction specified on the Tire Changing Instructions located with the
jack hardware.
2. Slide the wheel partially under the vehicle and install the secondary
(locking) retainer through an outer hole in the tire, and rotate
one-quarter turn to locked position. Install the primary retainer through
the center of the tire. Pull on the cable to align the components at the
end of the cable.
3. Turn the jack handle clockwise until the tire is raised to its stowed
position underneath the vehicle. The effort to turn the jack handle
increases significantly and the spare tire carrier ratchets or slips when
the tire is raised to the maximum tightness. Tighten to the best of your
ability, to the point where the ratchet/slip occurs, if possible. The spare
tire carrier will not allow you to overtighten. If the spare tire carrier
ratchets or slips with little effort, take the vehicle to your dealer for
assistance at your earliest convenience.
2004 Monterey(mty)
Owners Guide (post-2002-fmt)
USA English(fus)
Roadside Emergencies
193
Page 194 of 272
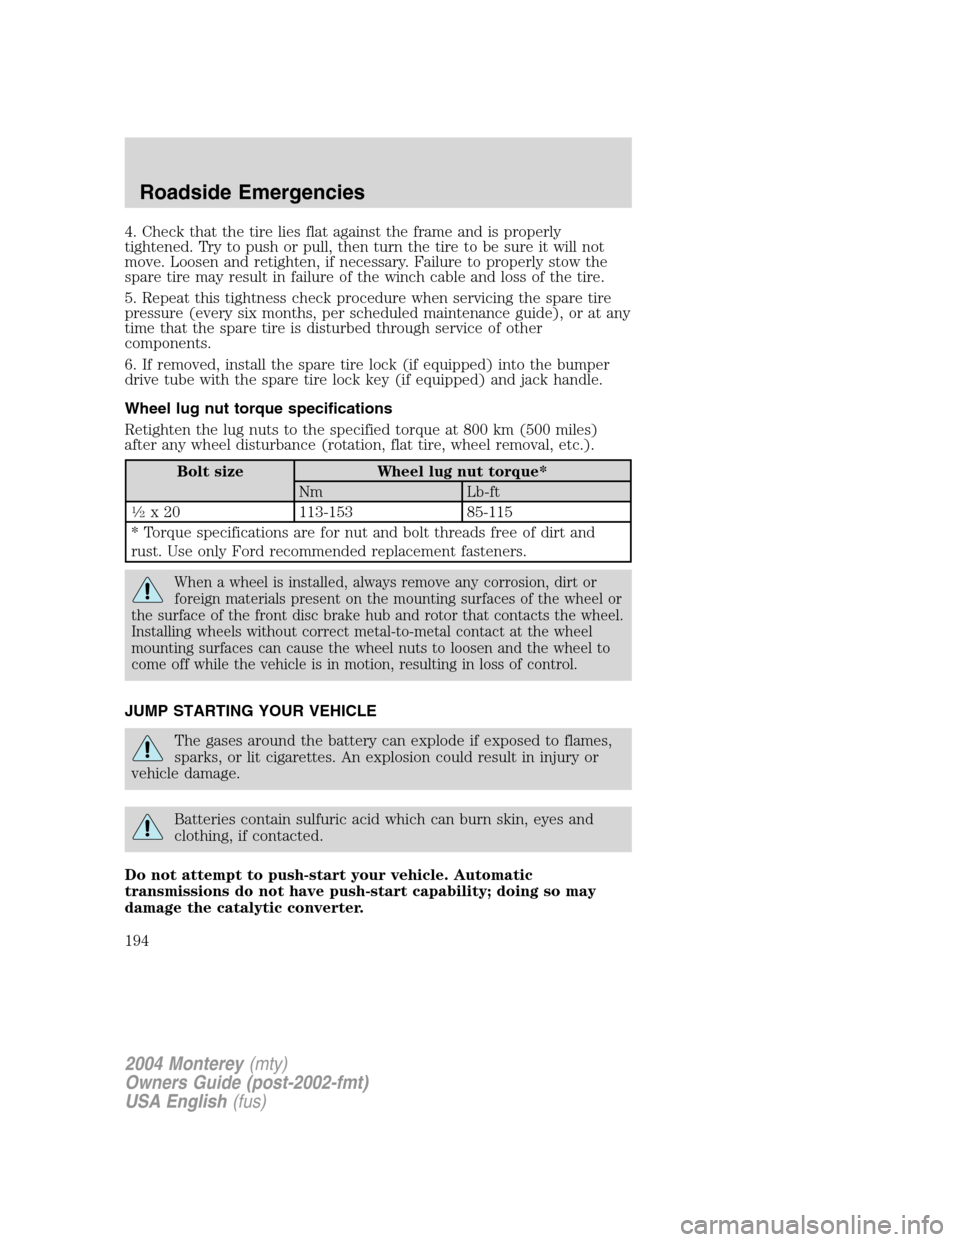
4. Check that the tire lies flat against the frame and is properly
tightened. Try to push or pull, then turn the tire to be sure it will not
move. Loosen and retighten, if necessary. Failure to properly stow the
spare tire may result in failure of the winch cable and loss of the tire.
5. Repeat this tightness check procedure when servicing the spare tire
pressure (every six months, per scheduled maintenance guide), or at any
time that the spare tire is disturbed through service of other
components.
6. If removed, install the spare tire lock (if equipped) into the bumper
drive tube with the spare tire lock key (if equipped) and jack handle.
Wheel lug nut torque specifications
Retighten the lug nuts to the specified torque at 800 km (500 miles)
after any wheel disturbance (rotation, flat tire, wheel removal, etc.).
Bolt size Wheel lug nut torque*
Nm Lb-ft
1⁄2x 20 113-153 85-115
* Torque specifications are for nut and bolt threads free of dirt and
rust. Use only Ford recommended replacement fasteners.
When a wheel is installed, always remove any corrosion, dirt or
foreign materials present on the mounting surfaces of the wheel or
the surface of the front disc brake hub and rotor that contacts the wheel.
Installing wheels without correct metal-to-metal contact at the wheel
mounting surfaces can cause the wheel nuts to loosen and the wheel to
come off while the vehicle is in motion, resulting in loss of control.
JUMP STARTING YOUR VEHICLE
The gases around the battery can explode if exposed to flames,
sparks, or lit cigarettes. An explosion could result in injury or
vehicle damage.
Batteries contain sulfuric acid which can burn skin, eyes and
clothing, if contacted.
Do not attempt to push-start your vehicle. Automatic
transmissions do not have push-start capability; doing so may
damage the catalytic converter.
2004 Monterey(mty)
Owners Guide (post-2002-fmt)
USA English(fus)
Roadside Emergencies
194
Page 210 of 272

WASHING THE EXTERIOR
Wash your vehicle regularly with cool or lukewarm water and a neutral
Ph shampoo, such as Motorcraft Detail Wash (ZC-3–A), which is available
from your dealer.
•Never use strong household detergents or soap, such as dish washing
or laundry liquid. These products can discolor and spot painted
surfaces.
•Never wash a vehicle that is“hot to the touch”or during exposure to
strong, direct sunlight.
•Always use a clean sponge or carwash mitt with plenty of water for
best results.
•Dry the vehicle with a chamois or soft terry cloth towel in order to
eliminate water spotting.
•It is especially important to wash the vehicle regularly during the
winter months, as dirt and road salt are difficult to remove and cause
damage to the vehicle.
•Immediately remove items such as gasoline, diesel fuel, bird droppings
and insect deposits because they can cause damage to the vehicle’s
paintwork and trim over time.
•Remove any exterior accessories, such as antennas, before entering a
car wash.
•Suntan lotions and insect repellents can damage any painted
surface; if these substances come in contact with your vehicle,
wash off as soon as possible.
WAXING
Applying a polymer paint sealant to your vehicle every six months will
assist in reducing minor scratches and paint damage.
•Wash the vehicle first.
•Do not use waxes that contain abrasives.
•Do not allow paint sealant to come in contact with any non-body
(low-gloss black) colored trim, such as grained door handles, roof
racks, bumpers, side moldings, mirror housings or the windshield cowl
area. The paint sealant will“gray”or stain the parts over time.
•Do not allow paint sealant to come in contact with the sliding door
electrical contact switches. Paint sealant or other contaminants could
interfere with the proper operation of the power locks or power
2004 Monterey(mty)
Owners Guide (post-2002-fmt)
USA English(fus)
Cleaning
Cleaning
210
Page 211 of 272
sliding door. If necessary, clean the contacts with Motorcraft Bug and
Tar Remover (ZC-42) to remove any sealant. Do not use any abrasives
on the contact surfaces.
PAINT CHIPS
Your dealer has touch-up paint and sprays to match your vehicle’s color.
Take your color code (printed on a sticker in the driver’s door jam) to
your dealer to ensure you get the correct color.
•Remove particles such as bird droppings, tree sap, insect deposits, tar
spots, road salt and industrial fallout before repairing paint chips.
•Always read the instructions before using the products.
ALUMINUM WHEELS AND WHEEL COVERS
Aluminum wheels and wheel covers are coated with a clearcoat paint
finish. In order to maintain their shine:
•Clean weekly with Motorcraft Wheel and Tire Cleaner (ZC-37–A),
which is available from your dealer. Heavy dirt and brake dust
accumulation may require agitation with a sponge. Rinse thoroughly
with a strong stream of water.
•Never apply any cleaning chemical to hot or warm wheel rims or
covers.
•Some automatic car washes may cause damage to the finish on your
wheel rims or covers. Chemical-strength cleaners, or cleaning
chemicals, in combination with brush agitation to remove brake dust
and dirt, could wear away the clearcoat finish over time.
•Do not use hydrofluoric acid-based or high caustic-based wheel
cleaners, steel wool, fuels or strong household detergent.
•To remove tar and grease, use Motorcraft Bug and Tar Remover
(ZC-42), available from your dealer.
ENGINE
Engines are more efficient when they are clean because grease and dirt
buildup keep the engine warmer than normal. When washing:
•Take care when using a power washer to clean the engine. The
high-pressure fluid could penetrate the sealed parts and cause
damage.
•Do not spray a hot engine with cold water to avoid cracking the
engine block or other engine components.
2004 Monterey(mty)
Owners Guide (post-2002-fmt)
USA English(fus)
Cleaning
211
Page 216 of 272
SERVICE RECOMMENDATIONS
To help you service your vehicle:
•We highlight do-it-yourself items in the engine compartment for easy
location.
•We provide a scheduled maintenance guide which makes tracking
routine service easy.
If your vehicle requires professional service, your dealership can provide
the necessary parts and service. Check yourWarranty Guide/Owner
Information Guideto find out which parts and services are covered.
Use only recommended fuels, lubricants, fluids and service parts
conforming to specifications. Motorcraft parts are designed and built to
provide the best performance in your vehicle.
PRECAUTIONS WHEN SERVICING YOUR VEHICLE
•Do not work on a hot engine.
•Make sure that nothing gets caught in moving parts.
•Do not work on a vehicle with the engine running in an enclosed
space, unless you are sure you have enough ventilation.
•Keep all open flames and other lit material away from the battery and
all fuel related parts.
Working with the engine off
1. Set the parking brake and shift to P (Park).
2. Turn off the engine and remove the key.
3. Block the wheels.
Working with the engine on
1. Set the parking brake and shift to P (Park).
2. Block the wheels.
Note:Do not start your engine with the air cleaner removed and do not
remove it while the engine is running.
2004 Monterey(mty)
Owners Guide (post-2002-fmt)
USA English(fus)
Maintenance and Specifications
Maintenance and Specifications
216
Page 221 of 272
2. If the engine oil level is not within the normal range, add only certified
engine oil of the recommended viscosity. Remove the engine oil filler cap
and use a funnel to pour the engine oil into the opening.
3. Recheck the engine oil level. Make sure the oil level is not above the
MAX mark on the engine oil level indicator (dipstick).
4. Install the indicator and ensure it is fully seated.
5. Fully install the engine oil filler cap by turning the filler cap clockwise
1/4 of a turn until three clicks are heard or until the cap is fully seated.
To avoid possible oil loss, DO NOT operate the vehicle with the
engine oil level indicator and/or the engine oil filler cap removed.
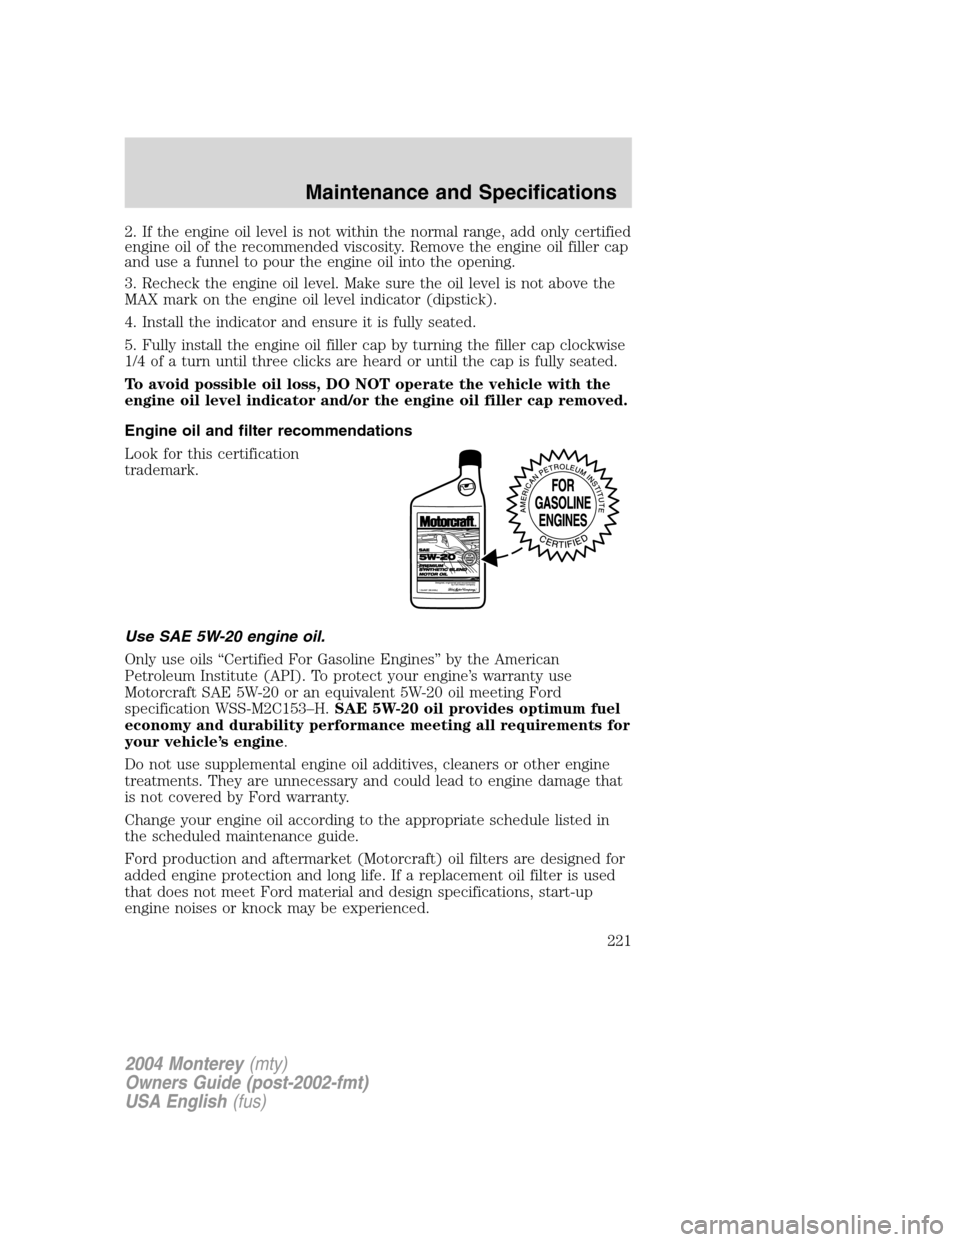
Engine oil and filter recommendations
Look for this certification
trademark.
Use SAE 5W-20 engine oil.
Only use oils“Certified For Gasoline Engines”by the American
Petroleum Institute (API). To protect your engine’s warranty use
Motorcraft SAE 5W-20 or an equivalent 5W-20 oil meeting Ford
specification WSS-M2C153–H.SAE 5W-20 oil provides optimum fuel
economy and durability performance meeting all requirements for
your vehicle’s engine.
Do not use supplemental engine oil additives, cleaners or other engine
treatments. They are unnecessary and could lead to engine damage that
is not covered by Ford warranty.
Change your engine oil according to the appropriate schedule listed in
the scheduled maintenance guide.
Ford production and aftermarket (Motorcraft) oil filters are designed for
added engine protection and long life. If a replacement oil filter is used
that does not meet Ford material and design specifications, start-up
engine noises or knock may be experienced.
2004 Monterey(mty)
Owners Guide (post-2002-fmt)
USA English(fus)
Maintenance and Specifications
221