atc Mercury Monterey 2004 Owner's Manuals
[x] Cancel search | Manufacturer: MERCURY, Model Year: 2004, Model line: Monterey, Model: Mercury Monterey 2004Pages: 272, PDF Size: 4.29 MB
Page 25 of 272
•Clean the cassette player head with a cassette cleaning cartridge after
10–12 hours of play to maintain good sound/operation.
Don’t:
•Use cassettes that are longer than 90 minutes.
•Expose tapes to direct sunlight, extreme humidity, heat or cold.
•Leave tapes in the cassette player for a long time when not being
played.
CD/CD PLAYER CARE
Do:
•Handle discs by their edges only. Never touch the playing surface.
•Inspect discs before playing. Clean only with an approved CD cleaner
and wipe from the center out.
Don’t:
•Expose discs to direct sunlight or heat sources for extended periods
of time.
•For vehicles equipped with a six disc CD changer, don’t insert more
than one disc into each slot of the CD changer magazine.
•Clean using a circular motion.
CD units are designed to play commercially pressed 12 cm (4.75
in) audio compact discs only. Due to technical incompatibility,
certain recordable and re-recordable compact discs may not
function correctly when used in Ford CD players. Irregular
shaped CDs, CDs with a scratch protection film attached, and CDs
with homemade paper (adhesive) labels should not be inserted
into the CD player. The label may peel and cause the CD to
become jammed. It is recommended that homemade CDs be
identified with permanent felt tip marker rather than adhesive
labels. Ball point pens may damage CDs. Please contact your
dealer for further information.
AUDIO SYSTEM WARRANTY AND SERVICE
Refer to theWarranty Guidefor audio system warranty information. If
service is necessary, see your dealer or qualified technician.
2004 Monterey(mty)
Owners Guide (post-2002-fmt)
USA English(fus)
Entertainment Systems
25
Page 52 of 272
SLIDING DOOR OPERATION
Manual door operation
If equipped with a Power Sliding Door (PSD), turn the Power Door
Lockout control on the overhead console to the OFF position. Refer to
Disabling Power Operation of the PSDin this chapter for more
information.
Note:Before unlatching the left side door, verify that the fuel fill door is
closed. The left hand door will not open if the fuel door is open.
Slide the door carefully in a controlled manner to the full open position.
At the end of travel, firmly push the door against the bump stop to
engage the hold open mechanism to restrain the door. When operating
the door on a gradient, special care should be taken to manually control
the opening and closing speed of the door.
If the door is allowed to slide open or closed unrestrained,
personal injury or damage to the door could result.
When closing the sliding door, keep the head, hands and other body
parts of vehicle occupants out of the path of the closing door. Slide the
door closed in a careful, controlled manner.
When closing the sliding doors, you should verify they are free of
obstructions and ensure that children and/or pets are not in the
proximity of the sliding door openings. Injury could result if body parts
are caught or pinched in an uncontrolled sliding door.
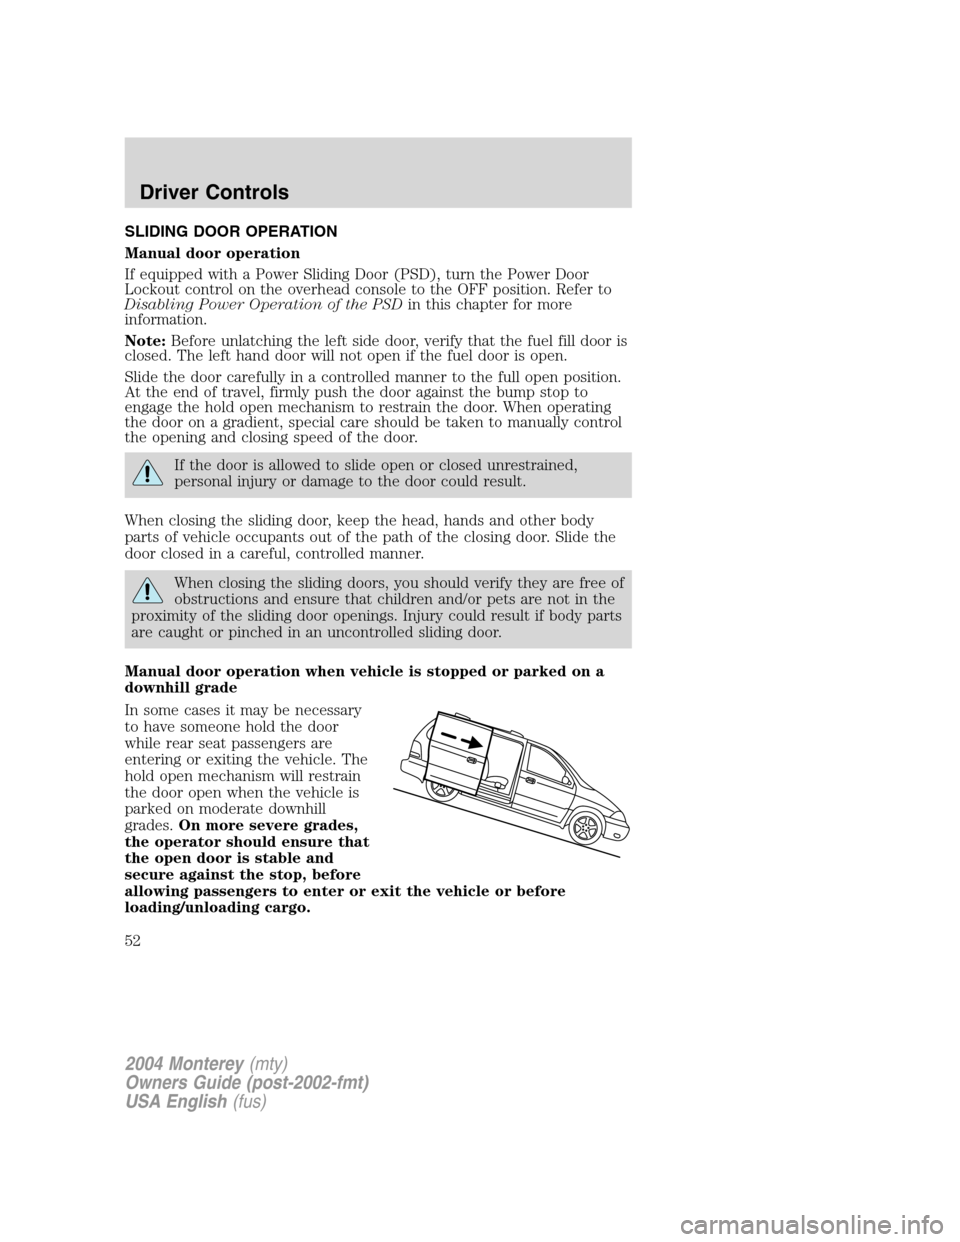
Manual door operation when vehicle is stopped or parked on a
downhill grade
In some cases it may be necessary
to have someone hold the door
while rear seat passengers are
entering or exiting the vehicle. The
hold open mechanism will restrain
the door open when the vehicle is
parked on moderate downhill
grades.On more severe grades,
the operator should ensure that
the open door is stable and
secure against the stop, before
allowing passengers to enter or exit the vehicle or before
loading/unloading cargo.
2004 Monterey(mty)
Owners Guide (post-2002-fmt)
USA English(fus)
Driver Controls
52
Page 105 of 272

After entering the 3rd row seat,
return the seat from the tumbled
position and latch it to the floor.
Operate recline control to return the
seatback to the upright position.
Note:
•Ensure that the seat and seatback
is latched securely in position.
•Keep floor area free of objects
that would prevent proper seat
engagement.
•Do not adjust or release the seat
floor latch while vehicle is in
motion.
•Do not operate the vehicle with seats in tumbled position.
Always latch the vehicle seat to the floor, whether the seat is
occupied or empty. If not latched, the seat may cause injury
during a sudden stop.
2004 Monterey(mty)
Owners Guide (post-2002-fmt)
USA English(fus)
Seating and Safety Restraints
105
Page 108 of 272
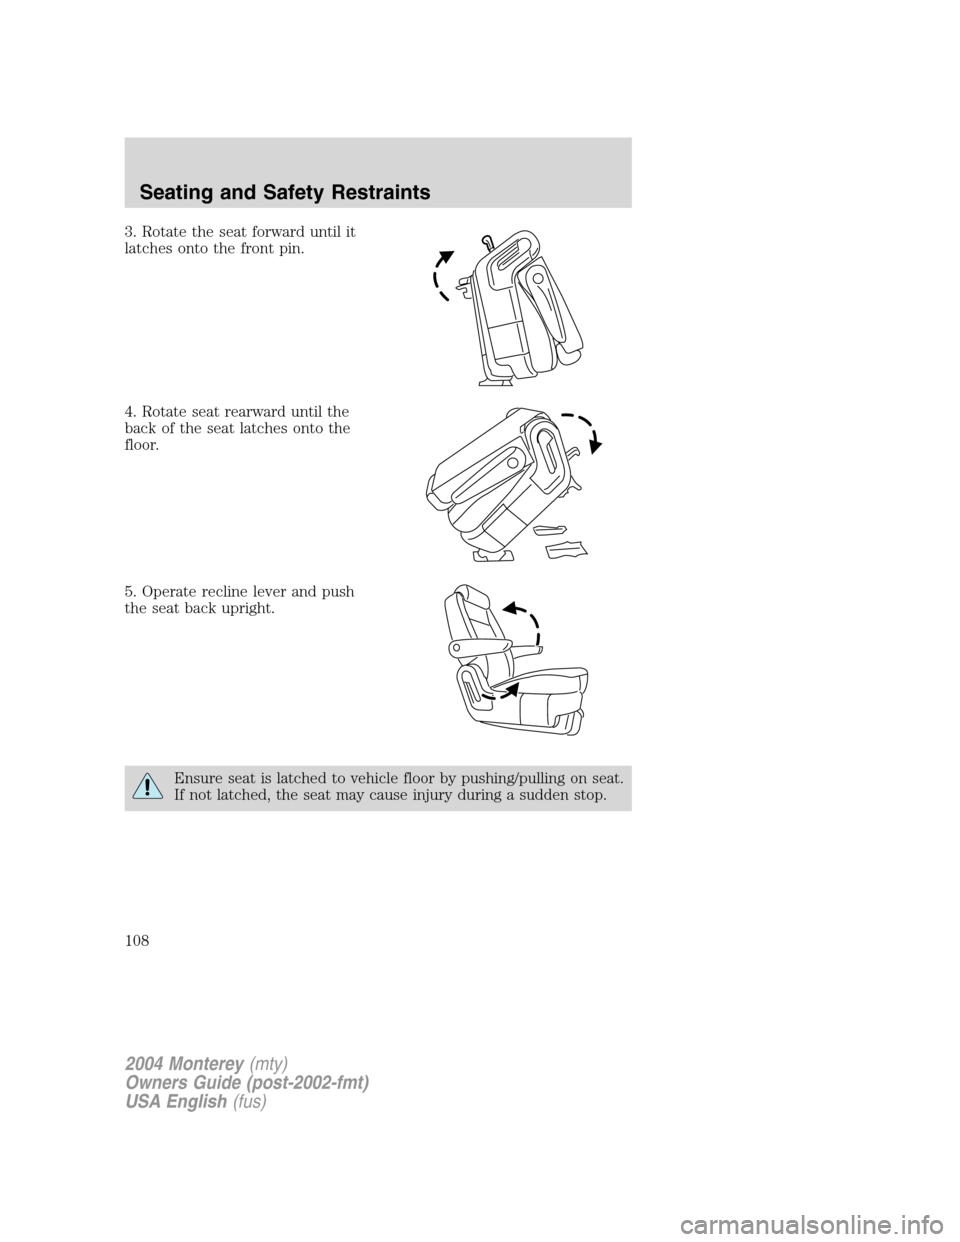
3. Rotate the seat forward until it
latches onto the front pin.
4. Rotate seat rearward until the
back of the seat latches onto the
floor.
5. Operate recline lever and push
the seat back upright.
Ensure seat is latched to vehicle floor by pushing/pulling on seat.
If not latched, the seat may cause injury during a sudden stop.
2004 Monterey(mty)
Owners Guide (post-2002-fmt)
USA English(fus)
Seating and Safety Restraints
108
Page 110 of 272
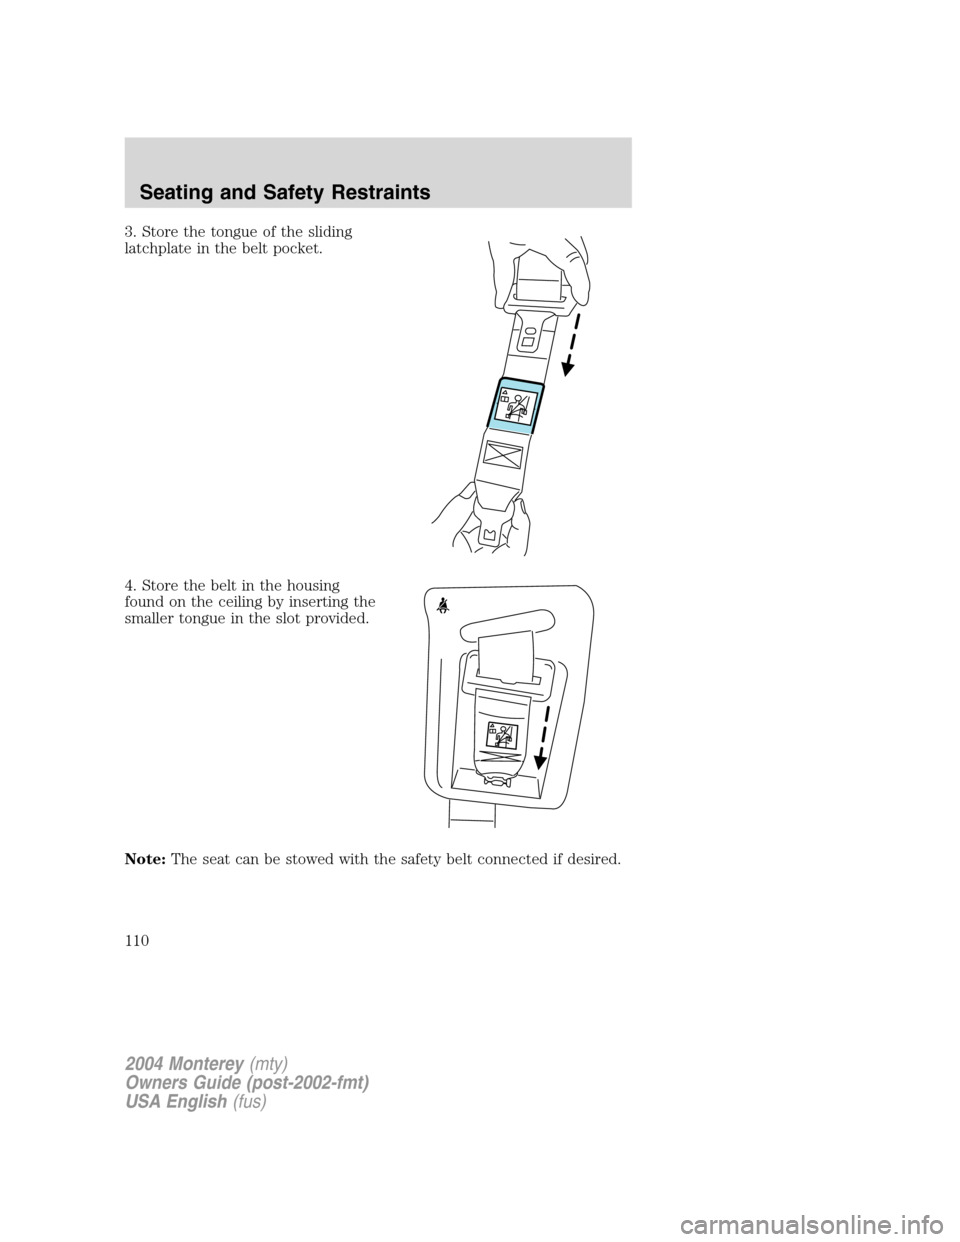
3. Store the tongue of the sliding
latchplate in the belt pocket.
4. Store the belt in the housing
found on the ceiling by inserting the
smaller tongue in the slot provided.
Note:The seat can be stowed with the safety belt connected if desired.
2004 Monterey(mty)
Owners Guide (post-2002-fmt)
USA English(fus)
Seating and Safety Restraints
110
Page 112 of 272
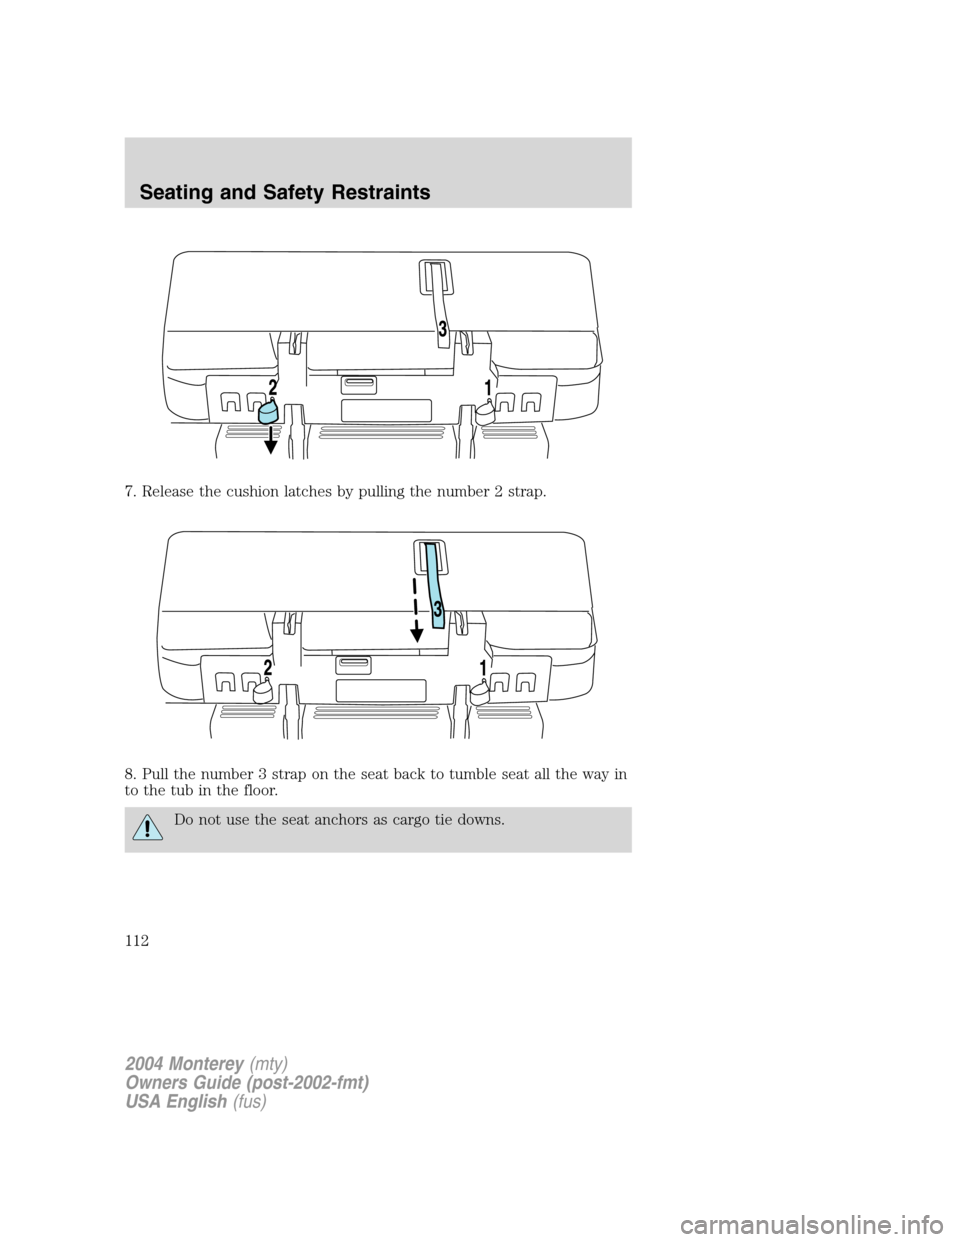
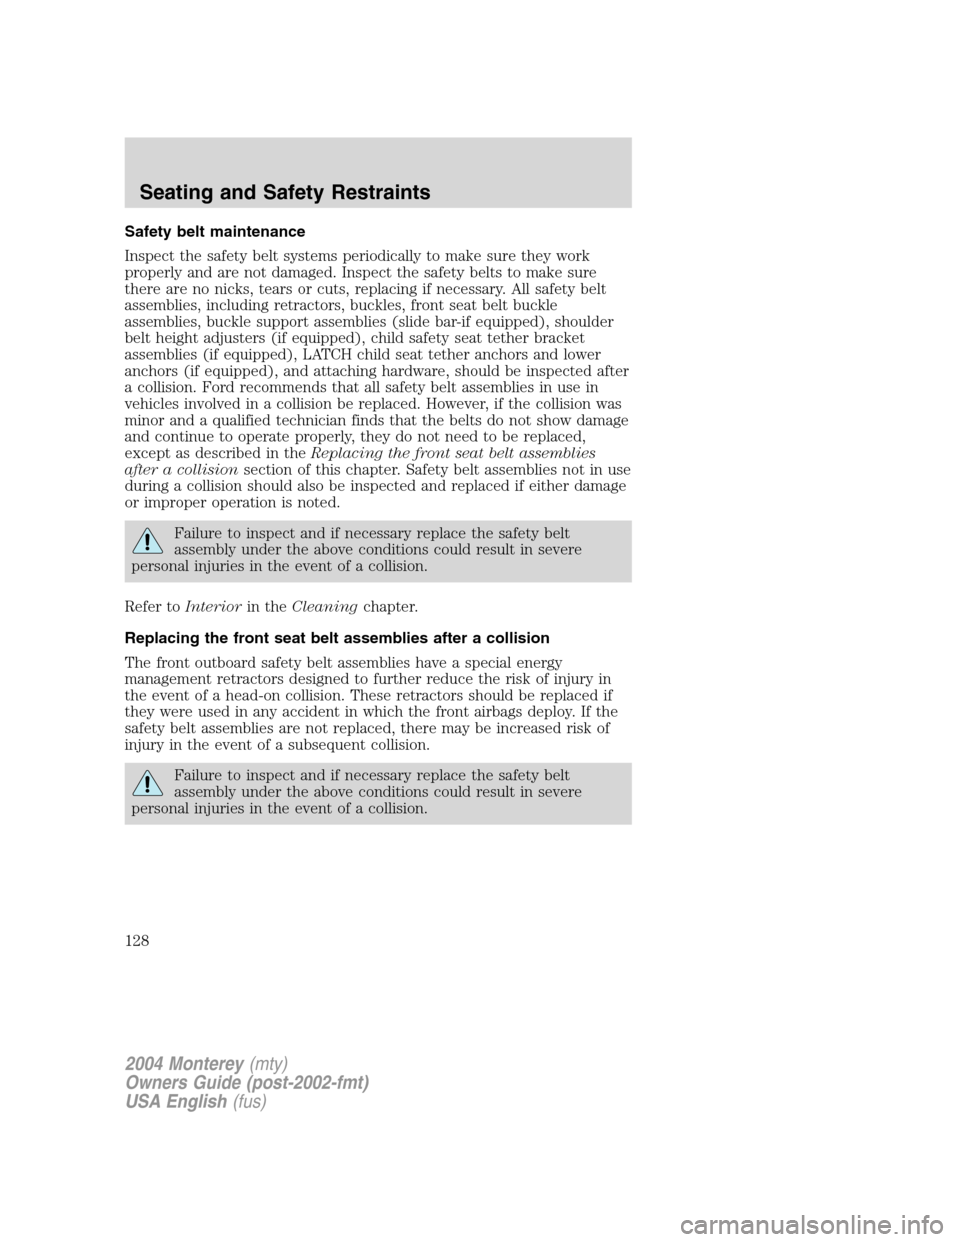
7. Release the cushion latches by pulling the number 2 strap.
8. Pull the number 3 strap on the seat back to tumble seat all the way in
to the tub in the floor.
Do not use the seat anchors as cargo tie downs.
2004 Monterey(mty)
Owners Guide (post-2002-fmt)
USA English(fus)
Seating and Safety Restraints
112
Page 113 of 272

Unstowing the third row seat
Ensure seat latching area is free of objects.
1. Lift the seat out of the tub in the
floor by pulling up on the exposed
strap or handle. Once seat is at a
vertical position, push the seat over,
letting it fall onto the latches.
2. To return the seat back to the
seating position, pull the number 1
strap, then while holding the
number 1 strap, pull the number 3
strap to raise the seat back.
3. Pull up on the head restraits to adjust them.
4. If the center lap/shoulder belt is detached, remove the belt from the
ceiling storage area just ahead of the liftgate opening and buckle the
tongue on the end of the belt to the mini-buckle on the left side of the
center seat.
Ensure seat is latched to vehicle floor by pushing/pulling on seat.
If not latched, the seat may cause injury during a sudden stop.
2004 Monterey(mty)
Owners Guide (post-2002-fmt)
USA English(fus)
Seating and Safety Restraints
113
Page 115 of 272

2. To access the tailgate function,
the seat must be in the seating
position. If the seat is not in the
seating position, follow all the steps
of the‘Unstowing Seat Section’.
Once the seat is in the seating
position, release the cushion latches
by pulling the number 2 strap.
Then, pull the seat rearward by the
number 3 strap and set the seat on
the liftgate scuff plate. The number
1 strap is not used to access this
position.
Do not sit on the head restraints.
3. To return the seat, ensure seat
latching area is free of objects.
Then, raise the seat off the liftgate
scuff plate and push at the top of
the seat back to rotate the seat back
onto the latches. Pull up on the
head restraints to raise them.
Ensure seat is latched to vehicle floor by pushing/pulling on seat.
If not latched, the seat may cause injury during a sudden stop.
2004 Monterey(mty)
Owners Guide (post-2002-fmt)
USA English(fus)
Seating and Safety Restraints
115
Page 120 of 272

In a rollover crash, an unbelted person is significantly more likely
to die than a person wearing a seat belt.
Each seating position in your vehicle has a specific safety belt
assembly which is made up of one buckle and one tongue that
are designed to be used as a pair. 1) Use the shoulder belt on the
outside shoulder only. Never wear the shoulder belt under the arm. 2)
Never swing the safety belt around your neck over the inside shoulder.
3) Never use a single belt for more than one person.
Always transport children 12 years old and under in the back
seat and always properly use appropriate child restraints.
Combination lap and shoulder belts
1. Insert the belt tongue into the
proper buckle (the buckle closest to
the direction the tongue is coming
from) until you hear a snap and feel
it latch. Make sure the tongue is
securely fastened in the buckle.
2. To unfasten, push the release
button and remove the tongue from
the buckle.
2004 Monterey(mty)
Owners Guide (post-2002-fmt)
USA English(fus)
Seating and Safety Restraints
120
Page 128 of 272
Safety belt maintenance
Inspect the safety belt systems periodically to make sure they work
properly and are not damaged. Inspect the safety belts to make sure
there are no nicks, tears or cuts, replacing if necessary. All safety belt
assemblies, including retractors, buckles, front seat belt buckle
assemblies, buckle support assemblies (slide bar-if equipped), shoulder
belt height adjusters (if equipped), child safety seat tether bracket
assemblies (if equipped), LATCH child seat tether anchors and lower
anchors (if equipped), and attaching hardware, should be inspected after
a collision. Ford recommends that all safety belt assemblies in use in
vehicles involved in a collision be replaced. However, if the collision was
minor and a qualified technician finds that the belts do not show damage
and continue to operate properly, they do not need to be replaced,
except as described in theReplacing the front seat belt assemblies
after a collisionsection of this chapter. Safety belt assemblies not in use
during a collision should also be inspected and replaced if either damage
or improper operation is noted.
Failure to inspect and if necessary replace the safety belt
assembly under the above conditions could result in severe
personal injuries in the event of a collision.
Refer toInteriorin theCleaningchapter.
Replacing the front seat belt assemblies after a collision
The front outboard safety belt assemblies have a special energy
management retractors designed to further reduce the risk of injury in
the event of a head-on collision. These retractors should be replaced if
they were used in any accident in which the front airbags deploy. If the
safety belt assemblies are not replaced, there may be increased risk of
injury in the event of a subsequent collision.
Failure to inspect and if necessary replace the safety belt
assembly under the above conditions could result in severe
personal injuries in the event of a collision.
2004 Monterey(mty)
Owners Guide (post-2002-fmt)
USA English(fus)
Seating and Safety Restraints
128