towing Mercury Monterey 2005 Owner's Manuals
[x] Cancel search | Manufacturer: MERCURY, Model Year: 2005, Model line: Monterey, Model: Mercury Monterey 2005Pages: 304, PDF Size: 3.45 MB
Page 2 of 304

Seating and Safety Restraints 109
Seating 109
Safety restraints 128
Air bags 142
Child restraints 155
Tires, Wheels and Loading 167
Tire Information 168
Changing tires 172
Wheel lug nut torque 182
Low tire warning system 191
Vehicle loading 194
Trailer towing 201
Recreational towing 205
Driving 206
Starting 206
Brakes 210
Transmission operation 214
Roadside Emergencies 222
Getting roadside assistance 222
Hazard flasher switch 223
Fuel pump shut-off switch 223
Fuses and relays 224
Jump starting 232
Wrecker towing 238
Customer Assistance 239
Reporting safety defects (U.S. only) 247
Table of Contents
2
2005 Monterey(mty)
Owners Guide (post-2002-fmt)
USA_English(fus)
Page 5 of 304

SAFETY AND ENVIRONMENT PROTECTION
Warning symbols in this guide
How can you reduce the risk of personal injury to yourself or others? In
this guide, answers to such questions are contained in comments
highlighted by the warning triangle symbol. These comments should be
read and observed.
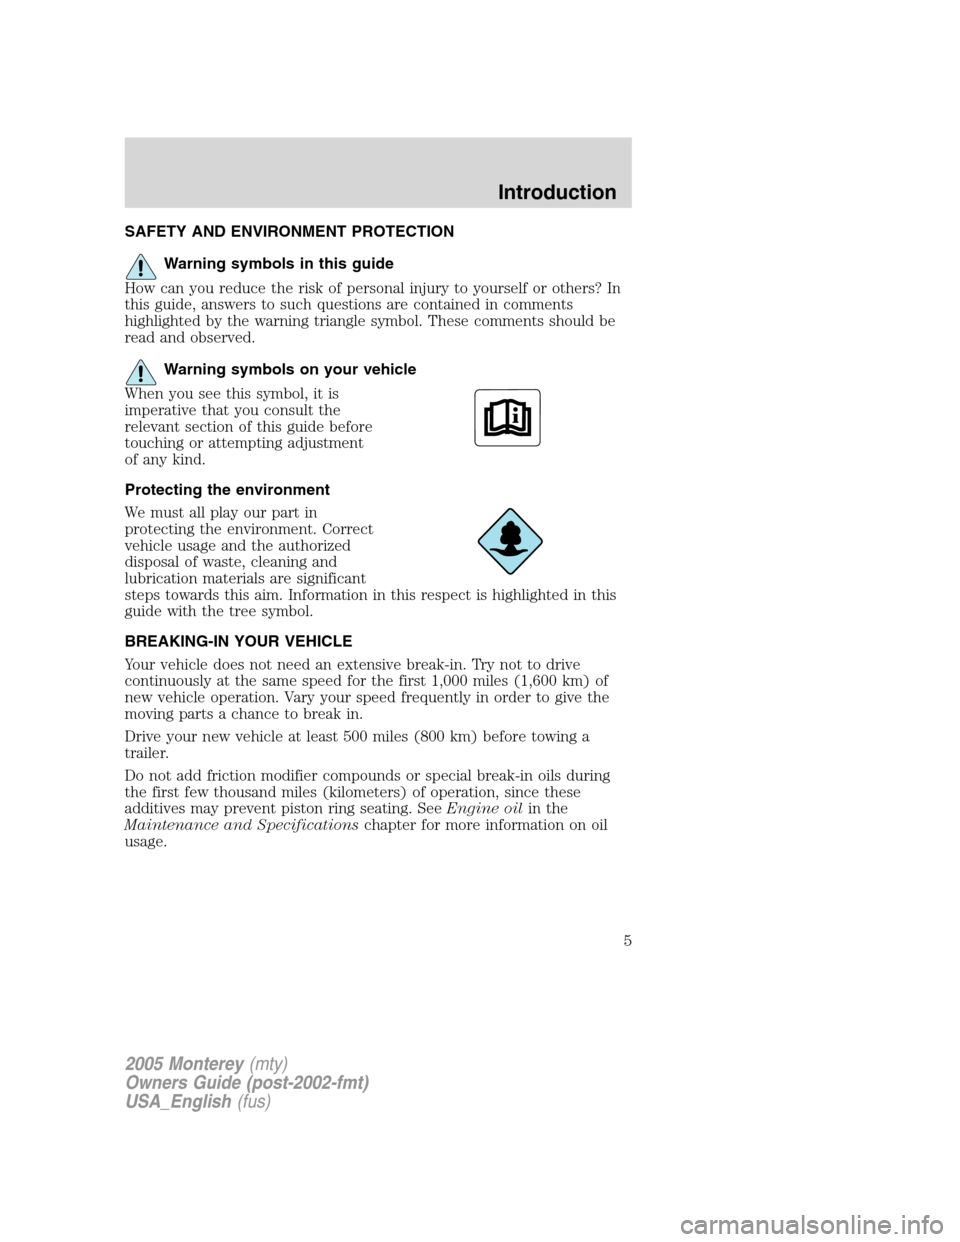
Warning symbols on your vehicle
When you see this symbol, it is
imperative that you consult the
relevant section of this guide before
touching or attempting adjustment
of any kind.
Protecting the environment
We must all play our part in
protecting the environment. Correct
vehicle usage and the authorized
disposal of waste, cleaning and
lubrication materials are significant
steps towards this aim. Information in this respect is highlighted in this
guide with the tree symbol.
BREAKING-IN YOUR VEHICLE
Your vehicle does not need an extensive break-in. Try not to drive
continuously at the same speed for the first 1,000 miles (1,600 km) of
new vehicle operation. Vary your speed frequently in order to give the
moving parts a chance to break in.
Drive your new vehicle at least 500 miles (800 km) before towing a
trailer.
Do not add friction modifier compounds or special break-in oils during
the first few thousand miles (kilometers) of operation, since these
additives may prevent piston ring seating. SeeEngine oilin the
Maintenance and Specificationschapter for more information on oil
usage.
2005 Monterey(mty)
Owners Guide (post-2002-fmt)
USA_English(fus)
Introduction
5
Page 81 of 304

Liftgate ajar Warning returns after the ignition key
is turned from OFF to ON
Check left park lamp
Check right park lamp
Check left headlamp
Check fuel cap
Check right headlamp
Check left turn lamp
Washer fluid low
Check right turn lamp
Change oil soon
Check tires
Check brake lamps
Turn signal on reminder
DRIVER’S DOOR AJAR.Displayed when the driver’s door is not
completely closed.
PASSENGER DOOR AJAR.Displayed when the passenger side door is
not completely closed.
LEFT REAR DOOR AJAR.Displayed when the driver’s rear door is not
completely closed.
RIGHT REAR DOOR AJAR.Displayed when the passenger side rear
door is not completely closed.
LIFTGATE AJAR.Displayed when the liftgate is not completely closed.
TRANSMISSION OVERHEATED.Indicates the transmission is
overheating. This warning may appear when towing heavy loads or when
driving in a low gear at a high speed for an extended period of time.
Stop the vehicle as soon as safely possible, turn off the engine and let it
cool. Check the transmission fluid and level. Refer toTransmission
fluidin theMaintenance and Specificationschapter. If the warning
stays on or continues to come on, contact your dealer for transmission
service as soon as possible.
PARK BRAKE SET.Displayed when the manual park brake is set. If
the warning stays on after the park brake is released, contact your dealer
as soon as possible.
CHECK BRAKE SYSTEM.Displayed when the braking system is not
operating properly. If the warning stays on or continues to come on,
contact your dealer as soon as possible.
2005 Monterey(mty)
Owners Guide (post-2002-fmt)
USA_English(fus)
Driver Controls
81
Page 121 of 304

Before returning the seatback to its original position, make sure
that cargo or any objects are not trapped underneath the
seatback. After returning the seatback to its original position, pull on
the seatback to ensure that it has fully latched. An unlatched seat may
become dangerous in the event of a sudden stop or collision.
Stowing the third row seat
1. If the comfort guide is on the
center lap/shoulder belt, slip the
guide off the belt and stow the
guide in the pocket on the back of
the seat.
2. If you plan to carry very large
objects or items that might damage
the center lap/shoulder belt, detach
the belt from the seat. Use a key or
seat belt tongue to release the
buckle.
2005 Monterey(mty)
Owners Guide (post-2002-fmt)
USA_English(fus)
Seating and Safety Restraints
121
Page 125 of 304

Unstowing the third row seat
Ensure seat latching area is free of objects.
1. Lift the seat out of the tub in the
floor by pulling up on the exposed
strap or handle. Once seat is at a
vertical position, push the seat over,
letting it fall onto the latches.
2. To return the seat back to the
seating position, pull the number 1
strap, then while holding the
number 1 strap, pull the number 3
strap to raise the seat back.
3. Release the number 1 strap to
allow the seat to lock, then release
the number 3 strap.
4. Pull up on the head restraints to adjust them.
5. If the center lap/shoulder belt is detached, remove the belt from the
ceiling storage area just ahead of the liftgate opening and buckle the
tongue on the end of the belt to the mini-buckle on the left side of the
center seat.
Ensure seat is latched to vehicle floor by pushing/pulling on seat.
If not latched, the seat may cause injury during a sudden stop.
Before returning the seatback to its original position, make sure
that cargo or any objects are not trapped underneath the
seatback. After returning the seatback to its original position, pull on
the seatback to ensure that it has fully latched. An unlatched seat may
become dangerous in the event of a sudden stop or collision.
2005 Monterey(mty)
Owners Guide (post-2002-fmt)
USA_English(fus)
Seating and Safety Restraints
125
Page 127 of 304

2. To access the tailgate function,
the seat must be in the seating
position. If the seat is not in the
seating position, follow all the steps
of the ‘Unstowing Seat Section’.
Once the seat is in the seating
position, release the cushion latches
by pulling the number 2 strap.
Then, pull the seat rearward by the
number 3 strap and set the seat on
the liftgate scuff plate. The number
1 strap is not used to access this
position.
Do not sit on the head restraints.
3. To return the seat, ensure seat
latching area is free of objects.
Then, raise the seat off the liftgate
scuff plate and push at the top of
the seat back to rotate the seat back
onto the latches. Pull up on the
head restraints to raise them.
Ensure seat is latched to vehicle floor by pushing/pulling on seat.
If not latched, the seat may cause injury during a sudden stop.
2
2005 Monterey(mty)
Owners Guide (post-2002-fmt)
USA_English(fus)
Seating and Safety Restraints
127
Page 135 of 304

Unbuckle the combination lap/shoulder belt and allow it to retract
completely to disengage the automatic locking mode and activate the
vehicle sensitive (emergency) locking mode.
Safety belt height adjustment
Your vehicle has safety belt height
adjustments at the front and second
row outboard seating positions.
Adjust the height of the shoulder
belt so the belt rests across the
middle of your shoulder.
To adjust the shoulder belt height,
squeeze and hold the buttons on the
side and slide the height adjuster up
or down. Release the buttons and
pull down on the height adjuster to make sure it is locked in place.
Position the safety belt height adjusters so that the belt rests
across the middle of your shoulder. Failure to adjust the safety
belt properly could reduce the effectiveness of the safety belt and
increase the risk of injury in a collision.
Third row comfort guide
Note:Before stowing the third row seat or folding the third row seat
back down, the center seat lap/shoulder belt needs to either have the
cross lap tongue stowed in the pocket on the belt or the entire belt
needs to be stowed in the roof.
2005 Monterey(mty)
Owners Guide (post-2002-fmt)
USA_English(fus)
Seating and Safety Restraints
135
Page 174 of 304

Dissimilar spare tire/wheel information (if equipped)
Failure to follow these guidelines could result in an increased
risk of loss of vehicle control, injury or death.
Your vehicle may be equipped with a dissimilar spare tire/wheel. A
dissimilar spare tire/wheel is defined as a spare tire and/or wheel that is
different in brand, size or appearance from the road tires and wheels. If
you have a dissimilar spare tire/wheel, then it is intended for temporary
use only. This means that if you need to use it, you should replace it as
soon as possible with a road tire/wheel that is the same size and type as
the road tires and wheels that were originally provided by Ford. If the
dissimilar spare tire or wheel is damaged, it should be replaced rather
than repaired.
When driving with the dissimilar spare tire/wheel,do not:
•Exceed 70 mph (113 km/h)
•Use more than one dissimilar spare tire/wheel at a time
•Use commercial car washing equipment
•Use snow chains on the end of the vehicle with the dissimilar spare
tire/wheel
The usage of a dissimilar spare tire/wheel can lead to impairment of the
following:
•Handling, stability and braking performance
•Comfort and noise
•Ground clearance and parking at curbs
•Winter weather driving capability
•Wet weather driving capability
•All-Wheel driving capability (if applicable)
•Load leveling adjustment (if applicable)
When driving with the dissimilar spare tire/wheel additional caution
should be given to:
•Towing a trailer
•Driving vehicles equipped with a camper body
•Driving vehicles with a load on the cargo rack
Drive cautiously when using a dissimilar spare tire/wheel and seek
service as soon as possible.
2005 Monterey(mty)
Owners Guide (post-2002-fmt)
USA_English(fus)
Tires, Wheels and Loading
174
Page 177 of 304

5. Use the lug wrench provided to turn the lug nut counter clock wise to
loosen, and remove the lug nut.
6. Lay the tire down and remove the secondary tether.
Note:Do not stow the full size tire or any flat tire under the vehicle.
Stowing the primary and secondary tether
Note:Ifno tireis to be stowed
under the vehicle, attach the
secondary tether to the primary
using the Velcro that’s attached to
the secondary tether.
Wrap the Velcro around the primary
cable and tightly back around the
secondary, overlapping itself to
secure.
Note:Store secondary lug nut with
the tether kit.
Tire change procedure
When one of the front wheels is off the ground, the transaxle
alone will not prevent the vehicle from moving or slipping off the
jack, even if the vehicle is in P (Park).
To help prevent the vehicle from moving when you change a tire,
be sure the parking brake is set, then block (in both directions)
the wheel that is diagonally opposite (other side and end of the
vehicle) to the tire being changed.
2005 Monterey(mty)
Owners Guide (post-2002-fmt)
USA_English(fus)
Tires, Wheels and Loading
177
Page 180 of 304

To lessen the risk of personal injury, do not put any part of your
body under the vehicle while changing a tire. Do not start the
engine when your vehicle is on the jack. The jack is only meant for
changing the tire.
8. Remove the lug nuts with the lug wrench.
9. Replace the flat tire with the spare tire, making sure the valve stem is
facing outward. Reinstall lug nuts until the wheel is snug against the hub.
Do not fully tighten the lug nuts until the wheel has been lowered.
10. Lower the wheel by turning the jack handle counterclockwise.
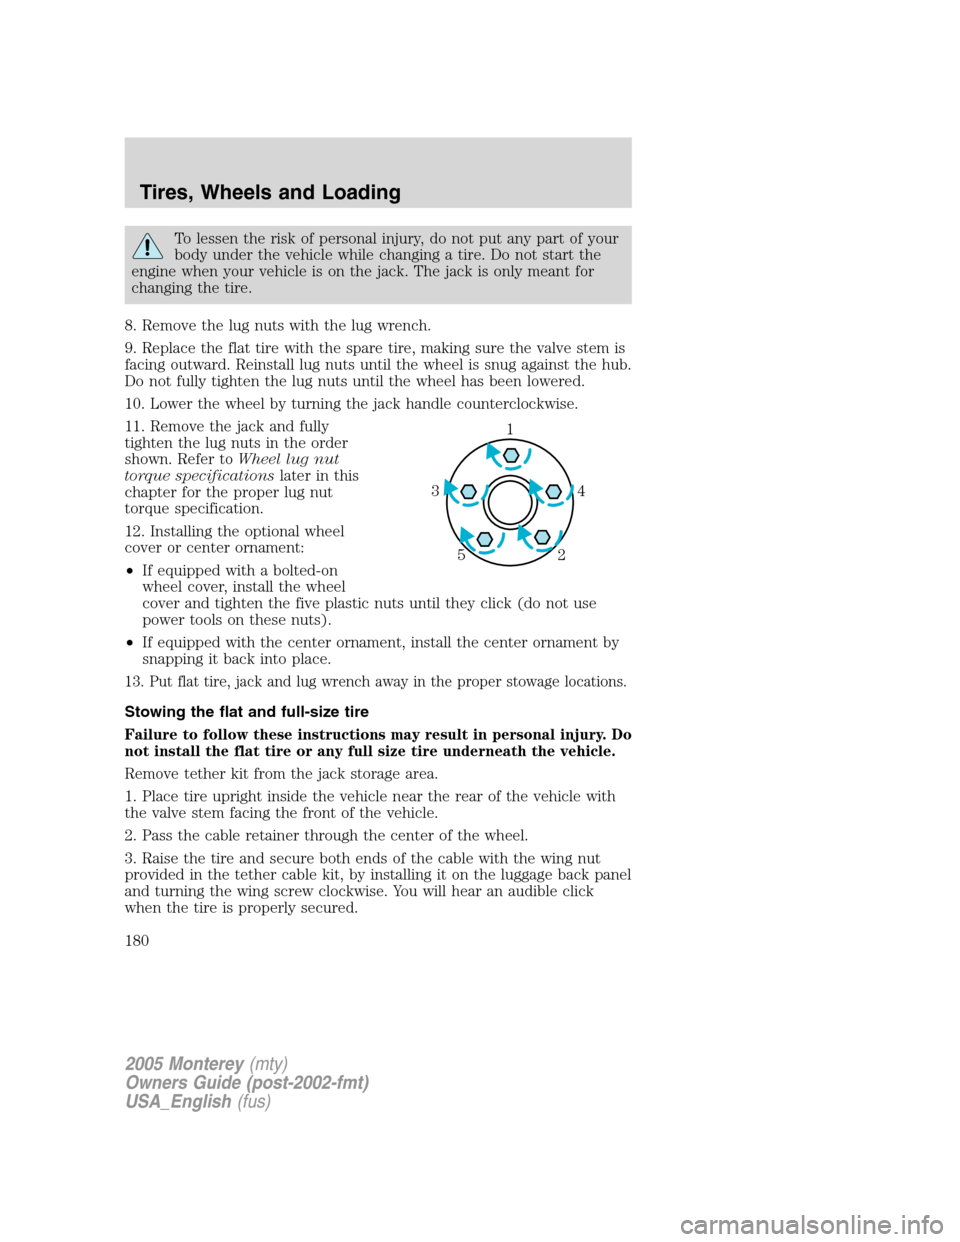
11. Remove the jack and fully
tighten the lug nuts in the order
shown. Refer toWheel lug nut
torque specificationslater in this
chapter for the proper lug nut
torque specification.
12. Installing the optional wheel
cover or center ornament:
•If equipped with a bolted-on
wheel cover, install the wheel
cover and tighten the five plastic nuts until they click (do not use
power tools on these nuts).
•If equipped with the center ornament, install the center ornament by
snapping it back into place.
13. Put flat tire, jack and lug wrench away in the proper stowage locations.
Stowing the flat and full-size tire
Failure to follow these instructions may result in personal injury. Do
not install the flat tire or any full size tire underneath the vehicle.
Remove tether kit from the jack storage area.
1. Place tire upright inside the vehicle near the rear of the vehicle with
the valve stem facing the front of the vehicle.
2. Pass the cable retainer through the center of the wheel.
3. Raise the tire and secure both ends of the cable with the wing nut
provided in the tether cable kit, by installing it on the luggage back panel
and turning the wing screw clockwise. You will hear an audible click
when the tire is properly secured.
1
4 3
2 5
2005 Monterey(mty)
Owners Guide (post-2002-fmt)
USA_English(fus)
Tires, Wheels and Loading
180