ignition switch Mercury Mountaineer 1998 Owner's Manuals
[x] Cancel search | Manufacturer: MERCURY, Model Year: 1998, Model line: Mountaineer, Model: Mercury Mountaineer 1998Pages: 216, PDF Size: 1.72 MB
Page 8 of 216

have your vehicle serviced at the
first available opportunity.
Under engine misfire
conditions, excessive
exhaust temperatures could
damage the catalytic converter,
the fuel system, interior floor
coverings or other vehicle
components, possibly causing a
fire.
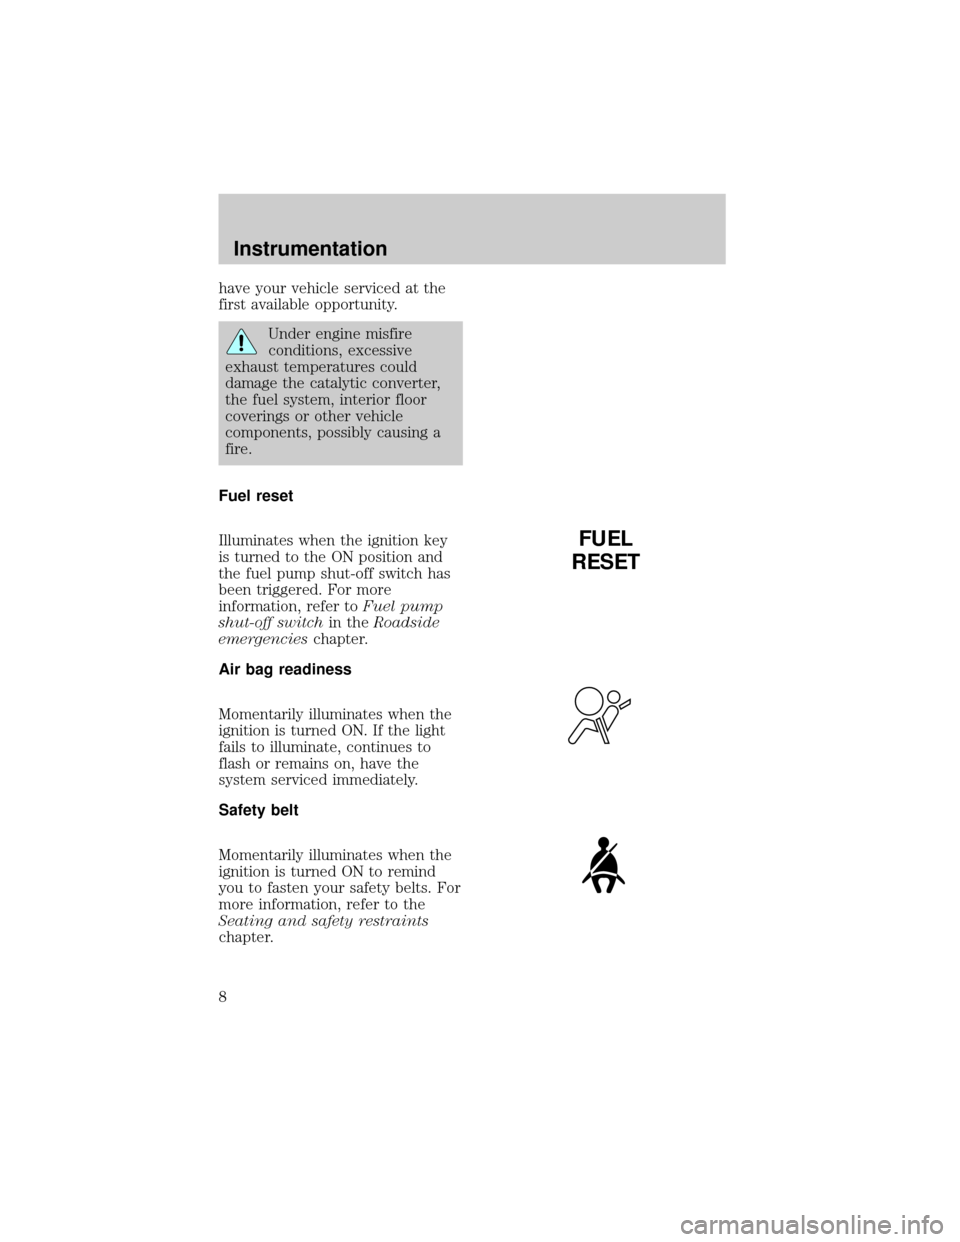
Fuel reset
Illuminates when the ignition key
is turned to the ON position and
the fuel pump shut-off switch has
been triggered. For more
information, refer toFuel pump
shut-off switchin theRoadside
emergencieschapter.
Air bag readiness
Momentarily illuminates when the
ignition is turned ON. If the light
fails to illuminate, continues to
flash or remains on, have the
system serviced immediately.
Safety belt
Momentarily illuminates when the
ignition is turned ON to remind
you to fasten your safety belts. For
more information, refer to the
Seating and safety restraints
chapter.
FUEL
RESET
Instrumentation
8
Page 10 of 216

Anti-theft system (if equipped)
Refer toAnti-theft systemin the
Controls and featureschapter.
Charging system
Momentarily illuminates when the
ignition is turned ON and the
engine is off. The light also
illuminates when the battery is not
charging properly, requiring
electrical system service.
Check gage
Illuminates when the key is in the
ON position and the engine coolant
temperature is high, the engine oil
pressure is low or the fuel level is
near empty. Refer toEngine
coolant temperature gauge,
Engine oil pressure gaugeor
Fuel gaugein this chapter for
more information.
Door ajar
Illuminates when the ignition
switch is in the ON or START
position and any door is open.
THEFT
CHECK
GAGE
DOOR
AJAR
Instrumentation
10
Page 11 of 216

O/D off (if equipped)
Illuminates when the transmission
control switch has been pushed.
When the light is on, the
transmission does not shift into
overdrive. If the light does not
come on when the transmission
control switch is depressed or if
the light flashes when you are
driving, have your vehicle serviced.
Speed control
This light comes on when either
the SET/ACCEL or RESUME
controls are pressed. It turns off
when the speed control OFF
control is pressed, the brake is
applied or the ignition is turned to
the OFF position.
Safety belt warning chime
Chimes to remind you to fasten
your safety belts.
For information on the safety belt
warning chime, refer to the
Seating and safety restraints
chapter.
Supplemental restraint system
(SRS) warning chime
For information on the SRS
warning chime, refer to the
Seating and safety restraints
chapter.
O/D
OFF
SPEED
CONT
Instrumentation
11
Page 13 of 216

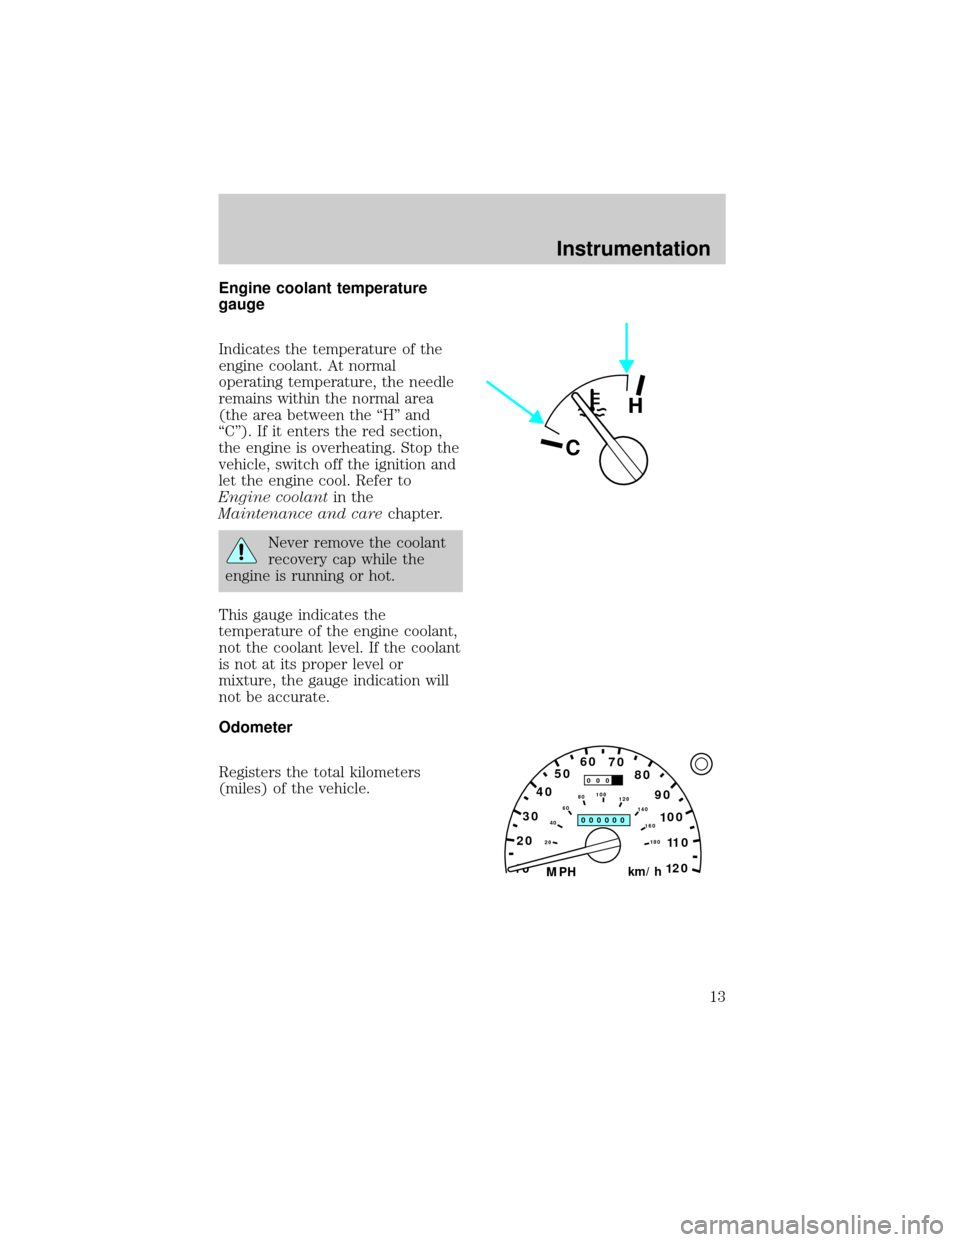
Engine coolant temperature
gauge
Indicates the temperature of the
engine coolant. At normal
operating temperature, the needle
remains within the normal area
(the area between the ªHº and
ªCº). If it enters the red section,
the engine is overheating. Stop the
vehicle, switch off the ignition and
let the engine cool. Refer to
Engine coolantin the
Maintenance and carechapter.
Never remove the coolant
recovery cap while the
engine is running or hot.
This gauge indicates the
temperature of the engine coolant,
not the coolant level. If the coolant
is not at its proper level or
mixture, the gauge indication will
not be accurate.
Odometer
Registers the total kilometers
(miles) of the vehicle.
C
H
10MPH 205060
70
304080
90
km/h
0 0 0
10 100
1
20
1
0 0 0 0 0 0406080100
120
140
160
180
20
Instrumentation
13
Page 15 of 216

Engine oil pressure gauge
This shows the engine oil pressure
in the system. Sufficient pressure
exists as long as the needle
remains in the normal range (the
area between the ªHº and ªLº).
If the gauge indicates low
pressure, switch off the engine
immediately. Check the oil level.
Add oil if needed (refer to
Checking and adding engine oil
in theMaintenance and care
chapter). If the oil level is correct,
have your vehicle checked at your
dealership or by a qualified
technician.
Fuel gauge
Displays approximately how much
fuel is in the fuel tank (when the
key is in the ON position). The
fuel gauge may vary slightly when
the vehicle is in motion. The
ignition should be in the OFF
position while the vehicle is being
refueled. When the gauge first
indicates empty, there is a small
amount of reserve fuel in the tank.
When refueling the vehicle from
empty indication, the amount of
fuel that can be added will be less
than the advertised capacity due to
the reserve fuel.
The FUEL DOOR icon and arrow
indicates which side of the vehicle
the fuel filler door is located.
H
L
EF
Instrumentation
15
Page 26 of 216

SPEED CONTROL
To turn speed control on
²Press ON.
Vehicle speed cannot be controlled
until the vehicle is traveling at or
above 48 km/h (30 mph).
Do not use the speed
control in heavy traffic or
on roads that are winding,
slippery, or unpaved.
Do not shift the gearshift
lever into N (Neutral) with
the speed control on.
To turn speed control off
²Press OFF or
²Turn off the vehicle ignition.
Once speed control is switched off,
the previously programmed set
speed will be erased.
OFF ON
OFF ON
Controls and features
26
Page 49 of 216

Replacing lost transmitters
Take all your vehicle's transmitters
to your dealer for reprogramming
if:
²a transmitter is lost or
²you want to purchase additional
transmitters (up to four may be
programmed).
To reprogram the transmitters,
place the key in the ignition and
switch from OFF to ON five times
in rapid succession (within 10
seconds). After doors lock/unlock,
press any button on all
transmitters (up to four). When
completed, switch the ignition to
OFF.
All transmitters must be
programmed at the same time.
Reprogramming transmitters
To reprogram all transmitters,
place the key in the ignition and
switch from OFF to ON eight times
in a row (within 10 seconds). After
doors lock/unlock, press any
button on all transmitters (up to
four). When completed, switch the
ignition to OFF.
All transmitters must be
reprogrammed at the same time.
Illuminated entry
The interior lamps and the puddle
lamps (located on the bottom of
the exterior rear view mirrors)
illuminate when the remote entry
system is used to unlock the
Controls and features
49
Page 50 of 216

door(s) or sound the personal
alarm.
The system automatically turns off
after 25 seconds or when the
ignition is turned to the START or
ACC position. The dome lamp
switch (if equipped) mustnotbe
set to the OFF position for the
illuminated entry system to
operate.
The inside lights will not turn off
if:
²they have been turned on with
the dimmer control or
²any door is open.
Battery saver will shut off the
interior lamps 45 minutes after the
last door is closed.
Autolock
Autolock is a feature that will
automatically lock all doors when:
²all vehicle doors, liftgate and
liftgate window are fully closed
²the ignition key is in the ON
position
²you shift into or through R
(Reverse)
²the brake pedal is released
The autolock feature repeats when:
²any door is opened and then
closed
²the brake pedal is released
Deactivating autolock
Before following the activation or
deactivation procedures, make sure
Controls and features
50
Page 52 of 216

6. Press the power door unlock
switch. The horn will chirp once
upon successful toggling of the
Autolock feature.
7. Turn ignition to OFF. The horn
will chirp to confirm procedure is
complete.
Keyless entry system
(if equipped)
With the keyless entry keypad, you
can:
²lock or unlock the vehicle doors
without using the key
²arm and disarm the perimeter
alarm system (if equipped)
²activate/deactivate the autolock
feature
See alsoRemote entry systemand
Perimeter alarm systemin this
chapter for more information.
Your vehicle has a factory-set 5
digit code that operates the
keyless entry system. You can also
program your own 5 digit personal
entry code.
The factory-set code is located:
²on the owner's wallet card in the
glove compartment
²taped to the computer module
When pressing the controls on the
keyless entry keypad, press the
middle of the buttons to ensure a
good activation.
123
45678
90
Controls and features
52
Page 60 of 216

SecuriLockykeys and the new
unprogrammed SecuriLockykey
readily accessible for the
procedure. Please read and
understand the entire procedure
before you begin.
1. Insert the first previously
programmed SecuriLockykey into
the ignition switch and turn the
ignition from OFF to RUN
(maintain ignition in RUN for at
least one second).
2. Turn ignition to OFF and
remove the first SecuriLockykey
from the ignition switch.
3. Within five seconds of turning
the ignition to OFF, insert the
second previously programmed
SecuriLockykey into the ignition
switch and turn the ignition from
OFF to RUN (maintain ignition in
RUN for at least one second but no
more than 5 seconds).
4. Turn the ignition to OFF and
remove the second SecuriLocky
key from the ignition switch.
5. Within 10 seconds of turning the
ignition to OFF, insert the
unprogrammed SecuriLockykey
(new key) into the ignition switch
and turn the ignition from OFF to
RUN (maintain ignition switch in
RUN for at least one second). This
step will program your new
SecuriLockykey.
6. If it is desired to program
additional SecuriLockykey(s),
repeat this procedure from step 1.
Controls and features
60