remote control Mercury Mountaineer 1999 Owner's Manuals
[x] Cancel search | Manufacturer: MERCURY, Model Year: 1999, Model line: Mountaineer, Model: Mercury Mountaineer 1999Pages: 248, PDF Size: 1.74 MB
Page 105 of 248

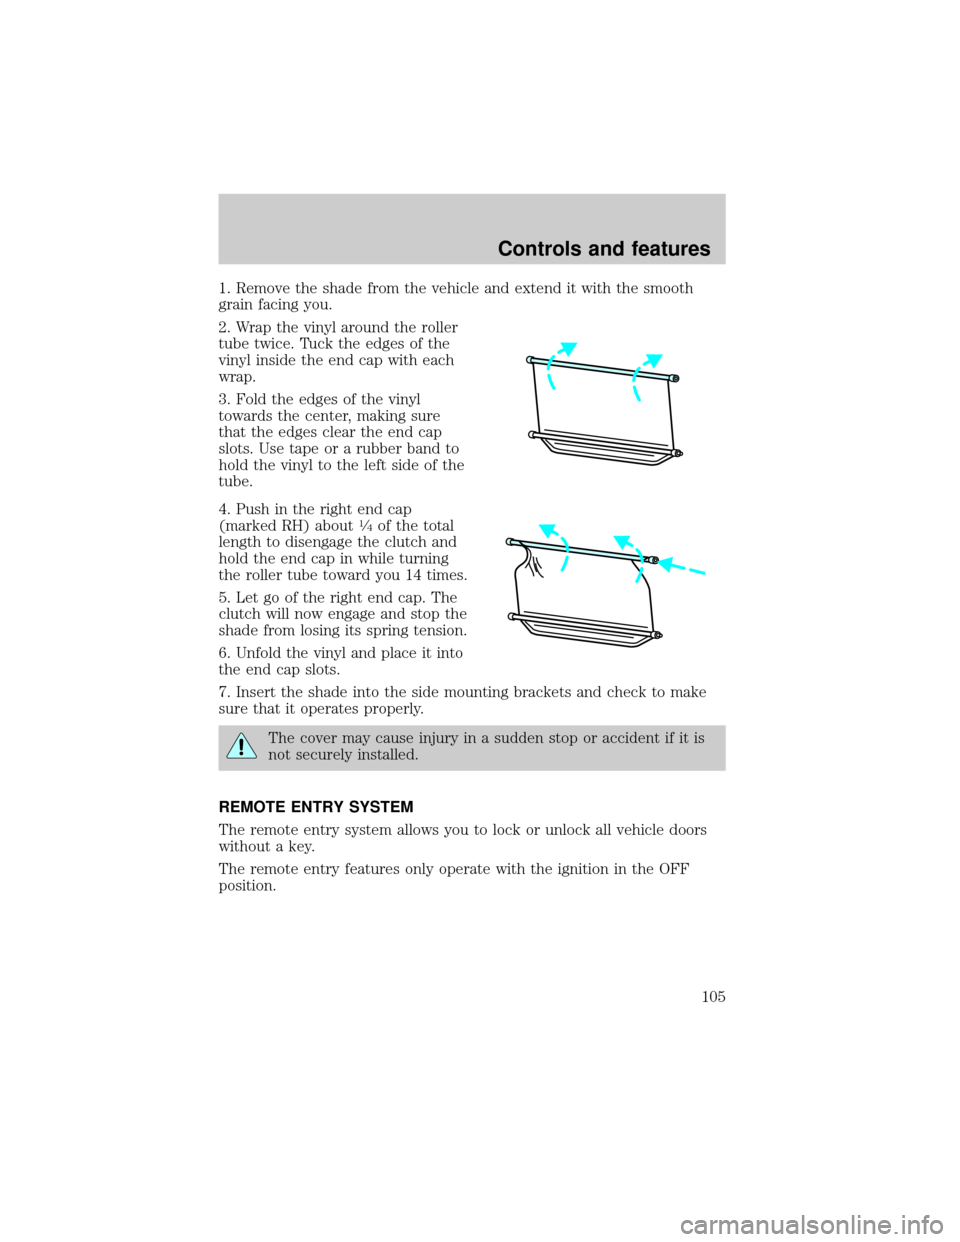
1. Remove the shade from the vehicle and extend it with the smooth
grain facing you.
2. Wrap the vinyl around the roller
tube twice. Tuck the edges of the
vinyl inside the end cap with each
wrap.
3. Fold the edges of the vinyl
towards the center, making sure
that the edges clear the end cap
slots. Use tape or a rubber band to
hold the vinyl to the left side of the
tube.
4. Push in the right end cap
(marked RH) about
1¤4of the total
length to disengage the clutch and
hold the end cap in while turning
the roller tube toward you 14 times.
5. Let go of the right end cap. The
clutch will now engage and stop the
shade from losing its spring tension.
6. Unfold the vinyl and place it into
the end cap slots.
7. Insert the shade into the side mounting brackets and check to make
sure that it operates properly.
The cover may cause injury in a sudden stop or accident if it is
not securely installed.
REMOTE ENTRY SYSTEM
The remote entry system allows you to lock or unlock all vehicle doors
without a key.
The remote entry features only operate with the ignition in the OFF
position.
Controls and features
105
Page 107 of 248

Changes or modifications not expressly approved by the party
responsible for compliance could void the user's authority to
operate the equipment.
Memory seat feature (if equipped)
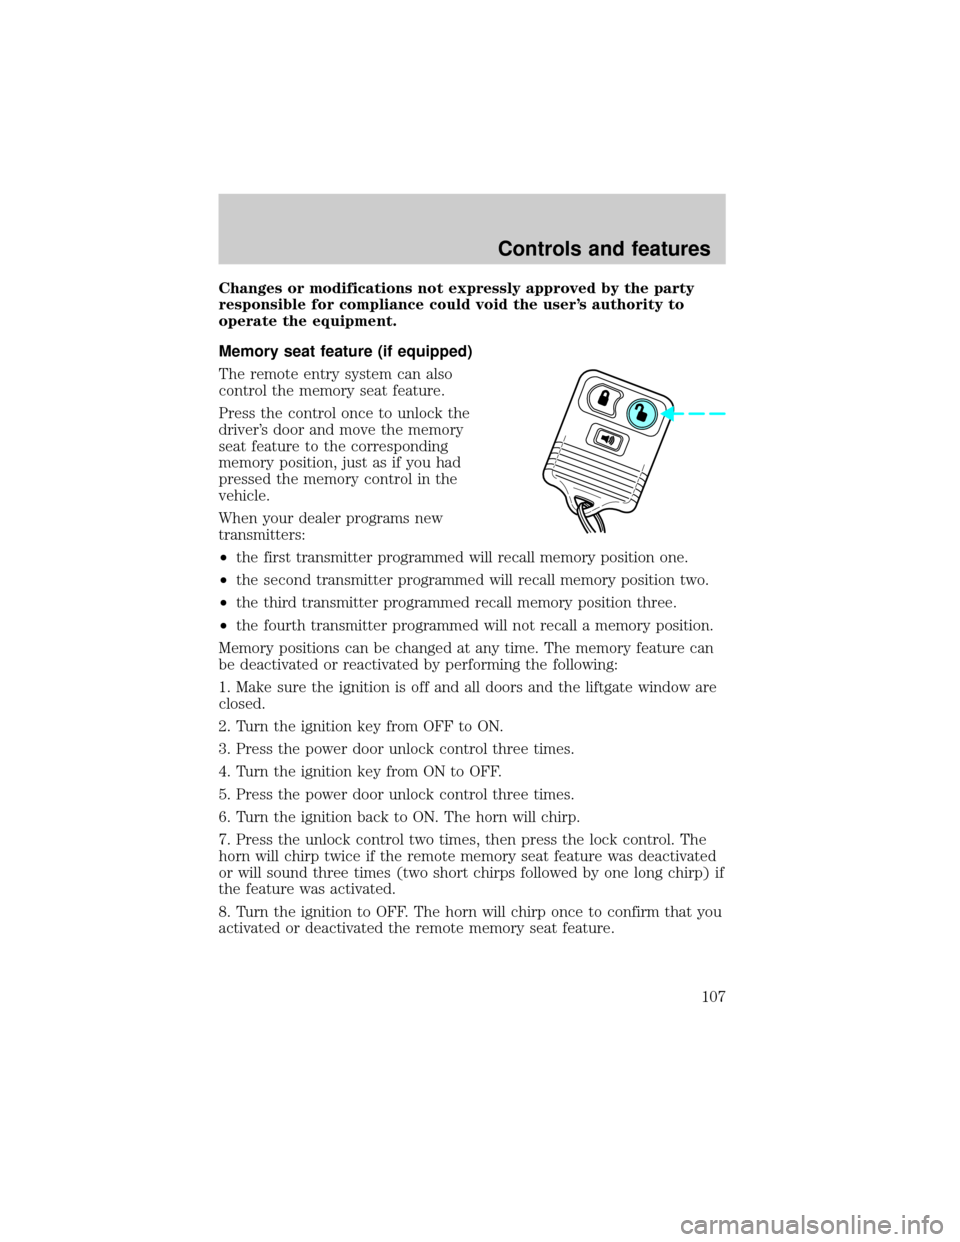
The remote entry system can also
control the memory seat feature.
Press the control once to unlock the
driver's door and move the memory
seat feature to the corresponding
memory position, just as if you had
pressed the memory control in the
vehicle.
When your dealer programs new
transmitters:
²the first transmitter programmed will recall memory position one.
²the second transmitter programmed will recall memory position two.
²the third transmitter programmed recall memory position three.
²the fourth transmitter programmed will not recall a memory position.
Memory positions can be changed at any time. The memory feature can
be deactivated or reactivated by performing the following:
1. Make sure the ignition is off and all doors and the liftgate window are
closed.
2. Turn the ignition key from OFF to ON.
3. Press the power door unlock control three times.
4. Turn the ignition key from ON to OFF.
5. Press the power door unlock control three times.
6. Turn the ignition back to ON. The horn will chirp.
7. Press the unlock control two times, then press the lock control. The
horn will chirp twice if the remote memory seat feature was deactivated
or will sound three times (two short chirps followed by one long chirp) if
the feature was activated.
8. Turn the ignition to OFF. The horn will chirp once to confirm that you
activated or deactivated the remote memory seat feature.
Controls and features
107
Page 108 of 248

The memory feature will continue to work from the door control even
when deactivated at the remote entry module.
Replacing the battery
The transmitter is powered by one coin type three-volt lithium battery
CR2032 or equivalent. Typical operating range will allow you to be up to
10 meters (33 feet) away from your vehicle. A decrease in operating
range can be caused by:
²weather conditions
²nearby radio towers
²structures around the vehicle
²other vehicles parked next to the vehicle
To replace the battery:
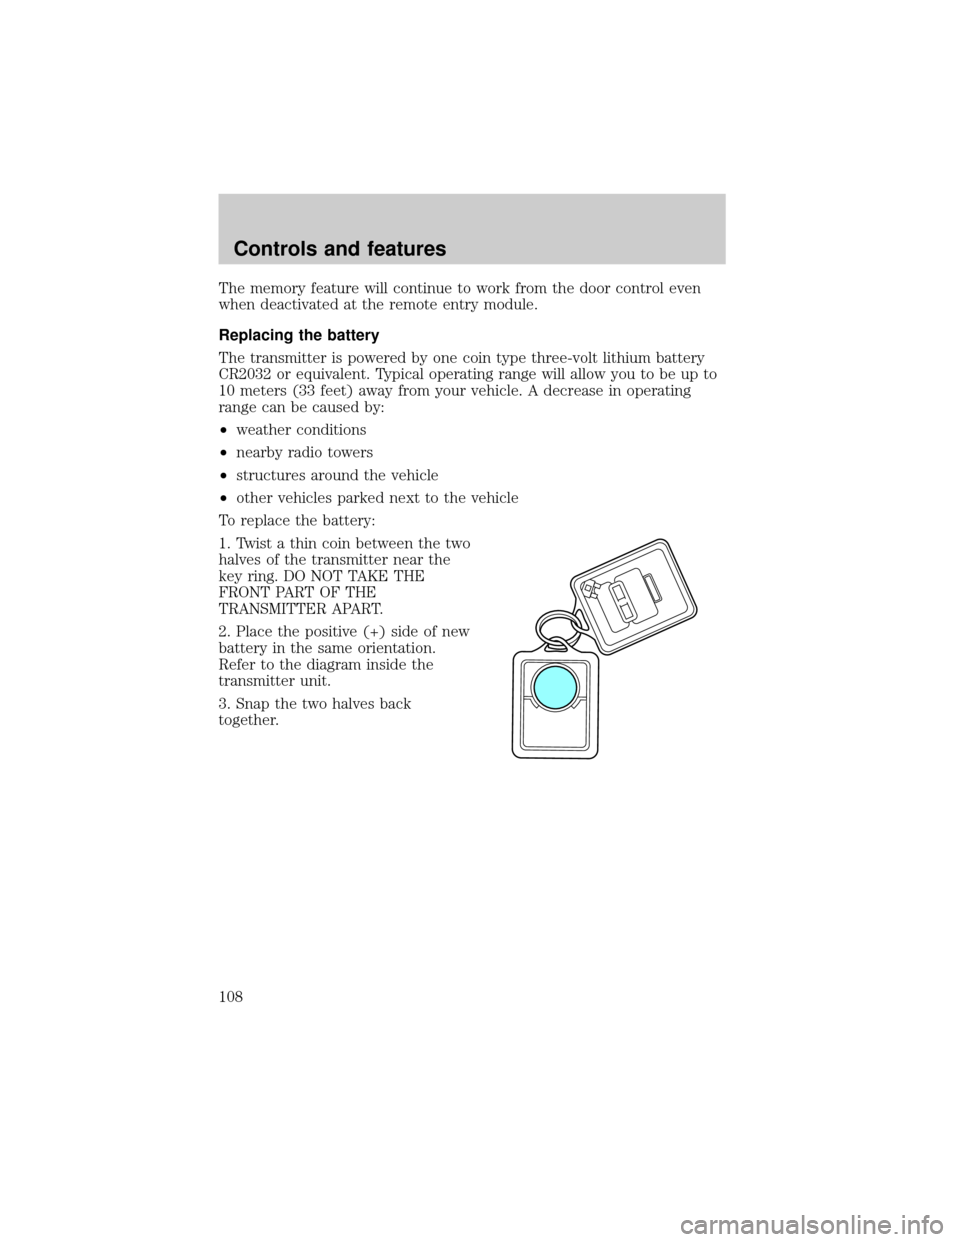
1. Twist a thin coin between the two
halves of the transmitter near the
key ring. DO NOT TAKE THE
FRONT PART OF THE
TRANSMITTER APART.
2. Place the positive (+) side of new
battery in the same orientation.
Refer to the diagram inside the
transmitter unit.
3. Snap the two halves back
together.
Controls and features
108
Page 109 of 248

Replacing lost transmitters
Take all your vehicle's transmitters
to your dealer if service is required.
If you purchase additional
transmitters (up to four may be
programmed), perform the following
procedure:
To reprogram the transmitters
yourself, place the key in the
ignition and turn from OFF to ON
eight times in rapid succession
(within 10 seconds) ending in ON. After doors lock/unlock, press any
control on all transmitters (up to four). When completed, turn the
ignition to OFF. The doors will lock/unlock one last time to confirm
completion of program mode.
All transmitters must be programmed at the same time.
Illuminated entry
The interior lamps illuminate when the remote entry system is used to
unlock the door(s) or sound the personal alarm.
The system automatically turns off after 25 seconds or when the ignition
is turned to the RUN or ACC position. The dome lamp control (if
equipped) mustnotbe set to the OFF position for the illuminated entry
system to operate.
The inside lights will not turn off if:
²they have been turned on with the dimmer control or
²any door is open.
The battery saver will shut off the interior lamps 40 minutes after the
ignition has been turned to the OFF position.
Autolock
Autolock is a feature that will automatically lock all doors when:
²all vehicle doors, liftgate and liftgate window are fully closed
²the ignition key is in the ON position
²you shift into or through R (Reverse)
²the brake pedal is released
Controls and features
109
Page 111 of 248

If autolock/relock has been changed, the horn will chirp to confirm
procedure is complete.
Keyless entry system (if equipped)
With the keyless entry keypad, you
can:
²lock or unlock the vehicle doors
without using the key
²activate/deactivate the autolock feature
See alsoRemote entry systemin this chapter for more information.
Your vehicle has a factory-set 5±digit code that operates the keyless
entry system. You can also program your own 5±digit personal entry
code.
The factory-set code is located:
²on the owner's wallet card in the glove compartment
²taped to the computer module
When pressing the controls on the keyless entry keypad, press the
middle of the controls to ensure a good activation.
Programming your own personal entry code
1. Enter the factory-set code (keypad will illuminate when pressed).
2. Press the 1/2 control within five
seconds of step 1.
3. Enter your personal 5 digit code.
Enter each digit within five seconds
of the previous one.
Do not set a code that includes five of the same number or presents
them in sequential order. Thieves can easily figure out these types of
codes.
Your personal code does not replace the permanent code that the
dealership gave you. You can use either code to unlock your vehicle. If a
second personal code is entered, the module will erase the first personal
code in favor of the new code.
123
45678
90
123
45678
90
Controls and features
111
Page 113 of 248

SECURILOCKYPASSIVE ANTI-THEFT SYSTEM
The SecuriLockypassive anti-theft system provides an advanced level of
vehicle theft protection. Your vehicle's engine can only be started with
the two special SecuriLockyelectronically coded keys provided with
your vehicle. Each time you start your vehicle, the SecuriLockykey is
read by the SecuriLockypassive anti-theft system. If the SecuriLocky
key identification code matches the code stored in the SecuriLocky
anti-theft system, the vehicle's engine is allowed to start. If the
SecuriLockykey identification code does not match the code stored in
the system or if a SecuriLockykey is not detected (vehicle theft
situation), the vehicle's engine will not operate.
The SecuriLockypassive anti-theft system is not compatible with
aftermarket remote start systems. Use of these systems may result in
vehicle starting problems and a loss of security protection. Large metallic
objects or devices such as the Mobil Speedpassyon the same key ring
as your SecuriLockykey may cause vehicle starting problems. These
objects and devices cannot damage the SecuriLockykey, but can cause
a momentary problem if they are too close to the key when starting the
engine. If a problem occurs. turn ignition off and restart the engine with
all other objects on the key ring held away from the SecuriLocky
ignition key.
Spare SecuriLockykeys can be purchased from your dealership and
programmed to your SecuriLockypassive anti-theft system. Refer to
Programming spare SecuriLockykeysfor more information.
If one or both of your SecuriLockykeys are lost or stolen and you want
to ensure the lost or stolen key will not operate your vehicle, bring your
vehicle and all available SecuriLockykeys to your dealership for
reinitialization.
Controls and features
113
Page 244 of 248

economy button ........................17
english/metric button ...............16
reset button ..............................17
system check button ...........17,18
Mirrors
automatic dimming rearview
mirror ........................................98
cleaning ...................................232
heated ......................................101
side view mirrors (power) .....101
Moon roof ....................................89
Motorcraft parts ........................217
Octane rating ............................215
Odometer .....................................13
Panic alarm feature, remote
entry system ..............................106
Parking brake ............................144
Power distribution box (see
Fuses) ........................................175
Power door locks ......................100
Power steering
fluid, checking and adding ....201
Radio ...34,35,36,37,38,39,40,41,42,
43,44,45,46,47,48,49,50,51,52,53,
54,55,57,58,59,60,61,62,63,64,65,
66,67,68,69
Relays ........................................170
Remote entry system .......105,113,
114,115
illuminated entry ....................109
locking/unlocking doors .........106
replacement/additional
transmitters .............................109
replacing the batteries ...........108
Reverse sensing system .............32
Roof rack ...................................167
Safety belts
(see Safety restraints) ...............11
Safety restraints
cleaning the safety belts .125,231
extension assembly ................124
for children .............................132warning light and chime ...11,124
Seat belts (see Safety
restraints) ......119,120,121,122,123
Seats ..........................................116
child safety seats ....................133
cleaning ............................230,231
memory seat ...........................107
Servicing your vehicle ..............191
Snowplowing .................................3
Spark plugs, specifications .......233
Special notice ................................3
ambulance conversions ..............3
utility-type vehicles ....................3
Specification chart, lubricants .235
Speed control ..............................81
Speedometer ...............................12
Starting your vehicle .........139,141
jump starting ............183,184,186
Steering wheel ............................86
tilting .........................................85
Tachometer .................................13
Tires ....................................209,210
changing ...........................178,179
checking the pressure ............210
replacing ..................................211
rotating ....................................210
snow tires and chains ............212
tire grades ...............................210
treadwear ................................209
Towing ..................163,165,166,167
recreational towing .................167
wrecker ....................................189
Traction-lok rear axle ...............160
Transfer case
fluid checking .........................205
Transmission ......................146,203
automatic operation ...............146
fluid, checking and adding
(automatic) ......................203,204
Trip odometer .............................13
Index
244