ECO mode Mercury Mountaineer 2000 s User Guide
[x] Cancel search | Manufacturer: MERCURY, Model Year: 2000, Model line: Mountaineer, Model: Mercury Mountaineer 2000Pages: 264, PDF Size: 2.29 MB
Page 59 of 264

Seek function for CD changer (if equipped)
²Pressto seek to the previous
track of the current disc. If a
selection has been playing for
three seconds or more and you
press
, the CD changer will
replay that selection from the
beginning.
²Press
to seek forward to the
next track of the current disc.
After the last track has been
completed, the first track of the
current disc will automatically replay.
Scan function
The scan function works in radio,
tape or CD mode.
Scan function in radio mode
Press the SCAN control to hear a brief sampling of all listenable stations
on the frequency band. Press the control again to stop the scan mode.
Scan function in tape mode
Press the SCAN control to hear a short sampling of all selections on the
tape. (The tape scans in a forward direction. At the end of the tape's
first side, direction automatically reverses to the opposite side of the
tape.) To stop on a particular selection, press the control again.
Scan function in CD mode
Press the SCAN control to hear a short sampling of all selections on the
CD. (The CD scans in a forward direction, wrapping back to the first
track at the end of the CD.) To stop on a particular selection, press the
control again.
Radio station memory preset
The radio is equipped with six station memory preset controls. These
controls can be used to select up to six preset AM stations and twelve
FM stations (six in FM1 and six in FM2).
SEEKSEEK
TUNE TUNE
SCAN
Controls and features
59
Page 62 of 264

Speaker fade adjust
Speaker sound can be adjusted
between the front and rear
speakers.
Press the FADE control then press:
²
to shift sound to the front
and
²
to shift sound to the rear.
Tape/CD/CD changer (if equipped) select
²To begin tape play (with a tape
loaded into the audio system)
while in the radio or CD mode,
press the TAPE control. Press the
button during rewind or fast forward to stop the rewind or fast
forward function.
²To begin CD play (if CD(s) are
loaded), press the CD control.
The first track of the disc will
begin playing. After that CD play
will begin where it stopped last.
If equipped with a CD changer, press the CD control to toggle between
single CD and CD changer play.
Rewind
The rewind control works in tape
and CD modes.
²In tape mode, radio play will
continue until rewind is stopped
(with the TAPE control) or the beginning of the tape is reached.
²In CD mode, pressing the REW control for less than three seconds
results in slow rewind. Pressing the control for more than three
seconds results in fast rewind.
BAL FADE
SEL
TAPE CD
TAPE CD
REW
1
Controls and features
62
Page 63 of 264

Fast forward
The fast forward control works in
tape and CD modes.
²In the tape mode, tape direction
will automatically reverse when
the end of the tape is reached.
²In CD mode, pressing the control for less than three seconds results in
slow forward action. Pressing the control for more than three seconds
results in fast forward action.
Tape direction select
Press SIDE 1±2 to play the alternate
side of a tape.
Eject function
Press the control to stop and eject a
tape.
Press the control to stop and eject a
CD.
DolbyTnoise reduction
Dolbytnoise reduction operates
only in tape mode. Dolbytnoise
reduction reduces the amount of
hiss and static during tape playback.
Press the
control to activate (and deactivate) Dolbytnoise
reduction.
The Dolbytnoise reduction system is manufactured under license from
Dolby Laboratories Licensing Corporation. Dolbytand the double-D
symbol are trademarks of DolbytLabratories Licensing Corporation.
FF
2
SIDE 1-2
3
EJ
EJ
4
Controls and features
63
Page 85 of 264

²Place the provided height
adaptors onto the back of the
GARAGE control as needed.
²Press the GARAGE control to
activate the transmitter.
Moon roof (if equipped)
You can move the moon roof back to open the glass panel or tilt up to
ventilate the vehicle.
To open the moon roof:
The moon roof is equipped with an
automatic, one-touch, express
opening feature. Press and release
the rear portion of the control. To
stop motion at any time during the
one-touch opening, press the control
a second time.
To close the moon roof:
Press and hold the front portion of
the control until the glass panel
stops moving. Once fully closed, the rear of the glass panel will appear
higher than the front edge.
To vent:
To tilt the moon roof into the vent position (when the glass panel is
closed), press and hold the front portion of the control. To close the
moon roof from the vent position, press and hold the rear portion of the
control until the glass panel stops moving.
If the battery is disconnected, discharged, or a new battery is installed,
the moon roof needs to be opened to the vent position to reset the moon
roof positions.
The moon roof has a sliding shade that can be opened or closed when
the glass panel is shut. To close the shade, pull it toward the front of the
vehicle.
MODELAMPLAMP
Controls and features
85
Page 86 of 264

Do not let children play with the moon roof. They may seriously
hurt themselves.
Electronic compass/temperature display (if equipped)
Outside air temperature
The outside temperature display is
contained in the overhead console.
The temperature display can be
turned off and on by pressing the
MODE control on the overhead
console. The temperature can be
displayed in Centigrade or
Fahrenheit by pressing the MODE
control.
If the outside temperature falls
below 3.3ÉC (38ÉF), the display will
alternate from ªICEº to the outside
temperature at a two second rate
for one minute.
Compass
The compass display is contained in the overhead console. The vehicle
heading is displayed as one of N, NE, E, SE, S, SW, W and NW.
The compass reading may be affected when you drive near large
buildings, bridges, power lines and powerful broadcast antenna. Magnetic
or metallic objects placed in or on the vehicle may also affect compass
accuracy. Adjustments may need to be made to the zone and calibration
of the compass.
OPEN
GARAGE
LAMPMODELAMP
73¡ NW
Controls and features
86
Page 88 of 264

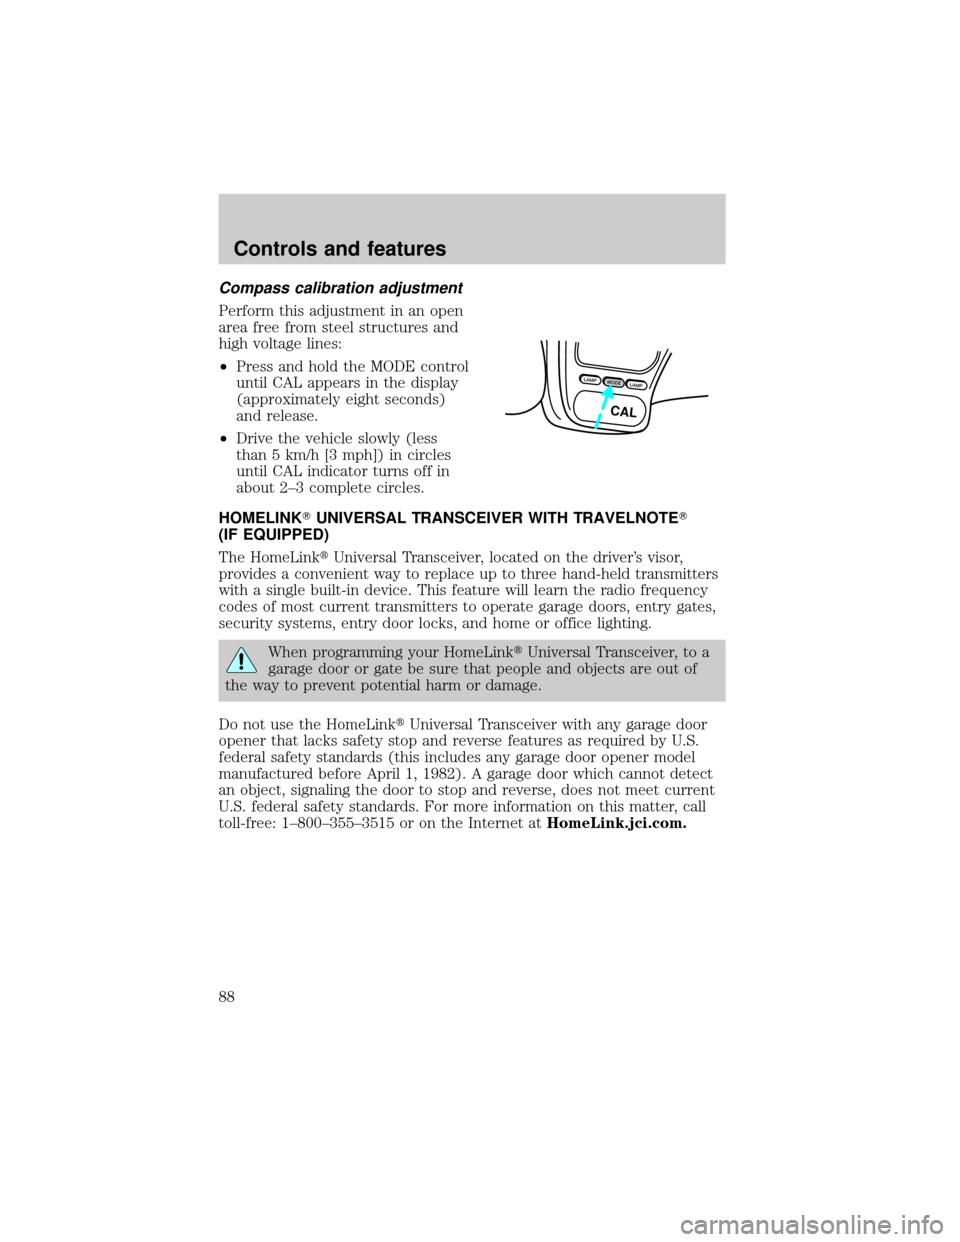
Compass calibration adjustment
Perform this adjustment in an open
area free from steel structures and
high voltage lines:
²Press and hold the MODE control
until CAL appears in the display
(approximately eight seconds)
and release.
²Drive the vehicle slowly (less
than 5 km/h [3 mph]) in circles
until CAL indicator turns off in
about 2±3 complete circles.
HOMELINKTUNIVERSAL TRANSCEIVER WITH TRAVELNOTET
(IF EQUIPPED)
The HomeLinktUniversal Transceiver, located on the driver's visor,
provides a convenient way to replace up to three hand-held transmitters
with a single built-in device. This feature will learn the radio frequency
codes of most current transmitters to operate garage doors, entry gates,
security systems, entry door locks, and home or office lighting.
When programming your HomeLinktUniversal Transceiver, to a
garage door or gate be sure that people and objects are out of
the way to prevent potential harm or damage.
Do not use the HomeLinktUniversal Transceiver with any garage door
opener that lacks safety stop and reverse features as required by U.S.
federal safety standards (this includes any garage door opener model
manufactured before April 1, 1982). A garage door which cannot detect
an object, signaling the door to stop and reverse, does not meet current
U.S. federal safety standards. For more information on this matter, call
toll-free: 1±800±355±3515 or on the Internet atHomeLink.jci.com.
LAMPMODELAMP
CAL
Controls and features
88
Page 105 of 264

Programming remote transmitters
It is necessary to haveall(maximum of four Ð original and/or new) of
your remote transmitters available prior to beginning this procedure.
To program the transmitters yourself:
²Insert a key in the ignition and
turn from 3 (OFF) to 4 (ON)
eight times in rapid succession
(within 10 seconds) with the
eighth turn ending in the 4 (ON)
position. The doors will
lock/unlock to confirm that
programming mode has been
entered.
²Within 20 seconds, program a
remote transmitter by pressing
any button on a transmitter. The doors will lock/unlock to confirm that
the remote transmitter has been programmed. (If more than 20
seconds pass before pressing a remote transmitter button, the
programming mode will exit and the procedure will have to be
repeated.)
²Repeat the previous step to program additional remote transmitters.
The doors will lock/unlock to confirm that each remote transmitter has
been programmed.
²When you have completed programming the remote transmitters, turn
the ignition to 3 (OFF) or wait 20 seconds. Again the doors will
lock/unlock to confirm programming has been completed.
Illuminated entry
The interior lamps illuminate when the remote entry system is used to
unlock the door(s) or sound the personal alarm.
The system automatically turns off after 25 seconds or when the ignition
is turned to the RUN or ACC position. The dome lamp control (if
equipped) mustnotbe set to the OFF position for the illuminated entry
system to operate.
The inside lights will not turn off if:
²they have been turned on with the dimmer control or
²any door is open.
3
2
1
5
4
Controls and features
105
Page 135 of 264

SAFETY SEATS FOR CHILDREN
Child and infant or child safety seats
Use a safety seat that is recommended for the size and weight of the
child. Carefully follow all of the manufacturer's instructions with the
safety seat you put in your vehicle. If you do not install and use the
safety seat properly, the child may be injured in a sudden stop or
collision.
When installing a child safety seat:
²Review and follow the information
presented in theAir Bag
Supplemental Restraint System
section in this chapter.
²Use the correct safety belt buckle
for that seating position (the
buckle closest to the direction the
tongue is coming from).
²Insert the belt tongue into the
proper buckle until you hear a
snap and feel it latch. Make sure the tongue is securely fastened in the
buckle.
²Keep the buckle release button pointing up and away from the safety
seat, with the tongue between the child seat and the release button,
to prevent accidental unbuckling.
²Place seat back in upright position.
²Put the safety belt in the automatic locking mode. Refer toAutomatic
locking mode(passenger side front and outboard rear seating
positions) (if equipped).
Seating and safety restraints
135
Page 151 of 264

The transmission control indicator
light (TCIL) will illuminate on the
instrument cluster.
Drive± Not shown on the display. Activate by pressing the transmission
control switch on the end of the gearshift lever with the gearshift in
the
position. The O/D OFF indicator will illuminate on the instrument
cluster. Transmission operates in gears one through three.
(Drive)
provides more engine braking than
(Overdrive) and is useful when:
²driving with a heavy load.
²towing a trailer up or down steep hills.
²additional engine braking is desired. If towing a trailer, refer to
Driving while you towin theTrailer Towingchapter.
To return to
(Overdrive) mode, press the transmission control switch.
The O/D OFF indicator will no longer be illuminated.
Each time the vehicle is started, the transmission will automatically
return to normal overdrive mode.
Every time the vehicle is shut off and restarted, you must press the
transmission control switch to cancel overdrive operation if driving in
overdrive is not desired.
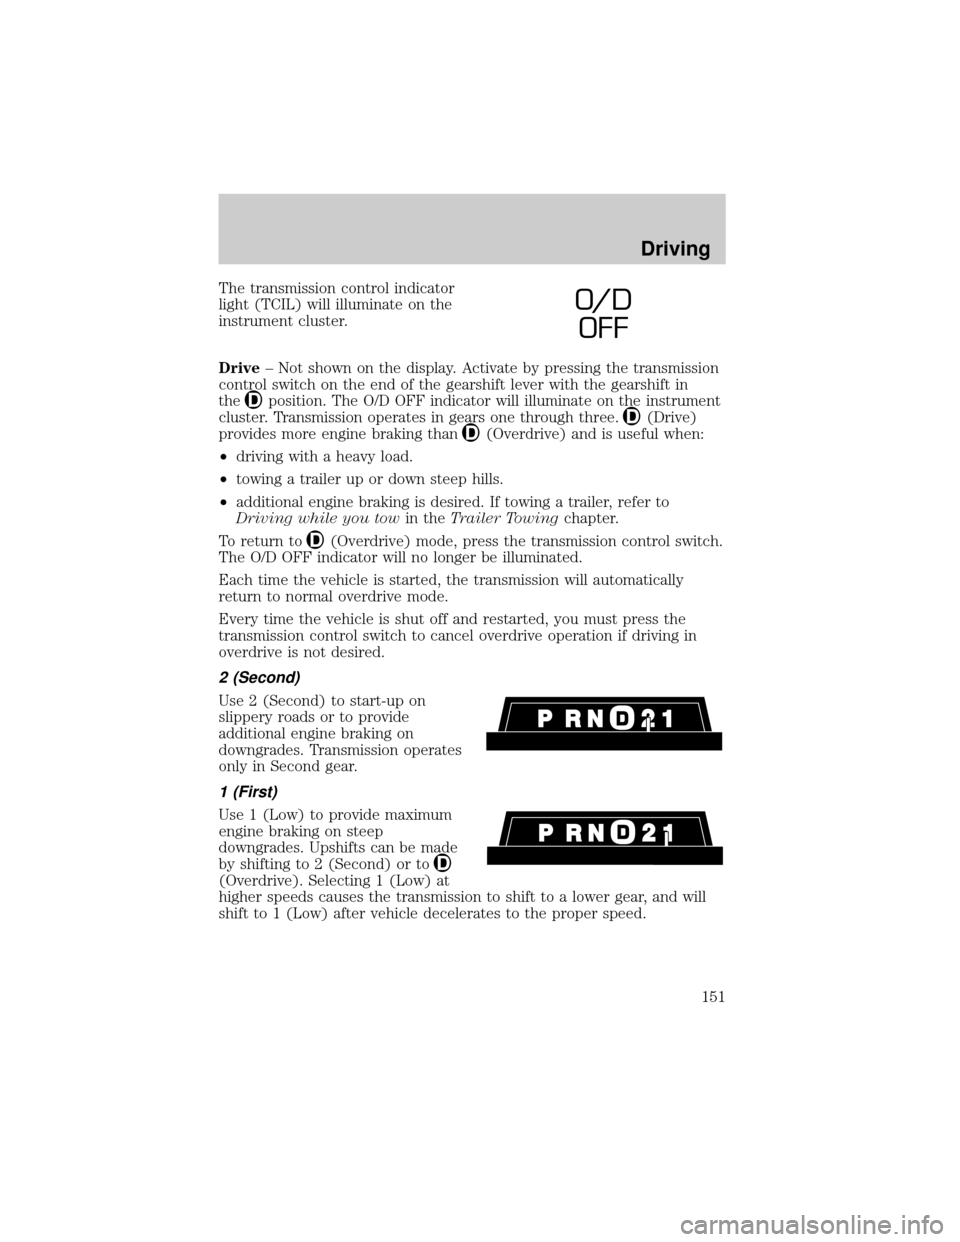
2 (Second)
Use 2 (Second) to start-up on
slippery roads or to provide
additional engine braking on
downgrades. Transmission operates
only in Second gear.
1 (First)
Use 1 (Low) to provide maximum
engine braking on steep
downgrades. Upshifts can be made
by shifting to 2 (Second) or to
(Overdrive). Selecting 1 (Low) at
higher speeds causes the transmission to shift to a lower gear, and will
shift to 1 (Low) after vehicle decelerates to the proper speed.
O/ D
OFF
Driving
151
Page 153 of 264

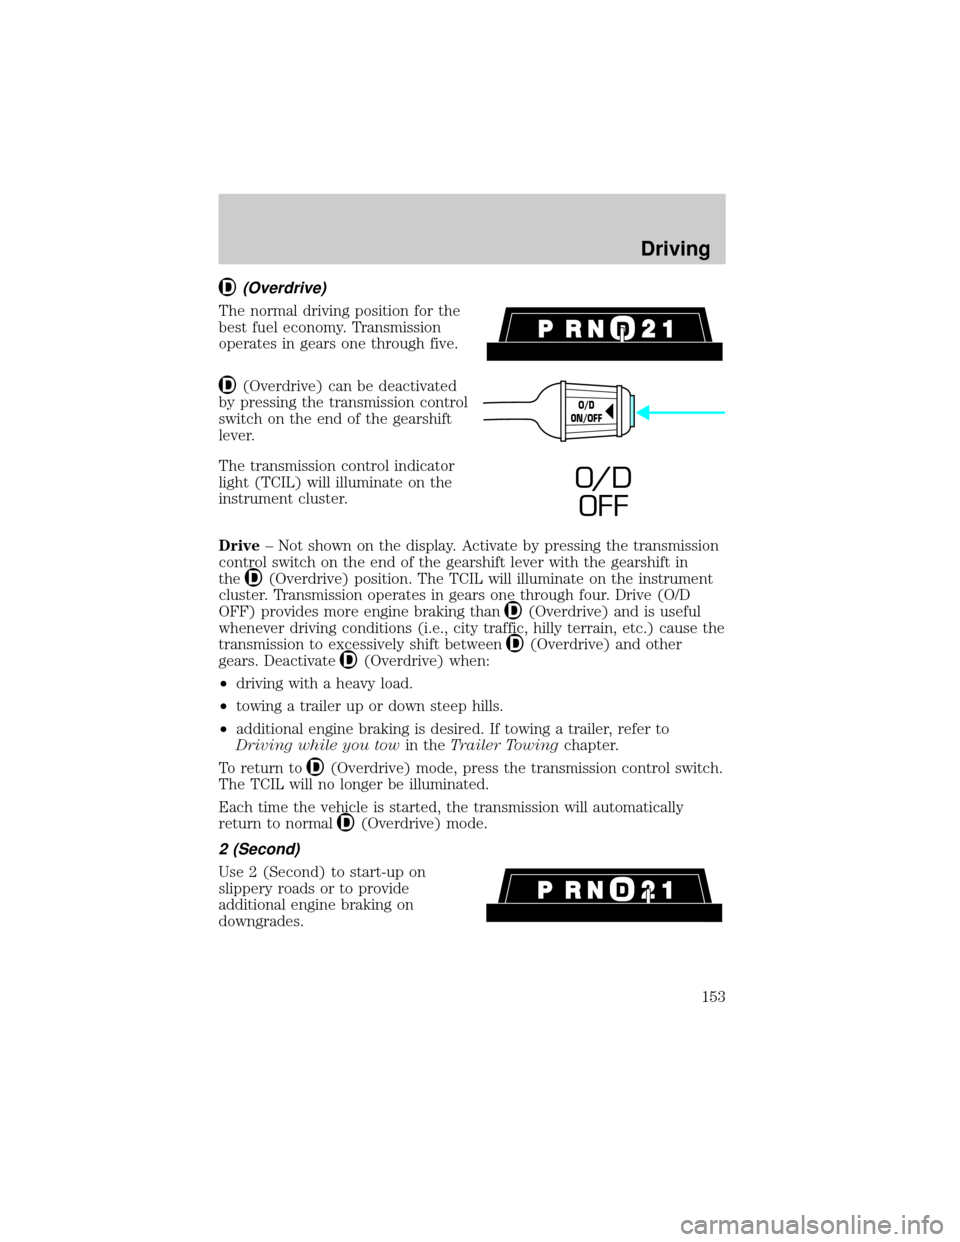
(Overdrive)
The normal driving position for the
best fuel economy. Transmission
operates in gears one through five.
(Overdrive) can be deactivated
by pressing the transmission control
switch on the end of the gearshift
lever.
The transmission control indicator
light (TCIL) will illuminate on the
instrument cluster.
Drive± Not shown on the display. Activate by pressing the transmission
control switch on the end of the gearshift lever with the gearshift in
the
(Overdrive) position. The TCIL will illuminate on the instrument
cluster. Transmission operates in gears one through four. Drive (O/D
OFF) provides more engine braking than
(Overdrive) and is useful
whenever driving conditions (i.e., city traffic, hilly terrain, etc.) cause the
transmission to excessively shift between
(Overdrive) and other
gears. Deactivate
(Overdrive) when:
²driving with a heavy load.
²towing a trailer up or down steep hills.
²additional engine braking is desired. If towing a trailer, refer to
Driving while you towin theTrailer Towingchapter.
To return to
(Overdrive) mode, press the transmission control switch.
The TCIL will no longer be illuminated.
Each time the vehicle is started, the transmission will automatically
return to normal
(Overdrive) mode.
2 (Second)
Use 2 (Second) to start-up on
slippery roads or to provide
additional engine braking on
downgrades.
O/D
ON/OFF
O/ D
OFF
Driving
153