steering Mercury Mountaineer 2000 s User Guide
[x] Cancel search | Manufacturer: MERCURY, Model Year: 2000, Model line: Mountaineer, Model: Mercury Mountaineer 2000Pages: 264, PDF Size: 2.29 MB
Page 145 of 264

ABS warning lampABS
TheABSwarning lamp in the instrument cluster momentarily illuminates
when the ignition is turned to the ON position. If the light does not
illuminate momentarily at start up, remains on or continues to flash, the
ABS needs to be serviced.
With the ABS light on, the anti-lock
brake system is disabled and normal
braking is still effective unless the
brake warning light also remains
illuminated with parking brake
released. (If your brake warning lamp illuminates, have your vehicle
serviced immediately.)
Using ABS
²In an emergency or when maximum efficiency from the ABS is
required, apply continuous force on the brake. The ABS will be
activated immediately, thus allowing you to retain full steering control
of your vehicle and, providing there is sufficient space, will enable you
to avoid obstacles and bring the vehicle to a controlled stop.
²The Anti-Lock system does not decrease the time necessary to apply
the brakes or always reduce stopping distance. Always leave enough
room between your vehicle and the vehicle in front of you to stop.
²We recommend that you familiarize yourself with this braking
technique. However, avoid taking any unnecessary risks.
Parking brake
Apply the parking brake whenever
the vehicle is parked. To set the
parking brake, press the parking
brake pedal down until the pedal
stops.
!
BRAKE
Driving
145
Page 146 of 264

The BRAKE warning lamp in the
instrument cluster illuminates and
remains illuminated (when the
ignition is turned ON) until the
parking brake is released.
Always set the parking brake fully and make sure that the
gearshift is securely latched in P (Park).
The parking brake is not recommended to stop a moving vehicle.
However, if the normal brakes fail, the parking brake can be used to stop
your vehicle in an emergency. Since the parking brake applies only the
rear brakes, the vehicle's stopping distance will increase greatly and the
handling of your vehicle will be adversely affected.
Pull the release lever to release the
brake. Driving with the parking
brake on will cause the brakes to
wear out quickly and reduce fuel
economy.
STEERING
Your vehicle is equipped with power steering. Power steering uses energy
from the engine to help steer the vehicle.
To prevent damage to the power steering pump:
²Never hold the steering wheel to the extreme right or the extreme left
for more than a few seconds when the engine is running.
²Do not operate the vehicle with a low power steering pump fluid level.
If the power steering system breaks down (or if the engine is turned
off), you can steer the vehicle manually, but it takes more effort.
If the steering wanders or pulls, the condition could be caused by any of
the following:
²underinflated tire(s) on any wheel(s)
!
BRAKE
BRAKE
RELEASE
Driving
146
Page 147 of 264

²high crown in center of road
²high crosswinds
²wheels out of alignment
²loose or worn components in steering linkage
AIR SUSPENSION SYSTEM (IF EQUIPPED)
The load leveling feature of the air suspension automatically keeps the
vehicle at a constant level if a load is added or removed from the vehicle.
This system maintains the vehicle height at a constant level by
automatically adding air or releasing air from the springs to offset
changes in vehicle loads.
When ever a door is opened (including the liftgate) the system
memorizes and maintains the height of the vehicle until all doors are
closed.
It is normal to hear a buzz or clicking from the air compressor on the
vehicle when the ignition is turned off. The system stays energized for 40
minutes after the ignition is turned off to compensate for any load
changes made after the vehicle is parked.
The air suspension shut-off switch is
located in the cargo area behind the
left rear quarter trim panel.
On vehicles equipped with
Air Suspension, turn OFF
the Air Suspension switch prior to
jacking, hoisting or towing your
vehicle.
Normal vehicle operation does not
require any action by the driver.
PREPARING TO DRIVE YOUR VEHICLE
Utility vehicles have a significantly higher rollover rate than
other types of vehicles.
Driving
147
Page 157 of 264

Shifting from 4WD LOW to 4WD AUTO or 4WD HIGH
1. Bring the vehicle to a stop.
2. Depress the brake.
3. Place the gearshift in N (Neutral).
4. Move the 4WD control to the
4WD AUTO or 4WD HIGH position.
Driving off-road with 4WD
Your vehicle is specially equipped for driving on sand, snow, mud and
rough terrain and has operating characteristics that are somewhat
different from conventional vehicles, both on and off the road.
Maintain steering wheel control at all times, especially in rough terrain.
Since sudden changes in terrain can result in abrupt steering wheel
motion, make sure you grip the steering wheel from the outside. Do not
grip the spokes.
Drive cautiously to avoid vehicle damage from concealed objects such as
rocks and stumps.
You should either know the terrain or examine maps of the area before
driving. Map out your route before driving in the area. For more
information on driving off-road, read the ªFour Wheelingº supplement in
your owner's portfolio.
If your vehicle gets stuck
If the vehicle is stuck in mud or snow it may be rocked out by shifting
from forward and reverse gears, stopping between shifts, in a steady
pattern. Press lightly on the accelerator in each gear.
Do not rock the vehicle if the engine is not at normal operating
temperature or damage to the transmission may occur.
Do not rock the vehicle for more than a few minutes or damage
to the transmission and tires may occur or the engine may
overheat.
HIGH
LOW AUTO4x4
Driving
157
Page 160 of 264

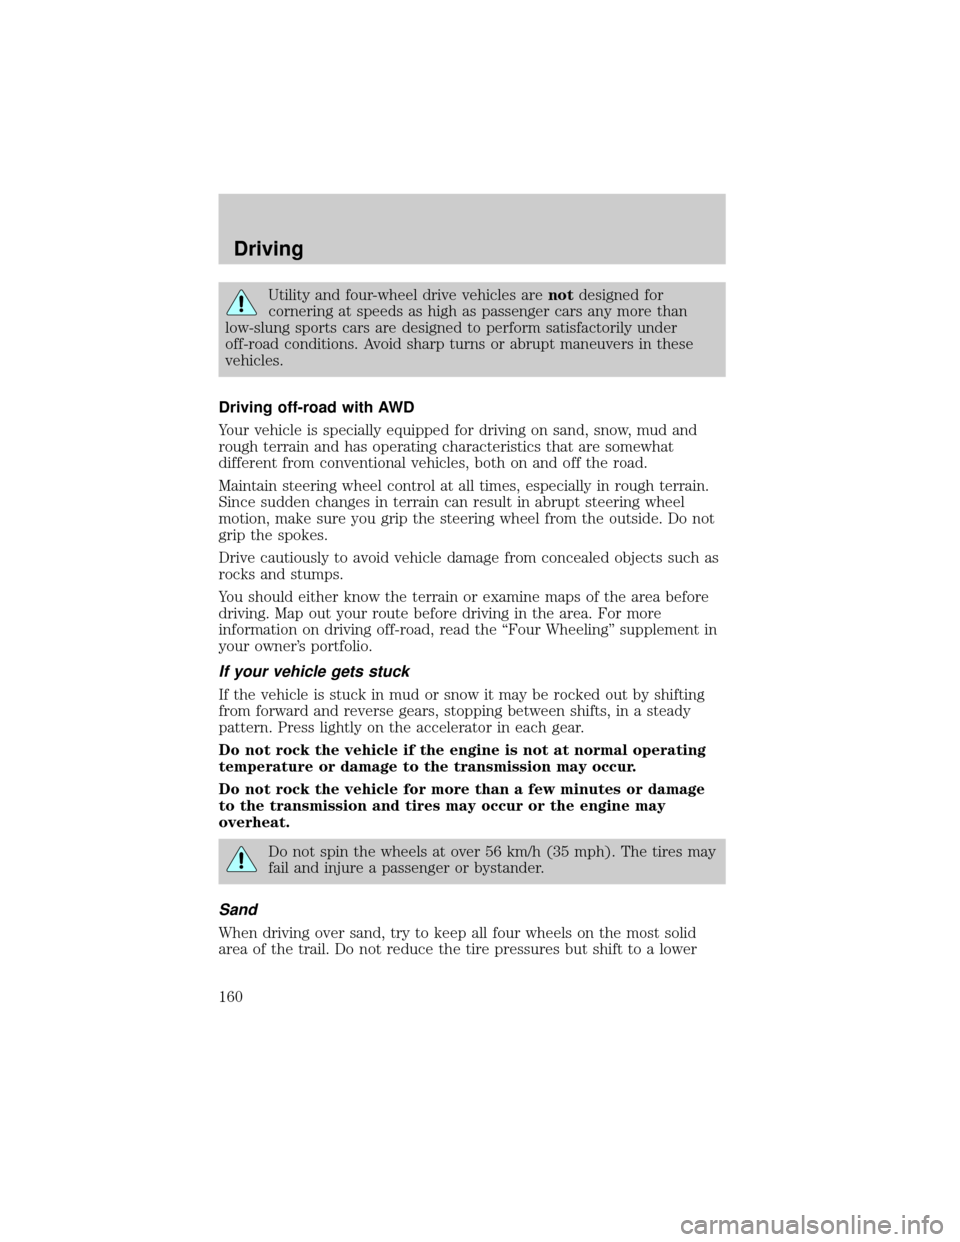
Utility and four-wheel drive vehicles arenotdesigned for
cornering at speeds as high as passenger cars any more than
low-slung sports cars are designed to perform satisfactorily under
off-road conditions. Avoid sharp turns or abrupt maneuvers in these
vehicles.
Driving off-road with AWD
Your vehicle is specially equipped for driving on sand, snow, mud and
rough terrain and has operating characteristics that are somewhat
different from conventional vehicles, both on and off the road.
Maintain steering wheel control at all times, especially in rough terrain.
Since sudden changes in terrain can result in abrupt steering wheel
motion, make sure you grip the steering wheel from the outside. Do not
grip the spokes.
Drive cautiously to avoid vehicle damage from concealed objects such as
rocks and stumps.
You should either know the terrain or examine maps of the area before
driving. Map out your route before driving in the area. For more
information on driving off-road, read the ªFour Wheelingº supplement in
your owner's portfolio.
If your vehicle gets stuck
If the vehicle is stuck in mud or snow it may be rocked out by shifting
from forward and reverse gears, stopping between shifts, in a steady
pattern. Press lightly on the accelerator in each gear.
Do not rock the vehicle if the engine is not at normal operating
temperature or damage to the transmission may occur.
Do not rock the vehicle for more than a few minutes or damage
to the transmission and tires may occur or the engine may
overheat.
Do not spin the wheels at over 56 km/h (35 mph). The tires may
fail and injure a passenger or bystander.
Sand
When driving over sand, try to keep all four wheels on the most solid
area of the trail. Do not reduce the tire pressures but shift to a lower
Driving
160
Page 172 of 264

Roadside coverage beyond basic warranty
In the United States, you may purchase additional roadside assistance
coverage beyond this period through the Ford Auto Club by contacting
your Ford or Lincoln Mercury dealer.
HAZARD FLASHER
Use only in an emergency to warn traffic of vehicle breakdown,
approaching danger, etc. The hazard flashers can be operated when the
ignition is off.
²The hazard lights control is
located on top of the steering
column.
²Depress hazard lights control to
activate all hazard flashers
simultaneously.
²Depress control again to turn the
flashers off.
RESETTING THE FUEL PUMP SHUT-OFF SWITCH
The fuel pump shut-off switch is a device intended to stop the electric
fuel pump when your vehicle has been involved in a substantial jolt.
After a collision, if the engine cranks but does not start, the fuel pump
shut-off switch may have been activated.
Roadside emergencies
172
Page 180 of 264

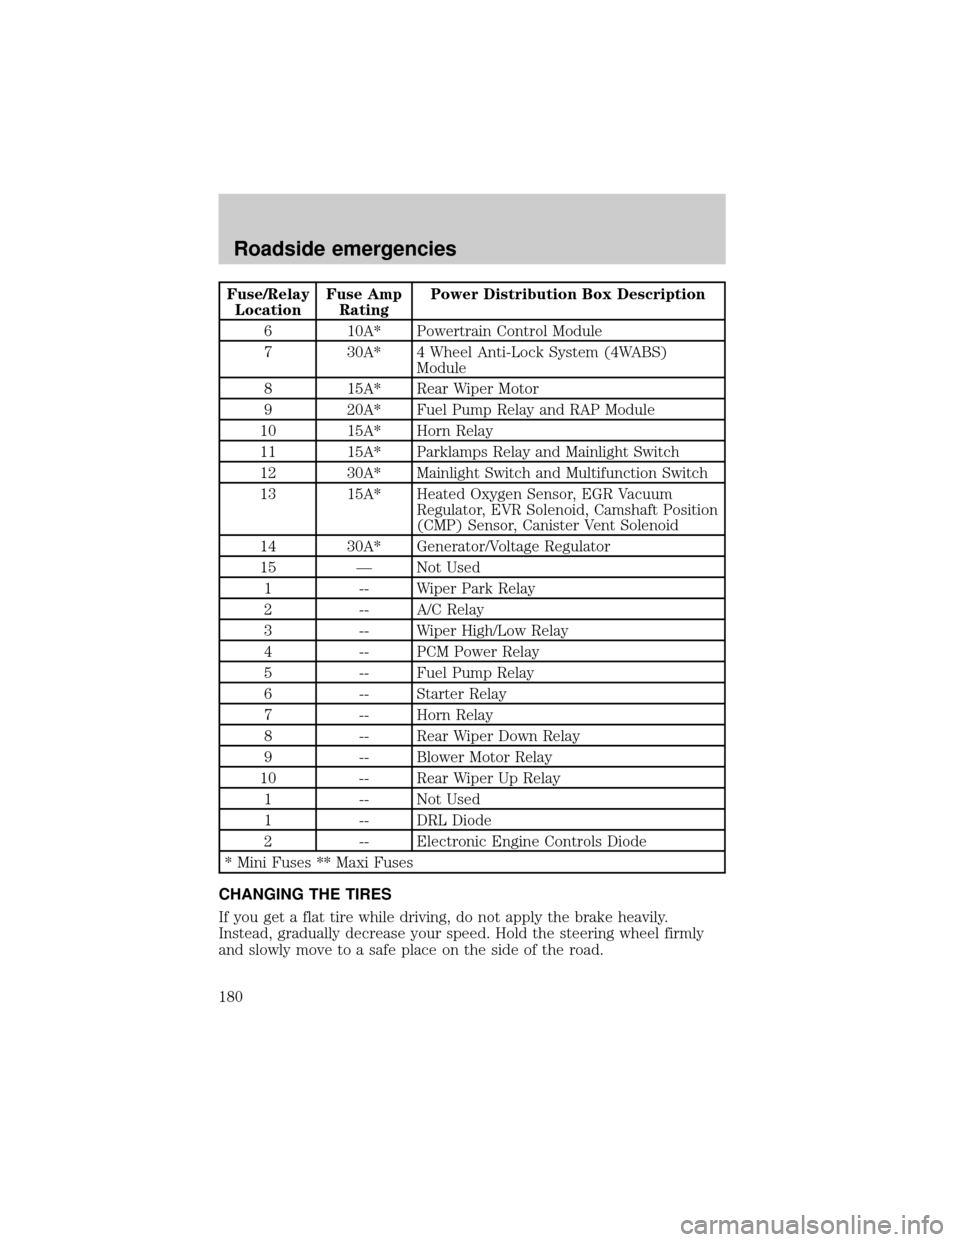
Fuse/Relay
LocationFuse Amp
RatingPower Distribution Box Description
6 10A* Powertrain Control Module
7 30A* 4 Wheel Anti-Lock System (4WABS)
Module
8 15A* Rear Wiper Motor
9 20A* Fuel Pump Relay and RAP Module
10 15A* Horn Relay
11 15A* Parklamps Relay and Mainlight Switch
12 30A* Mainlight Switch and Multifunction Switch
13 15A* Heated Oxygen Sensor, EGR Vacuum
Regulator, EVR Solenoid, Camshaft Position
(CMP) Sensor, Canister Vent Solenoid
14 30A* Generator/Voltage Regulator
15 Ð Not Used
1 -- Wiper Park Relay
2 -- A/C Relay
3 -- Wiper High/Low Relay
4 -- PCM Power Relay
5 -- Fuel Pump Relay
6 -- Starter Relay
7 -- Horn Relay
8 -- Rear Wiper Down Relay
9 -- Blower Motor Relay
10 -- Rear Wiper Up Relay
1 -- Not Used
1 -- DRL Diode
2 -- Electronic Engine Controls Diode
* Mini Fuses ** Maxi Fuses
CHANGING THE TIRES
If you get a flat tire while driving, do not apply the brake heavily.
Instead, gradually decrease your speed. Hold the steering wheel firmly
and slowly move to a safe place on the side of the road.
Roadside emergencies
180
Page 193 of 264

Do not start your engine with the air cleaner removed and do
not remove it while the engine is running.
OPENING THE HOOD
1. Inside the vehicle, pull the hood
release handle located under the
steering column on the instrument
panel.
2. Go to the front of the vehicle and release the auxiliary latch that is
located in the center between the hood and the grill.
3. Lift the hood until the lift cylinders hold it open.
Maintenance and care
193
Page 194 of 264

IDENTIFYING COMPONENTS IN THE ENGINE COMPARTMENT
4.0L SOHC V6 engine
1. Windshield washer fluid reservoir
2. Automatic transmission fluid dipstick
3. Engine oil filler cap
4. Engine oil dipstick
5. Brake fluid reservoir
6. Power distribution box
7. Battery
8. Power steering fluid reservoir
9. Air filter assembly
10. Engine coolant reservoir
10
134256
978
Maintenance and care
194
Page 195 of 264

5.0L V8 engine
1. Engine coolant reservoir
2. Windshield washer fluid reservoir
3. Engine oil filler cap
4. Automatic transmission fluid dipstick
5. Brake fluid reservoir
6. Power distribution box
7. Battery
8. Power steering fluid reservoir
9. Engine oil dipstick
10. Air filter assembly
ENGINE OIL
Checking the engine oil
Refer to the Scheduled Maintenance Guide for the appropriate intervals
for checking the engine oil.
1. Make sure the vehicle is on level ground.
2. Turn the engine off and wait a few minutes for the oil to drain into the
oil pan.
1
23
7
564
9810
Maintenance and care
195