clock Mercury Mountaineer 2002 s Owner's Guide
[x] Cancel search | Manufacturer: MERCURY, Model Year: 2002, Model line: Mountaineer, Model: Mercury Mountaineer 2002Pages: 312, PDF Size: 3.02 MB
Page 270 of 312

Replacing front parking lamp/turn signal bulbs
1. Make sure headlamp switch is in
OFF position, then open the hood.
2. At the back of the headlamp, pry
up and remove the two retainer pins
to release the headlamp assembly
from the vehicle and pull headlamp
forward.
3. Rotate the bulb socket
counterclockwise and remove from
lamp assembly.
4. Carefully pull bulb straight out of
socket and push in the new bulb.
5. Install bulb socket in lamp
assembly by turning clockwise.
6. Install the headlamp on vehicle by
aligning the lamp on the vehicle,
push rearward to fully seat the lamp
assembly then insert and push the
two retainer pins down.
7. Turn the lamps on and make sure
they work properly.
Maintenance and care
270
Page 271 of 312

Replacing side repeater bulbs
1. Carefully pry the lamp assembly
away from the fender.
2. Rotate the bulb socket
counterclockwise and remove from
lamp assembly.
3. Carefully pull bulb straight out of
socket and push in the new bulb.
4. Install the bulb socket in lamp
assembly by turning clockwise.
5. Carefully install the lamp
assembly on the fender snapping it in place.
Replacing front/rear side marker bulbs
1. Reach under the side of the front
or rear bumper, rotate bulb socket
counterclockwise and remove from
lamp assembly.
2. Carefully pull bulb straight out of
socket and push in the new bulb.
3. Install bulb socket in lamp
assembly by turning clockwise.
Replacing tail/brake/turn/backup lamp bulbs
The tail/brake/turn/backup bulbs are located in the tail lamp assembly,
one just below the other. Follow the same steps to replace each bulb:
1. Open the liftgate to expose the
lamp assemblies.
2. Remove the two screws from the
lamp assembly.
3. Pull the lamp assembly towards
the rear and side of the vehicle at
an angle carefully removing it from
the vehicle.
4. Rotate the bulb socket
counterclockwise and remove from
lamp assembly.
Maintenance and care
271
Page 272 of 312

5. Pull the bulb straight out of the socket and push in the new bulb.
6. To complete installation, follow the removal procedure in reverse
order.
Replacing foglamp bulbs
1. Reach under the front of the
front bumper and remove the bulb
socket from the foglamp by turning
counterclockwise.
2. Disconnect the electrical
connector from the foglamp bulb.
3. Connect the electrical connector
to the new foglamp bulb.
4. Install the bulb socket in the foglamp turning clockwise.
Replacing license plate lamp bulbs
1. Remove two screws and the
license plate lamp assembly from
the liftgate.
2. Remove bulb socket from lamp
assembly by turning
counterclockwise.
3. Carefully pull the bulb from the
socket and push in the new bulb.
4. Install the lamp assembly on
liftgate with two screws.
Maintenance and care
272
Page 275 of 312

•(4) Horizontal reference line
2. Measure the height from the
center of your headlamp to the
ground and mark a 2.4 meter (8
foot) horizontal reference line on
the vertical wall or screen at this
height (a piece of masking tape
works well). The center of the lamp
is marked by a 3.0 mm circle on the
headlamp lens.
3. Turn on the low beam headlamps to illuminate the wall or screen and
open the hood.
4. On the wall or screen you will
observe a light pattern with a
distinct horizontal edge of high
intensity light with a slight angle
towards the right. If this edge is not
at the horizontal reference line, the
beam will need to be adjusted.
5. Locate the vertical adjuster on
each headlamp, then usea4mm
socket/wrench to turn the adjuster
either counterclockwise (to adjust
down) or clockwise (to adjust up)
aligning the upper edge of the light
pattern up to the horizontal line.
6. HORIZONTAL AIM IS NOT
REQUIRED FOR THIS VEHICLE
AND IS NON-ADJUSTABLE.
7. Close the hood and turn off the lamps.
CLEANING AND CARING FOR YOUR VEHICLE
Refer to the Accessories chapter for a list of Ford-approved cleaners,
polishes and sealants.
Washing the exterior
Wash your vehicle regularly with cool or lukewarm water and a neutral
Ph shampoo, such as Detail Wash (ZC-3–A), which is available from your
dealer.
Maintenance and care
275
Page 305 of 312

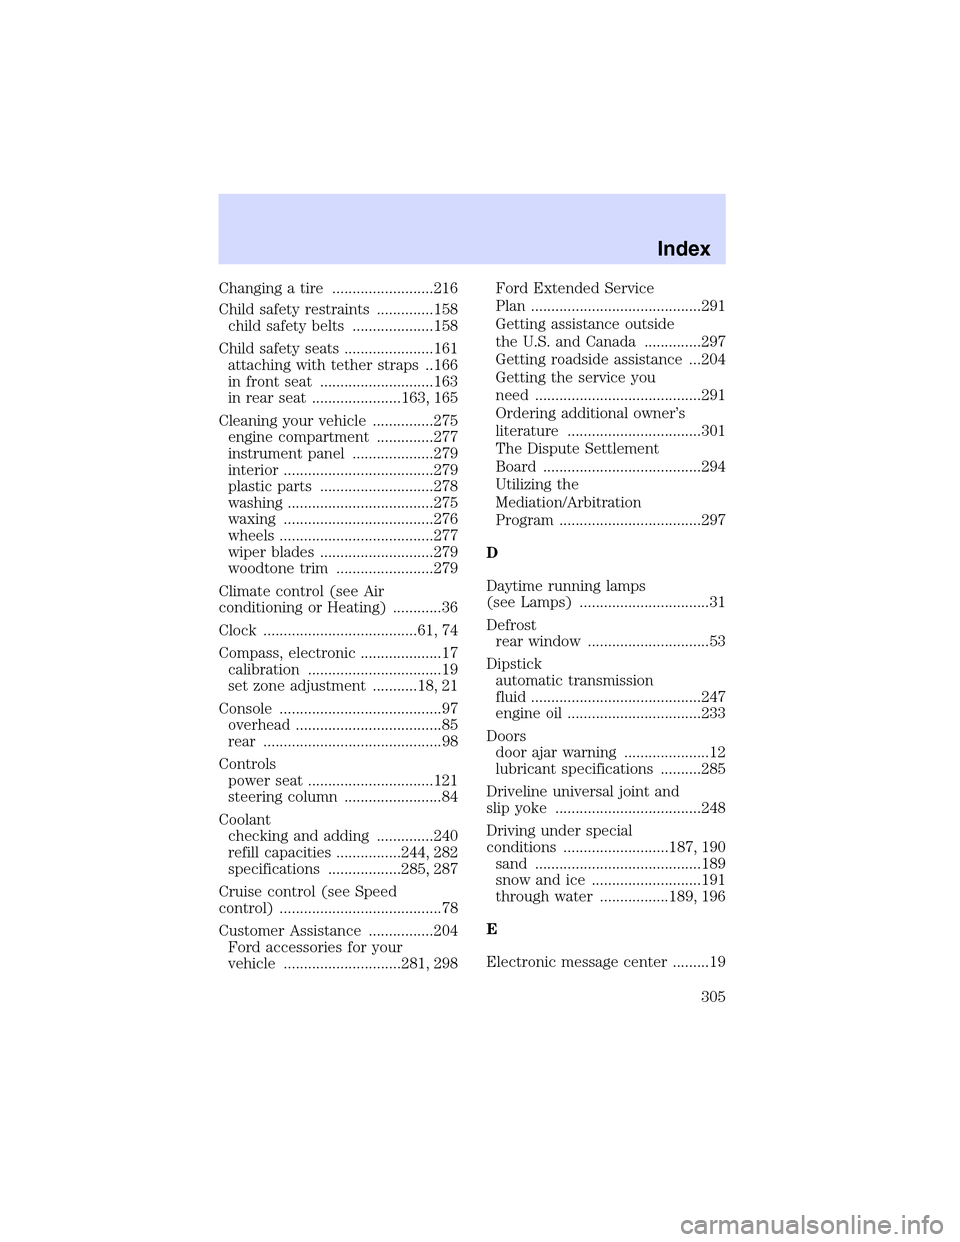
Changing a tire .........................216
Child safety restraints ..............158
child safety belts ....................158
Child safety seats ......................161
attaching with tether straps ..166
in front seat ............................163
in rear seat ......................163, 165
Cleaning your vehicle ...............275
engine compartment ..............277
instrument panel ....................279
interior .....................................279
plastic parts ............................278
washing ....................................275
waxing .....................................276
wheels ......................................277
wiper blades ............................279
woodtone trim ........................279
Climate control (see Air
conditioning or Heating) ............36
Clock ......................................61, 74
Compass, electronic ....................17
calibration .................................19
set zone adjustment ...........18, 21
Console ........................................97
overhead ....................................85
rear ............................................98
Controls
power seat ...............................121
steering column ........................84
Coolant
checking and adding ..............240
refill capacities ................244, 282
specifications ..................285, 287
Cruise control (see Speed
control) ........................................78
Customer Assistance ................204
Ford accessories for your
vehicle .............................281, 298Ford Extended Service
Plan ..........................................291
Getting assistance outside
the U.S. and Canada ..............297
Getting roadside assistance ...204
Getting the service you
need .........................................291
Ordering additional owner’s
literature .................................301
The Dispute Settlement
Board .......................................294
Utilizing the
Mediation/Arbitration
Program ...................................297
D
Daytime running lamps
(see Lamps) ................................31
Defrost
rear window ..............................53
Dipstick
automatic transmission
fluid ..........................................247
engine oil .................................233
Doors
door ajar warning .....................12
lubricant specifications ..........285
Driveline universal joint and
slip yoke ....................................248
Driving under special
conditions ..........................187, 190
sand .........................................189
snow and ice ...........................191
through water .................189, 196
E
Electronic message center .........19
Index
305