reset Mercury Mountaineer 2003 s User Guide
[x] Cancel search | Manufacturer: MERCURY, Model Year: 2003, Model line: Mountaineer, Model: Mercury Mountaineer 2003Pages: 264, PDF Size: 2.5 MB
Page 70 of 264

6. Release the RESET AND SETUP
control, then slowly press RESET
down again.
7. Press the SETUP control
repeatedly until the correct zone
setting for your geographic location is displayed on the message center.
To exit the zone setting mode press and release the RESET control.
8. Press the RESET control to start
the compass calibration function.
9. Slowly drive the vehicle in a
circle (less than 5 km/h [3 mph])
until the CIRCLE SLOWLY TO
CALIBRATE indicator changes to
CALIBRATION COMPLETED. This
will take up to three circles to complete calibration.
10. The compass is now calibrated.
Average fuel economy (AFE)
Select this function from the INFO
menu to display your average fuel
economy in liters/100 km or
miles/U.S. gallon.
If you calculate your average fuel
economy by dividing liters of fuel used by 100 kilometers traveled (miles
traveled by gallons used), your figure may be different than displayed for
the following reasons:
•Your vehicle was not perfectly level during fill-up
•Differences in the automatic shut-off points on the fuel pumps at
service stations
•Variations in top-off procedure from one fill-up to another
•Rounding of the displayed values to the nearest 0.1 liter (gallon)
1. Drive the vehicle at least 8 km (5 miles) with the speed control
system engaged to display a stabilized average.
2. Record the highway fuel economy for future reference.
It is important to press the RESET control after setting the speed
control to get accurate highway fuel economy readings.
Driver Controls
70
Page 71 of 264

Average fuel economy for FFV-equipped vehicles
Upon refueling, your vehicle must determine the percentage of Ethanol
in the fuel. For the first several minutes, or few miles of driving, the
message CALCULATING FUEL will appear in the message center. The
correct fuel economy will appear within approximately five miles of
driving.
Trip elapsed drive time
Select this function from the INFO
menu to display a timer.
To operate the Trip Elapsed Drive
Time perform the following:
1. Press and release RESET in order
to start the timer.
2. Press and release RESET to pause the timer.
3. Press and hold RESET for 2 seconds in order to reset the timer.
Distance to empty (DTE)
Selecting this function from the
INFO menu will give you an
estimate of how far you can drive
with the fuel remaining in your tank
under normal driving conditions.
Remember to turn the ignition OFF when refueling your vehicle.
Otherwise, the display will not show the addition of fuel for a few
kilometers (miles).
The DTE function will display LOW FUEL LEVEL and sound a tone for 1
second when you have low fuel level indicated on the fuel gauge.
Driver Controls
71
Page 72 of 264

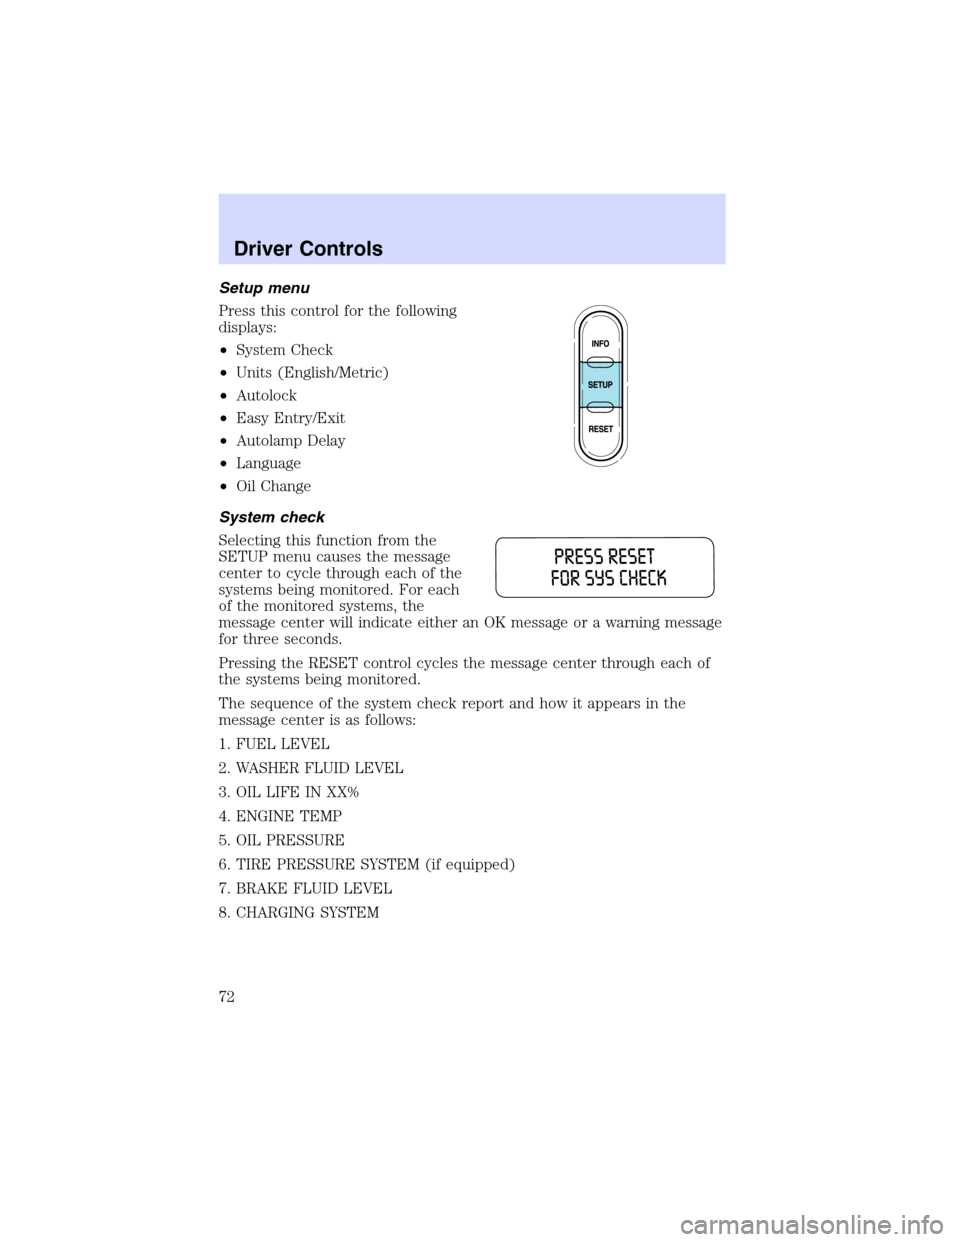
Setup menu
Press this control for the following
displays:
•System Check
•Units (English/Metric)
•Autolock
•Easy Entry/Exit
•Autolamp Delay
•Language
•Oil Change
System check
Selecting this function from the
SETUP menu causes the message
center to cycle through each of the
systems being monitored. For each
of the monitored systems, the
message center will indicate either an OK message or a warning message
for three seconds.
Pressing the RESET control cycles the message center through each of
the systems being monitored.
The sequence of the system check report and how it appears in the
message center is as follows:
1. FUEL LEVEL
2. WASHER FLUID LEVEL
3. OIL LIFE IN XX%
4. ENGINE TEMP
5. OIL PRESSURE
6. TIRE PRESSURE SYSTEM (if equipped)
7. BRAKE FLUID LEVEL
8. CHARGING SYSTEM
Driver Controls
72
Page 73 of 264

Units (English/Metric)
1. Select this function from the
SETUP menu for the current units
to be displayed.
2. Press the RESET control to
change from English to Metric.
Autolocks
1. Select this function from the
SETUP control for the current
display mode.
2. Press the RESET control to turn
the autolocks ON or OFF.
Easy entry/exit (if equipped)
1. Select this function from the
SETUP control for the current
display mode.
2. Press the RESET control to turn
the easy entry/exit feature ON or
OFF. For more information refer toMemory Seatin theSeating and
Safety Restraintschapter.
Autolamp delay
1. Select this function from the
SETUP control for the current
display mode.
2. Press the RESET control to select
the autolamp delay time.
Language
1. Select this function from the
SETUP menu for the current
language to be displayed.
Driver Controls
73
Page 74 of 264

2. Pressing the RESET control
cycles the message center through
each of the language choices.
3. Press and hold the RESET
control to set the language choice.
System warnings
System warnings alert you to possible problems or malfunctions in your
vehicle’s operating systems.
In the event of a multiple warning situation, the message center will
cycle the display to show all warnings by displaying each one for several
seconds.
The message center will display the last selected feature if there are no
more warning messages. This allows you to use the full functionality of
the message center after you acknowledge the warning by pressing the
RESET control and clearing the warning message.
Warning messages that have been reset are divided into three categories:
•They will reappear on the display every minute from the reset.
•They will reappear on the display ten minutes from the reset.
•They will not reappear until an ignition OFF-ON cycle has been
completed.
This acts as a reminder that these warning conditions still exist within
the vehicle.
Driver Controls
74
Page 77 of 264

LOW WASHER FLUID LEVEL.Indicates the washer fluid reservoir is
less than one quarter full. Check the washer fluid level. Refer to
Windshield washer fluidin theMaintenance and specifications
chapter.
DOOR AJAR.Displayed when a door or liftgate is not completely
closed.
CHANGE OIL SOON/OIL CHANGE REQUIRED.Displayed when the
engine oil life remaining is 5 percent or less. When oil life left is between
5% and 0%, the CHANGE OIL SOON message will be displayed. When oil
life left reaches 0%, the OIL CHANGE REQUIRED message will be
displayed.
An oil change is required whenever indicated by the message center.
USE ONLY RECOMMENDED ENGINE OILS.
To reset the oil monitoring system to 100% after each oil change
[approximately 8,000 km (5,000 miles) or 180 days] perform the
following:
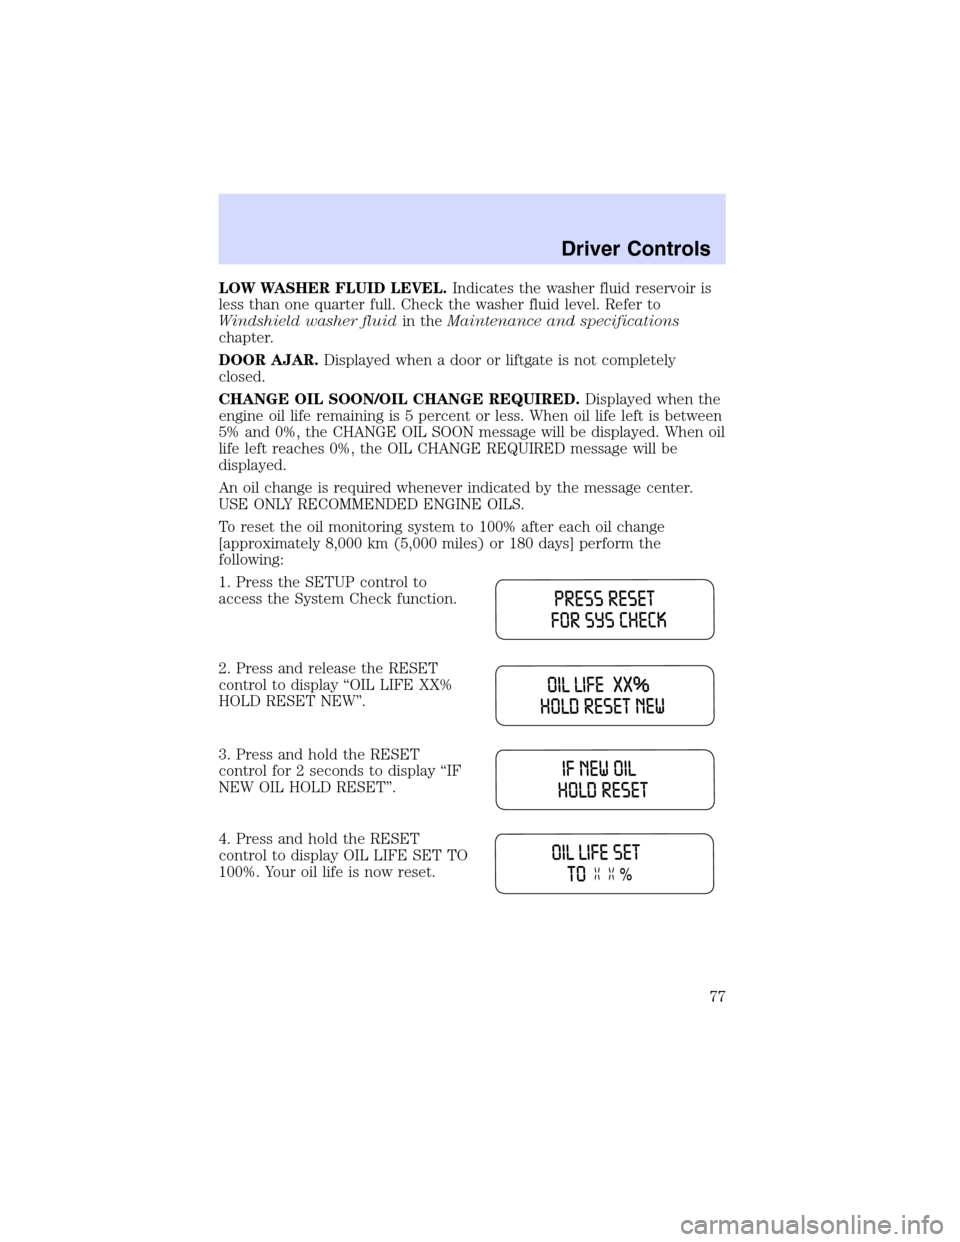
1. Press the SETUP control to
access the System Check function.
2. Press and release the RESET
control to display“OIL LIFE XX%
HOLD RESET NEW”.
3. Press and hold the RESET
control for 2 seconds to display“IF
NEW OIL HOLD RESET”.
4. Press and hold the RESET
control to display OIL LIFE SET TO
100%. Your oil life is now reset.
Driver Controls
77
Page 78 of 264

To reset the oil monitoring system to your personalized oil life %:
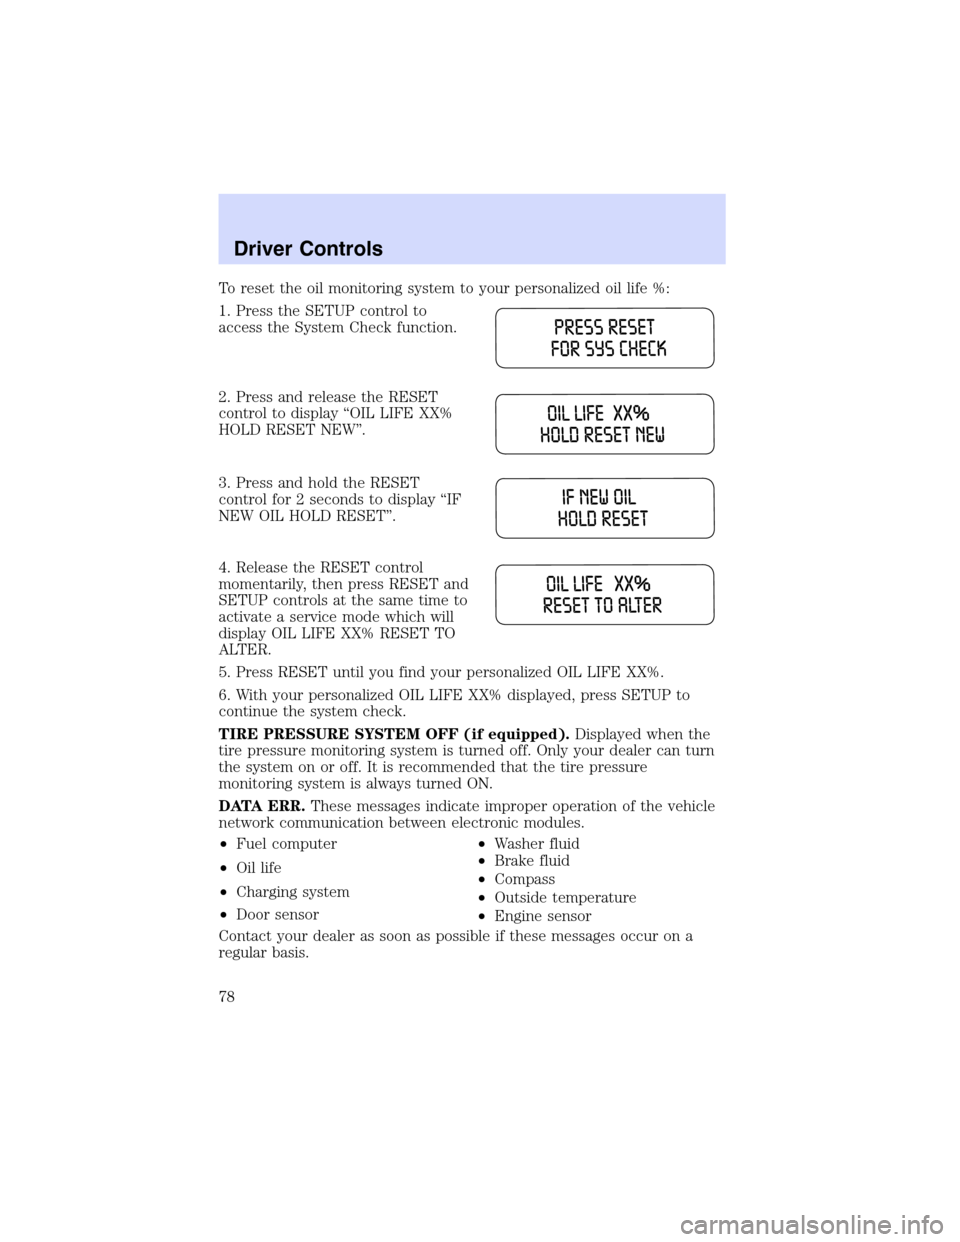
1. Press the SETUP control to
access the System Check function.
2. Press and release the RESET
control to display“OIL LIFE XX%
HOLD RESET NEW”.
3. Press and hold the RESET
control for 2 seconds to display“IF
NEW OIL HOLD RESET”.
4. Release the RESET control
momentarily, then press RESET and
SETUP controls at the same time to
activate a service mode which will
display OIL LIFE XX% RESET TO
ALTER.
5. Press RESET until you find your personalized OIL LIFE XX%.
6. With your personalized OIL LIFE XX% displayed, press SETUP to
continue the system check.
TIRE PRESSURE SYSTEM OFF (if equipped).Displayed when the
tire pressure monitoring system is turned off. Only your dealer can turn
the system on or off. It is recommended that the tire pressure
monitoring system is always turned ON.
DATA ERR.These messages indicate improper operation of the vehicle
network communication between electronic modules.
•Fuel computer
•Oil life
•Charging system
•Door sensor•Washer fluid
•Brake fluid
•Compass
•Outside temperature
•Engine sensor
Contact your dealer as soon as possible if these messages occur on a
regular basis.
Driver Controls
78
Page 165 of 264

FUEL PUMP SHUT-OFF SWITCHFUEL
RESET
The fuel pump shut-off switch is a device intended to stop the electric
fuel pump when your vehicle has been involved in a substantial jolt.
After a collision, if the engine cranks but does not start, the fuel pump
shut-off switch may have been activated.
The fuel pump shut-off switch is
located in the passenger’s foot well,
by the kick panel.
Use the following procedure to reset the fuel pump shut-off switch.
1. Turn the ignition to the OFF position.
2. Check the fuel system for leaks.
3. If no fuel leak is apparent, reset the fuel pump shut-off switch by
pushing in on the reset button.
4. Turn the ignition to the ON position. Pause for a few seconds and
return the key to the OFF position.
5. Make a further check for leaks in the fuel system.
Roadside Emergencies
165
Page 219 of 264

If the battery has been disconnected or a new battery has been installed,
the clock and radio settings must be reset once the battery is
reconnected.
•Always dispose of automotive
batteries in a responsible manner.
Follow your local authorized
standards for disposal. Call your
local authorized recycling center
to find out more about recycling
automotive batteries.
ENGINE COOLANT
Checking engine coolant
The concentration and level of engine coolant should be checked at the
mileage intervals listed in the scheduled maintenance guide. The coolant
concentration should be maintained at 50/50 coolant and distilled water,
which equates to a freeze point of -36°C (-34°F). Coolant concentration
testing is possible with a hydrometer or antifreeze tester (such as the
Rotunda Battery and Antifreeze Tester, 014–R1060). The level of coolant
should be maintained at the“cold full”of“cold fill range”level in the
coolant reservoir. If the level falls below, add coolant per the instructions
in theAdding engine coolantsection.
Your vehicle was factory-filled with a 50/50 engine coolant and water
concentration. If the concentration of coolant falls below 40% or above
60%, the engine parts could become damaged or not work properly.A
50–50 mixture of coolant and water provides the following:
•Freeze protection down to -36°C (-34°F).
•Boiling protection up to 129°C (265°F).
•Protection against rust and other forms of corrosion.
•Enables calibrated gauges to work properly.
LEAD
RETURN
RECYCLE
Maintenance and Specifications
219
Page 223 of 264

Coolant refill capacity
To find out how much fluid your vehicle’s cooling system can hold, refer
toRefill capacitiesin this chapter.
Fill your engine coolant reservoir as outlined inAdding engine coolant
in this chapter.
Severe climates
If you drive in extremely cold climates (less than–36°C[–34°F]), it
may be necessary to increase the coolant concentration above 50%.
Refer to the chart on the coolant container to ensure the coolant
concentration in your vehicle will provide adequate freeze protection.
Never increase the engine coolant concentration above 60%
(protection to–60°F). At a level over 60%, your engine could overheat
and become damaged.
If you drive in extremely hot climates, it is still necessary to maintain the
coolant concentration at 50/50 coolant and water.Do not allow the
coolant concentration to fall below 40% coolant.At a concentration
less than 40%, the corrosion protection to your engine and cooling
components may be compromised and permanent damage may result.
What you should know about fail-safe cooling (4.6L V8 engine only)
If the engine coolant supply is depleted, this feature allows the vehicle to
be driven temporarily before incremental component damage is incurred.
The“fail-safe”distance depends on ambient temperatures, vehicle load
and terrain.
How fail-safe cooling works
If the engine begins to overheat:
•The engine coolant temperature
gauge will move to the red (hot)
area.
•The
and thesymbol
will illuminate.
•The“Service Engine Soon”
indicator light will illuminate.
If the engine reaches a preset over-temperature condition, the engine
will automatically switch to alternating cylinder operation. Each disabled
cylinder acts as an air pump and cools the engine.
Maintenance and Specifications
223