radio Mercury Mountaineer 2003 Owner's Manuals
[x] Cancel search | Manufacturer: MERCURY, Model Year: 2003, Model line: Mountaineer, Model: Mercury Mountaineer 2003Pages: 264, PDF Size: 2.5 MB
Page 17 of 264
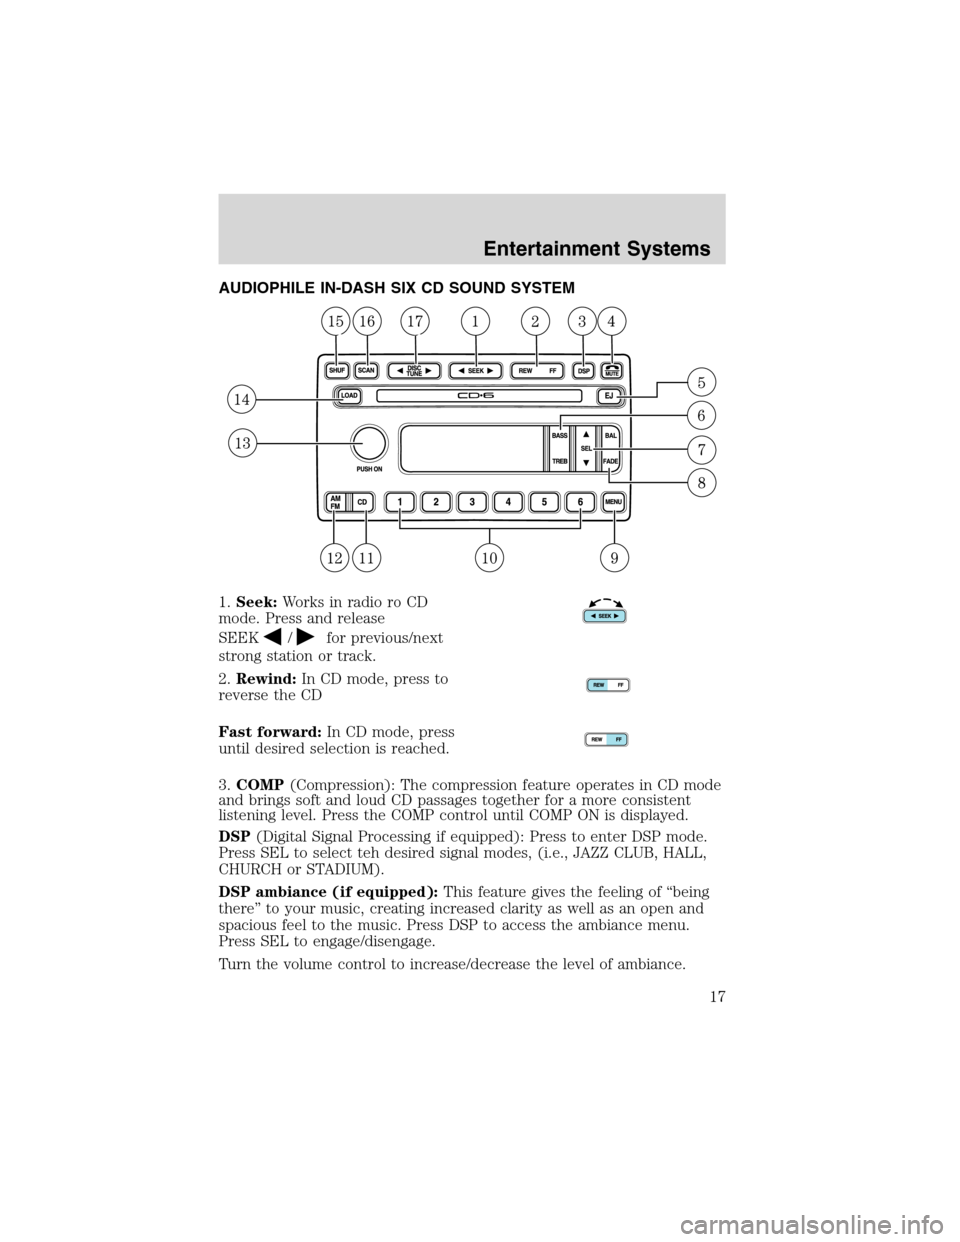
AUDIOPHILE IN-DASH SIX CD SOUND SYSTEM
1.Seek:Works in radio ro CD
mode. Press and release
SEEK
/for previous/next
strong station or track.
2.Rewind:In CD mode, press to
reverse the CD
Fast forward:In CD mode, press
until desired selection is reached.
3.COMP(Compression): The compression feature operates in CD mode
and brings soft and loud CD passages together for a more consistent
listening level. Press the COMP control until COMP ON is displayed.
DSP(Digital Signal Processing if equipped): Press to enter DSP mode.
Press SEL to select teh desired signal modes, (i.e., JAZZ CLUB, HALL,
CHURCH or STADIUM).
DSP ambiance (if equipped):This feature gives the feeling of“being
there”to your music, creating increased clarity as well as an open and
spacious feel to the music. Press DSP to access the ambiance menu.
Press SEL to engage/disengage.
Turn the volume control to increase/decrease the level of ambiance.
Entertainment Systems
Entertainment Systems
17
Page 19 of 264
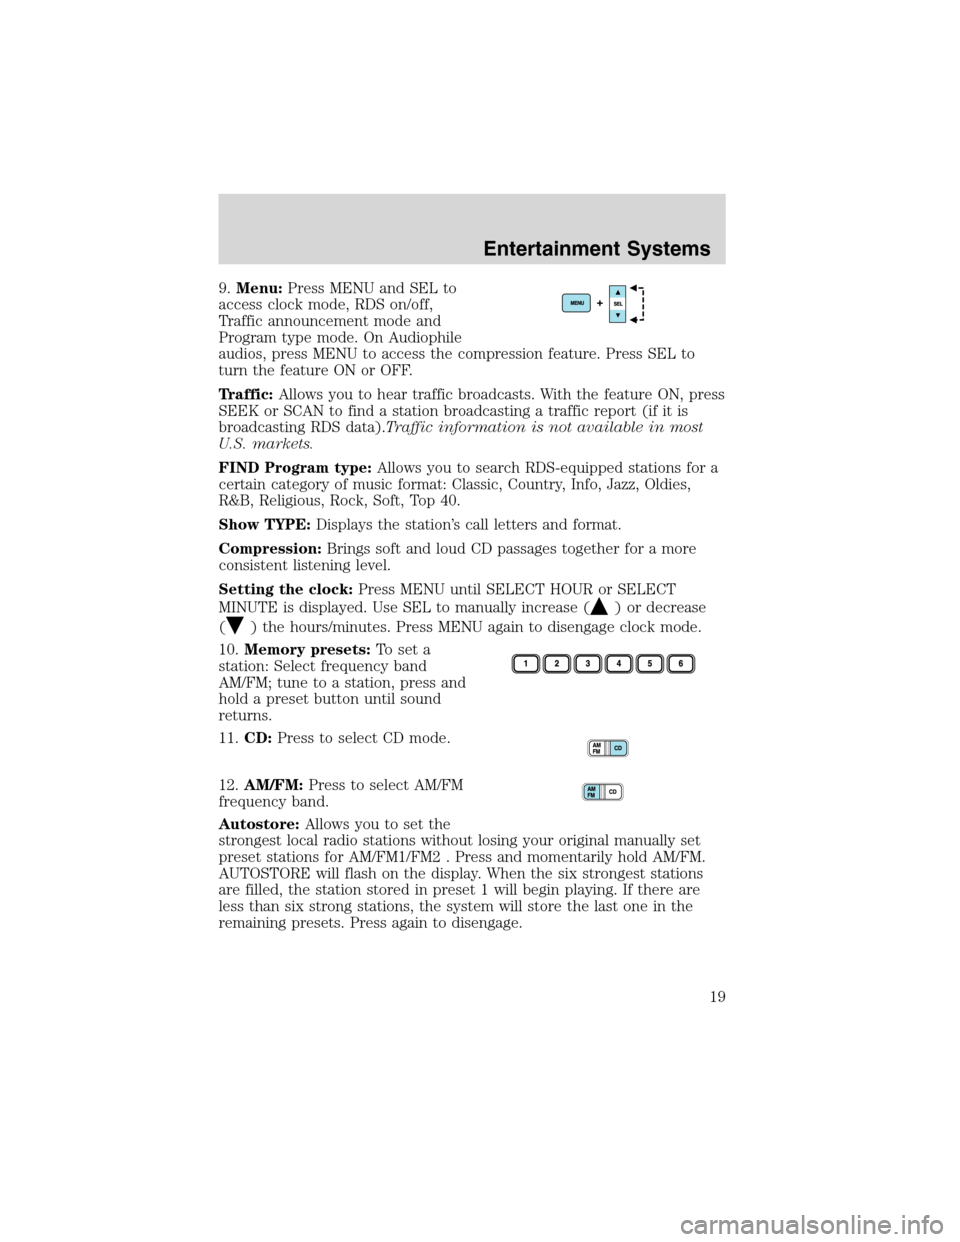
9.Menu:Press MENU and SEL to
access clock mode, RDS on/off,
Traffic announcement mode and
Program type mode. On Audiophile
audios, press MENU to access the compression feature. Press SEL to
turn the feature ON or OFF.
Traffic:Allows you to hear traffic broadcasts. With the feature ON, press
SEEK or SCAN to find a station broadcasting a traffic report (if it is
broadcasting RDS data).Traffic information is not available in most
U.S. markets.
FIND Program type:Allows you to search RDS-equipped stations for a
certain category of music format: Classic, Country, Info, Jazz, Oldies,
R&B, Religious, Rock, Soft, Top 40.
Show TYPE:Displays the station’s call letters and format.
Compression:Brings soft and loud CD passages together for a more
consistent listening level.
Setting the clock:Press MENU until SELECT HOUR or SELECT
MINUTE is displayed. Use SEL to manually increase (
) or decrease
(
) the hours/minutes. Press MENU again to disengage clock mode.
10.Memory presets:To set a
station: Select frequency band
AM/FM; tune to a station, press and
hold a preset button until sound
returns.
11.CD:Press to select CD mode.
12.AM/FM:Press to select AM/FM
frequency band.
Autostore:Allows you to set the
strongest local radio stations without losing your original manually set
preset stations for AM/FM1/FM2 . Press and momentarily hold AM/FM.
AUTOSTORE will flash on the display. When the six strongest stations
are filled, the station stored in preset 1 will begin playing. If there are
less than six strong stations, the system will store the last one in the
remaining presets. Press again to disengage.
Entertainment Systems
19
Page 20 of 264
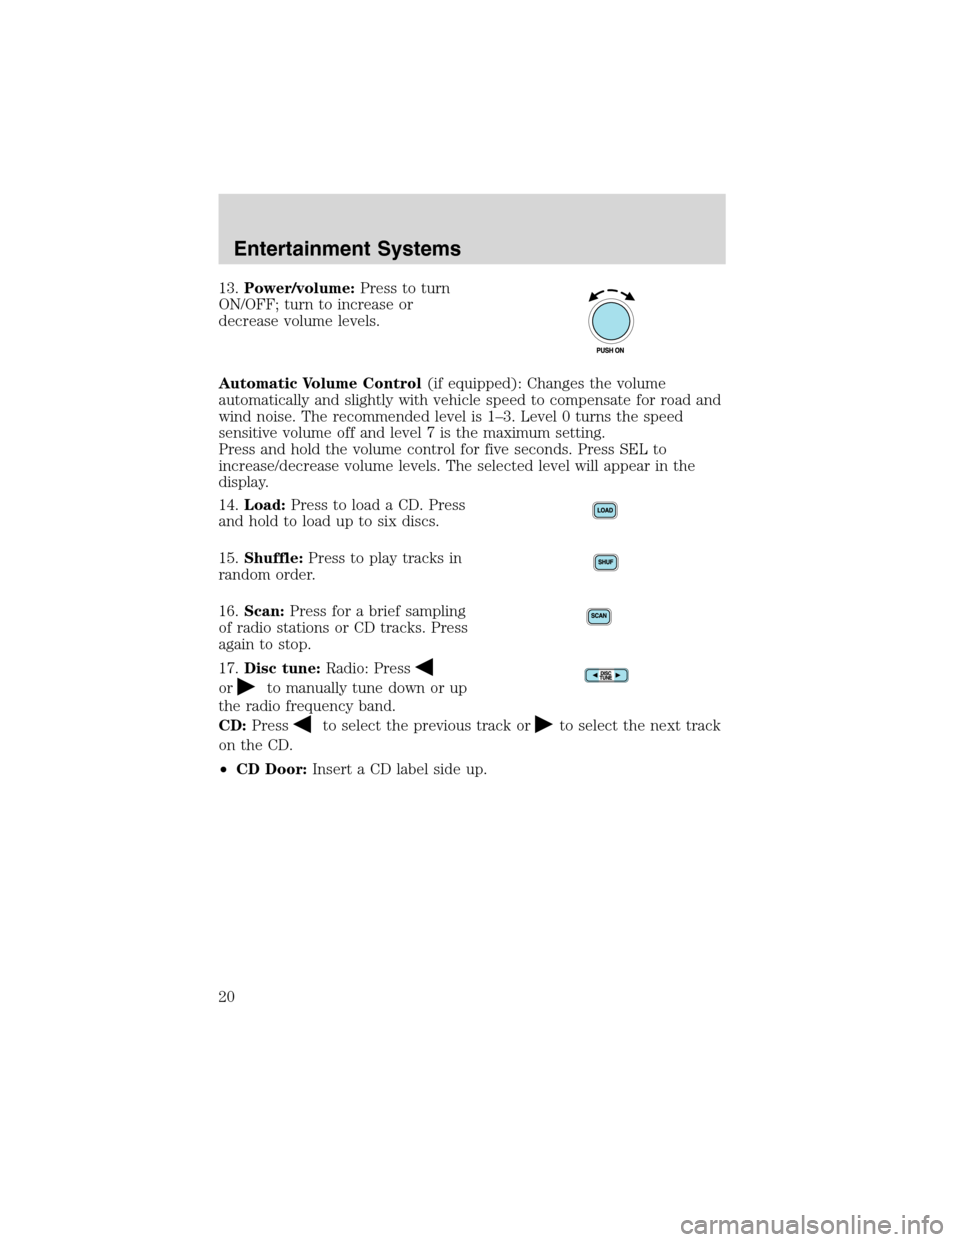
13.Power/volume:Press to turn
ON/OFF; turn to increase or
decrease volume levels.
Automatic Volume Control(if equipped): Changes the volume
automatically and slightly with vehicle speed to compensate for road and
wind noise. The recommended level is 1–3. Level 0 turns the speed
sensitive volume off and level 7 is the maximum setting.
Press and hold the volume control for five seconds. Press SEL to
increase/decrease volume levels. The selected level will appear in the
display.
14.Load:Press to load a CD. Press
and hold to load up to six discs.
15.Shuffle:Press to play tracks in
random order.
16.Scan:Press for a brief sampling
of radio stations or CD tracks. Press
again to stop.
17.Disc tune:Radio: Press
orto manually tune down or up
the radio frequency band.
CD:Press
to select the previous track orto select the next track
on the CD.
•CD Door:Insert a CD label side up.
Entertainment Systems
20
Page 22 of 264
not be inserted into the CD player. The label may peel and cause
the CD to become jammed. It is recommended that homemade
CDs be identified with permanent felt tip marker rather than
adhesive labels. Ball point pens may damage CDs. Please contact
your dealer for further information.
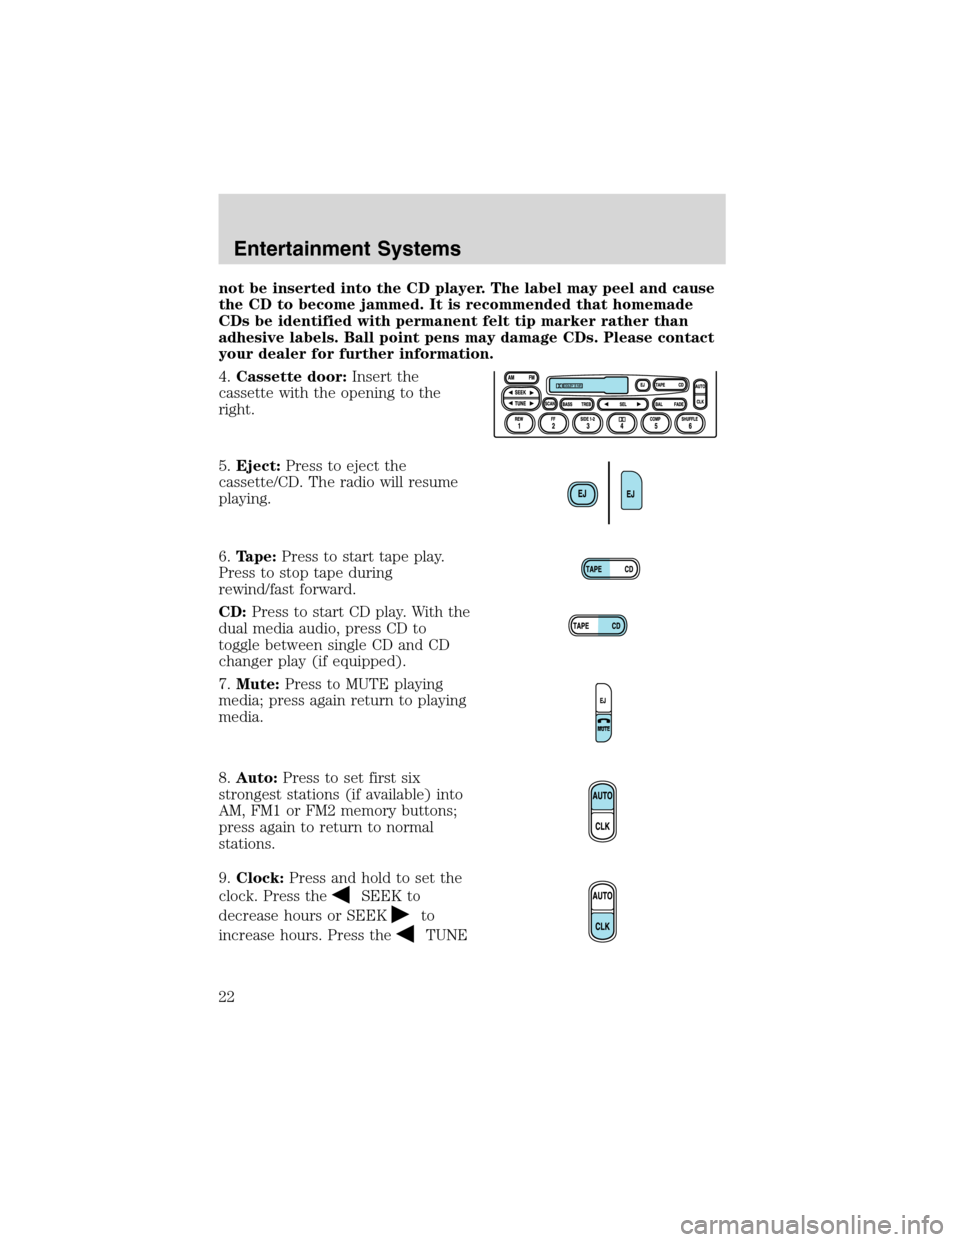
4.Cassette door:Insert the
cassette with the opening to the
right.
5.Eject:Press to eject the
cassette/CD. The radio will resume
playing.
6.Tape:Press to start tape play.
Press to stop tape during
rewind/fast forward.
CD:Press to start CD play. With the
dual media audio, press CD to
toggle between single CD and CD
changer play (if equipped).
7.Mute:Press to MUTE playing
media; press again return to playing
media.
8.Auto:Press to set first six
strongest stations (if available) into
AM, FM1 or FM2 memory buttons;
press again to return to normal
stations.
9.Clock:Press and hold to set the
clock. Press the
SEEK to
decrease hours or SEEK
to
increase hours. Press the
TUNE
Entertainment Systems
22
Page 24 of 264

16.Fast Forward (FF):Press for
a slow advance, press and hold for a
fast advance.
17.Rewind (REW):Press for a
slow rewind, press and hold for a
fast rewind.
18.Select (SEL):Use with Bass,
Treble, Balance and Fade controls.
19.Bass:Press BASS; then press
SEL
/to decrease/increase
the bass output.
Treble:Press TREB; then press
SEL
/to decrease/increase
the treble output.
20.Tune:Works in radio mode only.
Press TUNE
/to change
frequency down/up.
21.Seek:Press and release
SEEK
/for previous/next
strong station, selection or track.
22.AM/FM:Press to select
AM/FM1/FM2 frequency band.
FF2
REW1
SEL
SEEKTUNE
SEEKTUNE
Entertainment Systems
24
Page 25 of 264
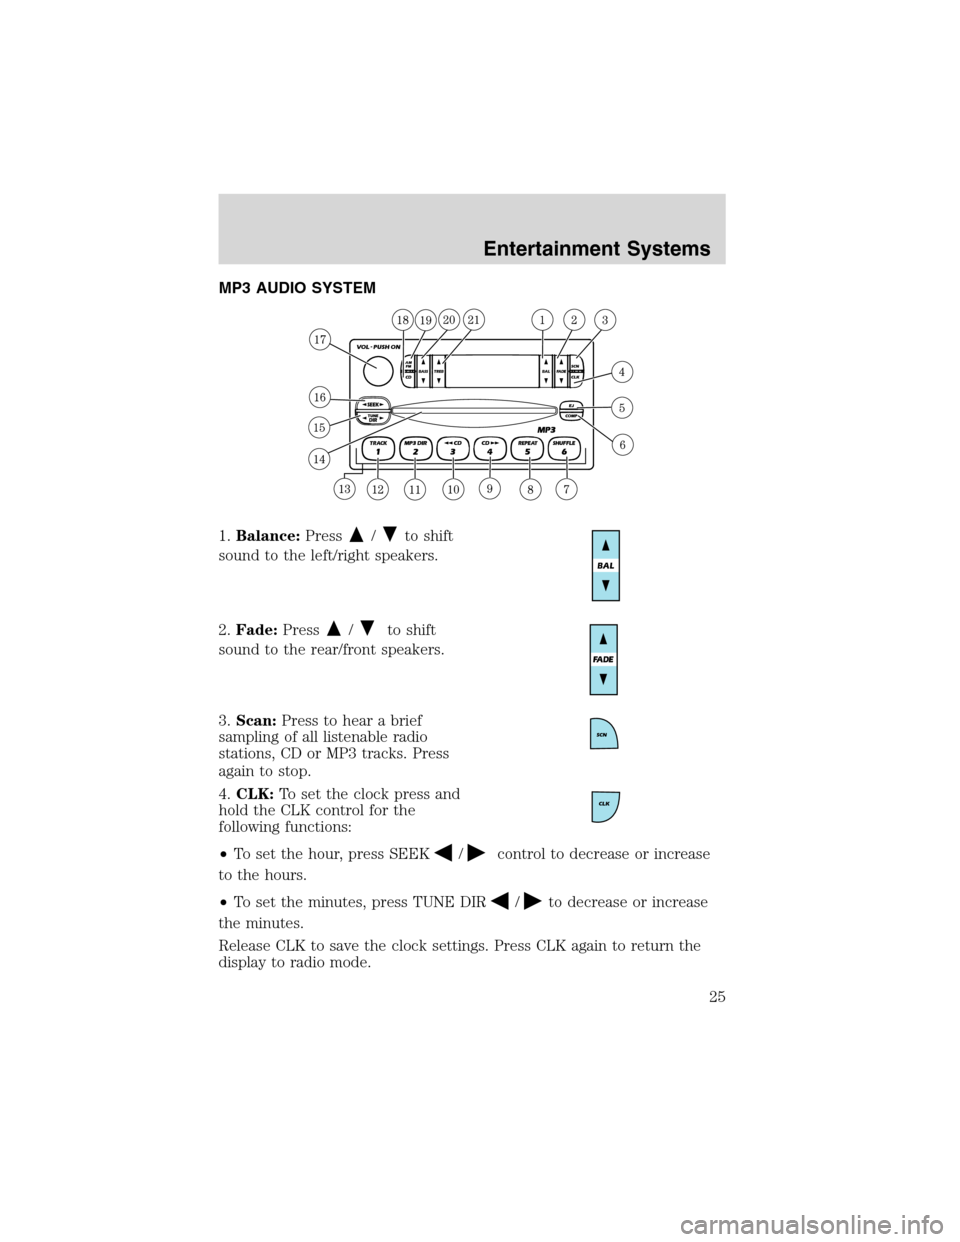
MP3 AUDIO SYSTEM
1.Balance:Press
/to shift
sound to the left/right speakers.
2.Fade:Press
/to shift
sound to the rear/front speakers.
3.Scan:Press to hear a brief
sampling of all listenable radio
stations, CD or MP3 tracks. Press
again to stop.
4.CLK:To set the clock press and
hold the CLK control for the
following functions:
•To set the hour, press SEEK
/control to decrease or increase
to the hours.
•To set the minutes, press TUNE DIR
/to decrease or increase
the minutes.
Release CLK to save the clock settings. Press CLK again to return the
display to radio mode.
Entertainment Systems
25
Page 26 of 264
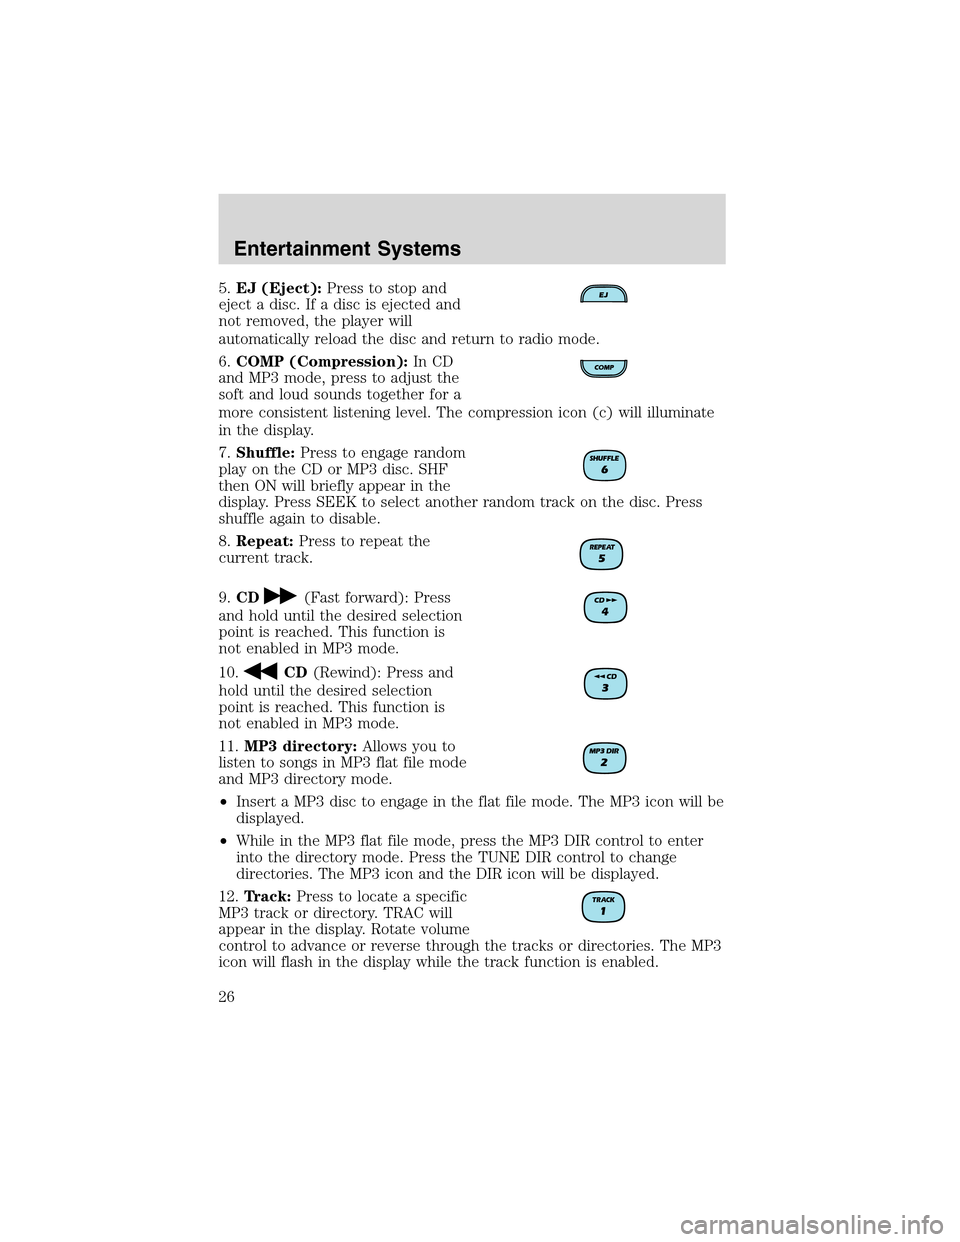
5.EJ (Eject):Press to stop and
eject a disc. If a disc is ejected and
not removed, the player will
automatically reload the disc and return to radio mode.
6.COMP (Compression):In CD
and MP3 mode, press to adjust the
soft and loud sounds together for a
more consistent listening level. The compression icon (c) will illuminate
in the display.
7.Shuffle:Press to engage random
play on the CD or MP3 disc. SHF
then ON will briefly appear in the
display. Press SEEK to select another random track on the disc. Press
shuffle again to disable.
8.Repeat:Press to repeat the
current track.
9.CD
(Fast forward): Press
and hold until the desired selection
point is reached. This function is
not enabled in MP3 mode.
10.
CD(Rewind): Press and
hold until the desired selection
point is reached. This function is
not enabled in MP3 mode.
11.MP3 directory:Allows you to
listen to songs in MP3 flat file mode
and MP3 directory mode.
•Insert a MP3 disc to engage in the flat file mode. The MP3 icon will be
displayed.
•While in the MP3 flat file mode, press the MP3 DIR control to enter
into the directory mode. Press the TUNE DIR control to change
directories. The MP3 icon and the DIR icon will be displayed.
12.Track:Press to locate a specific
MP3 track or directory. TRAC will
appear in the display. Rotate volume
control to advance or reverse through the tracks or directories. The MP3
icon will flash in the display while the track function is enabled.
Entertainment Systems
26
Page 27 of 264
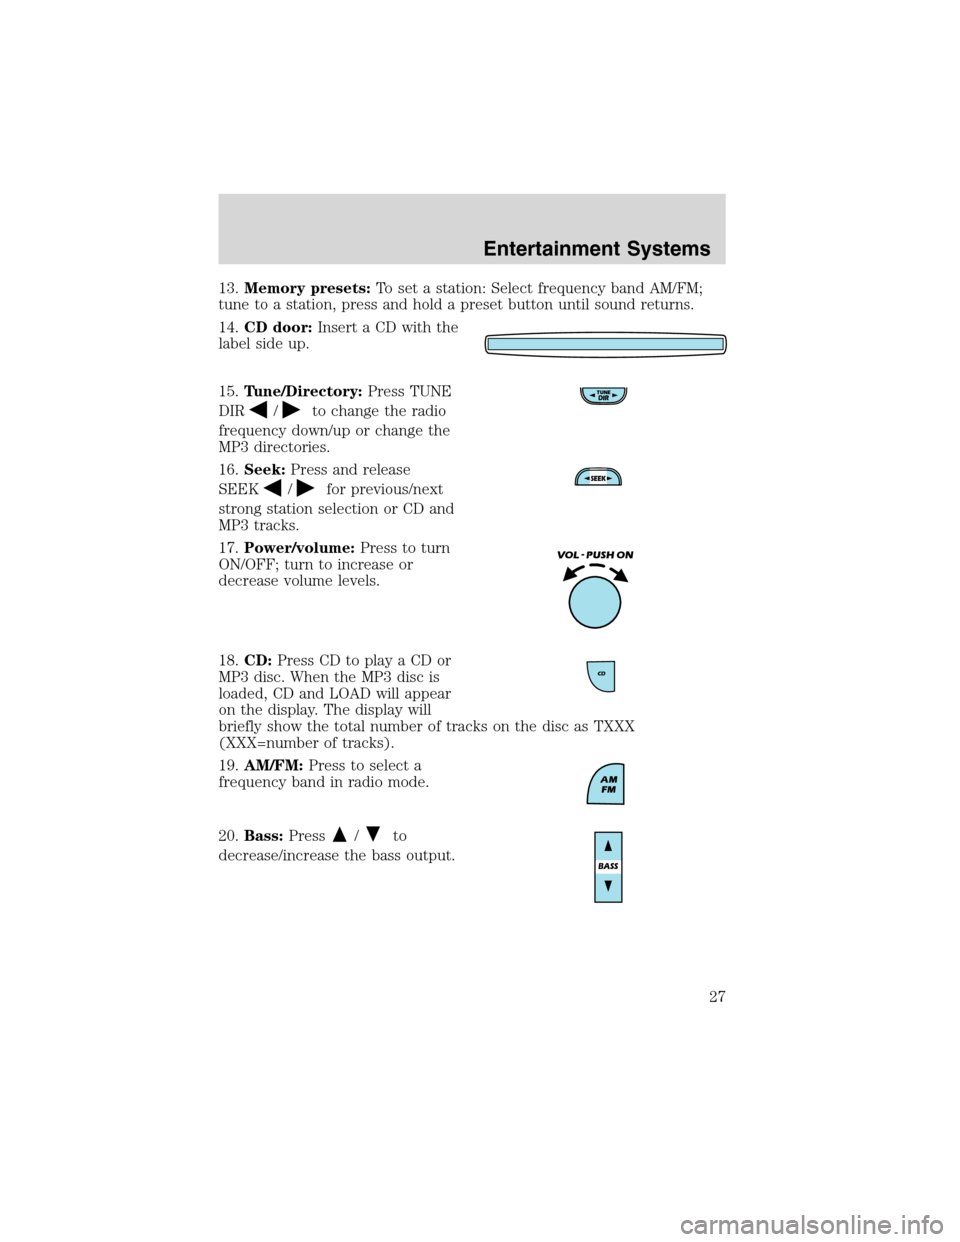
13.Memory presets:To set a station: Select frequency band AM/FM;
tune to a station, press and hold a preset button until sound returns.
14.CD door:Insert a CD with the
label side up.
15.Tune/Directory:Press TUNE
DIR
/to change the radio
frequency down/up or change the
MP3 directories.
16.Seek:Press and release
SEEK
/for previous/next
strong station selection or CD and
MP3 tracks.
17.Power/volume:Press to turn
ON/OFF; turn to increase or
decrease volume levels.
18.CD:Press CD to play a CD or
MP3 disc. When the MP3 disc is
loaded, CD and LOAD will appear
on the display. The display will
briefly show the total number of tracks on the disc as TXXX
(XXX=number of tracks).
19.AM/FM:Press to select a
frequency band in radio mode.
20.Bass:Press
/to
decrease/increase the bass output.
Entertainment Systems
27
Page 29 of 264
Error messages
You may experience an error message for the following situations:
•NO DISC when the CD control is pressed and there is not a CD
present.
•DISC ERR when there is a damaged or unreadable disc. Such as, data
discs containing no .mp3 files, or for data discs containing more than
255 files or directories.
•CD ERR for any other disc malfunction.
RADIO FREQUENCIES
AM and FM frequencies are established by the Federal Communications
Commission (FCC) and the Canadian Radio and Telecommunications
Commission (CRTC). Those frequencies are:
AM - 530, 540–1700, 1710 kHz
FM- 87.7, 87.9–107.7, 107.9 MHz
RADIO RECEPTION FACTORS
There are three factors that can affect radio reception:
•Distance/strength: The further you travel from an FM station, the
weaker the signal and the weaker the reception.
•Terrain: Hills, mountains, tall buildings, power lines, electric fences,
traffic lights and thunderstorms can interfere with your reception.
•Station overload: When you pass a broadcast tower, a stronger signal
may overtake a weaker one and play while the weak station frequency
is displayed.
CASSETTE/PLAYER CARE
Do:
•Use only cassettes that are 90 minutes long or less.
•Tighten very loose tapes by inserting a finger or pencil into the hole
and turning the hub.
•Remove loose labels before inserting tapes.
•Allow tapes which have been subjected to extreme heat, humidity or
cold to reach a moderate temperature before playing.
•Clean the cassette player head with a cassette cleaning cartridge after
10–12 hours of play to maintain good sound/operation.
Entertainment Systems
29
Page 50 of 264

CENTER CONSOLE
Your vehicle may be equipped with a
variety of console features. These
include:
•Utility compartment with
cassette/compact disc storage
•Auxiliary power point
•Cupholders
•Tissue box holder (located on underside of console lid)
•Ash tray (if equipped)
Use only soft cups in the cupholder. Hard objects can injure you
in a collision.
Cell phone use
The use of Mobile Communications Equipment has become increasingly
important in the conduct of business and personal affairs. However,
drivers must not compromise their own or others’safety when using
such equipment. Mobile Communications can enhance personal safety
and security when appropriately used, particularly in emergency
situations. Safety must be paramount when using mobile communications
equipment to avoid negating these benefits.
Mobile Communication Equipment includes, but is not limited to cellular
phones, pagers, portable email devices, in vehicle communications
systems, telematics devices and portable two-way radios.
A driver’s first responsibility is the safe operation of the vehicle.
The most important thing you can do to prevent a crash is to
avoid distractions and pay attention to the road. Wait until it is safe to
operate Mobile Communications Equipment.
Driver Controls
50