service Mercury Mountaineer 2005 s Owner's Guide
[x] Cancel search | Manufacturer: MERCURY, Model Year: 2005, Model line: Mountaineer, Model: Mercury Mountaineer 2005Pages: 304, PDF Size: 4.34 MB
Page 156 of 304
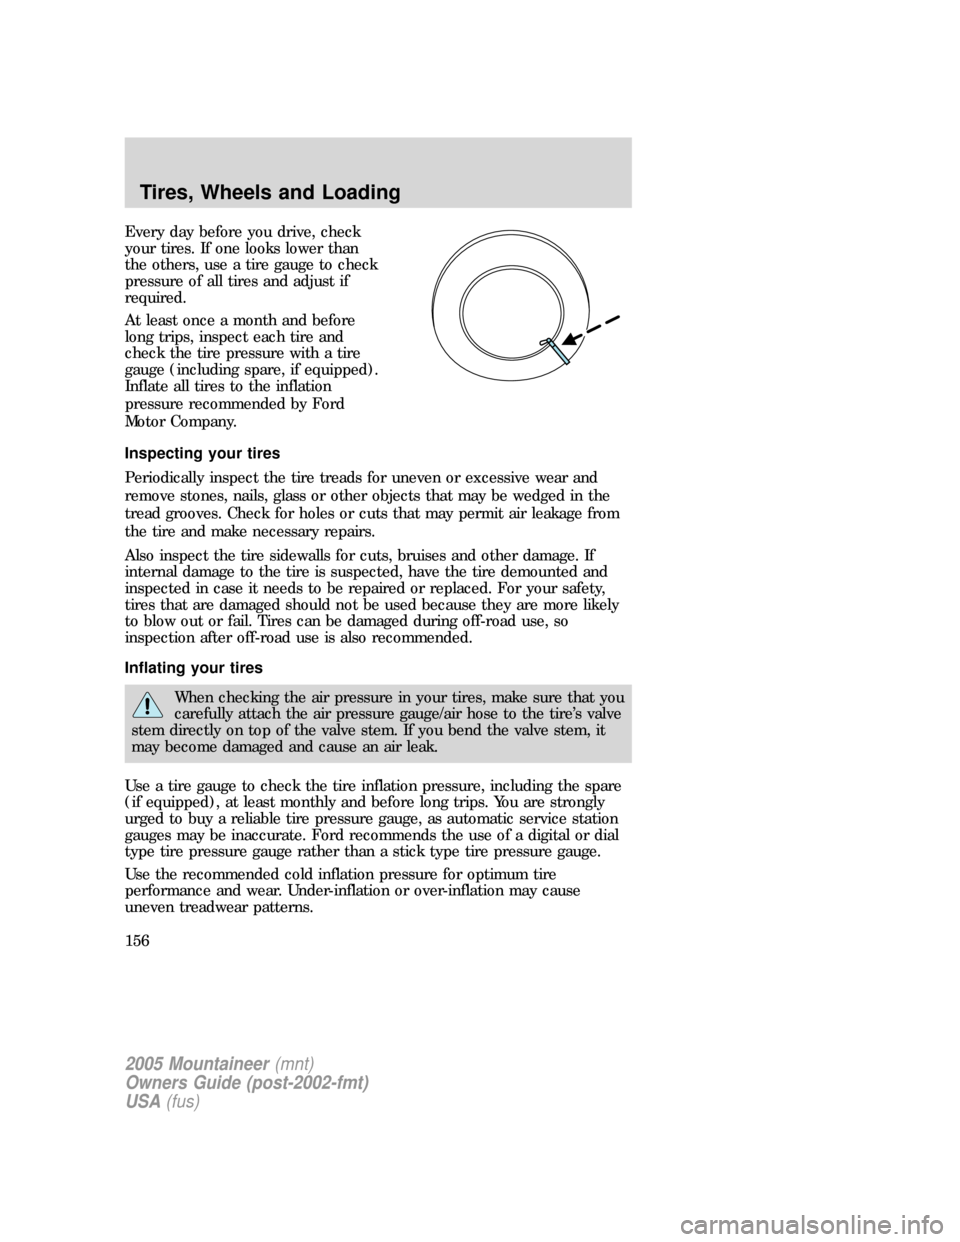
Every day before you drive, check
your tires. If one looks lower than
the others, use a tire gauge to check
pressure of all tires and adjust if
required.
At least once a month and before
long trips, inspect each tire and
check the tire pressure with a tire
gauge (including spare, if equipped).
Inflate all tires to the inflation
pressure recommended by Ford
Motor Company.
Inspecting your tires
Periodically inspect the tire treads for uneven or excessive wear and
remove stones, nails, glass or other objects that may be wedged in the
tread grooves. Check for holes or cuts that may permit air leakage from
the tire and make necessary repairs.
Also inspect the tire sidewalls for cuts, bruises and other damage. If
internal damage to the tire is suspected, have the tire demounted and
inspected in case it needs to be repaired or replaced. For your safety,
tires that are damaged should not be used because they are more likely
to blow out or fail. Tires can be damaged during off-road use, so
inspection after off-road use is also recommended.
Inflating your tires
When checking the air pressure in your tires, make sure that you
carefully attach the air pressure gauge/air hose to the tire’s valve
stem directly on top of the valve stem. If you bend the valve stem, it
may become damaged and cause an air leak.
Use a tire gauge to check the tire inflation pressure, including the spare
(if equipped), at least monthly and before long trips. You are strongly
urged to buy a reliable tire pressure gauge, as automatic service station
gauges may be inaccurate. Ford recommends the use of a digital or dial
type tire pressure gauge rather than a stick type tire pressure gauge.
Use the recommended cold inflation pressure for optimum tire
performance and wear. Under-inflation or over-inflation may cause
uneven treadwear patterns.
2005 Mountaineer(mnt)
Owners Guide (post-2002-fmt)
USA(fus)
Tires, Wheels and Loading
156
Page 159 of 304
The installation of replacement tires with steel cord body plies in the tire
sidewall may cause malfunction of the Tire Pressure Monitoring System
(TPMS), and is not recommended (cord material information is molded
on the tire sidewall). Additionally, if your vehicle was originally equipped
with run-flat tires, replacing them with tires that are not identical to
those originally fitted may cause malfunction of the TPMS, and is not
recommended. Run-flat tires should not be used to replace regular tires.
Always check your TPMS indicator immediately after replacing one or
more tires on your vehicle. If the TPMS indicator is on, your TPMS is
malfunctioning. Your replacement tire might be incompatible with your
TPMS system, or some component of the TPMS system may be damaged.
Important:Ford recommends you replace your tires every 6 years
regardless of the condition of the tire tread wear. As tires age, the
rubber weakens, potentially increasing the risk of a tire failure during
use, causing loss of vehicle control and personal injury.
Important:Remember to replace the spare tire when you replace the
road tires on your vehicle. Even if it has never been used, the spare tire
should be replaced because tires degrade over time.
Important:Remember to replace the wheel air valves when the road
tires are replaced on your vehicle.
CHANGING THE TIRES
If you get a flat tire while driving:
•do not brake heavily.
•gradually decrease the vehicle’s speed.
•hold the steering wheel firmly.
•slowly move to a safe place on the side of the road.
Note:If your vehicle is equipped with the tire pressure monitoring
system (TPMS), the system indicator light will illuminate when the spare
is in use. To restore the full functionality of the monitoring system, all
road wheels equipped with tire pressure monitoring sensors must be
mounted on the vehicle.
If your vehicle is equipped with TPMS, have a flat serviced by a dealer or
a qualified technician in order to prevent damage to the TPMS sensor,
refer toChanging tires with TPMSin theTires, Wheels and Loading
chapter. Replace the spare tire with a road tire as soon as possible.
2005 Mountaineer(mnt)
Owners Guide (post-2002-fmt)
USA(fus)
Tires, Wheels and Loading
159
Page 161 of 304
•All-Wheel driving capability (if applicable)
•Load leveling adjustment (if applicable)
When driving with the dissimilar spare tire/wheel additional caution
should be given to:
•Towing a trailer
•Driving vehicles equipped with a camper body
•Driving vehicles with a load on the cargo rack
Drive cautiously when using a dissimilar spare tire/wheel and seek
service as soon as possible.
Stopping and securing the vehicle
1. If you get a flat tire while driving,
do not apply the brake heavily;
instead, gradually decrease your
speed. Hold the steering wheel
firmly and slowly move to a safe
place on the side of the road.
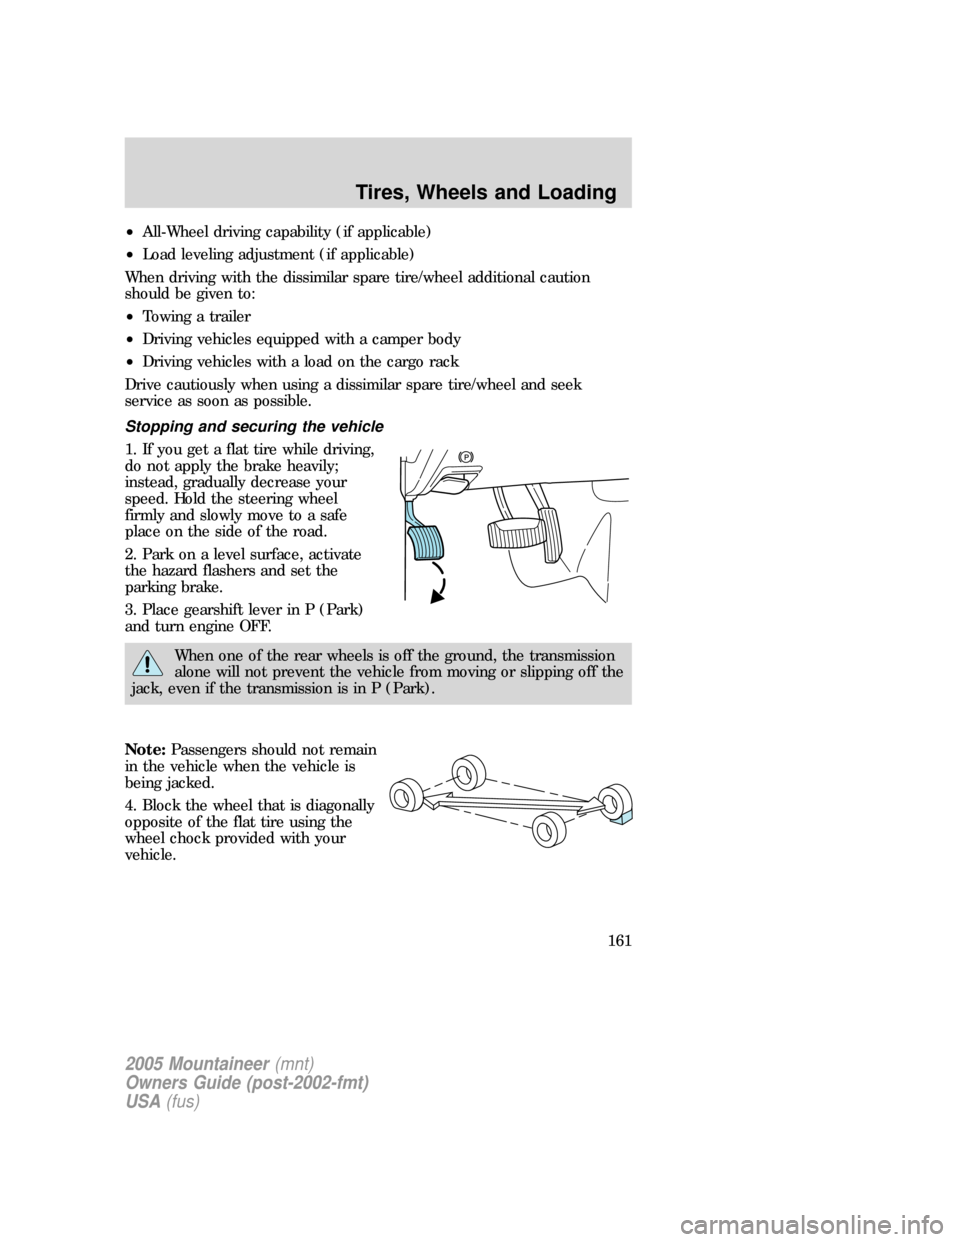
2. Park on a level surface, activate
the hazard flashers and set the
parking brake.
3. Place gearshift lever in P (Park)
and turn engine OFF.
When one of the rear wheels is off the ground, the transmission
alone will not prevent the vehicle from moving or slipping off the
jack, even if the transmission is in P (Park).
Note:Passengers should not remain
in the vehicle when the vehicle is
being jacked.
4. Block the wheel that is diagonally
opposite of the flat tire using the
wheel chock provided with your
vehicle.
2005 Mountaineer(mnt)
Owners Guide (post-2002-fmt)
USA(fus)
Tires, Wheels and Loading
161
Page 167 of 304
3. Turn the lug wrench clockwise until the tire is raised to its stowed
position underneath the vehicle. The effort to turn the jack handle
increases significantly and the spare tire carrier ratchets or slips when
the tire is raised to the maximum tightness. Tighten to the best of your
ability, to the point where the ratchet/slip occurs, if possible. The spare
tire carrier will not allow you to overtighten. If the spare tire carrier
ratchets or slips with little effort, take the vehicle to your dealer for
assistance at your earliest convenience.
4. Check that the tire lies flat against the frame and is properly
tightened. Try to push or pull, then turn the tire to be sure it will not
move. Loosen and retighten, if necessary. Failure to properly stow the
spare tire may result in failure of the winch cable and loss of the tire.
5. If your vehicle is equipped with a spare tire lock and key, be sure to
install the spare tire lock into the bumper drive tube with the spare tire
lock key and jack handle.
6. Repeat this tightness check procedure when servicing the spare tire
pressure (every six months, perscheduled maintenance information),
or at any time that the spare tire is disturbed through service of other
components.
Re-stowing the jack and tools
1. Unblock the wheels.
2. Stow the wheel ornament (if removed) in a safe location in the vehicle
(such as the glove box or jack stowage compartment) so it will not
become damaged. Re-install the wheel ornament onto the wheel once the
tire is repaired or replaced.
3. Stow the jack and tools in their respective locations, making sure they
are fully secured so they do not rattle when you drive.
WHEEL LUG NUT TORQUE SPECIFICATIONS
Retighten the lug nuts to the specified torque at 50–100 miles (80–160
km) after any wheel disturbance (rotation, flat tire, wheel removal, etc.).
Lug nut socket size/Bolt size Wheel lug nut torque*
lb.ft. N•m
Lug nut socket size:
3�4” (19 mm) hex
Bolt size:1�2x20100 135
* Torque specifications are for nut and bolt threads free of dirt and
rust. Use only Ford recommended replacement fasteners.
2005 Mountaineer(mnt)
Owners Guide (post-2002-fmt)
USA(fus)
Tires, Wheels and Loading
167
Page 168 of 304
When a wheel is installed, always remove any corrosion, dirt and
foreign materials present on the mounting surfaces of the wheel
and the surface of the front disc brake hub and rotor that contacts the
wheel. Installing wheels without correct metal-to-metal contact at the
wheel mounting surfaces can cause the wheel nuts to loosen and the
wheel to come off while the vehicle is in motion, resulting in loss of
control.
Note:If there is corrosion on the area where the wheel contacts the
hub, apply a thin film of grease or anti-seize compound on that area.
INFORMATION CONTAINED ON THE TIRE SIDEWALL
Federal law requires tire manufacturers to place standardized
information on the sidewall of all tires. This information identifies and
describes the fundamental characteristics of the tire and also provides a
U.S. DOT Tire Identification Number for safety standard certification and
in case of a recall.
Information on “P” type tires
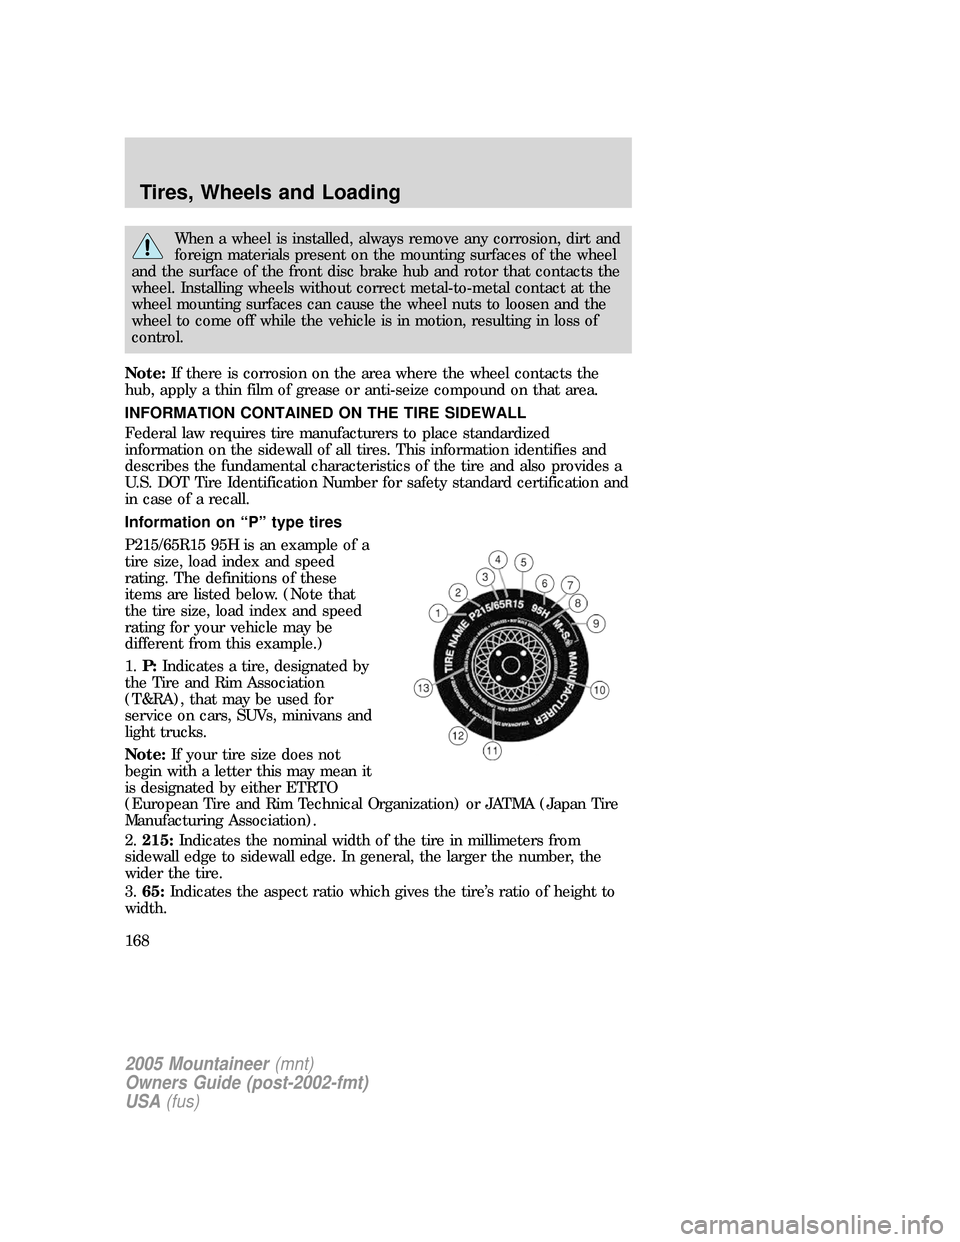
P215/65R15 95H is an example of a
tire size, load index and speed
rating. The definitions of these
items are listed below. (Note that
the tire size, load index and speed
rating for your vehicle may be
different from this example.)
1.P:Indicates a tire, designated by
the Tire and Rim Association
(T&RA), that may be used for
service on cars, SUVs, minivans and
light trucks.
Note:If your tire size does not
begin with a letter this may mean it
is designated by either ETRTO
(European Tire and Rim Technical Organization) or JATMA (Japan Tire
Manufacturing Association).
2.215:Indicates the nominal width of the tire in millimeters from
sidewall edge to sidewall edge. In general, the larger the number, the
wider the tire.
3.65:Indicates the aspect ratio which gives the tire’s ratio of height to
width.
2005 Mountaineer(mnt)
Owners Guide (post-2002-fmt)
USA(fus)
Tires, Wheels and Loading
168
Page 171 of 304

13.Maximum Permissible Inflation Pressure:Indicates the tire
manufacturers’ maximum permissible pressure and/or the pressure at
which the maximum load can be carried by the tire. This pressure is
normally higher than the manufacturer’s recommended cold inflation
pressure which can be found on either the Safety Compliance
Certification Label which is located on the B-Pillar or the edge of the
driver’s door. The cold inflation pressure should never be set lower than
the recommended pressure on the vehicle label.
The tire suppliers may have additional markings, notes or warnings such
as standard load, radial tubeless, etc.
Additional information contained on the tire sidewall for “LT” type
tires
“LT” type tires have some additional
information beyond those of “P”
type tires; these differences are
described below:
1.LT:Indicates a tire, designated by
the Tire and Rim Association
(T&RA), that is intended for service
on light trucks.
2.Load Range/Load Inflation
Limits:Indicates the tire’s
load-carrying capabilities and its
inflation limits.
3.Maximum Load Dual lb. (kg)
at psi (kPa) cold:Indicates the
maximum load and tire pressure
when the tire is used as a dual; defined as four tires on the rear axle (a
total of six or more tires on the vehicle).
4.Maximum Load Single lb. (kg) at psi (kPa) cold:Indicates the
maximum load and tire pressure when the tire is used as a single;
defined as two tires (total) on the rear axle.
2005 Mountaineer(mnt)
Owners Guide (post-2002-fmt)
USA(fus)
Tires, Wheels and Loading
171
Page 172 of 304
Information on “T” type tires
“T” type tires have some additional
information beyond those of “P”
type tires; these differences are
described below:
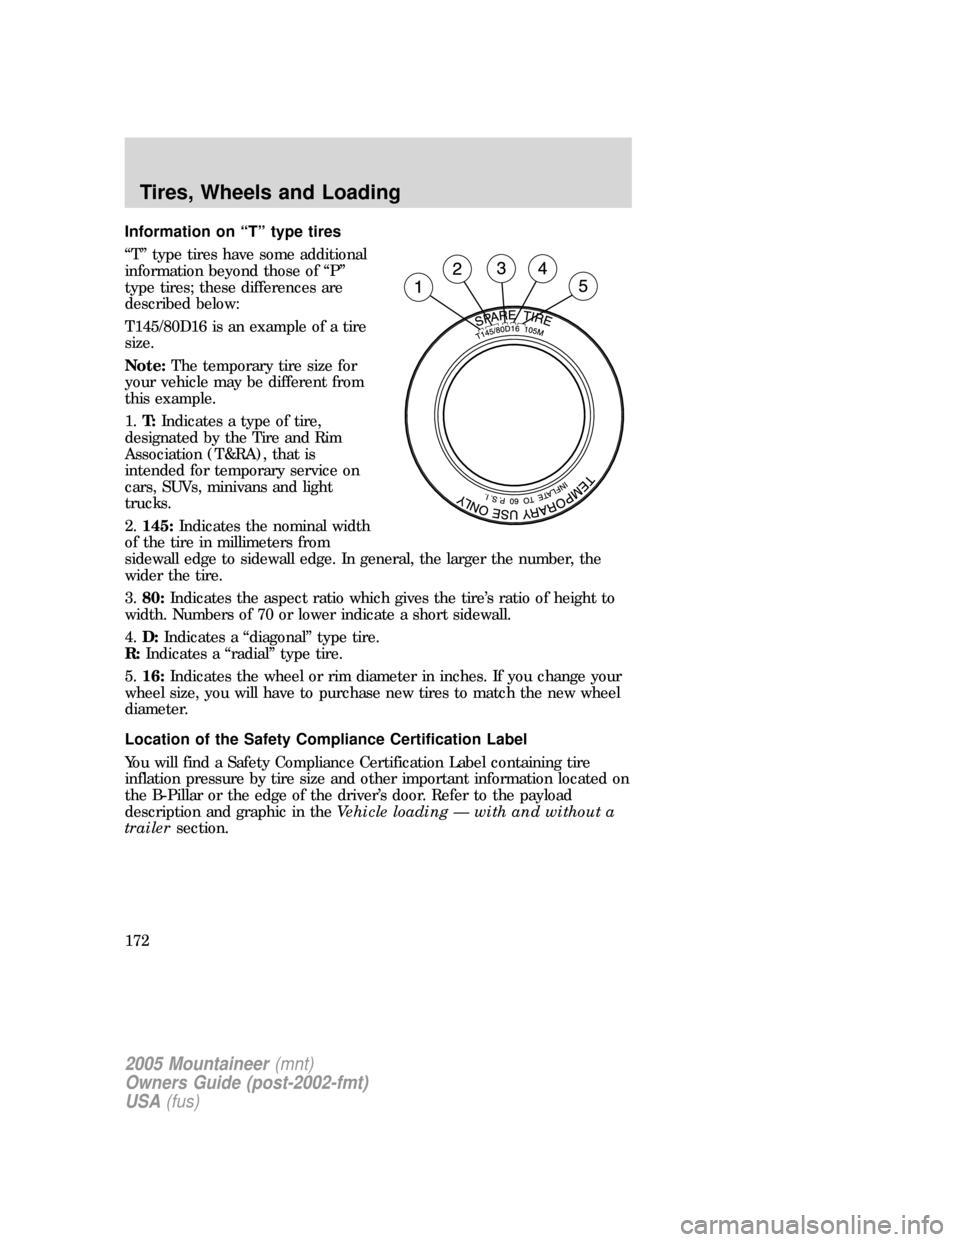
T145/80D16 is an example of a tire
size.
Note:The temporary tire size for
your vehicle may be different from
this example.
1.T:Indicates a type of tire,
designated by the Tire and Rim
Association (T&RA), that is
intended for temporary service on
cars, SUVs, minivans and light
trucks.
2.145:Indicates the nominal width
of the tire in millimeters from
sidewall edge to sidewall edge. In general, the larger the number, the
wider the tire.
3.80:Indicates the aspect ratio which gives the tire’s ratio of height to
width. Numbers of 70 or lower indicate a short sidewall.
4.D:Indicates a “diagonal” type tire.
R:Indicates a “radial” type tire.
5.16:Indicates the wheel or rim diameter in inches. If you change your
wheel size, you will have to purchase new tires to match the new wheel
diameter.
Location of the Safety Compliance Certification Label
You will find a Safety Compliance Certification Label containing tire
inflation pressure by tire size and other important information located on
the B-Pillar or the edge of the driver’s door. Refer to the payload
description and graphic in theVehicle loading — with and without a
trailersection.
2005 Mountaineer(mnt)
Owners Guide (post-2002-fmt)
USA(fus)
Tires, Wheels and Loading
172
Page 177 of 304

TIRE PRESSURE MONITORING SYSTEM (TPMS)(IF EQUIPPED)
When the Tire Pressure Monitoring
System warning light is lit, one or
more of your tires is significantly
under-inflated. You should stop and
check your tires as soon as possible,
and inflate them to the proper pressure as indicated on the vehicle’s tire
information placard (label). Driving on a significantly under-inflated tire
causes the tire to overheat and can eventually lead to tire failure.
Under-inflation also reduces fuel efficiency and tire tread life, and may
affect the vehicle’s handling and stopping ability. Even if your vehicle is
equipped with a Tire Pressure Monitoring System, it is still important
that you manually check the inflation pressure of your tires regularly.
Each tire, including the spare, should be checked monthly when cold and
set to the recommended inflation pressure which can be found on either
the Safety Compliance Certification Label which is located on the B-Pillar
or the edge of the driver’s door.
The Tire Pressure Monitoring System is NOT a substitute for
manually checking tire pressure. The tire pressure should be
checked periodically (at least monthly) using a tire gauge, see
Inspecting and inflating your tiresin this chapter. Failure to
properly maintain your tire pressure could increase the risk of tire
failure, loss of control, vehicle rollover and personal injury.
Changing tires with TPMS
It is recommended that you always
have your tires serviced by a dealer
or qualified technician.Each road
tire is equipped with a tire
pressure sensor mounted on the
wheel inside the tire connected
to the valve stem. The tire
pressure sensor must be
unbolted from the wheel prior to
tire removal. The sensor can be
removed by loosening the nut at the valve stem. Failure to
remove the sensor may damage it.The rubber grommet (washer)
between the wheel and the tire pressure sensor needs to be replaced
whenever the sensor is removed to minimize air leaks.
2005 Mountaineer(mnt)
Owners Guide (post-2002-fmt)
USA(fus)
Tires, Wheels and Loading
177
Page 181 of 304
tires are flat, repair as necessary. If all tires appear to be inflated,
carefully drive the vehicle to the nearest location where air can be added
to the tires. Turn the ignition to the “off” position. Inflate all the tires to
the recommended cold pressure.
The Tire Pressure Monitoring System complies with part 15 of the FCC
rules and with RS-210 of Industry Canada. Operation is subject to the
following two conditions: (1) This device may not cause harmful
interference, and (2) This device must accept any interference received,
including interference that may cause undesired operation.
The Tire Pressure Monitoring System is NOT a substitute for
manually checking tire pressure. The tire pressure should be
checked periodically (at least monthly) using a tire gauge, see
Inspecting and inflating your tiresin this chapter. Failure to
properly maintain your tire pressure could increase the risk of tire
failure, loss of control, vehicle rollover and personal injury.
USING SNOW TIRES AND TRACTION DEVICES
Snow tires must be the same size and grade as the tires you
currently have on your vehicle.
The tires on your vehicle have all-weather treads to provide traction in
rain and snow. However, in some climates, using snow tires or traction
devices may be necessary. Ford offers tire cables as a Ford approved
accessory and recommends use of these or SAE class “S” tire cables. See
your dealer or qualified service technician for more information on tire
cables for your vehicle.
Follow these guidelines when using snow tires and traction devices:
•Cables or chains should only be used on the rear wheels.
•Install cables or chains securely, verifying that the cables or chains do
not touch any wiring, brake lines or fuel lines.
•Drive cautiously. If you hear the cables or chains rub or bang against
the vehicle, stop and retighten them. If this does not work, remove the
cables or chains to prevent vehicle damage.
•Avoid overloading your vehicle.
•Remove the cables or chains when they are no longer needed.
•Do not use cables or chains on dry roads.
•Do not exceed 30 mph (48 km/h) with tire cables or chains on your
vehicle.
2005 Mountaineer(mnt)
Owners Guide (post-2002-fmt)
USA(fus)
Tires, Wheels and Loading
181
Page 189 of 304
Special loading instructions for owners of pickup trucks and
utility-type vehicles
For important information regarding safe operation of this type
of vehicle, see thePreparing to drive your vehiclesection in
theDrivingchapter of thisOwner’s Guide.
Loaded vehicles may handle differently than unloaded vehicles.
Extra precautions, such as slower speeds and increased stopping
distance, should be taken when driving a heavily loaded vehicle.
Your vehicle can haul more cargo and people than most passenger cars.
Depending upon the type and placement of the load, hauling cargo and
people may raise the center of gravity of the vehicle.
Calculating the load your vehicle can carry/tow
1. Use the appropriate maximum GCWR chart (in theTrailer towing
section in this chapter) for your type of engine and rear axle ratio.
2. Weigh your vehicle without cargo. To obtain correct weights, take your
vehicle to a shipping company or an inspection station for trucks.
3. Subtract your loaded weight from the maximum GCWR in the chart.
This is the maximum trailer weight your vehicle can tow. It must be
below the maximum trailer weight shown in the chart.
TRAILER TOWING
Trailer towing with your vehicle may require the use of a trailer tow
option package.
Trailer towing puts additional loads on your vehicle’s engine, transmission,
axle, brakes, tires, and suspension. For your safety and to maximize vehicle
performance, be sure to use the proper equipment while towing.
Follow these guidelines to ensure safe towing procedure:
•Stay within your vehicle’s load limits.
•Thoroughly prepare your vehicle for towing. Refer toPreparing to
towin this chapter.
•Use extra caution when driving while trailer towing. Refer toDriving
while you towin this chapter.
•Service your vehicle more frequently if you tow a trailer. Refer to the
severe duty schedule in the scheduled maintenance guide.
•Do not tow a trailer until your vehicle has been driven at least 500
miles (800 km).
2005 Mountaineer(mnt)
Owners Guide (post-2002-fmt)
USA(fus)
Tires, Wheels and Loading
189