lights Mercury Mountaineer 2006 s User Guide
[x] Cancel search | Manufacturer: MERCURY, Model Year: 2006, Model line: Mountaineer, Model: Mercury Mountaineer 2006Pages: 344, PDF Size: 2.66 MB
Page 54 of 344
Replacing headlamp bulbs
Do not touch the glass of a halogen bulb.
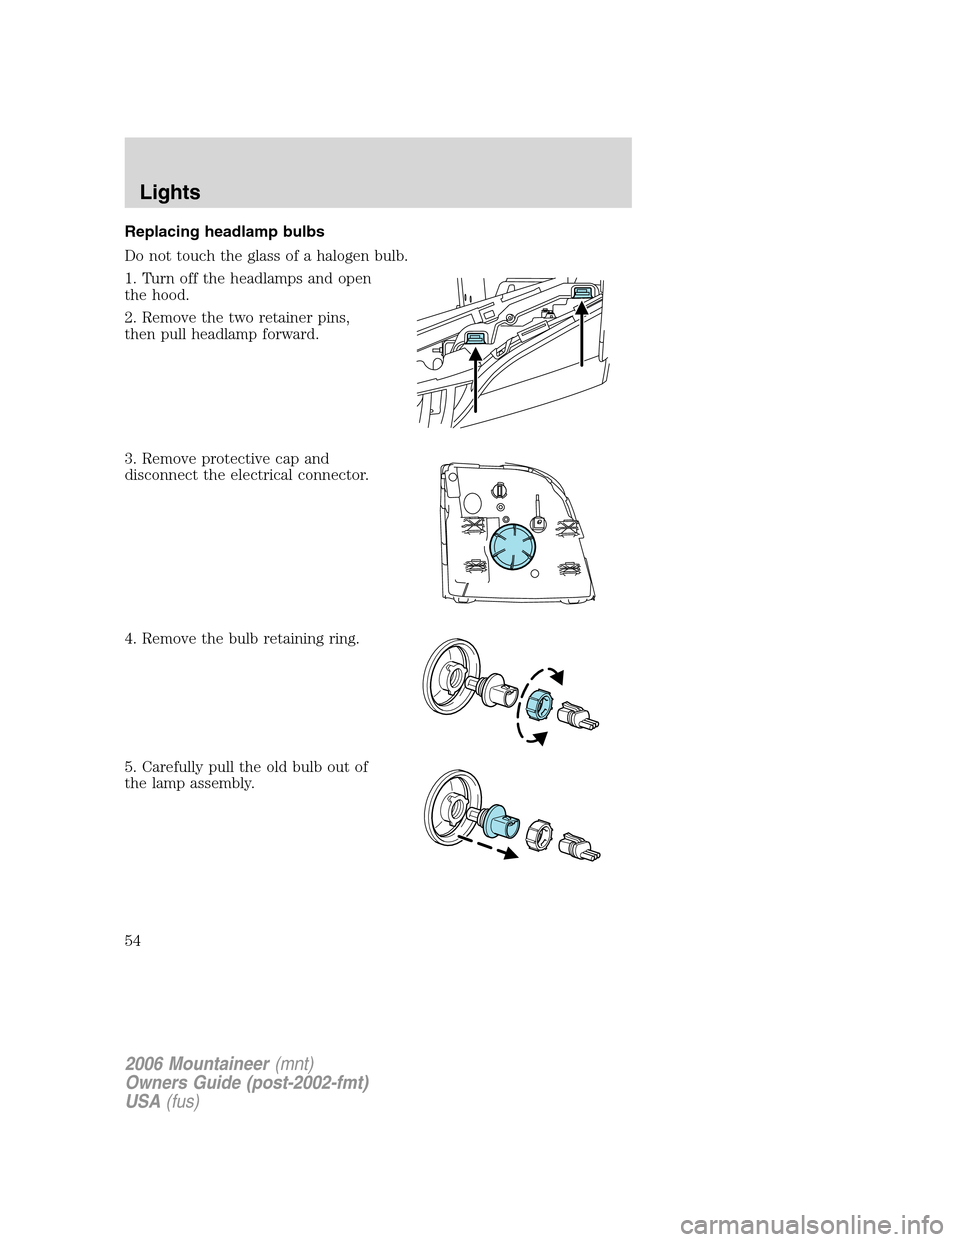
1. Turn off the headlamps and open
the hood.
2. Remove the two retainer pins,
then pull headlamp forward.
3. Remove protective cap and
disconnect the electrical connector.
4. Remove the bulb retaining ring.
5. Carefully pull the old bulb out of
the lamp assembly.
2006 Mountaineer(mnt)
Owners Guide (post-2002-fmt)
USA(fus)
Lights
54
Page 55 of 344
Handle a halogen headlamp bulb carefully and keep out of
children’s reach. Grasp the bulb only by its plastic base and do
not touch the glass. The oil from your hand could cause the bulb to
break the next time the headlamps are operated.
Reverse steps to reinstall bulb(s).
Replacing front parking/turn signal bulbs
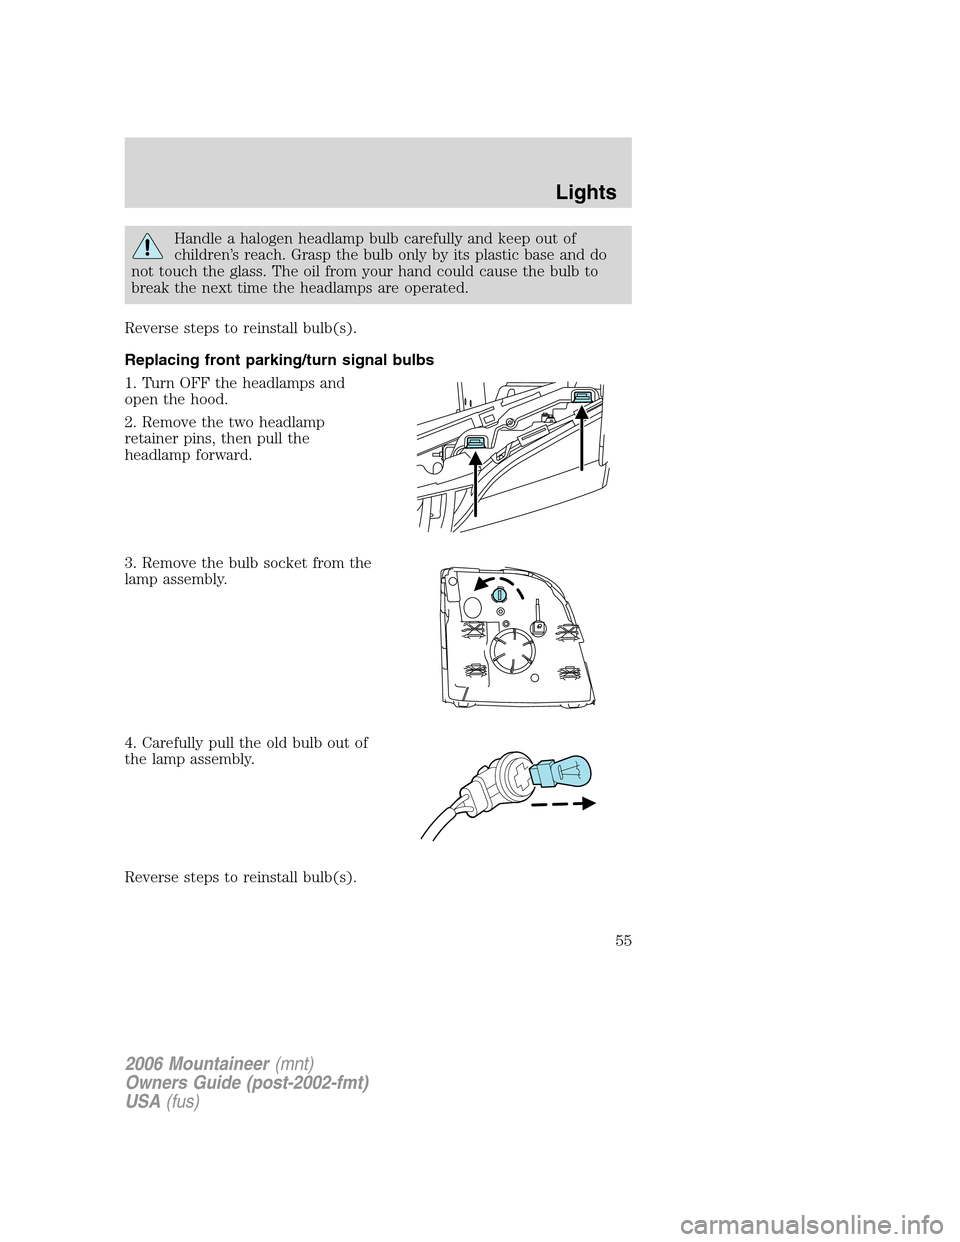
1. Turn OFF the headlamps and
open the hood.
2. Remove the two headlamp
retainer pins, then pull the
headlamp forward.
3. Remove the bulb socket from the
lamp assembly.
4. Carefully pull the old bulb out of
the lamp assembly.
Reverse steps to reinstall bulb(s).
2006 Mountaineer(mnt)
Owners Guide (post-2002-fmt)
USA(fus)
Lights
55
Page 56 of 344
Replacing side-mounted turn signal bulbs
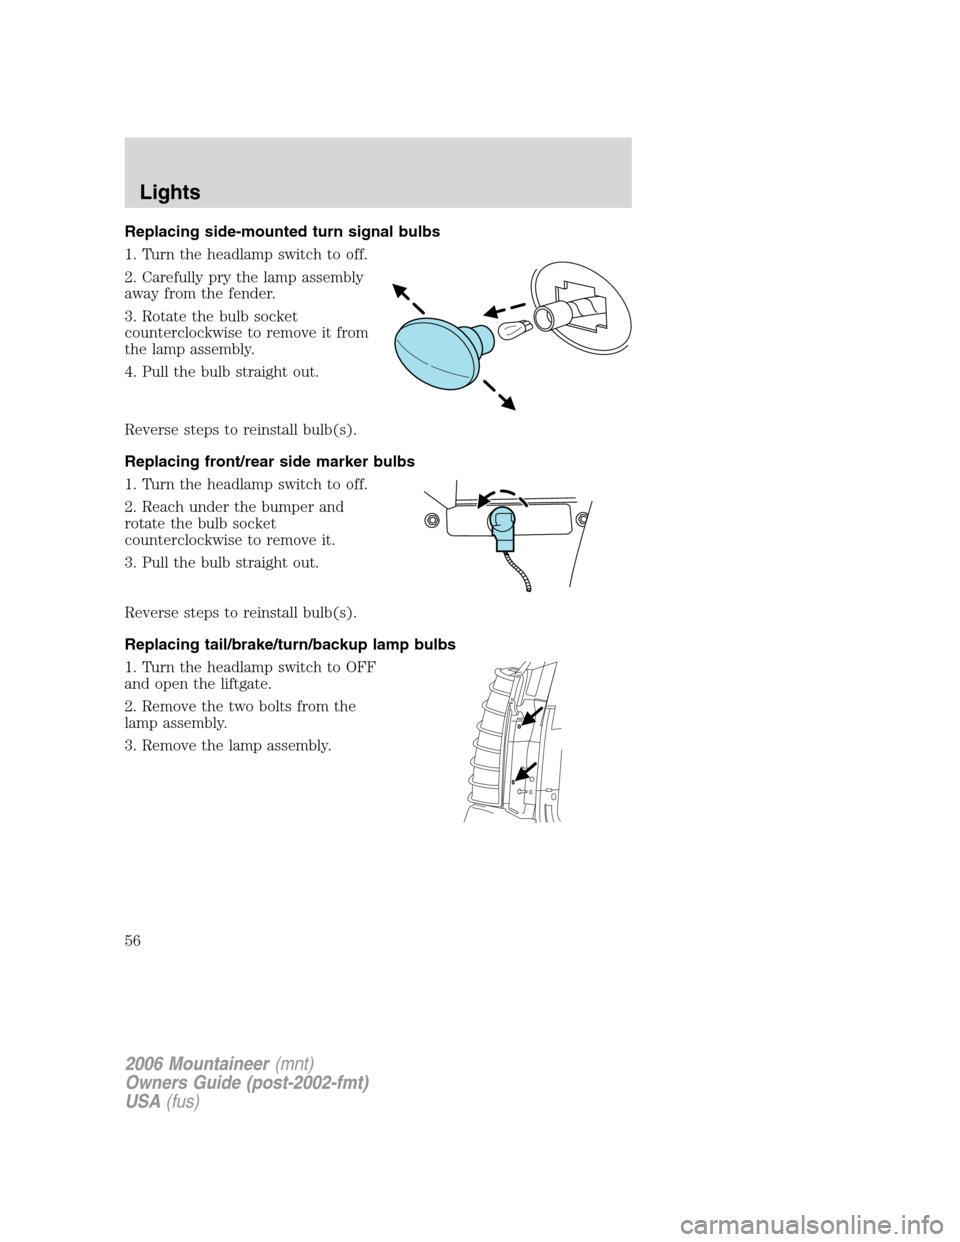
1. Turn the headlamp switch to off.
2. Carefully pry the lamp assembly
away from the fender.
3. Rotate the bulb socket
counterclockwise to remove it from
the lamp assembly.
4. Pull the bulb straight out.
Reverse steps to reinstall bulb(s).
Replacing front/rear side marker bulbs
1. Turn the headlamp switch to off.
2. Reach under the bumper and
rotate the bulb socket
counterclockwise to remove it.
3. Pull the bulb straight out.
Reverse steps to reinstall bulb(s).
Replacing tail/brake/turn/backup lamp bulbs
1. Turn the headlamp switch to OFF
and open the liftgate.
2. Remove the two bolts from the
lamp assembly.
3. Remove the lamp assembly.
2006 Mountaineer(mnt)
Owners Guide (post-2002-fmt)
USA(fus)
Lights
56
Page 57 of 344
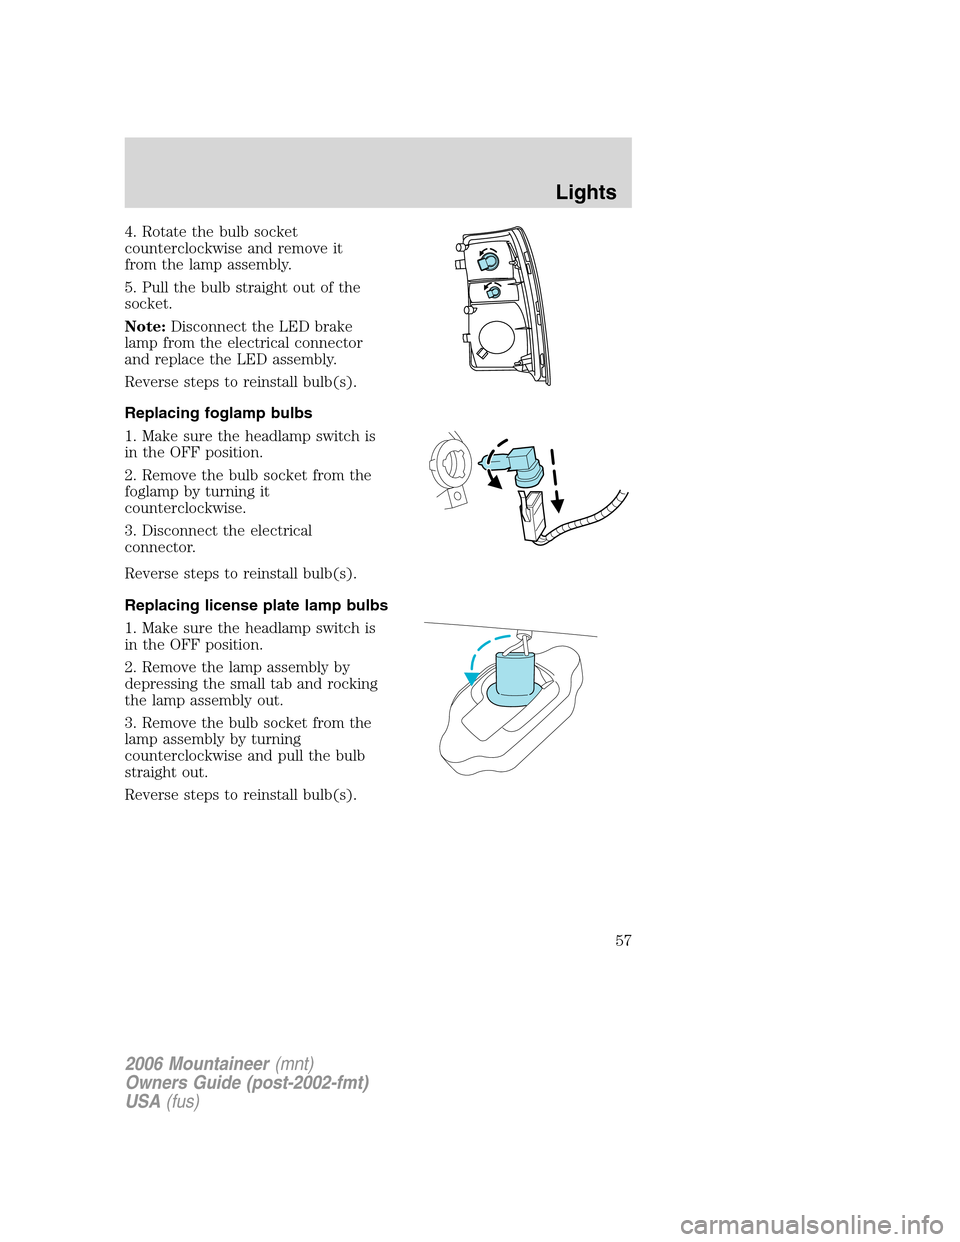
4. Rotate the bulb socket
counterclockwise and remove it
from the lamp assembly.
5. Pull the bulb straight out of the
socket.
Note:Disconnect the LED brake
lamp from the electrical connector
and replace the LED assembly.
Reverse steps to reinstall bulb(s).
Replacing foglamp bulbs
1. Make sure the headlamp switch is
in the OFF position.
2. Remove the bulb socket from the
foglamp by turning it
counterclockwise.
3. Disconnect the electrical
connector.
Reverse steps to reinstall bulb(s).
Replacing license plate lamp bulbs
1. Make sure the headlamp switch is
in the OFF position.
2. Remove the lamp assembly by
depressing the small tab and rocking
the lamp assembly out.
3. Remove the bulb socket from the
lamp assembly by turning
counterclockwise and pull the bulb
straight out.
Reverse steps to reinstall bulb(s).
2006 Mountaineer(mnt)
Owners Guide (post-2002-fmt)
USA(fus)
Lights
57
Page 58 of 344

Replacing high-mount brakelamp bulb
1. Remove the two screws and lamp
assembly away from the vehicle.
2. Remove the bulb holder from the
lamp assembly by depressing the
snaps.
3. Pull the bulb straight out of the
socket and push in the new bulb.
Reverse steps to reinstall bulb(s).
2006 Mountaineer(mnt)
Owners Guide (post-2002-fmt)
USA(fus)
Lights
58
Page 66 of 344

AUTOMATIC DIMMING INSIDE REAR VIEW MIRROR (IF EQUIPPED)
Your vehicle may be equipped with
an inside rear view mirror with an
auto-dimming function. The
electrochromic day/night mirror will
change from the normal (high
reflective) state to the non-glare
(darkened) state when bright lights (glare) reach the mirror. When the
mirror detects bright light from behind the vehicle, it will automatically
adjust (darken) to minimize glare.
The mirror will automatically return to the normal state whenever the
vehicle is placed in R (Reverse) to ensure a bright clear view when
backing up.
Do not block the sensor on the backside of the inside rear view mirror
since this may impair proper mirror performance.
EXTERIOR MIRRORS
Power side view mirrors
The ignition must be in the ACC or ON position to adjust the power side
view mirrors.
To adjust your mirrors:
1. Rotate the control clockwise to
adjust the right mirror and rotate
the control counterclockwise to
adjust the left mirror.
2. Move the control in the direction
you wish to tilt the mirror.
3. Return to the center position to
lock mirrors in place.
2006 Mountaineer(mnt)
Owners Guide (post-2002-fmt)
USA(fus)
Driver Controls
66
Page 82 of 344

1. Select this function from the
SETUP MENU for the current
language to be displayed.
2. Press and hold the TRIP/RESET
control to select a new language.
Selectable languages are English, Spanish, French, Japanese, or Arabic.
3. Press the TRIP/RESET control switch for the next SETUP MENU item
or wait for more than 4 seconds to return to the INFO MENU.
Autolamp
This feature keeps your headlights on for up to three minutes after the
ignition is switched off.
1. To change the time delay of the
autolamp feature, select this
function from the SETUP MENU.
2. Press and hold the TRIP/RESET
control switch to select the new
Autolamp delay time (in seconds)
values of 0, 10, 20, 30, 60, 90, 120 or 180 and wraps back to 0. Selecting
0 will result in no delay feature.
Note:“>” in front of a number indicates current selection.
3. Press the TRIP/RESET control switch for the next SETUP MENU item
or wait for more than 4 seconds return to the INFO MENU.
Autolock
This feature automatically locks all vehicle doors when the vehicle is
shifted into any gear and when the vehicle is in motion over 13 mph (20
km/h) or higher.
1. To disable/enable the autolock
feature, select this function from the
SETUP MENU.
2. Press and hold the TRIP/RESET
control switch to turn the autolock
feature ON or OFF.
3. Press the TRIP/RESET control switch for the next SETUP MENU item
or wait for more than 4 seconds return to the INFO MENU.
Autounlock
This feature automatically unlocks all vehicle doors when the driver’s
door is opened within 10 minutes of the ignition being turned off.
2006 Mountaineer(mnt)
Owners Guide (post-2002-fmt)
USA(fus)
Driver Controls
82
Page 87 of 344

DOOR AJAR.Displayed when a door is not completely closed.
CHECK CHARGING SYSTEM.Displayed when the electrical system is
not maintaining proper voltage when the engine is running. If you are
operating electrical accessories when the engine is idling at a low speed,
turn off as many of the electrical loads as soon as possible. If the
warning stays on or comes on when the engine is operating at normal
speeds, have the electrical system checked as soon as possible.
FUEL LEVEL LOW.Displayed as an early reminder of a low fuel
condition.
PARK BRAKE ENGAGED.Displayed when the manual park brake is
set, the engine is running and the vehicle is driven more than 3 mph (5
km). If the warning stays on after the park brake is released, contact
your authorized dealer as soon as possible.
CHECK BRAKE SYSTEM.Displayed when the braking system is not
operating properly. If the warning stays on or continues to come on,
contact your authorized dealer as soon as possible.
CHECK PARK AID (if equipped).Displayed when the transmission is
in R (Reverse) and the Reverse Sensing System (Park Aid) is disabled.
Refer toReverse Sensing System (Park Aid)in this section to enable.
LOW TIRE PRESSURE.Displayed when one or more tires on your
vehicle have low tire pressure. Refer toInflating Your Tiresin the
Tires, Wheels and Loadingchapter.
TIRE MONITOR FAULT.Displayed when the Tire Pressure Monitoring
System is malfunctioning. If the warning stays on or continues to come
on, have the system inspected by your authorized dealer.
TIRE SENSOR FAULT.Displayed when a tire pressure sensor is
malfunctioning, or your spare tire is in use. For more information on how
the system operates under these conditions, refer toUnderstanding
Your Tire Pressure Monitoring Systemin theTires, Wheels and
Loadingchapter. If the warning stays on or continues to come on, have
the system inspected by your authorized dealer.
BRAKE FLUID LEVEL LOW.Indicates the brake fluid level is low and
the brake system should be inspected immediately. Refer toBrake fluid
reservoirin theMaintenance and Specificationschapter.
CHECK HEADLAMP.Displayed when the headlamps are activated and
at least one bulb is burned out. Check the lamps as soon as possible and
have the burned out lamp replaced. Refer toReplacing headlamp bulbs
in theLightschapter.
2006 Mountaineer(mnt)
Owners Guide (post-2002-fmt)
USA(fus)
Driver Controls
87
Page 88 of 344
CHECK HIGHBEAM LAMP.Displayed when the highbeam lamps are
activated and at least one bulb is burned out. Check the lamps as soon
as possible and have the burned out lamp replaced. Refer toReplacing
headlamp bulbsin theLightschapter.
CHECK TURN LAMP.Displayed when the turn lamps are activated and
at least one bulb is burned out. Check the lamps as soon as possible and
have the burned out lamp replaced. Refer toReplacing headlamp bulbs
in theLightschapter.
WASHER FLUID LEVEL LOW.Indicates the washer fluid reservoir is
less than one quarter full. Check the washer fluid level. Refer to
Windshield washer fluidin theMaintenance and Specifications
chapter.
OIL CHANGE REQUIRED.Displayed when the engine oil life
remaining is 0%.
An oil change is required whenever indicated by the message center and
according to the recommended maintenance schedule. USE ONLY
RECOMMENDED ENGINE OILS.
ENGINE OIL CHANGE SOON.Displayed when the engine oil life
reaches 5% or less of the Oil Life Start Value.
LIFTGATE/GLASS AJAR.Displayed when the liftgate or the liftgate
glass is not completely closed.
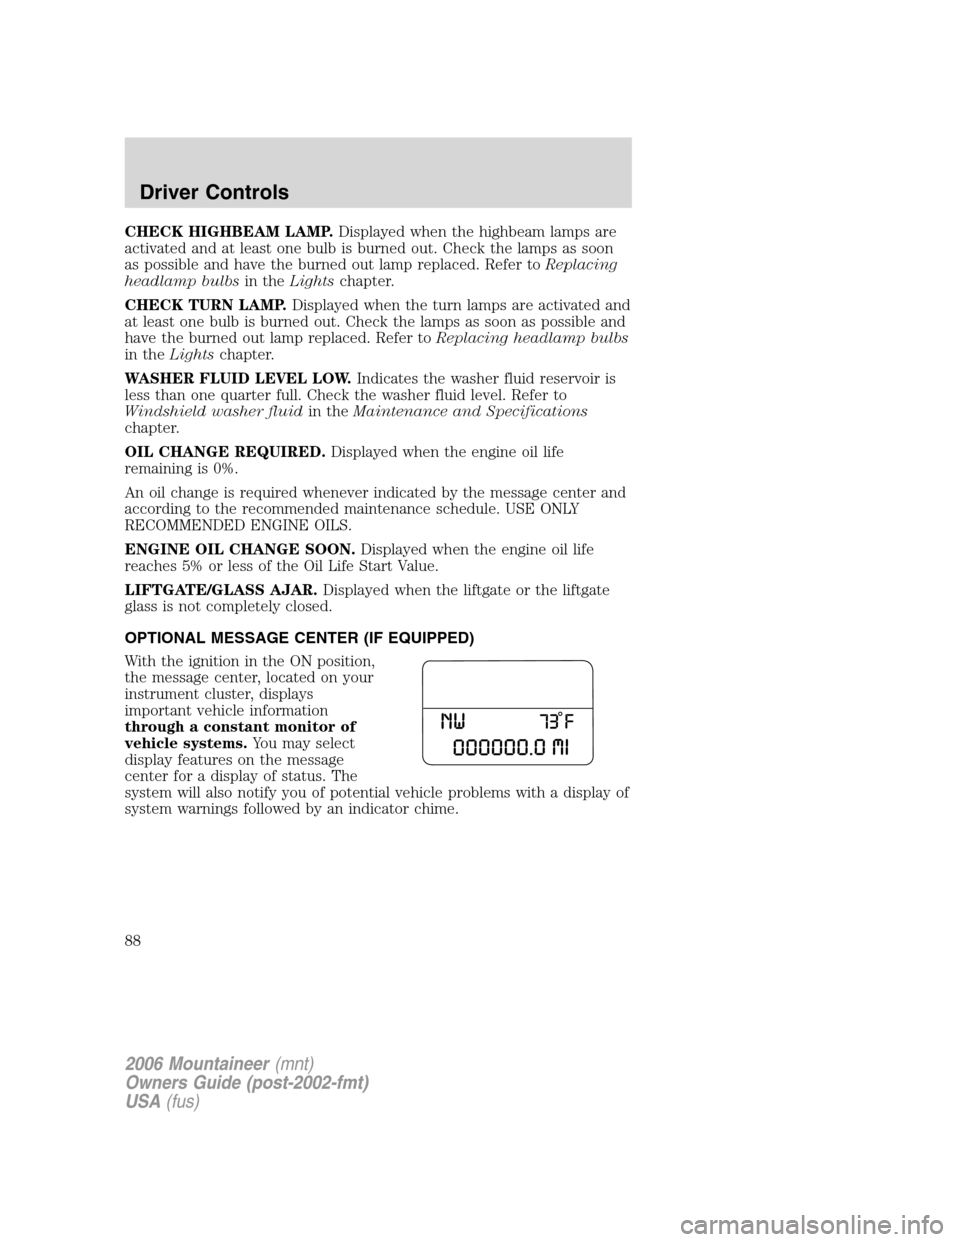
OPTIONAL MESSAGE CENTER (IF EQUIPPED)
With the ignition in the ON position,
the message center, located on your
instrument cluster, displays
important vehicle information
through a constant monitor of
vehicle systems.You may select
display features on the message
center for a display of status. The
system will also notify you of potential vehicle problems with a display of
system warnings followed by an indicator chime.
2006 Mountaineer(mnt)
Owners Guide (post-2002-fmt)
USA(fus)
Driver Controls
88
Page 94 of 344

•Press and hold the RESET
control for more than 2 seconds.
Oil life is set to 100% and “OIL
CHANGE SET TO 100%” is
displayed.
Note:To change oil life 100% miles
value from 5,000 miles (8,000 km)
and 180 days to another value, refer
to theOil Life Start Valueselected from the SETUP MENU in this
section.
Units (English/Metric)
1. Select this function from the
SETUP MENU for the current units
to be displayed.
2. Press the RESET control to
change from English to Metric.
3. Press the RESET control for the
next SETUP MENU item or wait for
more than 4 seconds to return to
the INFO menu.
Language
Note:When entering the SETUP MENU and a non-English language has
been selected, “PRESS RESET FOR ENGLISH” will be displayed to
change back to English.
1. Select this function from the
SETUP MENU for the current
language to be displayed.
2. Press the RESET control to cycle
the message center through each of
the language choices to the desired
language.
Selectable languages are English, Spanish, French, Japanese, or Arabic.
3. Press the RESET control for the next SETUP MENU item or wait for
more than 4 seconds to return to the INFO menu.
Autolamp
This feature keeps your headlights on for up to three minutes after the
ignition is switched off.
2006 Mountaineer(mnt)
Owners Guide (post-2002-fmt)
USA(fus)
Driver Controls
94