light Mercury Mountaineer 2007 s Owner's Guide
[x] Cancel search | Manufacturer: MERCURY, Model Year: 2007, Model line: Mountaineer, Model: Mercury Mountaineer 2007Pages: 360, PDF Size: 3.36 MB
Page 62 of 360
CD, MP3 and CD player care
•Handle discs by their edges only. Never touch the playing surface.
•Do not expose discs to direct sunlight or heat sources for extended
periods of time.
•Do not insert more than one disc into the slot of the CD player
(if equipped).
•Always store discs out of direct sunlight. Excessive heat may damage
or warp discs.
•Use care when handling and playing CD-R and CD-RW discs, which
are more susceptible to damage from heat, light and stress than are
regular CDs.
•Always insert and remove a disc by holding the disc flat, with the
playing surface facing down, in order to prevent damage to the disc or
the player.
•Never insert any object other than a compact disc (CD) or digital
versatile disc (DVD) into the player, as doing so may damage the
player and may cause injury to you.
•Do not disassemble the player. The laser used in disc playback is
extremely harmful to the eyes.
The FES DVD system is designed to play commercially pressed
12 cm (4.75 in) audio compact discs and digital versatile discs
(DVD) only. Due to technical incompatibility, certain recordable
and re-recordable compact discs may not function correctly when
used in Ford CD and DVD players. Irregular shaped CDs or DVDs,
CDs or DVDs with a scratch protection film attached, and CDs
with homemade paper (adhesive) labels should not be inserted
into the FES DVD system. The label may peel and cause the CD
or DVD to become jammed. It is recommended that homemade
CDs or DVDs be identified with permanent felt tip marker rather
than adhesive labels. Ball point pens may damage CDs or DVDs.
Please contact your authorized dealer for further information.
Playing a DVD
1. Ensure that the vehicle ignition is in the RUN or ACCESSORY
position.
2. Ensure that the navigation system is on.
3. Insert a DVD label-side up into the system.
2007 Mountaineer(mnt)
Owners Guide (post-2002-fmt)
USA(fus)
Entertainment Systems
62
Page 64 of 360
2. Press the right cursor button. The
DVD will advance one frame. Each
press of the right cursor button will
advance the DVD video by one
frame.
Headphone/auxiliary jacks
There are wired headphones (not included) and auxiliary jacks on the
left and right side of your DVD system. They can be used to plug in
wired headphones or to connect and play auxiliary electronic devices
such as game systems, personal camcorders, video cassette recorders,
etc.
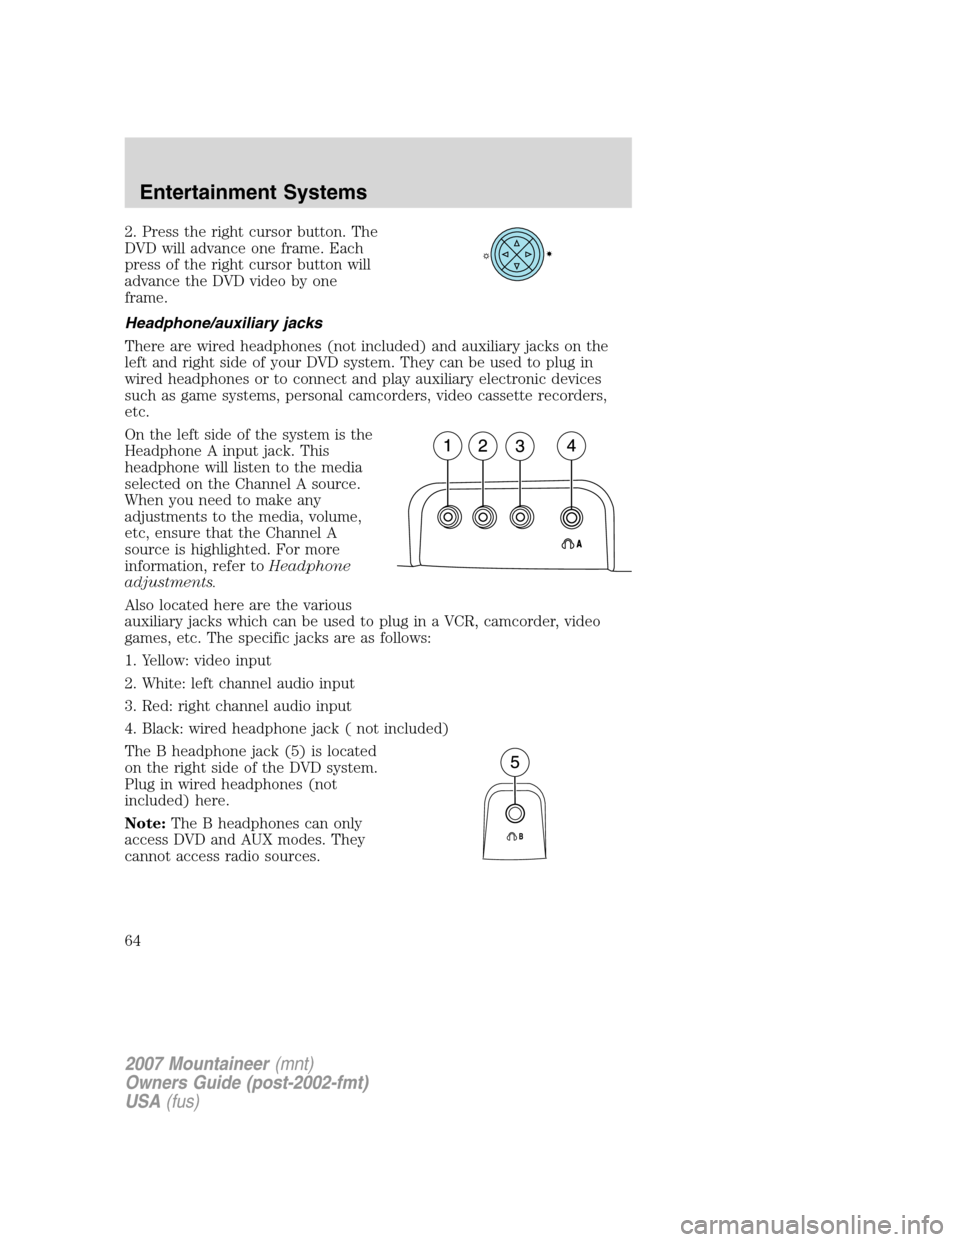
On the left side of the system is the
Headphone A input jack. This
headphone will listen to the media
selected on the Channel A source.
When you need to make any
adjustments to the media, volume,
etc, ensure that the Channel A
source is highlighted. For more
information, refer toHeadphone
adjustments.
Also located here are the various
auxiliary jacks which can be used to plug in a VCR, camcorder, video
games, etc. The specific jacks are as follows:
1. Yellow: video input
2. White: left channel audio input
3. Red: right channel audio input
4. Black: wired headphone jack ( not included)
The B headphone jack (5) is located
on the right side of the DVD system.
Plug in wired headphones (not
included) here.
Note:The B headphones can only
access DVD and AUX modes. They
cannot access radio sources.
2007 Mountaineer(mnt)
Owners Guide (post-2002-fmt)
USA(fus)
Entertainment Systems
64
Page 67 of 360
The front glass on the liquid crystal display (LCD) flip-down
screen may break when hit with a hard surface. If the glass
breaks, do not touch the liquid crystalline material. In case of contact
with skin, wash immediately with soap and water.
The driver should not attempt to operate any function of the
DVD system while the vehicle is in motion. Give full attention to
driving and to the road. Pull off the road in a safe place before
inserting or extracting DVDs from the system. A remote control is
included in the system to allow the rear seat occupants to operate the
FES functions without distracting the driver.
Do not expose the liquid crystal display (LCD) flip-down screen
to direct sunlight or intensive ultraviolet rays for extensive
periods of time. Ultraviolet rays deteriorate the liquid crystal.
Be sure to review User Manuals for video games and video game
equipment when used as auxiliary inputs for your Family Entertainment
System (FES).
Do not operate video games or video equipment if the power cords
and/or cables are broken, split or damaged. Carefully place cords and/or
cables where they will not be stepped on or interfere with the operation
of seats and/or compartments.
Disconnect video games and video equipment power cords and/or cables
when not in use.
Avoid touching auxiliary input jacks with your fingers. Do not blow on
them or allow them to get wet or dirty.
Do not clean any part of the DVD player with benzene, paint thinner or
any other solvent.
Federal Communication Commission (FCC) Compliance
Changes or modifications not approved by Ford Lincoln-Mercury could
void user’s authority to operate the equipment. This equipment has been
tested and found to comply with the limits for a Class B digital device,
pursuant to Part 15 of the FCC Rules. These limits are designed to
provide reasonable protection against harmful interference in a
residential installation. This equipment generates, uses and can radiate
radio frequency energy and, if not installed and used in accordance with
the instructions, may cause harmful interference and radio
communications.
2007 Mountaineer(mnt)
Owners Guide (post-2002-fmt)
USA(fus)
Entertainment Systems
67
Page 68 of 360
However, there is no guarantee that interference will not occur in a
particular installation. If this equipment does cause harmful interference
to radio or television reception, which can be determined by turning the
equipment off and on, the user is encouraged to consult the dealer or an
experienced radio/TV technician for help.
Care and service of the DVD player
Environmental extremes
DVD players which are subjected to harsh environmental conditions may
be damaged or perform at less than maximum capability. To avoid these
outcomes, whenever possible avoid exposing your DVD player to:
•extremely hot or cold temperatures.
•direct sunlight.
•high humidity.
•a dusty environment.
•locations where strong magnetic fields are generated.
Temperature extremes
When the vehicle is parked under direct sunlight or in an extremely cold
place for a long period of time, wait until the cabin temperature of the
vehicle is at normal temperature before operating the system.
Humidity and moisture condensation
Moisture in the air will condense in the DVD player under extremely
humid conditions or when moving from a cold place to a warm one.
Moisture condensation may cause damage to the DVD and/or player. If
moisture condensation occurs, do not insert a CD or DVD into the
player. If one is already in the player, remove it. Turn the DVD player ON
to dry the moisture before inserting a DVD. This could take an hour or
more.
Foreign substances
Exercise care to prevent dirt and foreign objects from entering the DVD
player compartment. Be especially careful not to spill liquids of any kind
onto the media controls or into the system. If liquid is accidentally
spilled onto the system, immediately turn the system OFF and consult a
qualified service technician.
Cleaning the liquid crystal display (LCD) flip-down screen
Clean the display screen by applying a small amount of water or any
ammonia-based household glass cleaner directly to a soft cloth. Rub the
2007 Mountaineer(mnt)
Owners Guide (post-2002-fmt)
USA(fus)
Entertainment Systems
68
Page 71 of 360
•Remove any snow, ice or leaves from the air intake area at the base of
the windshield.
•To improve the A/C cool down when the vehicle interior is
significantly warmer than the outside temperature, drive with the
windows slightly open for 2–3 minutes after start up or until the
vehicle has been “aired out.”
For maximum cooling performance in panel (
) mode:
•Select MAX A/C mode. MAX A/C uses recirculated air with A/C to
provide a cooler airflow.
•Move the temperature control to the coolest setting.
•Set the fan to the highest speed initially, then adjust in order to
maintain comfort.
To allow side window defogging and demisting while warming up the
vehicle cabin:
1. Select
.
2. Select A/C.
3. Set the temperature control to maintain comfort.
4. Set the fan speed to the highest setting.
5. Direct the outer instrument panel vents towards the side windows. To
increase airflow to the outer instrument panel vents, close the vents
located in the middle of the instrument panel.
To allow windshield defogging and demisting while warming up vehicle:
1. Select
floor/defrost mode.
2. Set temperature control to maintain comfort.
3. Set fan to highest setting.
Do not place objects on top of the instrument panel as these
objects may become projectiles in a collision or sudden stop.
2007 Mountaineer(mnt)
Owners Guide (post-2002-fmt)
USA(fus)
Climate Controls
71
Page 74 of 360
pressed again. The external temperature will be most accurate when the
vehicle has been moving for a period of time.
17.Temperature conversion:
Press to toggle between Fahrenheit
and Celsius temperature on the
DATC display only. The set point temperatures in Celsius will be
displayed in half-degree increments.
Operating tips
•To reduce fog build up on the windshield during humid weather, place
the air flow selector in the
position.
•To reduce humidity build up inside the vehicle, do not drive with the
air flow selector in OFF or with recirculated air engaged.
•Do not put objects under the front seats that will interfere with the
airflow to the rear seats.
•Remove any snow, ice or leaves from the air intake area at the base of
the windshield.
•To improve the A/C cool down, drive with the windows slightly open
for 2–3 minutes after start up or until the vehicle has been “aired out.”
For maximum cooling performance:
•Select and A/C and recirculated air. Use recirculated air with A/C to
provide a cooler airflow.
•Move the temperature control to the coolest setting.
To allow side window defogging and demisting while warming up the
vehicle cabin:
1. Select
.
2. Select A/C.
3. Set the temperature control to maintain comfort.
4. Set the fan speed to the highest setting.
5. Direct the outer instrument panel vents towards the side windows. To
increase airflow to the outer instrument panel vents, close the vents
located in the middle of the instrument panel.
Do not place objects on top of the instrument panel as these
objects may become projectiles in a collision or sudden stop.
F C
2007 Mountaineer(mnt)
Owners Guide (post-2002-fmt)
USA(fus)
Climate Controls
74
Page 76 of 360
The ignition must be in the 3 (ON) position to operate the rear window
defroster.
The defroster turns off automatically after 10 minutes or when the
ignition is turned to the 1 (OFF/LOCK) or 2 (ACC) position. To manually
turn off the defroster before 10 minutes have passed, push the control
again.
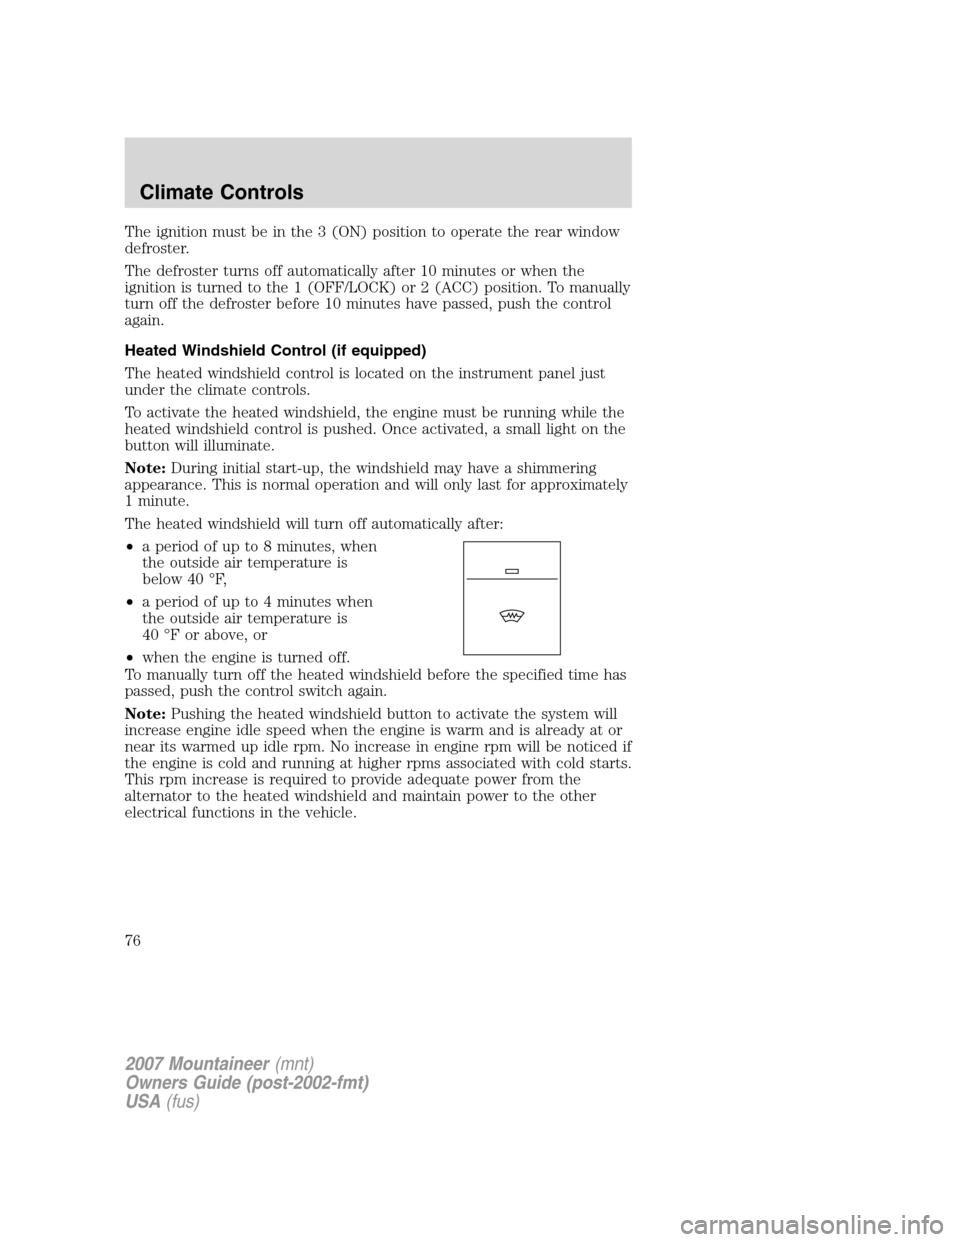
Heated Windshield Control (if equipped)
The heated windshield control is located on the instrument panel just
under the climate controls.
To activate the heated windshield, the engine must be running while the
heated windshield control is pushed. Once activated, a small light on the
button will illuminate.
Note:During initial start-up, the windshield may have a shimmering
appearance. This is normal operation and will only last for approximately
1 minute.
The heated windshield will turn off automatically after:
•a period of up to 8 minutes, when
the outside air temperature is
below 40 °F,
•a period of up to 4 minutes when
the outside air temperature is
40 °F or above, or
•when the engine is turned off.
To manually turn off the heated windshield before the specified time has
passed, push the control switch again.
Note:Pushing the heated windshield button to activate the system will
increase engine idle speed when the engine is warm and is already at or
near its warmed up idle rpm. No increase in engine rpm will be noticed if
the engine is cold and running at higher rpms associated with cold starts.
This rpm increase is required to provide adequate power from the
alternator to the heated windshield and maintain power to the other
electrical functions in the vehicle.
2007 Mountaineer(mnt)
Owners Guide (post-2002-fmt)
USA(fus)
Climate Controls
76
Page 77 of 360
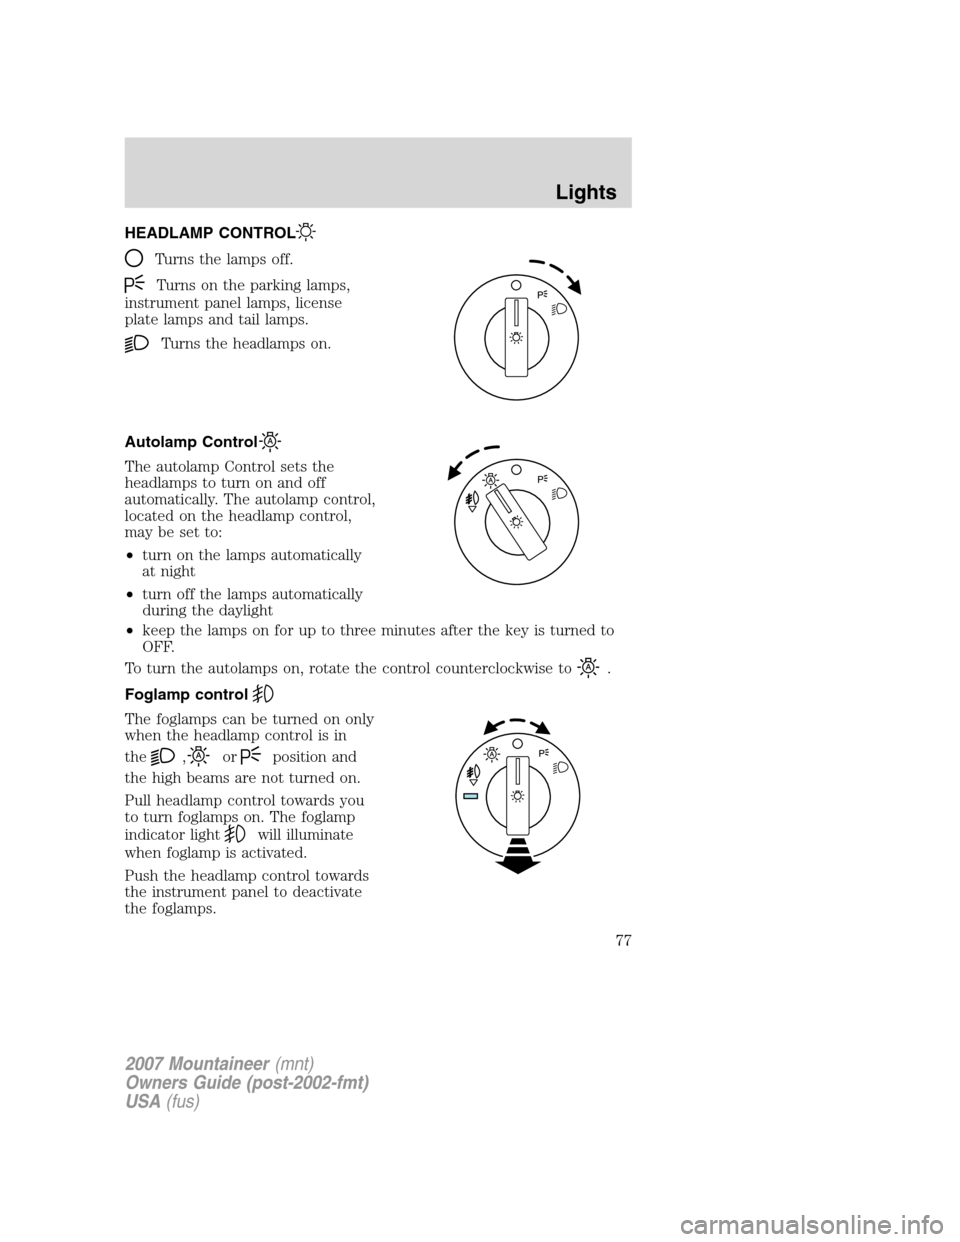
HEADLAMP CONTROL
Turns the lamps off.
Turns on the parking lamps,
instrument panel lamps, license
plate lamps and tail lamps.
Turns the headlamps on.
Autolamp Control
The autolamp Control sets the
headlamps to turn on and off
automatically. The autolamp control,
located on the headlamp control,
may be set to:
•turn on the lamps automatically
at night
•turn off the lamps automatically
during the daylight
•keep the lamps on for up to three minutes after the key is turned to
OFF.
To turn the autolamps on, rotate the control counterclockwise to
.
Foglamp control
The foglamps can be turned on only
when the headlamp control is in
the
,orposition and
the high beams are not turned on.
Pull headlamp control towards you
to turn foglamps on. The foglamp
indicator light
will illuminate
when foglamp is activated.
Push the headlamp control towards
the instrument panel to deactivate
the foglamps.
2007 Mountaineer(mnt)
Owners Guide (post-2002-fmt)
USA(fus)
Lights
77
Page 78 of 360
Daytime running lamps (DRL) (if equipped)
To activate DRL:
•the ignition must be in the ON position and
•the headlamp control is in the
orposition
•the transmission is not in park.
Always remember to turn on your headlamps at dusk or during
inclement weather. The Daytime Running Light (DRL) System
does not activate your tail lamps and generally may not provide
adequate lighting during these conditions. Failure to activate your
headlamps under these conditions may result in a collision.
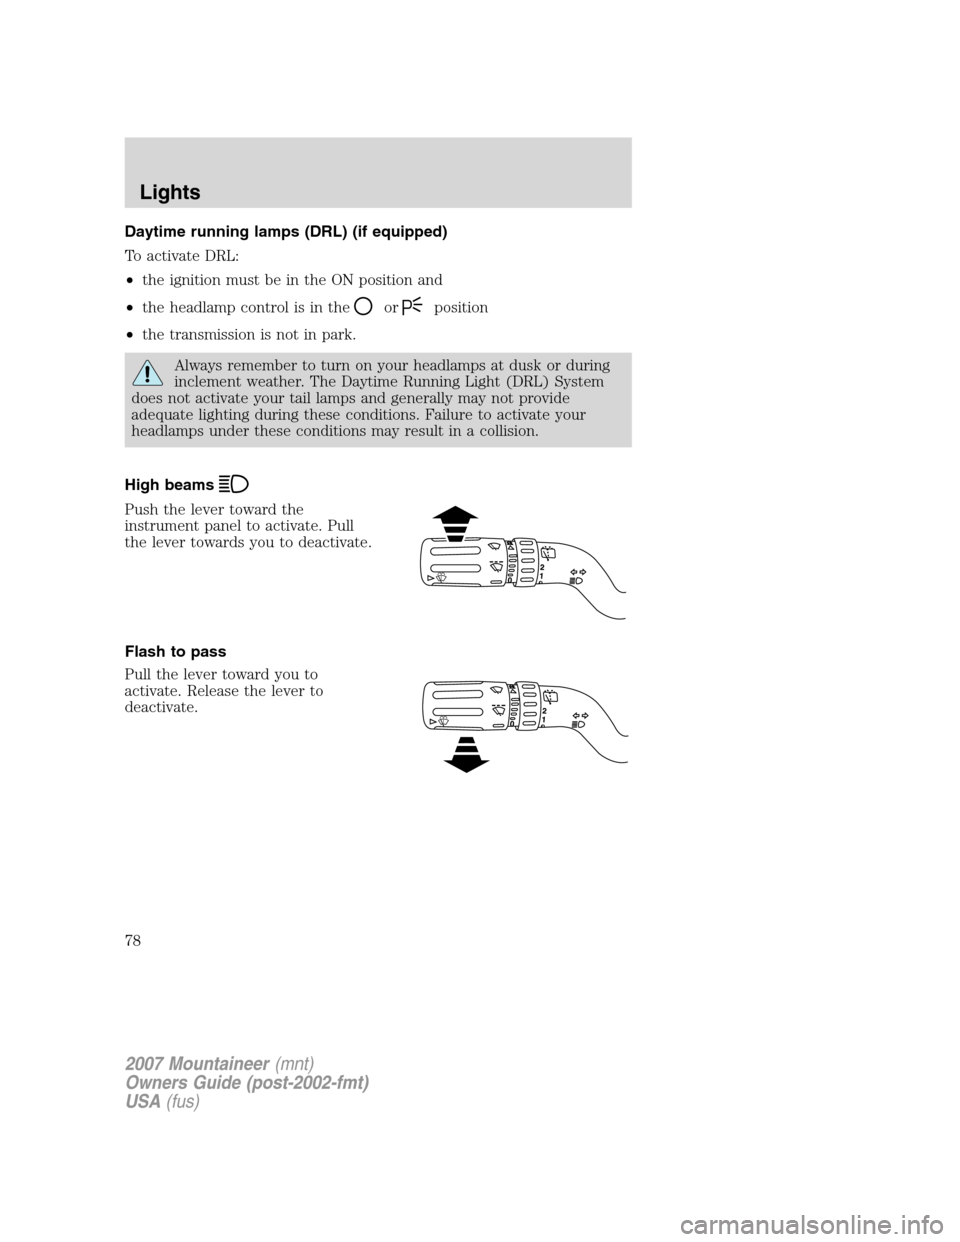
High beams
Push the lever toward the
instrument panel to activate. Pull
the lever towards you to deactivate.
Flash to pass
Pull the lever toward you to
activate. Release the lever to
deactivate.
2007 Mountaineer(mnt)
Owners Guide (post-2002-fmt)
USA(fus)
Lights
78
Page 79 of 360
PANEL DIMMER CONTROL
Use to adjust the brightness of the
instrument panel when exterior
lights are on.
•Rotate the thumbwheel from left
to right to brighten the
instrument panel.
•Rotate the thumbwheel from right
to left to dim the instrument
panel.
•Rotate fully to the right (past detent) to turn on interior lamps.
•Rotate to the left position (past detent) to turn off the interior lamps
and will also disable the illuminated entry feature.
AIMING THE HEADLAMPS
The headlamps on your vehicle are properly aimed before leaving the
assembly plant. If your vehicle is involved in an accident or if you have
problems fixing the alignment of your headlamps, have them checked by
a qualified service technician.
Headlamp aim adjustment
The headlamps on your vehicle can only be vertically adjusted. Your
vehicle does not require horizontal aim adjustments.
To adjust the headlamps:
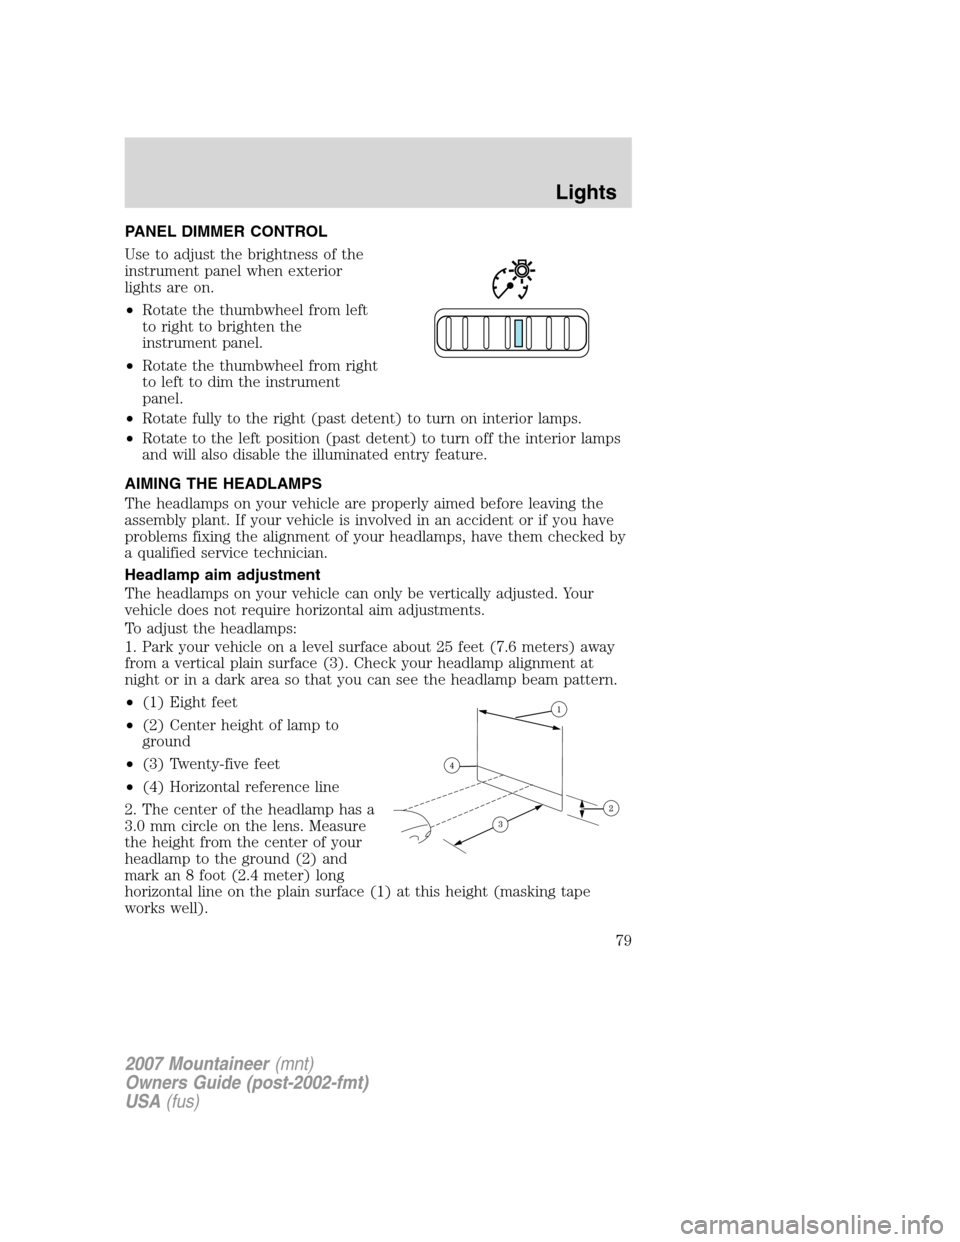
1. Park your vehicle on a level surface about 25 feet (7.6 meters) away
from a vertical plain surface (3). Check your headlamp alignment at
night or in a dark area so that you can see the headlamp beam pattern.
•(1) Eight feet
•(2) Center height of lamp to
ground
•(3) Twenty-five feet
•(4) Horizontal reference line
2. The center of the headlamp has a
3.0 mm circle on the lens. Measure
the height from the center of your
headlamp to the ground (2) and
mark an 8 foot (2.4 meter) long
horizontal line on the plain surface (1) at this height (masking tape
works well).
2007 Mountaineer(mnt)
Owners Guide (post-2002-fmt)
USA(fus)
Lights
79