buttons Mercury Mountaineer 2008 Pioneer Navigation System Supplement
[x] Cancel search | Manufacturer: MERCURY, Model Year: 2008, Model line: Mountaineer, Model: Mercury Mountaineer 2008Pages: 164, PDF Size: 4.44 MB
Page 48 of 164
QUICK TOUCH BUTTONS
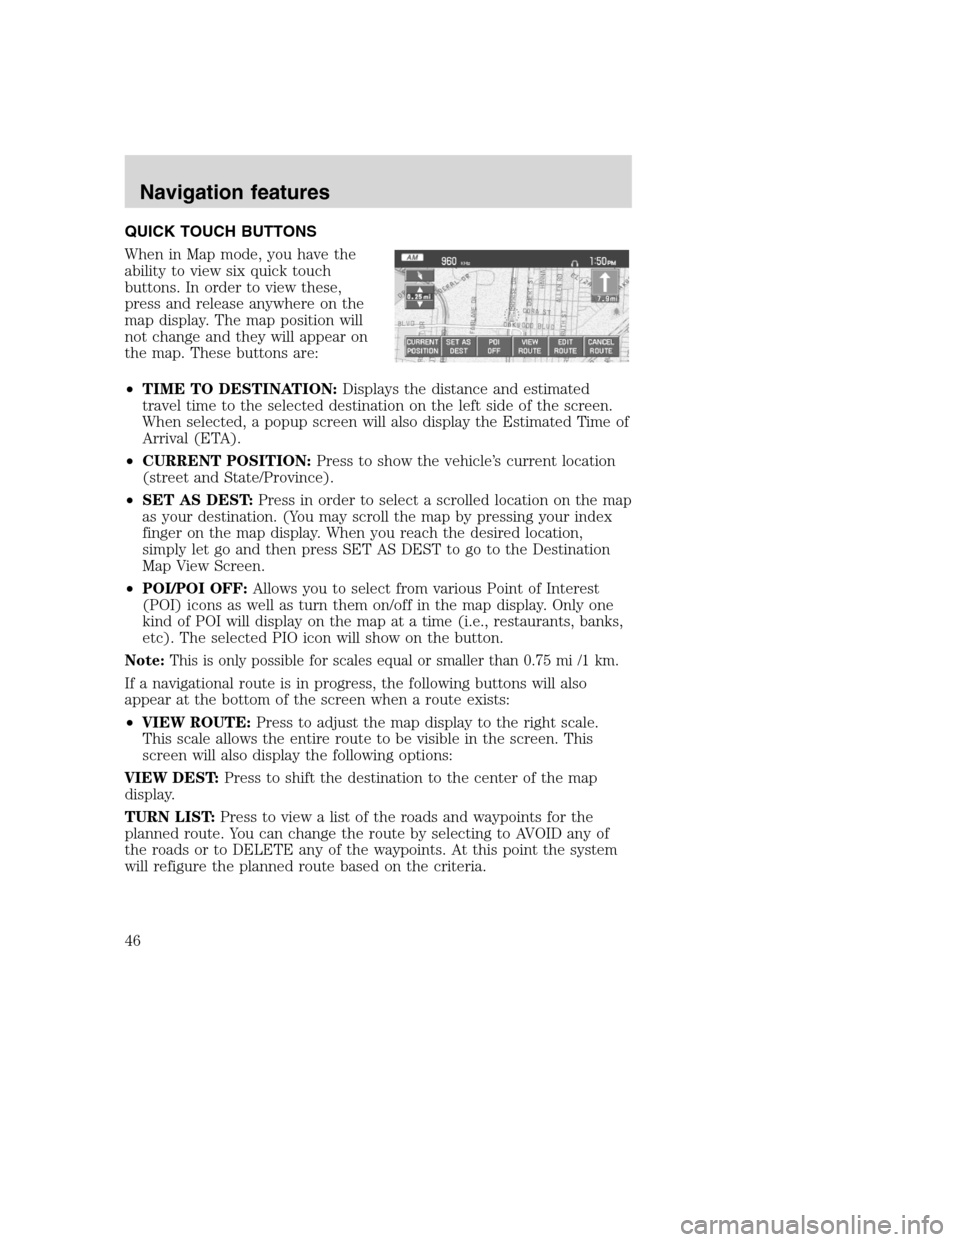
When in Map mode, you have the
ability to view six quick touch
buttons. In order to view these,
press and release anywhere on the
map display. The map position will
not change and they will appear on
the map. These buttons are:
•TIME TO DESTINATION:Displays the distance and estimated
travel time to the selected destination on the left side of the screen.
When selected, a popup screen will also display the Estimated Time of
Arrival (ETA).
•CURRENT POSITION:Press to show the vehicle’s current location
(street and State/Province).
•SET AS DEST:Press in order to select a scrolled location on the map
as your destination. (You may scroll the map by pressing your index
finger on the map display. When you reach the desired location,
simply let go and then press SET AS DEST to go to the Destination
Map View Screen.
•POI/POI OFF:Allows you to select from various Point of Interest
(POI) icons as well as turn them on/off in the map display. Only one
kind of POI will display on the map at a time (i.e., restaurants, banks,
etc). The selected PIO icon will show on the button.
Note:This is only possible for scales equal or smaller than 0.75 mi /1 km.
If a navigational route is in progress, the following buttons will also
appear at the bottom of the screen when a route exists:
•VIEW ROUTE:Press to adjust the map display to the right scale.
This scale allows the entire route to be visible in the screen. This
screen will also display the following options:
VIEW DEST:Press to shift the destination to the center of the map
display.
TURN LIST:Press to view a list of the roads and waypoints for the
planned route. You can change the route by selecting to AVOID any of
the roads or to DELETE any of the waypoints. At this point the system
will refigure the planned route based on the criteria.
2008(nv1)
Supplement
USA(fus)
Navigation features
46
Page 53 of 164
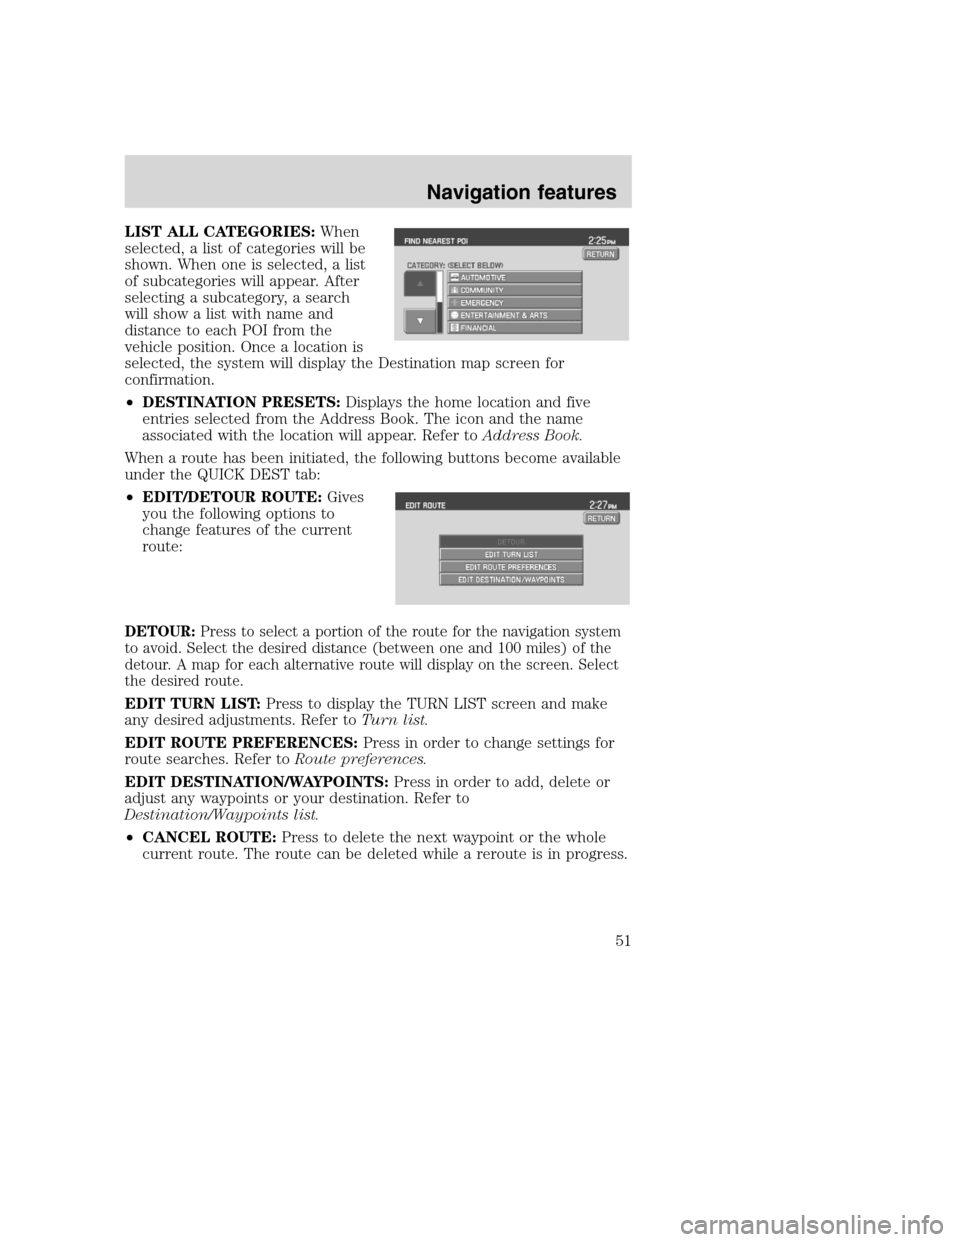
LIST ALL CATEGORIES:When
selected, a list of categories will be
shown. When one is selected, a list
of subcategories will appear. After
selecting a subcategory, a search
will show a list with name and
distance to each POI from the
vehicle position. Once a location is
selected, the system will display the Destination map screen for
confirmation.
•DESTINATION PRESETS:Displays the home location and five
entries selected from the Address Book. The icon and the name
associated with the location will appear. Refer toAddress Book.
When a route has been initiated, the following buttons become available
under the QUICK DEST tab:
•EDIT/DETOUR ROUTE:Gives
you the following options to
change features of the current
route:
DETOUR:Press to select a portion of the route for the navigation system
to avoid. Select the desired distance (between one and 100 miles) of the
detour. A map for each alternative route will display on the screen. Select
the desired route.
EDIT TURN LIST:Press to display the TURN LIST screen and make
any desired adjustments. Refer toTurn list.
EDIT ROUTE PREFERENCES:Press in order to change settings for
route searches. Refer toRoute preferences.
EDIT DESTINATION/WAYPOINTS:Press in order to add, delete or
adjust any waypoints or your destination. Refer to
Destination/Waypoints list.
•CANCEL ROUTE:Press to delete the next waypoint or the whole
current route. The route can be deleted while a reroute is in progress.
2008(nv1)
Supplement
USA(fus)
Navigation features
51
Page 63 of 164
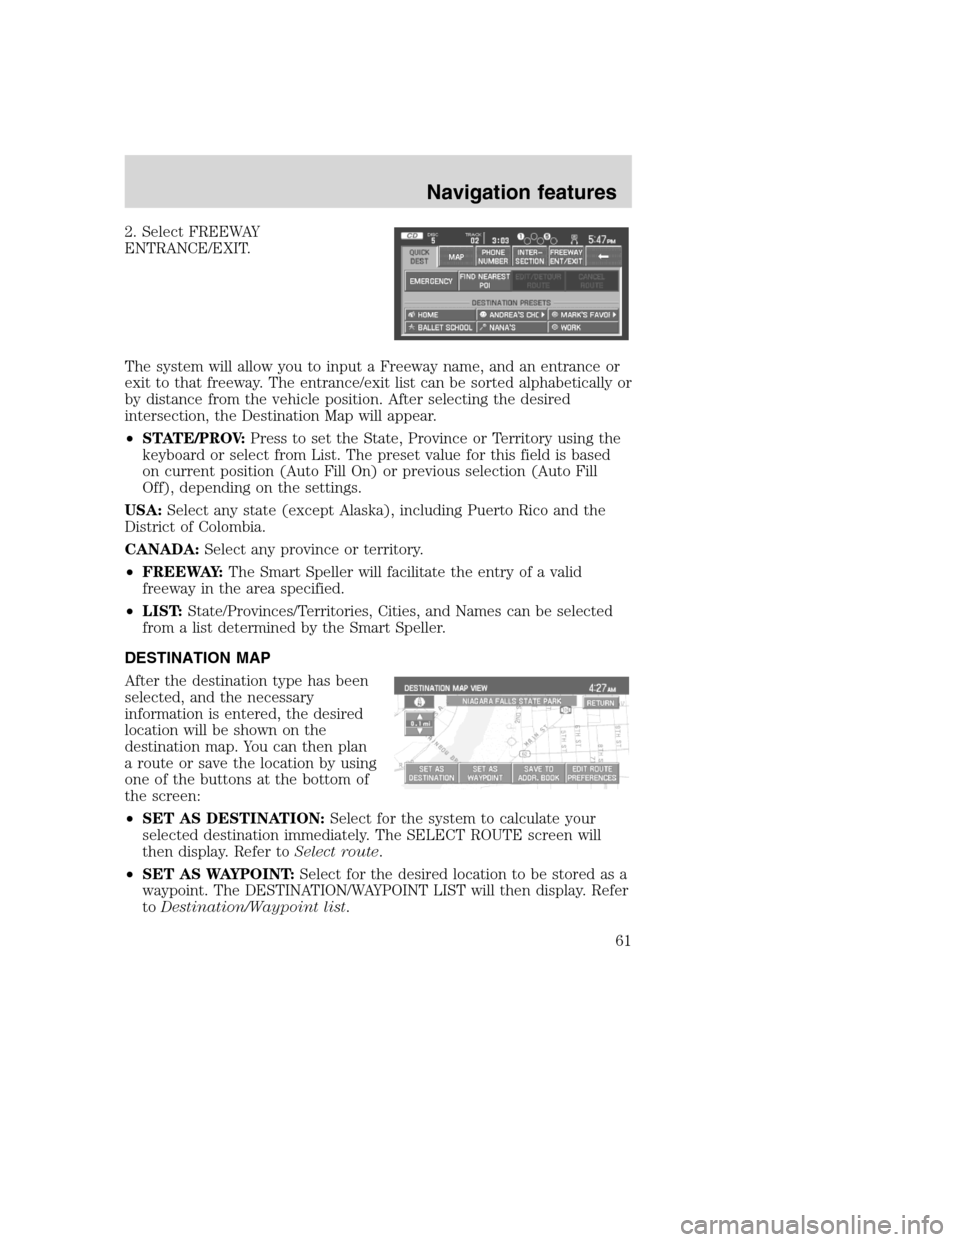
2. Select FREEWAY
ENTRANCE/EXIT.
The system will allow you to input a Freeway name, and an entrance or
exit to that freeway. The entrance/exit list can be sorted alphabetically or
by distance from the vehicle position. After selecting the desired
intersection, the Destination Map will appear.
•STATE/PROV:Press to set the State, Province or Territory using the
keyboard or select from List. The preset value for this field is based
on current position (Auto Fill On) or previous selection (Auto Fill
Off), depending on the settings.
USA:Select any state (except Alaska), including Puerto Rico and the
District of Colombia.
CANADA:Select any province or territory.
•FREEWAY:The Smart Speller will facilitate the entry of a valid
freeway in the area specified.
•LIST:State/Provinces/Territories, Cities, and Names can be selected
from a list determined by the Smart Speller.
DESTINATION MAP
After the destination type has been
selected, and the necessary
information is entered, the desired
location will be shown on the
destination map. You can then plan
a route or save the location by using
one of the buttons at the bottom of
the screen:
•SET AS DESTINATION:Select for the system to calculate your
selected destination immediately. The SELECT ROUTE screen will
then display. Refer toSelect route.
•SET AS WAYPOINT:Select for the desired location to be stored as a
waypoint. The DESTINATION/WAYPOINT LIST will then display. Refer
toDestination/Waypoint list.
2008(nv1)
Supplement
USA(fus)
Navigation features
61
Page 71 of 164
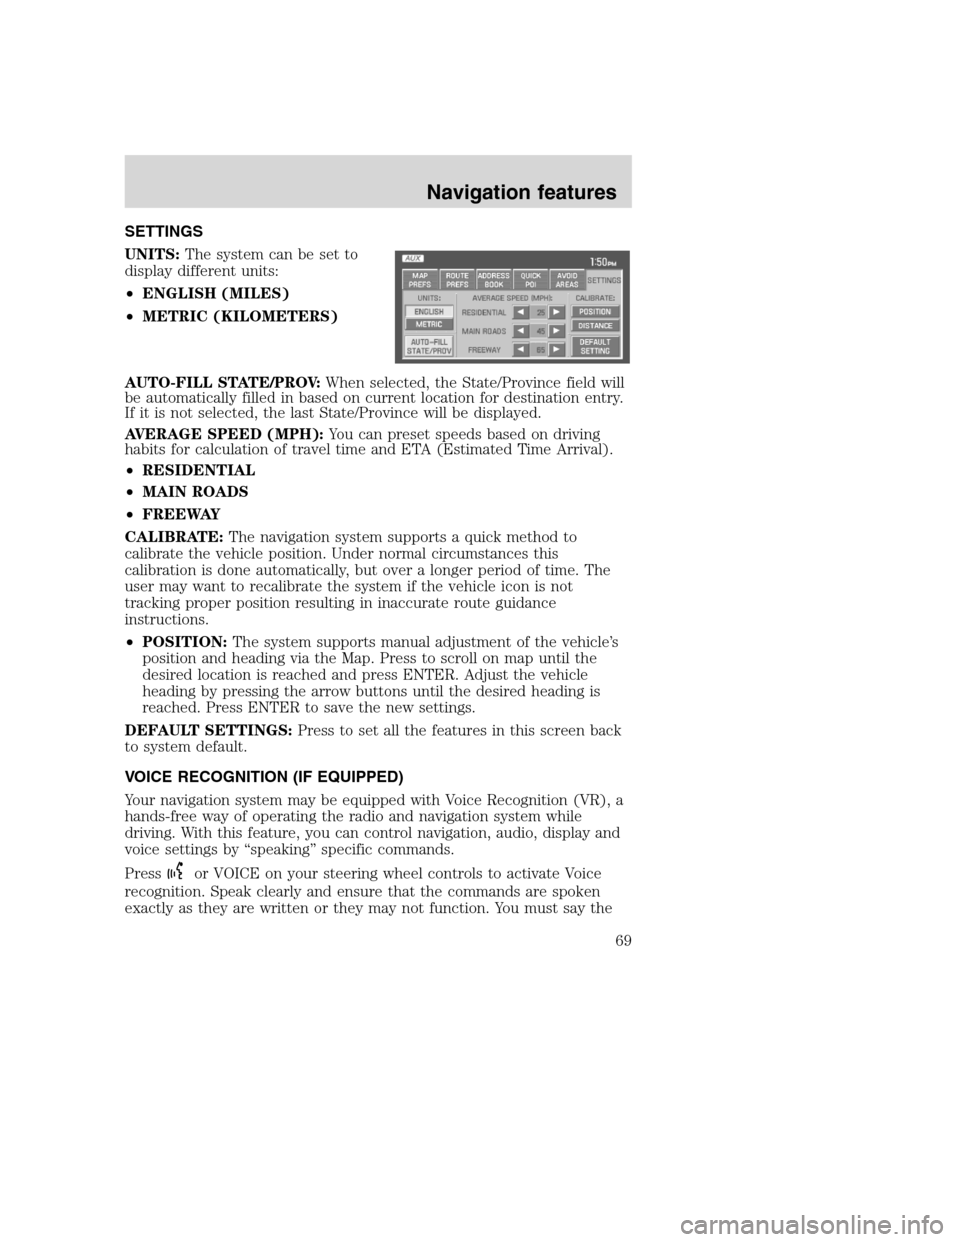
SETTINGS
UNITS:The system can be set to
display different units:
•ENGLISH (MILES)
•METRIC (KILOMETERS)
AUTO-FILL STATE/PROV:When selected, the State/Province field will
be automatically filled in based on current location for destination entry.
If it is not selected, the last State/Province will be displayed.
AVERAGE SPEED (MPH):You can preset speeds based on driving
habits for calculation of travel time and ETA (Estimated Time Arrival).
•RESIDENTIAL
•MAIN ROADS
•FREEWAY
CALIBRATE:The navigation system supports a quick method to
calibrate the vehicle position. Under normal circumstances this
calibration is done automatically, but over a longer period of time. The
user may want to recalibrate the system if the vehicle icon is not
tracking proper position resulting in inaccurate route guidance
instructions.
•POSITION:The system supports manual adjustment of the vehicle’s
position and heading via the Map. Press to scroll on map until the
desired location is reached and press ENTER. Adjust the vehicle
heading by pressing the arrow buttons until the desired heading is
reached. Press ENTER to save the new settings.
DEFAULT SETTINGS:Press to set all the features in this screen back
to system default.
VOICE RECOGNITION (IF EQUIPPED)
Your navigation system may be equipped with Voice Recognition (VR), a
hands-free way of operating the radio and navigation system while
driving. With this feature, you can control navigation, audio, display and
voice settings by “speaking” specific commands.
Press
or VOICE on your steering wheel controls to activate Voice
recognition. Speak clearly and ensure that the commands are spoken
exactly as they are written or they may not function. You must say the
2008(nv1)
Supplement
USA(fus)
Navigation features
69
Page 82 of 164
For the best system performance, please adhere to the following:
•The interior of the vehicle needs to be as quiet as possible. Wind noise
from open windows, road vibrations, and radio volume may prevent
the system from correctly recognizing voice commands.
•Wait until the tone sounds after pressing the push to talk button
before speaking a command.
•Speak naturally without large pauses in between words.
•Please realize voice recognition performance is not 100% and varies by
user. The voice recognition system is meant to be a secondary
convenience control and if it doesn’t operate optimally, users can still
operate their navigation system via the touch screen and hard buttons.
To speak voice commands:
1. Push VOICE or
on the steering wheel. A tone will sound.
2. ‘Main Menu’ and
will appear in the status bar.
3. The system will speak the available voice commands and a tone will
sound.
4. ‘Listening’ and
will appear in the status bar and the system
waits for your response.
5. If the system is not confident that it recognized your voice command,
it will ask for a confirmation of yes or no.
6. If the system does not recognize or hear the your voice command, it will
say, “Sorry, please say....“andrepeat the available voice commands.
The voice failed icon
will be displayed in the status bar.
7. If the system does not recognize or hear your voice command a
second time, the system will say, “Sorry, please press the voice button
and try again” and the voice session is terminated.
8. Once confirmation / recognition takes place, the voice success
icon
is displayed. The system will speak the next level of available
commands, a tone will sound, and the appropriate voice menu name and
icon will be displayed.
9. If the voice session is not complete, the system will then speak the
next set of available voice commands, a tone will sound, and the system
will display ‘listening’
and again, waits for a response.
10. This sequence of events occurs until the voice recognition session is
complete.
2008(nv1)
Supplement
USA(fus)
Navigation features
80
Page 91 of 164
CLEANING THE NAVIGATION DISPLAY SCREEN
Do not spray cleaning fluid directly onto the navigation display screen as
this may cause damage. Instead, spray the cleaning fluid onto a soft cloth
and gently wipe the screen and unit. Use only rubbing alcohol-based
cleaners (i.e. methyl alcohol) or a damp clean cloth.
Do notclean any part of the screen or system with acid cleaners, alkali
cleaners, benzene cleaners, paint thinner or any other solvent.
Do notspill liquids of any kind into the unit.
GLOSSARY
COMP:Compression
DEST:Destination
DSP:Digital Signal Processing
ETA :Estimated Time of Arrival
FCC:Federal Communications Commission
GPS:Global Positioning System
MAP/NAVIGATION DVD:The disc containing a map database to
operate the navigation system.
POI:Point(s) Of Interest
PROV:Province
PTY:Program Type
RDS:Radio Data System
SCV:Speed Compensated Volume
SMART SPELLER:Feature that provides a number of available
candidates matching partial input entered by the user.
SR:Satellite Radio
TOUCH SCREEN:A touch-sensitive screen that lets the user make
choices by touching icons or graphical buttons on the screen.
WAYPOINT:An intermediate stop or destination before the final
destination.
2008(nv1)
Supplement
USA(fus)
General Information
89
Page 98 of 164
•Please realize voice recognition performance is not 100% and varies by
user. The voice recognition system is meant to be a secondary
convenience control and if it doesn’t operate optimally, you can still
operate your navigation system via the touch screen and hard buttons.
To speak voice commands:
1. Push the VOICE or
button on the steering wheel. A tone will
sound.
2. The system will say, “Main menu” and the ‘Listening’ icon (
) will
appear in the status bar.
3. Say “Phone” to access SYNC’s phone features or say “User Device” to
access SYNC’s media features. Depending on your choice, SYNC will say
“Phone” or “USB”, “Please say a command”. A tone will sound signifying
SYNC is ready for your response.
4. ‘Listening’ and
will appear in the status bar and the system
waits for your response.
5. If the system is not confident that it recognized your command, it will
ask for a confirmation of yes or no.
6. If the system does not recognize your command, the voice failed
icon
will be displayed in the status bar. The system will give you a
short list of commands you can say. Say the command again. If the
system doesn’t recognize the repeated command, the system will say,
“Please say a command, help or cancel”.
7. If the system does not recognize your command a second time, the
system will say, “I didn’t understand you, please try again.”
8. Once confirmation / recognition takes place, the voice success
icon
is displayed, the system will speak the next level of available
commands, a tone will sound, and the appropriate voice menu name and
icon will be displayed.
9. If the voice session is not complete, the system will then speak the
next set of available voice commands, a tone will sound, and the system
will display ‘Listening’
and again, waits for a response.
10. This sequence of events occurs until the voice recognition session is
complete.
2008(nv1)
Supplement
USA(fus)
SYNC (if equipped)
96SeeEnd User License Agreementat the end of this book
Page 102 of 164
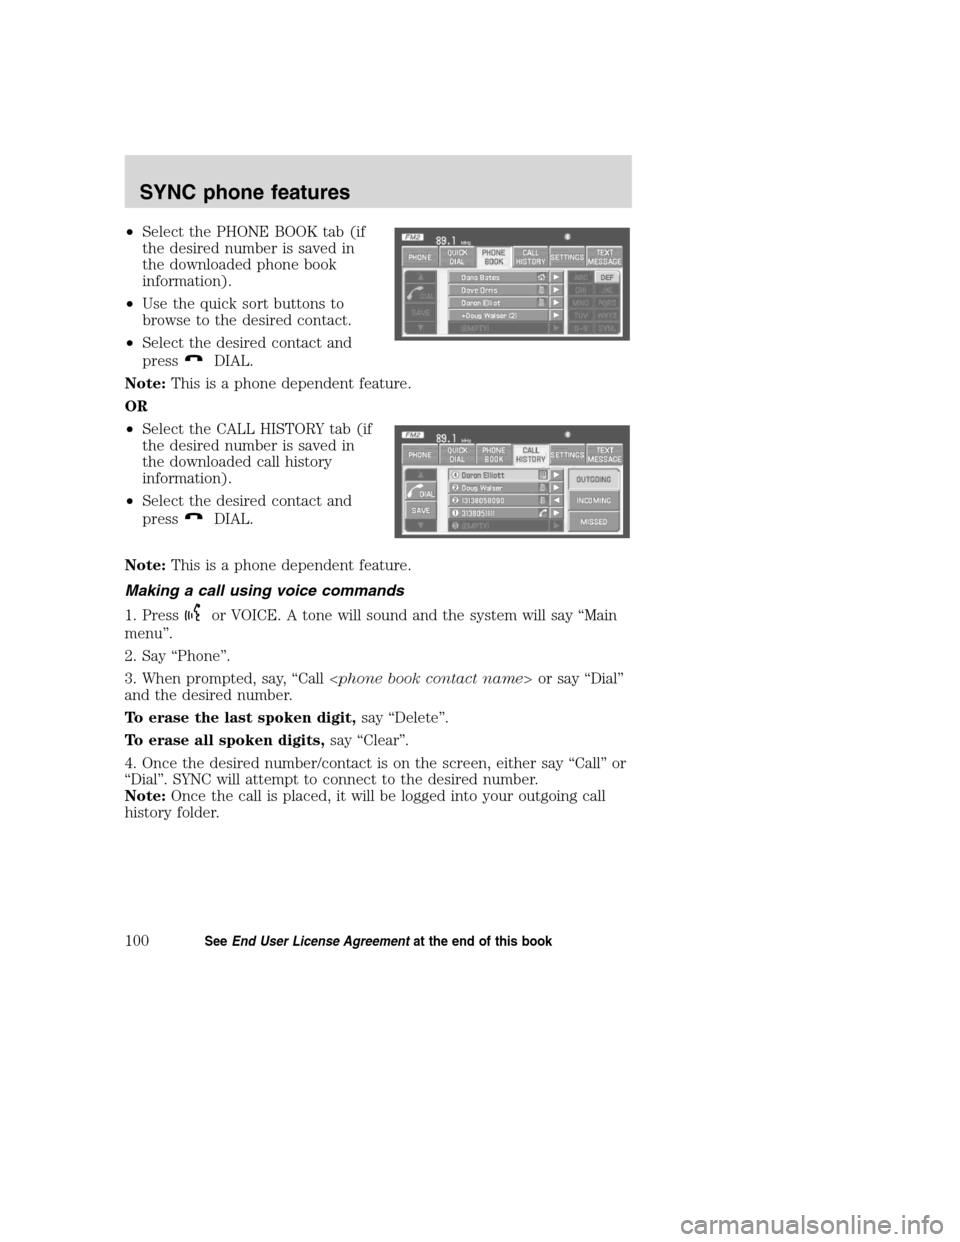
•Select the PHONE BOOK tab (if
the desired number is saved in
the downloaded phone book
information).
•Use the quick sort buttons to
browse to the desired contact.
•Select the desired contact and
press
DIAL.
Note:This is a phone dependent feature.
OR
•Select the CALL HISTORY tab (if
the desired number is saved in
the downloaded call history
information).
•Select the desired contact and
press
DIAL.
Note:This is a phone dependent feature.
Making a call using voice commands
1. Press
or VOICE. A tone will sound and the system will say “Main
menu”.
2. Say “Phone”.
3. When prompted, say, “Call
and the desired number.
To erase the last spoken digit,say “Delete”.
To erase all spoken digits,say “Clear”.
4. Once the desired number/contact is on the screen, either say “Call” or
“Dial”. SYNC will attempt to connect to the desired number.
Note:Once the call is placed, it will be logged into your outgoing call
history folder.
2008(nv1)
Supplement
USA(fus)
SYNC phone features
100SeeEnd User License Agreementat the end of this book
Page 106 of 164
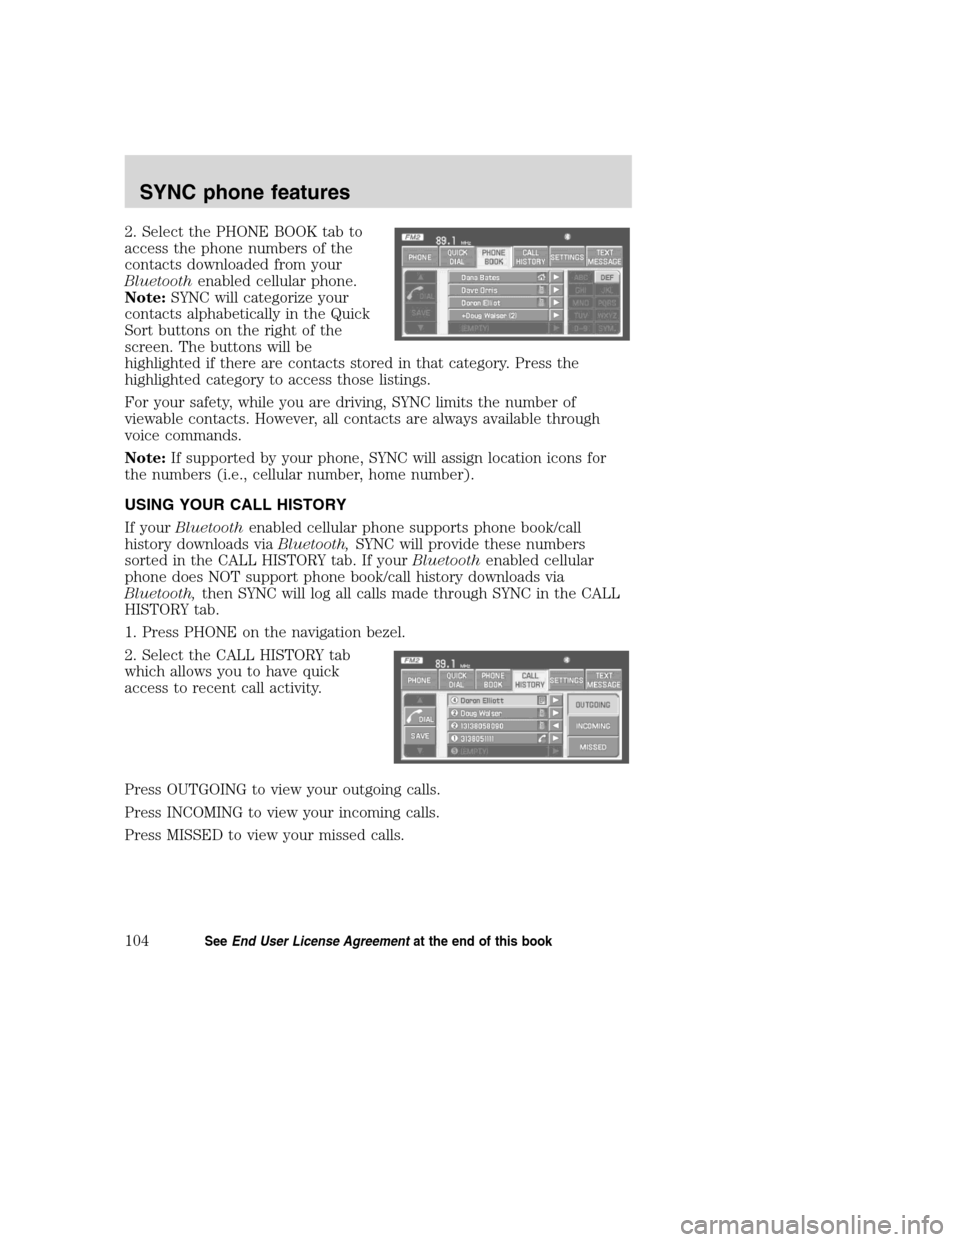
2. Select the PHONE BOOK tab to
access the phone numbers of the
contacts downloaded from your
Bluetoothenabled cellular phone.
Note:SYNC will categorize your
contacts alphabetically in the Quick
Sort buttons on the right of the
screen. The buttons will be
highlighted if there are contacts stored in that category. Press the
highlighted category to access those listings.
For your safety, while you are driving, SYNC limits the number of
viewable contacts. However, all contacts are always available through
voice commands.
Note:If supported by your phone, SYNC will assign location icons for
the numbers (i.e., cellular number, home number).
USING YOUR CALL HISTORY
If yourBluetoothenabled cellular phone supports phone book/call
history downloads viaBluetooth,SYNC will provide these numbers
sorted in the CALL HISTORY tab. If yourBluetoothenabled cellular
phone does NOT support phone book/call history downloads via
Bluetooth,then SYNC will log all calls made through SYNC in the CALL
HISTORY tab.
1. Press PHONE on the navigation bezel.
2. Select the CALL HISTORY tab
which allows you to have quick
access to recent call activity.
Press OUTGOING to view your outgoing calls.
Press INCOMING to view your incoming calls.
Press MISSED to view your missed calls.
2008(nv1)
Supplement
USA(fus)
SYNC phone features
104SeeEnd User License Agreementat the end of this book
Page 128 of 164
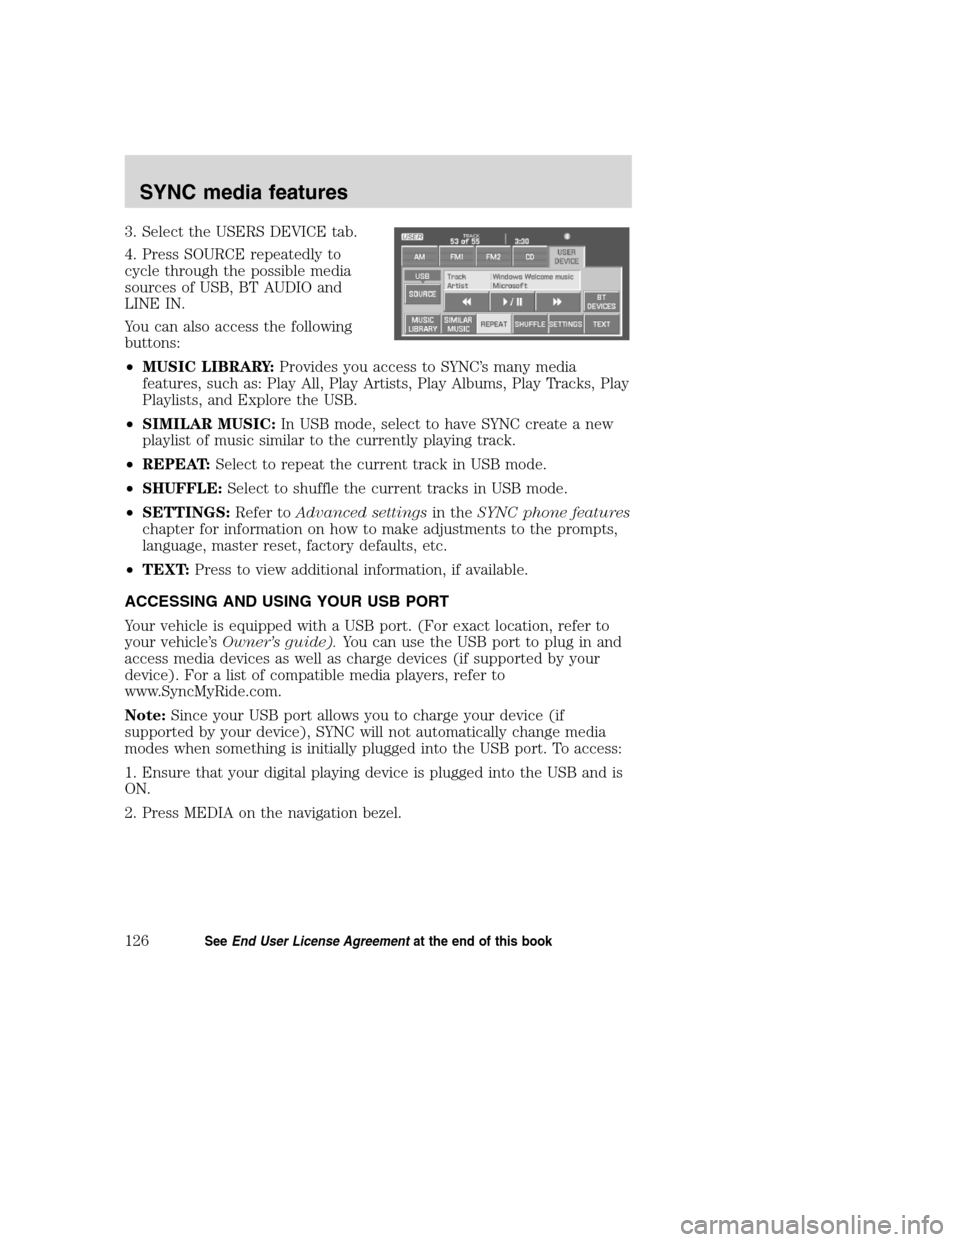
3. Select the USERS DEVICE tab.
4. Press SOURCE repeatedly to
cycle through the possible media
sources of USB, BT AUDIO and
LINE IN.
You can also access the following
buttons:
•MUSIC LIBRARY:Provides you access to SYNC’s many media
features, such as: Play All, Play Artists, Play Albums, Play Tracks, Play
Playlists, and Explore the USB.
•SIMILAR MUSIC:In USB mode, select to have SYNC create a new
playlist of music similar to the currently playing track.
•REPEAT:Select to repeat the current track in USB mode.
•SHUFFLE:Select to shuffle the current tracks in USB mode.
•SETTINGS:Refer toAdvanced settingsin theSYNC phone features
chapter for information on how to make adjustments to the prompts,
language, master reset, factory defaults, etc.
•TEXT:Press to view additional information, if available.
ACCESSING AND USING YOUR USB PORT
Your vehicle is equipped with a USB port. (For exact location, refer to
your vehicle’sOwner’s guide).You can use the USB port to plug in and
access media devices as well as charge devices (if supported by your
device). For a list of compatible media players, refer to
www.SyncMyRide.com.
Note:Since your USB port allows you to charge your device (if
supported by your device), SYNC will not automatically change media
modes when something is initially plugged into the USB port. To access:
1. Ensure that your digital playing device is plugged into the USB and is
ON.
2. Press MEDIA on the navigation bezel.
2008(nv1)
Supplement
USA(fus)
SYNC media features
126SeeEnd User License Agreementat the end of this book