Mercury Mountaineer 2010 Owner's Manuals
Manufacturer: MERCURY, Model Year: 2010, Model line: Mountaineer, Model: Mercury Mountaineer 2010Pages: 390, PDF Size: 2.75 MB
Page 161 of 390

Using the manual lumbar support (if equipped)
For more lumbar support, turn the
lumbar support control toward the
front of vehicle.
For less lumbar support, turn the
lumbar support control toward the
rear of vehicle.
Adjusting the front power seat (if equipped)
WARNING:Never adjust the driver’s seat or seatback when the
vehicle is moving.
WARNING:Do not pile cargo higher than the seatbacks to avoid
injuring people in a collision or sudden stop.
WARNING:Always drive and ride with your seatback upright
and the lap belt snug and low across the hips.
WARNING:Reclining the seatback can cause an occupant to
slide under the seat’s safety belt, resulting in severe personal
injuries in the event of a collision.
WARNING:Sitting improperly out of position or with the seat
back reclined too far can take off weight from the seat cushion
and affect the decision of the passenger sensing system, resulting in
serious injury or death in a crash. Always sit upright against your
seatback, with your feet on the floor.
Seating and Safety Restraints
161
2010 Mountaineer(mnt)
Owners Guide(own2002), 1st Printing
USA(fus)
Page 162 of 390
WARNING:To reduce the risk of possible serious injury: Do not
hang objects off seat back or stow objects in the seatback map
pocket (if equipped) when a child is in the front passenger seat. Do
not place objects underneath the front passenger seat or between the
seat and the center console (if equipped). Check the “passenger airbag
off” or “pass airbag off” indicator lamp for proper airbag status. Refer
toFront passenger sensing systemsection for additional details.
Failure to follow these instructions may interfere with the front
passenger seat sensing system.
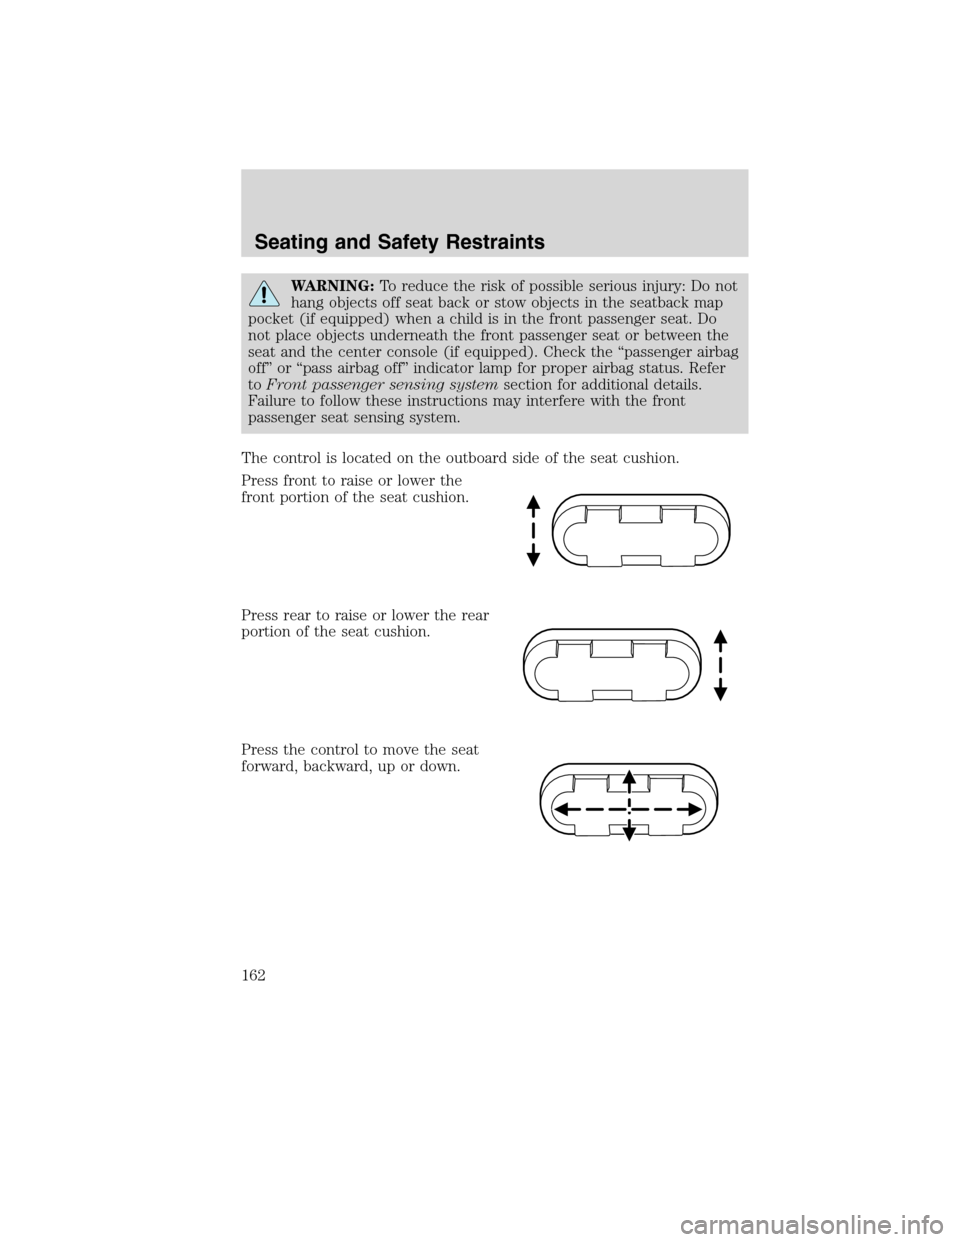
The control is located on the outboard side of the seat cushion.
Press front to raise or lower the
front portion of the seat cushion.
Press rear to raise or lower the rear
portion of the seat cushion.
Press the control to move the seat
forward, backward, up or down.
Seating and Safety Restraints
162
2010 Mountaineer(mnt)
Owners Guide(own2002), 1st Printing
USA(fus)
Page 163 of 390
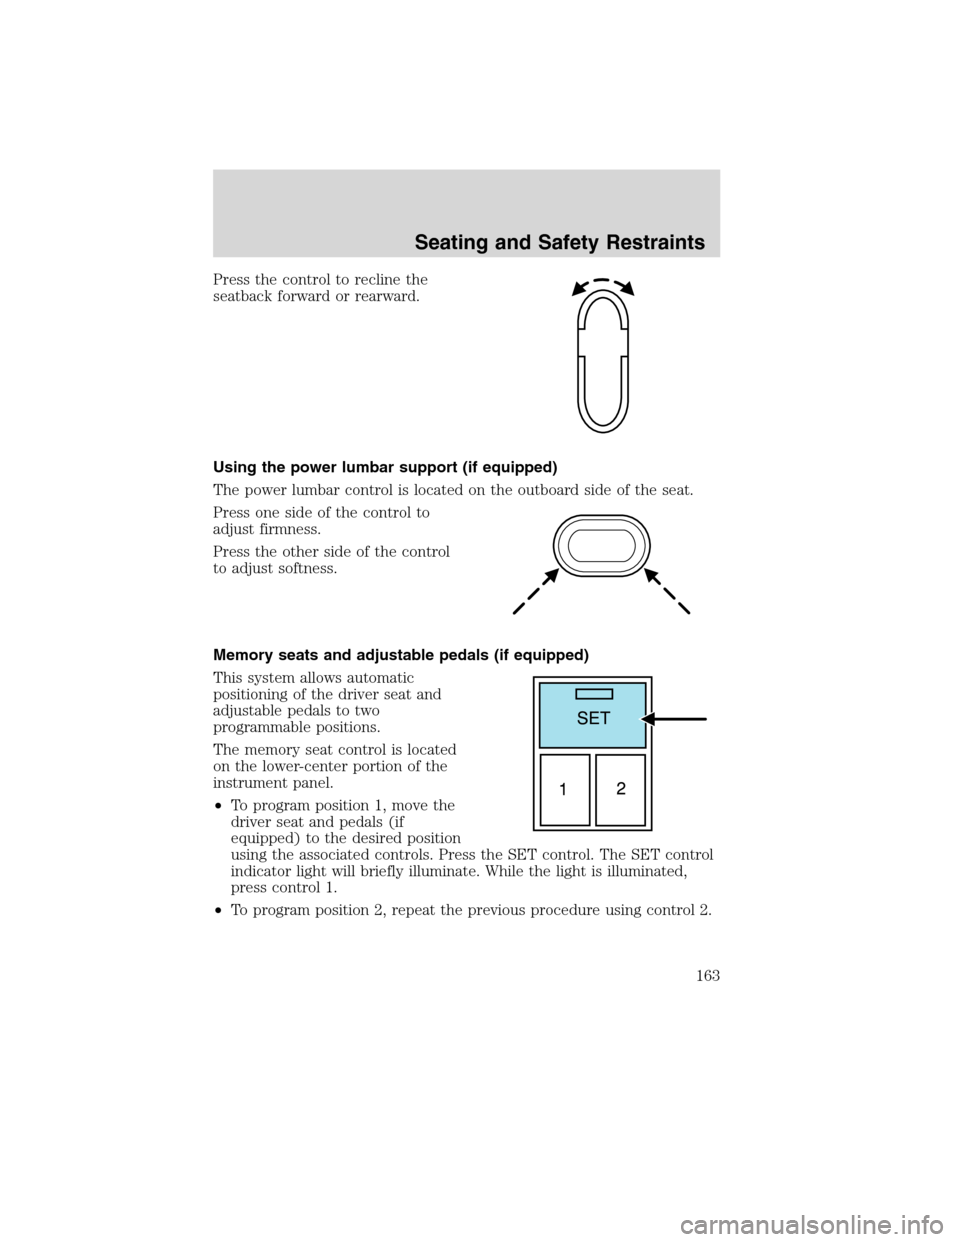
Press the control to recline the
seatback forward or rearward.
Using the power lumbar support (if equipped)
The power lumbar control is located on the outboard side of the seat.
Press one side of the control to
adjust firmness.
Press the other side of the control
to adjust softness.
Memory seats and adjustable pedals (if equipped)
This system allows automatic
positioning of the driver seat and
adjustable pedals to two
programmable positions.
The memory seat control is located
on the lower-center portion of the
instrument panel.
•To program position 1, move the
driver seat and pedals (if
equipped) to the desired position
using the associated controls. Press the SET control. The SET control
indicator light will briefly illuminate. While the light is illuminated,
press control 1.
•To program position 2, repeat the previous procedure using control 2.
Seating and Safety Restraints
163
2010 Mountaineer(mnt)
Owners Guide(own2002), 1st Printing
USA(fus)
Page 164 of 390

A position can be recalled:
•in any gearshift position if the ignition isnotin the on position.
•only in P (Park) or N (Neutral) if the ignition is in the on position.
A memory seat position may be programmed at any time.
The memory positions are also recalled when you press your remote
entry transmitter UNLOCK control if the transmitter is programmed to a
memory position or when you enter a valid personal entry code that is
programmed to a memory position.
To program the memory feature to a remote entry transmitter and for
more information on how to use the keypad, refer toRemote entry
systemandKeyless entry systemin theLocks and Securitychapter.
Easy entry/exit feature (if equipped)
The easy entry feature automatically moves the driver’s seat 2 inches
(5 cm) forward when:
•the transmission is in P (Park)
•the key is inserted into the ignition cylinder
(If the seat is located less than 2 inches [5 cm] from the front of the seat
track, the seat will travel up to
1�4inch (.64 cm) to the front of the seat
track).
The easy out feature automatically moves the driver’s seat 2 inches
(5 cm) backward when:
•the transmission is in P (Park)
•the key is removed from the ignition cylinder
(If the seat is located less than 2 inches (5 cm) from the rear of the seat
track, the seat will travel up to
1�4inch (.64 cm) to the rear of the seat
track).
If the memory setting is programmed through the remote transmitter,
upon unlocking the door via remote entry system, the seat position will
travel to the desired memory setting less 2 inches (5 cm). Once entering
the vehicle and inserting the key in the ignition while in P (Park), the
easy entry feature will move the seat an additional 2 inches (5 cm) to
the desired memory location. SeeLocks and Securityfor activating the
memory seat feature through the remote entry system.
Seating and Safety Restraints
164
2010 Mountaineer(mnt)
Owners Guide(own2002), 1st Printing
USA(fus)
Page 165 of 390
Deactivating/activating the easy access/easy out feature
The easy entry/exit feature can be turned off or on through the vehicle
message center (if equipped). If your vehicle does not have a message
center, the feature can be turned off or on through the following process:
1. Put the key into the ignition (The driver seat may move forward if the
easy entry/exit feature is activated).
2. Place the ignition key into the on position (do not start the vehicle).
When the vehicle is in the on position, the interior and exterior lights,
the climate controls, and the radio are functional without the engine
started. SeeProgramming remote transmittersfor ignition switch
diagram.
3. Turn the ignition key to the off position.
4. Cycle the ignition key between the off position and the on position a
total of three times ending with the ignition in the off position.
5. Engage the forward or rearward seat switch.
6. Remove the ignition key from the ignition switch. (The driver seat
may move rearward if the easy entry/exit feature is activated).
Steps 2 through 6 must be performed within a 20 second period. The
easy entry/exit feature will be deactivated. Repeating the above process
will also reactivate the easy entry/exit feature.
Heated seats (if equipped)
WARNING:Persons who are unable to feel pain to the skin
because of advanced age, chronic illness, diabetes, spinal cord
injury, medication, alcohol use, exhaustion, or other physical
conditions, must exercise care when using the seat heater. The seat
heater may cause burns even at low temperatures, especially if used
for long periods of time. Do not place anything on the seat that
insulates against heat, such as a blanket or cushion, because this may
cause the seat heater to overheat. Do not puncture the seat with pins,
needles, or other pointed objects because this may damage the heating
element which may cause the seat heater to overheat. An overheated
seat may cause serious personal injury.
Note:Do not do the following:
•Place heavy objects on the seat
•Operate the seat heater if water or any other liquid is spilled on the
seat. Allow the seat to dry thoroughly.
Seating and Safety Restraints
165
2010 Mountaineer(mnt)
Owners Guide(own2002), 1st Printing
USA(fus)
Page 166 of 390
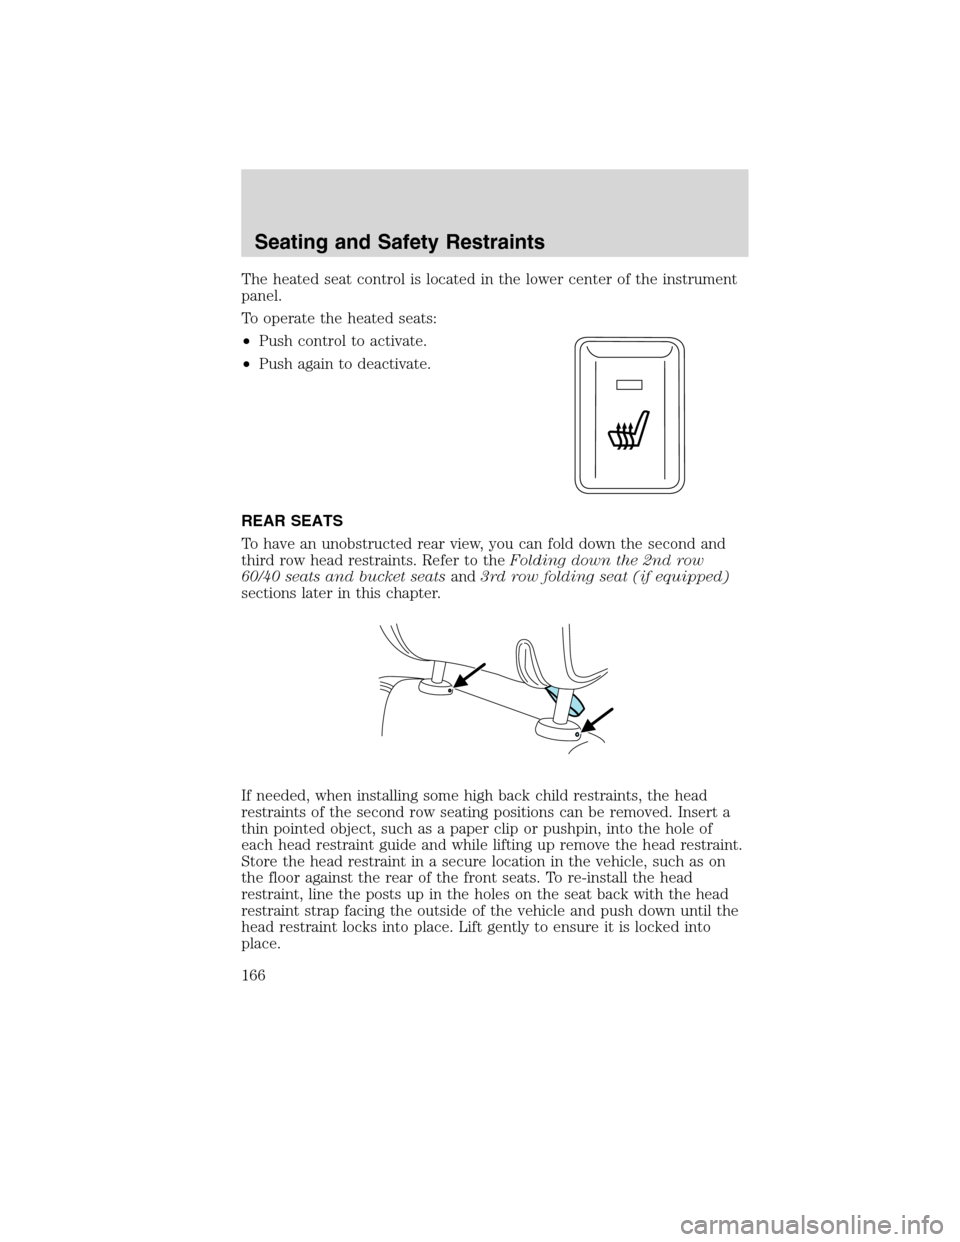
The heated seat control is located in the lower center of the instrument
panel.
To operate the heated seats:
•Push control to activate.
•Push again to deactivate.
REAR SEATS
To have an unobstructed rear view, you can fold down the second and
third row head restraints. Refer to theFolding down the 2nd row
60/40 seats and bucket seatsand3rd row folding seat (if equipped)
sections later in this chapter.
If needed, when installing some high back child restraints, the head
restraints of the second row seating positions can be removed. Insert a
thin pointed object, such as a paper clip or pushpin, into the hole of
each head restraint guide and while lifting up remove the head restraint.
Store the head restraint in a secure location in the vehicle, such as on
the floor against the rear of the front seats. To re-install the head
restraint, line the posts up in the holes on the seat back with the head
restraint strap facing the outside of the vehicle and push down until the
head restraint locks into place. Lift gently to ensure it is locked into
place.
Seating and Safety Restraints
166
2010 Mountaineer(mnt)
Owners Guide(own2002), 1st Printing
USA(fus)
Page 167 of 390

Refer toSafety seats for childrenlater in this chapter.
WARNING:If the head restraint has been removed from a
seating position to accommodate a high back child restraint, the
head restraint must be re-installed prior to use of the seat by any other
occupant in order to reduce the risk of personal injury in the event of
a collision.
Folding down the 2nd row 60/40 seats and bucket seats
Ensure that the head restraint is in the down position and no objects
such as books, purses or briefcases are on the floor in front of the
second row seats before folding them down.
1. Lower the head restraints by
pulling on the strap.
2. Locate the recline handle situated
on the side of the seat cushion by
the door.
3. Pull up on the handle and push
the seatback forward toward the
front of the vehicle.
Seating and Safety Restraints
167
2010 Mountaineer(mnt)
Owners Guide(own2002), 1st Printing
USA(fus)
Page 168 of 390
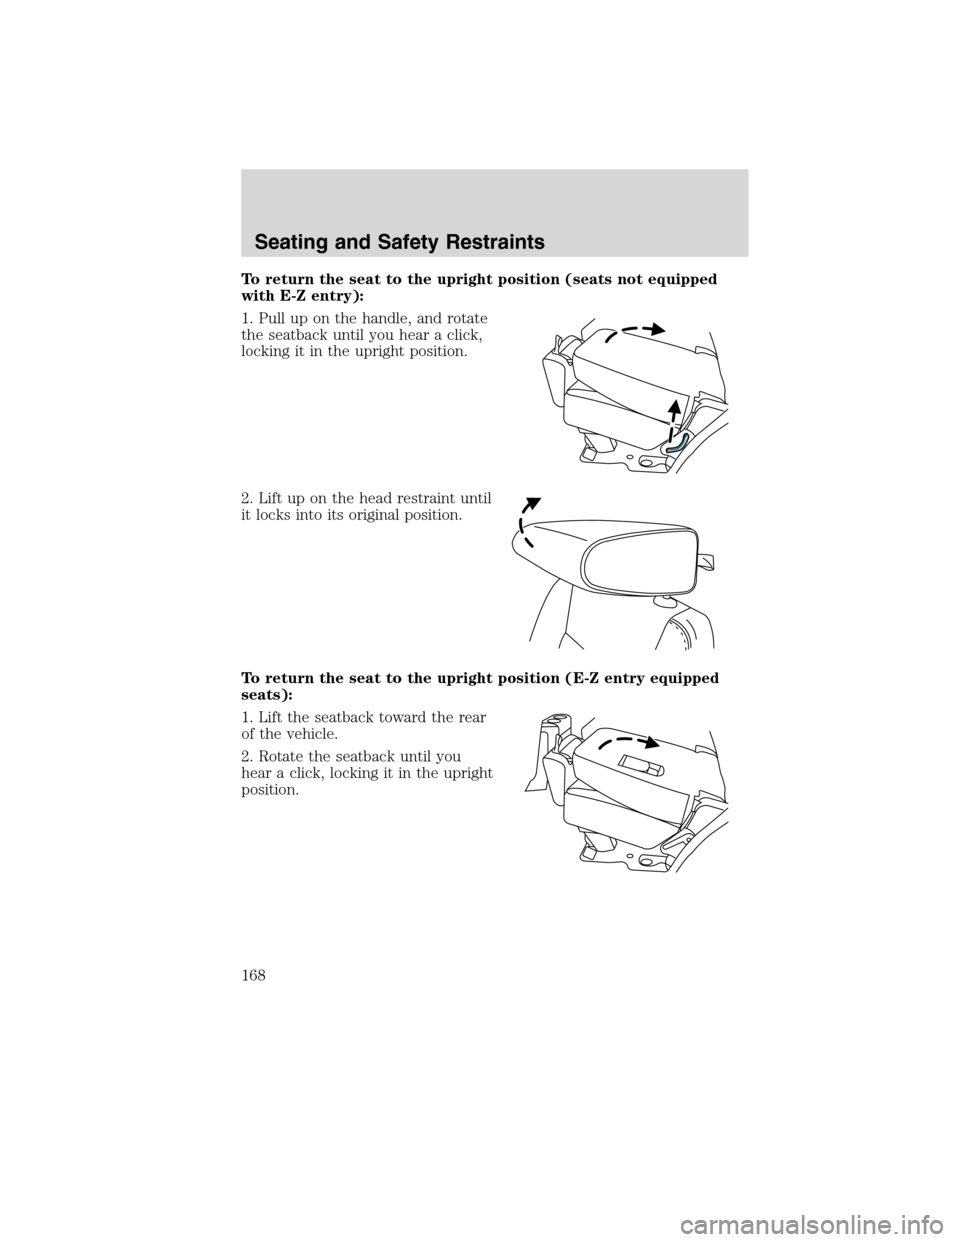
To return the seat to the upright position (seats not equipped
with E-Z entry):
1. Pull up on the handle, and rotate
the seatback until you hear a click,
locking it in the upright position.
2. Lift up on the head restraint until
it locks into its original position.
To return the seat to the upright position (E-Z entry equipped
seats):
1. Lift the seatback toward the rear
of the vehicle.
2. Rotate the seatback until you
hear a click, locking it in the upright
position.
Seating and Safety Restraints
168
2010 Mountaineer(mnt)
Owners Guide(own2002), 1st Printing
USA(fus)
Page 169 of 390

3. If the seat is to be occupied, lift
up on the head restraint until it
locks into its original position.
WARNING:Before returning the seatback to its original
position, make sure that cargo or any objects are not trapped
behind the seatback. After returning the seatback to its original
position, pull on the seatback to ensure that it has fully latched. An
unlatched seat may become dangerous in the event of a sudden stop or
collision.
Placing the 2nd row 60/40 seats in cargo mode (if equipped)
The 2nd row seats can be placed in a kneel down load floor position to
allow more cargo space.
To place the seats in the cargo mode:
1. Fold down the 2nd row seat. SeeFolding down the 2nd row 60/40
seats and bucket seatsabove.
2. Lift the cargo mode lever located
on the back of the seatback to kneel
the seat down and get a flat loading
floor.
Seating and Safety Restraints
169
2010 Mountaineer(mnt)
Owners Guide(own2002), 1st Printing
USA(fus)
Page 170 of 390

Returning to the upright position from full lowered load floor
position
The seatback cannot be returned to the upright position until the seat is
returned from the kneel down position. To return the seat to the upright
position:
1. Push the seat rearward until the
latch is engaged. Use the cushion or
seatback to return to the fold-down
position. Do not use the recliner
handle as it could cause damage to
the handle.
2. Return the seatback to the
upright position.
Adjusting the 2nd row seat for E-Z Entry
The E-Z entry seat allows for easier entry and exit to and from the 3rd
row seat.
To enter the 3rd row seat:
1. Fold down the 2nd row seat and release the handle. Refer toFolding
down the 2nd row 60/40 seats and bucket seatsearlier in this section.
Note:When folding down the seat, lift the handle only once. When the
seatback releases and folds, the handle should be released. Any further
turning of the handle while the seatback releases, may damage the
handle. Once the seatback is folded, a second lifting of the handle will
detach the seat rear leg locking mechanism from the floor allowing the
seat to tumble forward.
2. Pull the handle up again until the
seat releases from the floor.
3. Push the seat upward and fold it
away from the third row.
Seating and Safety Restraints
170
2010 Mountaineer(mnt)
Owners Guide(own2002), 1st Printing
USA(fus)