lights Mercury Mystique 1998 Owner's Manuals
[x] Cancel search | Manufacturer: MERCURY, Model Year: 1998, Model line: Mystique, Model: Mercury Mystique 1998Pages: 196, PDF Size: 1.65 MB
Page 6 of 196

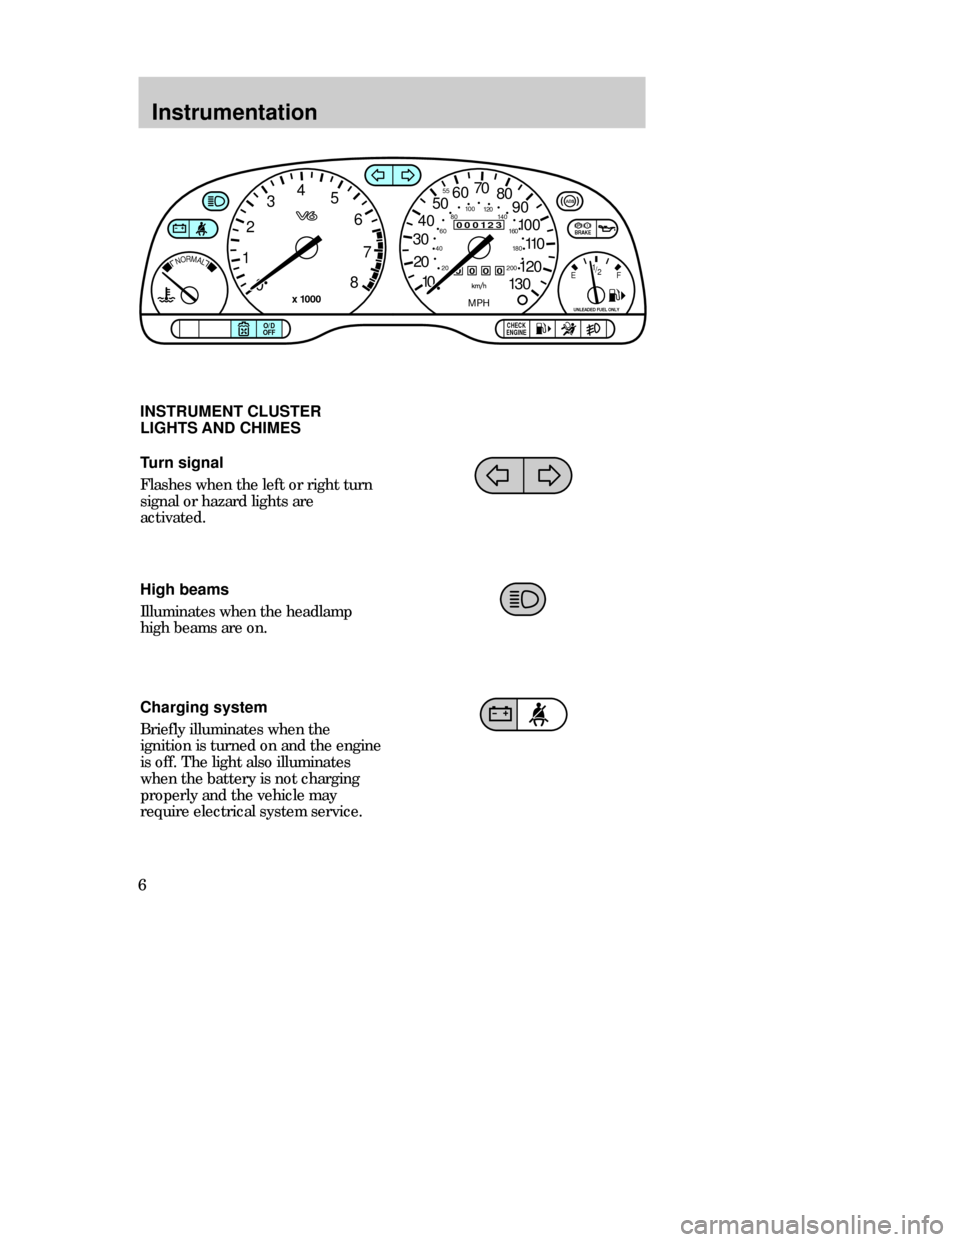
High beams
Illuminates when the headlamp
high beams are on.
Instrumentation
6Turn signal
Flashes when the left or right turn
signal or hazard lights are
activated.
Charging system
Briefly illuminates when the
ignition is turned on and the engine
is off. The light also illuminates
when the battery is not charging
properly and the vehicle may
require electrical system service.
000123
000010 20 3040506070
80
90
110
120
130
MPH
20 4060
55
80120 100
140
160
180
200100
EF 1
/
2
UNLEADED FUEL ONLY
12
03
x 1000
4
5
6
7
8
NORMAL
BRAKE
CHECK
ENGINE TRACTION
CONTROLO/D
OFF
INSTRUMENT CLUSTER
LIGHTS AND CHIMES
CDW IIA2Instrum_en MM 5/15/97 7:43 PM Page 6
Page 10 of 196

Instrumentation
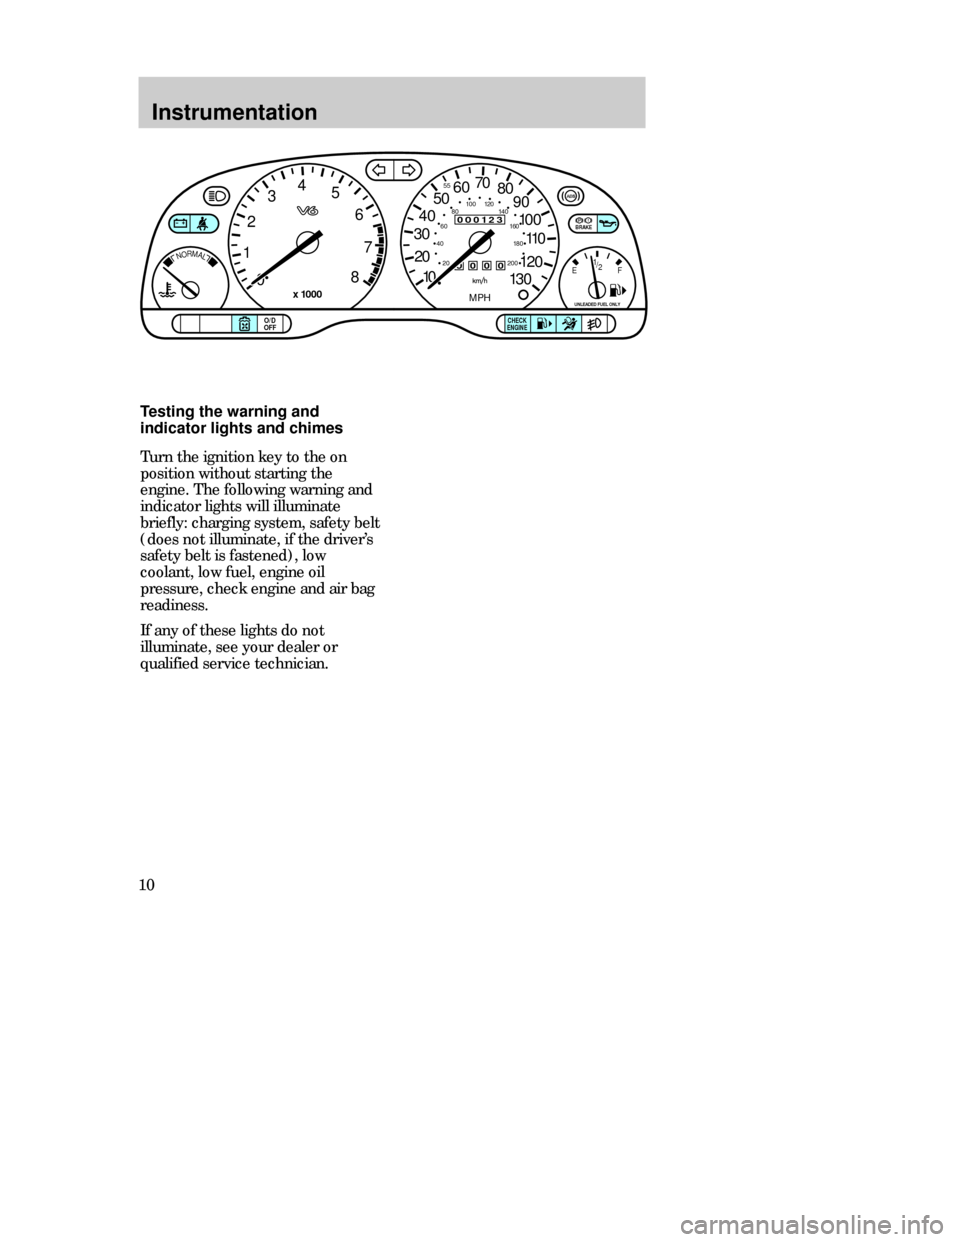
10Testing the warning and
indicator lights and chimes
Turn the ignition key to the on
position without starting the
engine. The following warning and
indicator lights will illuminate
briefly: charging system, safety belt
(does not illuminate, if the driver’s
safety belt is fastened), low
coolant, low fuel, engine oil
pressure, check engine and air bag
readiness.
If any of these lights do not
illuminate, see your dealer or
qualified service technician.
000123
000010 20 3040506070
80
90
110
120
130
MPH
20 4060
55
80120 100
140
160
180
200100
EF 1
/
2
UNLEADED FUEL ONLY
12
03
x 1000
4
5
6
7
8
NORMAL
BRAKE
CHECK
ENGINE TRACTION
CONTROLO/D
OFF
CDW IIA2Instrum_en MM 5/15/97 7:43 PM Page 10
Page 16 of 196

Controls and features
16Panel dimmer control
Adjust the control to vary the
intensity of the panel lighting.
Operates only when the exterior
lights are switched on.
Rear window defroster
(if equipped)
Press the defroster control to clear
the rear window of thin ice and fog.
The ignition must be in the on
position to operate the rear
window defroster.
The defroster turns off
automatically after 10 minutes or
when the ignition is turned to the
off position. To manually turn off
the defroster, push the control
again.
CDW IIIC3Cont en MM 5/15/97 7:45 PM Page 16
Page 24 of 196

Controls and features
24STEERING COLUMN
CONTROLS
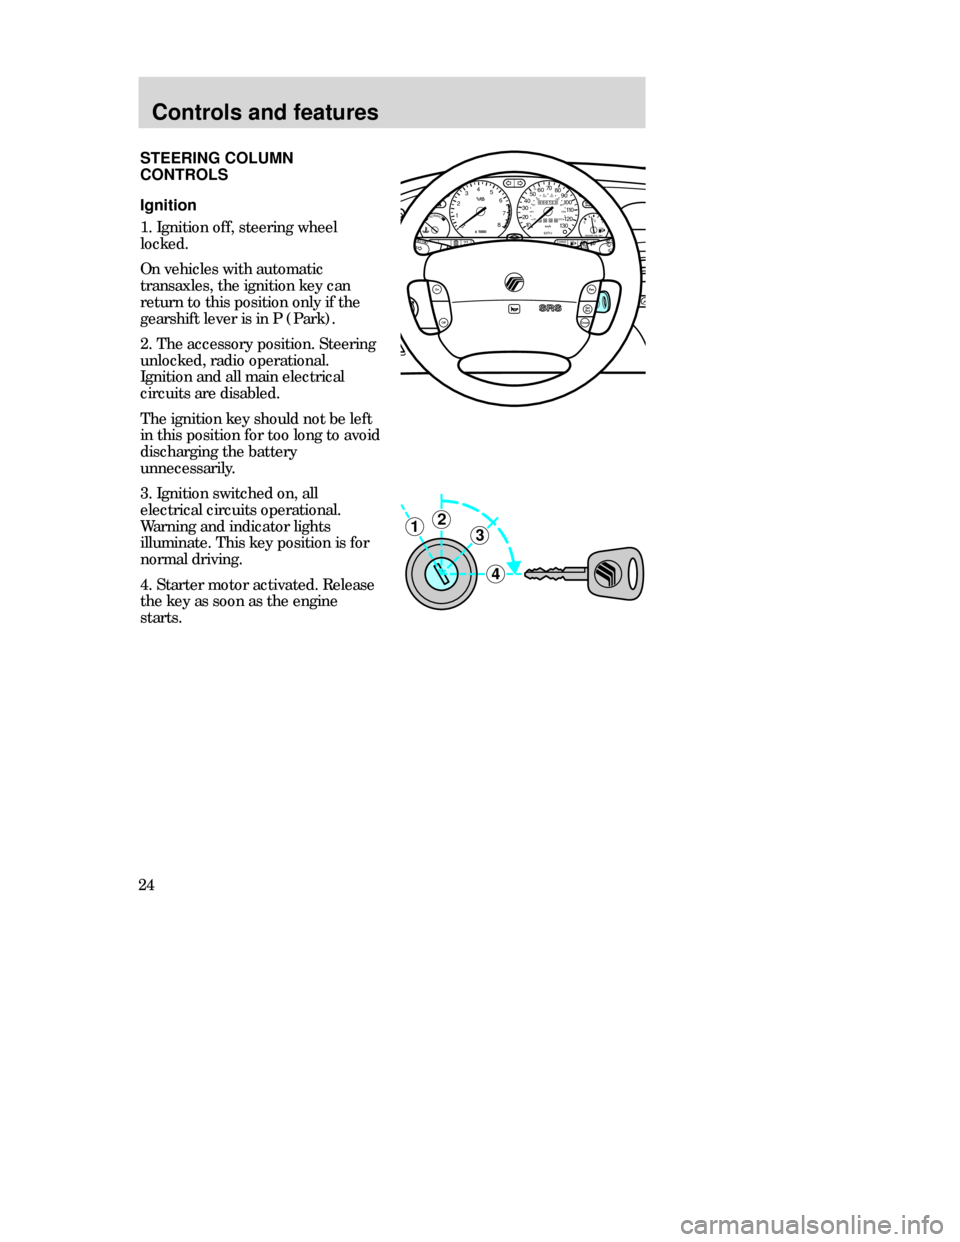
Ignition
1. Ignition off, steering wheel
locked.
On vehicles with automatic
transaxles, the ignition key can
return to this position only if the
gearshift lever is in P (Park).
2. The accessory position. Steering
unlocked, radio operational.
Ignition and all main electrical
circuits are disabled.
The ignition key should not be left
in this position for too long to avoid
discharging the battery
unnecessarily.
3. Ignition switched on, all
electrical circuits operational.
Warning and indicator lights
illuminate. This key position is for
normal driving.
4. Starter motor activated. Release
the key as soon as the engine
starts.
3
4
21
MIRRORS
000123
000010 20 3040506070
80
90
100
110
120
130MPH20 406055
80120 100
140
160
180
200EF 1
/
2UNLEADED FUEL ONLY
12
03x 1000
4
5
6
7
8
NORMALBRAKE
CHECK
ENGINE TRACTION
CONTROLO/D
OFF
Off
Res
Set
AccCoast
On
CDW IIIC3Cont en MM 5/15/97 7:45 PM Page 24
Page 26 of 196

Controls and features
26Hazard flasher control
Use only in an emergency to warn
traffic of vehicle breakdown or
approaching danger. Depress to
activate. Depress again to switch
off. The hazard lights can be
operated when the ignition is off.
Off
ResSet
AccCoast
On
Off
ResSet
AccCoast
On
Horn
Press the pad. The horn can be
operated when the ignition is off.
CDW IIIC3Cont en MM 5/15/97 7:45 PM Page 26
Page 81 of 196

Starting
81 3. Turn the key to the onposition
(without turning the key to start).
Make sure the following lights
illuminate briefly. If a light fails to
illuminate, have the vehicle
serviced by your dealer or a
qualified service technician.
•If the driver’s safety belt is
fastened the warning light does
not illuminate.
BRAKE
CHECK
ENGINE
CDW IVA1_2 Starting en MM 5/15/97 7:50 PM Page 81
Page 103 of 196

Driving
103 Using a hitch
Do not use hitches that:
•Clamp onto the vehicle bumper.
•Attach to the axle.
Distribute the load so that only 10
to 15% of the total weight of the
trailer is on the tongue. Tie down
the load so that it does not shift
and change weight on the hitch.
Follow the instructions of a
reputable rental agency.
Using trailer lamps
See your local trailer retailer or
rental agency for proper
instructions and equipment for
hooking up trailer lamps.
Do not hook the trailer lamps
directly into the vehicle’s wiring
system. If the trailer lamps are not
working properly, the warning
lights in the instrument cluster may
not work properly.
CDW IVB1-10Driving en MM 5/15/97 7:51 PM Page 103
Page 107 of 196

Roadside emergencies
107 HAZARD FLASHER CONTROL
Use only in an emergency to warn
traffic of vehicle breakdown or
approaching danger. Depress to
activate. Depress again to switch
off. The hazard lights can be
operated when the ignition is off.
Off
ResSet
AccCoast
On
FUELPUMPSHUT-OFF SWITCH
If the engine cranks, but does not
start or does not start after a
collision, the fuel pump shut-off
switch may have been activated.
The shut-off switch is a device
intended to stop the electric fuel
pump when your vehicle has been
involved in a substantial jolt.
Once the shut-off switch is
activated, you must reset the
switch by hand before you can start
your vehicle. The switch is located
on the side panel in front of the
driver’s side door.
CDW IVC1-6Roads en MM 5/15/97 7:53 PM Page 107
Page 112 of 196

Roadside emergencies
112Passenger compartment fuse
panel
To check or change a fuse or a
relay, open the fuse box by pulling
down the lock release lever (1).
1
Power distribution box (engine compartment)
Relay
Circuits switched
R 1
R 2
R 3
R 4
R 5
R 6
R 7
R 8
R 9
R 10
R 11
D1
Daytime running lights
Radiator fan relay (high speed)
Air conditioning
Air conditioning clutch relay
Radiator fan relay (low speed)
Starter solenoid
Horn
Electrically operated fuel pump
Low beam headlamps
High beam headlamps
EEC module
Reverse voltage protection
CDW IVC1-6Roads en MM 5/15/97 7:53 PM Page 112
Page 116 of 196

Roadside emergencies
116
CHANGING TIRES
Park your vehicle in such a position
that neither the traffic nor you are
hindered or endangered when
changing the tire. Ensure that the
vehicle is on firm, level ground. If
necessary, secure your vehicle
further by blocking the wheels with
chocks.
Activate the hazard lights.
Apply the parking brake and
engage first or reverse gear or, if
the vehicle has an automatic
transaxle, select the P (Park)
position.
If parking on a slope is unavoidable,
secure the wheels with suitable
chocks.
CDW IVC1-6Roads en MM 5/15/97 7:53 PM Page 116