oil Mercury Mystique 1998 Owner's Manuals
[x] Cancel search | Manufacturer: MERCURY, Model Year: 1998, Model line: Mystique, Model: Mercury Mystique 1998Pages: 196, PDF Size: 1.65 MB
Page 9 of 196
Instrumentation
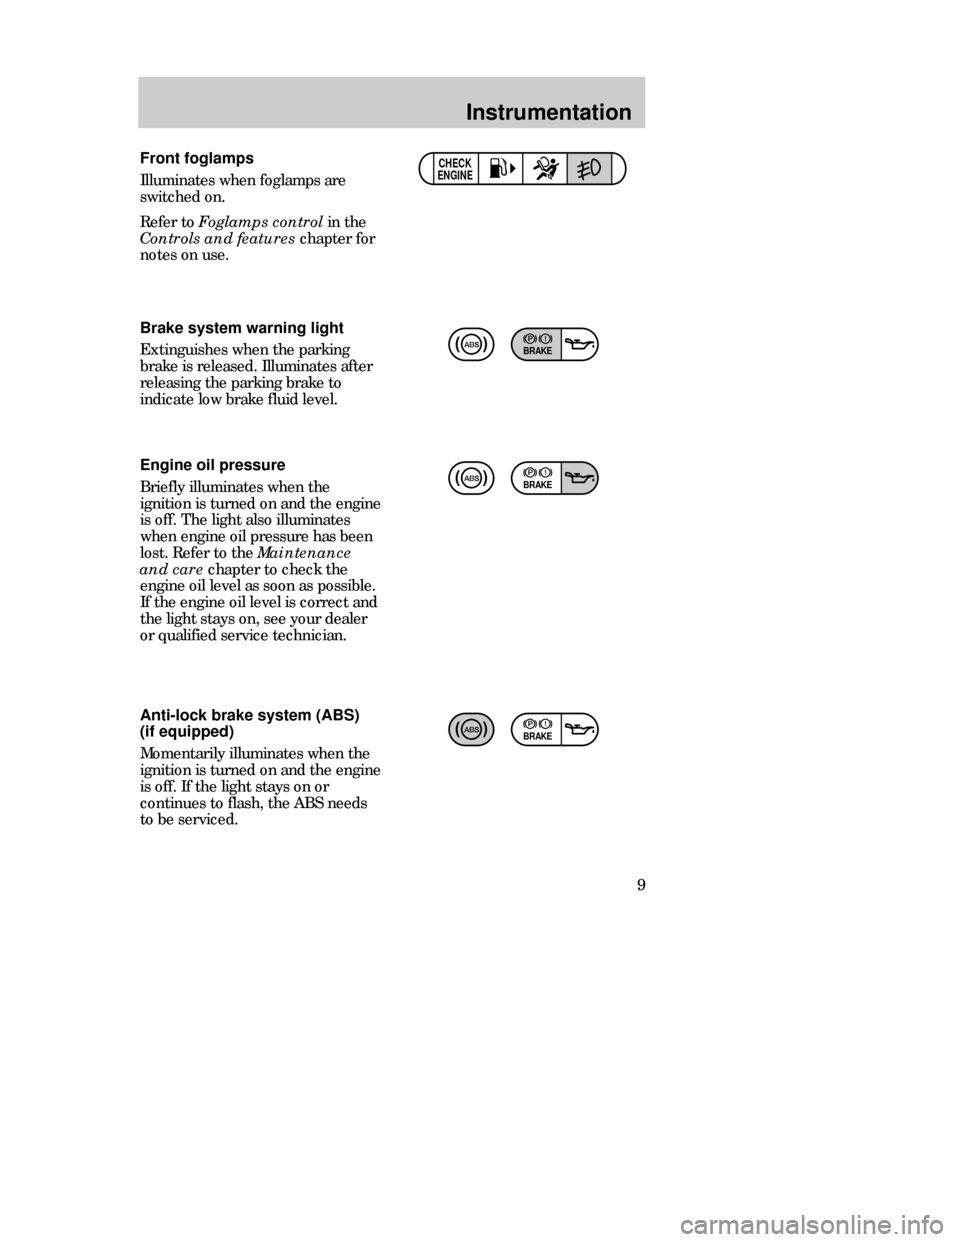
9 Front foglamps
Illuminates when foglamps are
switched on.
Refer to Foglamps controlin the
Controls and features chapter for
notes on use.
CHECK
ENGINE
Brake system warning light
Extinguishes when the parking
brake is released. Illuminates after
releasing the parking brake to
indicate low brake fluid level.
Anti-lock brake system (ABS)
(if equipped)
Momentarily illuminates when the
ignition is turned on and the engine
is off. If the light stays on or
continues to flash, the ABSneeds
to be serviced. Engine oil pressure
Briefly illuminates when the
ignition is turned on and the engine
is off. The light also illuminates
when engine oil pressure has been
lost. Refer to the Maintenance
and carechapter to check the
engine oil level as soon as possible.
If the engine oil level is correct and
the light stays on, see your dealer
or qualified service technician.
BRAKE
BRAKE
BRAKE
CDW IIA2Instrum_en MM 5/15/97 7:43 PM Page 9
Page 10 of 196
Instrumentation
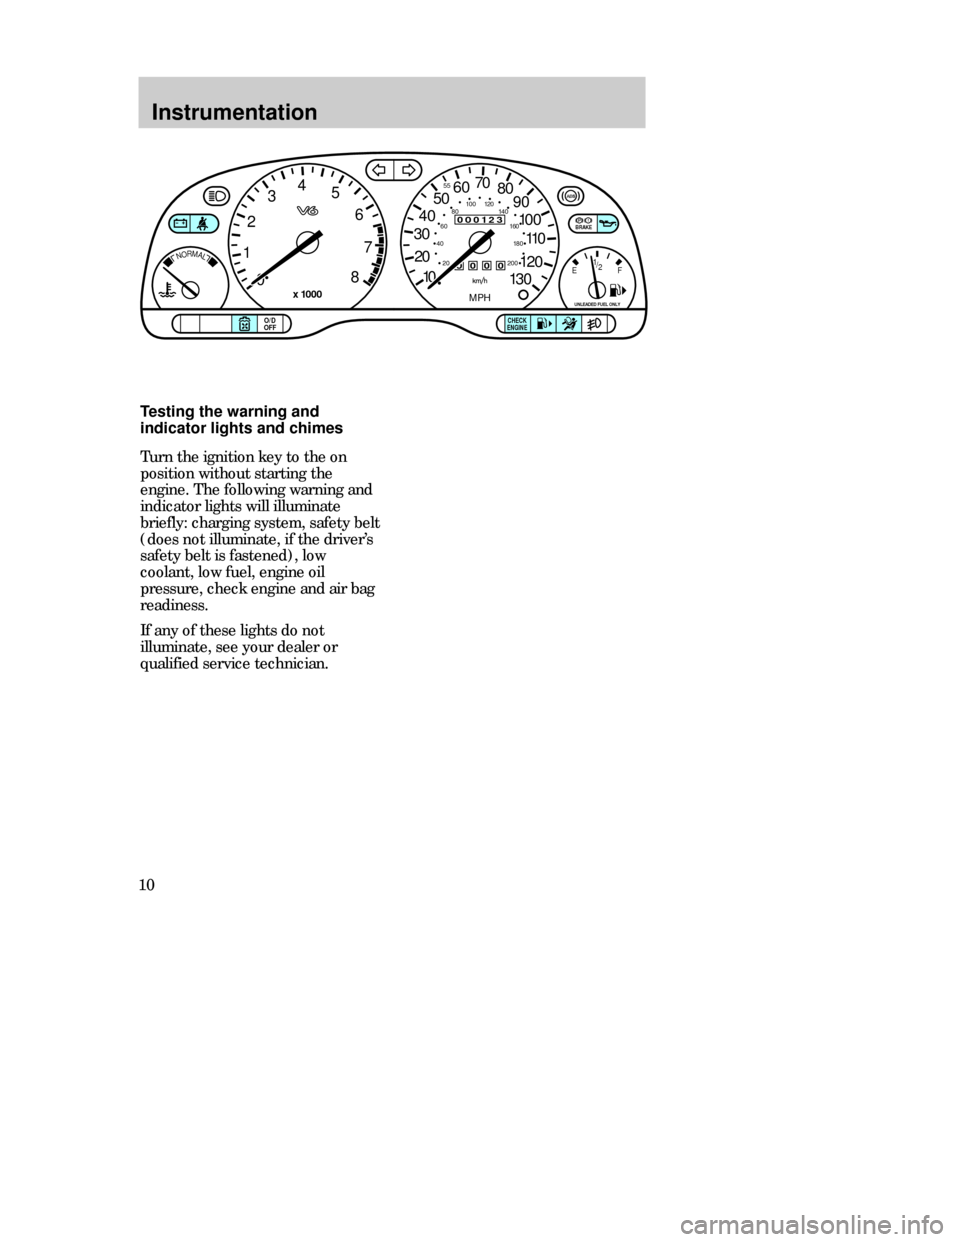
10Testing the warning and
indicator lights and chimes
Turn the ignition key to the on
position without starting the
engine. The following warning and
indicator lights will illuminate
briefly: charging system, safety belt
(does not illuminate, if the driver’s
safety belt is fastened), low
coolant, low fuel, engine oil
pressure, check engine and air bag
readiness.
If any of these lights do not
illuminate, see your dealer or
qualified service technician.
000123
000010 20 3040506070
80
90
110
120
130
MPH
20 4060
55
80120 100
140
160
180
200100
EF 1
/
2
UNLEADED FUEL ONLY
12
03
x 1000
4
5
6
7
8
NORMAL
BRAKE
CHECK
ENGINE TRACTION
CONTROLO/D
OFF
CDW IIA2Instrum_en MM 5/15/97 7:43 PM Page 10
Page 130 of 196
Maintenance and care
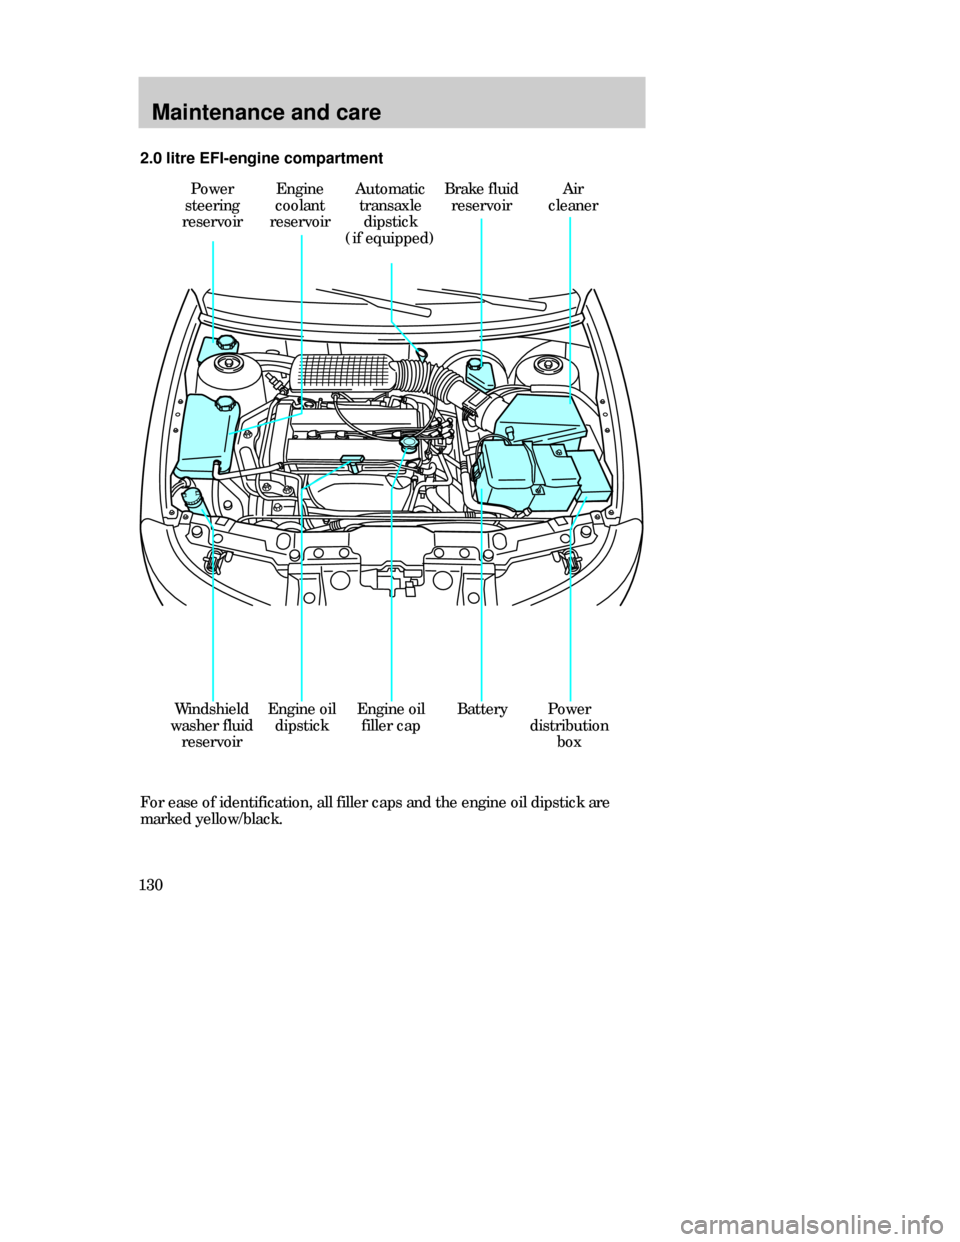
130For ease of identification, all filler caps and the engine oil dipstick are
marked yellow/black. 2.0 litre EFI-engine compartment
Power
steering
reservoirEngine
coolant
reservoirAutomatic
transaxle
dipstick
(if equipped)Brake fluid
reservoir
BatteryWindshield
washer fluid
reservoirEngine oil
dipstickPower
distribution
box
Air
cleaner
Engine oil
filler cap
CDW VA1-19Maint en MM 5/15/97 7:55 PM Page 130
Page 131 of 196
Maintenance and care
131
Power
steering
reservoirEngine
coolant
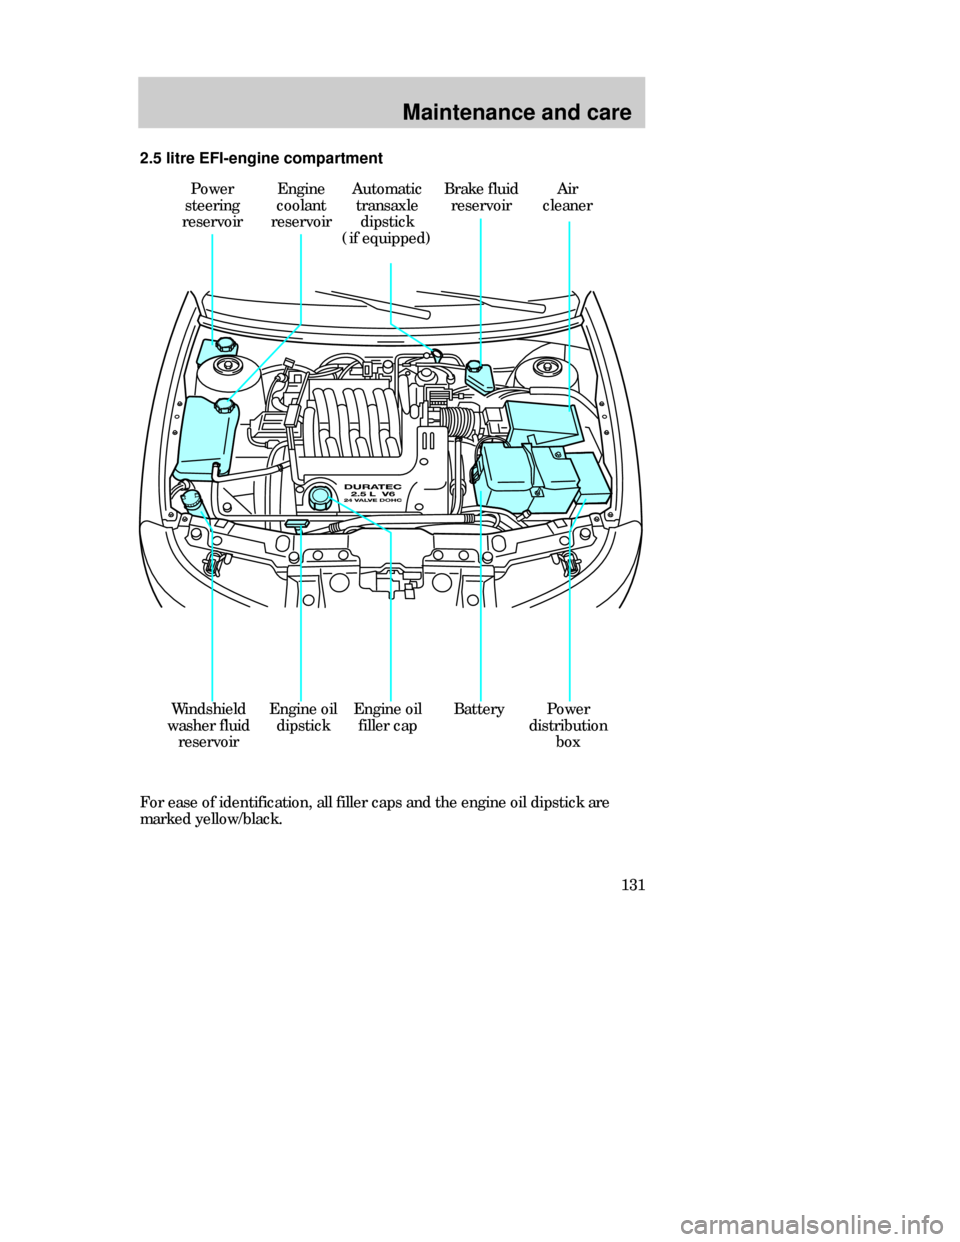
reservoir 2.5 litre EFI-engine compartment
For ease of identification, all filler caps and the engine oil dipstick are
marked yellow/black.Air
cleanerBrake fluid
reservoirAutomatic
transaxle
dipstick
(if equipped)
BatteryWindshield
washer fluid
reservoirEngine oil
dipstickPower
distribution
boxEngine oil
filler cap
CDW VA1-19Maint en MM 5/15/97 7:55 PM Page 131
Page 132 of 196

Maintenance and care
132
Engine oil
Use SAE 5W-30 motor oil
CERTIFIED FOR GASOLINE
ENGINES by the American
Petroleum Institute.
Do not use supplemental engine oil
additives, oil treatments or engine
treatments. They are unnecessary
and could, under certain
conditions, lead to engine damage
which is not covered by Ford
Warranty.
Checking the engine oil
Check the engine oil each time you
fuel your vehicle.
To check the oil:
1. Make sure the vehicle is on level
ground. If the engine is warm, turn
the engine off and wait a few
minutes for the oil to drain into the
oil pan.
2. Set the parking brake and ensure
the gearshift is securely latched in
P (Park).
3. Open the hood. Protect yourself
from engine heat.
4. Locate and carefully remove the
engine oil dipstick.
5. Wipe the dipstick clean. Insert
the dipstick fully, then remove it
again. The oil level should be in the
range shown on the dipstick.2.0 l DOHC
2.5 l DOHC
AMERICANPETROLEUMINSTITUTE
CERTIFIED
FOR
GASOLINE
ENGINES
AMERICANPETROLEUMINSTITUTECERTIFIEDFOR
GASOLINE
ENGINES
Motorcraft
Do not exceed MAX!
Do not exceed MAX!
CDW VA1-19Maint en MM 5/15/97 7:55 PM Page 132
Page 133 of 196
Maintenance and care
133 6. If the oil level is below the
minimum line, add engine oil as
necessary. If the oil level is beyond
the maximum line, engine damage
or high oil consumption may occur
and some oil must be removed
from the engine by a service
technician.
7. Put the dipstick back in and
ensure it is fully seated.
Continuous contact with
used motor oil has caused
cancer in laboratory mice.
Adding engine oil
1. Check the engine oil. For
instructions, refer to Checking the
engine oilin this chapter.
2. If the fluid level is not within the
normal range, add only certified
engine oil of the preferred
viscosity. Add engine oil through
the oil filler cap. Remove the filler
cap and use a funnel to pour oil in
the opening.
3. Recheck the oil level.
Make
sure the oil level is not above
the MAX mark on the dipstick.
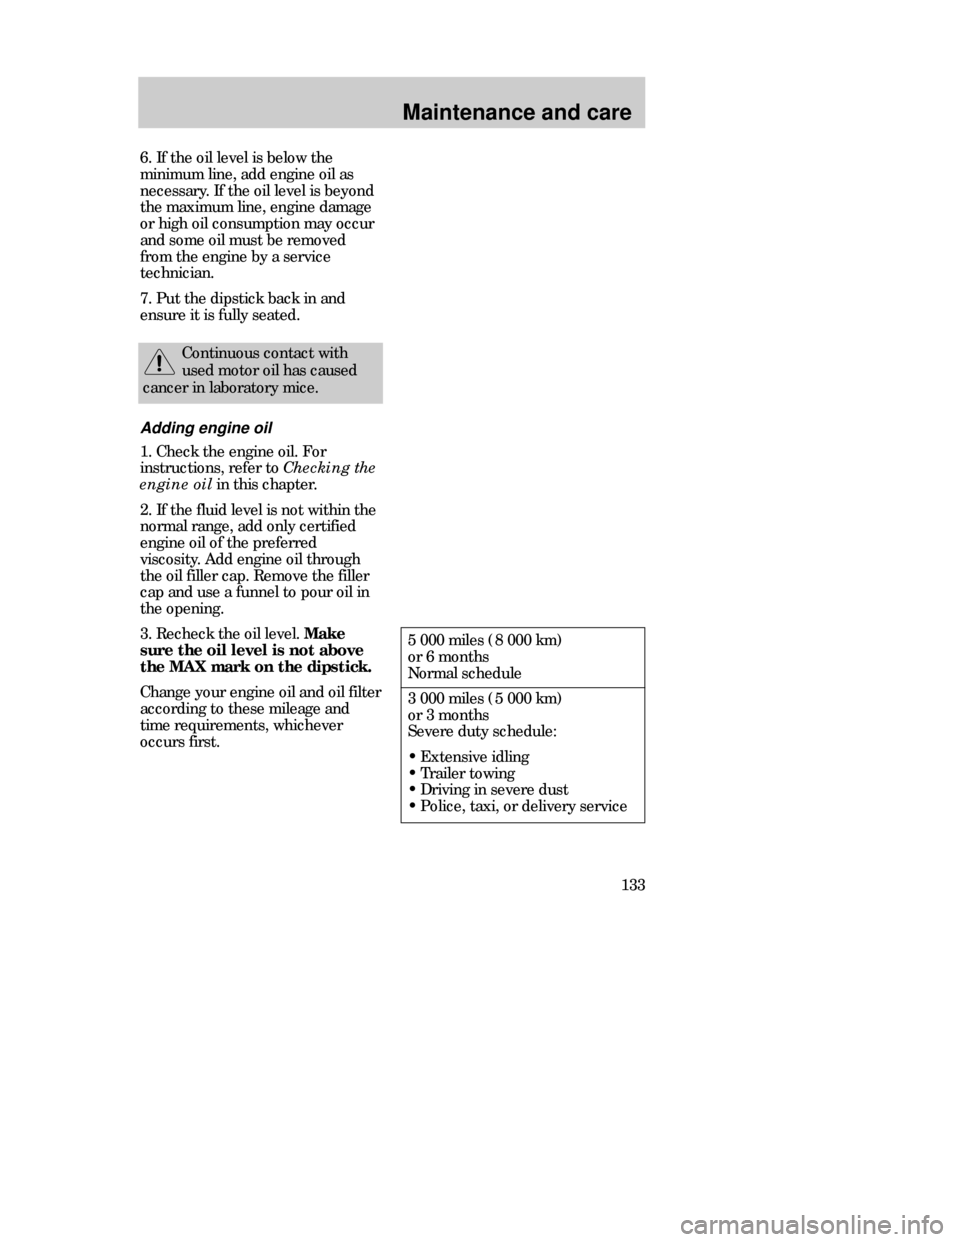
Change your engine oil and oil filter
according to these mileage and
time requirements, whichever
occurs first.5 000 miles (8 000 km)
or 6 months
Normal schedule
3 000 miles (5 000 km)
or 3 months
Severe duty schedule:
•Extensive idling
•Trailer towing
•Driving in severe dust
•Police, taxi, or delivery service
CDW VA1-19Maint en MM 5/15/97 7:55 PM Page 133
Page 134 of 196
Maintenance and care
134Empty and used oil
containers must be disposed
of at an authorized waste disposal
facility.
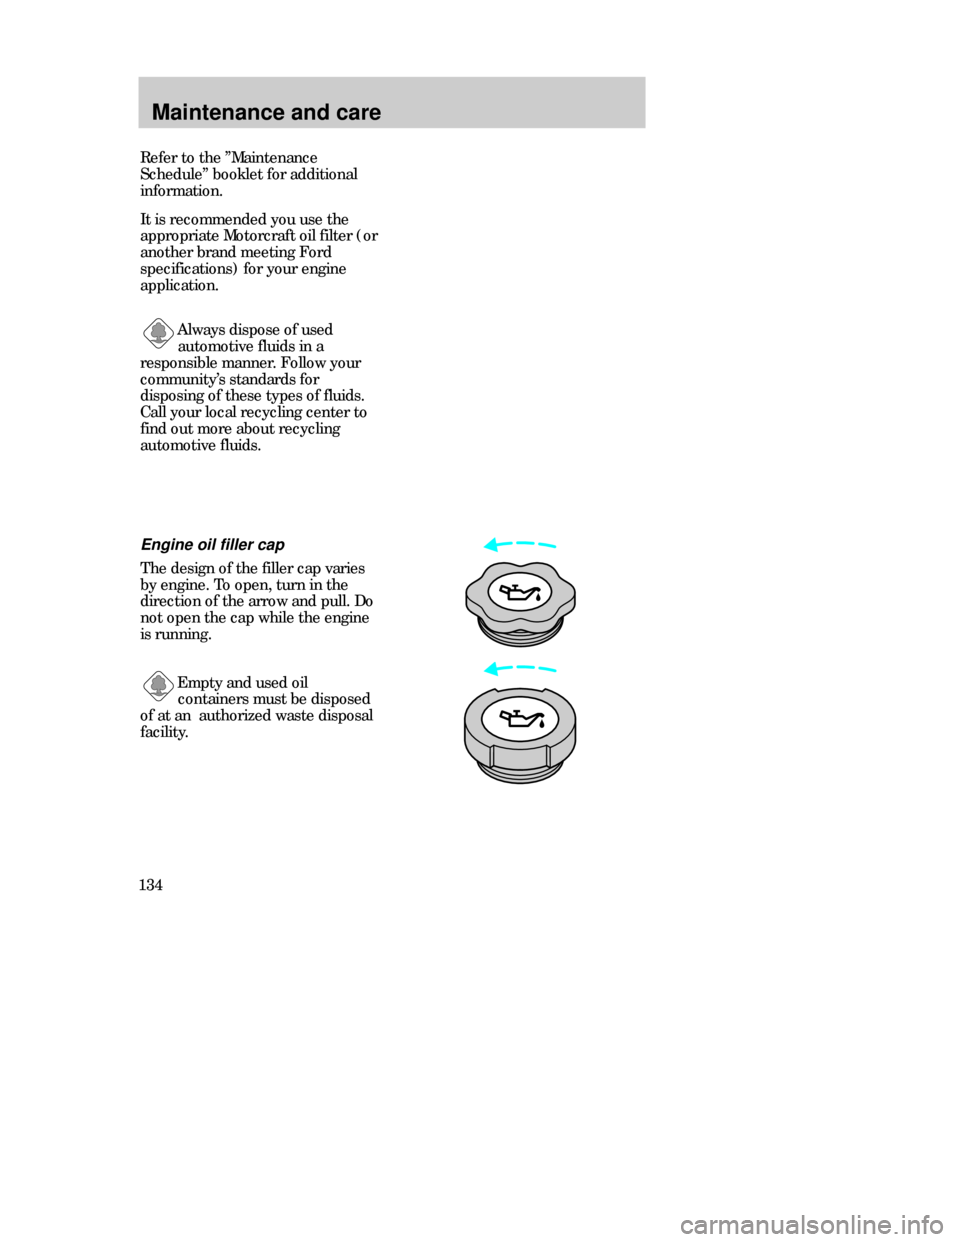
Engine oil filler cap
The design of the filler cap varies
by engine. To open, turn in the
direction of the arrow and pull. Do
not open the cap while the engine
is running.
Refer to the ”Maintenance
Schedule” booklet for additional
information.
Always dispose of used
automotive fluids in a
responsible manner. Follow your
community’s standards for
disposing of these types of fluids.
Call your local recycling center to
find out more about recycling
automotive fluids.
It is recommended you use the
appropriate Motorcraft oil filter (or
another brand meeting Ford
specifications) for your engine
application.
CDW VA1-19Maint en MM 5/15/97 7:55 PM Page 134
Page 164 of 196

Maintenance and care
164
BRAKE
TRACTION
CONTROLO/D
OFF
If you notice one or more of the
following, the emission system may
not be functioning properly; have
the vehicle serviced as soon as
possible:
•Fluid leaks.
•The charging system, engine oil
pressure or low coolant warning
lights illuminate in the
instrument cluster and remain lit.
•Strange odors.
•Engine runs for more than five
seconds after shut off or engine
misfires, surges, stalls or
backfires.
•Loss of oil pressure.
CDW VA1-19Maint en MM 5/15/97 7:56 PM Page 164
Page 167 of 196
Maintenance and care
167
1
1
2
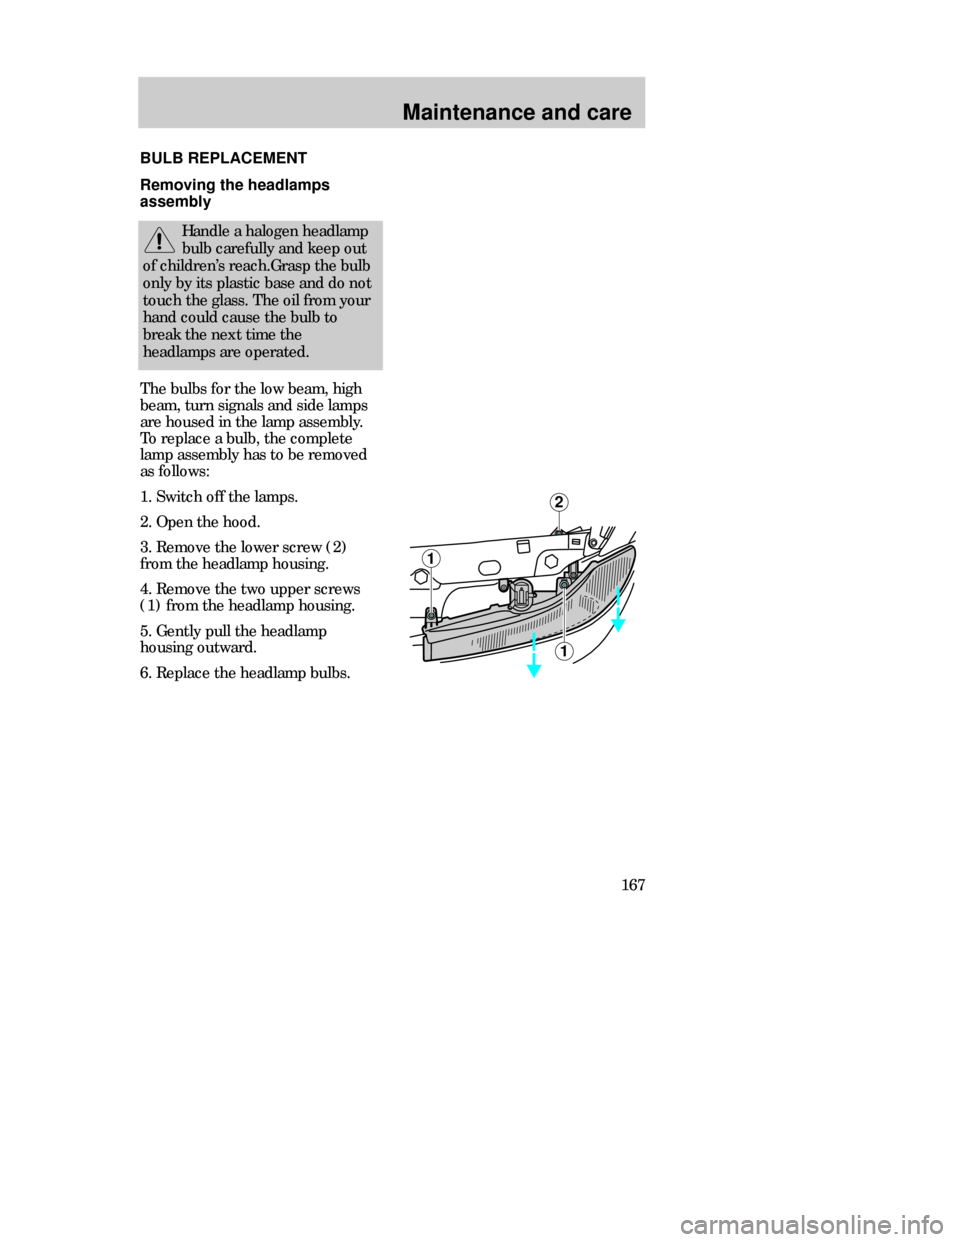
The bulbs for the low beam, high
beam, turn signals and side lamps
are housed in the lamp assembly.
To replace a bulb, the complete
lamp assembly has to be removed
as follows:
1. Switch off the lamps.
2. Open the hood.
3. Remove the lower screw (2)
from the headlamp housing.
4. Remove the two upper screws
(1) from the headlamp housing.
5. Gently pull the headlamp
housing outward.
6. Replace the headlamp bulbs. BULB REPLACEMENT
Handle a halogen headlamp
bulb carefully and keep out
of children’s reach.Grasp the bulb
only by its plastic base and do not
touch the glass. The oil from your
hand could cause the bulb to
break the next time the
headlamps are operated.
Removing the headlamps
assembly
CDW VA1-19Maint en MM 5/15/97 7:56 PM Page 167
Page 171 of 196
Maintenance and care
171
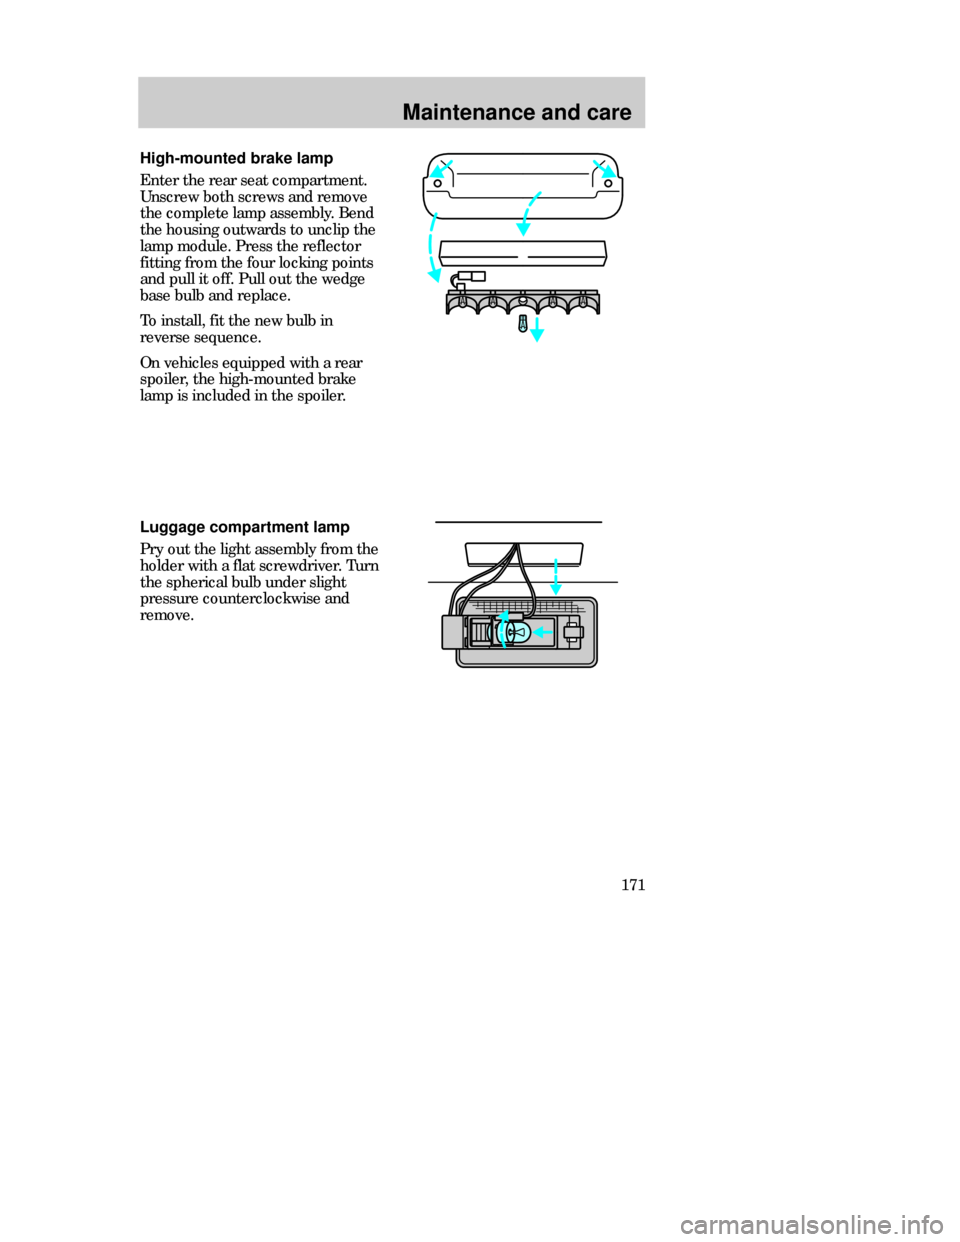
High-mounted brake lamp
Enter the rear seat compartment.
Unscrew both screws and remove
the complete lamp assembly. Bend
the housing outwards to unclip the
lamp module. Press the reflector
fitting from the four locking points
and pull it off. Pull out the wedge
base bulb and replace.
To install, fit the new bulb in
reverse sequence.
On vehicles equipped with a rear
spoiler, the high-mounted brake
lamp is included in the spoiler.
Luggage compartment lamp
Pry out the light assembly from the
holder with a flat screwdriver. Turn
the spherical bulb under slight
pressure counterclockwise and
remove.
CDW VA1-19Maint en MM 5/15/97 7:56 PM Page 171