battery Mercury Mystique 2000 Owner's Manuals
[x] Cancel search | Manufacturer: MERCURY, Model Year: 2000, Model line: Mystique, Model: Mercury Mystique 2000Pages: 248, PDF Size: 2.2 MB
Page 5 of 248
Introduction
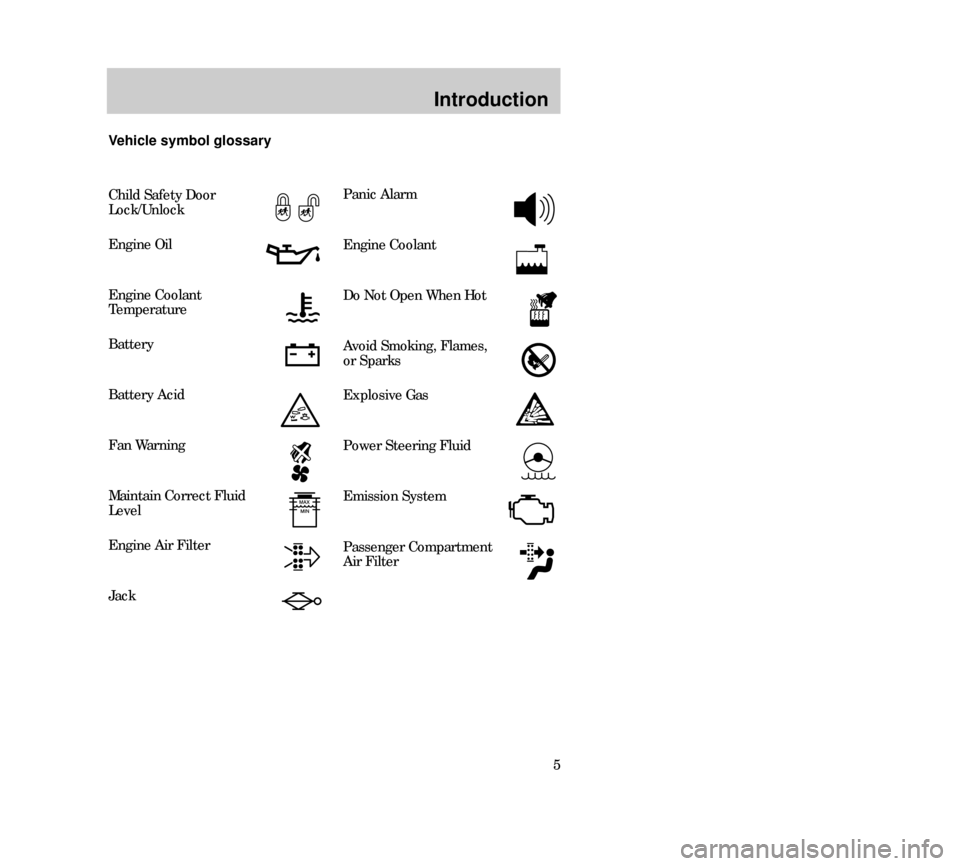
5 Vehicle symbol glossary
Child Safety Door
Lock/Unlock
Engine Oil
Engine Coolant
Temperature
Battery
Battery Acid
Fan Warning
Maintain Correct Fluid
Level
Engine Air Filter
Jack
Panic Alarm
Engine Coolant
Do Not Open When Hot
Avoid Smoking, Flames,
or Sparks
Explosive Gas
Power Steering Fluid
Emission System
Passenger Compartment
Air Filter
11MIten 24.6.99 15:01 Uhr Seite 5
Page 9 of 248
Instrumentation
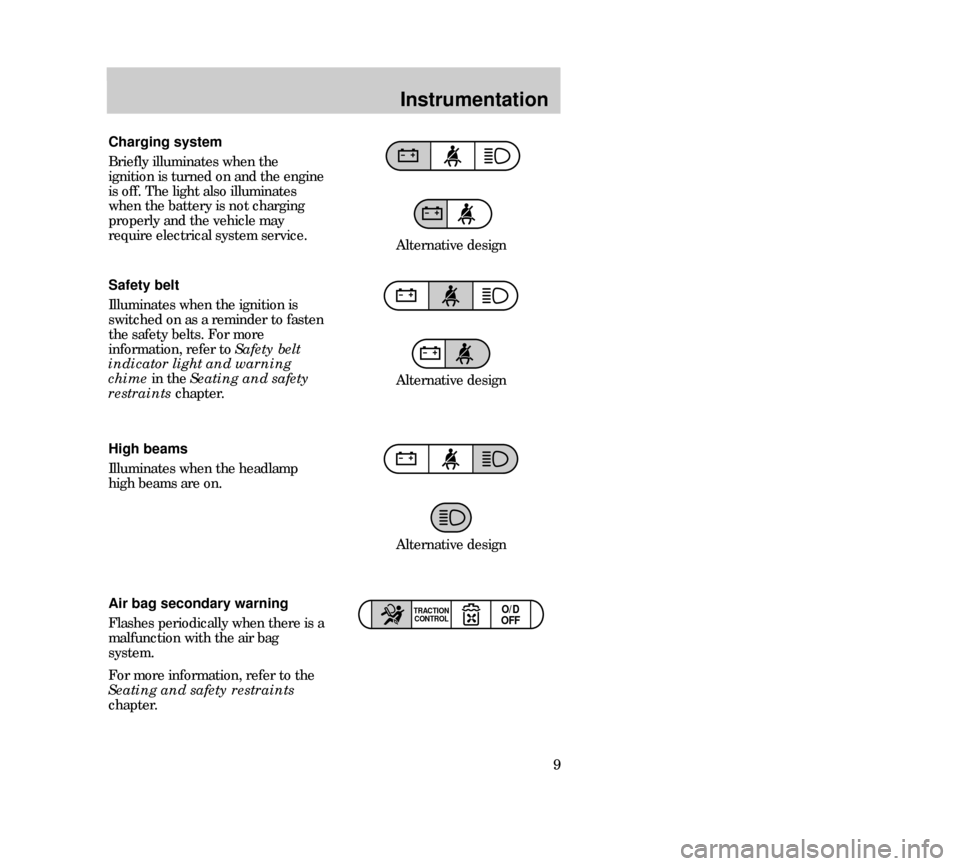
9 High beams
Illuminates when the headlamp
high beams are on. Charging system
Briefly illuminates when the
ignition is turned on and the engine
is off. The light also illuminates
when the battery is not charging
properly and the vehicle may
require electrical system service.
O/D
OFFTRACTION
CONTROLAir bag secondary warning
Flashes periodically when there is a
malfunction with the air bag
system.
For more information, refer to the
Seating and safety restraints
chapter. Safety belt
Illuminates when the ignition is
switched on as a reminder to fasten
the safety belts. For more
information, refer to Safety belt
indicator light and warning
chime in the Seating and safety
restraints chapter.Alternative design
Alternative design
Alternative design
12MInen 24.6.99 15:03 Uhr Seite 9
Page 42 of 248
Controls and features
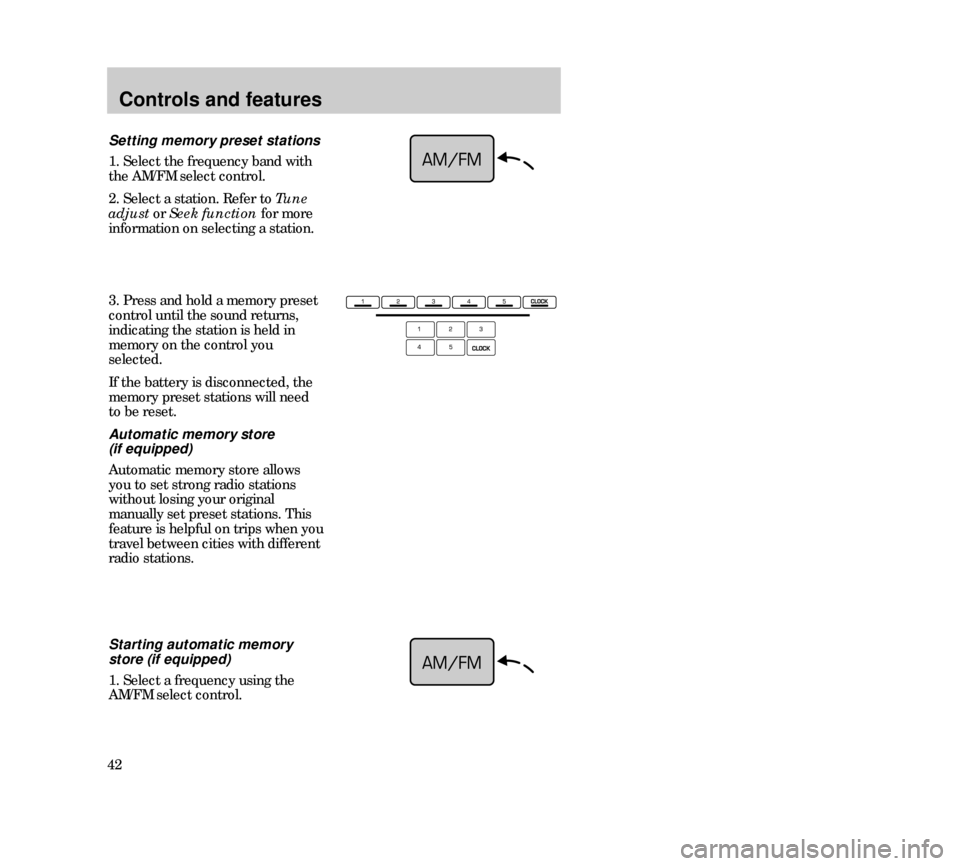
423. Press and hold a memory preset
control until the sound returns,
indicating the station is held in
memory on the control you
selected.
If the battery is disconnected, the
memory preset stations will need
to be reset.
Automatic memory store
(if equipped)
Automatic memory store allows
you to set strong radio stations
without losing your original
manually set preset stations. This
feature is helpful on trips when you
travel between cities with different
radio stations.
Setting memory preset stations
1. Select the frequency band with
the AM/FM select control.
2. Select a station. Refer to Tune
adjust or Seek functionfor more
information on selecting a station.
Starting automatic memory
store (if equipped)
1. Select a frequency using the
AM/FM select control.
13MCfen 24.6.99 15:06 Uhr Seite 42
Page 54 of 248
Controls and features
54STEERING COLUMN
CONTROLS
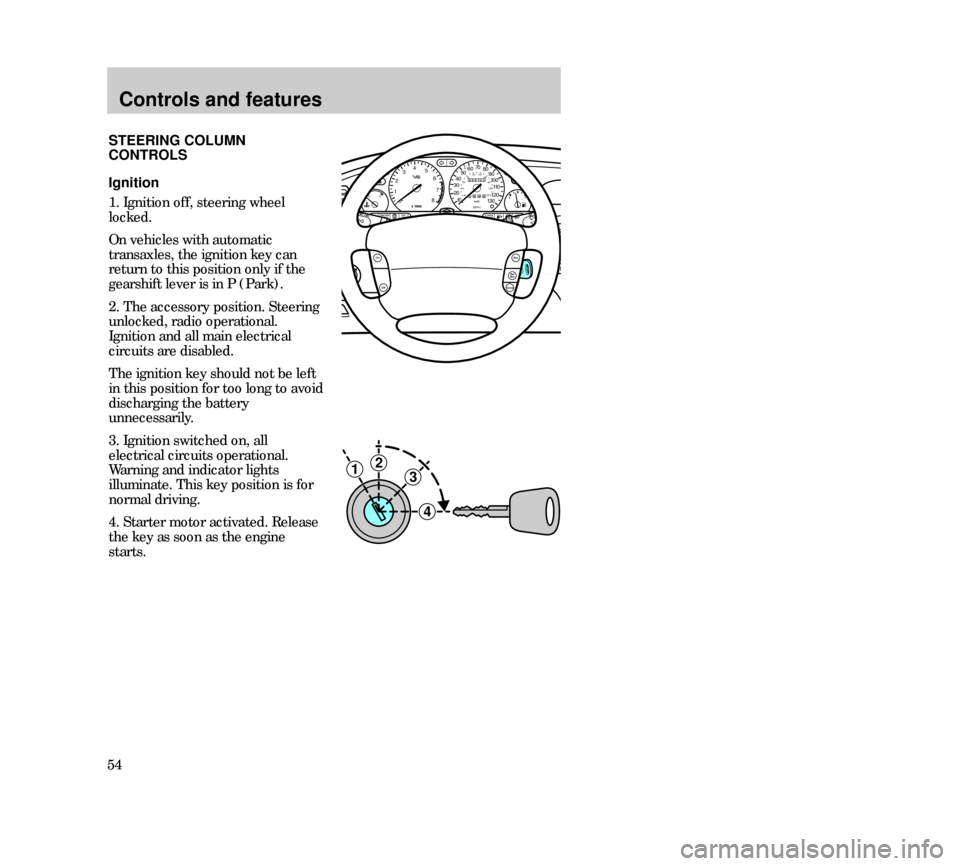
Ignition
1. Ignition off, steering wheel
locked.
On vehicles with automatic
transaxles, the ignition key can
return to this position only if the
gearshift lever is in P (Park).
2. The accessory position. Steering
unlocked, radio operational.
Ignition and all main electrical
circuits are disabled.
The ignition key should not be left
in this position for too long to avoid
discharging the battery
unnecessarily.
3. Ignition switched on, all
electrical circuits operational.
Warning and indicator lights
illuminate. This key position is for
normal driving.
4. Starter motor activated. Release
the key as soon as the engine
starts.
3
4
21
TRACTION
CONTROL
MIRRORS
000123
000010 20 3040506070
80
90
10 0
110
120
13 0MPH20 406055
80120 10 0
14 0
160
18 0
200EF12
03x 1000
4
5
6
7
8
CHECK
ENGINEO/D
OFF
Off
Res
Set
AccCoast
On
CH
13MCfen 24.6.99 15:06 Uhr Seite 54
Page 69 of 248
Controls and features
69 Opening the luggage
compartment
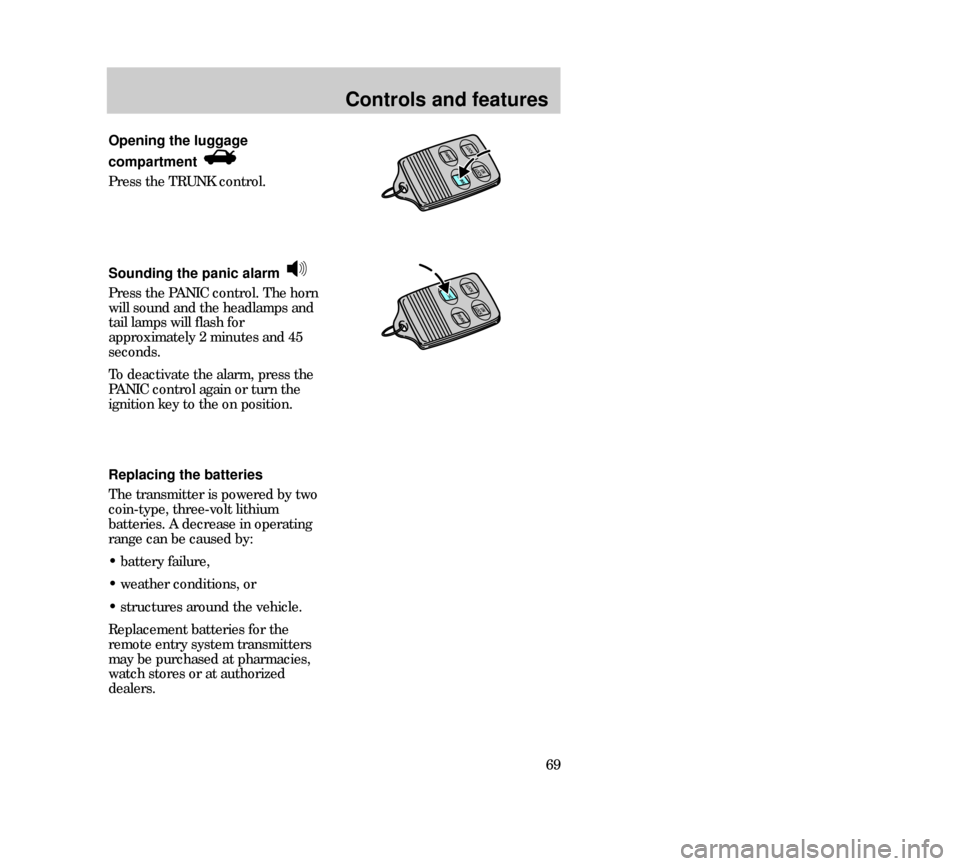
Press the TRUNK control.
Sounding the panic alarm
Press the PANIC control. The horn
will sound and the headlamps and
tail lamps will flash for
approximately 2 minutes and 45
seconds.
To deactivate the alarm, press the
PANIC control again or turn the
ignition key to the on position.
UN
LOCK
LOCKPANIC
TRUNK
TRUNKUN
LOCK
LOCKPANIC
Replacing the batteries
The transmitter is powered by two
coin-type, three-volt lithium
batteries. A decrease in operating
range can be caused by:
• battery failure,
• weather conditions, or
• structures around the vehicle.
Replacement batteries for the
remote entry system transmitters
may be purchased at pharmacies,
watch stores or at authorized
dealers.
13MCfen 24.6.99 15:07 Uhr Seite 69
Page 121 of 248

Driving
121 Speed sensitive power steering
(if equipped)
The steering system is speed
sensitive. This means that the
steering effort is light for parking
and heavier for highway driving.
However, if you have to swerve
around an object or another
vehicle, your vehicle will have full
power assist.
TRANSAXLE OPERATION
Automatic transaxle
(if equipped)
Your 2.5 l V6 automatic transaxle
electronically controls the shift feel
by using an adaptive learning
strategy. This feature is designed to
optimize shift smoothness. It is
normal for your transaxle to adjust
during the first few hundred
kilometers (miles) of operation
until the adaptive strategy has
been learned. The adaptive
learning strategy is maintained by
power from the battery. When the
battery is disconnected or a new
battery is installed, the transaxle
must relearn its adaptive strategy.
Optimal shifting will resume within
a few hundred kilometers (miles)
of operation.
Vehicles equipped with an
automatic transaxle are equipped
with a brake-shift interlock feature
that prevents the gearshift lever
from being moved from the P
(Park) position unless the brake
pedal is depressed.Putting your vehicle in gear
You must push the thumb button to
move the gearshift to the position
you choose.
To operate:
1. Start the engine.
2. Depress and hold the brake
pedal.
3. Move the gearshift lever out of
P (Park).
22MDren 24.6.99 15:26 Uhr Seite 121
Page 123 of 248

Driving
123 P= Park . . . . . . . . . . . . . .
R= Reverse . . . . . . . . . . .
N= Neutral . . . . . . . . . . . .
D= Drive: Gear 1 to 4
with overdrive . . . . . .
Gear 1 to 3
with overdrive
cancelled . . . . . . . . . .
2= Gear 2 . . . . . . . . . . . .
1= Gear 1 . . . . . . . . . . . .
Driving
Never leave a vehicle
unattended while it is
running.
•P(Park)
Always come to a complete stop
before shifting into P (Park). This
locks the transaxle and prevents
the front wheels from rotating.
•R(Reverse)
The vehicle only moves backward.
Always come to a complete stop
before shifting in or out of R
(Reverse). Understanding gearshift
positions
To account for customer driving
habits and conditions, your 2.5 l V6
automatic transaxle electronically
controls the shift feel by using an
adaptive learning strategy. During
the first few hundred kilometers
(miles) of operation, it is normal
for your transaxle to adjust. The
adaptive learning strategy is
maintained by power from the
battery. When the battery is
disconnected or a new battery is
installed, the transaxle must
relearn its adaptive strategy.
Optimal shifting will resume within
a few hundred kilometers (miles)
of operation.
22MDren 24.6.99 15:26 Uhr Seite 123
Page 144 of 248
Roadside emergencies
144
1
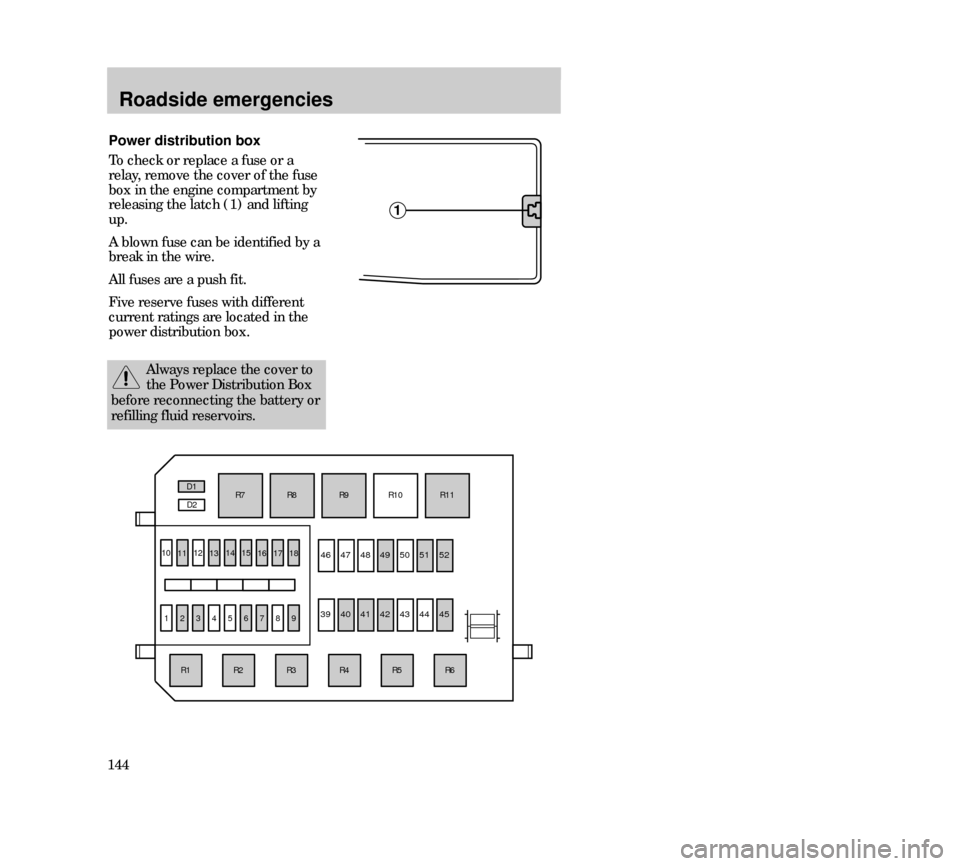
Power distribution box
To check or replace a fuse or a
relay, remove the cover of the fuse
box in the engine compartment by
releasing the latch (1) and lifting
up.
A blown fuse can be identified by a
break in the wire.
All fuses are a push fit.
Five reserve fuses with different
current ratings are located in the
power distribution box.
111213141516
R6R5R4R3R2
10
123456789
R1R7R8
R9R10
R11 D1
D2
17
18
4647
4849 5051 52
394041
424344
45
Always replace the cover to
the Power Distribution Box
before reconnecting the battery or
refilling fluid reservoirs.
23MREen 24.6.99 15:28 Uhr Seite 144
Page 154 of 248
Roadside emergencies
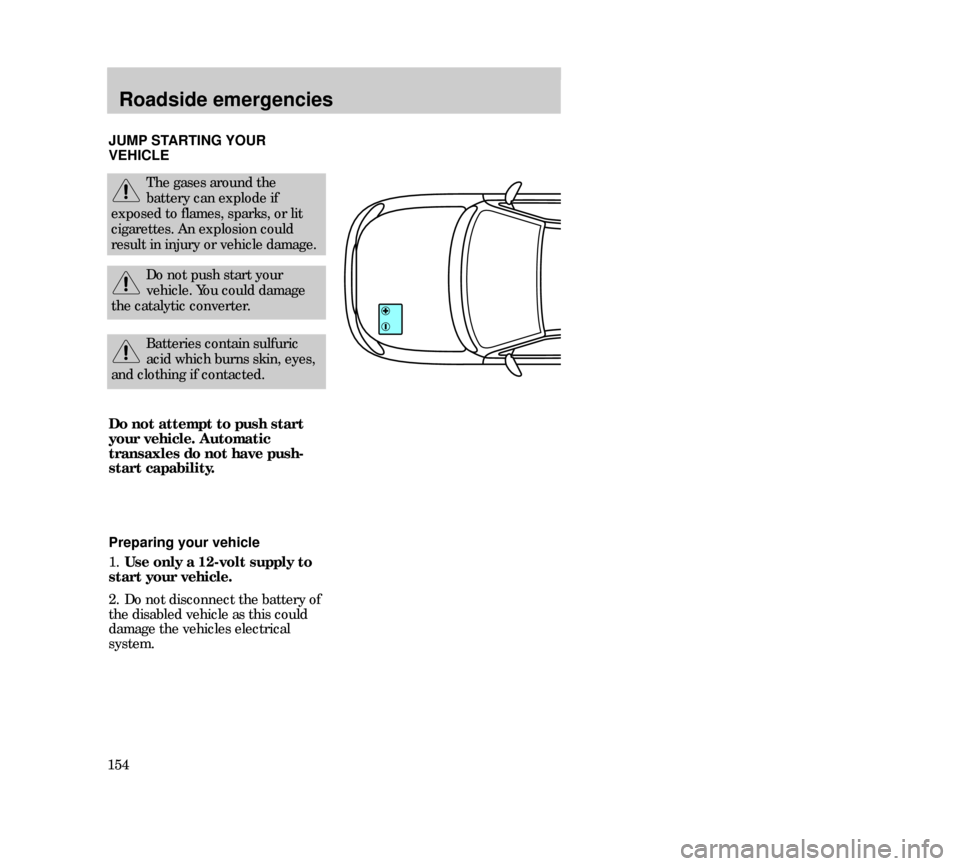
154JUMP STARTING YOUR
VEHICLE
The gases around the
battery can explode if
exposed to flames, sparks, or lit
cigarettes. An explosion could
result in injury or vehicle damage.
Do not push start your
vehicle. You could damage
the catalytic converter.
Batteries contain sulfuric
acid which burns skin, eyes,
and clothing if contacted.
Do not attempt to push start
your vehicle. Automatic
transaxles do not have push-
start capability.
Preparing your vehicle
1.Use only a 12-volt supply to
start your vehicle.
2. Do not disconnect the battery of
the disabled vehicle as this could
damage the vehicles electrical
system.
23MREen 24.6.99 15:28 Uhr Seite 154
Page 155 of 248
Roadside emergencies
155
3. Park the booster vehicle close to
the hood of the disabled vehicle,
making sure the two vehicles do
nottouch. Set the parking brake
on both vehicles and stay clear of
the engine cooling fan and other
moving parts.
4. Check all battery terminals and
remove any excessive corrosion
before you attach the battery
cables. Ensure that vent caps are
tight and level.
5. Turn the heater fan on in both
vehicles to protect from any
electrical surges. Turn all other
accessories off.
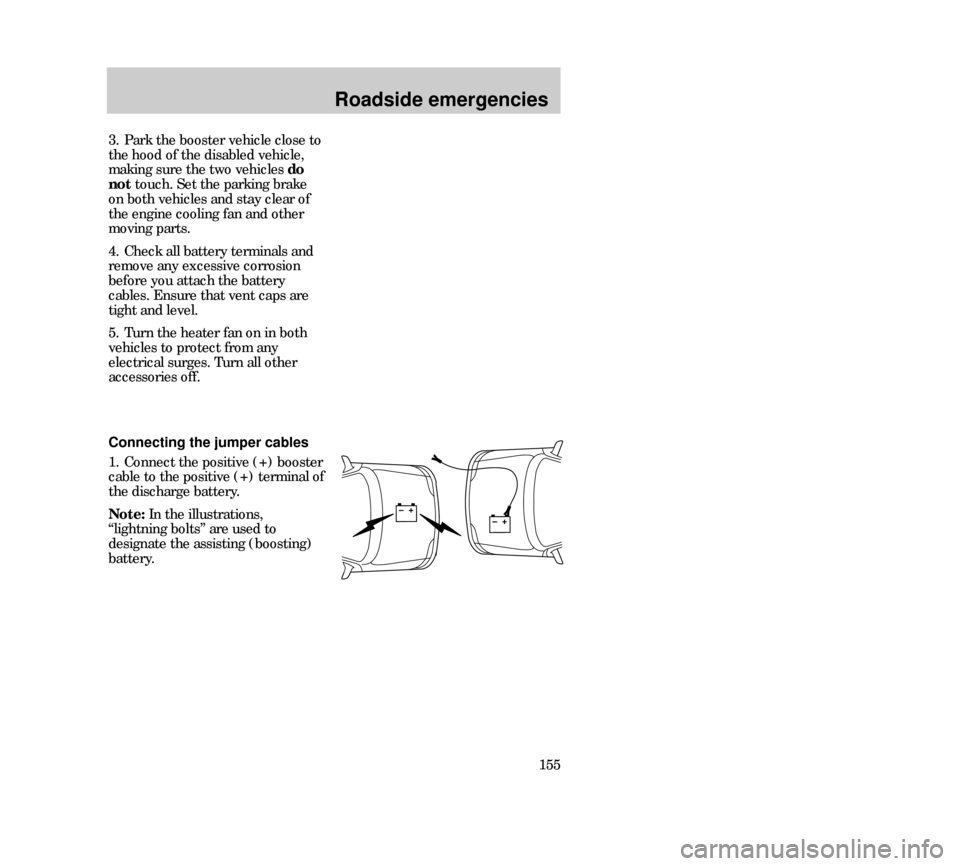
Connecting the jumper cables
1. Connect the positive (+) booster
cable to the positive (+) terminal of
the discharge battery.
Note:In the illustrations,
“lightning bolts” are used to
designate the assisting (boosting)
battery.
23MREen 24.6.99 15:28 Uhr Seite 155