Mercury Sable 1997 Owner's Manuals
Manufacturer: MERCURY, Model Year: 1997, Model line: Sable, Model: Mercury Sable 1997Pages: 167, PDF Size: 1.59 MB
Page 111 of 167
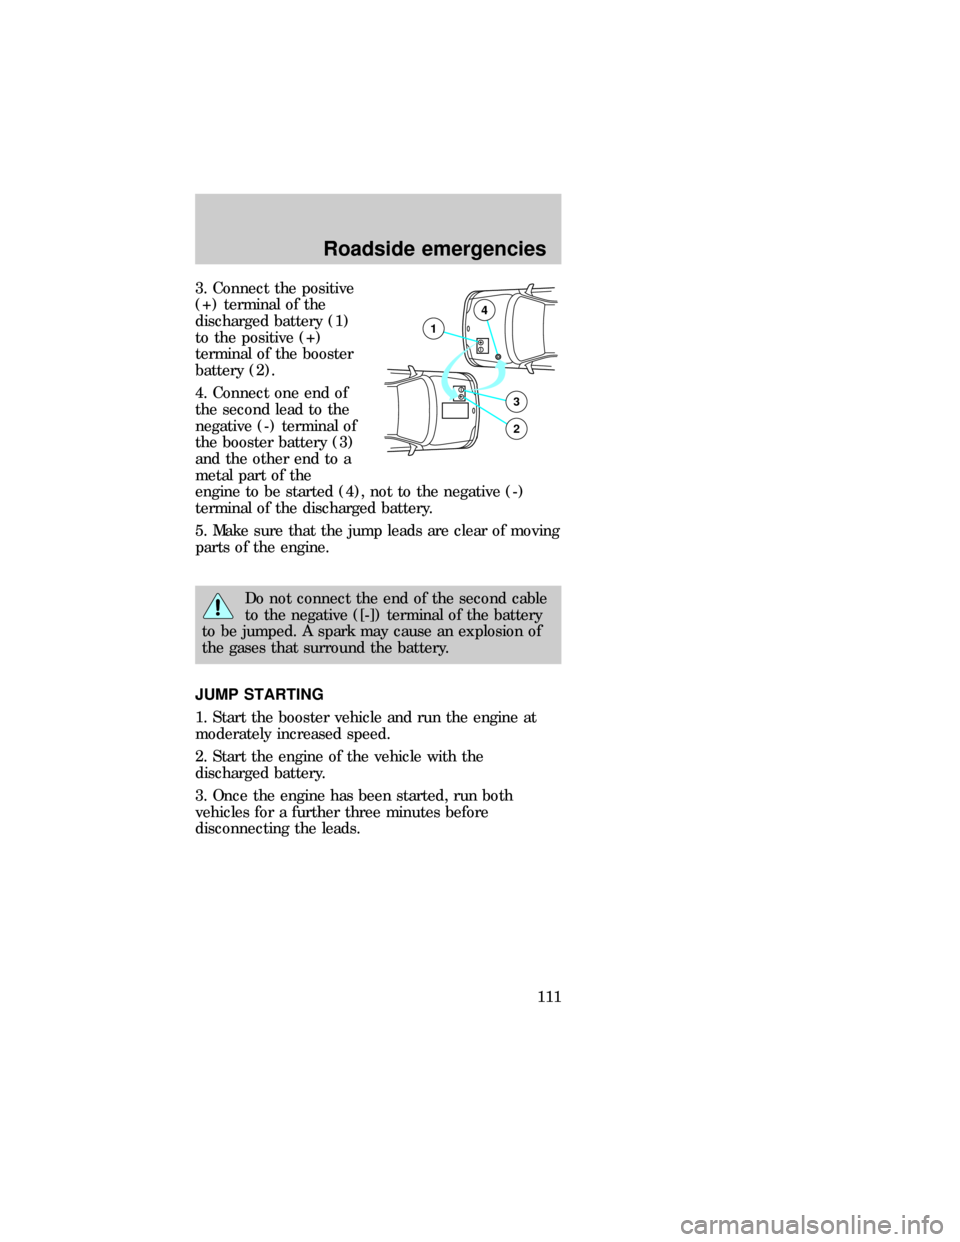
3. Connect the positive
(+) terminal of the
discharged battery (1)
to the positive (+)
terminal of the booster
battery (2).
4. Connect one end of
the second lead to the
negative (-) terminal of
the booster battery (3)
and the other end to a
metal part of the
engine to be started (4), not to the negative (-)
terminal of the discharged battery.
5. Make sure that the jump leads are clear of moving
parts of the engine.
Do not connect the end of the second cable
to the negative ([-]) terminal of the battery
to be jumped. A spark may cause an explosion of
the gases that surround the battery.
JUMP STARTING
1. Start the booster vehicle and run the engine at
moderately increased speed.
2. Start the engine of the vehicle with the
discharged battery.
3. Once the engine has been started, run both
vehicles for a further three minutes before
disconnecting the leads.
+–
+–3
2
1
4
com_jump_starting.01
com_removing_cables.01
Roadside emergencies
111
Page 112 of 167
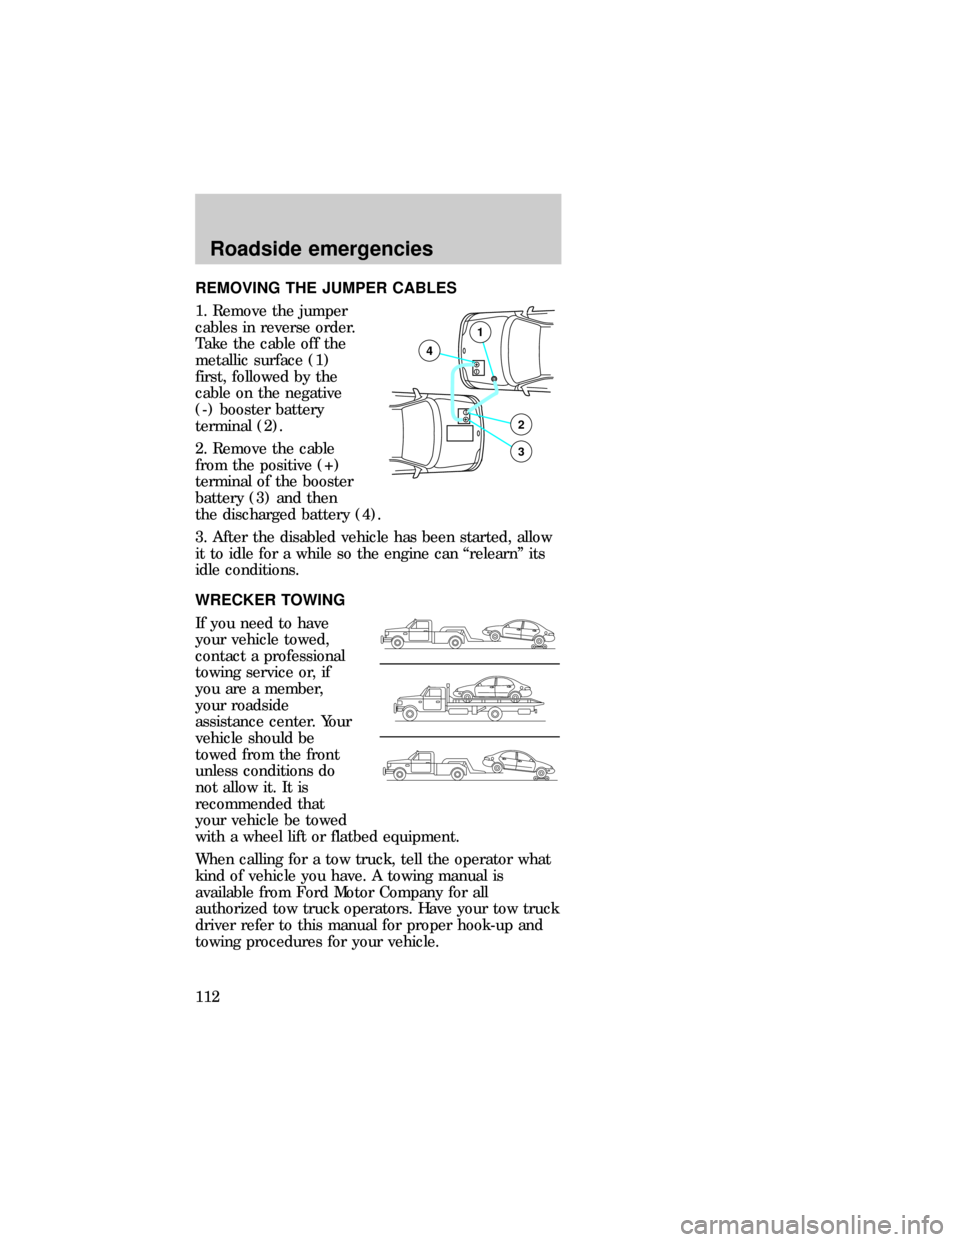
REMOVING THE JUMPER CABLES
1. Remove the jumper
cables in reverse order.
Take the cable off the
metallic surface (1)
first, followed by the
cable on the negative
(-) booster battery
terminal (2).
2. Remove the cable
from the positive (+)
terminal of the booster
battery (3) and then
the discharged battery (4).
3. After the disabled vehicle has been started, allow
it to idle for a while so the engine can ªrelearnº its
idle conditions.
WRECKER TOWING
If you need to have
your vehicle towed,
contact a professional
towing service or, if
you are a member,
your roadside
assistance center. Your
vehicle should be
towed from the front
unless conditions do
not allow it. It is
recommended that
your vehicle be towed
with a wheel lift or flatbed equipment.
When calling for a tow truck, tell the operator what
kind of vehicle you have. A towing manual is
available from Ford Motor Company for all
authorized tow truck operators. Have your tow truck
driver refer to this manual for proper hook-up and
towing procedures for your vehicle.
+–
+–2
3
4
1
dno_towing
dno_towing
Roadside emergencies
112
Page 113 of 167

TOWING YOUR VEHICLE BEHIND ANOTHER
VEHICLE
At times, you may want to tow your vehicle behind
another vehicle, such as a recreational vehicle, car
or a truck.
Before you have your vehicle towed:
²Release the parking brake.
²Move the gearshift to N (Neutral).
²Turn the key in the ignition to OFF.
²Unlock the steering wheel.
Do not tow your vehicle at a speed faster than 56
km/h (35 mph) or for a distance greater than 80 km
(50 miles), unless the drive wheels are placed on
dollies.
Never use a tow bar that attaches to the
bumper when you tow your vehicle. This
could damage the bumper and cause an accident.
Roadside emergencies
113
Page 114 of 167
SERVICE RECOMMENDATIONS
To help you service your vehicle:
²We highlight do-it-yourself items in the engine
compartment for easy location.
²As possible, we design parts that can be replaced
without tools.
²We provide you with a ªService Guideº which
makes tracking routine service for your vehicle
easy.
If your vehicle requires professional service, your
dealership can provide necessary parts and service.
Check your ªWarranty Information Bookletº to find
out which parts and services are covered.
Use only recommended fuels, lubricants, fluids and
service parts conforming to specifications. Motorcraft
parts are designed and built to provide the best
performance in your vehicle.
Precautions when servicing your vehicle
Be especially careful when inspecting or servicing
your vehicle. Here are some general precautions for
your safety:
²Do not work on a hot engine.
The cooling fan is automatic and may come
on at any time. Always disconnect the
negative terminal of the battery before working
near the fan.
²If you must work with the engine running, avoid
wearing loose clothing or jewelry that could get
caught in moving parts. Take precautions with
long hair.
²Do not work on a vehicle with the engine running
in an enclosed space, unless you are sure you
have enough ventilation.
com_service_recommendations.01
com_precautions_servicing.01
Maintenance and care
114
Page 115 of 167
²Keep all lit cigarettes, open flames and other lit
material away from the battery and all fuel related
parts.
If you disconnect the battery, the engine must
ªrelearnº its idle conditions before your vehicle will
drive properly, as explained inBatteryin this
chapter.
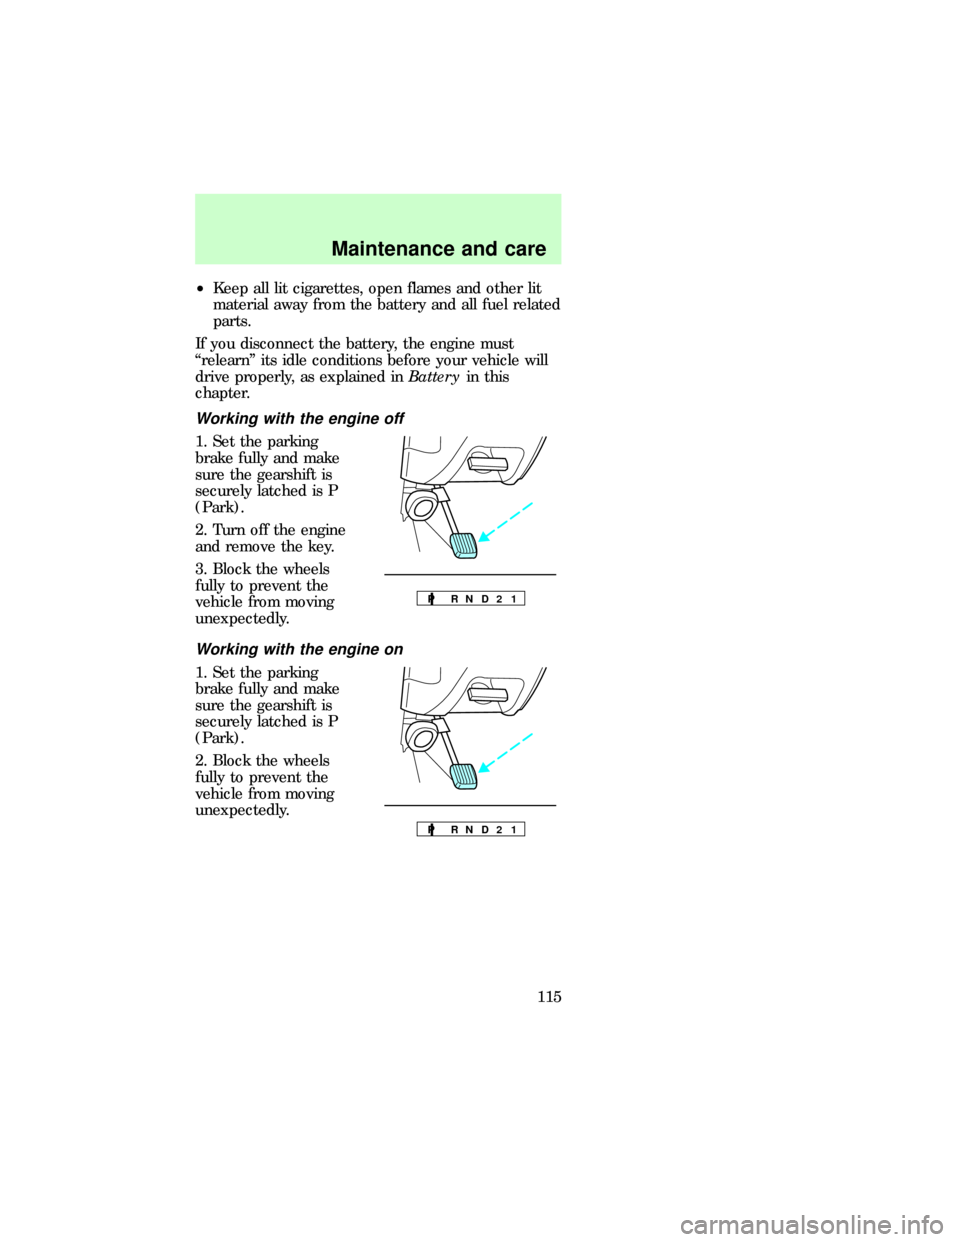
Working with the engine off
1. Set the parking
brake fully and make
sure the gearshift is
securely latched is P
(Park).
2. Turn off the engine
and remove the key.
3. Block the wheels
fully to prevent the
vehicle from moving
unexpectedly.
Working with the engine on
1. Set the parking
brake fully and make
sure the gearshift is
securely latched is P
(Park).
2. Block the wheels
fully to prevent the
vehicle from moving
unexpectedly.
P R N D 2 1
P R N D 2 1
dno_working-off
dno_working-on
dno_open-hood
Maintenance and care
115
Page 116 of 167
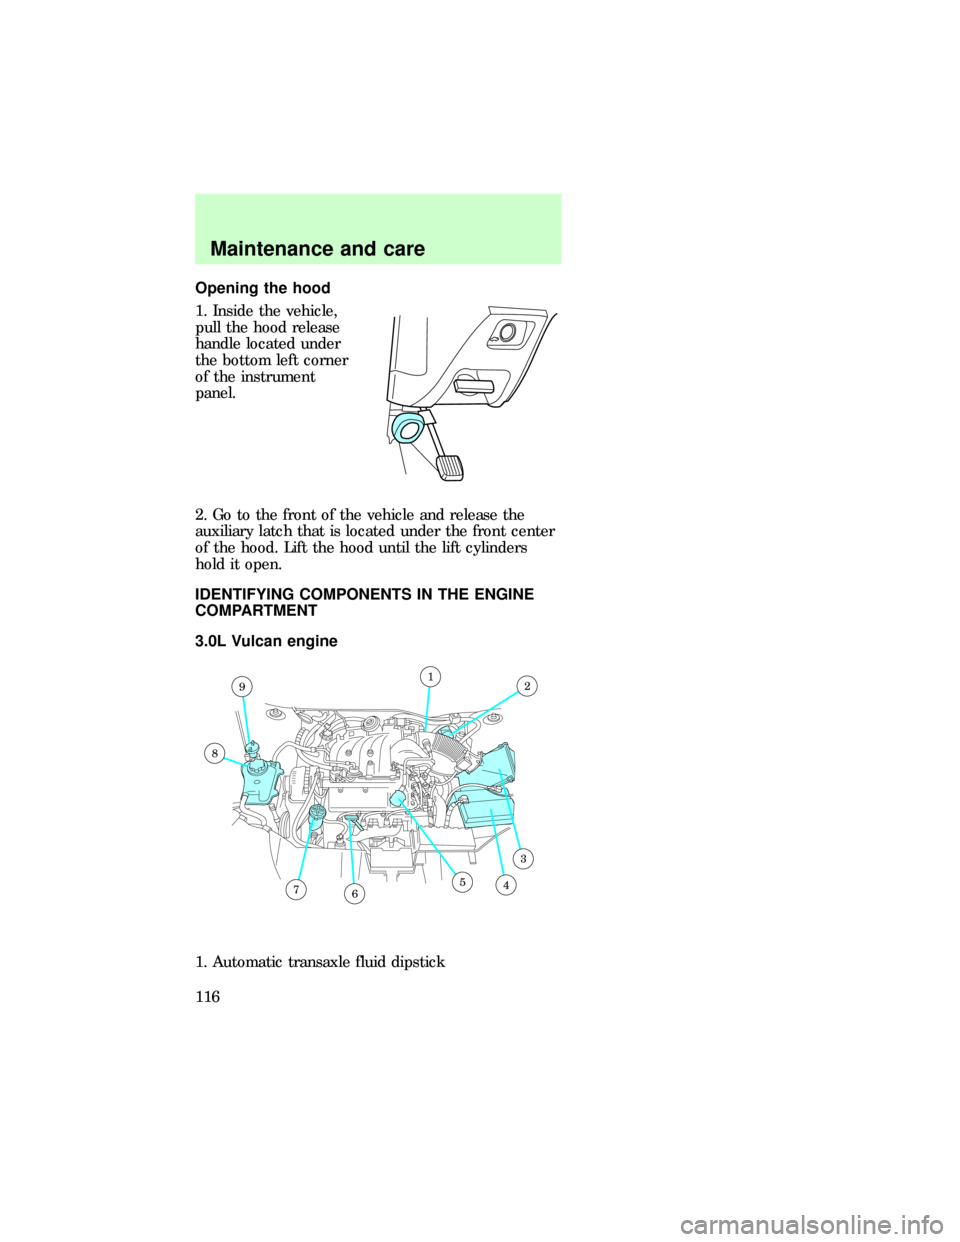
Opening the hood
1. Inside the vehicle,
pull the hood release
handle located under
the bottom left corner
of the instrument
panel.
2. Go to the front of the vehicle and release the
auxiliary latch that is located under the front center
of the hood. Lift the hood until the lift cylinders
hold it open.
IDENTIFYING COMPONENTS IN THE ENGINE
COMPARTMENT
3.0L Vulcan engine
1. Automatic transaxle fluid dipstick
12
3
4567
8
9
dno_id-engine
dno_vulcan
Maintenance and care
116
Page 117 of 167
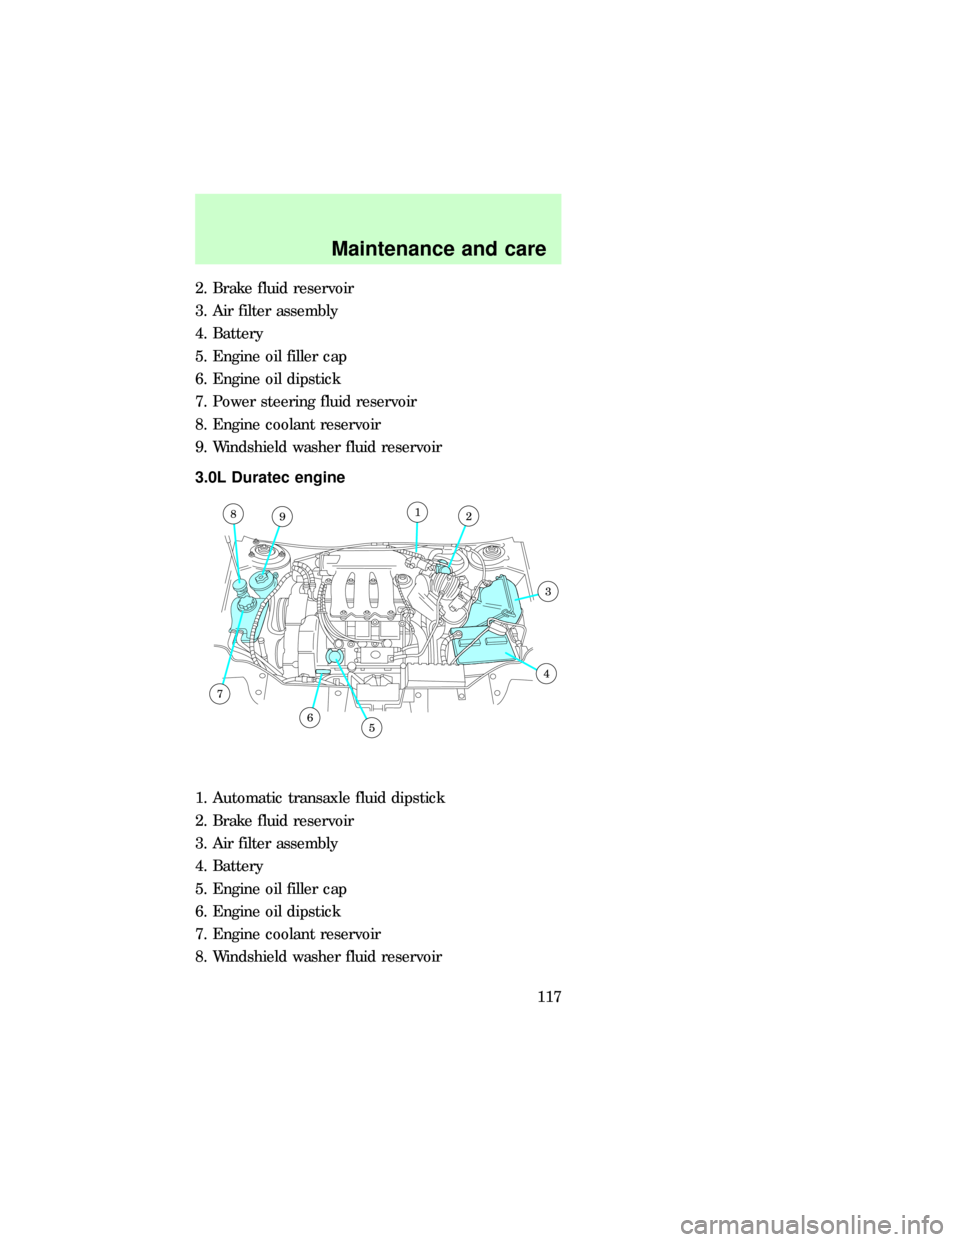
2. Brake fluid reservoir
3. Air filter assembly
4. Battery
5. Engine oil filler cap
6. Engine oil dipstick
7. Power steering fluid reservoir
8. Engine coolant reservoir
9. Windshield washer fluid reservoir
3.0L Duratec engine
1. Automatic transaxle fluid dipstick
2. Brake fluid reservoir
3. Air filter assembly
4. Battery
5. Engine oil filler cap
6. Engine oil dipstick
7. Engine coolant reservoir
8. Windshield washer fluid reservoir
8912
3
4
56
7
dno_duratec
Maintenance and care
117
Page 118 of 167

9. Power steering fluid reservoir
CHECKING AND ADDING ENGINE OIL
Checking the engine oil
Check the engine oil each time you fuel your
vehicle.
To check the oil:
1. Make sure the vehicle is on level ground. If the
engine is warm, turn the engine off and wait a few
minutes for the oil to drain into the oil pan.
2. Set the parking brake and ensure the gearshift is
securely latched in P (Park).
3. Open the hood. Protect yourself from engine heat.
4. Locate and carefully
remove the engine oil
dipstick.
5. Wipe the dipstick clean. Insert the dipstick fully,
then remove it again. The oil level should be in the
range shown on the dipstick.
6. If the oil level is below the MIN line or the ADD 1
QUART line, add oil as necessary. If the oil level is
beyond the MAX or FULL line, engine damage or
high engine oil consumption may occur and some oil
must be removed from the engine by a service
technician.
7. Put the dipstick back in and ensure it is fully
seated.
Adding engine oil
1. Check the engine oil. For instructions, refer to
Checking the engine oilin this chapter.
ADD 1 QTFULL
dno_engine-oils
dno_check-oil
dno_add-oil
Maintenance and care
118
Page 119 of 167
2. If the fluid level is not within the normal range,
add only certified engine oil of the preferred
viscosity. Add engine oil through the oil filler cap.
Remove the filler cap and use a funnel to pour oil in
the opening.
3. Recheck the oil level. Make sure the oil level is
not above the MAX or FULL mark on the dipstick.
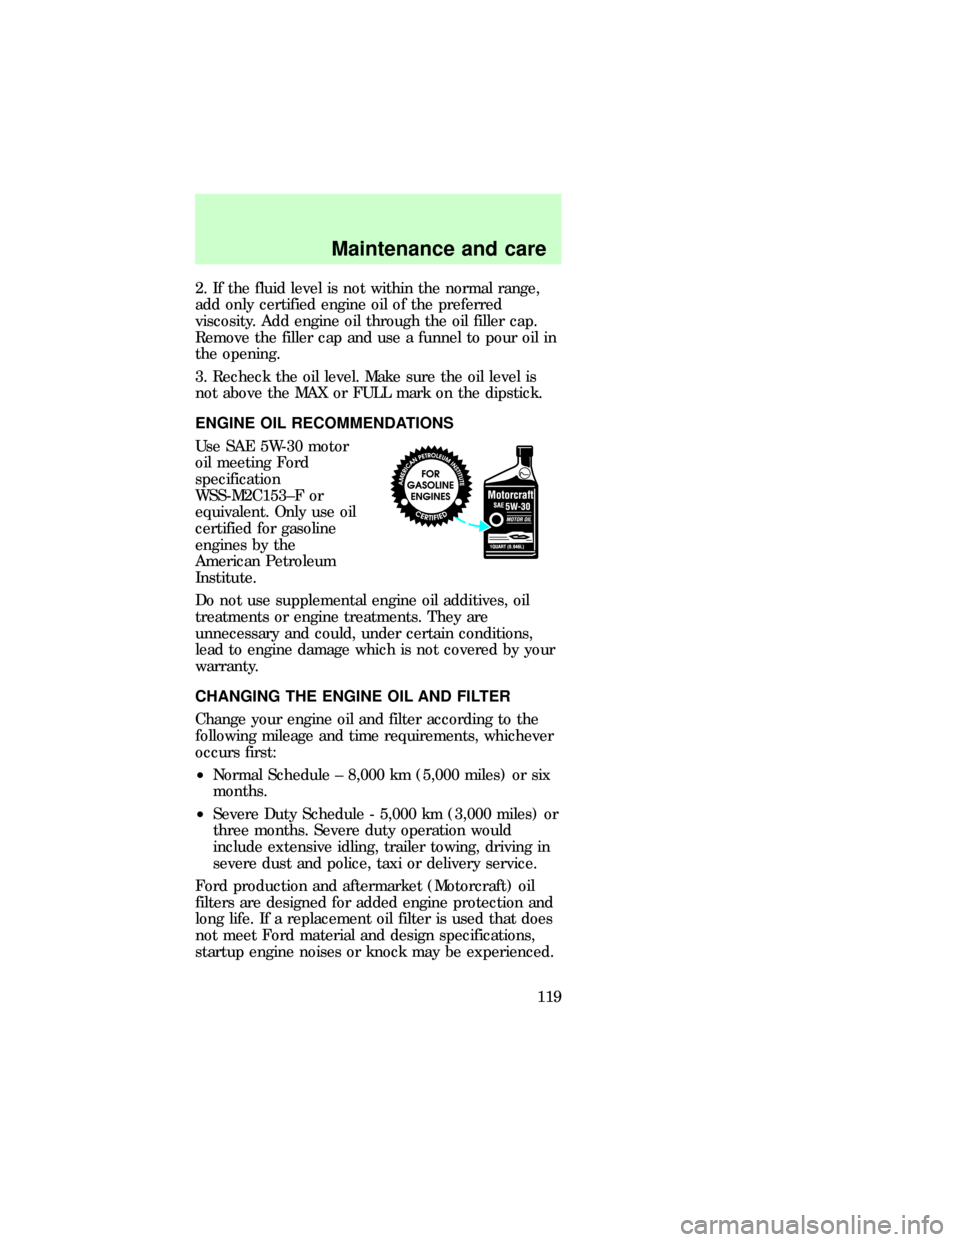
ENGINE OIL RECOMMENDATIONS
Use SAE 5W-30 motor
oil meeting Ford
specification
WSS-M2C153±F or
equivalent. Only use oil
certified for gasoline
engines by the
American Petroleum
Institute.
Do not use supplemental engine oil additives, oil
treatments or engine treatments. They are
unnecessary and could, under certain conditions,
lead to engine damage which is not covered by your
warranty.
CHANGING THE ENGINE OIL AND FILTER
Change your engine oil and filter according to the
following mileage and time requirements, whichever
occurs first:
²Normal Schedule ± 8,000 km (5,000 miles) or six
months.
²Severe Duty Schedule - 5,000 km (3,000 miles) or
three months. Severe duty operation would
include extensive idling, trailer towing, driving in
severe dust and police, taxi or delivery service.
Ford production and aftermarket (Motorcraft) oil
filters are designed for added engine protection and
long life. If a replacement oil filter is used that does
not meet Ford material and design specifications,
startup engine noises or knock may be experienced.
dno_oil-recommendation
dno_oil-and-filter-change
Maintenance and care
119
Page 120 of 167
It is recommended you use the appropriate
Motorcraft oil filter (or another brand meeting Ford
specifications) for your engine application.
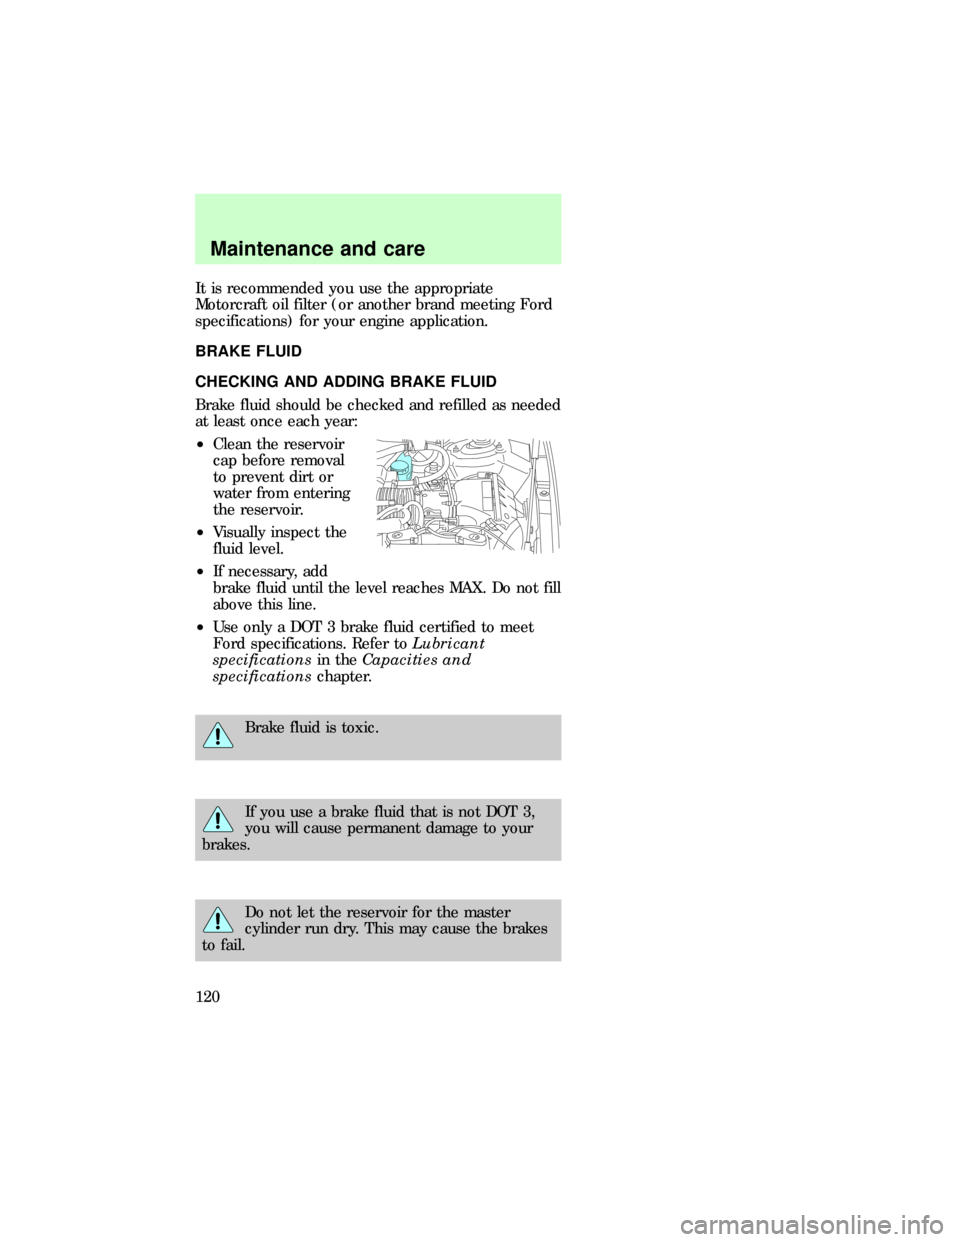
BRAKE FLUID
CHECKING AND ADDING BRAKE FLUID
Brake fluid should be checked and refilled as needed
at least once each year:
²Clean the reservoir
cap before removal
to prevent dirt or
water from entering
the reservoir.
²Visually inspect the
fluid level.
²If necessary, add
brake fluid until the level reaches MAX. Do not fill
above this line.
²Use only a DOT 3 brake fluid certified to meet
Ford specifications. Refer toLubricant
specificationsin theCapacities and
specificationschapter.
Brake fluid is toxic.
If you use a brake fluid that is not DOT 3,
you will cause permanent damage to your
brakes.
Do not let the reservoir for the master
cylinder run dry. This may cause the brakes
to fail.
dno_brake-fluids
com_checking-adding_fluid.01
dno_washer-fluid
Maintenance and care
120