headlamp Mercury Sable 1997 s User Guide
[x] Cancel search | Manufacturer: MERCURY, Model Year: 1997, Model line: Sable, Model: Mercury Sable 1997Pages: 167, PDF Size: 1.59 MB
Page 103 of 167

Fuse/Relay
LocationFuse Amp
RatingDescription
7 40A* Rear defroster
8 30A* Thermactor air
pump
9 40A* Engine cooling
fans
10 20A* Fuel pump
11 40A* Blower motor
12 - Not used
13 40A* Anti-lock brake
module
14 - Not used
15 15A** Daytime
running lamps
16 10A** Air bag
diagnostic
monitor
17 20A** Radio, amplifier,
CD changer
18 30A** Anti-lock brake
module
19 15A** Horn
20 15A** Park lamps
21 - Not used
22 30A** Headlamps
23 - Blower motor
24 - Intermittent
wiper control
25 - Wiper relay
26 30A** Alternator
27 - Not used
Roadside emergencies
103
Page 104 of 167

Fuse/Relay
LocationFuse Amp
RatingDescription
28 15A** Electronic
engine control
29 - Washer pump
relay
30 - Horn relay
31 - Autolamp
(headlamps)
32 - Starter relay
33 - Autolamp
(parking lamps)
*Maxi fuses. **Mini fuses
Always disconnect the battery before
servicing high current fuses.
Always replace the cover to the Power
Distribution Box before reconnecting the
battery or refilling fluid reservoirs.
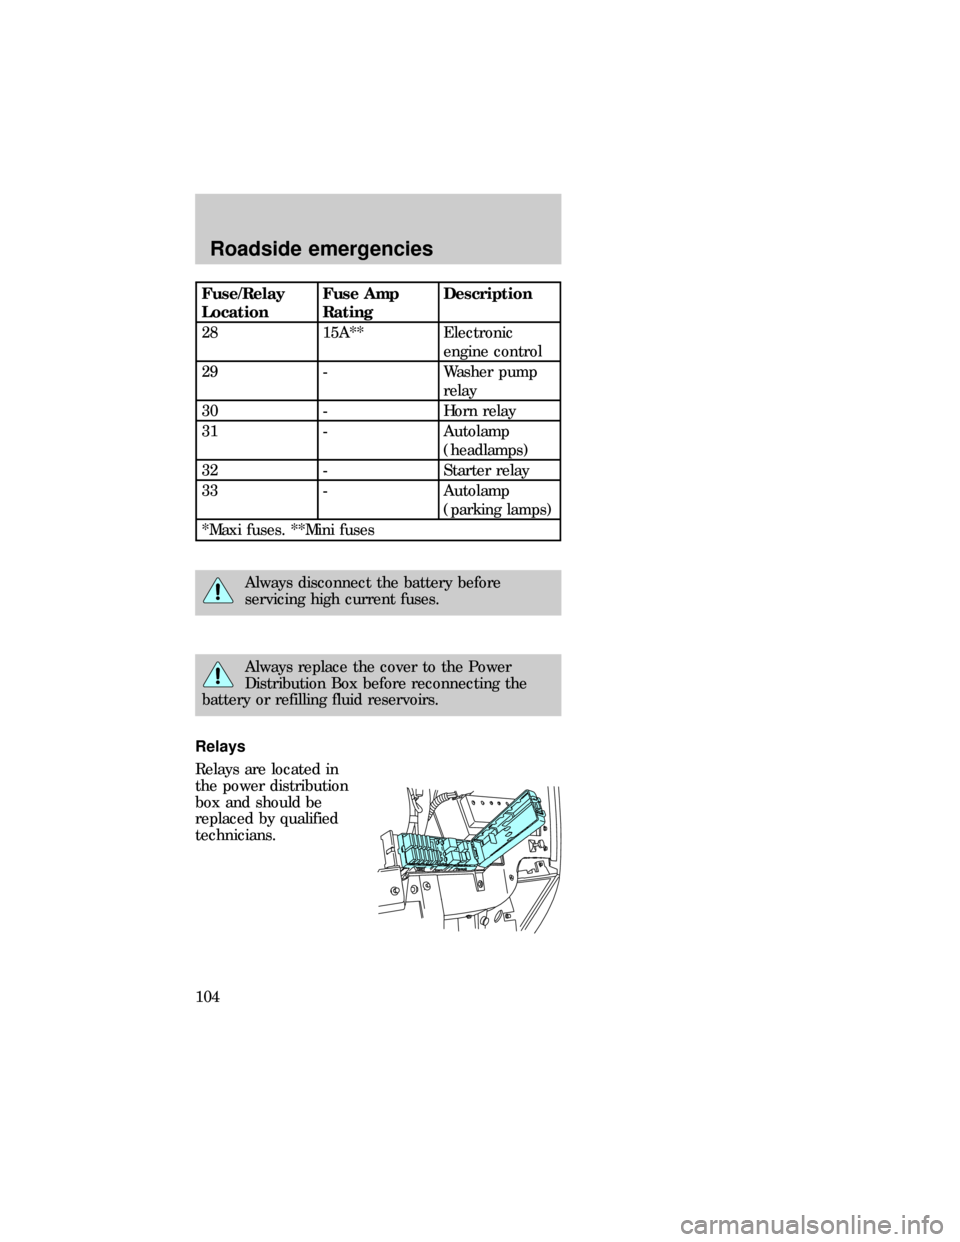
Relays
Relays are located in
the power distribution
box and should be
replaced by qualified
technicians.
dno_relay
dno_flat-tires
Roadside emergencies
104
Page 140 of 167

²At least ten minutes of driving on an expressway
or highway.
Before completing the above driving modes, the
engine must be warmed up and at operating
temperature. Once started, the vehicle must not be
turned off during these driving modes.
EXTERIOR LAMPS
It is a good idea to check the operation of the
following lights frequently:
²Headlamps
²High-mount brake lamp
²Tail lamps
²Brake lamps
²Backup lamps
²Hazard flashers
²Turn signals
²License plate lamp
²Interior overhead lamps
Do not remove lamp bulbs unless they will be
replaced immediately. If a bulb is removed for an
extended period of time, contaminants may enter
the lamp housings and affect performance.
High-mount brake lamp - Sedan
To remove the brake lamp:
1. Remove package
tray trim, then push
attachment toward the
rear.
2. Slide brake lamp up
and away from the rear
window to remove it
from the tabs that hold
it down.
3. Disconnect bulbs.
dno_drive-cycle
dno_exterior-bulbs
Maintenance and care
140
Page 141 of 167

To install brake lamp:
1. Install bulbs, then position the brake lamp over
tab slots and line up the tab with the tab slots.
2. Push down and toward the rear window to engage
the tabs.
3. Push attachment toward the rear window and line
up slot in attachment with the edge of the sheet
metal screw.
4. Release the attachment slot onto the sheet metal
hole. Install the package tray trim.
High-mount brake lamp - Wagon
To remove the brake lamp:
1. Remove interior trim
panel, then remove the
three attachment nuts
that hold brake lamp in
place.
2. Lift whole assembly
off vehicle from the
outside.
3. Disconnect bulbs.
To install brake lamp:
1. Install bulbs, the position brake lamp into tailgate
holes.
2. From the inside of the vehicle, stall and tighten
the four nuts that hold the brake lamp in place.
3. Install the interior trim panel.
Using the right bulbs
Function Trade Number
Front side marker lamp 194
Front park/turn lamp 3457NA
Headlamp 9007
Tail lamp/brake lamp 3157
Maintenance and care
141
Page 143 of 167

Function Trade Number
Heater-A/CGo to Ford
authorized
dealer
Automatic climate controlGo to Ford
authorized
dealer
Rear window defrost switchGo to Ford
authorized
dealer
Rear window wiper/washer
switch (wagon)Go to Ford
authorized
dealer
Headlamps
To remove the headlamp bulb:
1. Make sure headlamp switch is in OFF position,
then open the hood. If you are replacing the driver
side headlamp, unclip the electronic module on the
right side of the battery and move it out of the way.
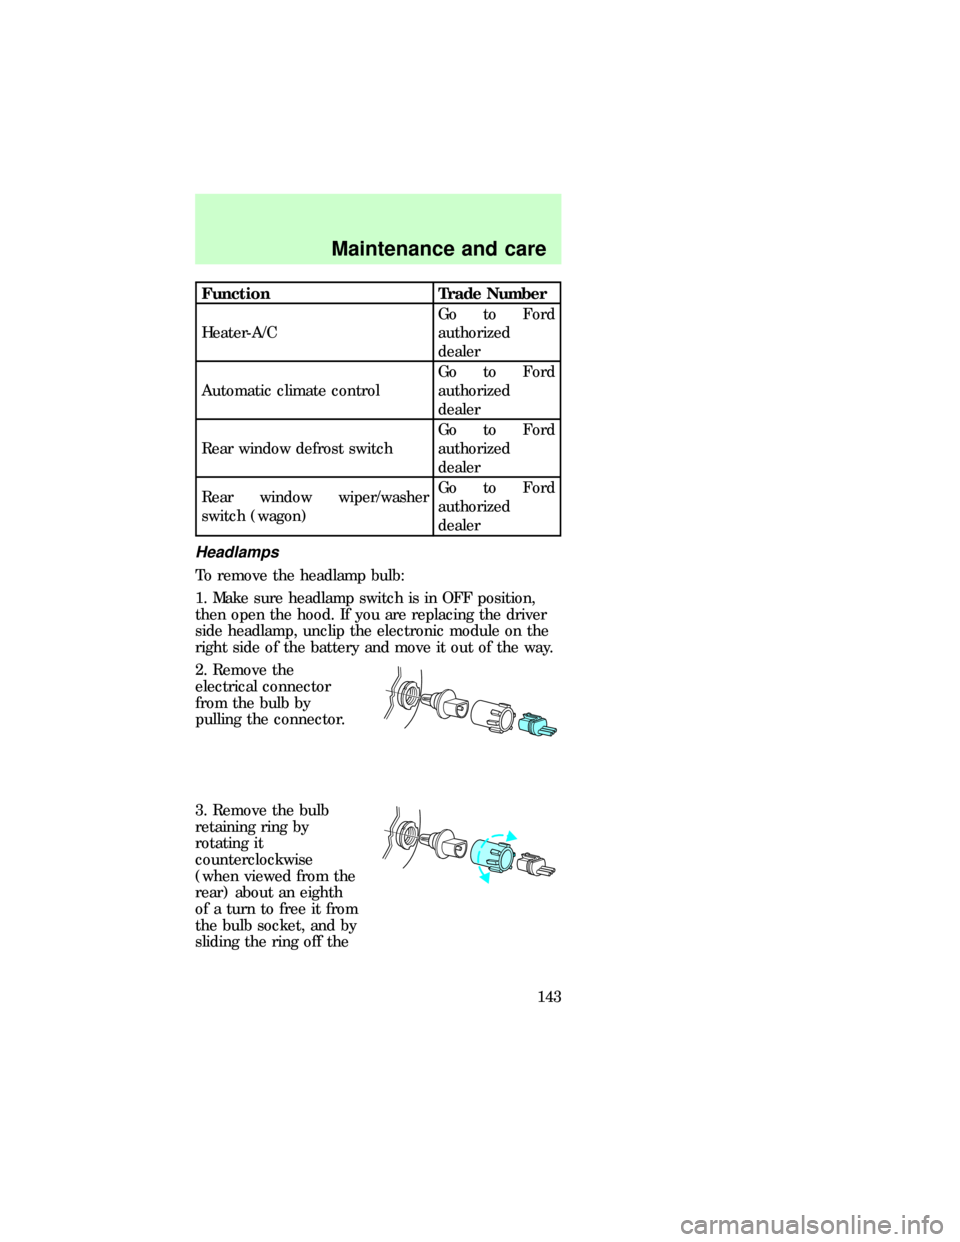
2. Remove the
electrical connector
from the bulb by
pulling the connector.
3. Remove the bulb
retaining ring by
rotating it
counterclockwise
(when viewed from the
rear) about an eighth
of a turn to free it from
the bulb socket, and by
sliding the ring off the
Maintenance and care
143
Page 144 of 167

plastic base. Keep the ring because it will be used
again to retain the new bulb.
4. Remove the old bulb from its socket by gently
pulling it straight back out of the socket. Do not
turn the bulb while you are removing it.
To install the new bulb:
1. With the flat side of
the bulb's plastic base
facing upward, insert
glass end of the bulb
into the socket. You
may need to turn the
bulb left or right to line
up the grooves in the
plastic base with the
tabs in the socket. When the grooves are aligned,
push the bulb into the socket until the plastic base
contacts the rear of the socket.
2. Slip the bulb retaining ring over the plastic base
until it contacts the rear of the socket by rotating it
clockwise until you feel a ªstop.º
3. Push the electrical connector into the rear of the
plastic base until it snaps, locking it into position.
4. Turn the headlamps on and make sure they work
properly. If the headlamp was correctly aligned
before you changed the bulb, you should not need to
align it again.
AIMING THE HEADLAMPS
Your vehicle is equipped with a Vehicle Headlamp
Aim Device (VHAD) on each headlamp body. Each
headlamp may be proeprly aimed in the horizontal
direction (left/right) and the vertical position
(up/down).
A non-zero bubble reading does not necessarily
indicate out-of-aim headlamps. If your vehicle is not
positioned on a level surface, the slope will be
included in the level indicator. Therefore, vertical
headlamp adjustment should be performed only
dno_formality
Maintenance and care
144
Page 145 of 167

when beam direction appears to be incorrect or a
level surface can not be verified.
The horizontal aim must be adjusted first. You will
need one 7 mm box wrench or open end wrench.
The following procedure assumes that the vehicle's
front structure is properly aligned. If the vehicle has
been in an accident requiring the front end of the
vehicle to be repaired, the horizontal indicator
should be recalibrated by the service facility.
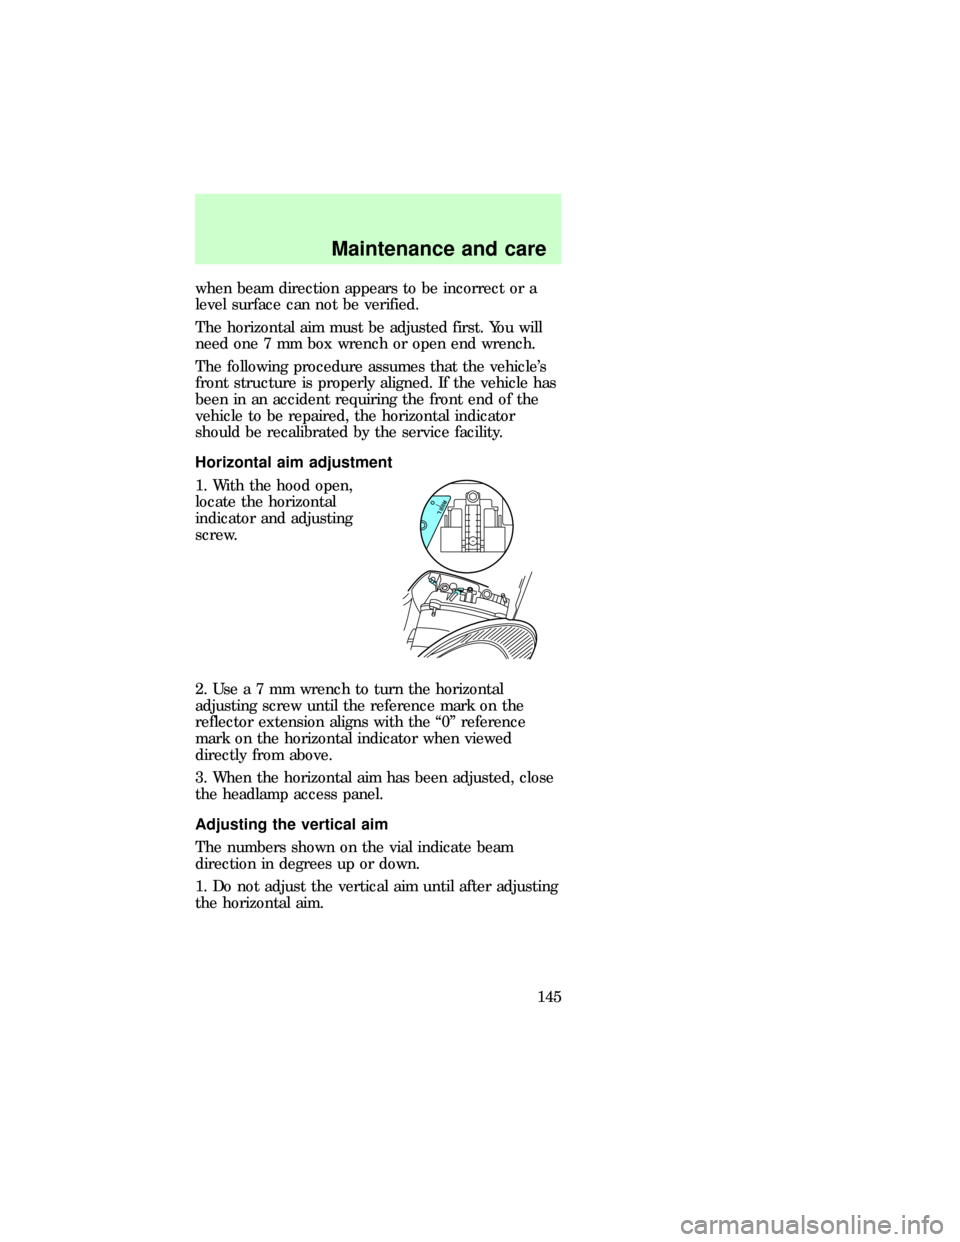
Horizontal aim adjustment
1. With the hood open,
locate the horizontal
indicator and adjusting
screw.
2.Usea7mmwrench to turn the horizontal
adjusting screw until the reference mark on the
reflector extension aligns with the ª0º reference
mark on the horizontal indicator when viewed
directly from above.
3. When the horizontal aim has been adjusted, close
the headlamp access panel.
Adjusting the vertical aim
The numbers shown on the vial indicate beam
direction in degrees up or down.
1. Do not adjust the vertical aim until after adjusting
the horizontal aim.
R L
O
dno_aiming-headlamps
dno_aiming
Maintenance and care
145
Page 146 of 167

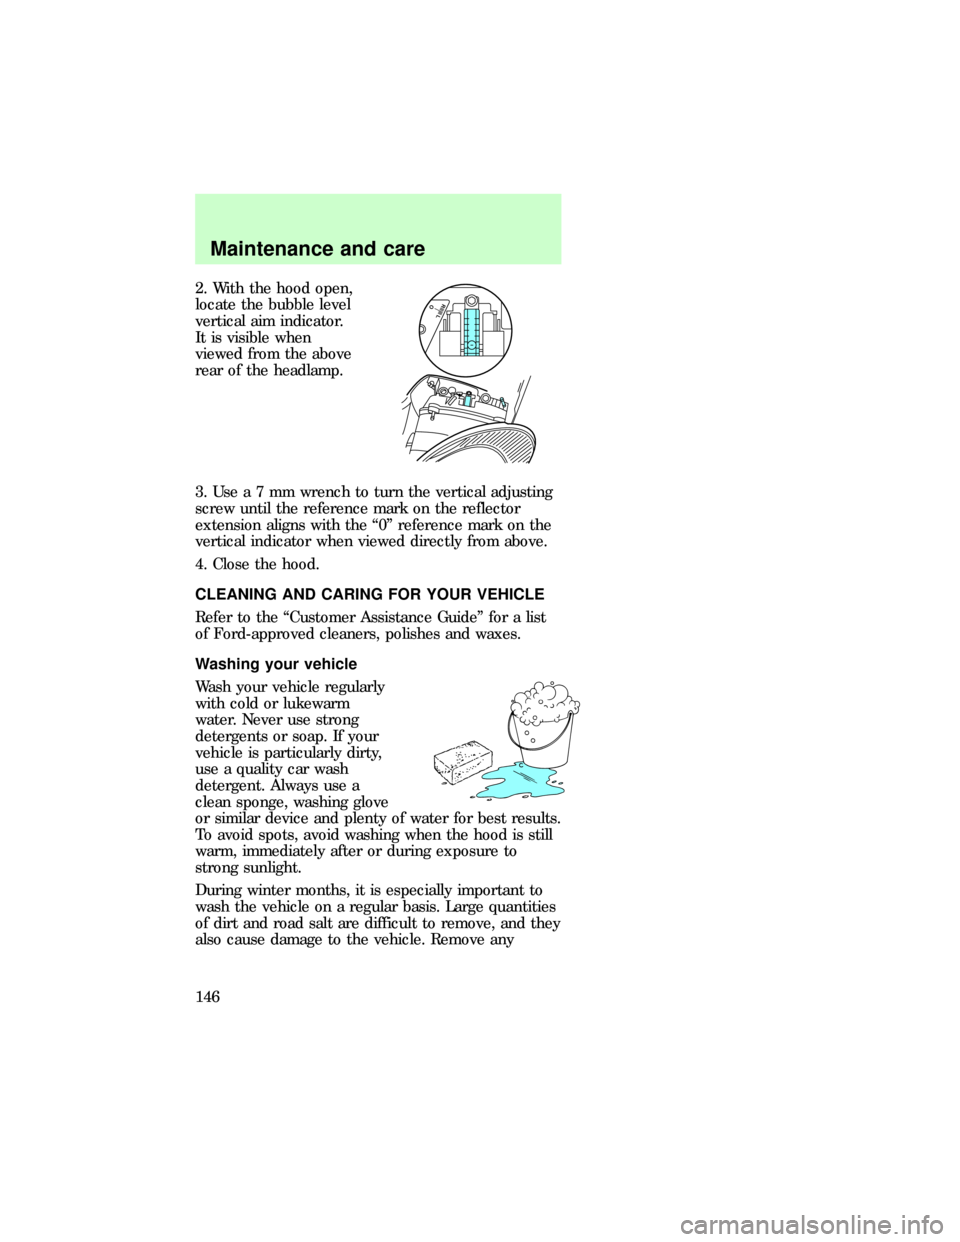
2. With the hood open,
locate the bubble level
vertical aim indicator.
It is visible when
viewed from the above
rear of the headlamp.
3.Usea7mmwrench to turn the vertical adjusting
screw until the reference mark on the reflector
extension aligns with the ª0º reference mark on the
vertical indicator when viewed directly from above.
4. Close the hood.
CLEANING AND CARING FOR YOUR VEHICLE
Refer to the ªCustomer Assistance Guideº for a list
of Ford-approved cleaners, polishes and waxes.
Washing your vehicle
Wash your vehicle regularly
with cold or lukewarm
water. Never use strong
detergents or soap. If your
vehicle is particularly dirty,
use a quality car wash
detergent. Always use a
clean sponge, washing glove
or similar device and plenty of water for best results.
To avoid spots, avoid washing when the hood is still
warm, immediately after or during exposure to
strong sunlight.
During winter months, it is especially important to
wash the vehicle on a regular basis. Large quantities
of dirt and road salt are difficult to remove, and they
also cause damage to the vehicle. Remove anyR L
O
com_cleaning_caring.01
com_washing_vehicle.01
Maintenance and care
146
Page 163 of 167

Aiming headlamps .. 144
Air bag supplemental
restraint system
and child safety
seats ......................... 61
description .............. 60
disposal .................... 64
indicator light ......... 63
passenger air bag ... 62
Air cleaner filter
replacing ................ 129
Air conditioning
automatic temperature
control system 16,17,18,
19,20
manual heating and air
conditioning
system ........... 14,15,16
Anti-theft system ...... 44
warning light ............. 8
Audio system (see
Electronic sound
system) ...................... 21
Autolamp system (see
Headlamps) ............... 13
Battery ..................... 127
servicing ................ 128
Brakes
adjustment .............. 81
anti-lock ................... 81
fluid, checking and
adding .................... 120
Brake-shift interlock . 83
Break-in period ........... 2
Cargo cover ............... 35
Cargo net ................... 35
Child safety seats ...... 66
Childproof locks ........ 31
Cleaning your vehicle 146
built-in child seat . 150engine
compartment ......... 147
fabric ...................... 149
instrument panel .. 149
plastic parts .......... 148
safety belts ............ 150
tail lamps ............... 148
washing .................. 146
waxing ................... 147
wheels .................... 147
Climate control
system ........................ 14
Console, description . 31
Daytime running light
system ........................ 14
Emission control
system ...................... 137
Engine
service points . 116,117
Engine block heater . 79
Engine coolant
checking and
adding ............. 121,122
disposal .................. 123
refill capacities ...... 124
Engine oil ................ 119
changing oil and oil
filter ....................... 119
checking and
adding .................... 118
Entry system
illumination ............. 43
Exhaust fumes .......... 79
Floor mats ................. 33
Fuel
calculating fuel
economy ................ 137
improving fuel
economy .................. 95
octane rating ......... 136
Index
163
Page 164 of 167

quality .................... 136
safety information
relating to automotive
fuels ....................... 134
Fuel gauge ................. 12
Fuel pump shut-off
switch .................... 21,96
Fuse panels
instrument panel .... 98
power
distribution box .... 102
Fuses .......................... 97
Gauges, Mechanical
engine coolant
temperature gauge . 11
Hazard flashers .... 26,96
Headlamps
flashing .................... 26
high beam ............... 25
turning on and off .. 13
Hood ........................ 116
Ignition
positions of the
ignition .................... 21
Instrument cluster ...... 6
Jump-starting your
vehicle ............... 110,111
attaching cables .... 110
disconnecting cables 112
Keyless entry system
autolock ................... 39
keypad ..................... 37
locking and unlocking
doors ........................ 38
programming entry
code ......................... 37
Lamps ........................ 13
instrument panel,
dimming ................... 13
map lamps ............... 27
replacing bulbs .... 140,
141,143Liftgate
remote release ........ 34
Lights, warning and
indicator
air bag ........................ 9
anti-lock
brakes (ABS) ....... 8,81
brake .......................... 9
charging system ........ 9
cruise indicator ......... 8
door ajar .................... 7
engine oil pressure ... 9
high beam ................. 6
low coolant ................ 7
low fuel ...................... 7
overdrive off .............. 8
safety belt ................. 7
service engine soon .. 7
Lubricant
specifications ........... 154
Luggage rack ............. 36
Mirrors
heated ...................... 30
side view mirrors
(power) ................... 30
Moon roof .................. 27
Motorcraft parts ...... 151
Odometer ................... 11
Parking brake ............ 82
Phone, cellular .......... 33
Power door locks ...... 29
Power steering
fluid, checking and
adding .................... 124
Rear window
defroster .................. 20
Refill capacities for
fluids ........................ 152
Relays ...................... 104
Remote entry system 41
Index
164