window Mercury Sable 1997 s User Guide
[x] Cancel search | Manufacturer: MERCURY, Model Year: 1997, Model line: Sable, Model: Mercury Sable 1997Pages: 167, PDF Size: 1.59 MB
Page 101 of 167

Fuse/Relay
LocationFuse Amp
RatingDescription
23 5A GEM remote
entry, anti-theft
24 5A Integrated
control panel,
RCC,
speedometer
25 10A OBD II
26 15A Decklid release
27 10A Battery saver
28 15A Brake lamps,
speed control
29 15A Hazard flashers,
multi-function
switch
30 15A High beams,
daytime
running lamps,
instrument
cluster
31 5A Tail lamps
32 10A Integrated
control panel,
climate
controls, heated
mirrors
33 5A Power windows,
lock
illumination
34 - Battery saver
relay
35 - Driver door
unlock relay
Roadside emergencies
101
Page 102 of 167

Fuse/Relay
LocationFuse Amp
RatingDescription
36 - Rear defroster
relay
37 - Interior lamps
relay
38 - One touch
window down
relay
39 - Accessory delay
relay
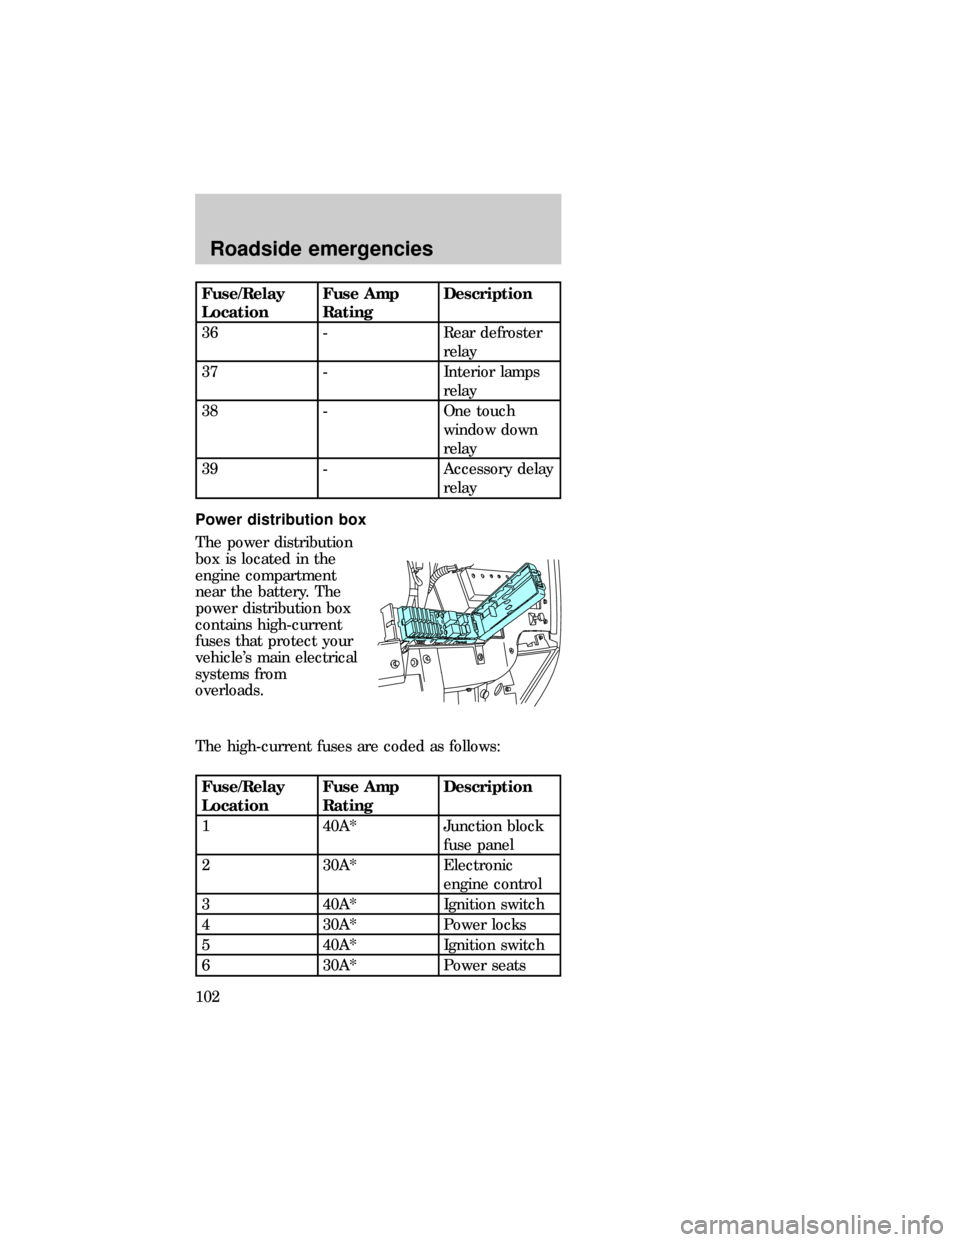
Power distribution box
The power distribution
box is located in the
engine compartment
near the battery. The
power distribution box
contains high-current
fuses that protect your
vehicle's main electrical
systems from
overloads.
The high-current fuses are coded as follows:
Fuse/Relay
LocationFuse Amp
RatingDescription
1 40A* Junction block
fuse panel
2 30A* Electronic
engine control
3 40A* Ignition switch
4 30A* Power locks
5 40A* Ignition switch
6 30A* Power seats
sab_pdb
Roadside emergencies
102
Page 108 of 167

9. Put flat tire, jack
and lug wrench away.
Make sure jack is
fastened so it does not
rattle when you drive.
Unblock the wheels.
Removing and replacing wheel covers
Full wheel cover
Your vehicle may have wheel covers with a wire
retention system. To remove the wheel cover, pry it
loose by inserting the tapered end of the jack handle
between the wheel cover and wheel.
To replace the wheel cover:
1. One of the windows on the wheel cover is
identified with a valve stem logo on the back side of
the wheel cover. Install the wheel over the wheel
with the window at the valve stem.
2. Hold the wheel cover in this position and press
the cover onto the wheel with the palm of your
hand. Do not force or hammer the cover.
Center wheel cover
1. Pry the center
ornament off the wheel
cover with the lug
wrench. Pry only at the
notch. Do not use a
screwdriver or any
other tool as this may
damage the wheel
cover surface finish.
dno_remove-replace-wheel-coverRoadside emergencies
108
Page 109 of 167

2. Remove the center
bolt on the wheel cover
with the lug wrench
tip.
3. To remove the wheel
cover, pry it loose by
inserting the tapered
end of the lug wrench
between the wheel
cover and wheel.
To replace the wheel cover:
1. One of the windows on the wheel cover is
identified with a valve stem logo on the back side of
the wheel cover. Install the wheel over the wheel
with the window at the valve stem.
2. Hold the wheel cover in this position and press
the cover onto the wheel with the palm of your
hand. Do not force or hammer the cover.
3. Attach the bolt to the pedestal through the center
hole on the cover with the lug wrench.
4. Align the legs of the center ornament with the
slots of the wheel cover. Reinstall the ornament by
pressing with the palm of your hand. Do not
hammer or force the cover.
Anti-theft lug nuts (if equipped)
If your vehicle is
equipped with this
feature, one of the lug
nuts on each wheel
must be removed and replaced with a special key.
The key and registration card are attached to the lug
wrench and stored with the spare tire. If you lose
dno_lug-nuts
Roadside emergencies
109
Page 140 of 167

²At least ten minutes of driving on an expressway
or highway.
Before completing the above driving modes, the
engine must be warmed up and at operating
temperature. Once started, the vehicle must not be
turned off during these driving modes.
EXTERIOR LAMPS
It is a good idea to check the operation of the
following lights frequently:
²Headlamps
²High-mount brake lamp
²Tail lamps
²Brake lamps
²Backup lamps
²Hazard flashers
²Turn signals
²License plate lamp
²Interior overhead lamps
Do not remove lamp bulbs unless they will be
replaced immediately. If a bulb is removed for an
extended period of time, contaminants may enter
the lamp housings and affect performance.
High-mount brake lamp - Sedan
To remove the brake lamp:
1. Remove package
tray trim, then push
attachment toward the
rear.
2. Slide brake lamp up
and away from the rear
window to remove it
from the tabs that hold
it down.
3. Disconnect bulbs.
dno_drive-cycle
dno_exterior-bulbs
Maintenance and care
140
Page 141 of 167

To install brake lamp:
1. Install bulbs, then position the brake lamp over
tab slots and line up the tab with the tab slots.
2. Push down and toward the rear window to engage
the tabs.
3. Push attachment toward the rear window and line
up slot in attachment with the edge of the sheet
metal screw.
4. Release the attachment slot onto the sheet metal
hole. Install the package tray trim.
High-mount brake lamp - Wagon
To remove the brake lamp:
1. Remove interior trim
panel, then remove the
three attachment nuts
that hold brake lamp in
place.
2. Lift whole assembly
off vehicle from the
outside.
3. Disconnect bulbs.
To install brake lamp:
1. Install bulbs, the position brake lamp into tailgate
holes.
2. From the inside of the vehicle, stall and tighten
the four nuts that hold the brake lamp in place.
3. Install the interior trim panel.
Using the right bulbs
Function Trade Number
Front side marker lamp 194
Front park/turn lamp 3457NA
Headlamp 9007
Tail lamp/brake lamp 3157
Maintenance and care
141
Page 143 of 167

Function Trade Number
Heater-A/CGo to Ford
authorized
dealer
Automatic climate controlGo to Ford
authorized
dealer
Rear window defrost switchGo to Ford
authorized
dealer
Rear window wiper/washer
switch (wagon)Go to Ford
authorized
dealer
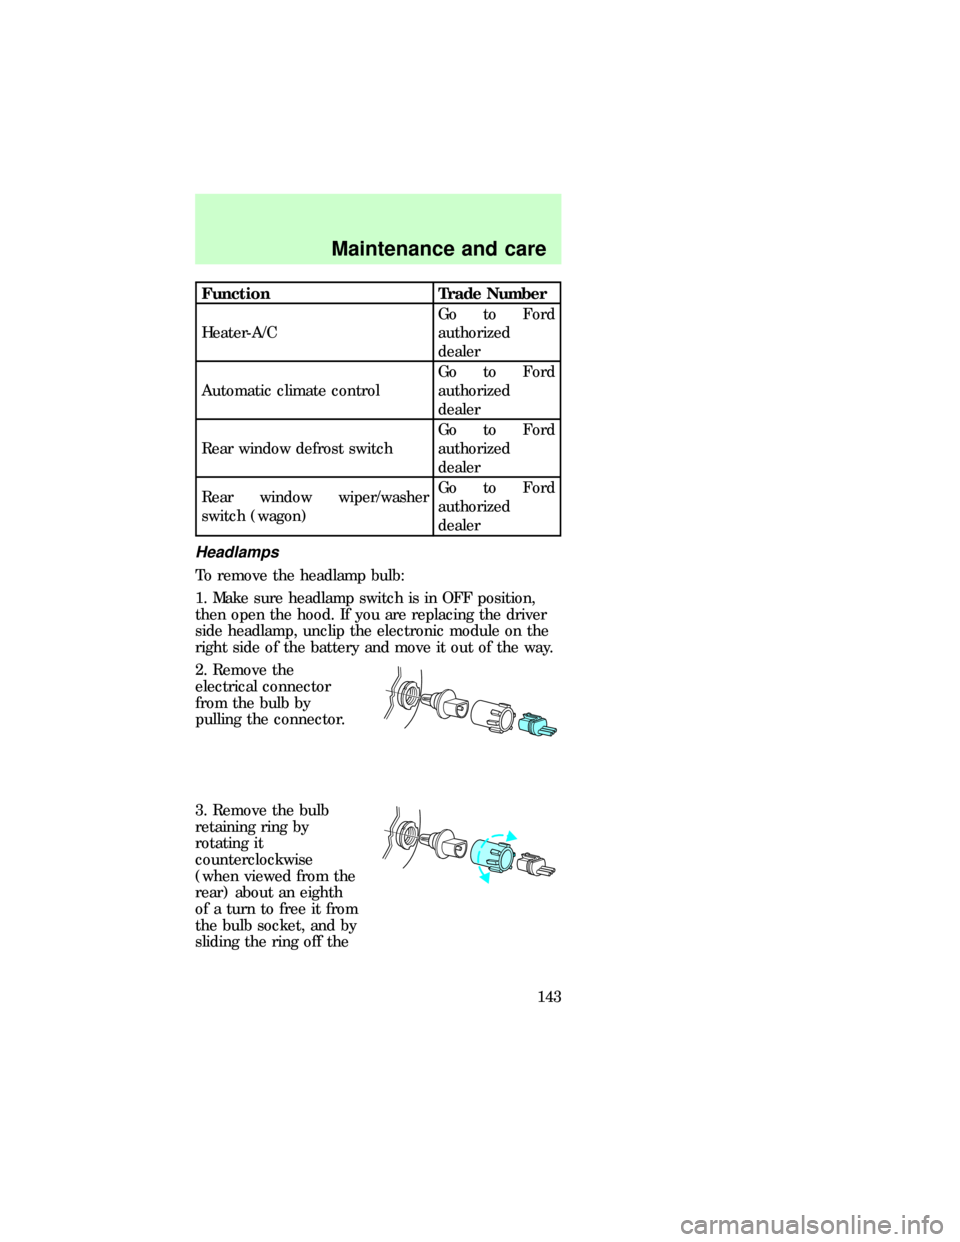
Headlamps
To remove the headlamp bulb:
1. Make sure headlamp switch is in OFF position,
then open the hood. If you are replacing the driver
side headlamp, unclip the electronic module on the
right side of the battery and move it out of the way.
2. Remove the
electrical connector
from the bulb by
pulling the connector.
3. Remove the bulb
retaining ring by
rotating it
counterclockwise
(when viewed from the
rear) about an eighth
of a turn to free it from
the bulb socket, and by
sliding the ring off the
Maintenance and care
143
Page 164 of 167

quality .................... 136
safety information
relating to automotive
fuels ....................... 134
Fuel gauge ................. 12
Fuel pump shut-off
switch .................... 21,96
Fuse panels
instrument panel .... 98
power
distribution box .... 102
Fuses .......................... 97
Gauges, Mechanical
engine coolant
temperature gauge . 11
Hazard flashers .... 26,96
Headlamps
flashing .................... 26
high beam ............... 25
turning on and off .. 13
Hood ........................ 116
Ignition
positions of the
ignition .................... 21
Instrument cluster ...... 6
Jump-starting your
vehicle ............... 110,111
attaching cables .... 110
disconnecting cables 112
Keyless entry system
autolock ................... 39
keypad ..................... 37
locking and unlocking
doors ........................ 38
programming entry
code ......................... 37
Lamps ........................ 13
instrument panel,
dimming ................... 13
map lamps ............... 27
replacing bulbs .... 140,
141,143Liftgate
remote release ........ 34
Lights, warning and
indicator
air bag ........................ 9
anti-lock
brakes (ABS) ....... 8,81
brake .......................... 9
charging system ........ 9
cruise indicator ......... 8
door ajar .................... 7
engine oil pressure ... 9
high beam ................. 6
low coolant ................ 7
low fuel ...................... 7
overdrive off .............. 8
safety belt ................. 7
service engine soon .. 7
Lubricant
specifications ........... 154
Luggage rack ............. 36
Mirrors
heated ...................... 30
side view mirrors
(power) ................... 30
Moon roof .................. 27
Motorcraft parts ...... 151
Odometer ................... 11
Parking brake ............ 82
Phone, cellular .......... 33
Power door locks ...... 29
Power steering
fluid, checking and
adding .................... 124
Rear window
defroster .................. 20
Refill capacities for
fluids ........................ 152
Relays ...................... 104
Remote entry system 41
Index
164
Page 166 of 167

indicator lights .......... 6
Vehicle dimensions . 156
Vehicle loading .......... 89
Ventilating your
vehicle ........................ 80
Warning chimes
headlamps on ............ 9
key in ignition ......... 10
safety belt ............... 10
Washer fluid ............ 121
rear window
reservoir ................ 121Wheels
anti-theft lug nuts 109
covers .................... 108
Windows
power windows,
operating ................. 29
Windshield washer fluid
and wipers ............ 21,26
checking and replacing
wiper blades .......... 129
Wrecker towing ....... 112
Index
166