light Mercury Sable 1997 s Owner's Guide
[x] Cancel search | Manufacturer: MERCURY, Model Year: 1997, Model line: Sable, Model: Mercury Sable 1997Pages: 167, PDF Size: 1.59 MB
Page 81 of 167
BRAKES
Your brakes are self-adjusting. Refer to the ªService
Guideº for maintenance scheduling.
Anti-lock brake system (ABS) (if equipped)
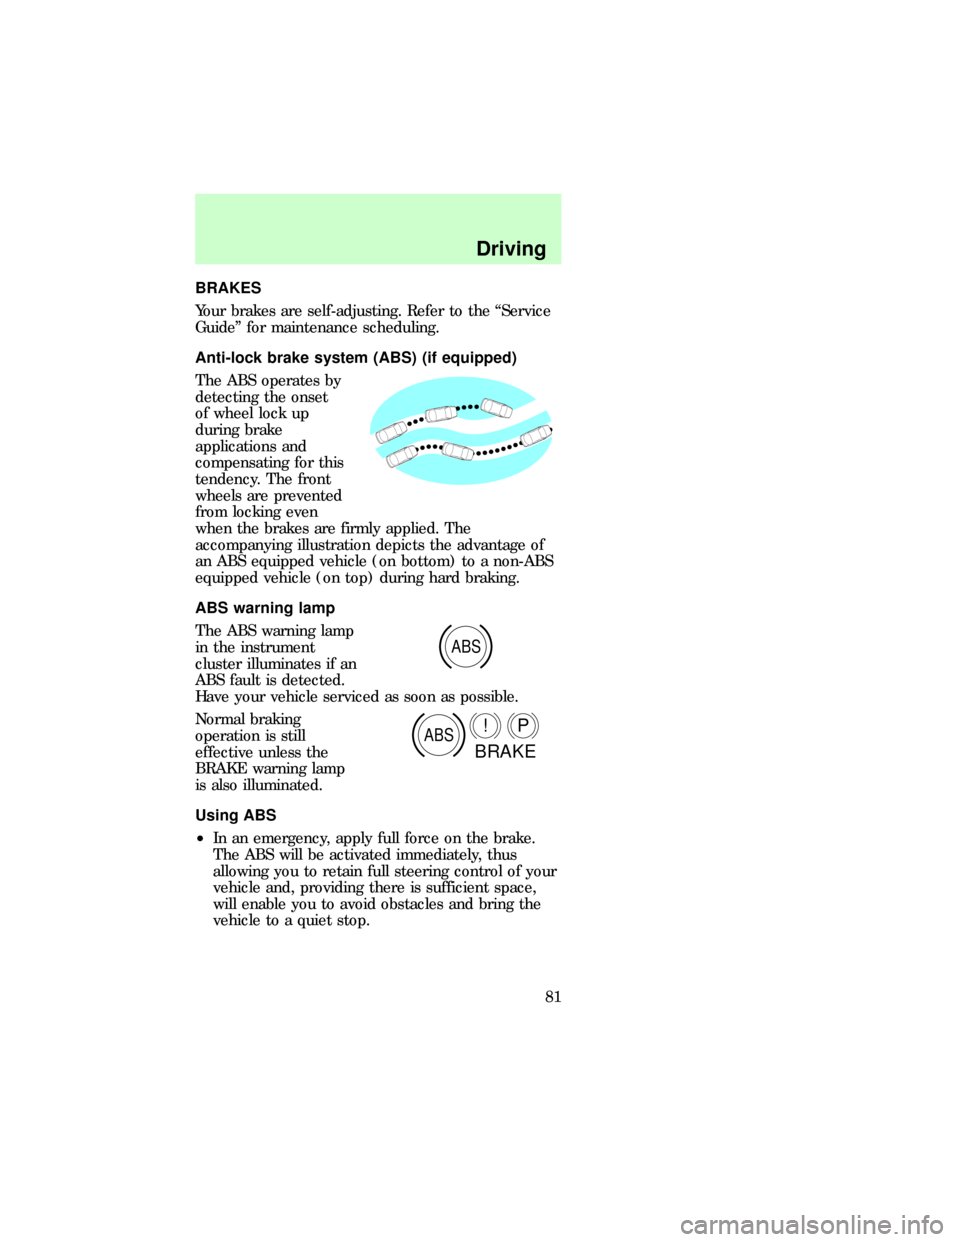
The ABS operates by
detecting the onset
of wheel lock up
during brake
applications and
compensating for this
tendency. The front
wheels are prevented
from locking even
when the brakes are firmly applied. The
accompanying illustration depicts the advantage of
an ABS equipped vehicle (on bottom) to a non-ABS
equipped vehicle (on top) during hard braking.
ABS warning lamp
The ABS warning lamp
in the instrument
cluster illuminates if an
ABS fault is detected.
Have your vehicle serviced as soon as possible.
Normal braking
operation is still
effective unless the
BRAKE warning lamp
is also illuminated.
Using ABS
²In an emergency, apply full force on the brake.
The ABS will be activated immediately, thus
allowing you to retain full steering control of your
vehicle and, providing there is sufficient space,
will enable you to avoid obstacles and bring the
vehicle to a quiet stop.
ABS
ABSP!
BRAKE
com_brakes.01
com_abs.01
dno_ABS-warning-light
com_using_abs.01
Driving
81
Page 83 of 167

Pull release handle
toward you to release
parking brake. Driving
with the parking brake
on will cause the
brakes to wear out
quickly and reduce fuel
economy.
TRANSAXLE
Brake-shift interlock
This vehicle is equipped with a brake-shift interlock
feature that prevents the gearshift from being moved
from P (Park) unless the brake pedal is pressed.
If you cannot move the gearshift out of P (Park)
with the brake pedal depressed:
1. Apply the parking brake, turn ignition key to
LOCK, then remove the key.
2. Insert the key and turn it to OFF. Apply the brake
pedal and shift to N (Neutral).
3. Start the vehicle.
If it is necessary to use the above procedure to
move the gearshift, it is possible that a fuse has
blown and the vehicle's brake lamps may not be
operating properly. Refer toFuses and relaysin the
Roadside emergencieschapter.
Do not drive your vehicle until you verify
that the brakelamps are working.
If your vehicle gets stuck in mud or snow it may be
rocked out by shifting from forward and reverse
gears in a steady pattern. Press lightly on the
dno_transaxle
dno_bsi
Driving
83
Page 88 of 167
If the O/D OFF indicator light (if equipped) is
flashing on and off when the vehicle is started or
does not come on when the O/D OFF switch is
pressed, it means there is a malfunction in your
transaxle's electronic system. Contact your dealer as
soon as possible or damage to the transaxle may
occur.
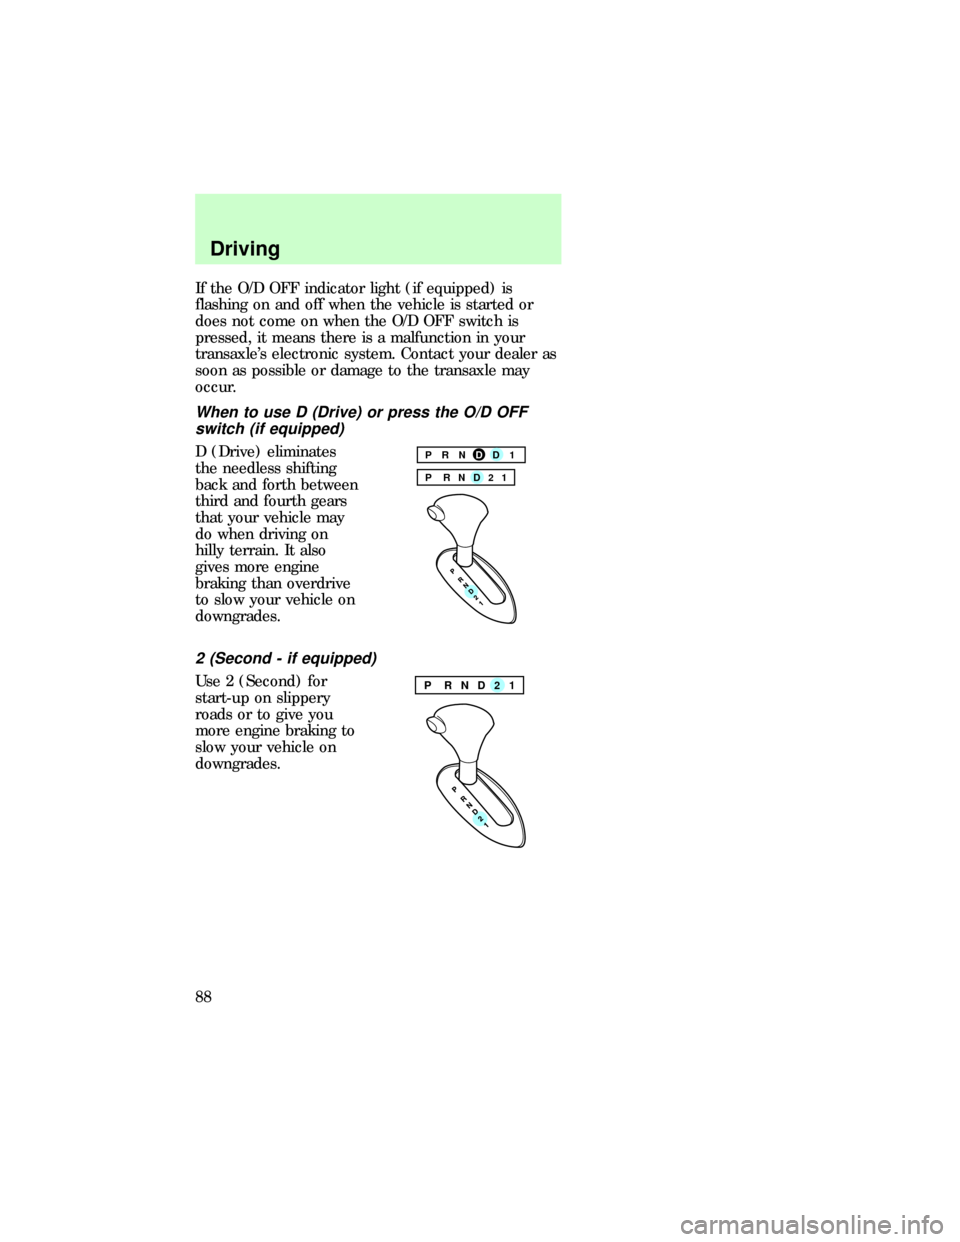
When to use D (Drive) or press the O/D OFF
switch (if equipped)
D (Drive) eliminates
the needless shifting
back and forth between
third and fourth gears
that your vehicle may
do when driving on
hilly terrain. It also
gives more engine
braking than overdrive
to slow your vehicle on
downgrades.
2 (Second - if equipped)
Use 2 (Second) for
start-up on slippery
roads or to give you
more engine braking to
slow your vehicle on
downgrades.
PRNDD1
P RND21
P RND21
Driving
88
Page 91 of 167
Do not exceed the GVWR or the GAWR
specified on the Safety Compliance
Certification Label.
Do not use replacement tires with lower weight
capacities than the originals because they may lower
the vehicle's GVWR and GAWR limitations.
Replacement tires with a higher weight limit than
the originals do not increase the GVWR and GAWR
limitations.
TRAILER TOWING
Your vehicle is classified as a light duty towing
vehicle. The amount of weight you can safely tow
depends on the type of engine you have in your
vehicle. Your vehicle does not come from the factory
fully equipped to tow. No towing packages are
available through Ford or Mercury/Lincoln dealers.
Do not tow a trailer until your vehicle has been
driven at least 800 km (500 miles). If towing with a
station wagon, inflate the rear tires to 35 psi.
Towing a trailer places an additional load on your
vehicle's engine, transaxle, brakes, tires and
suspension. Inspect these components carefully after
towing.
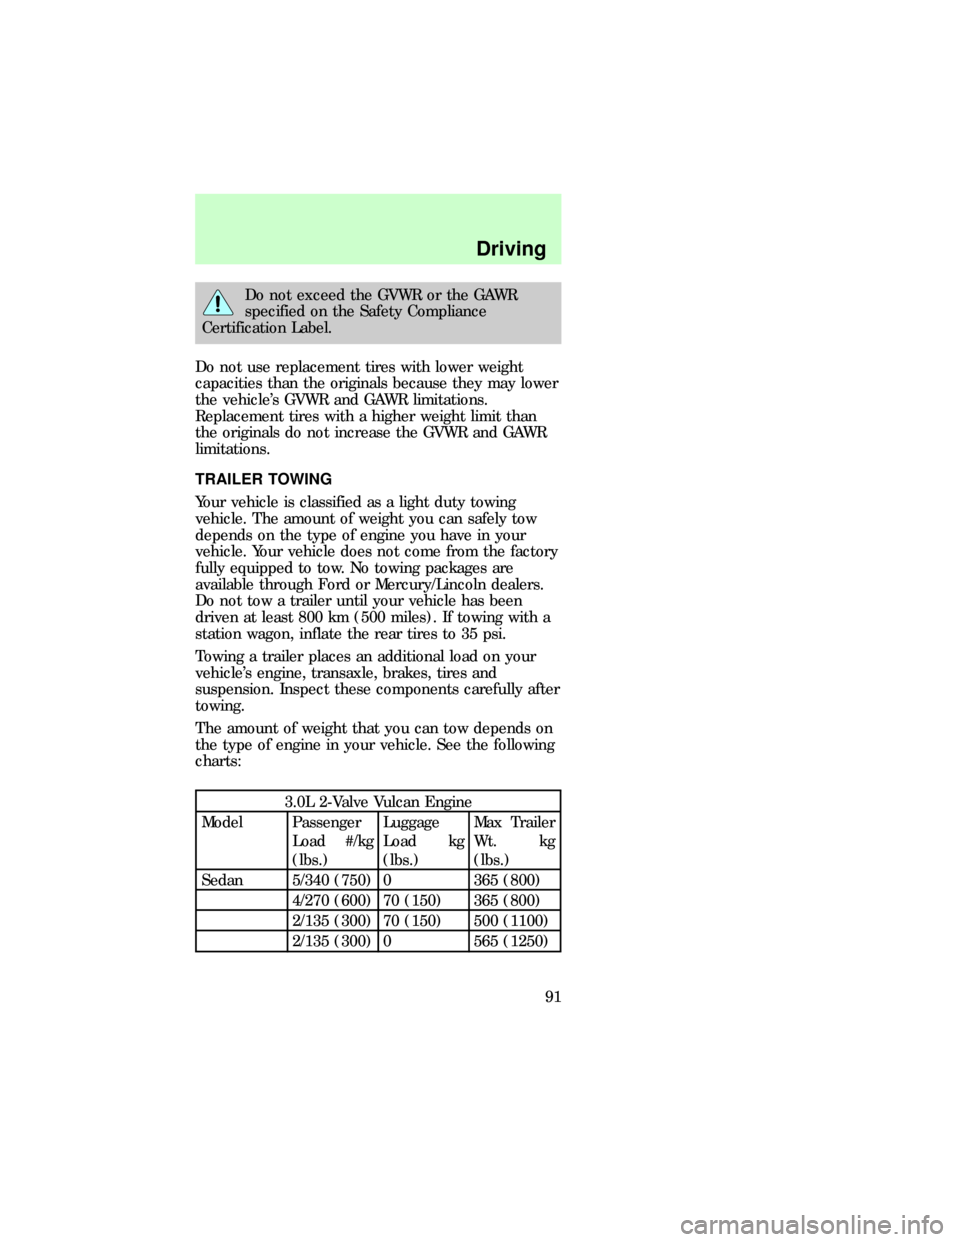
The amount of weight that you can tow depends on
the type of engine in your vehicle. See the following
charts:
3.0L 2-Valve Vulcan Engine
Model Passenger
Load #/kg
(lbs.)Luggage
Load kg
(lbs.)Max Trailer
Wt. kg
(lbs.)
Sedan 5/340 (750) 0 365 (800)
4/270 (600) 70 (150) 365 (800)
2/135 (300) 70 (150) 500 (1100)
2/135 (300) 0 565 (1250)
sab_trailer-towing
Driving
91
Page 94 of 167

Driving while you tow
Do not drive faster than 72 km/h (45 mph) with any
weight on the trailer while towing on a hot day or in
hilly country.
Cruise control may shut off if you are towing on
long, steep grades.
When towing a trailer:
²Use 2 (Second) (if equipped) or 1 (First) when
towing up or down steep hills. This will eliminate
excessive downshifting and upshifting for
optimum fuel economy and transaxle cooling.
²Anticipate stops and brake gradually.
Servicing after towing
If you tow a trailer for long distances, your vehicle
will require more frequent service intervals. Refer to
theService Guidefor more information.
Trailer towing tips
²Practice turning, stopping and backing up in an
area before starting on a trip to get the feel of the
vehicle trailer combination. When turning, drive
slightly beyond the normal turning point so the
trailer wheels will clear curbs and other obstacles.
²Allow more room for stopping with a trailer
attached.
²The trailer tongue weight should be 10±15% of
the loaded trailer weight.
²After you have traveled 80 km (50 miles),
thoroughly check your hitch, electrical
connections and trailer wheel lug nuts.
²When stopped in traffic for long periods of time in
hot weather, place the gearshift in P (Park) and
increase idle speed. This aids engine cooling and
air conditioner efficiency.
²Vehicles with trailers should not be parked on a
grade. If you must park on a grade, place wheel
chocks under the trailer's wheels.
dno_towing-tips
com_fuel_consumption.01
Driving
94
Page 96 of 167
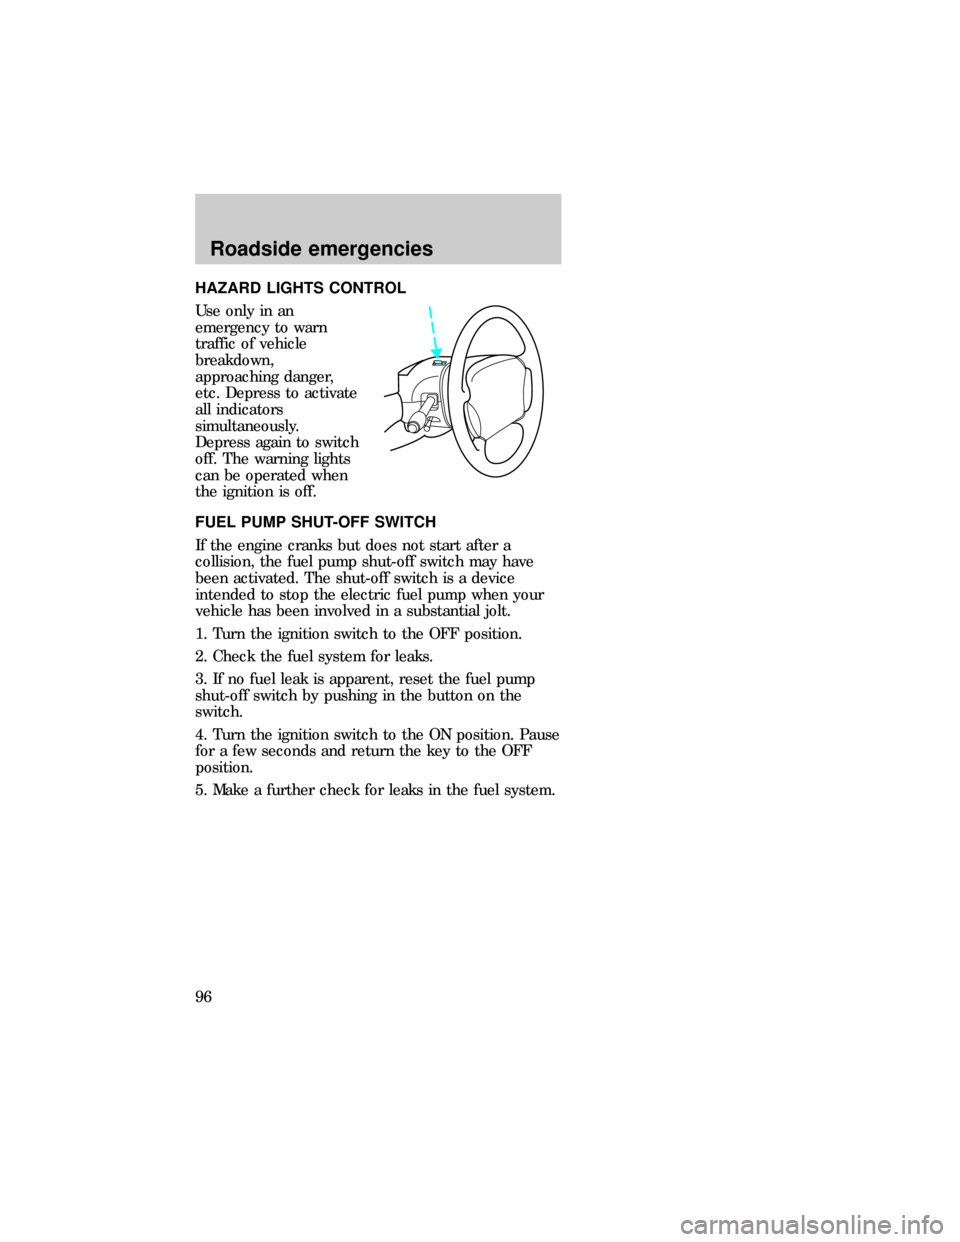
HAZARD LIGHTS CONTROL
Use only in an
emergency to warn
traffic of vehicle
breakdown,
approaching danger,
etc. Depress to activate
all indicators
simultaneously.
Depress again to switch
off. The warning lights
can be operated when
the ignition is off.
FUEL PUMP SHUT-OFF SWITCH
If the engine cranks but does not start after a
collision, the fuel pump shut-off switch may have
been activated. The shut-off switch is a device
intended to stop the electric fuel pump when your
vehicle has been involved in a substantial jolt.
1. Turn the ignition switch to the OFF position.
2. Check the fuel system for leaks.
3. If no fuel leak is apparent, reset the fuel pump
shut-off switch by pushing in the button on the
switch.
4. Turn the ignition switch to the ON position. Pause
for a few seconds and return the key to the OFF
position.
5. Make a further check for leaks in the fuel system.com_hazard_switch.01
dno_fuel-shut-off
Roadside emergencies
96
Page 98 of 167

Standard fuse amperage rating and color
Fuse rating Color
10 amp Red
15 amp Blue
20 amp Yellow
30 amp Light Green
30 amp fuse link Pink
40 amp Amber
Passenger compartment fuse panel
The fuse panel is
located below and to
the left of the steering
wheel by the brake
pedal. Pull the panel
cover outward to
access the fuses.
To remove a fuse, use the fuse puller tool provided
on the fuse panel cover.
The fuses are coded as follows:
sab_pass-fuse-panel
Roadside emergencies
98
Page 100 of 167

Fuse/Relay
LocationFuse Amp
RatingDescription
12 5A Instrument
cluster,
autolamps,
transaxle
control switch,
integrated
control panel,
GEM
13 5A Air bag, blower
motor,
electronic
automatic
temperature
control module
14 5A Lamp outage
indication
15 10A Turn signals
16 - Not used
17 30A Wiper system
(front)
18 5A Headlamp
switch
19 15A Wiper system
(rear)
20 5A Integrated
control panel,
remote entry,
cellular phone,
cigar lighter
21 20A Cigar lighter
22 5A Power mirrors,
power antenna,
autolamps,
decklid lamps
Roadside emergencies
100
Page 114 of 167
SERVICE RECOMMENDATIONS
To help you service your vehicle:
²We highlight do-it-yourself items in the engine
compartment for easy location.
²As possible, we design parts that can be replaced
without tools.
²We provide you with a ªService Guideº which
makes tracking routine service for your vehicle
easy.
If your vehicle requires professional service, your
dealership can provide necessary parts and service.
Check your ªWarranty Information Bookletº to find
out which parts and services are covered.
Use only recommended fuels, lubricants, fluids and
service parts conforming to specifications. Motorcraft
parts are designed and built to provide the best
performance in your vehicle.
Precautions when servicing your vehicle
Be especially careful when inspecting or servicing
your vehicle. Here are some general precautions for
your safety:
²Do not work on a hot engine.
The cooling fan is automatic and may come
on at any time. Always disconnect the
negative terminal of the battery before working
near the fan.
²If you must work with the engine running, avoid
wearing loose clothing or jewelry that could get
caught in moving parts. Take precautions with
long hair.
²Do not work on a vehicle with the engine running
in an enclosed space, unless you are sure you
have enough ventilation.
com_service_recommendations.01
com_precautions_servicing.01
Maintenance and care
114
Page 121 of 167
CHECKING AND ADDING WASHER FLUID
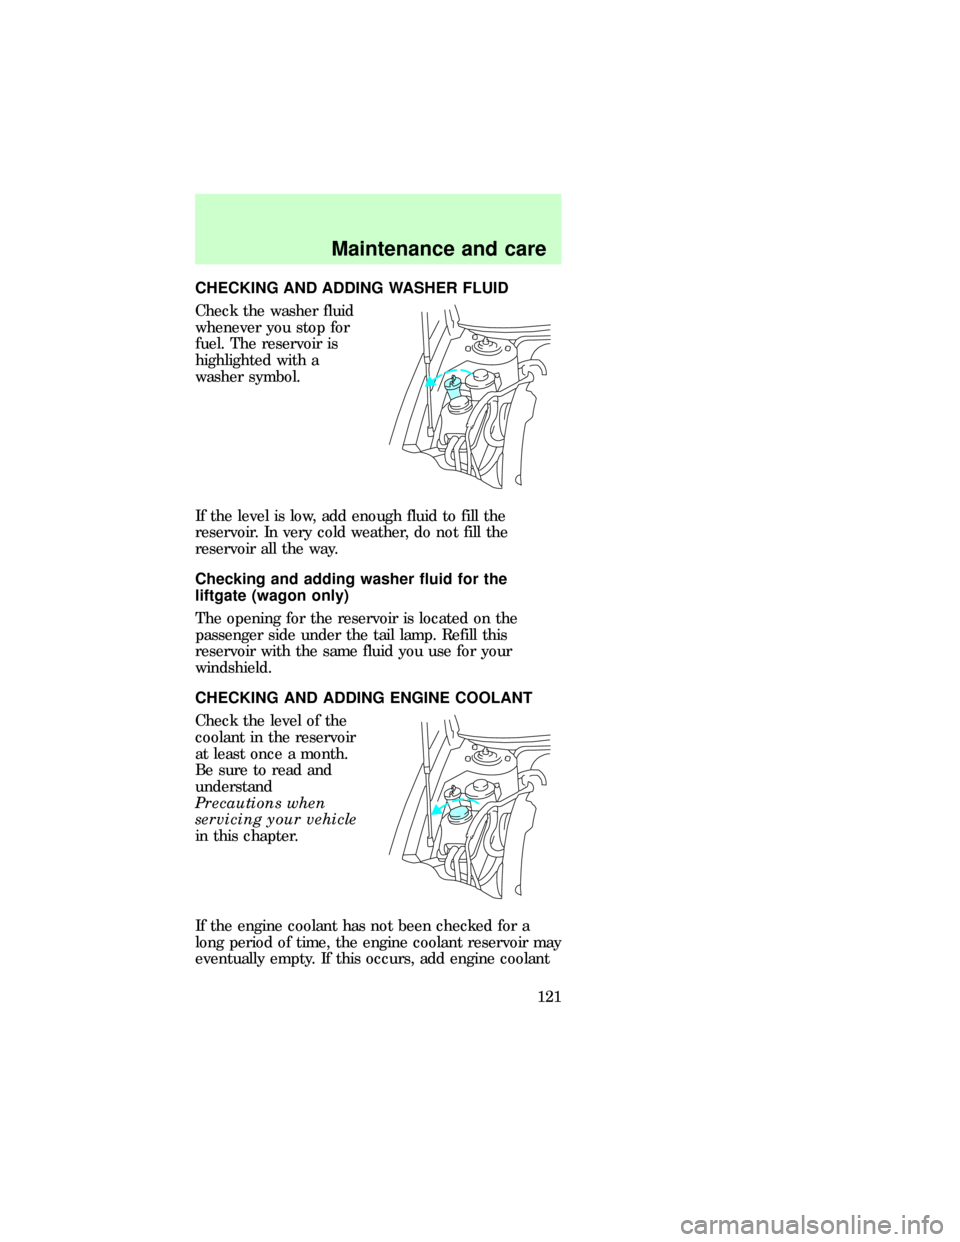
Check the washer fluid
whenever you stop for
fuel. The reservoir is
highlighted with a
washer symbol.
If the level is low, add enough fluid to fill the
reservoir. In very cold weather, do not fill the
reservoir all the way.
Checking and adding washer fluid for the
liftgate (wagon only)
The opening for the reservoir is located on the
passenger side under the tail lamp. Refill this
reservoir with the same fluid you use for your
windshield.
CHECKING AND ADDING ENGINE COOLANT
Check the level of the
coolant in the reservoir
at least once a month.
Be sure to read and
understand
Precautions when
servicing your vehicle
in this chapter.
If the engine coolant has not been checked for a
long period of time, the engine coolant reservoir may
eventually empty. If this occurs, add engine coolant
dno_wiper-washer
com_checking-adding_coolant.01
Maintenance and care
121