key Mercury Sable 1998 s User Guide
[x] Cancel search | Manufacturer: MERCURY, Model Year: 1998, Model line: Sable, Model: Mercury Sable 1998Pages: 190, PDF Size: 1.29 MB
Page 48 of 190

Once the doors and liftgate (wagon) are closed, the
system will arm in 30 seconds.
When you press the
lock control twice
within 5 seconds on
your remote entry
transmitter, the horn
will chirp once to let
you know that the
system is armed.
If the doors or liftgate (wagon) are not closed and
you press the remote entry transmitter twice to
confirm the doors are locked, the horn will chirp
twice to warn you that the system is not arming.
Disarming the system
You can disarm the system by any of the following
actions:
²Unlock the doors by
using your remote
entry transmitter.
²Unlock the doors by
using your keyless
entry pad.
²Unlock the doors or liftgate with a key. Turn the
key full travel (toward the front of the vehicle) to
make sure the alarm disarms.
²Turn ignition to ACC or ON.
123
45678
90
Controls and features
48
Page 49 of 190

²Press control on the
remote entry
transmitter. This will
disarm the system
when the alarm is
sounding.
KEYLESS ENTRY SYSTEM
With the keyless entry
keypad, you can:
²lock or unlock the
vehicle doors and liftgate (wagons) without using
the key.
²arm and disarm the perimeter alarm system (if
equipped)
See alsoRemote entry systemandPerimeter
alarm systemin this chapter for more information.
Your vehicle has a factory-set 5±digit code that
operates the keyless entry system. You can also
program your own 5±digit personal entry code.
The factory-set code is located:
²on the owner's wallet card in the glove
compartment
²taped to the computer module
When pressing the controls on the keyless entry
keypad, press the middle of the controls to ensure a
good activation.
123
45678
90
Controls and features
49
Page 50 of 190

Programming your own personal entry code
1. Enter the factory-set code (keypad will illuminate
when pressed).
2. Press the 1/2 control
within five seconds of
step 1.
3. Enter your personal
5 digit code. Enter
each digit within five
seconds of the previous one.
Do not set a code that includes five of the same
number or presents them in sequential order.
Thieves can easily figure out these types of codes.
Your personal code does not replace the permanent
code that the dealership gave you. You can use
either code to unlock your vehicle. If a second
personal code is entered, the module will erase the
first personal code in favor of the new code.
If you wish to erase your personal code, use the
following instructions:
Erasing personal code
1. Enter the factory-set code.
2. Press 1/2 within five
seconds of step 1.
3. Press the 7/8 and 9/0
controls at the same
time within five
seconds of step two.
The system will now only respond to the factory-set
code.
123
45678
90
123
45678
90
Controls and features
50
Page 51 of 190

Unlocking the doors and releasing the trunk
with the keyless entry system
The driver's door must be unlocked before any
other. If more than five seconds pass between
pressing numbers, enter the code again. The system
has shut down if the keypad light is out. If the
keyless entry system does not work, use the key or
remote entry transmitter(s).
1. To unlock the driver's door, enter one of the two
codes. After pressing the fifth number, the driver's
door unlocks.
2. To unlock the
passenger's door(s) and
liftgate (wagon), press
the 3/4 control within
five seconds of
unlocking the driver's
door.
3. To unlock the trunk
or liftgate (wagon),
enter the five-digit
factory-set code, then
press the 5/6 control
within five seconds.
Autolock
Autolock is a feature that will automatically lock all
doors when:
²all vehicle doors, liftgate and liftgate window are
fully closed
²the ignition key is in the ON position
²you shift into or through R (Reverse)
²the brake pedal is released
The autolock feature repeats when:
²any door is opened and then closed
²the brake pedal is released
123
45678
90
123
45678
90
Controls and features
51
Page 52 of 190

Deactivating autolock
Before following the activation or deactivation
procedures, make sure that the anti-theft system is
not armed, the ignition is OFF and all vehicle doors
and liftgate window are closed.
1. Enter the 5 digit entry code.
2. Press and release
the 3/4 control while
holding the 7/8 control.
3. Release the 7/8
control.
The horn will chirp
once if autolock was deactivated or twice (one short
and one long chirp) if autolock was activated.
To reactivate autolock, repeat steps 1 through 3.
Autolock can also be activated or deactivated using
the following procedure:
You must complete steps 1 through 5 within 30
seconds or the procedure will have to be repeated. If
the procedure needs to be repeated, you must wait
30 seconds.
1. Turn the ignition key from OFF to RUN/ACC.
2. Press the power door UNLOCK control three
times.
3. Turn the ignition key from RUN/ACC to OFF.
4. Press the power door UNLOCK control three
times.
5. Turn the ignition key from OFF to RUN/ACC. A
horn chirp indicates the enable/disable feature is
entered.
6. Press the power door UNLOCK control one time.
7. Press the power door LOCK control to toggle the
Autolock/Relock state. You will receive a horn chirp
followed by either a long honk, autolock/relock is
enabled, or no honk, autolock/relock is disabled.
8. Turn ignition to OFF.
123
45678
90
Controls and features
52
Page 53 of 190

If autolock/relock has been changed, the horn will
chirp to confirm procedure is complete.
SECURILOCKYANTI-THEFT SYSTEM
The SecuriLockyanti-theft system provides an
advanced level of vehicle theft protection. Your
vehicle's engine can only be started with the two
special SecuriLockyelectronically coded keys
provided with your vehicle. Each time you start your
vehicle, the SecuriLockykey is read by the
SecuriLockyanti-theft system. If the SecuriLocky
key identification code matches the code stored in
the SecuriLockyanti-theft system, the vehicle's
engine is allowed to start. If the SecuriLockykey
identification code does not match the code stored
in the system or if a SecuriLockykey is not
detected (vehicle theft situation), the vehicle's
engine will not operate.
Spare SecuriLockykeys can be purchased from
your dealership and programmed to your
SecuriLockyanti-theft system. Refer to
Programming spare SecuriLockykeysfor more
information.
If one or both of your SecuriLockykeys are lost or
stolen and you want to ensure the lost or stolen key
will not operate your vehicle, bring your vehicle and
all available SecuriLockykeys to your dealership for
reinitialization.
Controls and features
53
Page 56 of 190

Press the other side of the control to adjust
softness.
REAR SEATS
2nd seat/Split-folding rear seat (if equipped)
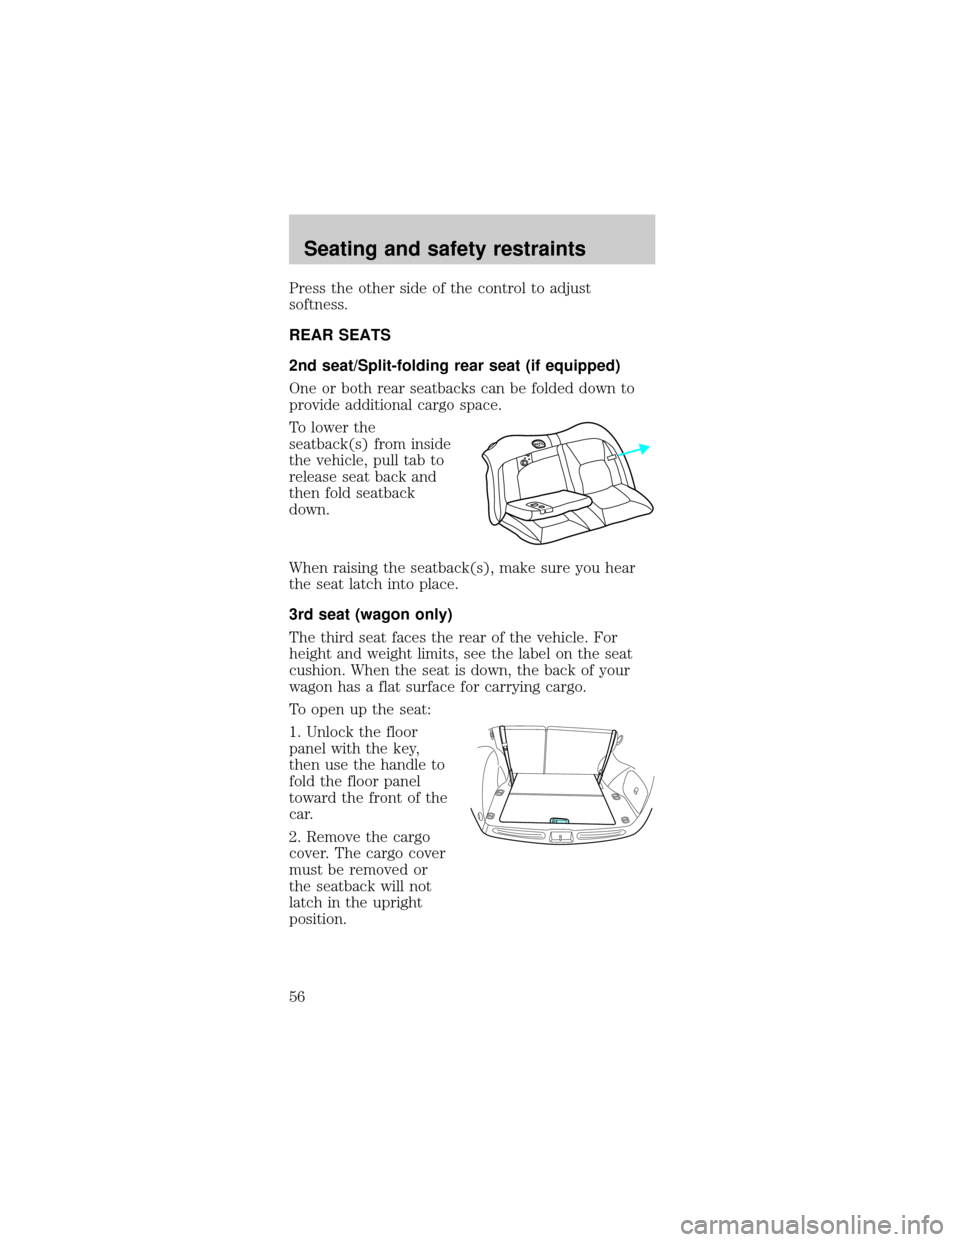
One or both rear seatbacks can be folded down to
provide additional cargo space.
To lower the
seatback(s) from inside
the vehicle, pull tab to
release seat back and
then fold seatback
down.
When raising the seatback(s), make sure you hear
the seat latch into place.
3rd seat (wagon only)
The third seat faces the rear of the vehicle. For
height and weight limits, see the label on the seat
cushion. When the seat is down, the back of your
wagon has a flat surface for carrying cargo.
To open up the seat:
1. Unlock the floor
panel with the key,
then use the handle to
fold the floor panel
toward the front of the
car.
2. Remove the cargo
cover. The cargo cover
must be removed or
the seatback will not
latch in the upright
position.
Seating and safety restraints
56
Page 61 of 190

To lower the shoulder belt height, push the button
and slide the height control down. To raise the
height of the shoulder belt, slide the height adjuster
up. Pull down on the height adjustment assembly to
make sure it is locked in place.
Position the shoulder belt height adjuster so
that the belt rests across the middle of your
shoulder. Failure to adjust the safety belt properly
could reduce the effectiveness of the safety belt
and increase the risk of injury in a collision.
Center rear lap belt (sedan)
The safety belt in the center rear seating position
has a detachable shoulder belt and does not contain
the automatic locking mode (ALR).
To attach the shoulder
belt to the lap belt, pull
the shoulder belt out
from the retractor in
the seatback and insert
into the lap belt
connecting pin into the
wide end of the key
slot on the shoulder
belt. Pull the
connecting pin into the
narrow end of the key
slot until you hear a
snap and feel it latch.
Make sure the shoulder
belt is securely
fastened to the lap belt
by pulling up on the shoulder belt.
Seating and safety restraints
61
Page 86 of 190

5. Turn the key to 4
(ON) without turning
the key to 5 (START).
Make sure the corresponding lights illuminate
briefly. If a light fails to illuminate, have the vehicle
serviced.
²If the driver's safety belt is fastened, the light
(
) will not illuminate.
STARTING THE ENGINE
1. Turn the key to 5
(START) without
pressing the
accelerator pedal and
release as soon as the
engine starts. The key
will return to 4 (ON).
2. If the temperature is above ±12É C (10É F) and
the engine does not start within five seconds on the
first try, turn the key to OFF, wait ten seconds and
try again.
3. If the temperature is below -12ÉC (10ÉF) and the
engine does not start in fifteen seconds on the first
try, turn the key OFF and wait ten seconds and try
1
23
4
5
CRUISE
RPMx1000
0 1234
5
6
7EFC H
FUEL DOOR>
SERVICE
ENGINE
SOONP!
BRAKEABS
+ –
UNLEADED FUEL ONLY
THEFT LOW
COOLANTO/D
OFF102030405060
70
80
90
100
1202060100
140
180
P R N D 2 1MPH km/h
00
000
00000
110
1
23
4
5
Starting
86
Page 93 of 190

AUTOMATIC TRANSAXLE OPERATION
Brake-shift interlock
This vehicle is equipped with a brake-shift interlock
feature that prevents the gearshift from being moved
from P (Park) unless the brake pedal is pressed.
If you cannot move the gearshift out of P (Park)
with the brake pedal depressed:
1. Apply the parking brake, turn ignition key to
LOCK, then remove the key.
2. Insert the key and turn it to OFF. Apply the brake
pedal and shift to N (Neutral).
3. Start the vehicle.
If it is necessary to use the above procedure to
move the gearshift, it is possible that a fuse has
blown and the vehicle's brakelamps may not be
operating properly. Refer toFuses and relaysin the
Roadside emergencieschapter.
Do not drive your vehicle until you verify
that the brakelamps are working.
If your vehicle gets stuck in mud or snow it may be
rocked out by shifting from forward and reverse
gears, stopping between shifts, in a steady pattern.
Press lightly on the accelerator in each gear. Do not
rock the vehicle for more than a few minutes,
because it could damage the vehicle.
Always set the parking brake fully and make
sure the gearshift is latched in P (Park).
Turn off the ignition whenever you leave your
vehicle.
Driving
93