wheel Mercury Sable 1998 Owner's Manuals
[x] Cancel search | Manufacturer: MERCURY, Model Year: 1998, Model line: Sable, Model: Mercury Sable 1998Pages: 190, PDF Size: 1.29 MB
Page 28 of 190

POSITIONS OF THE IGNITION
1. ACCESSORY, allows
the electrical
accessories such as the
radio to operate while
the engine is not
running.
2. LOCK, locks the
steering wheel,
automatic transmission gearshift lever and allows
key removal.
3. OFF, shuts off the engine and all accessories
without locking the steering wheel.
4. ON, all electrical circuits operational. Warning
lights illuminated. Key position when driving.
5. START, cranks the engine. Release the key as
soon as the engine starts.
SPEED CONTROL (IF EQUIPPED)
To turn speed control on
²Press ON.
Vehicle speed cannot
be controlled until the
vehicle is traveling at
or above 48 km/h (30
mph).
Do not use the speed control in heavy traffic
or on roads that are winding, slippery, or
unpaved.
Do not shift the gearshift lever into N
(Neutral) with the speed control on.
1
23
4
5
OFF ON
Controls and features
28
Page 33 of 190

Press the washer
control to activate the
rear washer. The wiper
will come on when the
washer control is
pressed, if it is not
already on.
Mist Function
To operate the Mist
function of the
windshield wipers,
push and release the
windshield washer control quickly. The wipers will
cycle one or two times.
HAZARD FLASHER
For information on the hazard flasher control, refer
toHazard lights controlin theRoadside
emergencieschapter.
TILT STEERING
Pull the tilt steering
control toward you to
move the steering
wheel up or down.
Hold the control while
adjusting the wheel to
the desired position,
then release the
control.
Never adjust the steering wheel when the
vehicle is moving.
LOF
OFFS
HI
Controls and features
33
Page 40 of 190

TRUNK REMOTE CONTROL
Press the remote trunk
release control on the
instrument panel to the
left of the steering
wheel.
LIFTGATE (WAGON ONLY)
You can open the
entire liftgate or just
the liftgate window. To
open the entire liftgate,
press the release
button hidden under
the exterior trim panel
just above the license
plate.
You must lock the liftgate with the key or power
lock control; it does not lock automatically.
The window locks when the liftgate is locked. To
open the window, make sure the liftgate and window
are unlocked, then press the outside lock cylinder.
The window can only be opened from the outside.
To prevent any damage to the liftgate and window,
close them completely before driving.
Controls and features
40
Page 89 of 190

BRAKES
Your brakes are self-adjusting. Refer to the ªService
Guideº for scheduled maintenance.
Occasional brake noise is normal and often does not
indicate a performance concern with the vehicle's
brake system. In normal operation, automotive brake
systems may emit occasional or intermittent squeal
or groan noises when the brakes are applied. Such
noises are usually heard during the first few brake
applications in the morning; however, they may be
heard at any time while braking and can be
aggravated by environmental conditions such as
cold, heat, moisture, road dust, salt or mud. If a
ªmetal-to-metal,º ªcontinuous grindingº or
ªcontinuous squealº sound is present while braking,
the brake linings may be worn-out and should be
inspected by a qualified service technician.
Anti-lock brake system (ABS) (if equipped)
On vehicles equipped with an anti-lock braking
system (ABS), a noise from the hydraulic pump
motor and pulsation in the pedal may be observed
during ABS braking events. Pedal pulsation coupled
with noise while braking under panic conditions or
on loose gravel, bumps, wet or snowy roads is
normal and indicates proper functioning of the
vehicle's anti-lock brake system. If the vehicle has
continuous vibration or shudder in the steering
wheel while braking, the vehicle should be inspected
by a qualified service technician.
Driving
89
Page 90 of 190

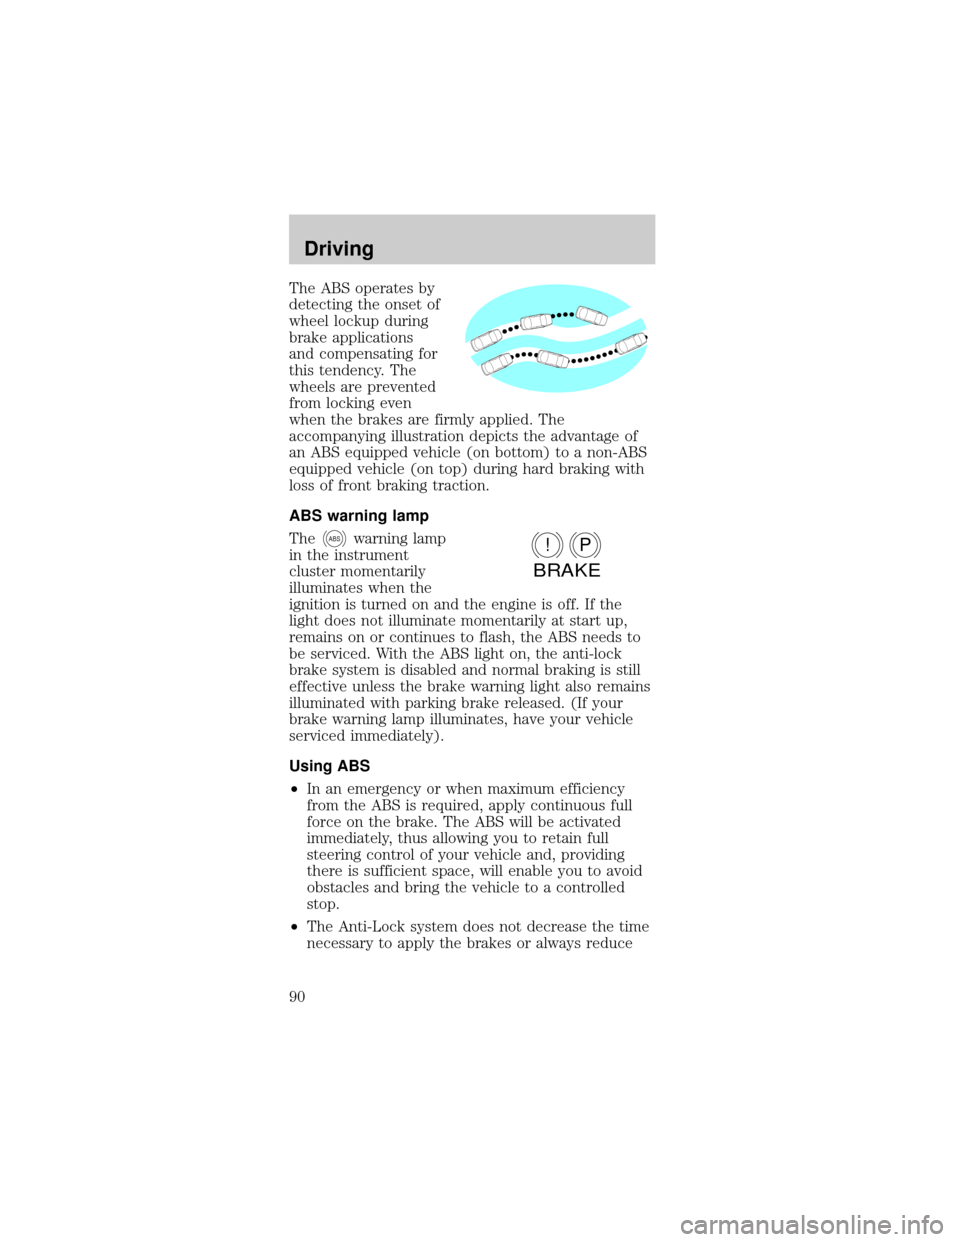
The ABS operates by
detecting the onset of
wheel lockup during
brake applications
and compensating for
this tendency. The
wheels are prevented
from locking even
when the brakes are firmly applied. The
accompanying illustration depicts the advantage of
an ABS equipped vehicle (on bottom) to a non-ABS
equipped vehicle (on top) during hard braking with
loss of front braking traction.
ABS warning lamp
The
ABSwarning lamp
in the instrument
cluster momentarily
illuminates when the
ignition is turned on and the engine is off. If the
light does not illuminate momentarily at start up,
remains on or continues to flash, the ABS needs to
be serviced. With the ABS light on, the anti-lock
brake system is disabled and normal braking is still
effective unless the brake warning light also remains
illuminated with parking brake released. (If your
brake warning lamp illuminates, have your vehicle
serviced immediately).
Using ABS
²In an emergency or when maximum efficiency
from the ABS is required, apply continuous full
force on the brake. The ABS will be activated
immediately, thus allowing you to retain full
steering control of your vehicle and, providing
there is sufficient space, will enable you to avoid
obstacles and bring the vehicle to a controlled
stop.
²The Anti-Lock system does not decrease the time
necessary to apply the brakes or always reduceP!
BRAKE
Driving
90
Page 92 of 190

Pull the release lever
to release the brake.
Driving with the
parking brake on will
cause the brakes to
wear out quickly and
reduce fuel economy.
STEERING
Your vehicle is equipped with power steering. Power
steering uses energy from the engine to help steer
the vehicle.
To prevent damage to the power steering pump:
²Never hold the steering wheel to the extreme
right or the extreme left for more than a few
seconds when the engine is running.
²Do not operate the vehicle with a low power
steering pump fluid level.
If the power steering system breaks down (or if the
engine is turned off), you can steer the vehicle
manually, but it takes more effort.
If the steering wanders or pulls, the condition could
be caused by any of the following:
²underinflated tire(s) on any wheel(s)
²high crown in center of road
²high crosswinds
²wheels out of alignment
²loose or worn components in steering linkage
Driving
92
Page 96 of 190

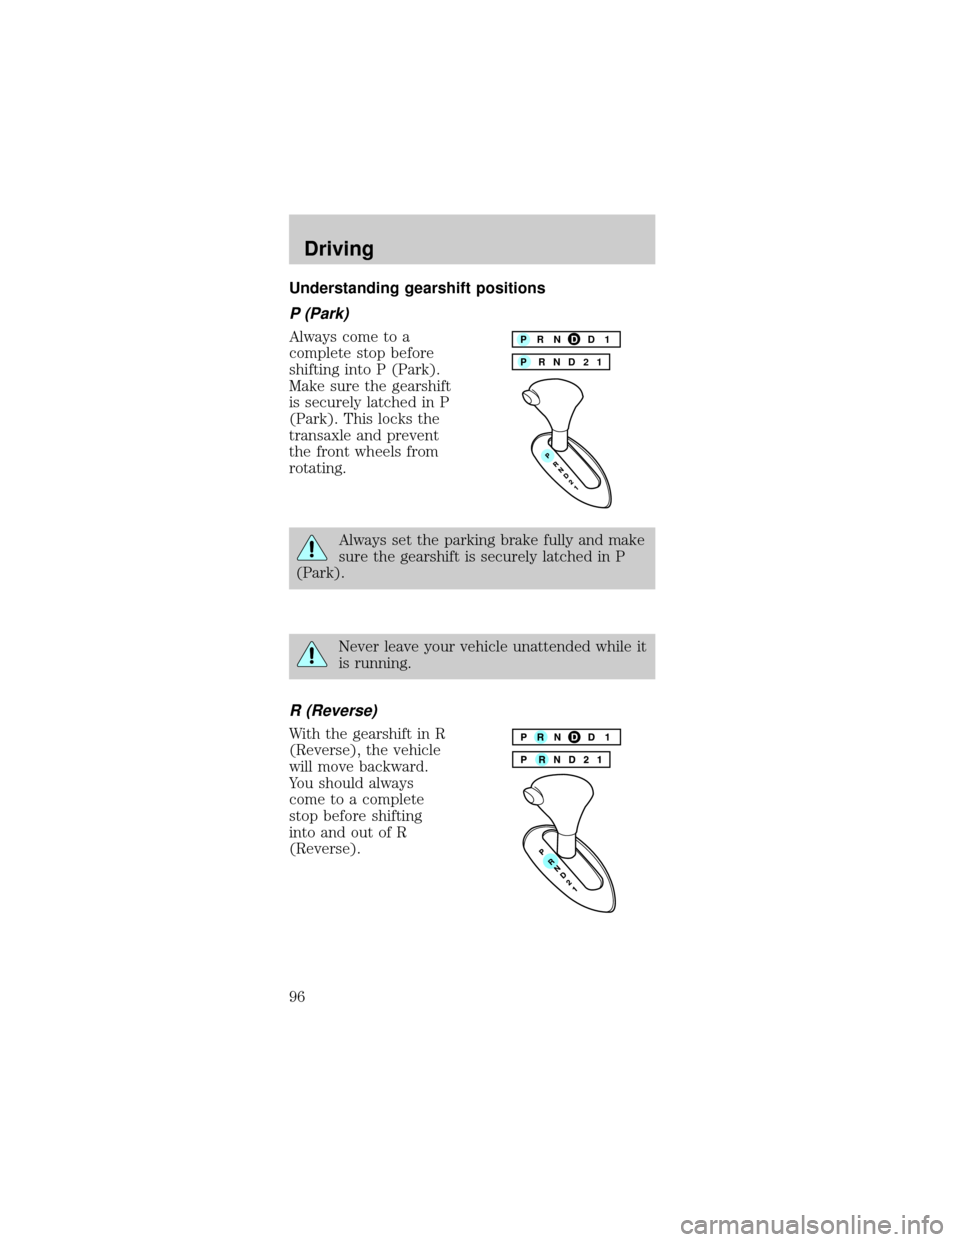
Understanding gearshift positions
P (Park)
Always come to a
complete stop before
shifting into P (Park).
Make sure the gearshift
is securely latched in P
(Park). This locks the
transaxle and prevent
the front wheels from
rotating.
Always set the parking brake fully and make
sure the gearshift is securely latched in P
(Park).
Never leave your vehicle unattended while it
is running.
R (Reverse)
With the gearshift in R
(Reverse), the vehicle
will move backward.
You should always
come to a complete
stop before shifting
into and out of R
(Reverse).
P RND21 PRNDD1
Driving
96
Page 102 of 190

DRIVING THROUGH WATER
Do not drive quickly through standing water,
especially if the depth is unknown. Traction or brake
capability may be limited and if the ignition system
gets wet, your engine may stall. Water may also
enter your engine's air intake and severely damage
your engine.
If driving through deep or standing water is
unavoidable, proceed very slowly. Never drive
through water that is higher than the bottom of the
hubs (truck)/wheel rims (car).
Once through the water, always try the brakes. Wet
brakes do not stop the vehicle as effectively as dry
brakes. Drying can be improved by moving your
vehicle slowly while applying light pressure on the
brake pedal.
TRAILER TOWING
Your vehicle is classified as a light duty towing
vehicle. The amount of weight you can safely tow
depends on the type of engine you have in your
vehicle. Your vehicle does not come from the factory
fully equipped to tow. No towing packages are
available through Ford or Mercury/Lincoln dealers.
Do not tow a trailer until your vehicle has been
driven at least 800 km (500 miles). If towing with a
station wagon, inflate the rear tires to 35 psi.
Towing a trailer places an additional load on your
vehicle's engine, transaxle, brakes, tires and
suspension. Inspect these components carefully after
towing.
The amount of weight that you can tow depends on
the type of engine in your vehicle. See the following
charts:
Driving
102
Page 106 of 190

Servicing after towing
If you tow a trailer for long distances, your vehicle
will require more frequent service intervals. Refer to
the Severe Duty Schedule in your ªService Guideº
for more information.
Trailer towing tips
²Practice turning, stopping and backing up in an
area before starting on a trip to get the feel of the
vehicle trailer combination. When turning, make
wider turns so the trailer wheels will clear curbs
and other obstacles.
²Allow more distance for stopping with a trailer
attached.
²The trailer tongue weight should be 10±15% of
the loaded trailer weight.
²After you have traveled 80 km (50 miles),
thoroughly check your hitch, electrical
connections and trailer wheel lug nuts.
²When stopped in traffic for long periods of time in
hot weather, place the gearshift in P (Park) and
increase idle speed. This aids engine cooling and
air conditioner efficiency.
²Vehicles with trailers should not be parked on a
grade. If you must park on a grade, place wheel
chocks under the trailer's wheels.
Driving
106
Page 107 of 190

Towing your vehicle behind another vehicle
At times, you may want to tow your vehicle behind
another vehicle, such as a recreational vehicle, car
or a truck.
Before you have your vehicle towed:
²Release the parking brake.
²Move the gearshift to N (Neutral).
²Turn the key in the ignition to OFF.
²Unlock the steering wheel.
Do not tow your vehicle at a speed faster than 56
km/h (35 mph) or for a distance greater than 80 km
(50 miles), unless the drive wheels are placed on
dollies.
Never use a tow bar that attaches to the
bumper when you tow your vehicle. This
could damage the bumper and cause an accident.
LUGGAGE RACK (IF EQUIPPED)
The rear crossbar can be adjusted to fit the item
being carried. The front crossbar does not move. Do
not load more than 44 kg (100 lbs.) on the luggage
rack.
To adjust cross-bar position:
1. Loosen the
thumbwheel at both
ends of the cross-bar.
2. Slide the cross-bar
to the desired location.
3. Tighten the thumbwheel at both ends of the
cross-bar.
Use adjustable tie down loops to secure the load.
Driving
107