auto Mercury Sable 2001 s Owner's Guide
[x] Cancel search | Manufacturer: MERCURY, Model Year: 2001, Model line: Sable, Model: Mercury Sable 2001Pages: 240, PDF Size: 2.22 MB
Page 71 of 240

Unlocking the doors and releasing the trunk with the keyless entry
system
The driver's door must be unlocked before any other. If more than five
seconds pass between pressing numbers, enter the code again. The
system has shut down if the keypad light is out. If the keyless entry
system does not work, use the key or remote entry transmitter(s).
1. To unlock the driver's door, enter one of the two codes. After pressing
the fifth number, the driver's door unlocks.
2. To unlock the passenger's door(s)
and liftgate (wagon), press the 3/4
control within five seconds of
unlocking the driver's door.
3. To unlock the trunk or liftgate
(wagon), enter the five-digit
factory-set code, then press the 5/6
control within five seconds.
Locking the doors and liftgate
(wagon), press the 7/8 and 9/0
controls at the same time. This can be done at any time.
Autolock (if equipped)
The autolock feature will lock all of the vehicle doors when:
²all doors are closed
²the engine is running and
²you shift into any gear putting the vehicle in motion
The autolock feature repeats when:
²any door, except the drivers door, is opened then closed while the
engine is running and
²you put the vehicle in motion
123
45678
90
123
45678
90
Controls and features
71
Page 72 of 240

Deactivating/activating autolock
There are 2 methods to enable/disable this feature. One through your
dealer and the second with a door lock sequence using the following
instructions:
1. Turn the ignition key to RUN, then press the door UNLOCK control
button 3 times.
2. Turn the ignition key to OFF, then press the door UNLOCK control
button 3 times.
3. Turn the ignition key to RUN, within five seconds press the door
UNLOCK control button 1 time.
The user should receive ahorn chirpto indicate the system has been
altered.
Pressing the power door UNLOCK control button again will toggle the
Autolock/Relock states.
²Turn ignition to OFF to exit.
Deactivating/activating horn chirp
There are 2 methods to enable/disable this feature. One through your
dealer and the second with a door lock sequence using the following
instructions:
1. Turn the ignition key to RUN, then press the door UNLOCK control
button 3 times.
2. Turn the ignition key to OFF, then press the door UNLOCK control
button 3 times.
3. Turn the ignition key to RUN, within five seconds press the door
UNLOCK control button 2 times.
The user should receive twohorn chirpsto indicate the system had
been altered.
Pressing the power door UNLOCK control button two times again will
toggle the Autolock/Relock states.
²Turn ignition to OFF to exit.
Controls and features
72
Page 73 of 240
SECURILOCKYPASSIVE ANTI-THEFT SYSTEM
SecuriLockypassive anti-theft system is an engine immobilization
system. This system prevents the engine from being started unless a
coded key programmed to your vehicleis used.
The SecuriLockypassive anti-theft system is not compatible with
non-Ford aftermarket remote start systems. Use of these systems may
result in vehicle starting problems and a loss of security protection.
Automatic arming
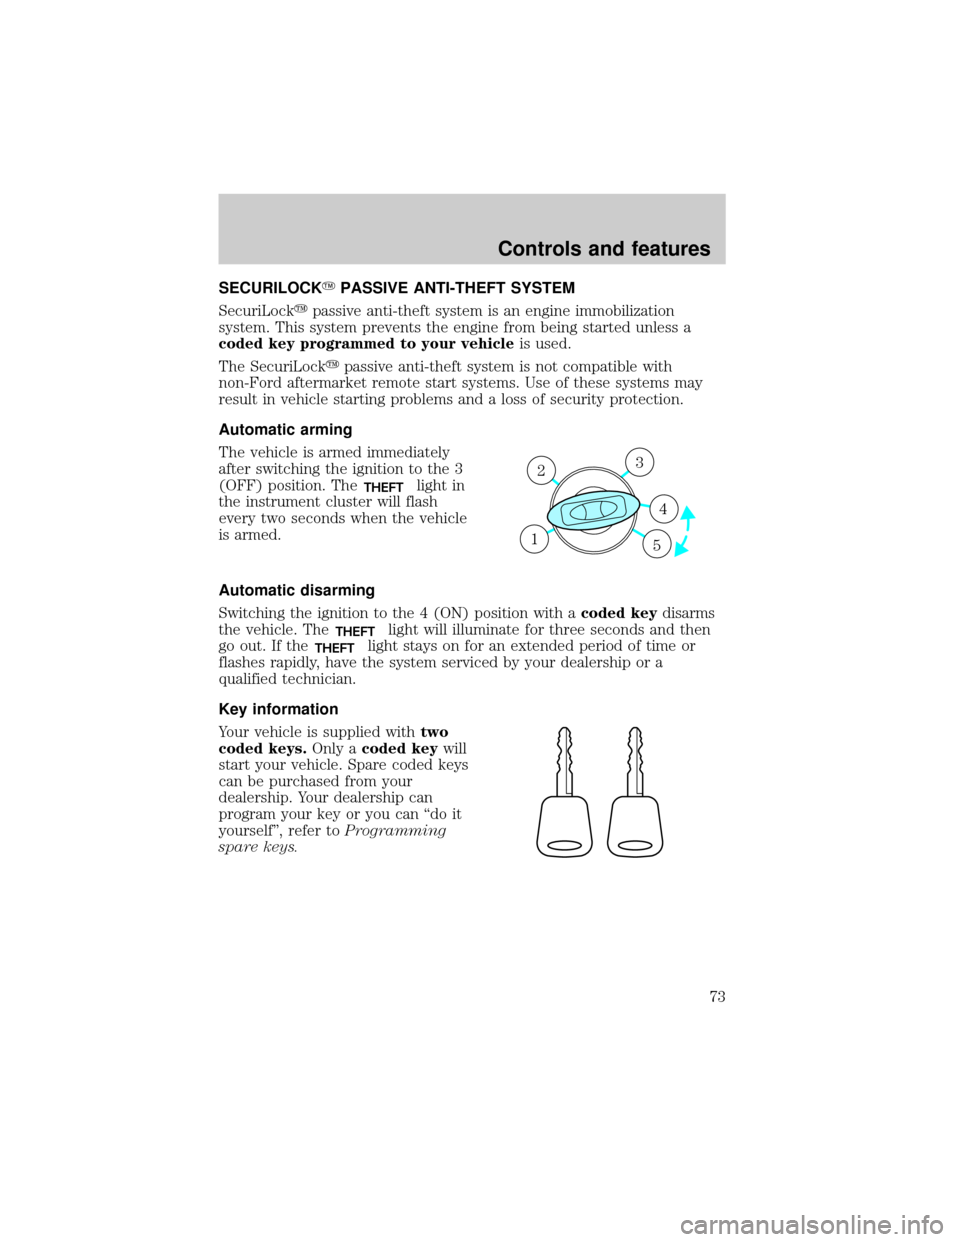
The vehicle is armed immediately
after switching the ignition to the 3
(OFF) position. The
THEFTlight in
the instrument cluster will flash
every two seconds when the vehicle
is armed.
Automatic disarming
Switching the ignition to the 4 (ON) position with acoded keydisarms
the vehicle. The
THEFTlight will illuminate for three seconds and then
go out. If the
THEFTlight stays on for an extended period of time or
flashes rapidly, have the system serviced by your dealership or a
qualified technician.
Key information
Your vehicle is supplied withtwo
coded keys.Only acoded keywill
start your vehicle. Spare coded keys
can be purchased from your
dealership. Your dealership can
program your key or you can ªdo it
yourselfº, refer toProgramming
spare keys.
3
4
1 2
5
Controls and features
73
Page 85 of 240
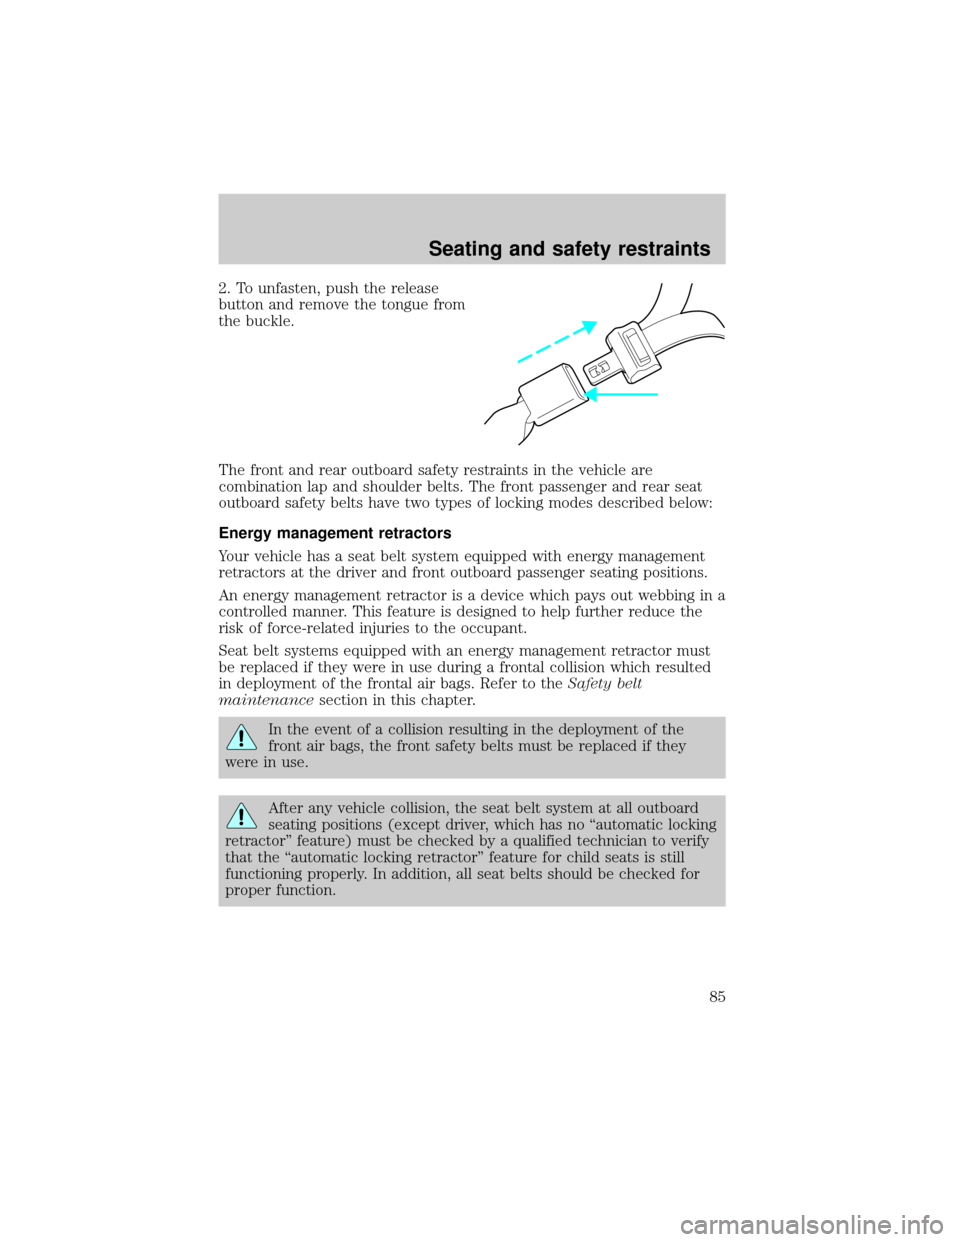
2. To unfasten, push the release
button and remove the tongue from
the buckle.
The front and rear outboard safety restraints in the vehicle are
combination lap and shoulder belts. The front passenger and rear seat
outboard safety belts have two types of locking modes described below:
Energy management retractors
Your vehicle has a seat belt system equipped with energy management
retractors at the driver and front outboard passenger seating positions.
An energy management retractor is a device which pays out webbing in a
controlled manner. This feature is designed to help further reduce the
risk of force-related injuries to the occupant.
Seat belt systems equipped with an energy management retractor must
be replaced if they were in use during a frontal collision which resulted
in deployment of the frontal air bags. Refer to theSafety belt
maintenancesection in this chapter.
In the event of a collision resulting in the deployment of the
front air bags, the front safety belts must be replaced if they
were in use.
After any vehicle collision, the seat belt system at all outboard
seating positions (except driver, which has no ªautomatic locking
retractorº feature) must be checked by a qualified technician to verify
that the ªautomatic locking retractorº feature for child seats is still
functioning properly. In addition, all seat belts should be checked for
proper function.
Seating and safety restraints
85
Page 86 of 240
BELT AND RETRACTOR ASSEMBLY MUST BE REPLACED if
the seat belt assembly ªautomatic locking retractorº feature or
any other seat belt function is not operating properly when checked
according to the procedures in Workshop Manual.
Failure to replace the Belt and Retractor assembly could
increase the risk of injury in collisions.
Vehicle sensitive mode
The vehicle sensitive mode is the normal retractor mode, allowing free
shoulder belt length adjustment to your movements and locking in
response to vehicle movement. For example, if the driver brakes
suddenly or turns a corner sharply, or the vehicle receives an impact of
approximately 8 km/h (5 mph) or more, the combination safety belts will
lock to help reduce forward movement of the driver and passengers.
Automatic locking mode
In this mode, the shoulder belt is automatically pre-locked. The belt will
still retract to remove any slack in the shoulder belt.
The automatic locking mode is not available on the driver safety belt.
When to use the automatic locking mode
²Anytimea child safety seat is installed in the vehicle. Children 12
years old and under should be properly restrained in the rear seat
whenever possible. Refer toSafety Restraints for ChildrenorSafety
Seats for Childrenlater in this chapter.
Seating and safety restraints
86
Page 87 of 240

How to use the automatic locking mode
²Buckle the combination lap and
shoulder belt.
²Grasp the shoulder portion and
pull downward until the entire
belt is extracted.
²Allow the belt to retract. As the belt retracts, you will hear a clicking
sound. This indicates the safety belt is now in the automatic locking
mode.
How to disengage the automatic locking mode
Disconnect the combination lap/shoulder belt and allow it to retract
completely to disengage the automatic locking mode and activate the
vehicle sensitive (emergency) locking mode.
Seating and safety restraints
87
Page 88 of 240
After any vehicle collision, the front passenger outboard seat belt
system must be checked by a qualified technician to verify that
the ªautomatic locking retractorº feature for child seats is still
functioning properly. In addition, all seat belts should be checked for
proper function.
BELT AND RETRACTOR ASSEMBLY MUST BE REPLACED if
the seat belt assembly ªautomatic locking retractorº feature or
any other seat belt function is not operating properly when checked
according to the procedures in Workshop Manual.
Failure to replace the Belt and Retractor assembly could
increase the risk of injury in collisions.
Safety belt pretensioner
Your vehicle is equipped with safety belt pretensioners at the driver and
front outboard passenger seating positions.
The safety belt pretensioners are designed to activate only when the
safety belts are fastened during certain frontal or near-frontal collisions
with sufficient longitudinal deceleration. A safety belt pretensioner is a
device which tightens the webbing of the lap and shoulder belts in such
a way that they fit more snugly against the body.
The driver and front outboard passenger safety belt system (including
retractors, buckles and height adjusters) must be replaced if the vehicle is
involved in a collision that results in the activation of the safety belt
pretensioners. Refer to theSafety belt maintenancesection in this chapter.
Failure to replace the safety belt assembly under the above
conditions could result in severe personal injuries in the event of
a collision.
Safety belt usage sensors
The driver and front outboard passenger safety belt buckles are
equipped with sensors that detect if the safety belts are fastened. The
sensors provide information to the Personal Safety System which can
then adapt the air bag deployment or safety belt pretensioner activation
based upon safety belt usage.
Seating and safety restraints
88
Page 89 of 240
The Personal Safety System provides the most benefit to belted
occupants. The system monitors and tailors the air bag
deployment based upon safety belt usage. Failure to properly wear
your safety belt will increase your risk of injury.
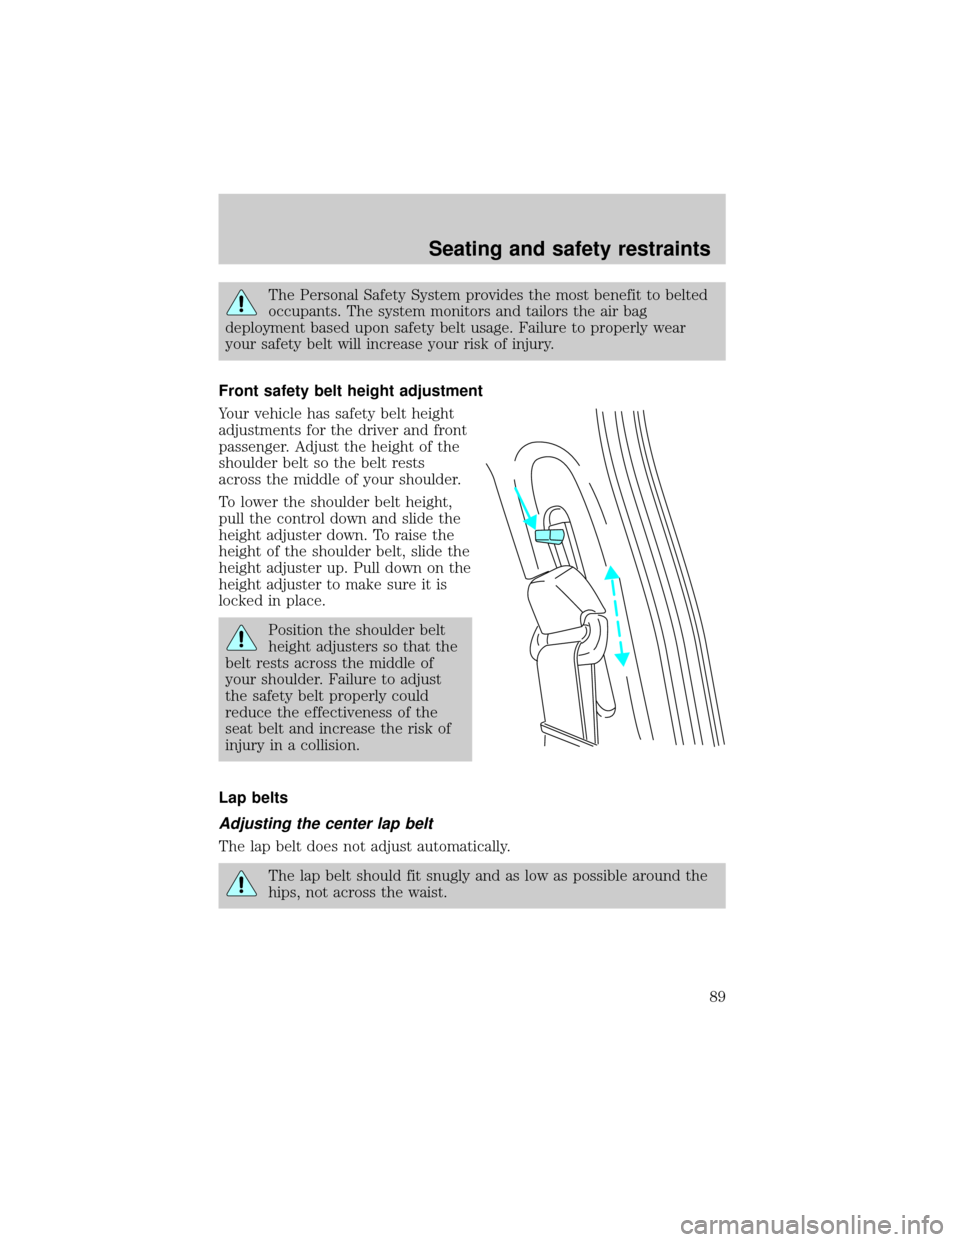
Front safety belt height adjustment
Your vehicle has safety belt height
adjustments for the driver and front
passenger. Adjust the height of the
shoulder belt so the belt rests
across the middle of your shoulder.
To lower the shoulder belt height,
pull the control down and slide the
height adjuster down. To raise the
height of the shoulder belt, slide the
height adjuster up. Pull down on the
height adjuster to make sure it is
locked in place.
Position the shoulder belt
height adjusters so that the
belt rests across the middle of
your shoulder. Failure to adjust
the safety belt properly could
reduce the effectiveness of the
seat belt and increase the risk of
injury in a collision.
Lap belts
Adjusting the center lap belt
The lap belt does not adjust automatically.
The lap belt should fit snugly and as low as possible around the
hips, not across the waist.
Seating and safety restraints
89
Page 94 of 240
Reasons given... Consider...
ªBelts wrinkle my
clothesºPossibly, but a serious crash can do much more
than wrinkle your clothes, particularly if you are
unbelted.
ªThe people I'm
with don't wear
beltsºSet the example, teen deaths occur 4 times more
often in vehicles with TWO or MORE people.
Children and younger brothers/sisters imitate
behavior they see.
ªI have an air bagº Air bags offer greater protection when used with
safety belts. Frontal airbags are not designed to
inflate in rear and side crashes or rollovers.
ªI'd rather be
thrown clearºNot a good idea.Peoplewho areejected are 40
times more likely to DIE.Safety belts help
prevent ejection, WE CAN'T ªPICK OUR CRASHº.
Do not sit on top of a buckled safety belt to avoid the Belt
Minder chime. Sitting on the safety belt will increase the risk of
injury in an accident. To disable (one-time) or deactivate the Belt
Minder feature please follow the directions stated below.
One time disable
Anytime the safety belt is buckled and then unbuckled during an ignition
ON cycle, Belt Minder will be disabled for that ignition cycle only. The
safety belt needs to be latched for a minimum of 3 seconds before belt
minder is disabled.
Deactivating/activating the belt minder feature
Read steps1-9thoroughly before proceeding with the
deactivation/activation programming procedure.
The Belt Minder feature can be deactivated/activated by performing the
following procedure:
Before following the procedure, make sure that:
²the parking brake is set
²the gearshift is in P (Park) (automatic transmission).
²the ignition switch is in the OFF position
²all vehicle doors are closed
²the driver's safety belt is unbuckled
Seating and safety restraints
94
Page 95 of 240
²the parklamps/headlamps are in OFF position (If vehicle is equipped
with Autolamps, this will not affect the procedure.)
To reduce the risk of injury, do not deactivate/activate the Belt
Minder feature while driving the vehicle.
1. Turn the ignition switch to the RUN (or ON) position. (DO NOT
START THE ENGINE)
2. Wait until the safety belt warning light turns off. (Approximately 1±2
minutes)
²Steps 3±5 must be completed within 60 seconds or the procedure will
have to be repeated.
3. Buckle then unbuckle the safety belt three times, ending with the
safety belt unbuckled. This can be done before or during Belt Minder
warning activation.
4. Turn on the parklamps/headlamps, turn off the parklamps/headlamps.
5. Buckle then unbuckle the safety belt three times, ending with the
safety belt unbuckled.
²After step 5 the safety belt warning light will be turned on for three
seconds.
6. Within seven seconds of the safety belt warning light turning off,
buckle then unbuckle the safety belt.
²This will disable Belt Minder if it is currently enabled, or enable Belt
Minder if it is currently disabled.
7. Confirmation of disabling Belt Minder is provided by flashing the
safety belt warning light four times per second for three seconds.
8. Confirmation of enabling Belt Minder is provided by flashing the safety
belt warning light four times per second for three seconds, followed by
three seconds with the safety belt warning light off, then followed by
flashing the safety belt warning light four times per second for three
seconds again.
9. After receiving confirmation, the deactivation/activation procedure is
complete.
Safety belt maintenance
Inspect the safety belt systems periodically to make sure they work
properly and are not damaged. Inspect the safety belts to make sure
Seating and safety restraints
95