light Mercury Sable 2002 s Owner's Guide
[x] Cancel search | Manufacturer: MERCURY, Model Year: 2002, Model line: Sable, Model: Mercury Sable 2002Pages: 240, PDF Size: 3.53 MB
Page 64 of 240
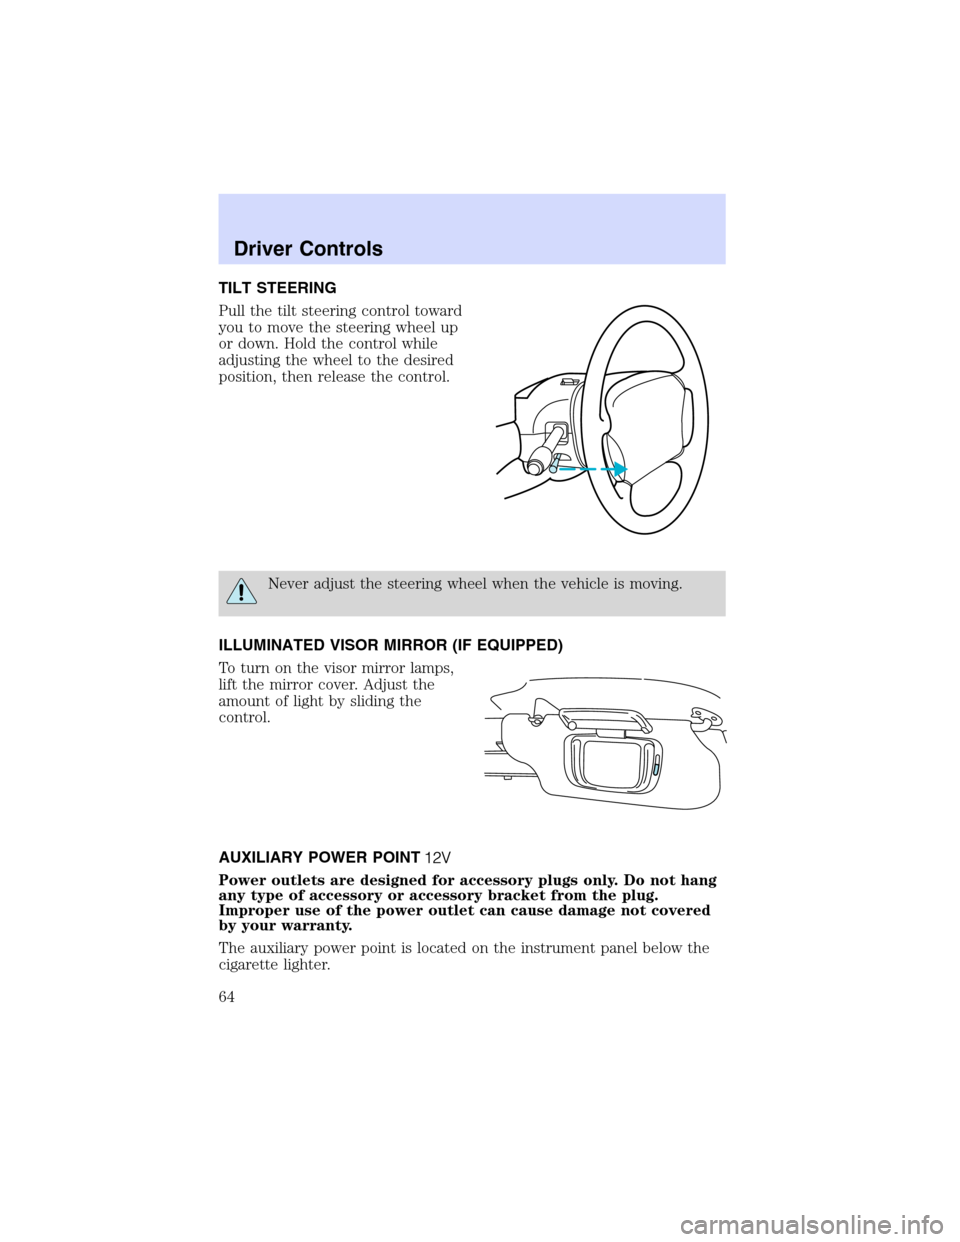
TILT STEERING
Pull the tilt steering control toward
you to move the steering wheel up
or down. Hold the control while
adjusting the wheel to the desired
position, then release the control.
Never adjust the steering wheel when the vehicle is moving.
ILLUMINATED VISOR MIRROR (IF EQUIPPED)
To turn on the visor mirror lamps,
lift the mirror cover. Adjust the
amount of light by sliding the
control.
AUXILIARY POWER POINT
Power outlets are designed for accessory plugs only. Do not hang
any type of accessory or accessory bracket from the plug.
Improper use of the power outlet can cause damage not covered
by your warranty.
The auxiliary power point is located on the instrument panel below the
cigarette lighter.
Driver Controls
64
Page 65 of 240

Do not plug optional electrical accessories into the cigarette
lighter. Use the power point.
POWER WINDOWS
Press and hold the rocker switches to open and close windows.
•Press the top portion of the
rocker switch to close.
•Press the bottom portion of the
rocker switch to open.
One touch down
•Press AUTO completely down to
the second detent. The driver’s
window will open fully. Depress
up to stop window operation.
AUTO
AUTO
AUTO
Driver Controls
65
Page 66 of 240

Window lock
The window lock feature allows only
the driver to operate the power
windows.
To lock out all the window controls
except for the driver’s press the left
side of the control. Press the right
side to restore the window controls.
Accessory delay (if equipped)
With accessory delay, the window switches may be used for up to ten
minutes after the ignition switch is turned to the OFF position or until
any door is opened.
MIRRORS
Automatic dimming inside rear view mirror (if equipped)
Your vehicle is equipped with an
inside rear view mirror which has an
auto-dimming function. The
electronic day/night mirror will
change from the normal state to the
non-glare state when bright lights
(glare) reach the mirror. When the mirror detects bright light from front
or behind, it will automatically adjust (darken) to minimize glare.
Do not block the sensor on the backside of the mirror since this may
impair proper mirror performance.
Press the control to turn the mirror OFF or AUTO.
The mirror will automatically return to the normal state whenever the
vehicle is placed in R (Reverse)(when the mirror is on) to ensure a
bright clear view when backing up.
Electronic compass (if equipped)
The compass reading will remain accurate during most driving
conditions. Unknown to the driver, the compass is continuously
recalibrating due to magnetic fields and subtle, slow changes in vehicle
magnetics which can occur over the life of the vehicle.
The compass reading will remain fixed when significant changes in the
local magnetic field are experienced (such as steel bridges). The
compass will return to normal operation upon leaving the magnetized
area.
OFF AUTO
Driver Controls
66
Page 67 of 240
If highly magnetized items (such as magnetic mount antennas) are
placed very near the compass the display will change to“C”for 15
seconds, then display all segments until the magnetized item is removed.
If a“C”is displayed, refer toCompass calibration adjustment.
Most geographic areas (zones) have a magnetic north compass point that
varies slightly from the northerly direction on maps. This variation is four
degrees between adjacent zones and will become noticeable as the
vehicle crosses multiple zones. A correct zone setting will eliminate this
error. Refer toCompass zone adjustment.
Compass zone adjustment
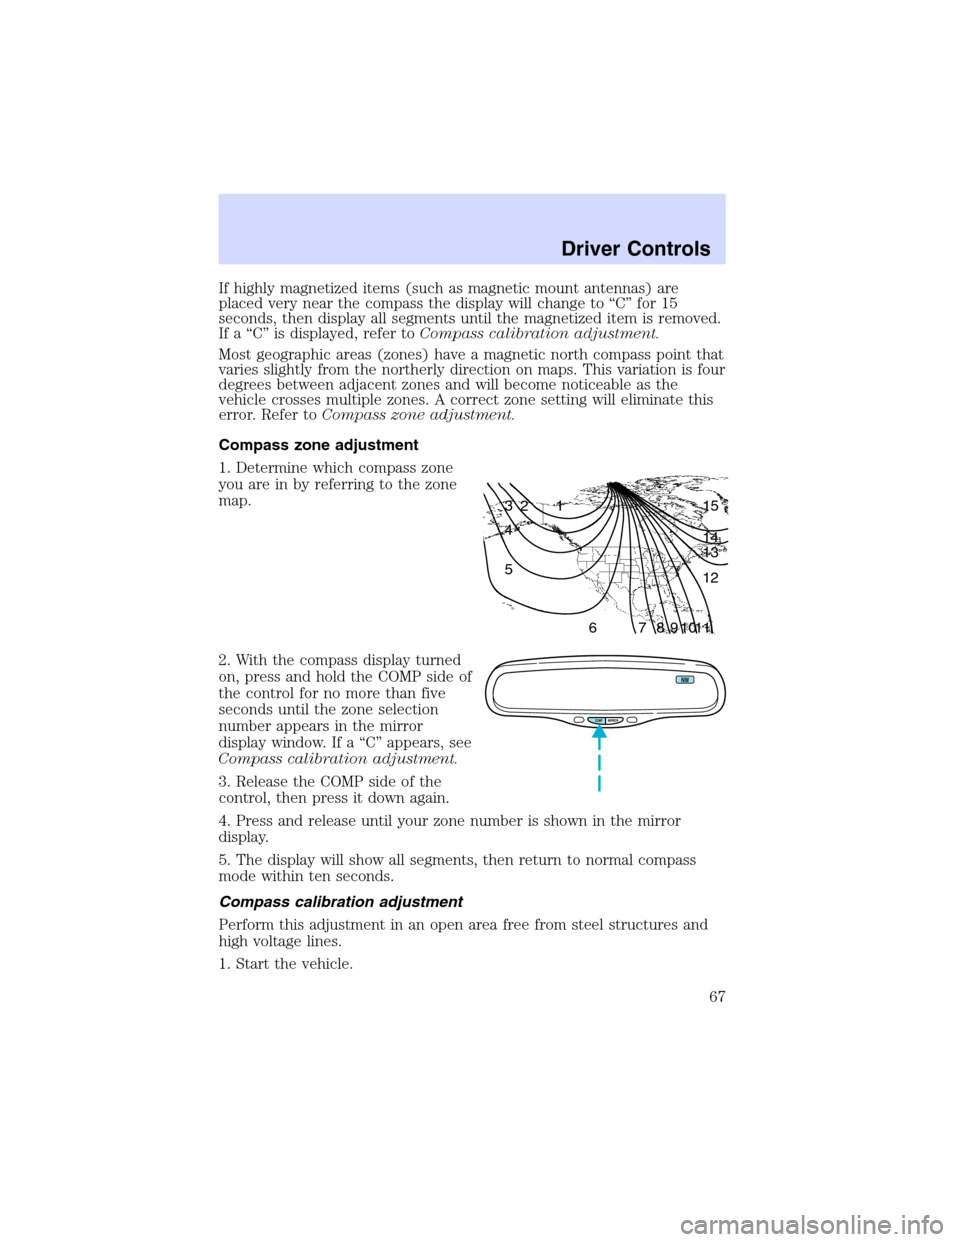
1. Determine which compass zone
you are in by referring to the zone
map.
2. With the compass display turned
on, press and hold the COMP side of
the control for no more than five
seconds until the zone selection
number appears in the mirror
display window. If a“C”appears, see
Compass calibration adjustment.
3. Release the COMP side of the
control, then press it down again.
4. Press and release until your zone number is shown in the mirror
display.
5. The display will show all segments, then return to normal compass
mode within ten seconds.
Compass calibration adjustment
Perform this adjustment in an open area free from steel structures and
high voltage lines.
1. Start the vehicle.
1 2 3
4
5
6 7 8 9 101112 13 14 15
COMP MIRROR
NW
Driver Controls
67
Page 72 of 240

To disengage speed control
•Depress the brake pedal.
Disengaging the speed control will
not erase the previously
programmed set speed.
Pressing OFF will erase the
previously programmed set speed.
To return to a previously set speed
•Press RES. For RES to operate,
the vehicle speed must be faster
than 48 km/h (30 mph).
Indicator light
This light comes on when either the
SET or RES controls are pressed. It
turns off when the speed control
OFF control is pressed, the brake is applied or the ignition is turned to
the OFF position.
OFF
ON
CRUISE
Driver Controls
72
Page 76 of 240
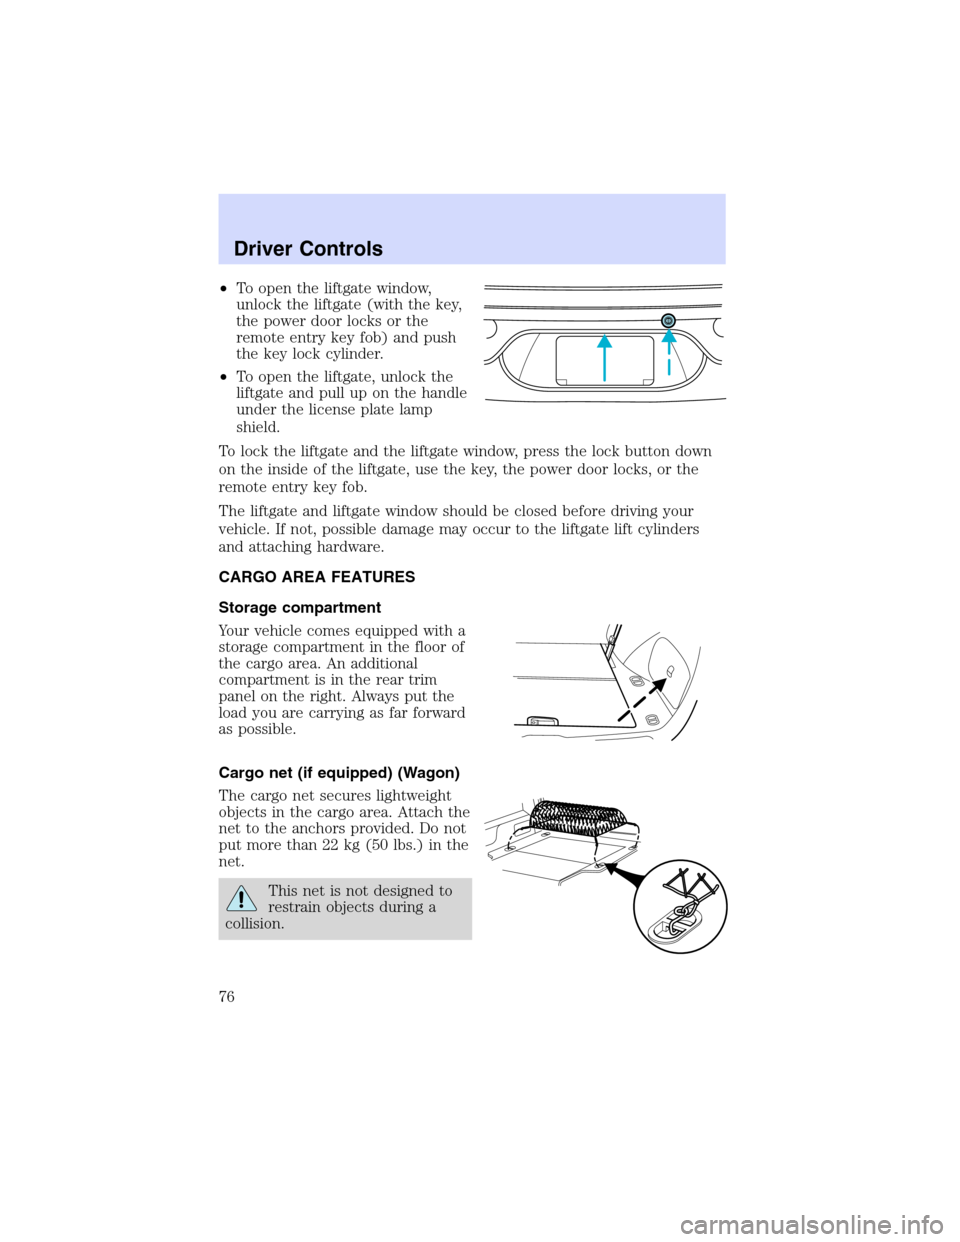
•To open the liftgate window,
unlock the liftgate (with the key,
the power door locks or the
remote entry key fob) and push
the key lock cylinder.
•To open the liftgate, unlock the
liftgate and pull up on the handle
under the license plate lamp
shield.
To lock the liftgate and the liftgate window, press the lock button down
on the inside of the liftgate, use the key, the power door locks, or the
remote entry key fob.
The liftgate and liftgate window should be closed before driving your
vehicle. If not, possible damage may occur to the liftgate lift cylinders
and attaching hardware.
CARGO AREA FEATURES
Storage compartment
Your vehicle comes equipped with a
storage compartment in the floor of
the cargo area. An additional
compartment is in the rear trim
panel on the right. Always put the
load you are carrying as far forward
as possible.
Cargo net (if equipped) (Wagon)
The cargo net secures lightweight
objects in the cargo area. Attach the
net to the anchors provided. Do not
put more than 22 kg (50 lbs.) in the
net.
This net is not designed to
restrain objects during a
collision.
Driver Controls
76
Page 78 of 240
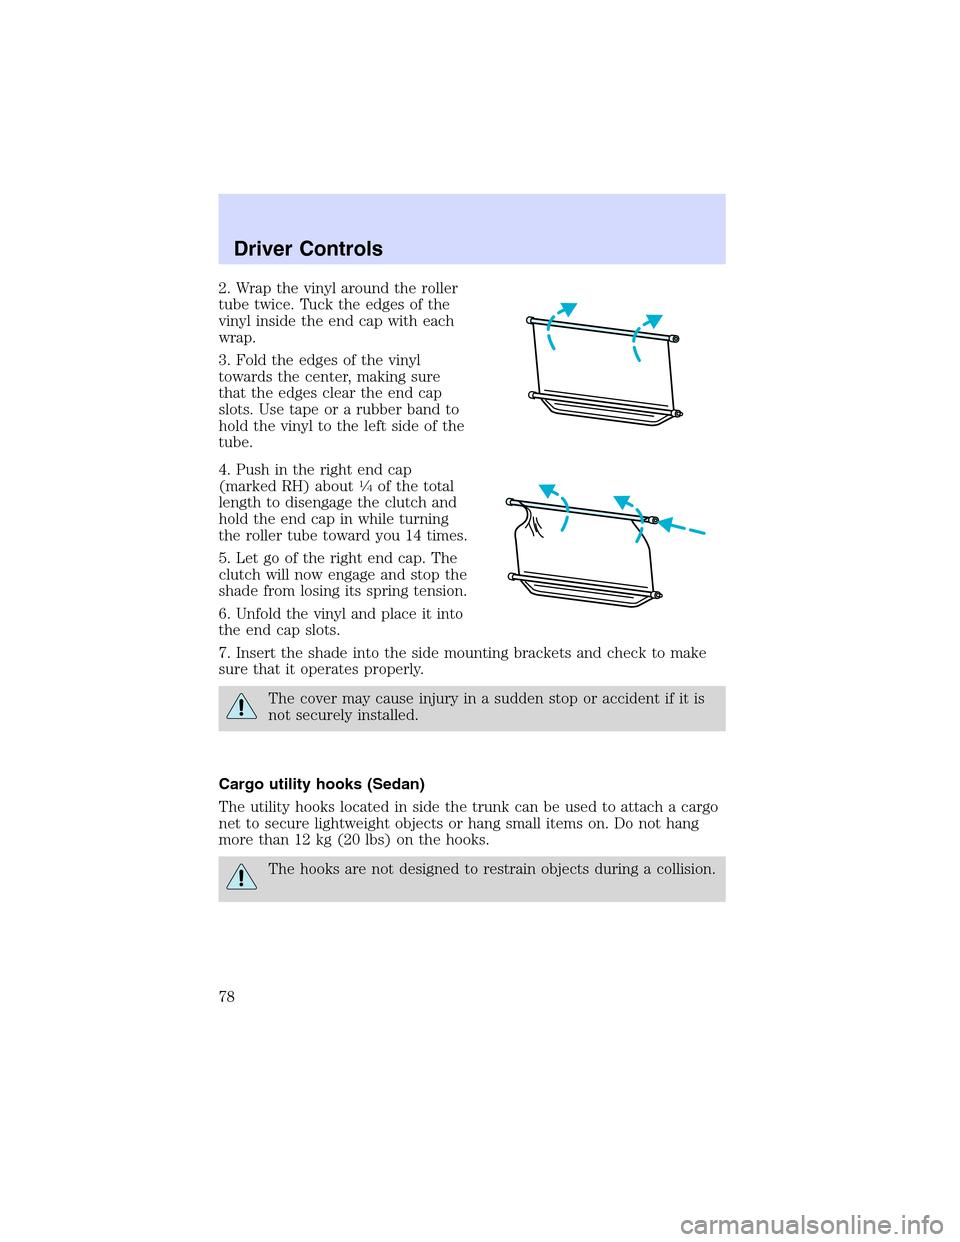
2. Wrap the vinyl around the roller
tube twice. Tuck the edges of the
vinyl inside the end cap with each
wrap.
3. Fold the edges of the vinyl
towards the center, making sure
that the edges clear the end cap
slots. Use tape or a rubber band to
hold the vinyl to the left side of the
tube.
4. Push in the right end cap
(marked RH) about
1�4of the total
length to disengage the clutch and
hold the end cap in while turning
the roller tube toward you 14 times.
5. Let go of the right end cap. The
clutch will now engage and stop the
shade from losing its spring tension.
6. Unfold the vinyl and place it into
the end cap slots.
7. Insert the shade into the side mounting brackets and check to make
sure that it operates properly.
The cover may cause injury in a sudden stop or accident if it is
not securely installed.
Cargo utility hooks (Sedan)
The utility hooks located in side the trunk can be used to attach a cargo
net to secure lightweight objects or hang small items on. Do not hang
more than 12 kg (20 lbs) on the hooks.
The hooks are not designed to restrain objects during a collision.
Driver Controls
78
Page 81 of 240
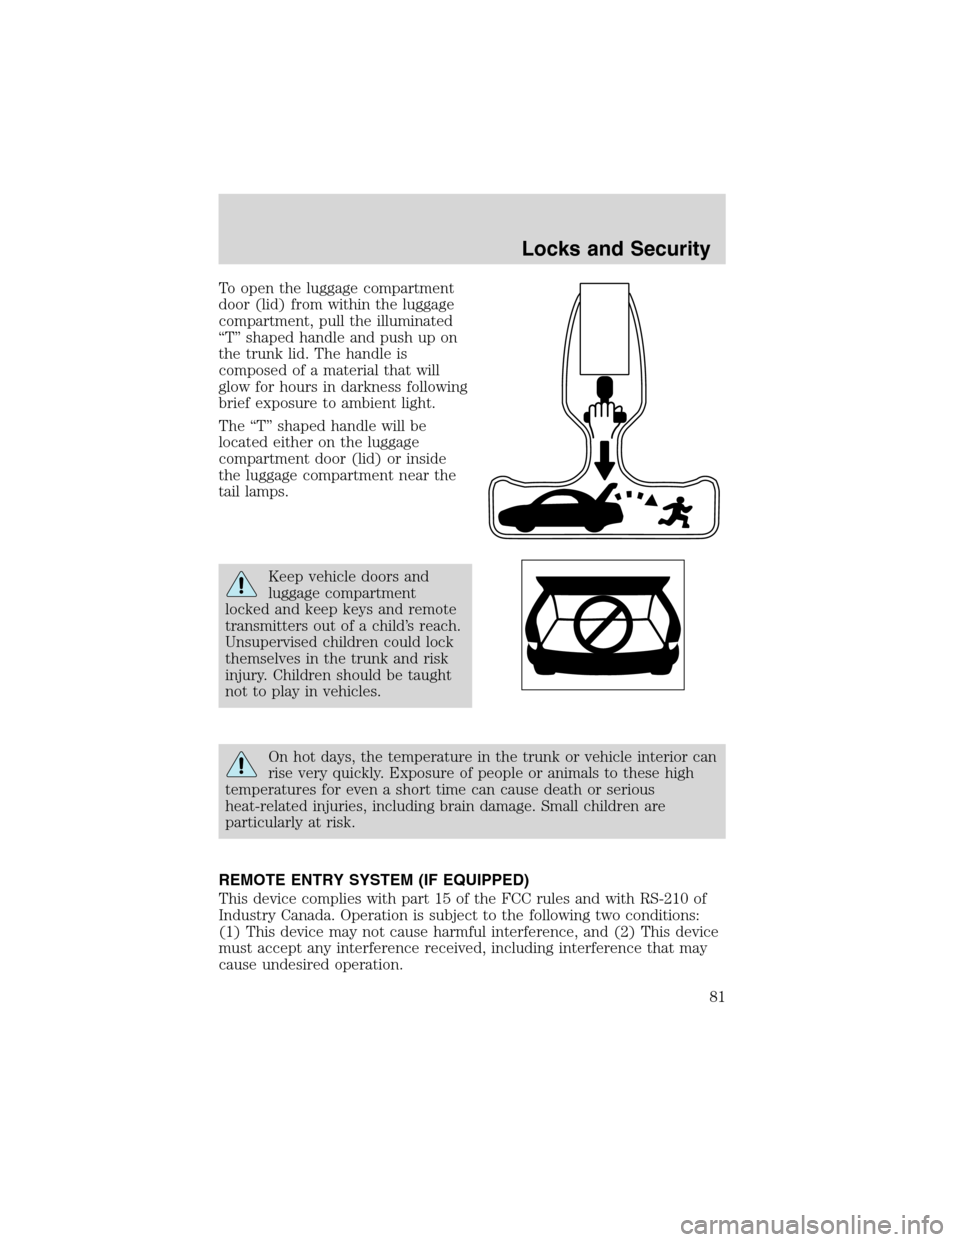
To open the luggage compartment
door (lid) from within the luggage
compartment, pull the illuminated
“T”shaped handle and push up on
the trunk lid. The handle is
composed of a material that will
glow for hours in darkness following
brief exposure to ambient light.
The“T”shaped handle will be
located either on the luggage
compartment door (lid) or inside
the luggage compartment near the
tail lamps.
Keep vehicle doors and
luggage compartment
locked and keep keys and remote
transmitters out of a child’s reach.
Unsupervised children could lock
themselves in the trunk and risk
injury. Children should be taught
not to play in vehicles.
On hot days, the temperature in the trunk or vehicle interior can
rise very quickly. Exposure of people or animals to these high
temperatures for even a short time can cause death or serious
heat-related injuries, including brain damage. Small children are
particularly at risk.
REMOTE ENTRY SYSTEM (IF EQUIPPED)
This device complies with part 15 of the FCC rules and with RS-210 of
Industry Canada. Operation is subject to the following two conditions:
(1) This device may not cause harmful interference, and (2) This device
must accept any interference received, including interference that may
cause undesired operation.
Locks and Security
81
Page 85 of 240
•Within 20 seconds, program a remote transmitter by pressing any
button on a transmitter. The doors will lock/unlock to confirm that the
remote transmitter has been programmed. (If more than 20 seconds
pass before pressing a remote transmitter button, the programming
mode will exit and the procedure will have to be repeated.)
•Repeat the previous step to program additional remote transmitters.
The doors will lock/unlock to confirm that each remote transmitter has
been programmed.
•When you have completed programming the remote transmitters, turn
the ignition to 3 (OFF) or wait 20 seconds. Again the doors will
lock/unlock to confirm programming has been completed.
Illuminated entry
The interior lamps illuminate when the remote entry system is used to
unlock the door(s).
The system automatically turns off after 25 seconds or when the ignition
is turned to the ON or ACC position. The dome lamp control (if
equipped) mustnotbe set to the OFF position for the illuminated entry
system to operate.
The inside lights will not turn off if:
•they have been turned on with the dimmer control, or
•any door is open.
The battery saver will shut off the interior lamps 10 minutes after the
ignition has been turned to the OFF position.
Perimeter lamps illuminated entry
The exterior lamps illuminate when the vehicle is unlocked by the
remote entry transmitter. Vehicles equipped with auto lamps, the puddle,
head, park, and tail lamps illuminate. Vehicles not equipped with auto
lamp, only the puddle, park and tail lamps illuminate.
The system automatically turns off after 25 seconds or when the ignition
is turned to the ON or ACC position.
The battery saver will shut off the exterior lamps 10 minutes after the
ignition has been turned to the OFF position.
Deactivating/activating perimeter lamps
There are 2 methods to enable/disable this feature. One through your
dealer and the second with a power door lock sequence using the
following instructions:
Locks and Security
85
Page 87 of 240
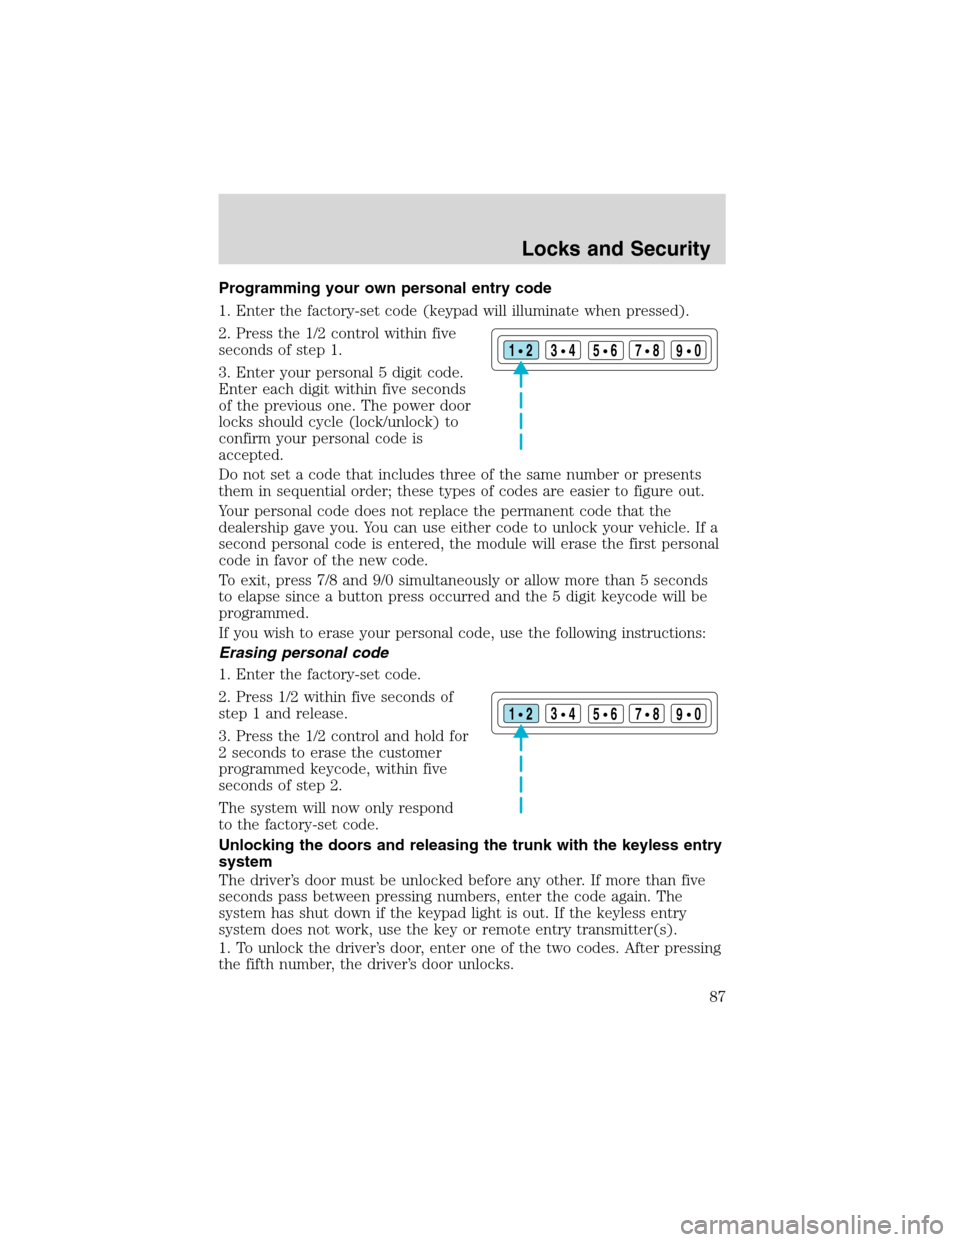
Programming your own personal entry code
1. Enter the factory-set code (keypad will illuminate when pressed).
2. Press the 1/2 control within five
seconds of step 1.
3. Enter your personal 5 digit code.
Enter each digit within five seconds
of the previous one. The power door
locks should cycle (lock/unlock) to
confirm your personal code is
accepted.
Do not set a code that includes three of the same number or presents
them in sequential order; these types of codes are easier to figure out.
Your personal code does not replace the permanent code that the
dealership gave you. You can use either code to unlock your vehicle. If a
second personal code is entered, the module will erase the first personal
code in favor of the new code.
To exit, press 7/8 and 9/0 simultaneously or allow more than 5 seconds
to elapse since a button press occurred and the 5 digit keycode will be
programmed.
If you wish to erase your personal code, use the following instructions:
Erasing personal code
1. Enter the factory-set code.
2. Press 1/2 within five seconds of
step 1 and release.
3. Press the 1/2 control and hold for
2 seconds to erase the customer
programmed keycode, within five
seconds of step 2.
The system will now only respond
to the factory-set code.
Unlocking the doors and releasing the trunk with the keyless entry
system
The driver’s door must be unlocked before any other. If more than five
seconds pass between pressing numbers, enter the code again. The
system has shut down if the keypad light is out. If the keyless entry
system does not work, use the key or remote entry transmitter(s).
1. To unlock the driver’s door, enter one of the two codes. After pressing
the fifth number, the driver’s door unlocks.
123
45678
90
123
45678
90
Locks and Security
87