keyless entry Mercury Sable 2002 Owner's Manuals
[x] Cancel search | Manufacturer: MERCURY, Model Year: 2002, Model line: Sable, Model: Mercury Sable 2002Pages: 240, PDF Size: 3.53 MB
Page 82 of 240
Changes or modifications not expressly approved by the party
responsible for compliance could void the user’s authority to
operate the equipment.
The remote entry system allows you to lock or unlock all vehicle doors,
trunk and liftgate without a key.
The remote entry features only operate with the vehicle in P (Park) or N
(Neutral) and the ignition in the, ACC, OFF or ON positions.
If there is any potential remote keyless entry problem with your vehicle,
ensureALL remote entry transmittersare brought to the dealership,
to aid in troubleshooting.
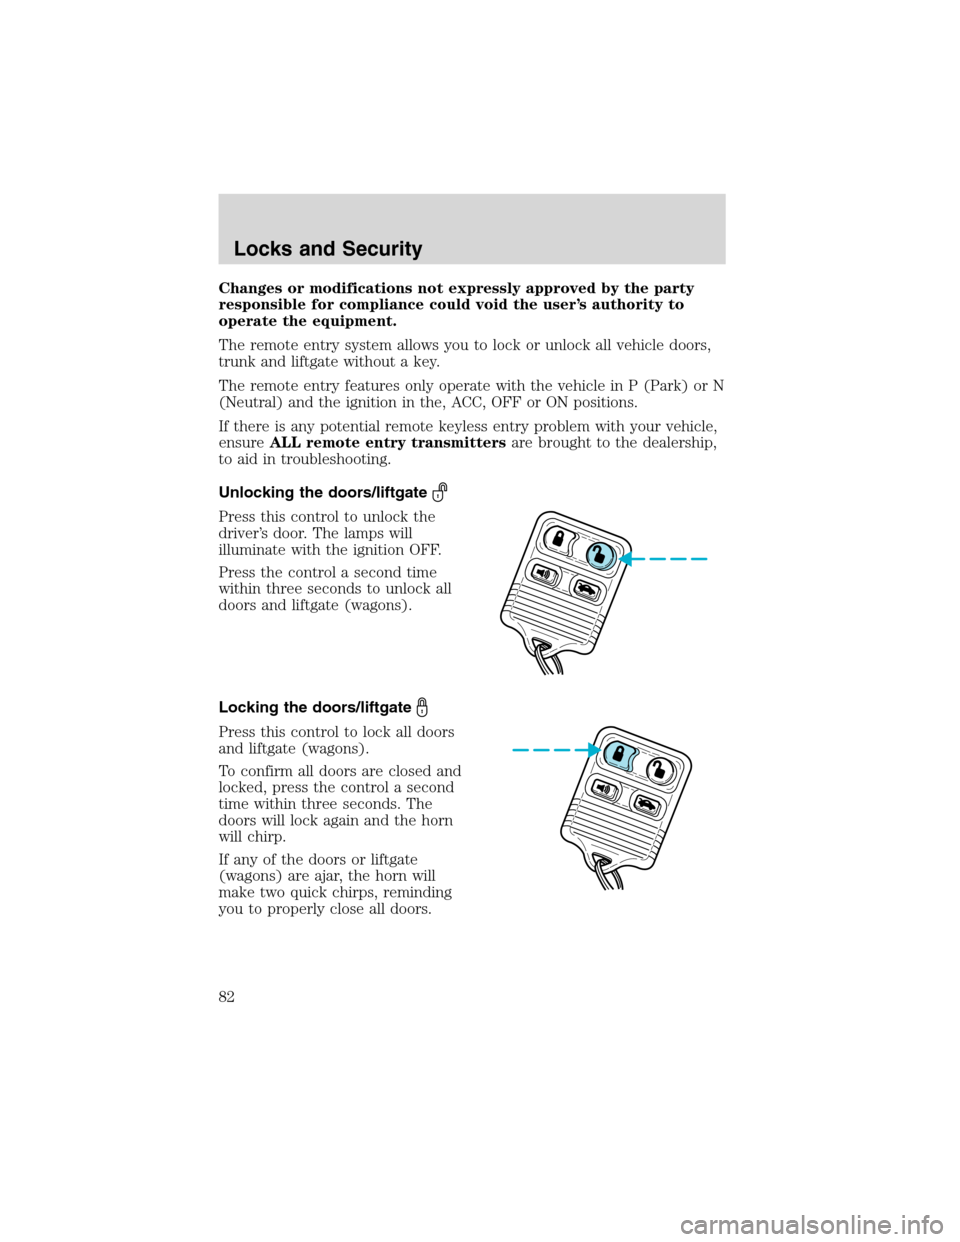
Unlocking the doors/liftgate
Press this control to unlock the
driver’s door. The lamps will
illuminate with the ignition OFF.
Press the control a second time
within three seconds to unlock all
doors and liftgate (wagons).
Locking the doors/liftgate
Press this control to lock all doors
and liftgate (wagons).
To confirm all doors are closed and
locked, press the control a second
time within three seconds. The
doors will lock again and the horn
will chirp.
If any of the doors or liftgate
(wagons) are ajar, the horn will
make two quick chirps, reminding
you to properly close all doors.
Locks and Security
82
Page 86 of 240
1. Turn the ignition key to RUN, then press the power door UNLOCK
control button 3 times.
2. Turn the ignition key to OFF, then press the power door UNLOCK
control button 3 times.
3. Turn the ignition key to RUN, within five seconds press the power
door UNLOCK control button 2 times.
The user should receive twohorn chirpsto indicate the system had
been altered.
Note:Puddle lamps cannot be deactivated, only the head, park, and tail
lamps will be deactivated/activated.
•Turn ignition to OFF to exit.
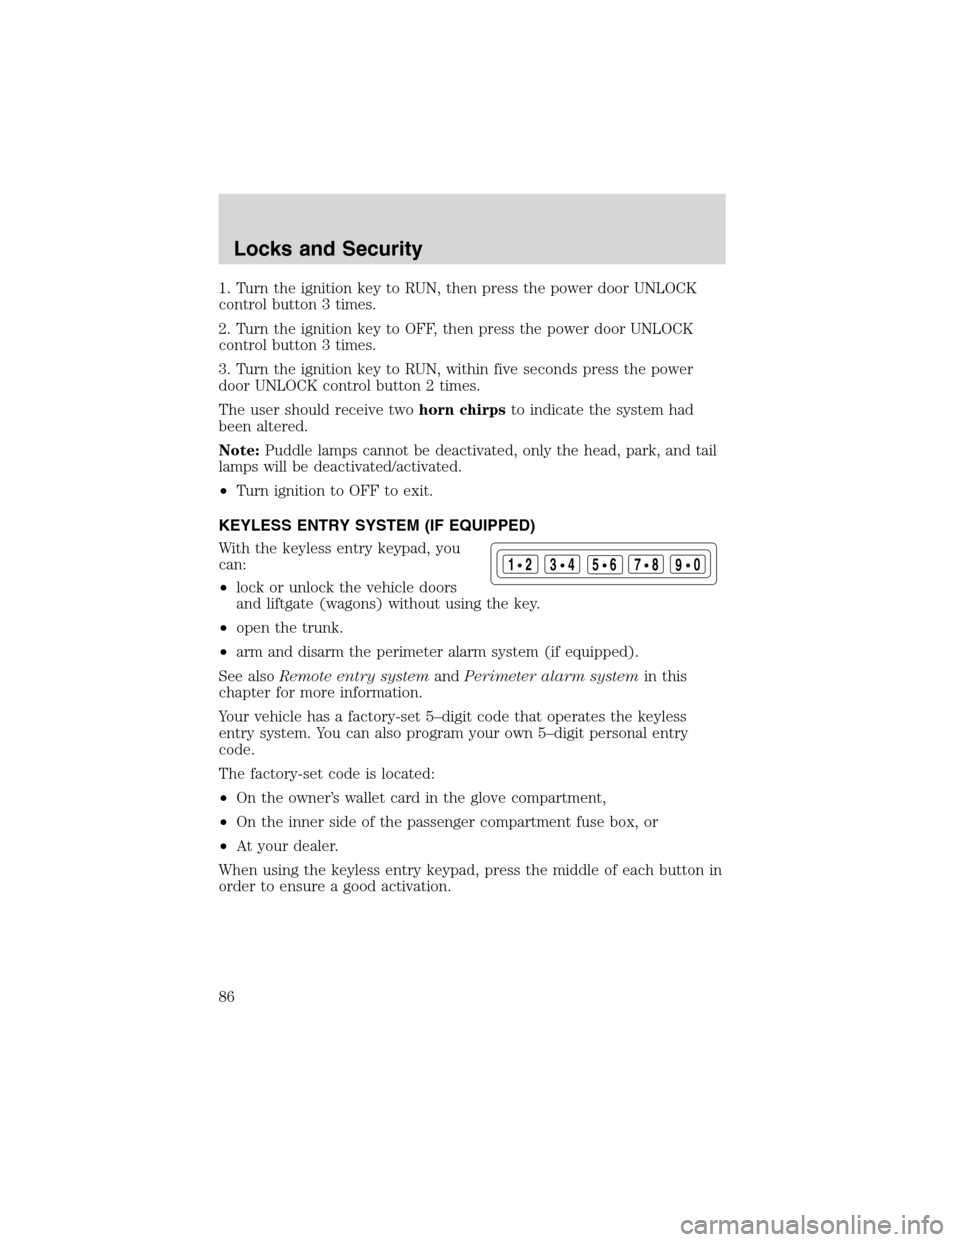
KEYLESS ENTRY SYSTEM (IF EQUIPPED)
With the keyless entry keypad, you
can:
•lock or unlock the vehicle doors
and liftgate (wagons) without using the key.
•open the trunk.
•arm and disarm the perimeter alarm system (if equipped).
See alsoRemote entry systemandPerimeter alarm systemin this
chapter for more information.
Your vehicle has a factory-set 5–digit code that operates the keyless
entry system. You can also program your own 5–digit personal entry
code.
The factory-set code is located:
•On the owner’s wallet card in the glove compartment,
•On the inner side of the passenger compartment fuse box, or
•At your dealer.
When using the keyless entry keypad, press the middle of each button in
order to ensure a good activation.
123
45678
90
Locks and Security
86
Page 87 of 240
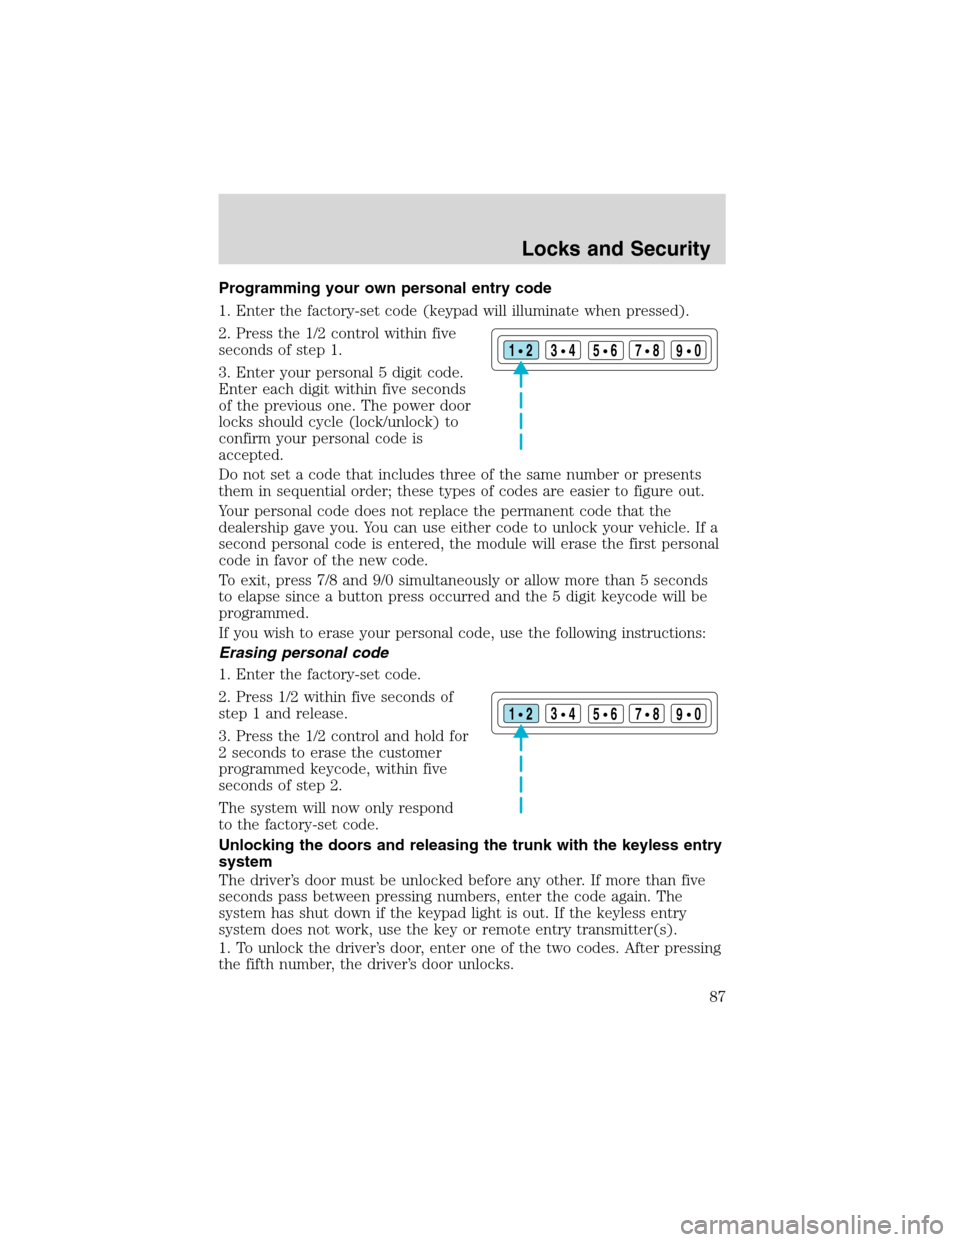
Programming your own personal entry code
1. Enter the factory-set code (keypad will illuminate when pressed).
2. Press the 1/2 control within five
seconds of step 1.
3. Enter your personal 5 digit code.
Enter each digit within five seconds
of the previous one. The power door
locks should cycle (lock/unlock) to
confirm your personal code is
accepted.
Do not set a code that includes three of the same number or presents
them in sequential order; these types of codes are easier to figure out.
Your personal code does not replace the permanent code that the
dealership gave you. You can use either code to unlock your vehicle. If a
second personal code is entered, the module will erase the first personal
code in favor of the new code.
To exit, press 7/8 and 9/0 simultaneously or allow more than 5 seconds
to elapse since a button press occurred and the 5 digit keycode will be
programmed.
If you wish to erase your personal code, use the following instructions:
Erasing personal code
1. Enter the factory-set code.
2. Press 1/2 within five seconds of
step 1 and release.
3. Press the 1/2 control and hold for
2 seconds to erase the customer
programmed keycode, within five
seconds of step 2.
The system will now only respond
to the factory-set code.
Unlocking the doors and releasing the trunk with the keyless entry
system
The driver’s door must be unlocked before any other. If more than five
seconds pass between pressing numbers, enter the code again. The
system has shut down if the keypad light is out. If the keyless entry
system does not work, use the key or remote entry transmitter(s).
1. To unlock the driver’s door, enter one of the two codes. After pressing
the fifth number, the driver’s door unlocks.
123
45678
90
123
45678
90
Locks and Security
87
Page 92 of 240
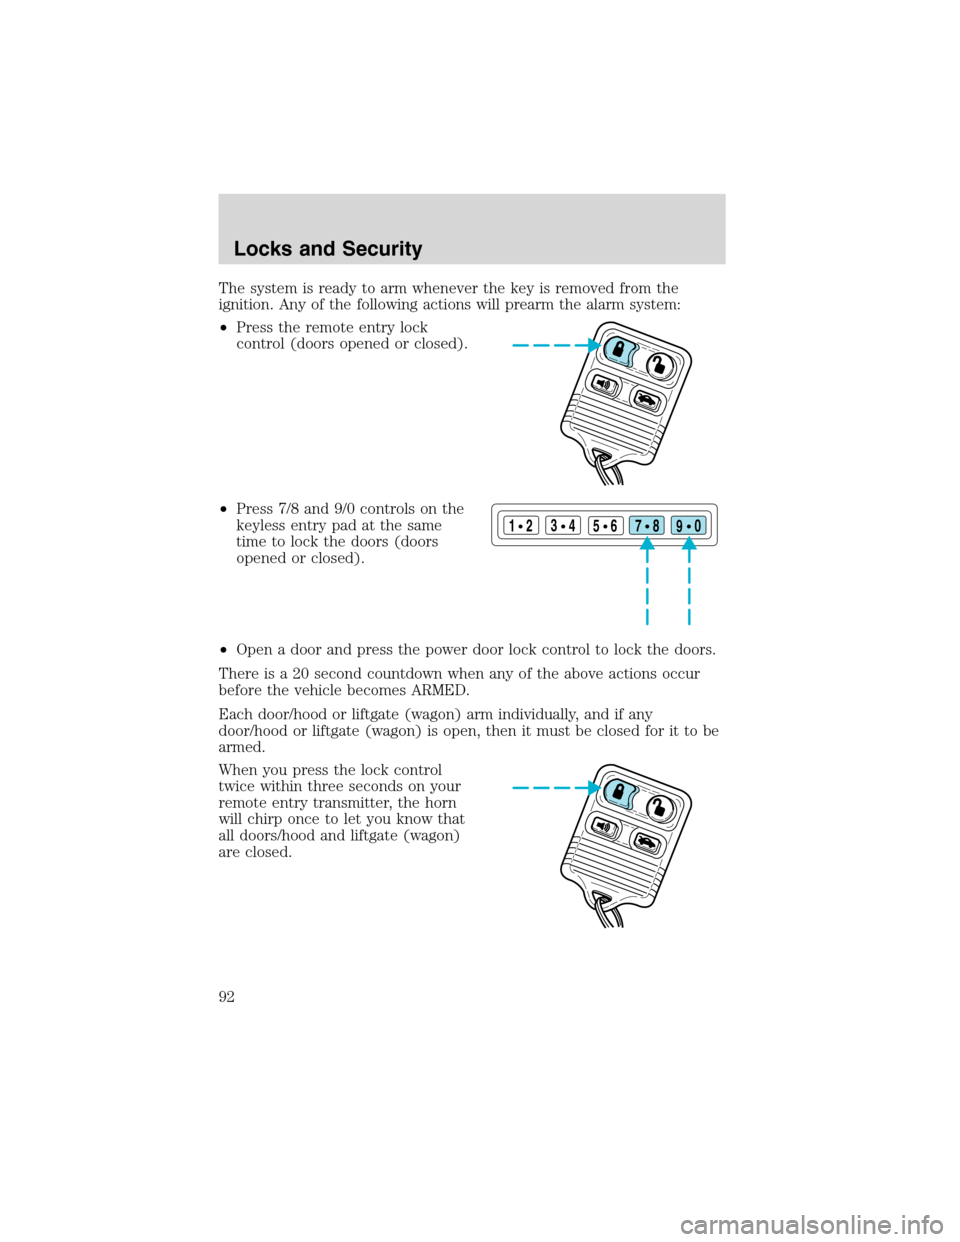
The system is ready to arm whenever the key is removed from the
ignition. Any of the following actions will prearm the alarm system:
•Press the remote entry lock
control (doors opened or closed).
•Press 7/8 and 9/0 controls on the
keyless entry pad at the same
time to lock the doors (doors
opened or closed).
•Open a door and press the power door lock control to lock the doors.
There is a 20 second countdown when any of the above actions occur
before the vehicle becomes ARMED.
Each door/hood or liftgate (wagon) arm individually, and if any
door/hood or liftgate (wagon) is open, then it must be closed for it to be
armed.
When you press the lock control
twice within three seconds on your
remote entry transmitter, the horn
will chirp once to let you know that
all doors/hood and liftgate (wagon)
are closed.
123
45678
90
Locks and Security
92
Page 93 of 240
If the doors/hood or liftgate (wagon) are not closed and you press the
remote entry transmitter twice to confirm the doors are locked, the horn
will chirp twice to warn you that a door/hood or liftgate (wagon) is still
open.
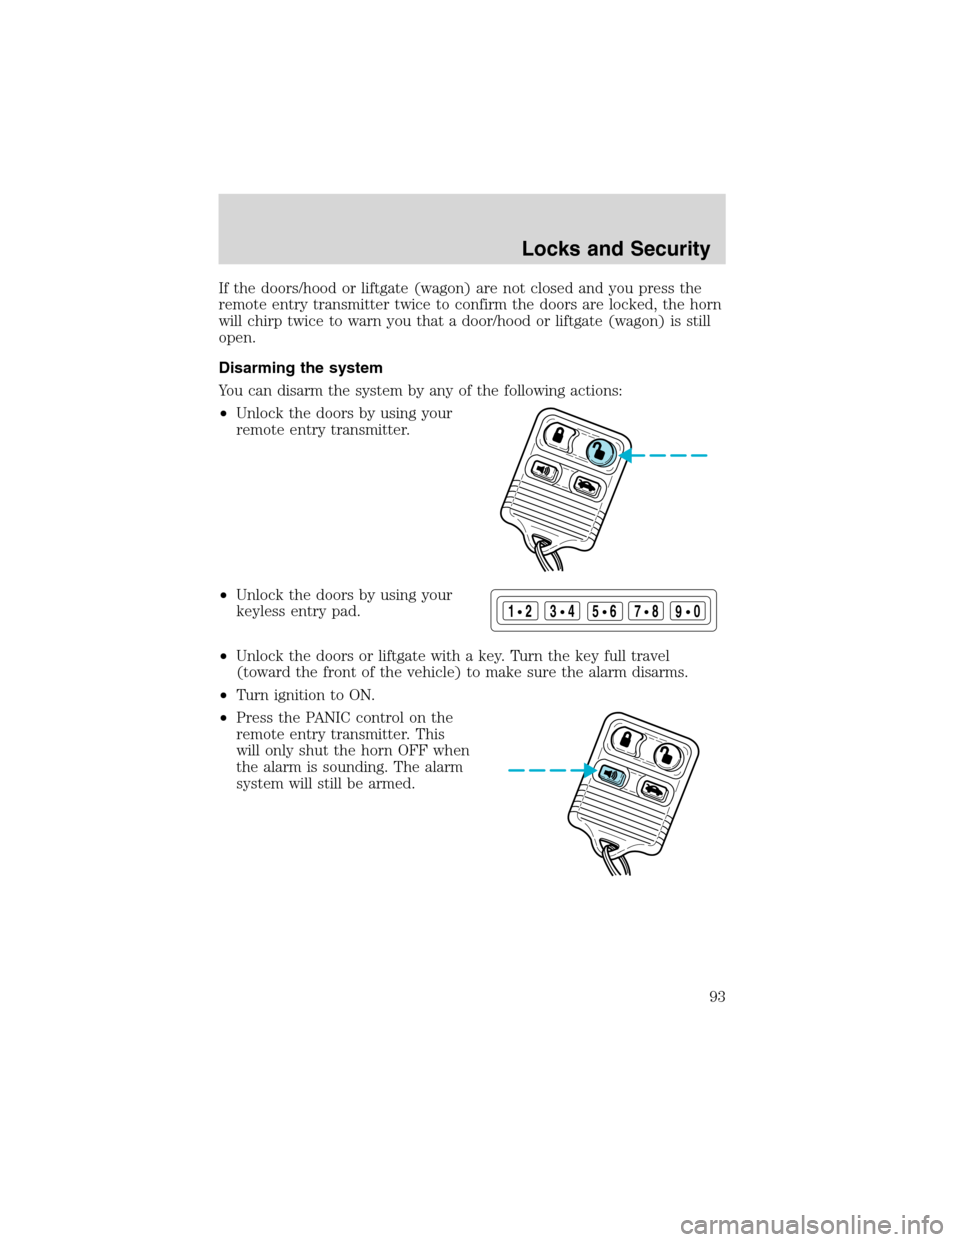
Disarming the system
You can disarm the system by any of the following actions:
•Unlock the doors by using your
remote entry transmitter.
•Unlock the doors by using your
keyless entry pad.
•Unlock the doors or liftgate with a key. Turn the key full travel
(toward the front of the vehicle) to make sure the alarm disarms.
•Turn ignition to ON.
•Press the PANIC control on the
remote entry transmitter. This
will only shut the horn OFF when
the alarm is sounding. The alarm
system will still be armed.
123
45678
90
Locks and Security
93
Page 232 of 240

FORD ACCESSORIES FOR YOUR VEHICLE
A wide selection of genuine Ford accessories are available for your
vehicle through your local authorized Ford, Lincoln Mercury or Ford of
Canada dealer. These quality accessories have been specifically
engineered to fulfill your automotive needs; they are custom designed to
complement the style and aerodynamic appearance of your vehicle. In
addition, each accessory is made from high quality materials and meets
or exceeds Ford’s rigorous engineering and safety specifications. Ford
Motor Company will repair or replace any properly dealer-installed Ford
accessory found to be defective in factory-supplied materials or
workmanship during the warranty period, as well as any component
damaged by the defective accessory. The accessory will be warranted for
whichever provides you the greatest benefit:
•12 months or 20,000 km (12,000 miles) (whichever occurs first), or
•the remainder of your new vehicle limited warranty.
This means that genuine Ford accessories purchased along with your
new vehicle and installed by the dealer are covered for the full length of
your New Vehicle’s Limited Warranty—3 years or 60,000 km (36,000
miles) (whichever occurs first). Contact your dealer for details and a
copy of the warranty.
Not all accessories are available for all models.
Vehicle Security
Remote keyless entry
Styled wheel locks
Vehicle security systems
Comfort and convenience
Cabin air filtration
Cargo nets
Cargo organizers
Cargo shades (Wagon only)
Cargo tray
Engine block heaters
Remote start
Accessories
232
Page 237 of 240
octane rating ...................167, 185
quality ......................................167
running out of fuel .................168
safety information relating to
automotive fuels .....................164
Fuses ..................................125–126
G
Gas cap (see Fuel cap) ............166
Gas mileage
(see Fuel economy) .................168
Gauges .........................................13
GAWR (Gross Axle Weight
Rating) .......................................118
definition .................................118
driving with a heavy load ......118
location ....................................118
GVWR (Gross Vehicle Weight
Rating) .......................................118
calculating ...............................118
definition .................................118
driving with a heavy load ......118
location ....................................118
H
Headlamps ...................................26
aiming ........................................28
autolamp system .......................26
bulb specifications ....................31
daytime running lights .............26
flash to pass ..............................27
high beam .................................27
replacing bulbs .........................33
turning on and off ....................26
Heating
heating and air conditioning
system .......................................23
Hood ..........................................150I
Ignition ...............................107, 185
Infant seats (see Safety seats) ..99
Inspection/maintenance (I/M)
testing ........................................172
Instrument panel
cleaning ...................................146
cluster ........................................10
lighting up panel and
interior .......................................27
J
Jack ............................................131
positioning ...............................131
storage .....................................131
Jump-starting your vehicle ......135
K
Keyless entry system .................64
Keys
positions of the ignition .........107
L
Lamps
autolamp system .......................26
bulb replacement
specifications chart ..................31
cargo lamps ...............................27
daytime running light ...............26
fog lamps ...................................26
headlamps .................................26
headlamps, flash to pass ..........27
instrument panel, dimming .....27
interior lamps .....................29–32
replacing
bulbs ..................31, 33, 35–38, 40
Index
237