ABS Mercury Sable 2003 Owner's Manuals
[x] Cancel search | Manufacturer: MERCURY, Model Year: 2003, Model line: Sable, Model: Mercury Sable 2003Pages: 216, PDF Size: 1.66 MB
Page 11 of 216
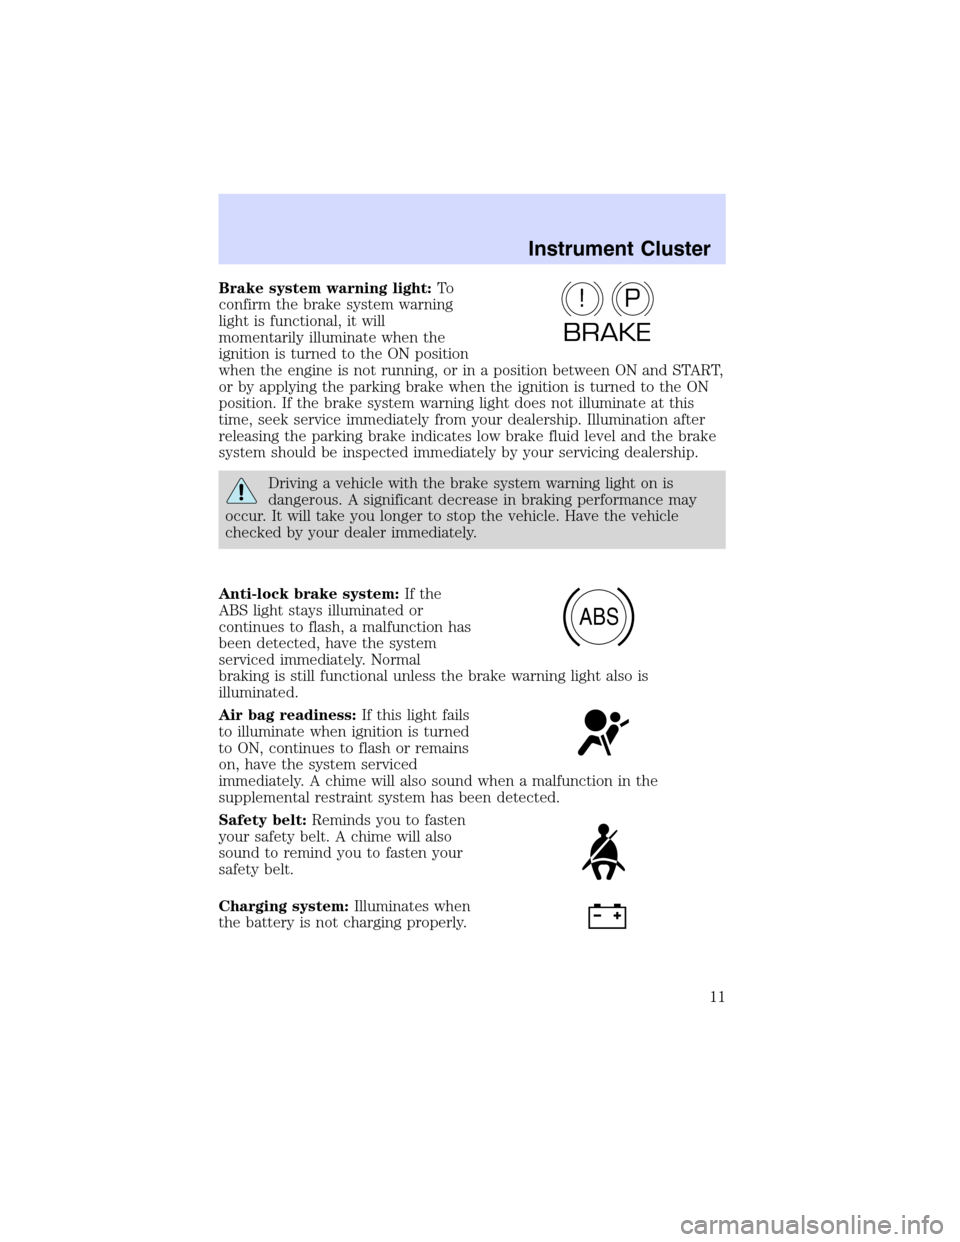
Brake system warning light:To
confirm the brake system warning
light is functional, it will
momentarily illuminate when the
ignition is turned to the ON position
when the engine is not running, or in a position between ON and START,
or by applying the parking brake when the ignition is turned to the ON
position. If the brake system warning light does not illuminate at this
time, seek service immediately from your dealership. Illumination after
releasing the parking brake indicates low brake fluid level and the brake
system should be inspected immediately by your servicing dealership.
Driving a vehicle with the brake system warning light on is
dangerous. A significant decrease in braking performance may
occur. It will take you longer to stop the vehicle. Have the vehicle
checked by your dealer immediately.
Anti-lock brake system:If the
ABS light stays illuminated or
continues to flash, a malfunction has
been detected, have the system
serviced immediately. Normal
braking is still functional unless the brake warning light also is
illuminated.
Air bag readiness:If this light fails
to illuminate when ignition is turned
to ON, continues to flash or remains
on, have the system serviced
immediately. A chime will also sound when a malfunction in the
supplemental restraint system has been detected.
Safety belt:Reminds you to fasten
your safety belt. A chime will also
sound to remind you to fasten your
safety belt.
Charging system:Illuminates when
the battery is not charging properly.
P!
BRAKE
ABS
Instrument Cluster
11
Page 37 of 216

To install the new bulb:
Handle a halogen headlamp bulb carefully and keep out of
children’s reach. Grasp the bulb only by its plastic base and do
not touch the glass. The oil from your hand could cause the bulb to
break the next time the headlamps are operated.
1. Install the new bulb in lamp assembly by pushing straight in with the
flat surface of the bulb’s plastic base facing upward. You may need to
turn the bulb slightly to align the grooves in the plastic base with the
tabs in the lamp assembly.
2. Install the bulb retaining ring over the plastic base and lock the ring
by rotating clockwise until it snaps into place.
3. Connect the electrical connector to the bulb.
4. Install the protective dust shield and lock the shield by rotating it
clockwise until it locks into position.
5. Carefully position the headlamp assembly onto the vehicle.
6. Hold the headlamp assembly snugly against the vehicle and install the
retainer pins straight down to lock the lamp into place.
7. Before reinstalling the bolt, make sure the retainer pins are fully
seated, and install bolt on headlamp housing.
8. Turn the headlamps on and make sure they work properly. If the
headlamp was correctly aligned before you changed the bulb, you should
not need to align it again.
Lights
37
Page 91 of 216

the label. Also, use the safety belt extension only if the safety belt is too
short for you when fully extended.
Do not use extensions to change the fit of the shoulder belt
across the torso.
Safety belt maintenance
Inspect the safety belt systems periodically to make sure they work
properly and are not damaged. Inspect the safety belts to make sure
there are no nicks, tears or cuts. Replace if necessary. All safety belt
assemblies, including retractors, buckles, front seat belt buckle
assemblies, buckle support assemblies (slide bar-if equipped), shoulder
belt height adjusters (if equipped), shoulder belt guide on seatback (if
equipped), child safety seat LATCH and tether anchors, and attaching
hardware, should be inspected after a collision. Ford Motor Company
recommends that all safety belt assemblies used in vehicles involved in a
collision be replaced. However, if the collision was minor and a qualified
technician finds that the belts do not show damage and continue to
operate properly, they do not need to be replaced. Safety belt assemblies
not in use during a collision should also be inspected and replaced if
either damage or improper operation is noted.
Failure to inspect and if necessary replace the safety belt
assembly under the above conditions could result in severe
personal injuries in the event of a collision.
Refer toInteriorin theCleaningchapter.
AIR BAG SUPPLEMENTAL RESTRAINT SYSTEM
AVOL
PUSH ONAM
FM H
M
EJ TAPEBASS
TREB
BAL
FADE
SCAN REW
FF
RCOMP
OFF
A/C
MAX
A/CSHUFFLE
SIDE 1-2CD SEEK
TUNE
DISC 1-61 234 56
P!
BRAKE
+ –
CRUISERPMx1000ABS0 123
4
5
6
72060
14 0
18 0 10 0km/hP R N D 2 10000000000EFC HFUEL DOOR >THEFTLOW
COOLANT
ONSET+RESCST-OFF
Seating and Safety Restraints
91
Page 114 of 216

BRAKES
Occasional brake noise is normal. If a metal-to-metal, continuous grinding
or continuous squeal sound is present, the brake linings may be worn-out
and should be inspected by a qualified service technician. If the vehicle
has continuous vibration or shudder in the steering wheel while braking,
the vehicle should be inspected by a qualified service technician.
Four-wheel anti-lock brake system (ABS) (if equipped)
Your vehicle may be equipped with an Anti-lock Braking System (ABS).
This system helps you maintain steering control during emergency stops
by keeping the brakes from locking. Noise from the ABS pump motor
and brake pedal pulsation may be observed during ABS braking; any
pulsation or mechanical noise you may feel or hear is normal.
Using ABS
When hard braking is required, apply continuous force on the brake
pedal; do not pump the brake pedal since this will reduce the
effectiveness of the ABS and will increase your vehicle’s stopping
distance. The ABS will be activated immediately, allowing you to retain
full steering control during hard braking and on slippery surfaces.
However, the ABS does not decrease stopping distance.
ABS warning lamp
ABS
TheABSlamp in the instrument cluster momentarily illuminates when
the ignition is turned to ON. If the light does not illuminate during start
up, remains on or flashes, the ABS may be disabled and may need to be
serviced.
Even when the ABS is disabled,
normal braking is still effective. (If
your BRAKE warning lamp
illuminates with the parking brake
released, have your brake system
serviced immediately.)
P!
BRAKE
Driving
114
Page 133 of 216
Fuse/relay
locationFuse amp
ratingPassenger compartment fuse
panel description
32 10A ABS, DRL relay coil, Speed
control actuator, Traction control
switch, AC heater selector switch,
Blend door actuator, Brake shift
interlock, Rear defroster relay coil
33—Not used
34—Not used
35—Not used
36 15A Turn signals, Back-up lamps
37 15A Transmission position switch
38 5A GEM park neutral switch
39—Not used
40—Not used
41—Not used
42—Not used
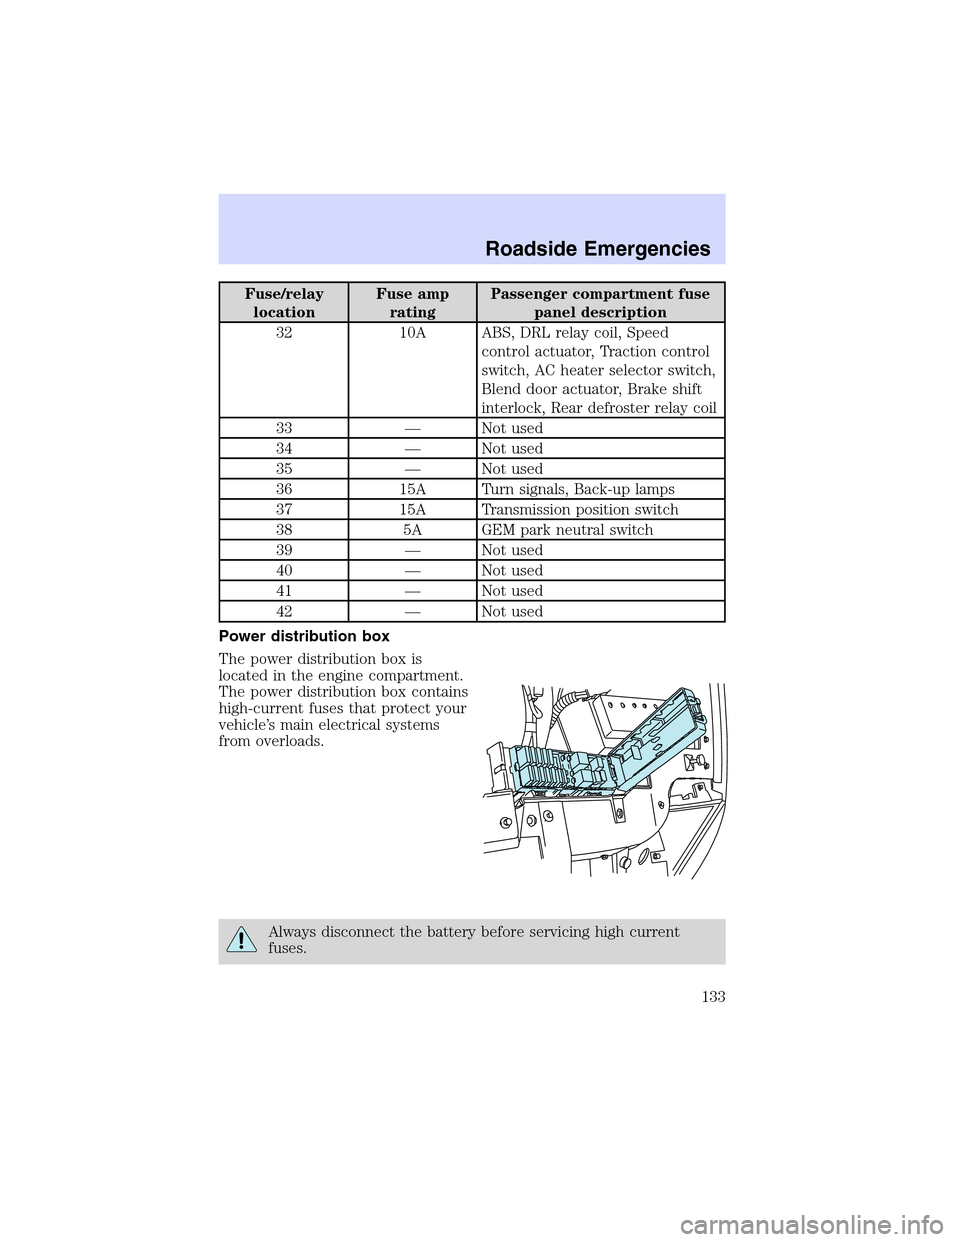
Power distribution box
The power distribution box is
located in the engine compartment.
The power distribution box contains
high-current fuses that protect your
vehicle’s main electrical systems
from overloads.
Always disconnect the battery before servicing high current
fuses.
Roadside Emergencies
133
Page 134 of 216
To reduce risk of electrical shock, always replace the cover to
the Power Distribution Box before reconnecting the battery or
refilling fluid reservoirs.
If the battery has been disconnected and reconnected, refer to the
Batterysection of theMaintenance and specificationschapter.
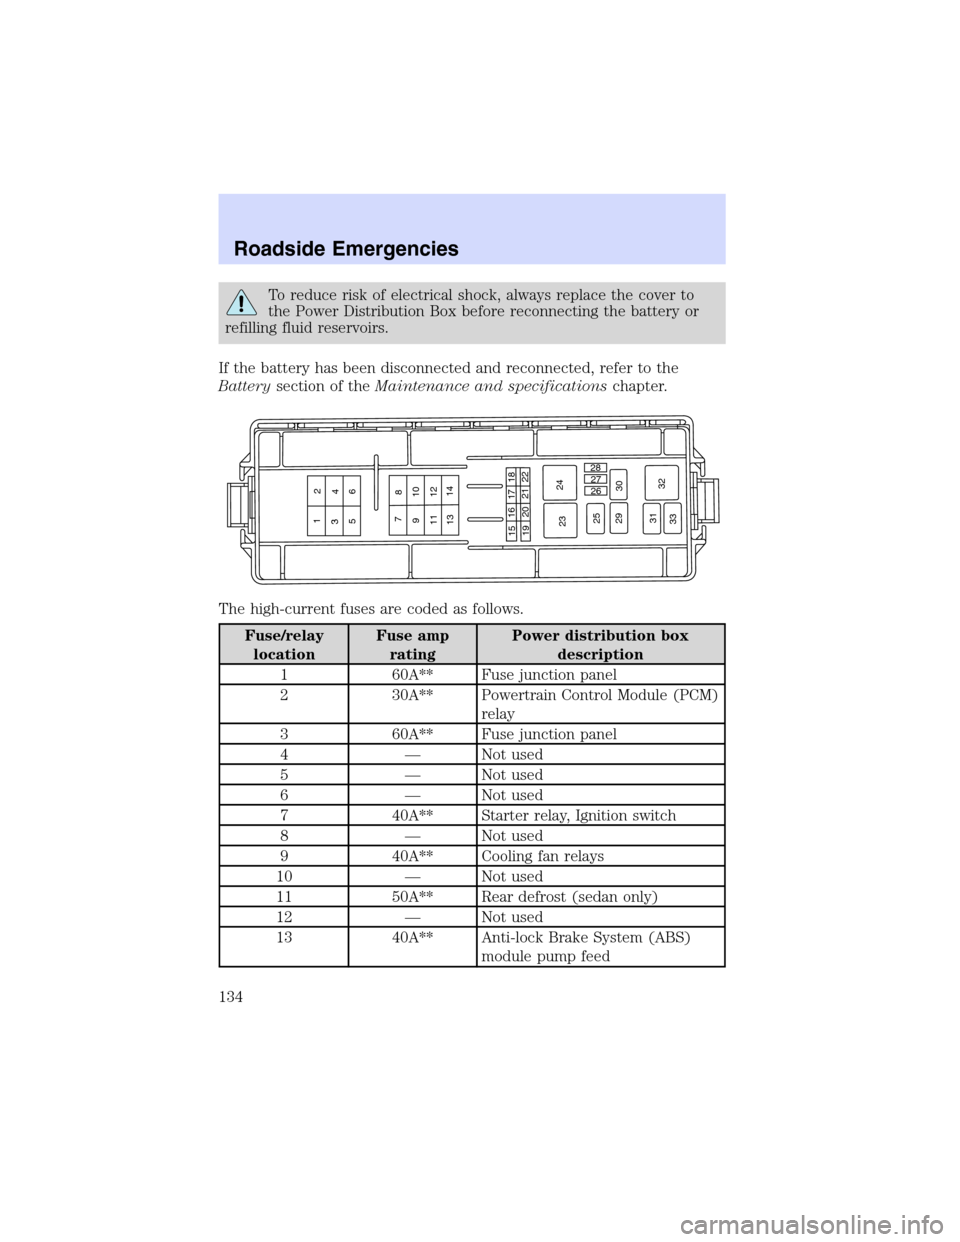
The high-current fuses are coded as follows.
Fuse/relay
locationFuse amp
ratingPower distribution box
description
1 60A** Fuse junction panel
2 30A** Powertrain Control Module (PCM)
relay
3 60A** Fuse junction panel
4—Not used
5—Not used
6—Not used
7 40A** Starter relay, Ignition switch
8—Not used
9 40A** Cooling fan relays
10—Not used
11 50A** Rear defrost (sedan only)
12—Not used
13 40A** Anti-lock Brake System (ABS)
module pump feed
1
23
4
56
7
8
910
11 12
1314
1516 17
18
19202122
2324
25
29
3026 27 28
31
32
33
Roadside Emergencies
134
Page 135 of 216
Fuse/relay
locationFuse amp
ratingPower distribution box
description
14—Not used
15 20A* ABS module valve solenoid
16 20A* Fuel pump relay
17 20A* Cell port
18 20A* Power point
19 15A* Right headlamp
20—Not used
21 15 A* Left headlamp
22 10A* A/C clutch relay, PCM keep alive
power
23—Starter motor relay
24—Fan relay
25—Wiper speed relay
26 10A* Alternator
27 5A* Rear control unit, Antenna
28 15A* HEGO sensor transmission shift
solenoid, Canister vent, A/C
clutch relay
29—Wiper park relay
30—Fuel pump relay
31—PCM power relay
32—Fan relay
33—A/C clutch relay
* Mini Fuses ** Maxi Fuses
Relays
Relays are located in the power distribution box and should be replaced
by qualified technicians.
Roadside Emergencies
135
Page 178 of 216

•Fuels can also be harmful if absorbed through the skin. If fuel is
splashed on the skin and/or clothing, promptly remove contaminated
clothing and wash skin thoroughly with soap and water. Repeated or
prolonged skin contact with fuel liquid or vapor causes skin irritation.
•Be particularly careful if you are taking“Antabuse”or other forms of
disulfiram for the treatment of alcoholism. Breathing gasoline and/or
ethanol vapors, or skin contact could cause an adverse reaction. In
sensitive individuals, serious personal injury or sickness may result. If
fuel is splashed on the skin, promptly wash skin thoroughly with soap
and water. Consult a physician immediately if you experience an
adverse reaction.
•FFV fuel tanks may contain zero to 85 percent ethanol. Any fuel
blends containing gasoline and ethanol should be treated the same as
“Fuel Ethanol”. To identify if your vehicle is an FFV, check your VIN
or the label on the inside of your fuel filler door. When checking the
VIN look for the engine type identifier (8th character). If your vehicle
is an FFV, then the character will be labeled as a“K.”
Pure ethanol is the alcohol which is the intoxicating agent in liquor, beer
and wine. It is distilled from the fermentation of plants such as field corn
and sugar cane. When ethanol is used in the making of motor fuels, a
small amount of a bad tasting chemical is added to discourage beverage
use. The resulting fuel is called E
d100 meaning 100% pure ethanol
diluted by 2% to 5% gasoline as the“denaturant.”
Fuel ethanol (summer blend
d) is then made by adding 15% more
unleaded gasoline. The resulting fuel also has a higher octane rating than
unleaded regular gasoline and other properties which allow engine
designs with greater efficiency and power.
Winter blends may contain up to 30% (E70)unleaded gasoline (25% plus
the denaturant) to enhance cold engine starts. Severely cold weather
may require additional measures for reliable starting. Refer toCold
Weather Startingin theDrivingchapter.
Ethanol is more chemically active than gasoline. It corrodes some metals
and causes some plastic and rubber components to swell, break down or
become brittle and crack, especially when mixed with gasoline. Special
materials and procedures have been developed for flexible fuel vehicles
and the dispensers used by ethanol fuel providers.
Flexible fuel components and standard unleaded gasoline fuel
components are not interchangeable. If your vehicle is not
serviced in accordance with flexible fuel vehicles procedures, damage
may occur and your warranty may be invalidated.
Maintenance and Specifications
178
Page 179 of 216
When refueling always shut the engine off and never allow
sparks or open flames near the filler neck. Never smoke while
refueling. Fuel vapor is extremely hazardous under certain conditions.
Care should be taken to avoid inhaling excess fumes.
The flow of fuel through a fuel pump nozzle can produce static
electricity, which can cause a fire if fuel is pumped into an
ungrounded fuel container.
Use the following guidelines to avoid static build-up when filling an
ungrounded fuel container:
•Place approved fuel container on the ground.
•DO NOT fill a fuel container while it is in the vehicle (including the
cargo area).
•Keep the fuel pump nozzle in contact with the fuel container while
filling.
•DO NOT use a device that would hold the fuel pump handle in the fill
position.
Fuel Filler Cap
Your fuel tank filler cap has an indexed design with a 1/8 turn on/off
feature.
When fueling your vehicle:
1. Turn the engine off.
2. Carefully turn the filler cap counterclockwise 1/8 of a turn until it
stops.
3. Pull to remove the cap from the fuel filler pipe.
4. To install the cap, align the tabs on the cap with the notches on the
filler pipe.
5. Turn the filler cap clockwise 1/8 of a turn until it stops.
If the“Check Fuel Cap”
indicator comes on or if“Service Engine
Soon/Check Engine”indicator comes on and stays on when you start the
engine, the fuel filler cap may not be properly installed. Turn off the
engine, remove the fuel filler cap, align the cap properly and reinstall it.
Maintenance and Specifications
179
Page 207 of 216
A
Accessory delay ..........................48
Air bag supplemental restraint
system ..............................91–92, 95
and child safety seats ..............94
description ..........................92, 95
disposal ......................................97
driver air bag ................92, 94, 96
indicator light ...........................95
operation .......................92, 94, 96
passenger air bag .........92, 94, 96
side air bag ................................95
Air cleaner filter .......................196
Air conditioning ..........................25
Antifreeze (see Engine
coolant) .....................................172
Anti-lock brake system
(see Brakes) ..............................114
Anti-theft system ........................71
arming the system ....................71
disarming a triggered system ..72
Audio system (see Radio) ...16, 18
Automatic transaxle
fluid, adding ............................190
fluid, checking ........................190
fluid, refill capacities ..............197
fluid, specification ..................200
Automatic transmission
driving an automatic
overdrive .................................119
Auxiliary power point .................47
Axle
lubricant specifications ..........198
B
Battery .......................................170acid, treating emergencies .....170
jumping a disabled battery ....140
maintenance-free ....................170
replacement, specifications ...196
servicing ..................................170
BeltMinder ...................................87
Brakes ........................................114
anti-lock ...................................114
anti-lock brake system (ABS)
warning light ...........................114
fluid, checking and adding ....189
fluid, refill capacities ..............197
fluid, specifications .........198, 200
lubricant specifications ..198, 200
parking ....................................115
shift interlock ..........................117
Bulbs ............................................34
C
Capacities for refilling fluids ....197
Cargo area shade ........................58
Cargo cover .................................57
Cargo net .....................................57
CD changer .................................20
CD-single premium ...............16, 18
Cell phone use ............................55
Certification Label ....................202
Changing a tire .........................136
Child safety restraints ................98
child safety belts ......................98
Child safety seats ......................101
attaching with tether straps ..105
in front seat ............................102
in rear seat ......................102, 105
Cleaning your vehicle
engine compartment ..............157
Index
Index
207