air condition Mercury Sable 2003 Owner's Manuals
[x] Cancel search | Manufacturer: MERCURY, Model Year: 2003, Model line: Sable, Model: Mercury Sable 2003Pages: 216, PDF Size: 1.66 MB
Page 1 of 216
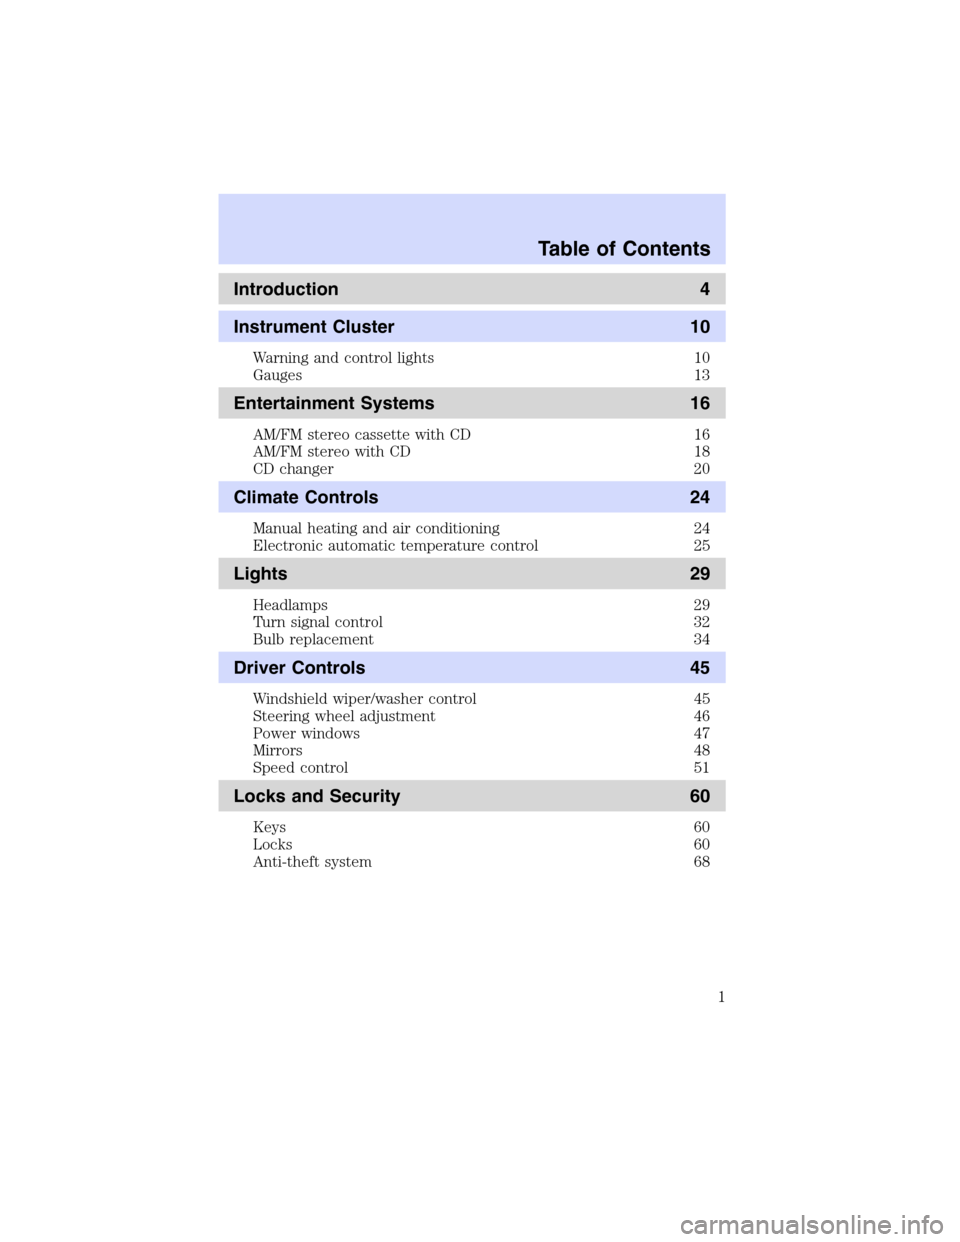
Introduction 4
Instrument Cluster 10
Warning and control lights 10
Gauges 13
Entertainment Systems 16
AM/FM stereo cassette with CD 16
AM/FM stereo with CD 18
CD changer 20
Climate Controls 24
Manual heating and air conditioning 24
Electronic automatic temperature control 25
Lights 29
Headlamps 29
Turn signal control 32
Bulb replacement 34
Driver Controls 45
Windshield wiper/washer control 45
Steering wheel adjustment 46
Power windows 47
Mirrors 48
Speed control 51
Locks and Security 60
Keys 60
Locks 60
Anti-theft system 68
Table of Contents
Table of Contents
1
Page 10 of 216
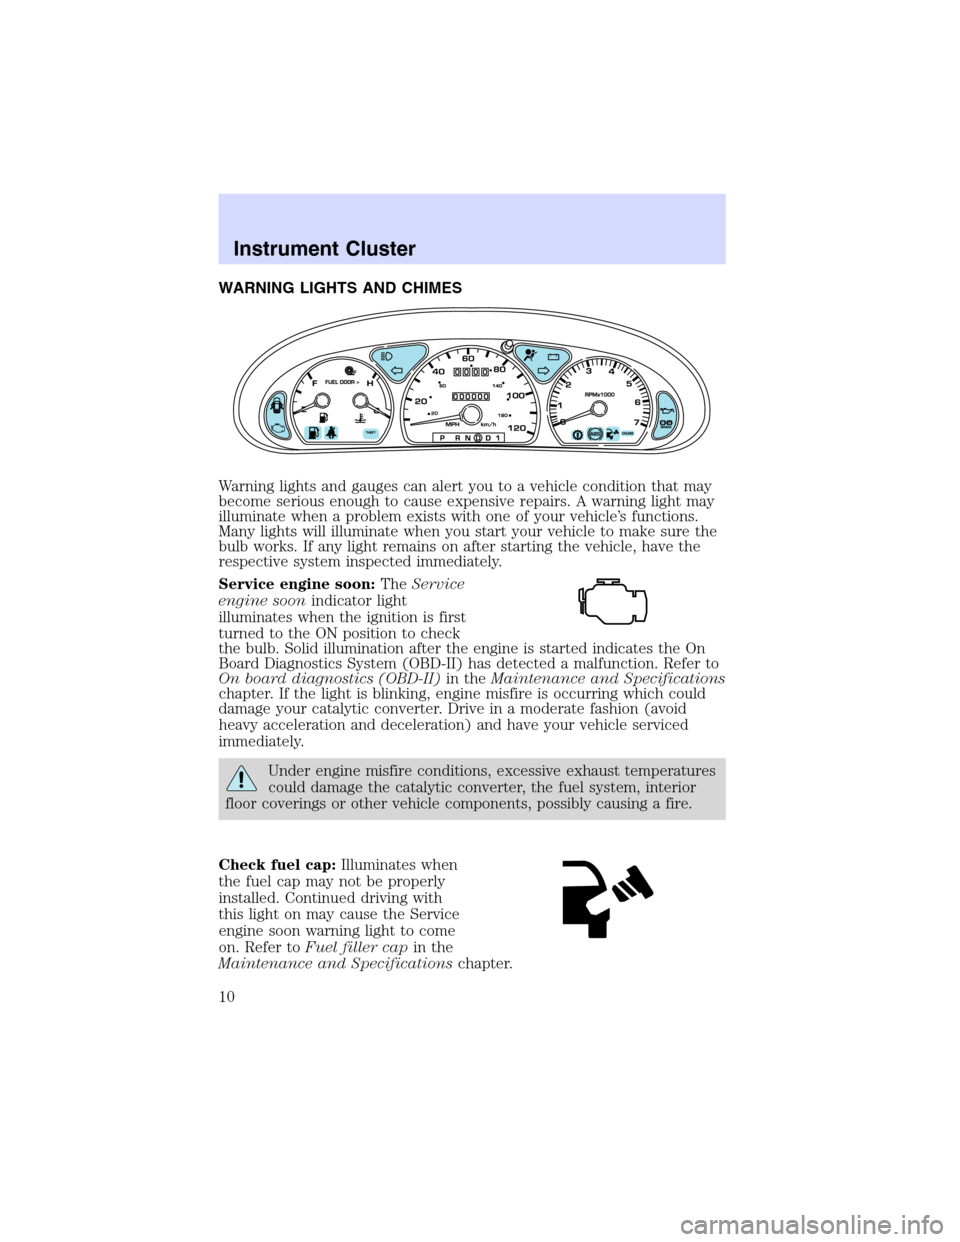
WARNING LIGHTS AND CHIMES
Warning lights and gauges can alert you to a vehicle condition that may
become serious enough to cause expensive repairs. A warning light may
illuminate when a problem exists with one of your vehicle’s functions.
Many lights will illuminate when you start your vehicle to make sure the
bulb works. If any light remains on after starting the vehicle, have the
respective system inspected immediately.
Service engine soon:TheService
engine soonindicator light
illuminates when the ignition is first
turned to the ON position to check
the bulb. Solid illumination after the engine is started indicates the On
Board Diagnostics System (OBD-II) has detected a malfunction. Refer to
On board diagnostics (OBD-II)in theMaintenance and Specifications
chapter. If the light is blinking, engine misfire is occurring which could
damage your catalytic converter. Drive in a moderate fashion (avoid
heavy acceleration and deceleration) and have your vehicle serviced
immediately.
Under engine misfire conditions, excessive exhaust temperatures
could damage the catalytic converter, the fuel system, interior
floor coverings or other vehicle components, possibly causing a fire.
Check fuel cap:Illuminates when
the fuel cap may not be properly
installed. Continued driving with
this light on may cause the Service
engine soon warning light to come
on. Refer toFuel filler capin the
Maintenance and Specificationschapter.
Instrument Cluster
Instrument Cluster
10
Page 24 of 216
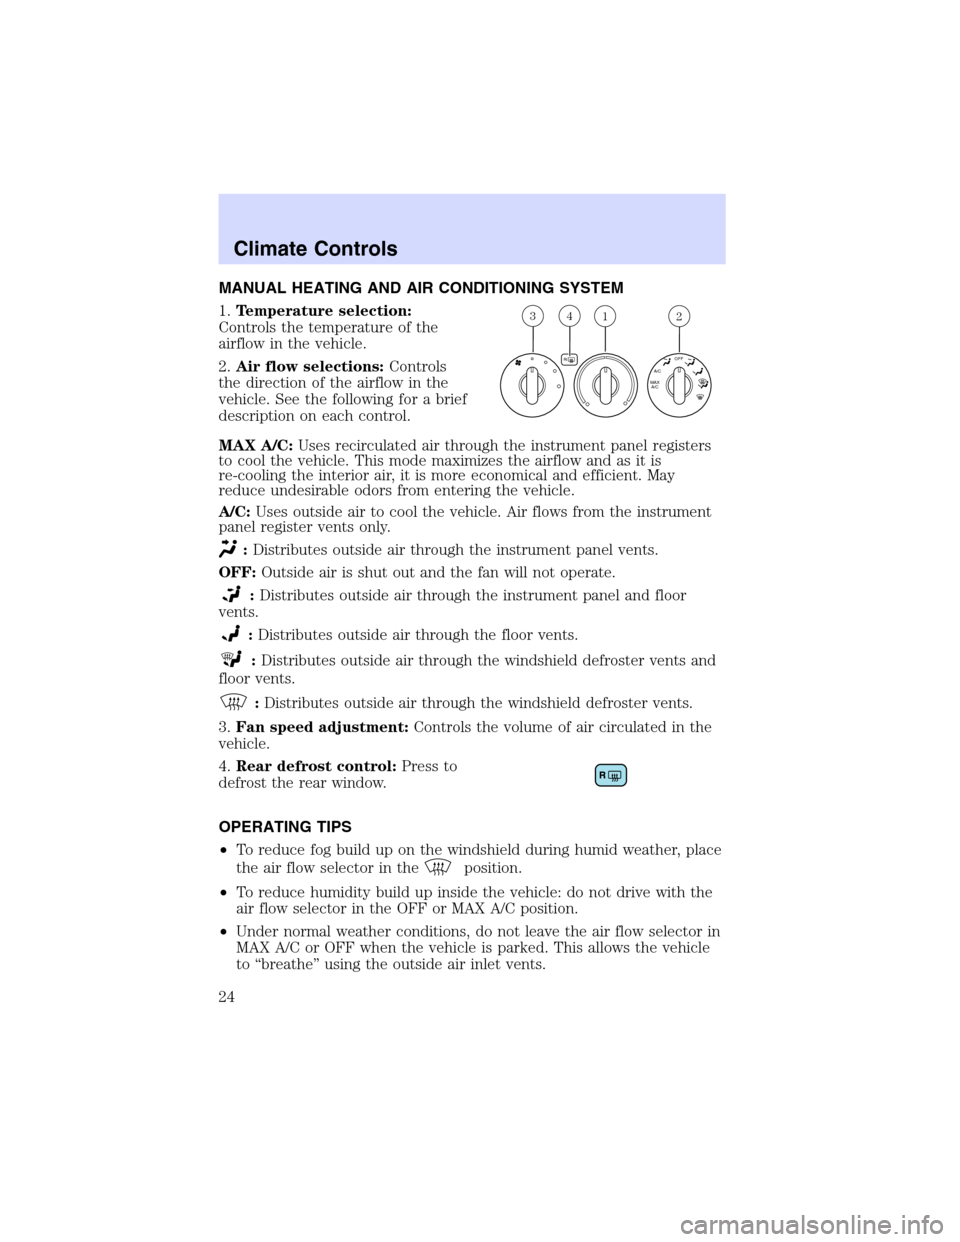
MANUAL HEATING AND AIR CONDITIONING SYSTEM
1.Temperature selection:
Controls the temperature of the
airflow in the vehicle.
2.Air flow selections:Controls
the direction of the airflow in the
vehicle. See the following for a brief
description on each control.
MAX A/C:Uses recirculated air through the instrument panel registers
to cool the vehicle. This mode maximizes the airflow and as it is
re-cooling the interior air, it is more economical and efficient. May
reduce undesirable odors from entering the vehicle.
A/C:Uses outside air to cool the vehicle. Air flows from the instrument
panel register vents only.
:Distributes outside air through the instrument panel vents.
OFF:Outside air is shut out and the fan will not operate.
:Distributes outside air through the instrument panel and floor
vents.
:Distributes outside air through the floor vents.
:Distributes outside air through the windshield defroster vents and
floor vents.
:Distributes outside air through the windshield defroster vents.
3.Fan speed adjustment:Controls the volume of air circulated in the
vehicle.
4.Rear defrost control:Press to
defrost the rear window.
OPERATING TIPS
•To reduce fog build up on the windshield during humid weather, place
the air flow selector in the
position.
•To reduce humidity build up inside the vehicle: do not drive with the
air flow selector in the OFF or MAX A/C position.
•Under normal weather conditions, do not leave the air flow selector in
MAX A/C or OFF when the vehicle is parked. This allows the vehicle
to“breathe”using the outside air inlet vents.
312
R
A/C
MAX
A/COFF
4
Climate Controls
Climate Controls
24
Page 26 of 216
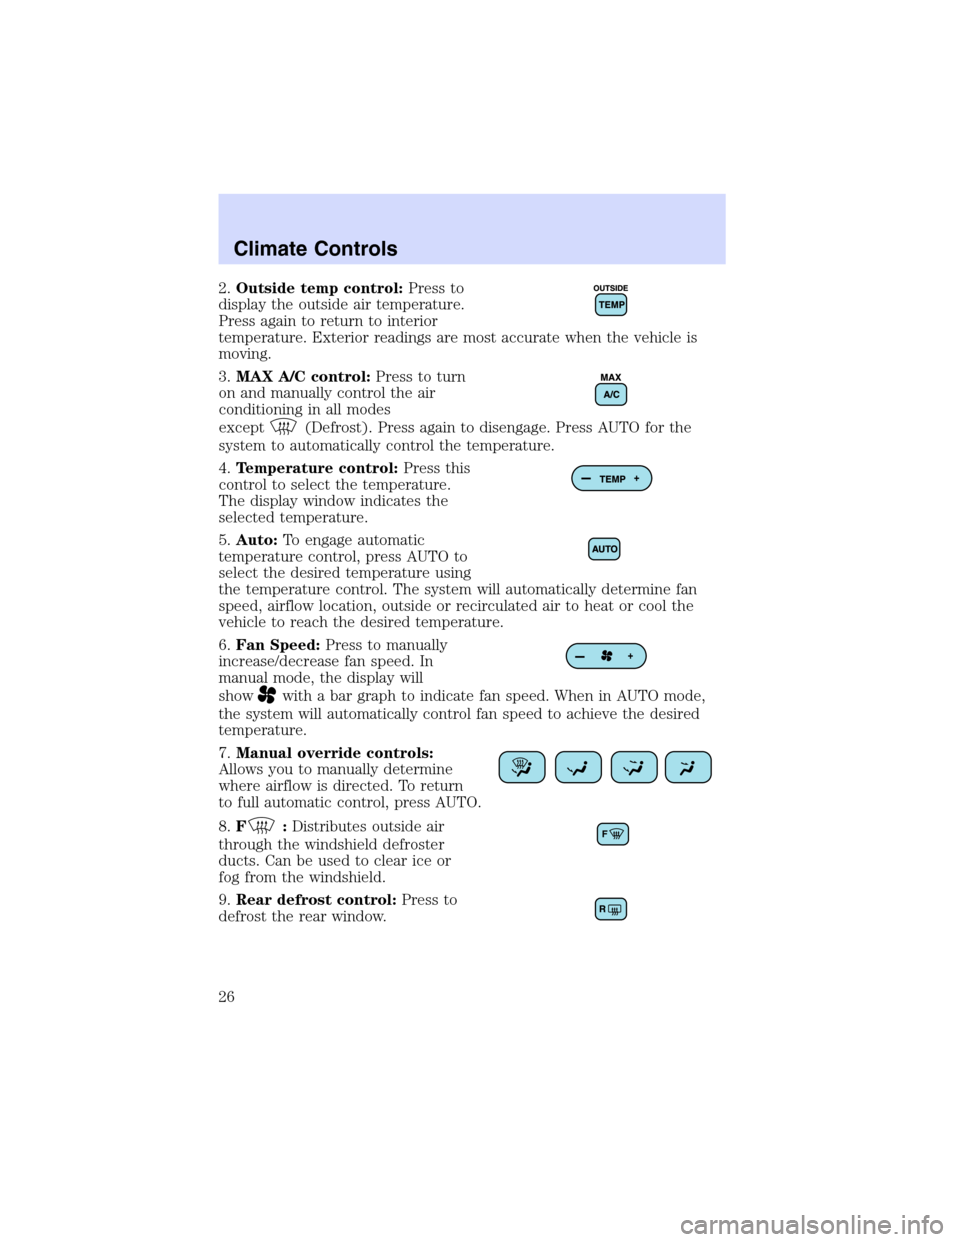
2.Outside temp control:Press to
display the outside air temperature.
Press again to return to interior
temperature. Exterior readings are most accurate when the vehicle is
moving.
3.MAX A/C control:Press to turn
on and manually control the air
conditioning in all modes
except
(Defrost). Press again to disengage. Press AUTO for the
system to automatically control the temperature.
4.Temperature control:Press this
control to select the temperature.
The display window indicates the
selected temperature.
5.Auto:To engage automatic
temperature control, press AUTO to
select the desired temperature using
the temperature control. The system will automatically determine fan
speed, airflow location, outside or recirculated air to heat or cool the
vehicle to reach the desired temperature.
6.Fan Speed:Press to manually
increase/decrease fan speed. In
manual mode, the display will
show
with a bar graph to indicate fan speed. When in AUTO mode,
the system will automatically control fan speed to achieve the desired
temperature.
7.Manual override controls:
Allows you to manually determine
where airflow is directed. To return
to full automatic control, press AUTO.
8.F
:Distributes outside air
through the windshield defroster
ducts. Can be used to clear ice or
fog from the windshield.
9.Rear defrost control:Press to
defrost the rear window.
Climate Controls
26
Page 27 of 216
10.:Distributes air through the windshield defroster ducts and floor
ducts. The system will automatically provide outside air to reduce
window fogging.
11.
:Distributes air through the floor and rear seat floor ducts
(if equipped).
12.
:Distributes air through the instrument panel and center console
registers (if equipped), the front and rear seat floor ducts.
13.
:Distributes air through the instrument panel and center console
registers (if equipped).
Fahrenheit/Celsius temperature:Press MAX A/C and F
to toggle
between Fahrenheit and Celsius temperature. The set point
temperatures in Celsius will be displayed in half-degree increments.
OPERATING TIPS
•To reduce fog build up on the windshield during humid weather, place
the air flow selector in the
position.
•To reduce humidity build up inside the vehicle: do not drive with the
air flow selector in the OFF or MAX A/C position.
•Under normal weather conditions, do not leave the air flow selector in
MAX A/C or OFF when the vehicle is parked. This allows the vehicle
to“breathe”using the outside air inlet vents.
•Do not put objects under the front seats that will interfere with the
airflow to the back seats.
•Remove any snow, ice or leaves from the air intake area at the base of
the windshield.
To aid in side window defogging/demisting in cold weather:
1. Select
2. Select A/C
3. Modulate the temperature control to maintain comfort.
4. Set the fan speed to HI
5. Direct the outer instrument panel vents towards the side windows
To increase airflow to the outer instrument panel vents, close the vents
located in the middle of the instrument panel.
Do not place objects on top of the instrument panel as these
objects may become projectiles in a collision or sudden stop.
Climate Controls
27
Page 77 of 216

SAFETY RESTRAINTS
Personal Safety System
The Personal Safety System provides an improved overall level of frontal
crash protection to front seat occupants and is designed to help further
reduce the risk of air bag-related injuries. The system is able to analyze
different occupant conditions and crash severity before activating the
appropriate safety devices to help better protect a range of occupants in
a variety of frontal crash situations.
Your vehicle’s Personal Safety System consists of:
•Driver and passenger dual-stage air bag supplemental restraints.
•Front safety belts with pretensioners, energy management retractors,
and safety belt usage sensors.
•Driver’s seat position sensor.
•Front crash severity sensor.
•Restraints Control Module (RCM) with impact and safing sensors.
•Restraint system warning light and back-up tone.
•The electrical wiring for the air bags, crash sensor(s), safety belt
pretensioners, front safety belt usage sensors, driver seat position
sensor, and indicator lights.
How does the personal safety system work?
The Personal Safety System can adapt the deployment strategy of your
vehicle’s safety devices according to crash severity and occupant
conditions. A collection of crash and occupant sensors provides
information to the Restraints Control Module (RCM). During a crash, the
RCM activates the safety belt pretensioners and/or either one or both
stages of the dual-stage air bag supplemental restraints based on crash
severity and occupant conditions.
The fact that the pretensioners or air bags did not activate for both front
seat occupants in a collision does not mean that something is wrong with
the system. Rather, it means the Personal Safety System determined the
accident conditions (crash severity, belt usage, etc.) were not
appropriate to activate these safety devices. Front air bags and
pretensioners are designed to activate only in frontal and near-frontal
collisions, not rollovers, side-impacts, or rear-impacts unless the collision
causes sufficient longitudinal deceleration.
Seating and Safety Restraints
77
Page 79 of 216

Determining if the Personal Safety System is operational
The Personal Safety System uses a warning light in the instrument
cluster or a back-up tone to indicate the condition of the system. Refer
to theWarning Lightsection in theInstrument Clusterchapter.
Routine maintenance of the Personal Safety System is not required.
The Restraints Control Module (RCM) monitors its own internal circuits
and the circuits for the air bag supplemental restraints, crash sensor(s),
safety belt pretensioners, front safety belt buckle sensors, and the driver
seat position sensor. In addition, the RCM also monitors the restraints
warning light in the instrument cluster. A difficulty with the system is
indicated by one or more of the following.
•The warning light will either flash or stay lit.
•The warning light will not illuminate immediately after ignition is
turned on.
•A series of five beeps will be heard. The tone pattern will repeat
periodically until the problem and warning light are repaired.
If any of these things happen, even intermittently, have the Personal
Safety System serviced at your dealership or by a qualified technician
immediately. Unless serviced, the system may not function properly in
the event of a collision.
Safety belt precautions
Always drive and ride with your seatback upright and the lap
belt snug and low across the hips.
To reduce the risk of injury, make sure children sit where they
can be properly restrained.
Never let a passenger hold a child on his or her lap while the
vehicle is moving. The passenger cannot protect the child from
injury in a collision.
All occupants of the vehicle, including the driver, should always
properly wear their safety belts, even when an air bag (SRS) is
provided.
Seating and Safety Restraints
79
Page 91 of 216

the label. Also, use the safety belt extension only if the safety belt is too
short for you when fully extended.
Do not use extensions to change the fit of the shoulder belt
across the torso.
Safety belt maintenance
Inspect the safety belt systems periodically to make sure they work
properly and are not damaged. Inspect the safety belts to make sure
there are no nicks, tears or cuts. Replace if necessary. All safety belt
assemblies, including retractors, buckles, front seat belt buckle
assemblies, buckle support assemblies (slide bar-if equipped), shoulder
belt height adjusters (if equipped), shoulder belt guide on seatback (if
equipped), child safety seat LATCH and tether anchors, and attaching
hardware, should be inspected after a collision. Ford Motor Company
recommends that all safety belt assemblies used in vehicles involved in a
collision be replaced. However, if the collision was minor and a qualified
technician finds that the belts do not show damage and continue to
operate properly, they do not need to be replaced. Safety belt assemblies
not in use during a collision should also be inspected and replaced if
either damage or improper operation is noted.
Failure to inspect and if necessary replace the safety belt
assembly under the above conditions could result in severe
personal injuries in the event of a collision.
Refer toInteriorin theCleaningchapter.
AIR BAG SUPPLEMENTAL RESTRAINT SYSTEM
AVOL
PUSH ONAM
FM H
M
EJ TAPEBASS
TREB
BAL
FADE
SCAN REW
FF
RCOMP
OFF
A/C
MAX
A/CSHUFFLE
SIDE 1-2CD SEEK
TUNE
DISC 1-61 234 56
P!
BRAKE
+ –
CRUISERPMx1000ABS0 123
4
5
6
72060
14 0
18 0 10 0km/hP R N D 2 10000000000EFC HFUEL DOOR >THEFTLOW
COOLANT
ONSET+RESCST-OFF
Seating and Safety Restraints
91
Page 92 of 216

The air bag supplemental restraint system is designed to work in
conjunction with the safety belts to help protect the driver and front
outboard passenger from certain upper body injuries. The term
“supplemental restraint”means the air bags are intended as a
supplement to the safety belts. Air bags alone cannot protect as well as
air bags plus safety belts in impacts for which the air bags are designed
to deploy, and air bags do not offer any protection in crashes for which
they do not deploy.
The air bag supplemental restraint system consists of:
•driver and passenger dual stage air bag modules (which include the
inflators and air bags).
•side air bags (if equipped). Refer toSide air bag systemlater in this
chapter.
•one or more impact and safing sensors.
•the same indicator light, RCM (restraints control module) and
diagnostic unit used for the Personal safety system.
The air bag supplemental restraints are an integral part of the Personal
Safety System. They are designed to be deployed in cases where the
Personal Safety System has determined the occupant conditions and
crash severity are appropriate to activate these devices. Refer to the
Personal Safety Systemsection in this chapter.
Important supplemental restraint system precautions
Air bags DO NOT inflate slowly or
gently and the risk of injury from a
deploying air bag is greatest close to
the trim covering the air bag
module.
Seating and Safety Restraints
92
Page 95 of 216

are not properly restrained or are otherwise out of position at the time
of air bag deployment. Thus, it is extremely important that occupants be
properly restrained as far away from the air bag module as possible while
maintaining vehicle control.
Several air bag system components get hot after inflation. Do not
touch them after inflation.
If the air bag has deployed,the air bag will not function
again and must be replaced immediately.If the air bag is not
replaced, the unrepaired area will increase the risk of injury in a
collision.
Determining if the system is operational
The supplemental restraint system uses a warning indicator in the
instrument cluster or a back-up tone to indicate the condition of the
system. Refer to theWarning lightsection in theInstrument cluster
chapter. Routine maintenance of the air bag is not required.
A difficulty with the system is indicated by one or more of the following:
•The readiness light (same light
for front and side air bag system)
will either flash or stay lit.
•The readiness light will not
illuminate immediately after ignition is turned on.
•A series of five beeps will be heard. The tone pattern will repeat
periodically until the problem and/or light are repaired.
If any of these things happen, even intermittently, have the supplemental
restraint system serviced at your dealership or by a qualified technician
immediately. Unless serviced, the system may not function properly in
the event of a collision.
Side air bag system (if equipped)
Do not place objects or mount equipment on or near the air bag
cover on the side of the seatbacks of the front seats or in front
seat areas that may come into contact with a deploying air bag. Failure
to follow these instructions may increase the risk of personal injury in
the event of a collision.
Seating and Safety Restraints
95