fan control Mercury Sable 2003 Owner's Manuals
[x] Cancel search | Manufacturer: MERCURY, Model Year: 2003, Model line: Sable, Model: Mercury Sable 2003Pages: 216, PDF Size: 1.66 MB
Page 7 of 216
Special instructions
For your added safety, your vehicle is fitted with sophisticated electronic
controls.
Please read the sectionSupplemental Restraint System (SRS)
in theSeating and safety restraintschapter. Failure to follow
the specific warnings and instructions could result in personal injury.
Front seat mounted rear facing child or infant seats should
NEVERbe used in front of a passenger side air bag unless the
air bag can be and is turned OFF.
MIDDLE EAST/NORTH AFRICA VEHICLE SPECIFIC INFORMATION
For your particular global region, your vehicle may be equipped with
features and options that are different from the ones that are described
in this Owner Guide; therefore, a supplement has been supplied that
complements this book. By referring to the pages in the provided
supplement, you can properly identify those features, recommendations
and specifications that are unique to your vehicle.Refer to this Owner
Guide for all other required information and warnings.
Introduction
7
Page 24 of 216
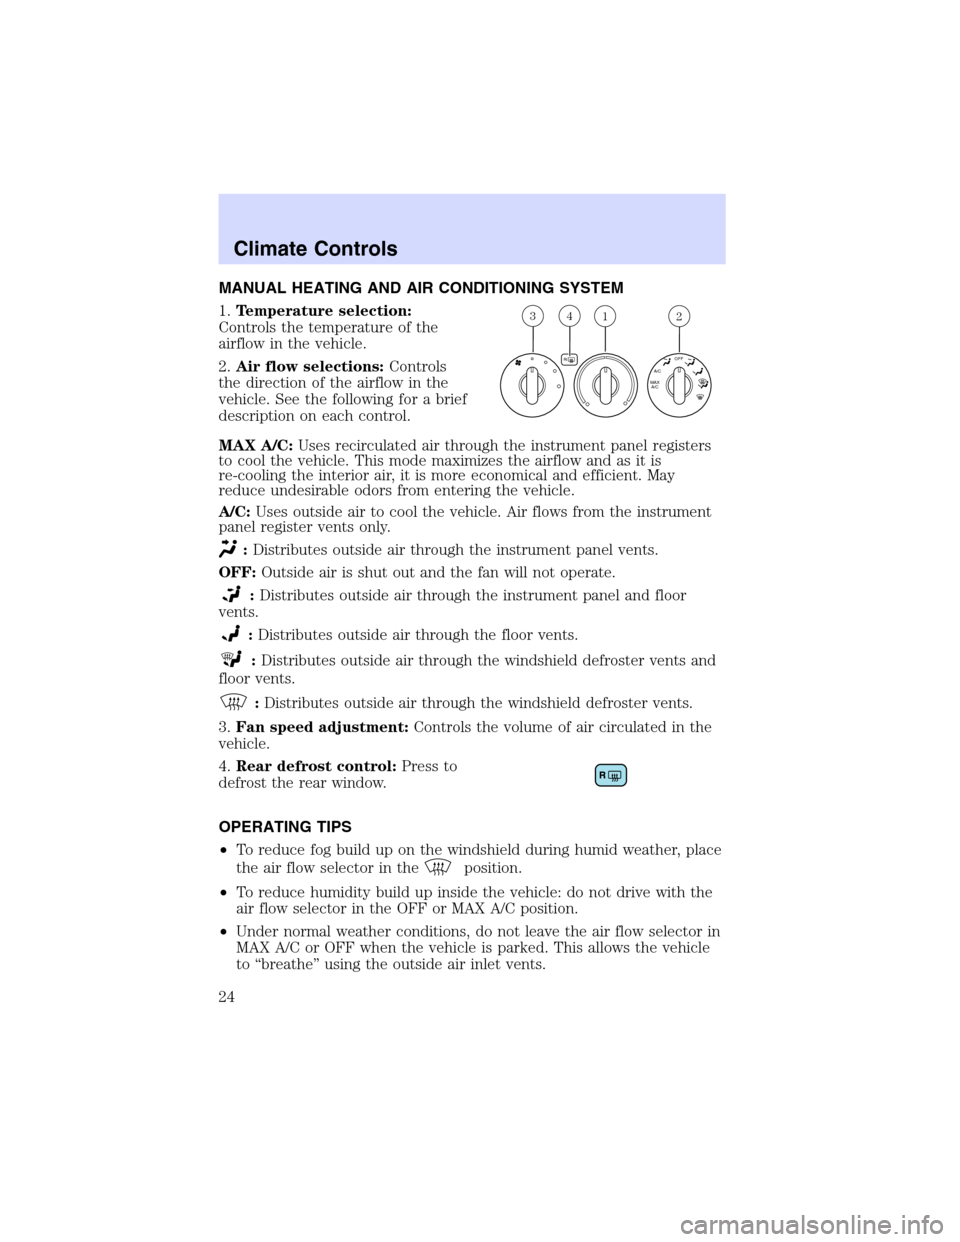
MANUAL HEATING AND AIR CONDITIONING SYSTEM
1.Temperature selection:
Controls the temperature of the
airflow in the vehicle.
2.Air flow selections:Controls
the direction of the airflow in the
vehicle. See the following for a brief
description on each control.
MAX A/C:Uses recirculated air through the instrument panel registers
to cool the vehicle. This mode maximizes the airflow and as it is
re-cooling the interior air, it is more economical and efficient. May
reduce undesirable odors from entering the vehicle.
A/C:Uses outside air to cool the vehicle. Air flows from the instrument
panel register vents only.
:Distributes outside air through the instrument panel vents.
OFF:Outside air is shut out and the fan will not operate.
:Distributes outside air through the instrument panel and floor
vents.
:Distributes outside air through the floor vents.
:Distributes outside air through the windshield defroster vents and
floor vents.
:Distributes outside air through the windshield defroster vents.
3.Fan speed adjustment:Controls the volume of air circulated in the
vehicle.
4.Rear defrost control:Press to
defrost the rear window.
OPERATING TIPS
•To reduce fog build up on the windshield during humid weather, place
the air flow selector in the
position.
•To reduce humidity build up inside the vehicle: do not drive with the
air flow selector in the OFF or MAX A/C position.
•Under normal weather conditions, do not leave the air flow selector in
MAX A/C or OFF when the vehicle is parked. This allows the vehicle
to“breathe”using the outside air inlet vents.
312
R
A/C
MAX
A/COFF
4
Climate Controls
Climate Controls
24
Page 25 of 216
•Do not put objects under the front seats that will interfere with the
airflow to the back seats.
•Remove any snow, ice or leaves from the air intake area at the base of
the windshield.
To aid in side window defogging/demisting in cold weather:
1. Select
2. Select A/C
3. Modulate the temperature control to maintain comfort.
4. Set the fan speed to HI
5. Direct the outer instrument panel vents towards the side windows
To increase airflow to the outer instrument panel vents, close the vents
located in the middle of the instrument panel.
Do not place objects on top of the instrument panel as these
objects may become projectiles in a collision or sudden stop.
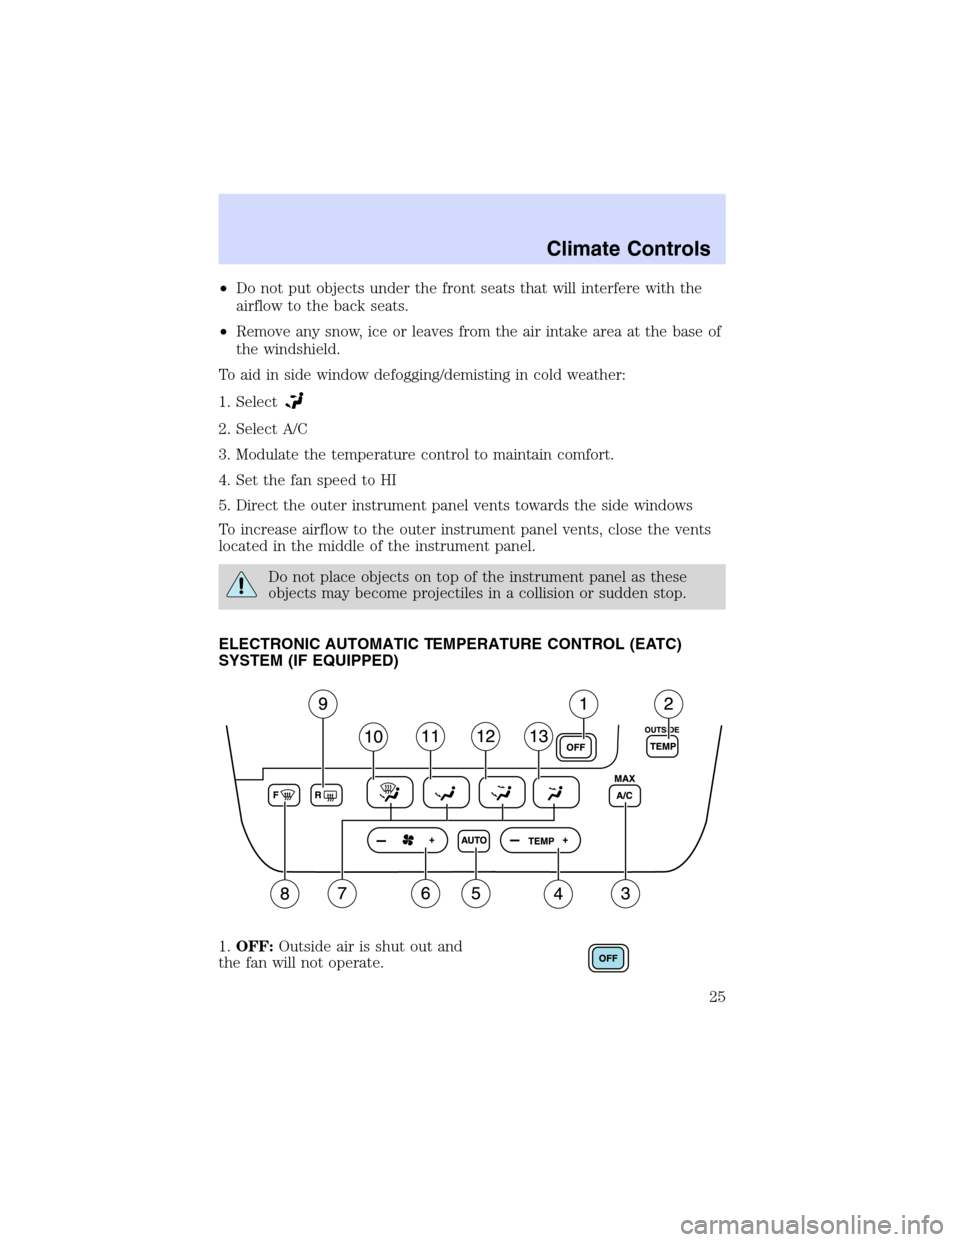
ELECTRONIC AUTOMATIC TEMPERATURE CONTROL (EATC)
SYSTEM (IF EQUIPPED)
1.OFF:Outside air is shut out and
the fan will not operate.
Climate Controls
25
Page 26 of 216
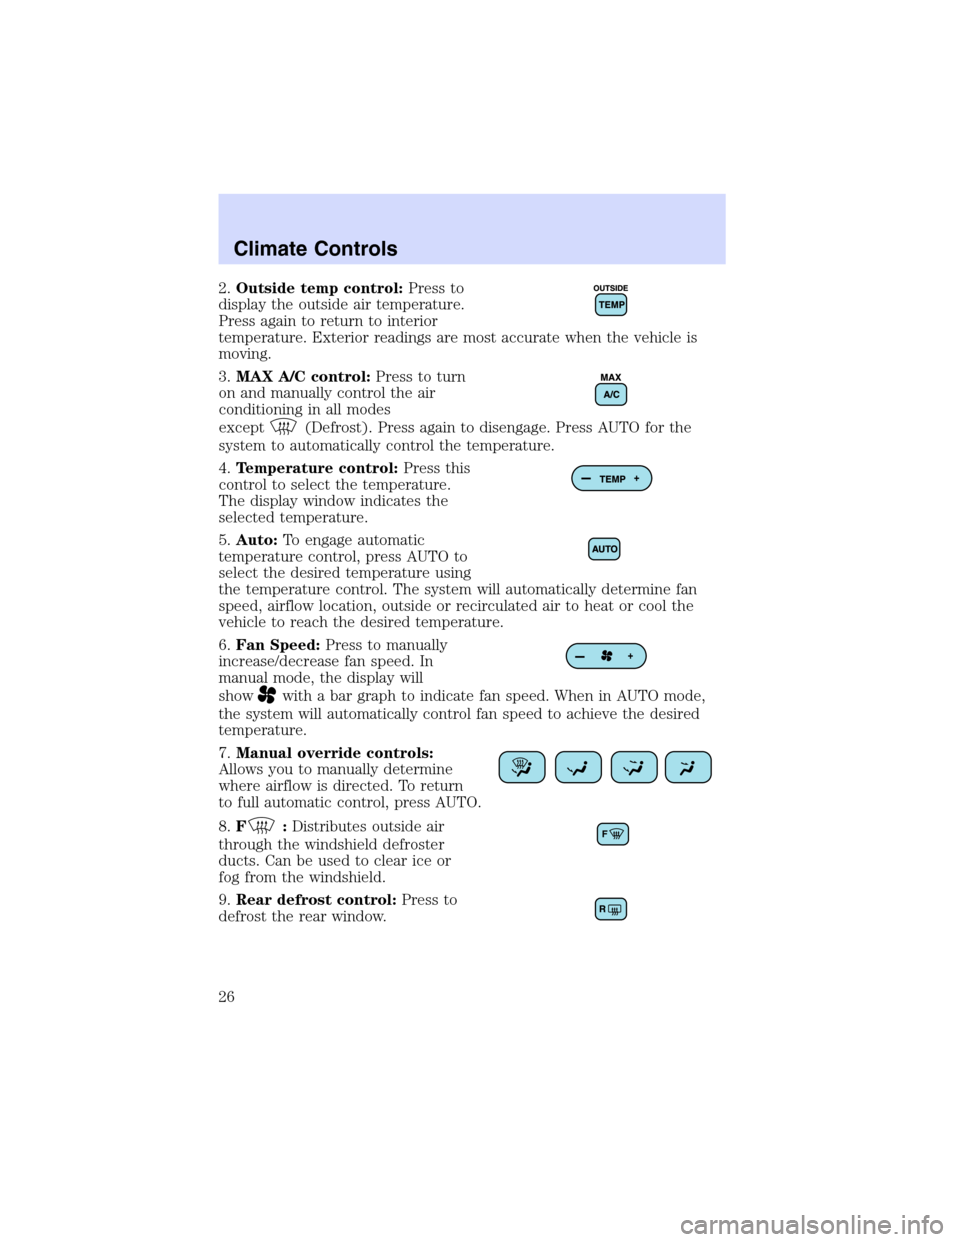
2.Outside temp control:Press to
display the outside air temperature.
Press again to return to interior
temperature. Exterior readings are most accurate when the vehicle is
moving.
3.MAX A/C control:Press to turn
on and manually control the air
conditioning in all modes
except
(Defrost). Press again to disengage. Press AUTO for the
system to automatically control the temperature.
4.Temperature control:Press this
control to select the temperature.
The display window indicates the
selected temperature.
5.Auto:To engage automatic
temperature control, press AUTO to
select the desired temperature using
the temperature control. The system will automatically determine fan
speed, airflow location, outside or recirculated air to heat or cool the
vehicle to reach the desired temperature.
6.Fan Speed:Press to manually
increase/decrease fan speed. In
manual mode, the display will
show
with a bar graph to indicate fan speed. When in AUTO mode,
the system will automatically control fan speed to achieve the desired
temperature.
7.Manual override controls:
Allows you to manually determine
where airflow is directed. To return
to full automatic control, press AUTO.
8.F
:Distributes outside air
through the windshield defroster
ducts. Can be used to clear ice or
fog from the windshield.
9.Rear defrost control:Press to
defrost the rear window.
Climate Controls
26
Page 27 of 216
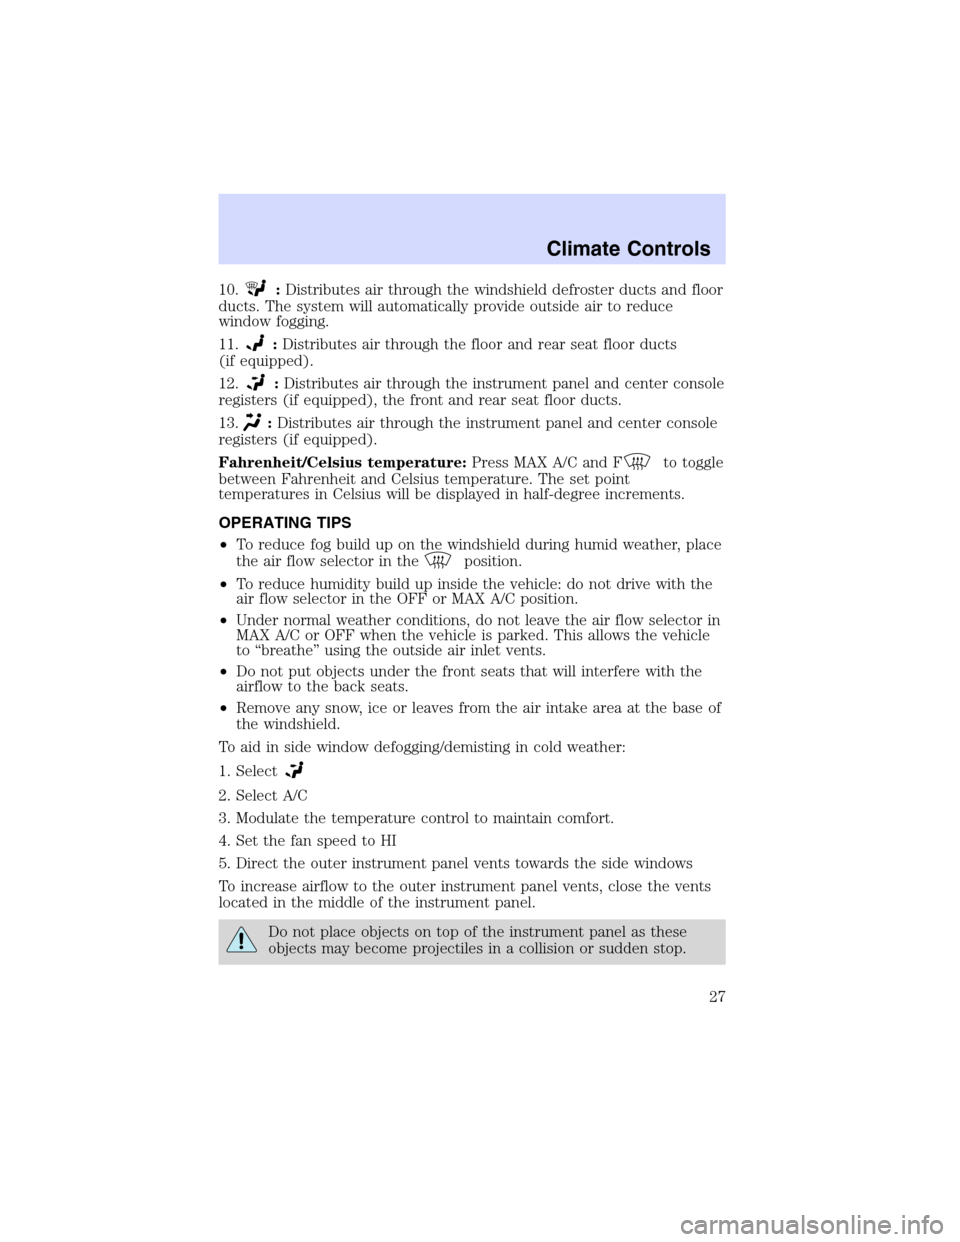
10.:Distributes air through the windshield defroster ducts and floor
ducts. The system will automatically provide outside air to reduce
window fogging.
11.
:Distributes air through the floor and rear seat floor ducts
(if equipped).
12.
:Distributes air through the instrument panel and center console
registers (if equipped), the front and rear seat floor ducts.
13.
:Distributes air through the instrument panel and center console
registers (if equipped).
Fahrenheit/Celsius temperature:Press MAX A/C and F
to toggle
between Fahrenheit and Celsius temperature. The set point
temperatures in Celsius will be displayed in half-degree increments.
OPERATING TIPS
•To reduce fog build up on the windshield during humid weather, place
the air flow selector in the
position.
•To reduce humidity build up inside the vehicle: do not drive with the
air flow selector in the OFF or MAX A/C position.
•Under normal weather conditions, do not leave the air flow selector in
MAX A/C or OFF when the vehicle is parked. This allows the vehicle
to“breathe”using the outside air inlet vents.
•Do not put objects under the front seats that will interfere with the
airflow to the back seats.
•Remove any snow, ice or leaves from the air intake area at the base of
the windshield.
To aid in side window defogging/demisting in cold weather:
1. Select
2. Select A/C
3. Modulate the temperature control to maintain comfort.
4. Set the fan speed to HI
5. Direct the outer instrument panel vents towards the side windows
To increase airflow to the outer instrument panel vents, close the vents
located in the middle of the instrument panel.
Do not place objects on top of the instrument panel as these
objects may become projectiles in a collision or sudden stop.
Climate Controls
27
Page 134 of 216
To reduce risk of electrical shock, always replace the cover to
the Power Distribution Box before reconnecting the battery or
refilling fluid reservoirs.
If the battery has been disconnected and reconnected, refer to the
Batterysection of theMaintenance and specificationschapter.
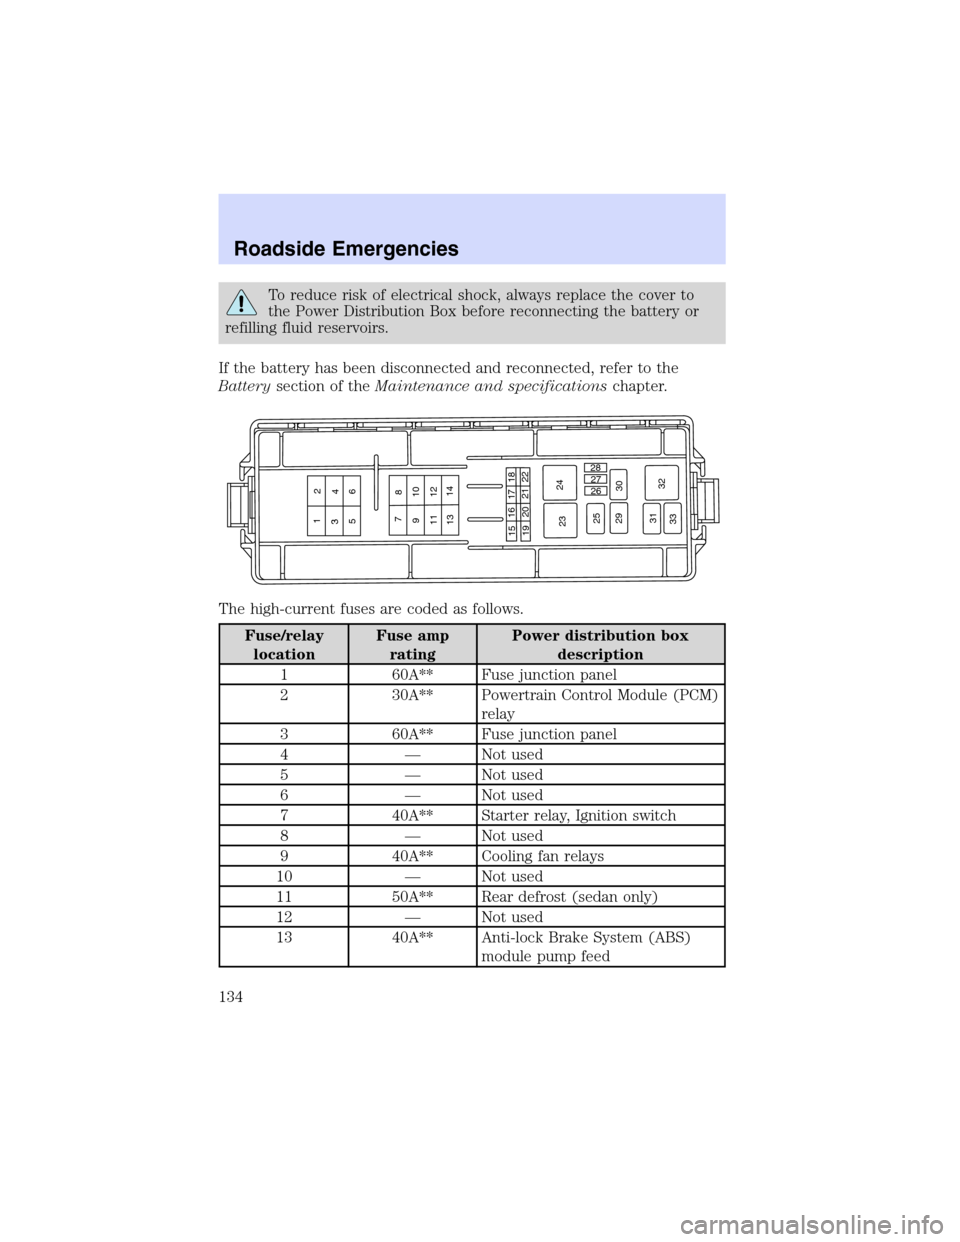
The high-current fuses are coded as follows.
Fuse/relay
locationFuse amp
ratingPower distribution box
description
1 60A** Fuse junction panel
2 30A** Powertrain Control Module (PCM)
relay
3 60A** Fuse junction panel
4—Not used
5—Not used
6—Not used
7 40A** Starter relay, Ignition switch
8—Not used
9 40A** Cooling fan relays
10—Not used
11 50A** Rear defrost (sedan only)
12—Not used
13 40A** Anti-lock Brake System (ABS)
module pump feed
1
23
4
56
7
8
910
11 12
1314
1516 17
18
19202122
2324
25
29
3026 27 28
31
32
33
Roadside Emergencies
134
Page 135 of 216
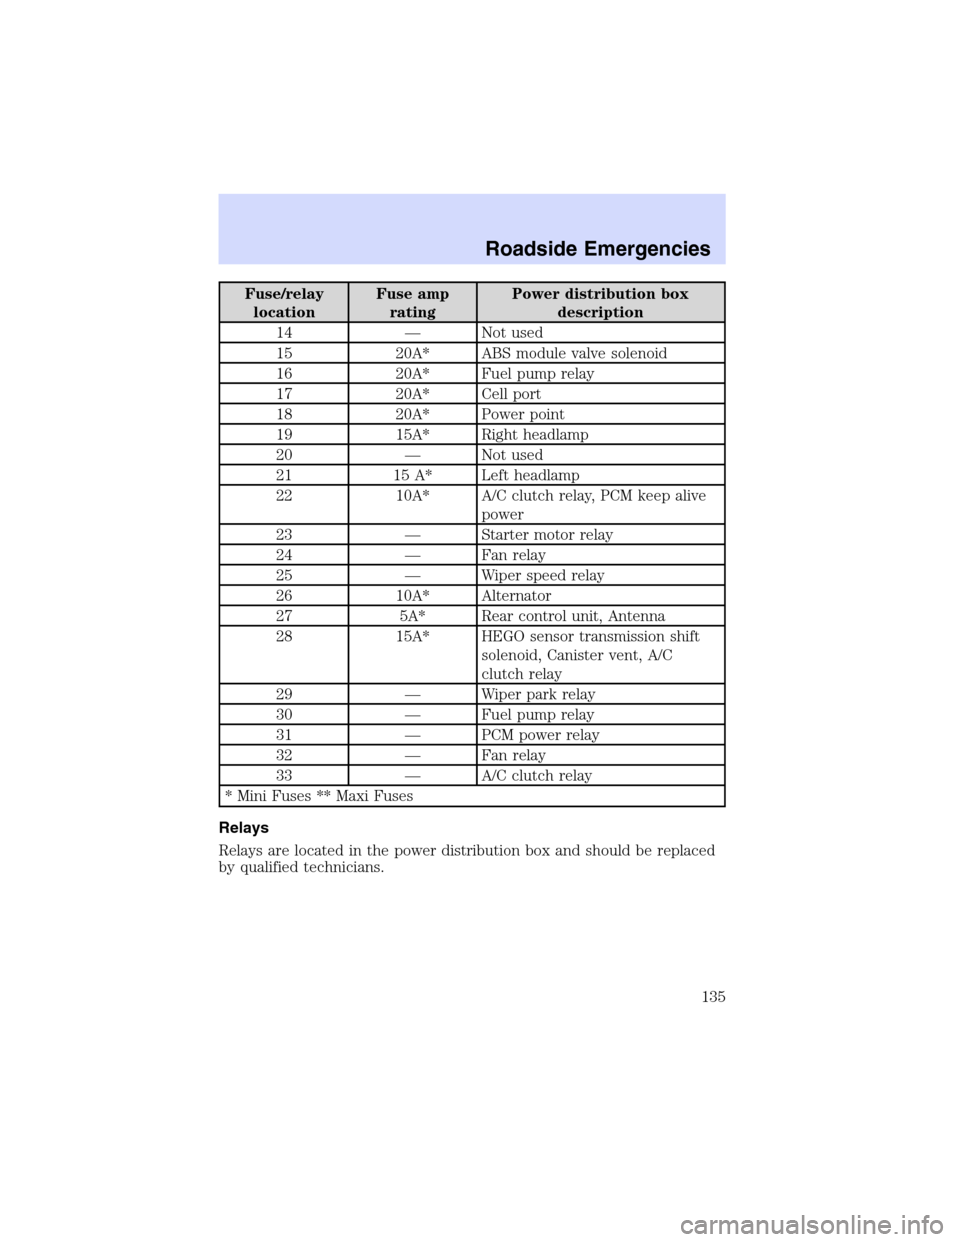
Fuse/relay
locationFuse amp
ratingPower distribution box
description
14—Not used
15 20A* ABS module valve solenoid
16 20A* Fuel pump relay
17 20A* Cell port
18 20A* Power point
19 15A* Right headlamp
20—Not used
21 15 A* Left headlamp
22 10A* A/C clutch relay, PCM keep alive
power
23—Starter motor relay
24—Fan relay
25—Wiper speed relay
26 10A* Alternator
27 5A* Rear control unit, Antenna
28 15A* HEGO sensor transmission shift
solenoid, Canister vent, A/C
clutch relay
29—Wiper park relay
30—Fuel pump relay
31—PCM power relay
32—Fan relay
33—A/C clutch relay
* Mini Fuses ** Maxi Fuses
Relays
Relays are located in the power distribution box and should be replaced
by qualified technicians.
Roadside Emergencies
135