high beam Mercury Sable 2003 Owner's Manuals
[x] Cancel search | Manufacturer: MERCURY, Model Year: 2003, Model line: Sable, Model: Mercury Sable 2003Pages: 216, PDF Size: 1.66 MB
Page 13 of 216
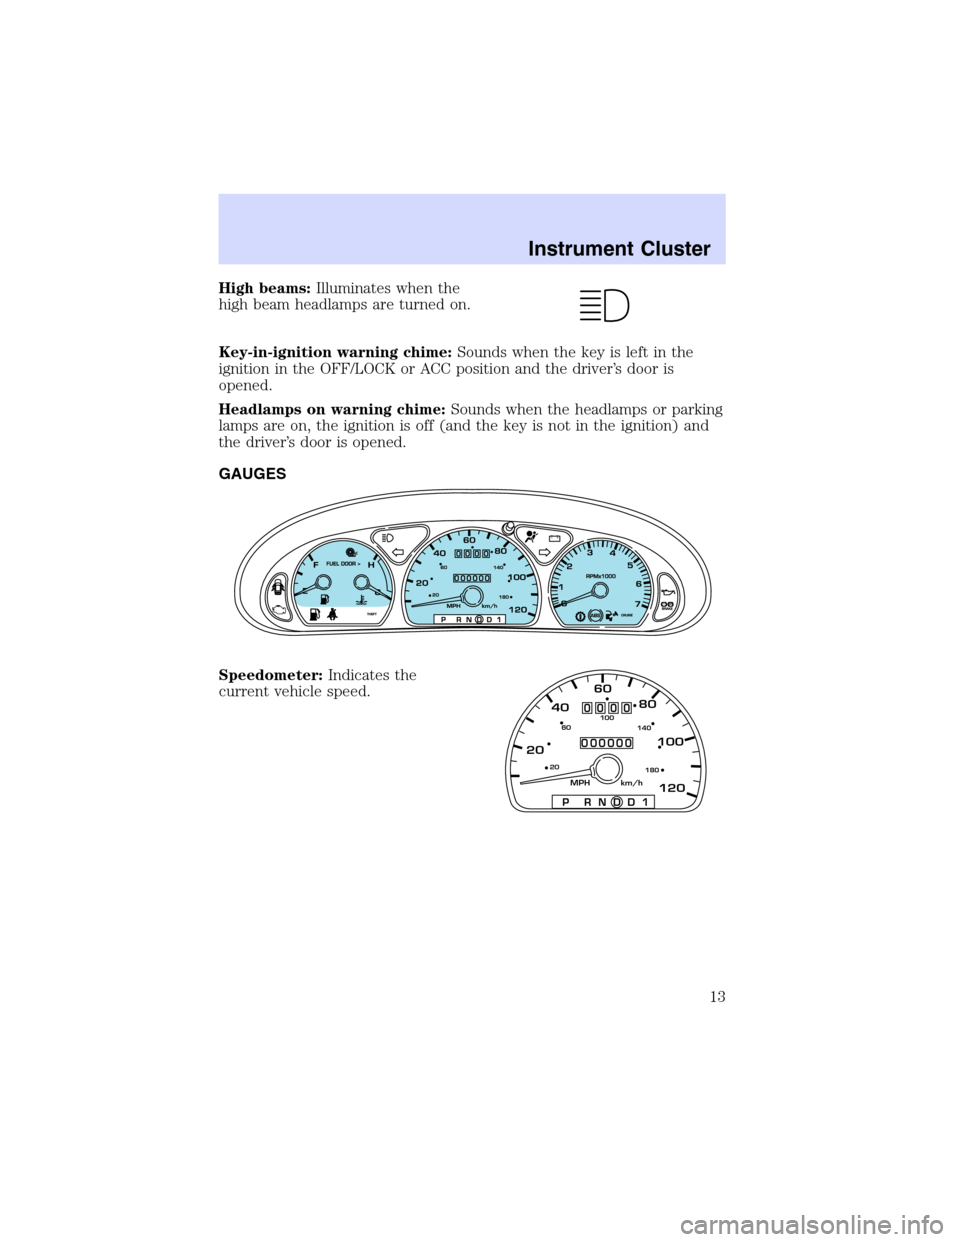
High beams:Illuminates when the
high beam headlamps are turned on.
Key-in-ignition warning chime:Sounds when the key is left in the
ignition in the OFF/LOCK or ACC position and the driver’s door is
opened.
Headlamps on warning chime:Sounds when the headlamps or parking
lamps are on, the ignition is off (and the key is not in the ignition) and
the driver’s door is opened.
GAUGES
Speedometer:Indicates the
current vehicle speed.
204060
80
100
1202060
140 100
180
P R N D D 1
MPH km/h
000000
0000
Instrument Cluster
13
Page 29 of 216
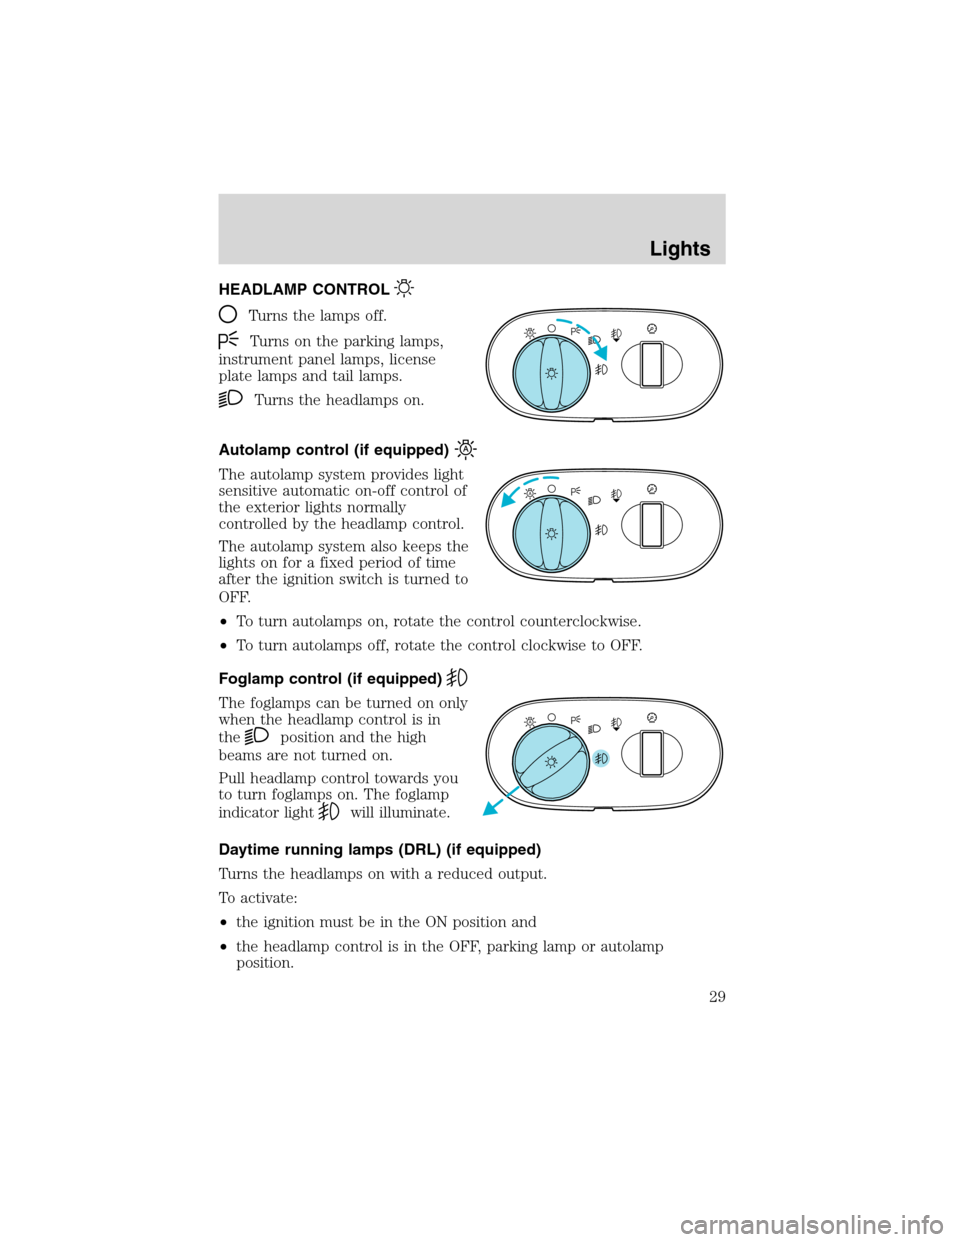
HEADLAMP CONTROL
Turns the lamps off.
Turns on the parking lamps,
instrument panel lamps, license
plate lamps and tail lamps.
Turns the headlamps on.
Autolamp control (if equipped)
The autolamp system provides light
sensitive automatic on-off control of
the exterior lights normally
controlled by the headlamp control.
The autolamp system also keeps the
lights on for a fixed period of time
after the ignition switch is turned to
OFF.
•To turn autolamps on, rotate the control counterclockwise.
•To turn autolamps off, rotate the control clockwise to OFF.
Foglamp control (if equipped)
The foglamps can be turned on only
when the headlamp control is in
the
position and the high
beams are not turned on.
Pull headlamp control towards you
to turn foglamps on. The foglamp
indicator light
will illuminate.
Daytime running lamps (DRL) (if equipped)
Turns the headlamps on with a reduced output.
To activate:
•the ignition must be in the ON position and
•the headlamp control is in the OFF, parking lamp or autolamp
position.
A
A
A
Lights
Lights
29
Page 30 of 216
Always remember to turn on your headlamps at dusk or during
inclement weather. The Daytime Running Lamp (DRL) system
does not activate with your tail lamps and generally may not provide
adequate lighting during these conditions. Failure to activate your
headlamps under these conditions may result in a collision.
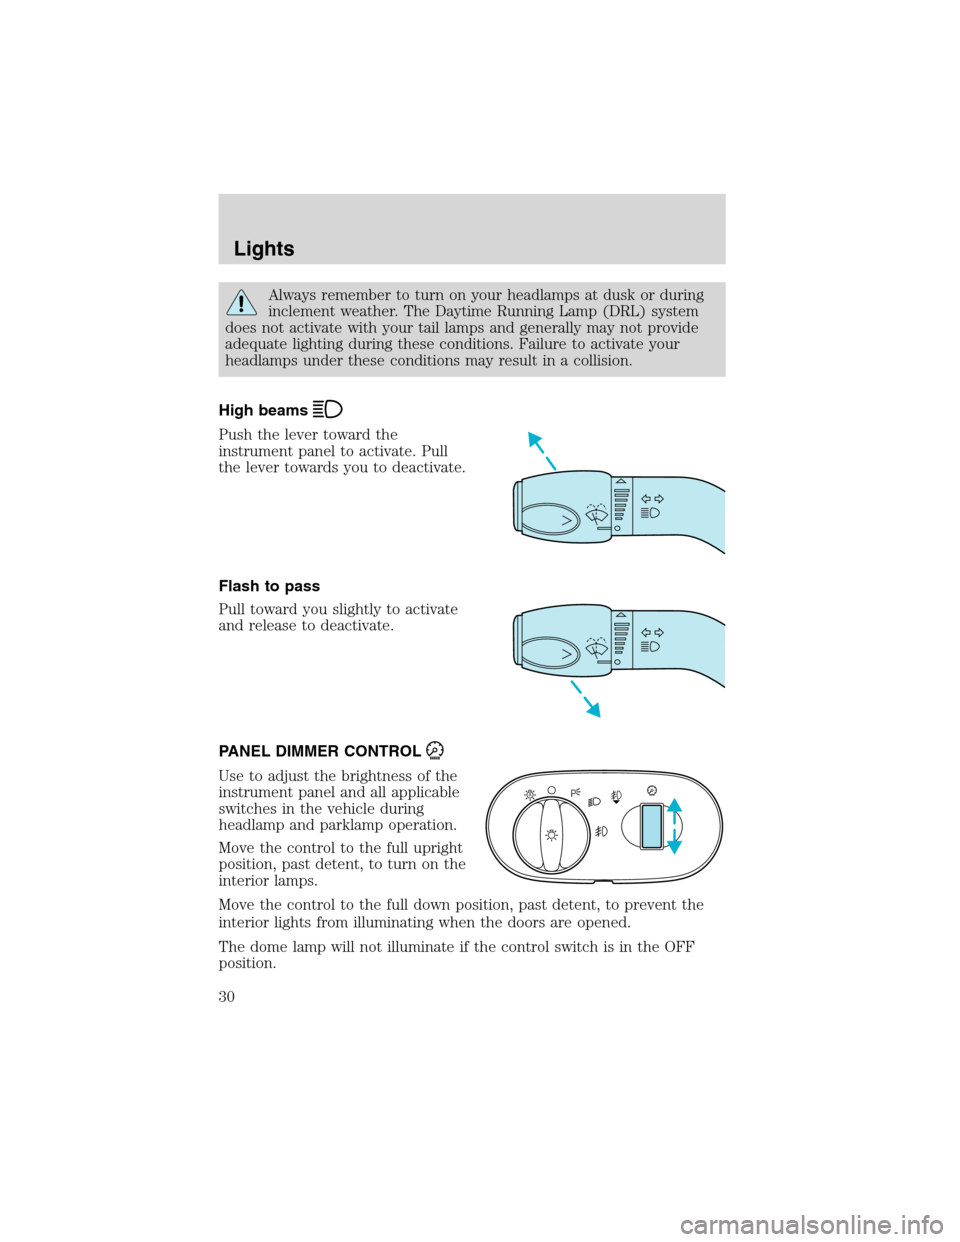
High beams
Push the lever toward the
instrument panel to activate. Pull
the lever towards you to deactivate.
Flash to pass
Pull toward you slightly to activate
and release to deactivate.
PANEL DIMMER CONTROL
Use to adjust the brightness of the
instrument panel and all applicable
switches in the vehicle during
headlamp and parklamp operation.
Move the control to the full upright
position, past detent, to turn on the
interior lamps.
Move the control to the full down position, past detent, to prevent the
interior lights from illuminating when the doors are opened.
The dome lamp will not illuminate if the control switch is in the OFF
position.
A
Lights
30
Page 31 of 216
AIMING THE HEADLAMPS
The headlamps on your vehicle are properly aimed at the assembly plant.
If your vehicle has been in an accident the alignment of your headlamps
should be checked by a qualified service technician.
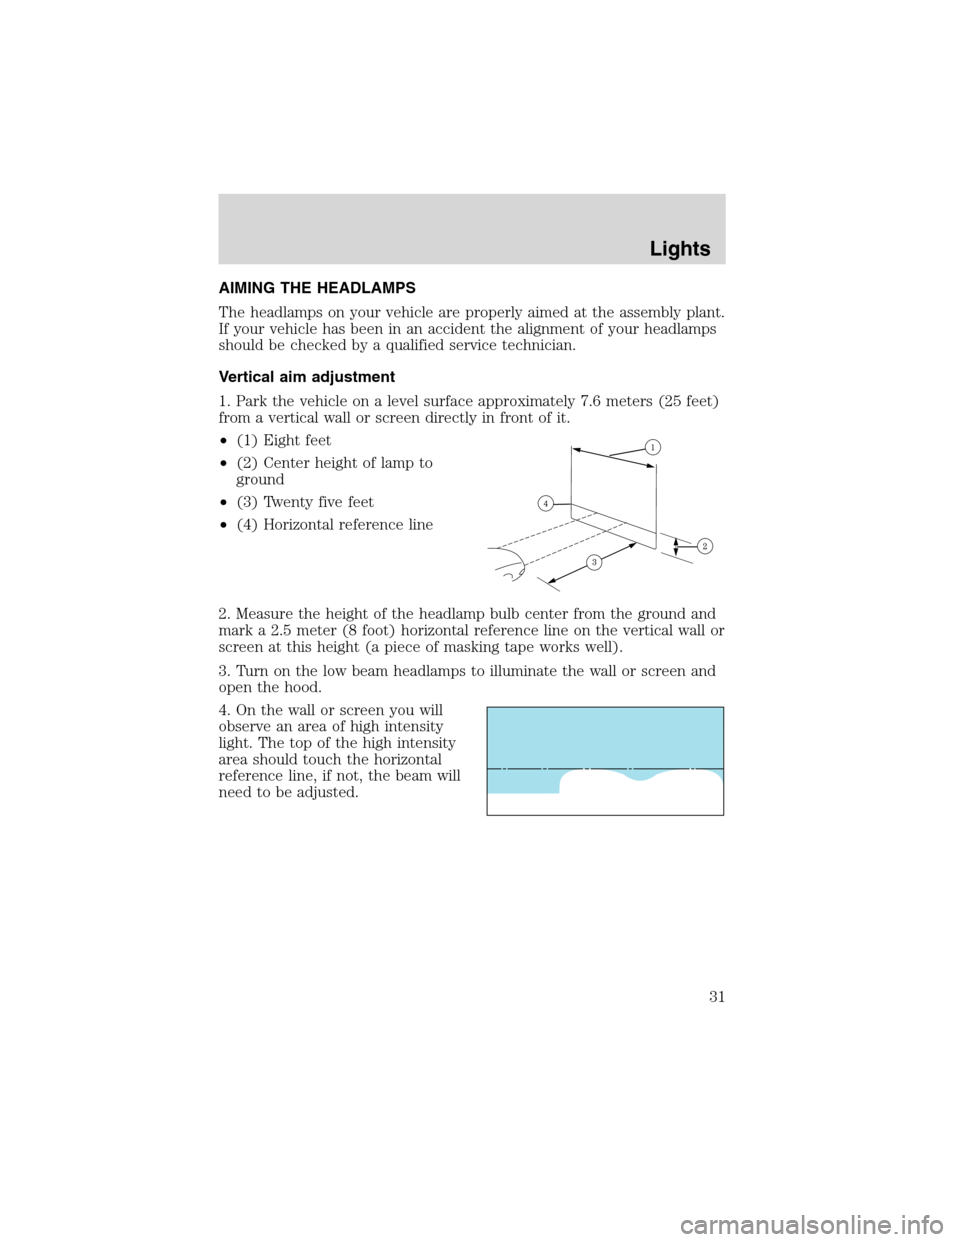
Vertical aim adjustment
1. Park the vehicle on a level surface approximately 7.6 meters (25 feet)
from a vertical wall or screen directly in front of it.
•(1) Eight feet
•(2) Center height of lamp to
ground
•(3) Twenty five feet
•(4) Horizontal reference line
2. Measure the height of the headlamp bulb center from the ground and
mark a 2.5 meter (8 foot) horizontal reference line on the vertical wall or
screen at this height (a piece of masking tape works well).
3. Turn on the low beam headlamps to illuminate the wall or screen and
open the hood.
4. On the wall or screen you will
observe an area of high intensity
light. The top of the high intensity
area should touch the horizontal
reference line, if not, the beam will
need to be adjusted.
Lights
31
Page 209 of 216
F
Flexible Fuel Vehicle (FFV) ....176
Floor mats ...................................55
Fluid capacities .........................197
Foglamps .....................................29
Fuel ............................................176
calculating fuel economy .......182
cap ...........................................179
capacity ...................................197
choosing the right fuel ...........180
comparisons with EPA fuel
economy estimates .................185
detergent in fuel .....................182
filling your vehicle with
fuel ...........................176, 179, 183
filter, specifications ........182, 196
fuel pump shut-off switch .....128
improving fuel economy ........182
octane rating ...................180, 200
quality ......................................181
running out of fuel .................182
safety information relating to
automotive fuels .....................176
Fuel - flex fuel vehicle
(FFV) .................................176, 180
Fuses ..........................................130
G
Gas cap (see Fuel cap) ............179
Gas mileage (see Fuel
economy) ...................................182
Gauges .........................................13
GAWR (Gross Axle Weight
Rating) .......................................121
definition .................................121
driving with a heavy load ......121
location ....................................121GVWR (Gross Vehicle Weight
Rating) .......................................121
calculating ...............................121
definition .................................121
driving with a heavy load ......121
location ....................................121
H
Hazard flashers .........................128
Headlamps ...................................29
aiming ........................................31
autolamp system .......................29
bulb specifications ....................34
daytime running lights .............29
flash to pass ..............................30
high beam .................................30
replacing bulbs .........................35
turning on and off ....................29
Heating
heating and air conditioning
system .................................24–25
Hood ..........................................163
I
Ignition ...............................109, 200
Infant seats
(see Safety seats) .....................101
Inspection/maintenance (I/M)
testing ........................................187
Instrument panel
cleaning ...................................159
cluster ........................................10
lighting up panel and interior..30
J
Jack ............................................136
positioning ...............................136
storage .....................................136
Index
209