seats Mercury Sable 2003 Owner's Manuals
[x] Cancel search | Manufacturer: MERCURY, Model Year: 2003, Model line: Sable, Model: Mercury Sable 2003Pages: 216, PDF Size: 1.66 MB
Page 7 of 216
Special instructions
For your added safety, your vehicle is fitted with sophisticated electronic
controls.
Please read the sectionSupplemental Restraint System (SRS)
in theSeating and safety restraintschapter. Failure to follow
the specific warnings and instructions could result in personal injury.
Front seat mounted rear facing child or infant seats should
NEVERbe used in front of a passenger side air bag unless the
air bag can be and is turned OFF.
MIDDLE EAST/NORTH AFRICA VEHICLE SPECIFIC INFORMATION
For your particular global region, your vehicle may be equipped with
features and options that are different from the ones that are described
in this Owner Guide; therefore, a supplement has been supplied that
complements this book. By referring to the pages in the provided
supplement, you can properly identify those features, recommendations
and specifications that are unique to your vehicle.Refer to this Owner
Guide for all other required information and warnings.
Introduction
7
Page 25 of 216
•Do not put objects under the front seats that will interfere with the
airflow to the back seats.
•Remove any snow, ice or leaves from the air intake area at the base of
the windshield.
To aid in side window defogging/demisting in cold weather:
1. Select
2. Select A/C
3. Modulate the temperature control to maintain comfort.
4. Set the fan speed to HI
5. Direct the outer instrument panel vents towards the side windows
To increase airflow to the outer instrument panel vents, close the vents
located in the middle of the instrument panel.
Do not place objects on top of the instrument panel as these
objects may become projectiles in a collision or sudden stop.
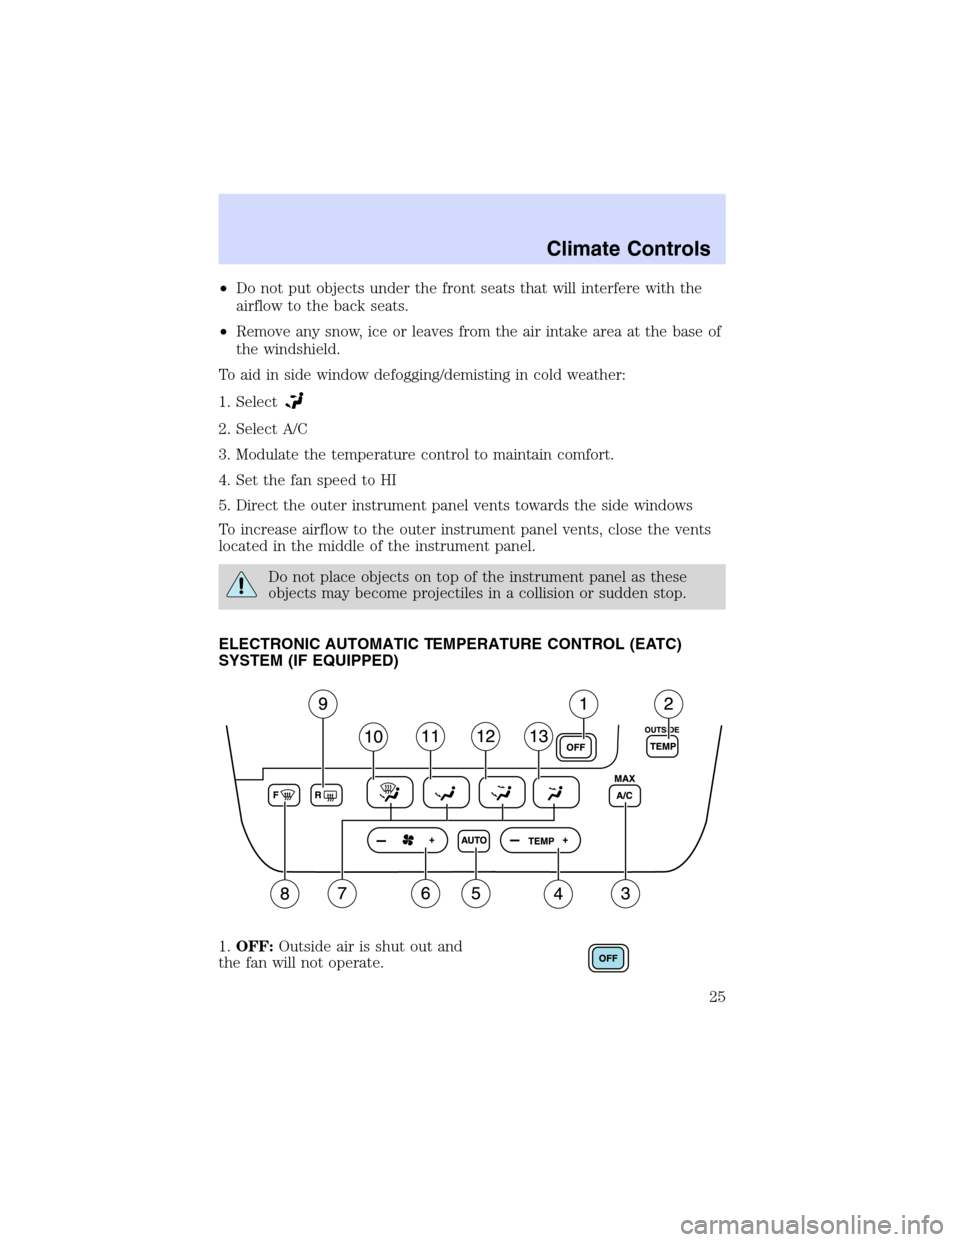
ELECTRONIC AUTOMATIC TEMPERATURE CONTROL (EATC)
SYSTEM (IF EQUIPPED)
1.OFF:Outside air is shut out and
the fan will not operate.
Climate Controls
25
Page 27 of 216
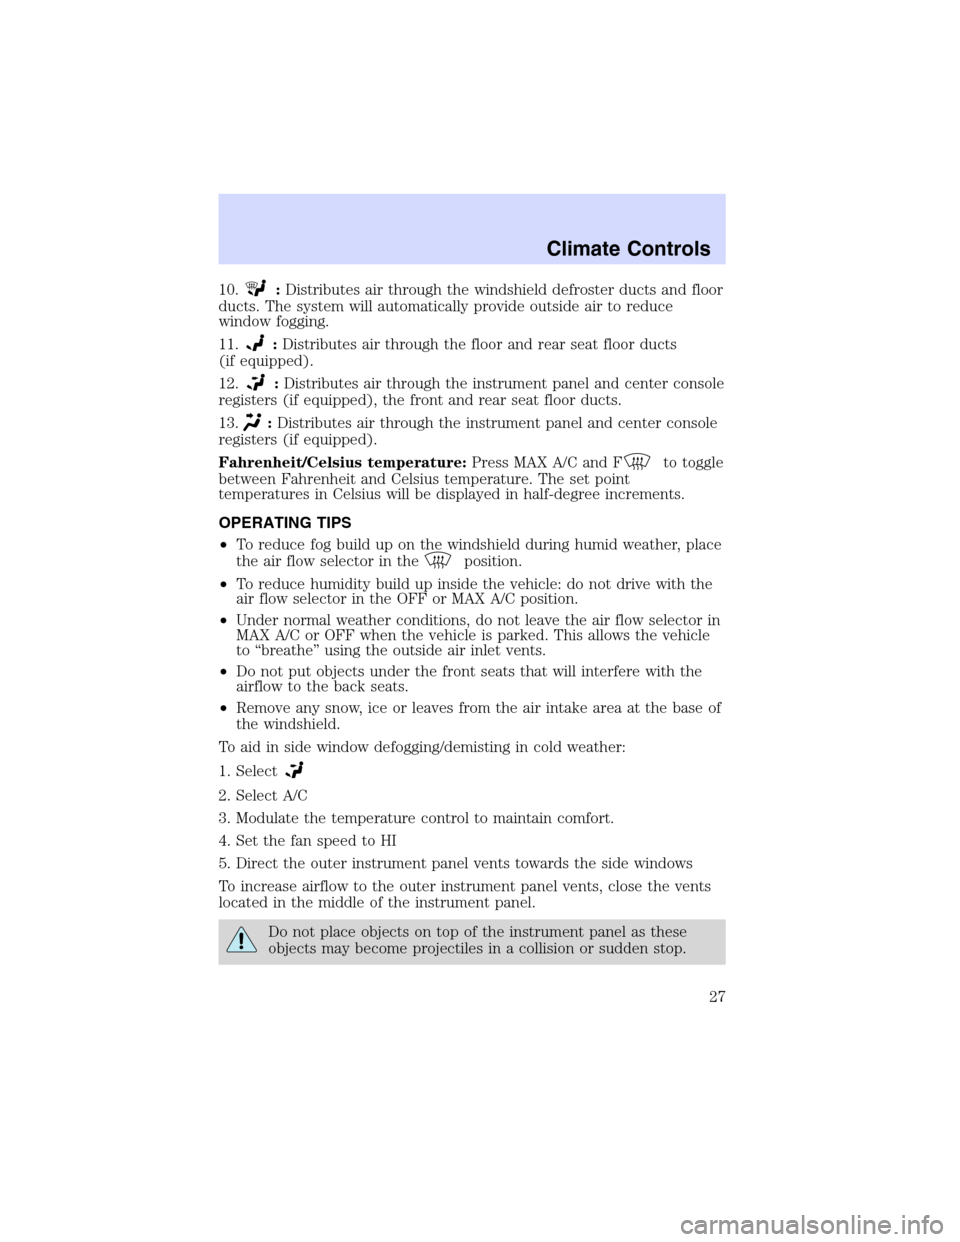
10.:Distributes air through the windshield defroster ducts and floor
ducts. The system will automatically provide outside air to reduce
window fogging.
11.
:Distributes air through the floor and rear seat floor ducts
(if equipped).
12.
:Distributes air through the instrument panel and center console
registers (if equipped), the front and rear seat floor ducts.
13.
:Distributes air through the instrument panel and center console
registers (if equipped).
Fahrenheit/Celsius temperature:Press MAX A/C and F
to toggle
between Fahrenheit and Celsius temperature. The set point
temperatures in Celsius will be displayed in half-degree increments.
OPERATING TIPS
•To reduce fog build up on the windshield during humid weather, place
the air flow selector in the
position.
•To reduce humidity build up inside the vehicle: do not drive with the
air flow selector in the OFF or MAX A/C position.
•Under normal weather conditions, do not leave the air flow selector in
MAX A/C or OFF when the vehicle is parked. This allows the vehicle
to“breathe”using the outside air inlet vents.
•Do not put objects under the front seats that will interfere with the
airflow to the back seats.
•Remove any snow, ice or leaves from the air intake area at the base of
the windshield.
To aid in side window defogging/demisting in cold weather:
1. Select
2. Select A/C
3. Modulate the temperature control to maintain comfort.
4. Set the fan speed to HI
5. Direct the outer instrument panel vents towards the side windows
To increase airflow to the outer instrument panel vents, close the vents
located in the middle of the instrument panel.
Do not place objects on top of the instrument panel as these
objects may become projectiles in a collision or sudden stop.
Climate Controls
27
Page 73 of 216
SEATING
Notes:
Reclining the seatback can cause an occupant to slide under the
seat’s safety belt, resulting in severe personal injuries in the
event of a collision.
Do not pile cargo higher than the seatbacks to reduce the risk of
injury in a collision or sudden stop.
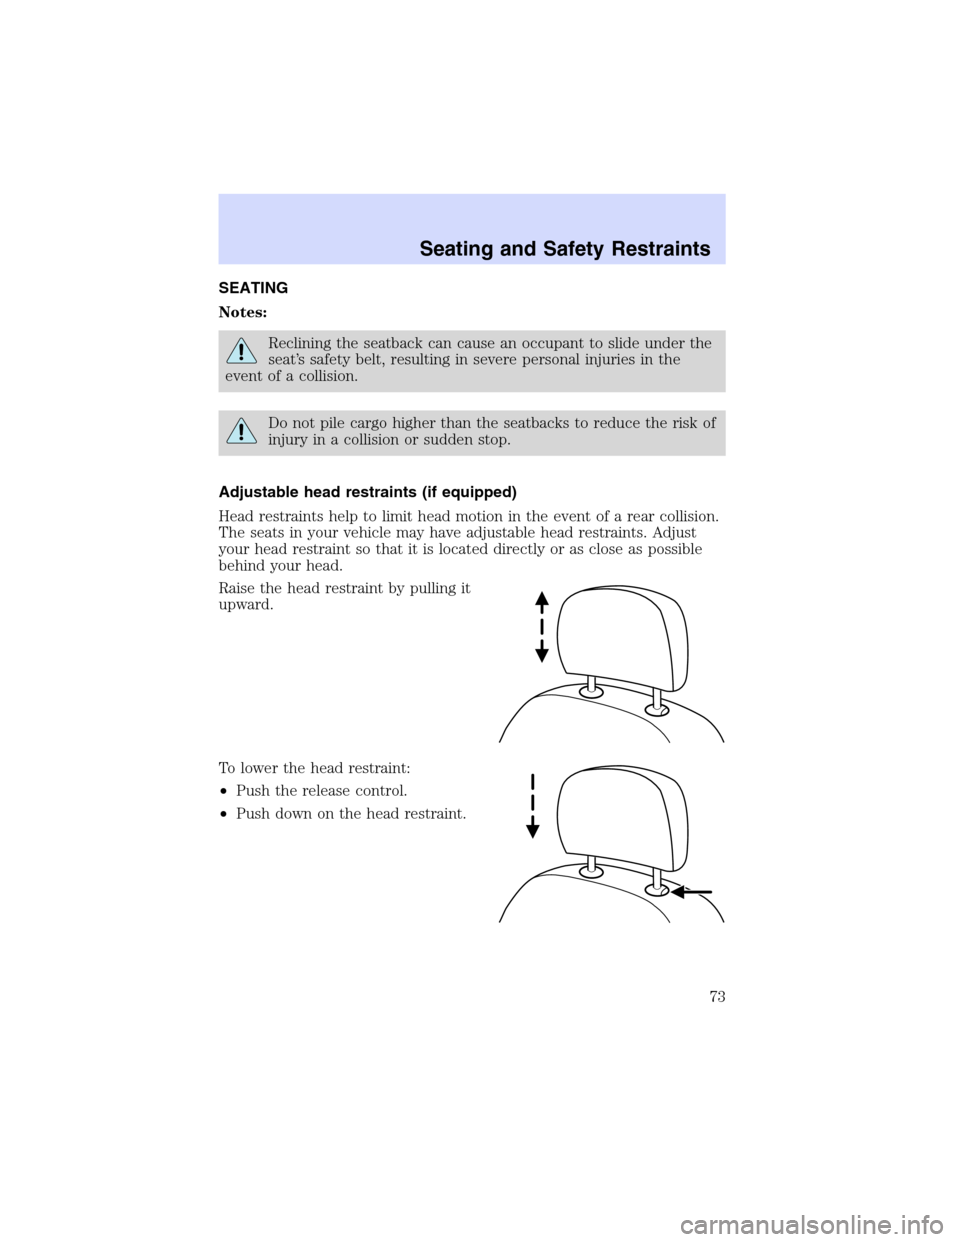
Adjustable head restraints (if equipped)
Head restraints help to limit head motion in the event of a rear collision.
The seats in your vehicle may have adjustable head restraints. Adjust
your head restraint so that it is located directly or as close as possible
behind your head.
Raise the head restraint by pulling it
upward.
To lower the head restraint:
•Push the release control.
•Push down on the head restraint.
Seating and Safety Restraints
Seating and Safety Restraints
73
Page 75 of 216
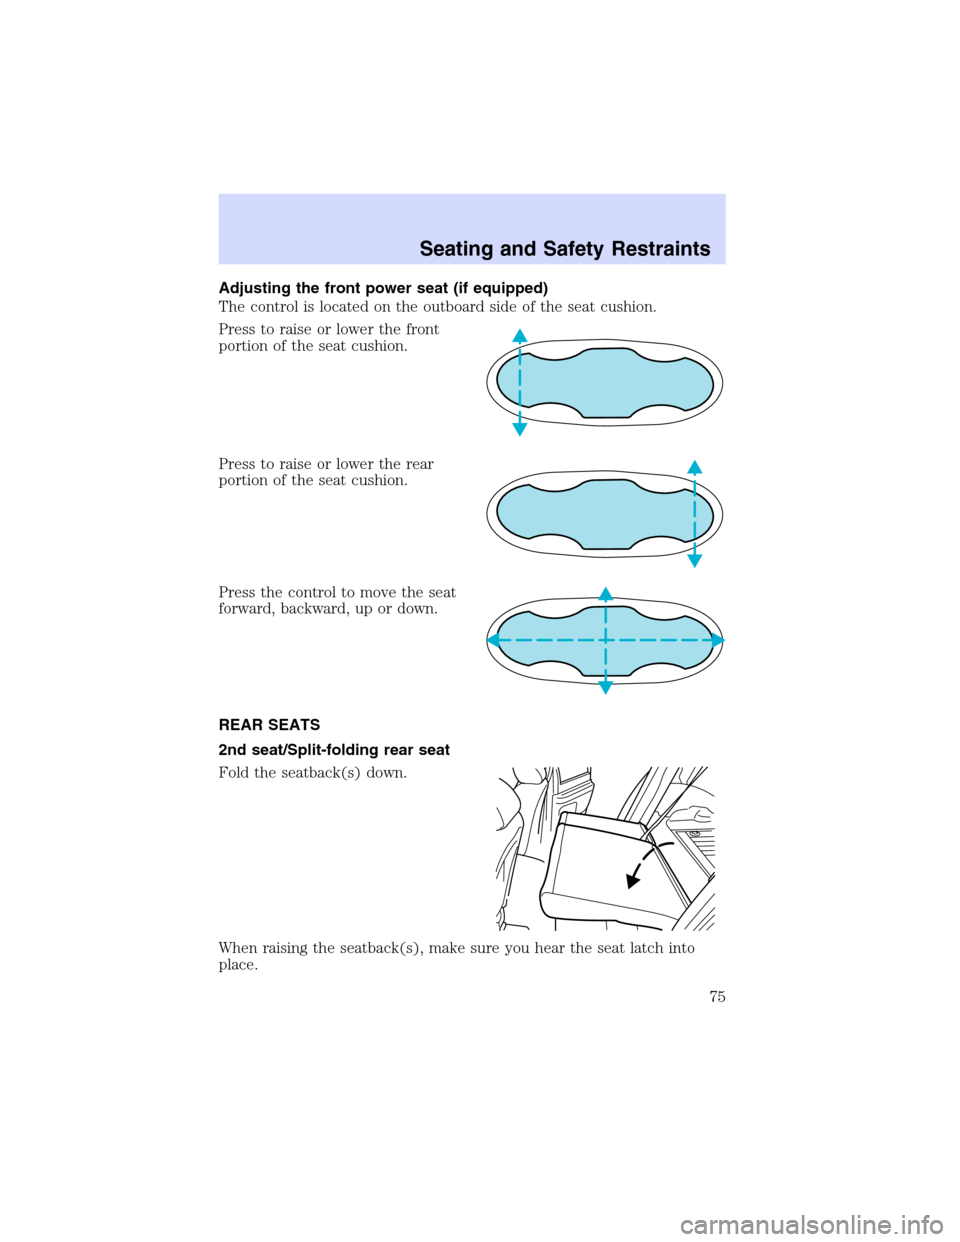
Adjusting the front power seat (if equipped)
The control is located on the outboard side of the seat cushion.
Press to raise or lower the front
portion of the seat cushion.
Press to raise or lower the rear
portion of the seat cushion.
Press the control to move the seat
forward, backward, up or down.
REAR SEATS
2nd seat/Split-folding rear seat
Fold the seatback(s) down.
When raising the seatback(s), make sure you hear the seat latch into
place.
Seating and Safety Restraints
75
Page 80 of 216
It is extremely dangerous to ride in a cargo area, inside or
outside of a vehicle. In a collision, people riding in these areas
are more likely to be seriously injured or killed. Do not allow people to
ride in any area of your vehicle that is not equipped with seats and
safety belts. Be sure everyone in your vehicle is in a seat and using a
safety belt properly.
In a rollover crash, an unbelted person is significantly more likely
to die than a person wearing a seat belt.
Each seating position in your vehicle has a specific safety belt
assembly which is made up of one buckle and one tongue that
are designed to be used as a pair. 1) Use the shoulder belt on the
outside shoulder only. Never wear the shoulder belt under the arm. 2)
Never swing the safety belt around your neck over the inside shoulder.
3) Never use a single belt for more than one person.
Always transport children 12 years old and under in the back
seat and always properly use appropriate child restraints.
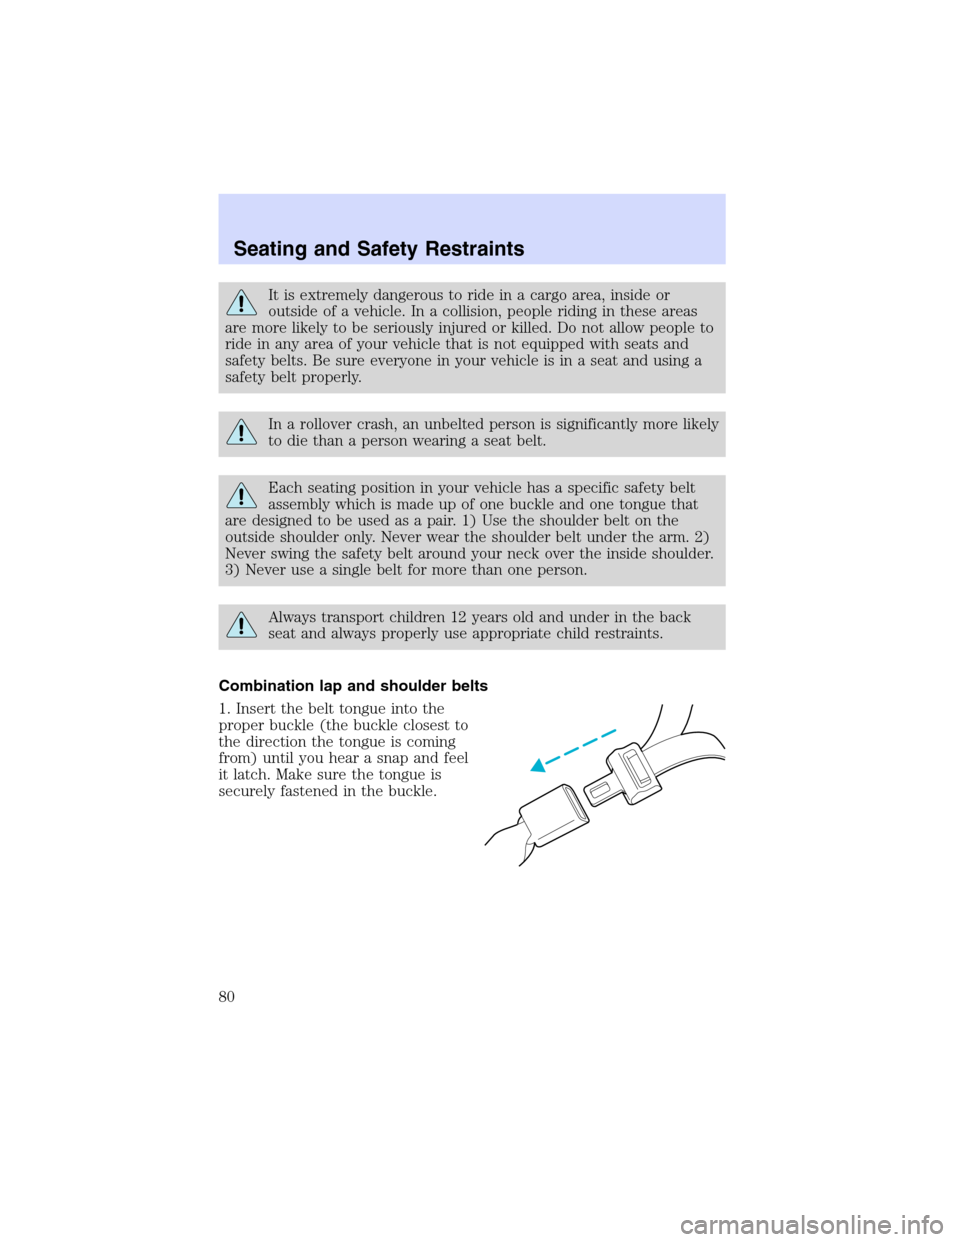
Combination lap and shoulder belts
1. Insert the belt tongue into the
proper buckle (the buckle closest to
the direction the tongue is coming
from) until you hear a snap and feel
it latch. Make sure the tongue is
securely fastened in the buckle.
Seating and Safety Restraints
80
Page 81 of 216
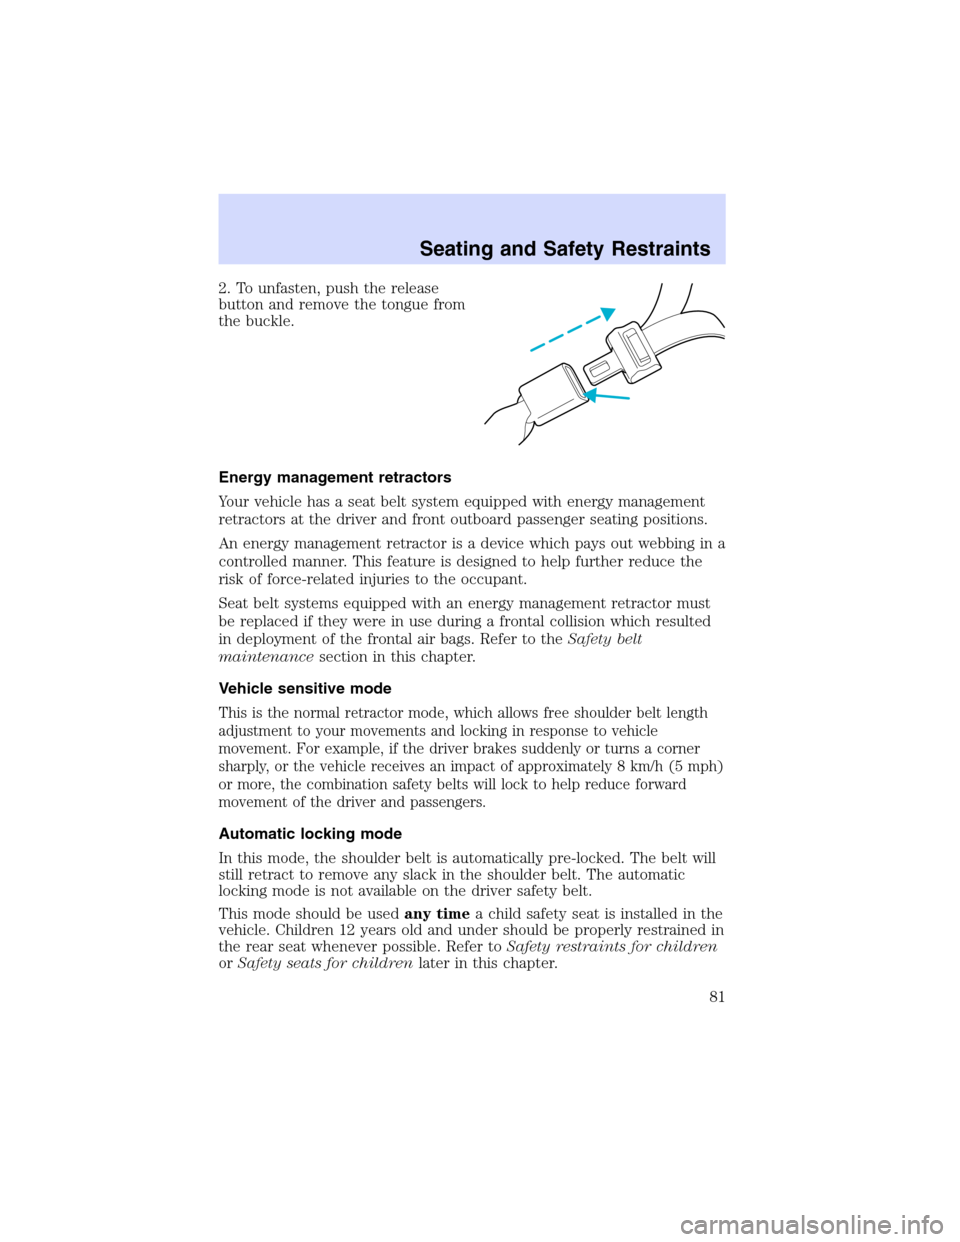
2. To unfasten, push the release
button and remove the tongue from
the buckle.
Energy management retractors
Your vehicle has a seat belt system equipped with energy management
retractors at the driver and front outboard passenger seating positions.
An energy management retractor is a device which pays out webbing in a
controlled manner. This feature is designed to help further reduce the
risk of force-related injuries to the occupant.
Seat belt systems equipped with an energy management retractor must
be replaced if they were in use during a frontal collision which resulted
in deployment of the frontal air bags. Refer to theSafety belt
maintenancesection in this chapter.
Vehicle sensitive mode
This is the normal retractor mode, which allows free shoulder belt length
adjustment to your movements and locking in response to vehicle
movement. For example, if the driver brakes suddenly or turns a corner
sharply, or the vehicle receives an impact of approximately 8 km/h (5 mph)
or more, the combination safety belts will lock to help reduce forward
movement of the driver and passengers.
Automatic locking mode
In this mode, the shoulder belt is automatically pre-locked. The belt will
still retract to remove any slack in the shoulder belt. The automatic
locking mode is not available on the driver safety belt.
This mode should be usedany timea child safety seat is installed in the
vehicle. Children 12 years old and under should be properly restrained in
the rear seat whenever possible. Refer toSafety restraints for children
orSafety seats for childrenlater in this chapter.
Seating and Safety Restraints
81
Page 83 of 216
After any vehicle collision, the seat belt system at all outboard
seating positions (except driver, which has no“automatic locking
retractor”feature) must be checked by a qualified technician to verify
that the“automatic locking retractor”feature for child seats is still
functioning properly. In addition, all seat belts should be checked for
proper function.
BELT AND RETRACTOR ASSEMBLY MUST BE REPLACED if
the seat belt assembly“automatic locking retractor”feature or
any other seat belt function is not operating properly when checked
according to the procedures in Workshop Manual.
Failure to replace the Belt and Retractor assembly could
increase the risk of injury in collisions.
Safety belt pretensioner
Your vehicle is equipped with safety belt pretensioners at the driver and
front outboard passenger seating positions.
The safety belt pretensioners are designed to activate only when the
safety belts are fastened during certain frontal or near-frontal collisions
with sufficient longitudinal deceleration. A safety belt pretensioner is a
device which tightens the webbing of the lap and shoulder belts in such
a way that they fit more snugly against the body.
The driver and front outboard passenger safety belt system (including
retractors, buckles and height adjusters) must be replaced if the vehicle
is involved in a collision that results in the activation of the safety belt
pretensioners. Refer to theSafety belt maintenancesection in this
chapter.
In the event of a collision resulting in the deployment of the
front air bags, the front safety belts must be replaced if they
were in use. Failure to replace the safety belt assembly could result in
severe personal injuries in the event of a collision.
Seating and Safety Restraints
83
Page 85 of 216
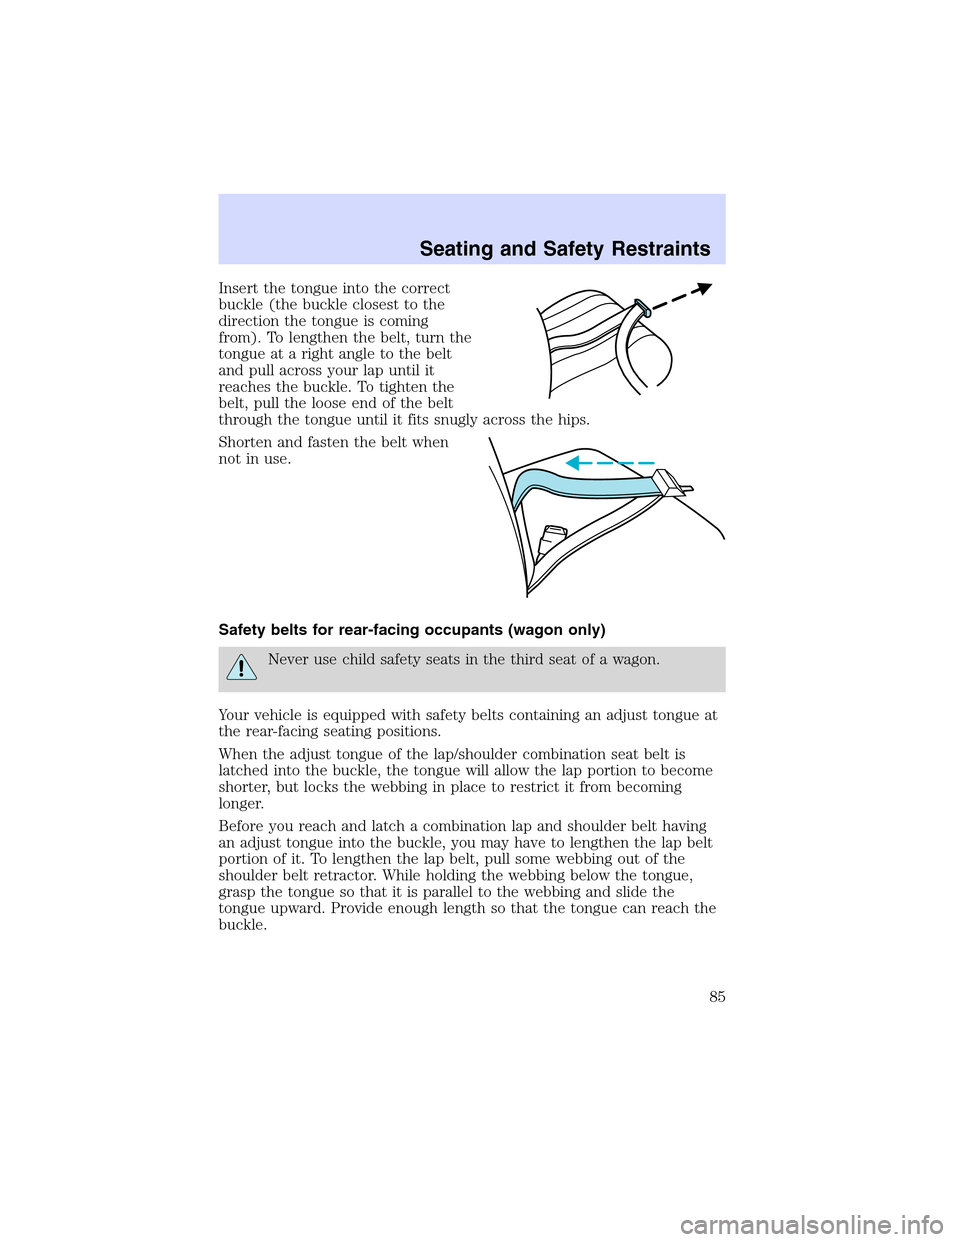
Insert the tongue into the correct
buckle (the buckle closest to the
direction the tongue is coming
from). To lengthen the belt, turn the
tongue at a right angle to the belt
and pull across your lap until it
reaches the buckle. To tighten the
belt, pull the loose end of the belt
through the tongue until it fits snugly across the hips.
Shorten and fasten the belt when
not in use.
Safety belts for rear-facing occupants (wagon only)
Never use child safety seats in the third seat of a wagon.
Your vehicle is equipped with safety belts containing an adjust tongue at
the rear-facing seating positions.
When the adjust tongue of the lap/shoulder combination seat belt is
latched into the buckle, the tongue will allow the lap portion to become
shorter, but locks the webbing in place to restrict it from becoming
longer.
Before you reach and latch a combination lap and shoulder belt having
an adjust tongue into the buckle, you may have to lengthen the lap belt
portion of it. To lengthen the lap belt, pull some webbing out of the
shoulder belt retractor. While holding the webbing below the tongue,
grasp the tongue so that it is parallel to the webbing and slide the
tongue upward. Provide enough length so that the tongue can reach the
buckle.
Seating and Safety Restraints
85
Page 86 of 216
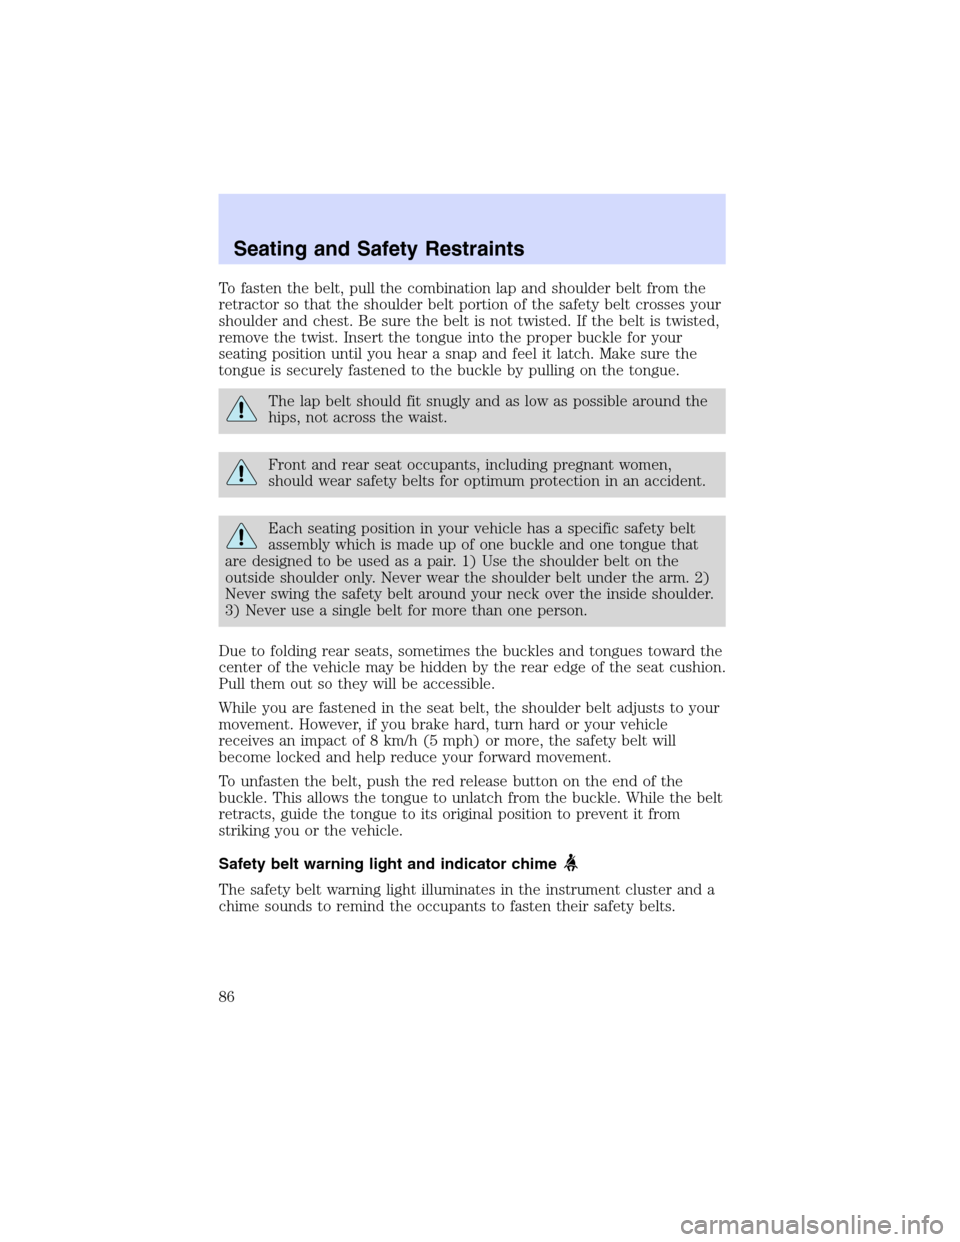
To fasten the belt, pull the combination lap and shoulder belt from the
retractor so that the shoulder belt portion of the safety belt crosses your
shoulder and chest. Be sure the belt is not twisted. If the belt is twisted,
remove the twist. Insert the tongue into the proper buckle for your
seating position until you hear a snap and feel it latch. Make sure the
tongue is securely fastened to the buckle by pulling on the tongue.
The lap belt should fit snugly and as low as possible around the
hips, not across the waist.
Front and rear seat occupants, including pregnant women,
should wear safety belts for optimum protection in an accident.
Each seating position in your vehicle has a specific safety belt
assembly which is made up of one buckle and one tongue that
are designed to be used as a pair. 1) Use the shoulder belt on the
outside shoulder only. Never wear the shoulder belt under the arm. 2)
Never swing the safety belt around your neck over the inside shoulder.
3) Never use a single belt for more than one person.
Due to folding rear seats, sometimes the buckles and tongues toward the
center of the vehicle may be hidden by the rear edge of the seat cushion.
Pull them out so they will be accessible.
While you are fastened in the seat belt, the shoulder belt adjusts to your
movement. However, if you brake hard, turn hard or your vehicle
receives an impact of 8 km/h (5 mph) or more, the safety belt will
become locked and help reduce your forward movement.
To unfasten the belt, push the red release button on the end of the
buckle. This allows the tongue to unlatch from the buckle. While the belt
retracts, guide the tongue to its original position to prevent it from
striking you or the vehicle.
Safety belt warning light and indicator chime
The safety belt warning light illuminates in the instrument cluster and a
chime sounds to remind the occupants to fasten their safety belts.
Seating and Safety Restraints
86