check engine Mercury Villager 1999 s User Guide
[x] Cancel search | Manufacturer: MERCURY, Model Year: 1999, Model line: Villager, Model: Mercury Villager 1999Pages: 264, PDF Size: 2.19 MB
Page 195 of 264
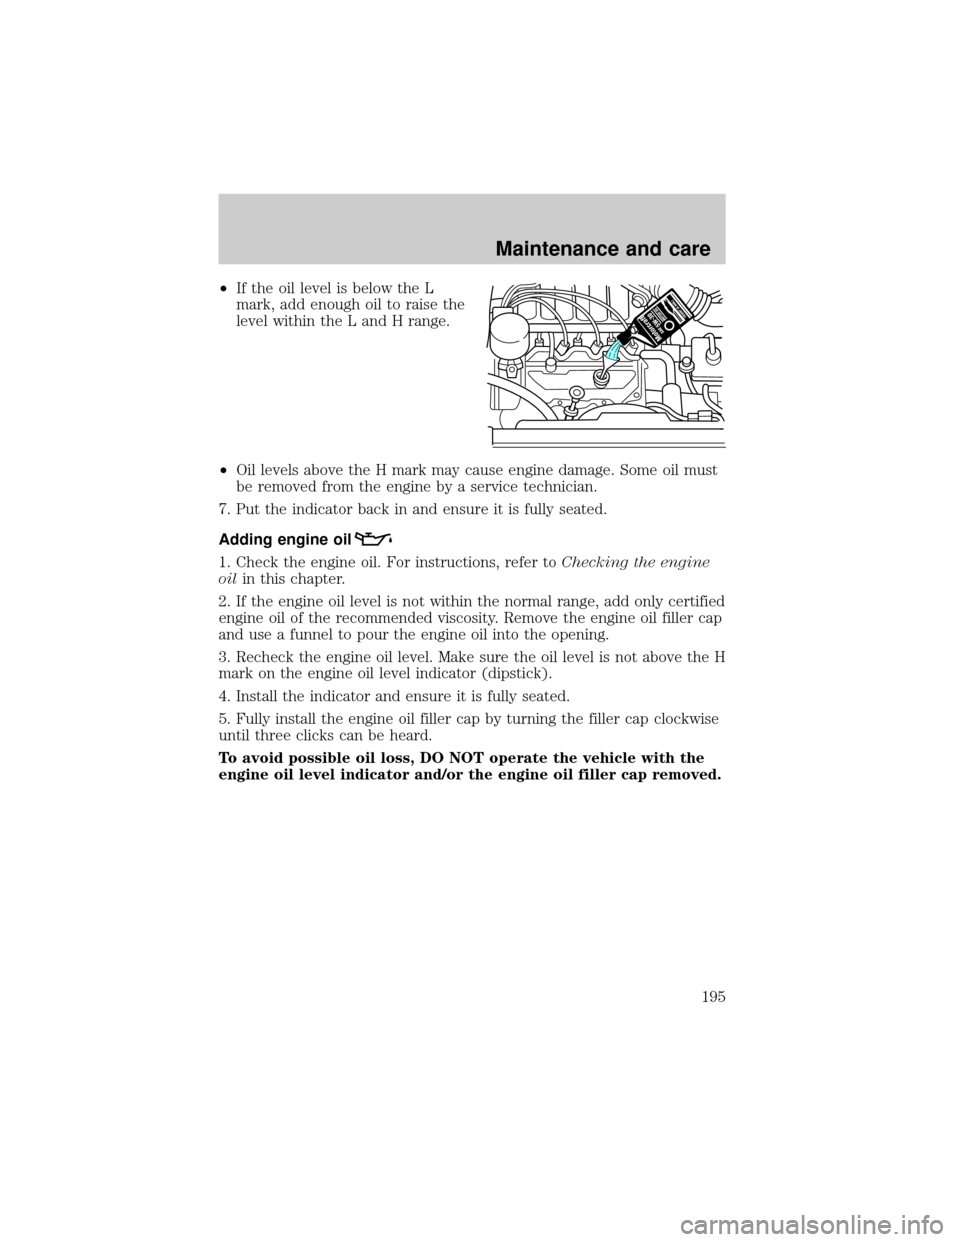
²If the oil level is below the L
mark, add enough oil to raise the
level within the L and H range.
²Oil levels above the H mark may cause engine damage. Some oil must
be removed from the engine by a service technician.
7. Put the indicator back in and ensure it is fully seated.
Adding engine oil
1. Check the engine oil. For instructions, refer toChecking the engine
oilin this chapter.
2. If the engine oil level is not within the normal range, add only certified
engine oil of the recommended viscosity. Remove the engine oil filler cap
and use a funnel to pour the engine oil into the opening.
3. Recheck the engine oil level. Make sure the oil level is not above the H
mark on the engine oil level indicator (dipstick).
4. Install the indicator and ensure it is fully seated.
5. Fully install the engine oil filler cap by turning the filler cap clockwise
until three clicks can be heard.
To avoid possible oil loss, DO NOT operate the vehicle with the
engine oil level indicator and/or the engine oil filler cap removed.
Maintenance and care
195
Page 198 of 264
WINDSHIELD WASHER FLUID
Checking and adding washer fluid
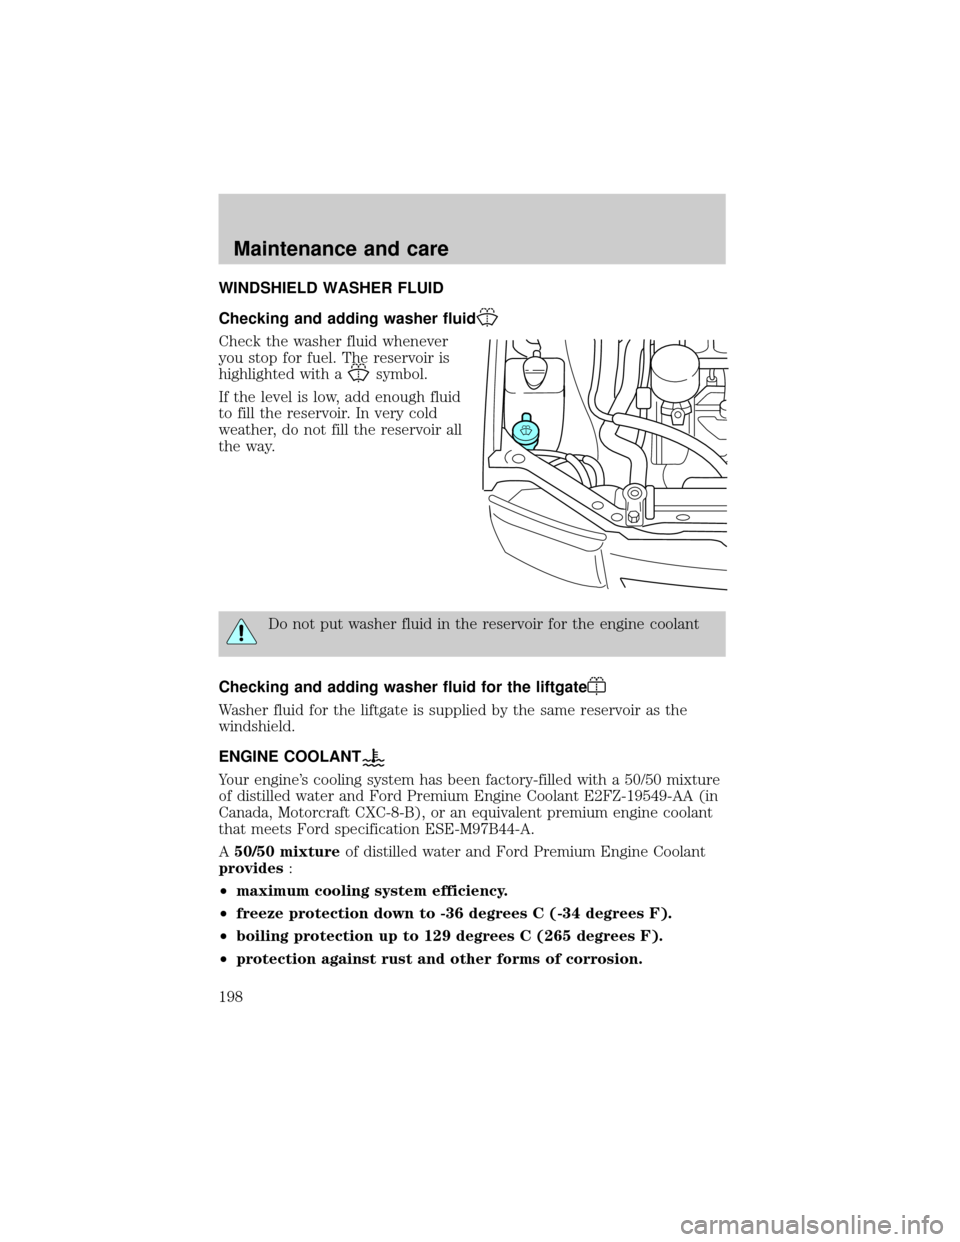
Check the washer fluid whenever
you stop for fuel. The reservoir is
highlighted with a
symbol.
If the level is low, add enough fluid
to fill the reservoir. In very cold
weather, do not fill the reservoir all
the way.
Do not put washer fluid in the reservoir for the engine coolant
Checking and adding washer fluid for the liftgate
Washer fluid for the liftgate is supplied by the same reservoir as the
windshield.
ENGINE COOLANT
Your engine's cooling system has been factory-filled with a 50/50 mixture
of distilled water and Ford Premium Engine Coolant E2FZ-19549-AA (in
Canada, Motorcraft CXC-8-B), or an equivalent premium engine coolant
that meets Ford specification ESE-M97B44-A.
A50/50 mixtureof distilled water and Ford Premium Engine Coolant
provides:
²maximum cooling system efficiency.
²freeze protection down to -36 degrees C (-34 degrees F).
²boiling protection up to 129 degrees C (265 degrees F).
²protection against rust and other forms of corrosion.
Maintenance and care
198
Page 199 of 264
The engine coolant must be
maintained at the correct fluid
level and concentration to work
properly. If the engine coolant
fluid level and concentration is
not maintained correctly,
damage to the engine and
cooling system may result.
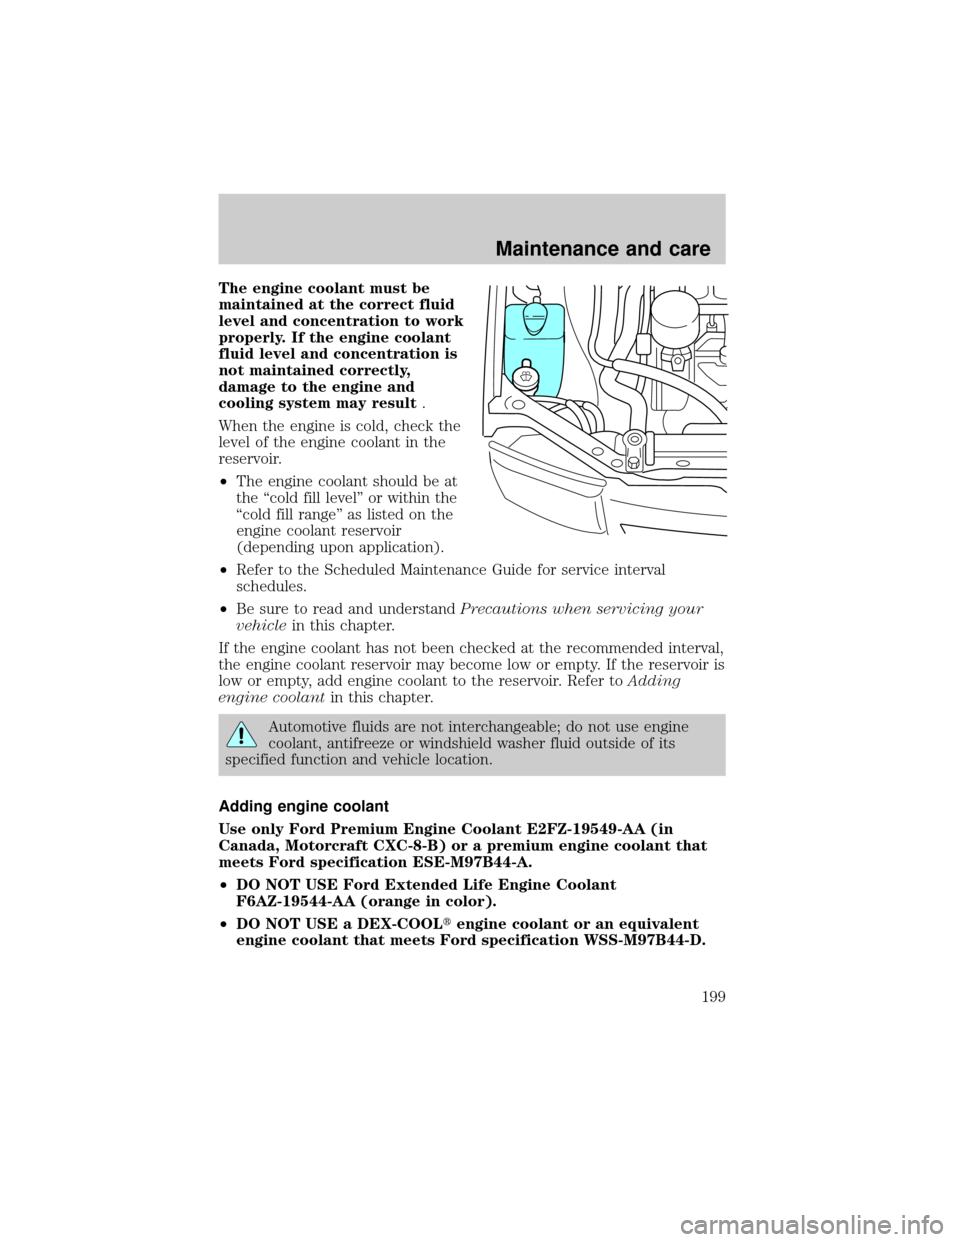
When the engine is cold, check the
level of the engine coolant in the
reservoir.
²The engine coolant should be at
the ªcold fill levelº or within the
ªcold fill rangeº as listed on the
engine coolant reservoir
(depending upon application).
²Refer to the Scheduled Maintenance Guide for service interval
schedules.
²Be sure to read and understandPrecautions when servicing your
vehiclein this chapter.
If the engine coolant has not been checked at the recommended interval,
the engine coolant reservoir may become low or empty. If the reservoir is
low or empty, add engine coolant to the reservoir. Refer toAdding
engine coolantin this chapter.
Automotive fluids are not interchangeable; do not use engine
coolant, antifreeze or windshield washer fluid outside of its
specified function and vehicle location.
Adding engine coolant
Use only Ford Premium Engine Coolant E2FZ-19549-AA (in
Canada, Motorcraft CXC-8-B) or a premium engine coolant that
meets Ford specification ESE-M97B44-A.
²DO NOT USE Ford Extended Life Engine Coolant
F6AZ-19544-AA (orange in color).
²DO NOT USE a DEX-COOLtengine coolant or an equivalent
engine coolant that meets Ford specification WSS-M97B44-D.
Maintenance and care
199
Page 200 of 264
²DO NOT USE alcohol or methanol antifreeze or any engine
coolants mixed with alcohol or methanol antifreeze.
²DO NOT USE supplemental coolant additives in your vehicle.
These additives may harm your engine's cooling system.
²DO NOT MIX recycled coolant and conventional coolant
together in your vehicle. Mixing of engine coolants may harm
your engine's cooling system.
²The use of an improper coolant may harm engine and cooling
system components and may void the warranty of your vehicle's
engine cooling system. If you are unsure which type of coolant
your vehicle requires, contact your local dealer.
Do not put engine coolant in the windshield washer fluid
reservoir. If engine coolant is sprayed onto the windshield, it
could make it difficult to see through the windshield.
When the engine is cool, add a50/50 mixtureof engine coolant and
distilled water to the engine coolant reservoir, until the coolant is at the
ªcold fill levelº or within the ª cold fill rangeº as listed in the engine
coolant reservoir (depending upon application).
²NEVER increase the coolant concentration above 60%.
²NEVER decrease the coolant concentration below 40%.
²Engine coolant concentrations above 60% or below 40% will
decrease the freeze protection characteristics of the engine
coolant and may cause engine damage.
Plain water may be added in an emergency, but youmustreplace it with
a 50/50 mixture of engine coolant and distilled water as soon as possible.
Check the coolant level in the reservoir before you drive your vehicle the
next few times (with the engine cool). If necessary, add a50/50
mixtureof engine coolant and distilled water to the engine coolant
reservoir until the coolant level is at the ªcold fill levelº or within the
ªcold fill rangeº as listed on the reservoir (depending upon application).
Have your dealer check the engine cooling system for leaks if you have
to add more than 1.0 liter (1.0 quart) of engine coolant per month.
Maintenance and care
200
Page 202 of 264
²NEVER increase the coolant concentration above 60%.
²Increased engine coolant concentrations above 60% will
decrease the freeze protection characteristics of the engine
coolant and may cause engine damage.
Vehicles driven year-round in non-extreme climates should use a 50/50
mixture of engine coolant and distilled water for optimum freeze
protection.
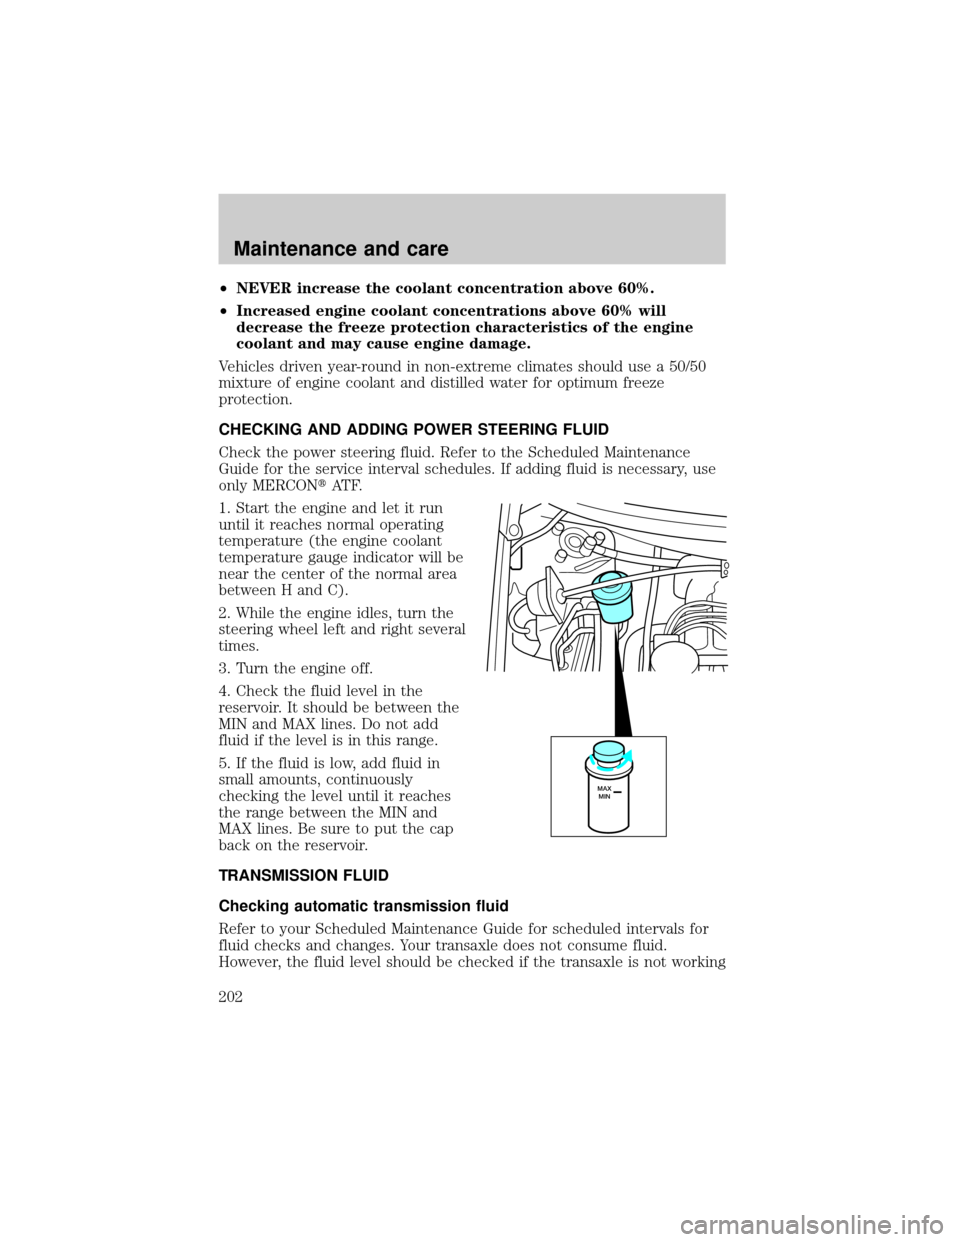
CHECKING AND ADDING POWER STEERING FLUID
Check the power steering fluid. Refer to the Scheduled Maintenance
Guide for the service interval schedules. If adding fluid is necessary, use
only MERCONtAT F.
1. Start the engine and let it run
until it reaches normal operating
temperature (the engine coolant
temperature gauge indicator will be
near the center of the normal area
between H and C).
2. While the engine idles, turn the
steering wheel left and right several
times.
3. Turn the engine off.
4. Check the fluid level in the
reservoir. It should be between the
MIN and MAX lines. Do not add
fluid if the level is in this range.
5. If the fluid is low, add fluid in
small amounts, continuously
checking the level until it reaches
the range between the MIN and
MAX lines. Be sure to put the cap
back on the reservoir.
TRANSMISSION FLUID
Checking automatic transmission fluid
Refer to your Scheduled Maintenance Guide for scheduled intervals for
fluid checks and changes. Your transaxle does not consume fluid.
However, the fluid level should be checked if the transaxle is not working
MAX
MIN
Maintenance and care
202
Page 203 of 264
properly, i.e., if the transaxle slips or shifts slowly or if you notice some
sign of fluid leakage.
Automatic transmission fluid expands when warmed. To obtain an
accurate fluid check, drive the vehicle until it is warmed up
(approximately 30 km [20 miles]). If your vehicle has been
operated for an extended period at high speeds, in city traffic
during hot weather or pulling a trailer, the vehicle should be
turned off for about 30 minutes to allow fluid to cool before
checking.
1. Drive the vehicle 30 km (20 miles) or until it reaches normal operating
temperature.
2. Park the vehicle on a level surface and engage the parking brake.
3. With the parking brake engaged and your foot on the brake pedal,
start the engine and move the gearshift lever through all of the gear
ranges. Allow sufficient time for each gear to engage.
4. Latch the gearshift lever in P (Park) and leave the engine running.
5. Remove the dipstick, wiping it clean with a clean, dry lint free rag.
6. Install the dipstick making sure it is fully seated in the filler tube.
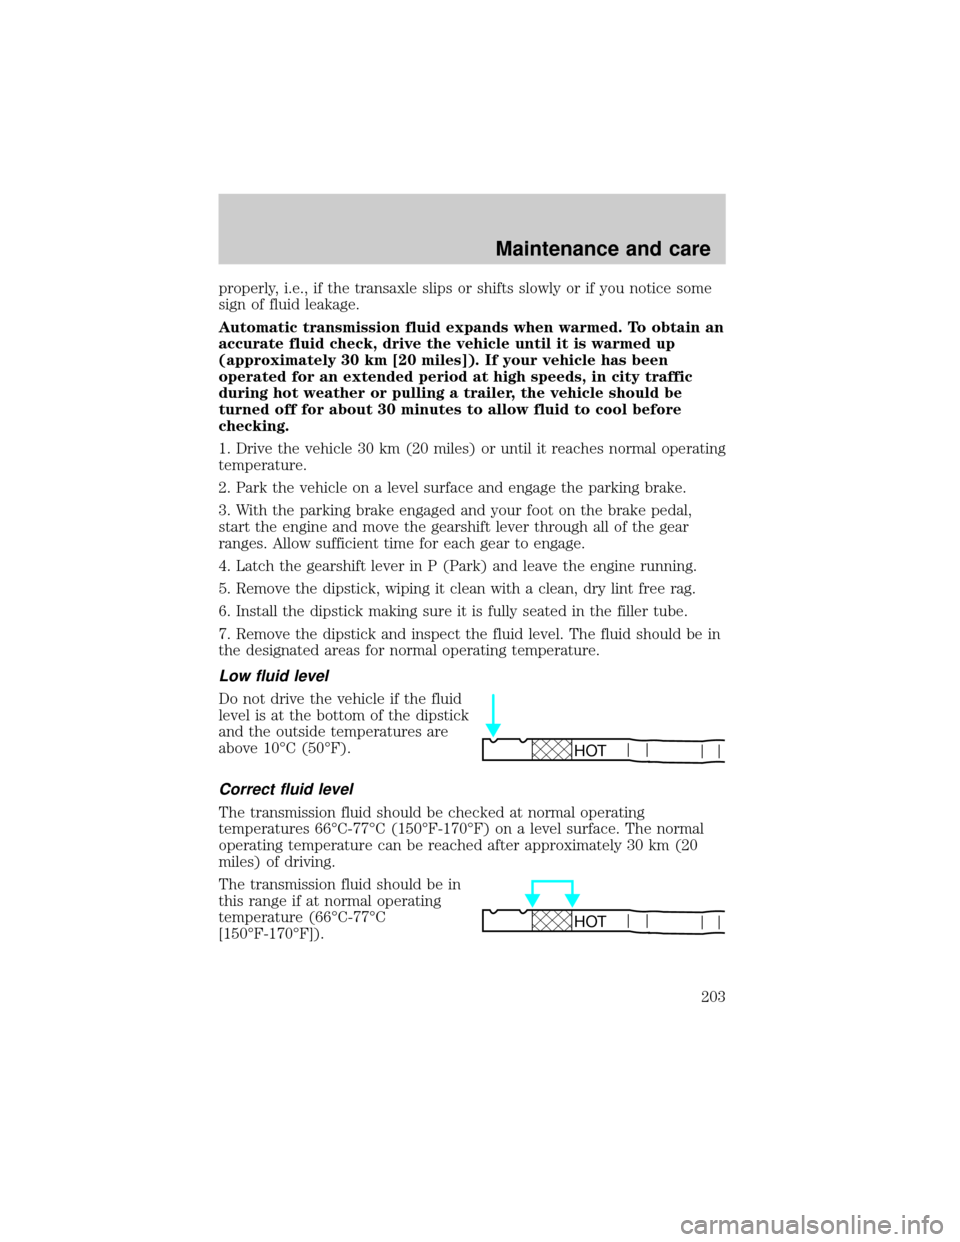
7. Remove the dipstick and inspect the fluid level. The fluid should be in
the designated areas for normal operating temperature.
Low fluid level
Do not drive the vehicle if the fluid
level is at the bottom of the dipstick
and the outside temperatures are
above 10ÉC (50ÉF).
Correct fluid level
The transmission fluid should be checked at normal operating
temperatures 66ÉC-77ÉC (150ÉF-170ÉF) on a level surface. The normal
operating temperature can be reached after approximately 30 km (20
miles) of driving.
The transmission fluid should be in
this range if at normal operating
temperature (66ÉC-77ÉC
[150ÉF-170ÉF]).
HOT
HOT
Maintenance and care
203
Page 205 of 264
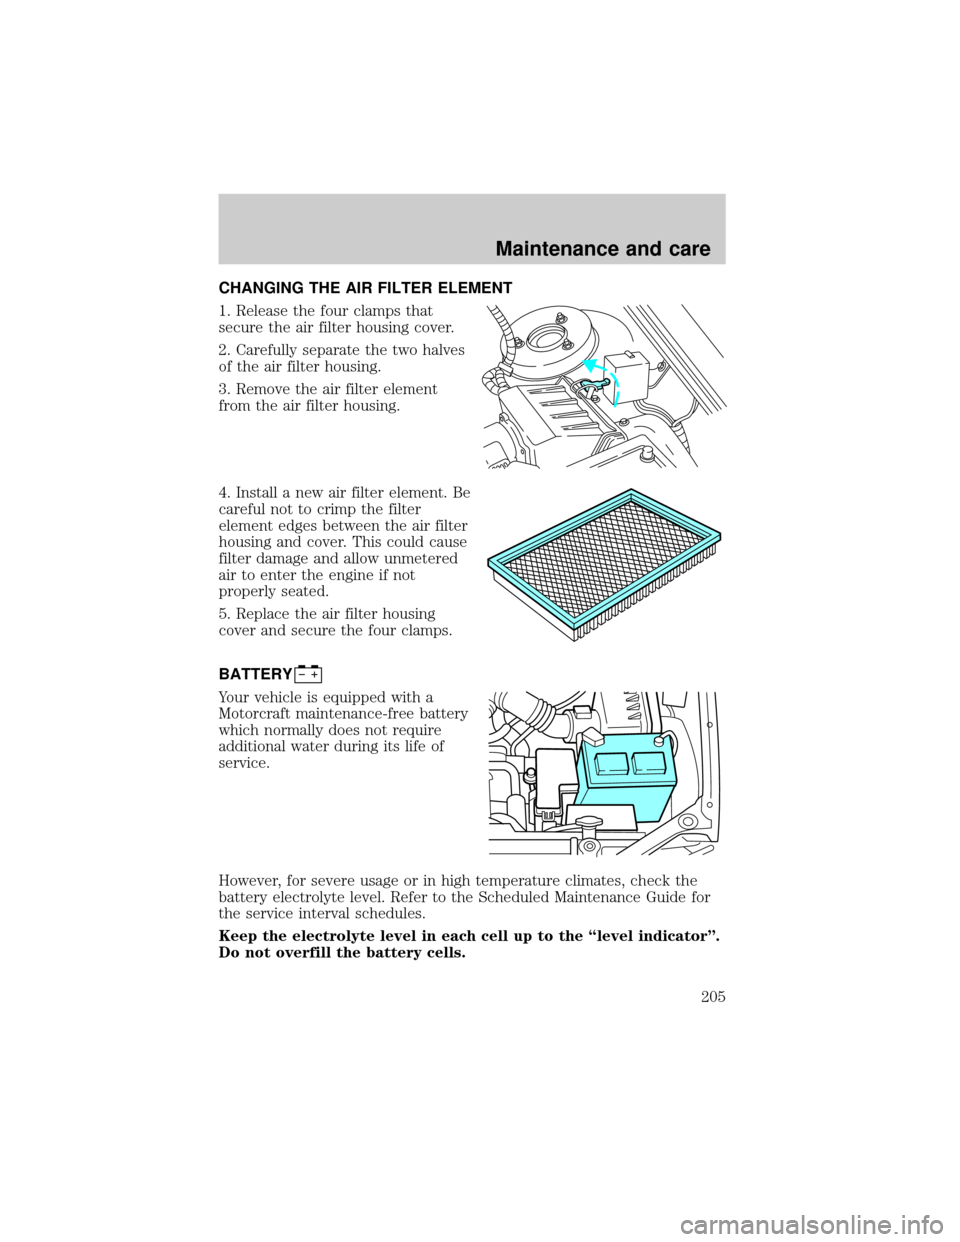
CHANGING THE AIR FILTER ELEMENT
1. Release the four clamps that
secure the air filter housing cover.
2. Carefully separate the two halves
of the air filter housing.
3. Remove the air filter element
from the air filter housing.
4. Install a new air filter element. Be
careful not to crimp the filter
element edges between the air filter
housing and cover. This could cause
filter damage and allow unmetered
air to enter the engine if not
properly seated.
5. Replace the air filter housing
cover and secure the four clamps.
BATTERY
Your vehicle is equipped with a
Motorcraft maintenance-free battery
which normally does not require
additional water during its life of
service.
However, for severe usage or in high temperature climates, check the
battery electrolyte level. Refer to the Scheduled Maintenance Guide for
the service interval schedules.
Keep the electrolyte level in each cell up to the ªlevel indicatorº.
Do not overfill the battery cells.
Maintenance and care
205
Page 222 of 264

Habits
²Smooth, moderate operation can yield up to 10% savings in fuel.
²Steady speeds without stopping will usually give the best fuel
economy.
²Idling for long periods of time (greater than one minute) may waste
fuel.
²Anticipate stopping; slowing down may eliminate the need to stop.
²Sudden or hard accelerations may reduce fuel economy.
²Slow down gradually.
²Driving at reasonable speeds (traveling at 88 km/h [55 mph] uses 15%
less fuel than traveling at 105 km/h [65 mph]).
²Revving the engine before turning it off may reduce fuel economy.
²Using the air conditioner or defroster may reduce fuel economy.
²You may want to turn off the speed control in hilly terrain if
unnecessary shifting between third and fourth gear occurs.
Unnecessary shifting of this type could result in reduced fuel
economy.
²Warming up a vehicle on cold mornings is not required and may
reduce fuel economy.
²Resting your foot on the brake pedal while driving may reduce fuel
economy.
²Combine errands and minimize stop-and-go driving.
Maintenance
²Keep tires properly inflated and use only recommended size.
²Operating a vehicle with the wheels out of alignment will reduce fuel
economy.
²Use recommended engine oil. Refer toLubricant Specifications.
²Perform all regularly scheduled maintenance items. Follow the
recommended maintenance schedule and owner maintenance checks
found in your vehicle Scheduled Maintenance Guide.
Conditions
²Heavily loading a vehicle or towing a trailer may reduce fuel economy
at any speed.
Maintenance and care
222
Page 224 of 264
The scheduled maintenance items listed in the Scheduled Maintenance
Guide are essential to the life and performance of your vehicle and to its
emissions system.
If other than Ford, Motorcraft or Ford-authorized parts are used for
maintenance replacements or for service of components affecting
emission control, such non-Ford parts should be equivalent to genuine
Ford Motor Company parts in performance and durability.
Do not park, idle, or drive your vehicle in dry grass or other dry
ground cover. The emission system heats up the engine
compartment and exhaust system, which can start a fire.
Illumination of the ªService Engine Soonº light, charging system warning
light or the temperature warning light, fluid leaks, strange odors, smoke
or loss of engine power, could indicate that the emission control system
is not working properly.
Exhaust leaks may result in entry of harmful and potentially
lethal fumes into the passenger compartment.
Do not make any unauthorized changes to your vehicle or engine. By
law, vehicle owners and anyone who manufactures, repairs, services,
sells, leases, trades vehicles, or supervises a fleet of vehicles are not
permitted to intentionally remove an emission control device or prevent
it from working. Information about your vehicle's emission system is on
the Vehicle Emission Control Information Decal located on or near the
engine. This decal identifies engine displacement and gives some tune up
specifications.
Please consult your ªWarranty Guideº for complete emission warranty
information.
Readiness for Inspection/Maintenance (I/M) testing
In some localities, it may be a legal requirement to pass an I/M test of
the on-board diagnostics system. If your ªCheck Engine/Service Engine
Soonº light is on, refer to the description in theWarning Lights and
Chimessection of theInstrumentationchapter. Your vehicle may not
pass the I/M test with the ªCheck Engine/Service Engine Soonº light on.
If the vehicle's powertrain system or its battery has just been serviced,
the on-board diagnostics system is reset to a ªnot ready for I/M testº
Maintenance and care
224
Page 225 of 264

condition. To ready the on-board diagnostics system for I/M testing,
follow the procedure described below:
1. Allow the engine to cool to ambient temperature (the engine coolant
temperature gauge indicator will point to C).
2. Start the engine and let it run until it reaches normal operating
temperature (the engine coolant temperature gauge indicator will be
near the center of the normal area between H and C).
3. Accelerate the vehicle to 88 km/h (55 mph), then quickly release the
accelerator pedal completely for at least six seconds.
4. Quickly depress the accelerator pedal for a moment, then drive the
vehicle at a speed of 86 to 96 km/h (53 to 60 mph) for at least five
minutes.
5. Bring the vehicle to a complete stop.
6. Accelerate the vehicle to 55 km/h (35 mph), and maintain the speed
for 20 seconds.
7. Repeat steps five and six at least three times.
8. Accelerate the vehicle to 88 km/h (55 mph), and maintain the speed
for at least three minutes.
9. Bring the vehicle to a complete stop and turn the engine off.
10. Repeat steps one through nine at least one more time.
If step one through eight are interrupted, repeat the preceding step. Any
safe driving mode is acceptable between steps. Once started, do not turn
off the engine until step seven is completed.
EXTERIOR BULBS
Replacing exterior bulbs
It is a good idea to check the operation of the following lights frequently:
²Headlamps
²Turn signals
²Cornering lamps
²High-mount brakelamp
²Tail lamps
²Brakelamps
²Backup lamps
²License plate lamps
Maintenance and care
225