length Mercury Villager 1999 Owner's Manuals
[x] Cancel search | Manufacturer: MERCURY, Model Year: 1999, Model line: Villager, Model: Mercury Villager 1999Pages: 264, PDF Size: 2.19 MB
Page 86 of 264
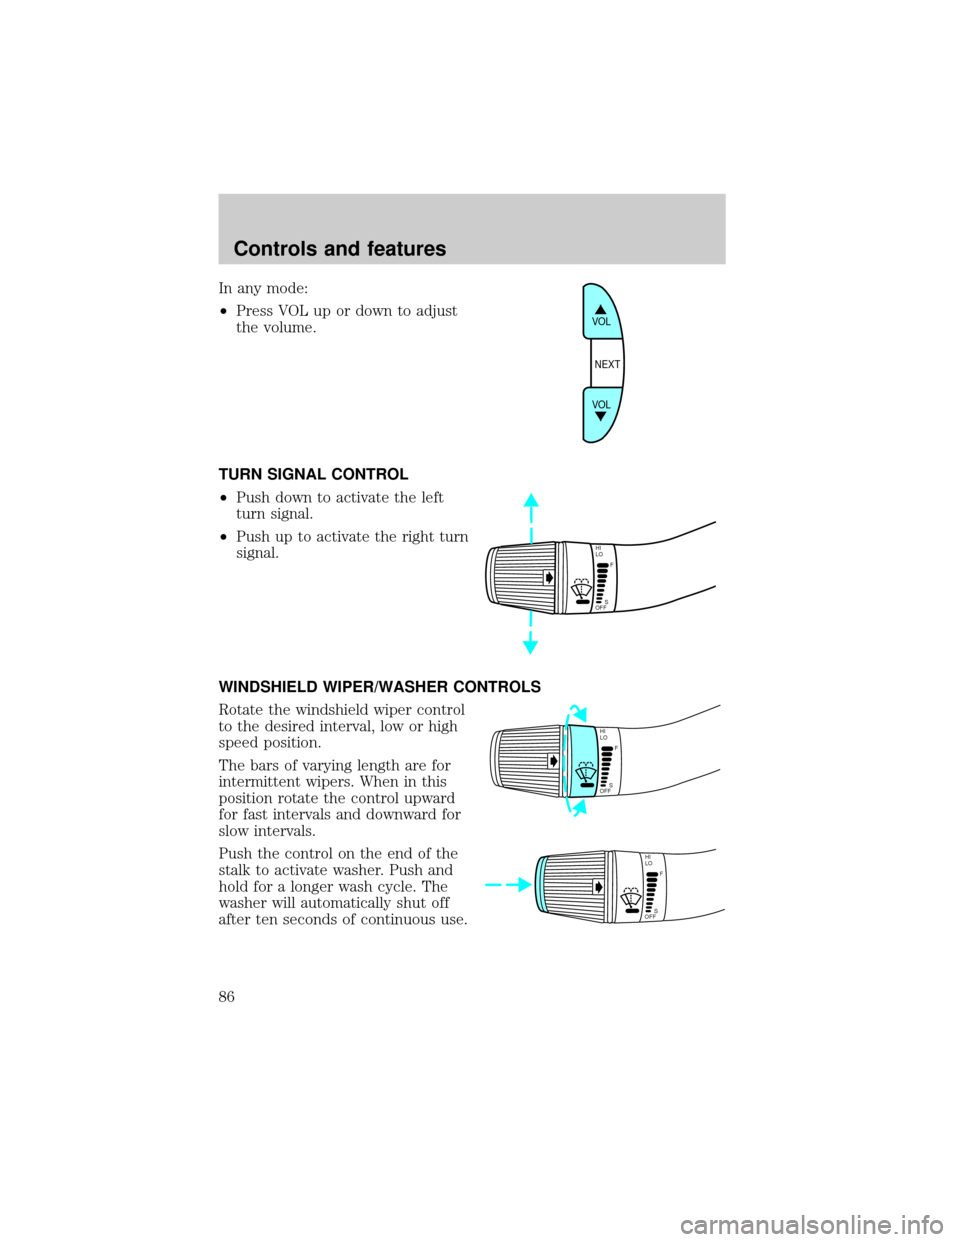
In any mode:
²Press VOL up or down to adjust
the volume.
TURN SIGNAL CONTROL
²Push down to activate the left
turn signal.
²Push up to activate the right turn
signal.
WINDSHIELD WIPER/WASHER CONTROLS
Rotate the windshield wiper control
to the desired interval, low or high
speed position.
The bars of varying length are for
intermittent wipers. When in this
position rotate the control upward
for fast intervals and downward for
slow intervals.
Push the control on the end of the
stalk to activate washer. Push and
hold for a longer wash cycle. The
washer will automatically shut off
after ten seconds of continuous use.
VOL
NEXT
VOL
HI
LO
F
S
OFF
HI
LO
F
S
OFF
HI
LO
F
S
OFF
Controls and features
86
Page 96 of 264

1. Press and hold the desired HomeLinktbutton.Do NOTrelease until
step 4has been completed.
2. When the indicator light begins to flash slowly (after 20 seconds),
position the hand-held transmitter 5±14 cm (2 to 5 inches) away from
the HomeLinktsurface.
3. Press and hold the hand-held transmitter button.
4. The HomeLinktindicator light will flash, first slowly and then rapidly.
When the indicator light begins to flash rapidly, release both buttons.
The previous device has now been erased and the new device can be
activated by pushing the HomeLinktbutton that has just been
programmed.
Operating TravelNoteT
TravelNotetrecords and stores messages for up to three minutes in total
length with simple controls. When you get an idea or remember
something important while you're driving, you don't have to try to
scribble it down or pull off the side of the road. All you have to do is
push a button and begin speaking.
To record a message:
1. Press and release theREC
buttonone timeto start recording.
(An audible tone will sound,
confirming the onset of recording).
2. Press and release theREC
buttona second timeto end
recording. (An audible tone will sound again, confirming the end of
recording and the red indicator light will turn off.)
3. While a message is being recorded, the indicator light will be a solid
red.
4. If the message exceeds the available memory space, two tones will
sound, the indicator light will flash amber and recording will end.
The indicator light will flash amber and an ªerrorº tone will sound if the
RECbutton is pressed when memory is full.
REC DEL PLAY
Controls and features
96
Page 126 of 264
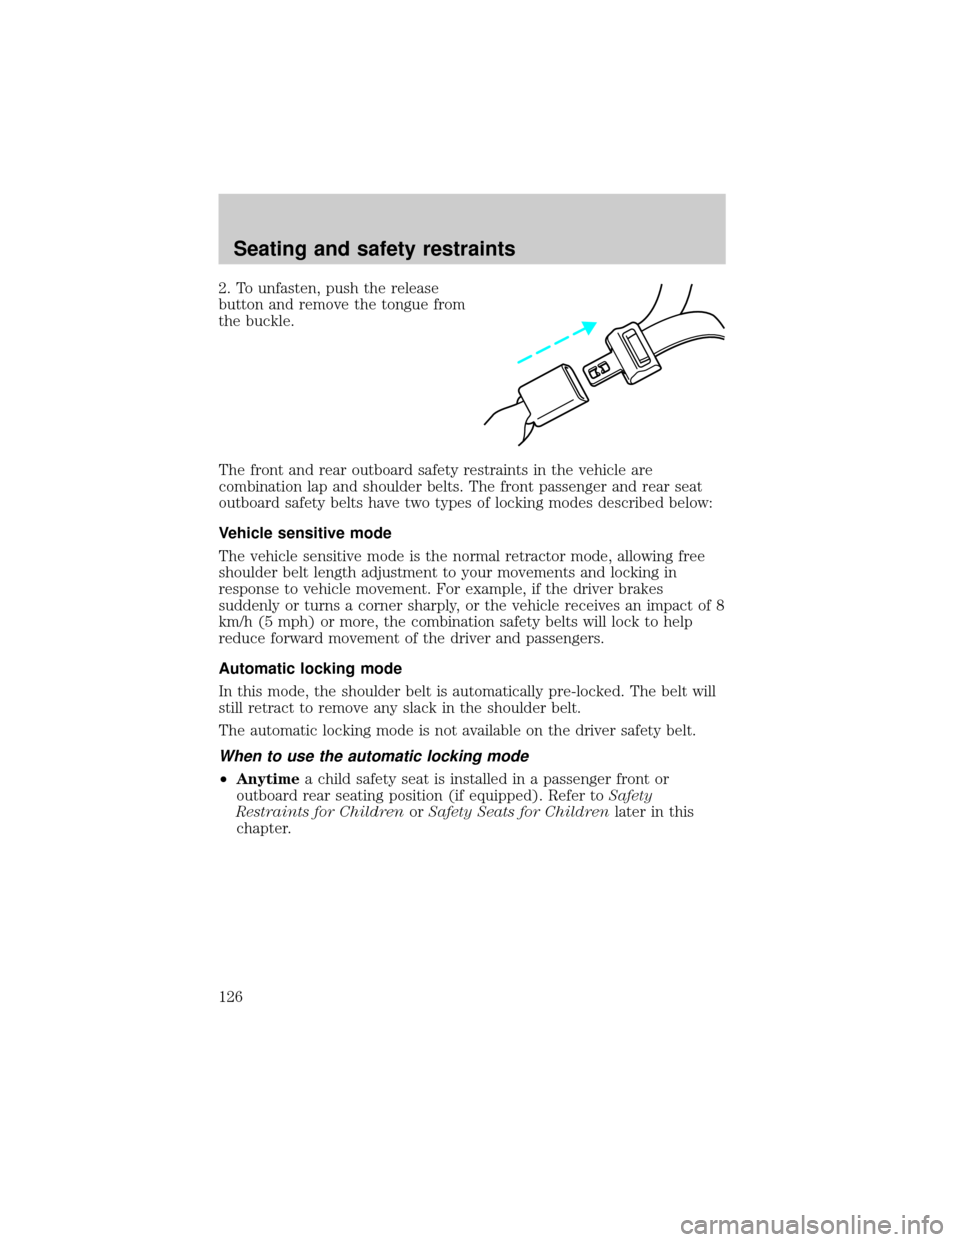
2. To unfasten, push the release
button and remove the tongue from
the buckle.
The front and rear outboard safety restraints in the vehicle are
combination lap and shoulder belts. The front passenger and rear seat
outboard safety belts have two types of locking modes described below:
Vehicle sensitive mode
The vehicle sensitive mode is the normal retractor mode, allowing free
shoulder belt length adjustment to your movements and locking in
response to vehicle movement. For example, if the driver brakes
suddenly or turns a corner sharply, or the vehicle receives an impact of 8
km/h (5 mph) or more, the combination safety belts will lock to help
reduce forward movement of the driver and passengers.
Automatic locking mode
In this mode, the shoulder belt is automatically pre-locked. The belt will
still retract to remove any slack in the shoulder belt.
The automatic locking mode is not available on the driver safety belt.
When to use the automatic locking mode
²Anytimea child safety seat is installed in a passenger front or
outboard rear seating position (if equipped). Refer toSafety
Restraints for ChildrenorSafety Seats for Childrenlater in this
chapter.
Seating and safety restraints
126
Page 129 of 264
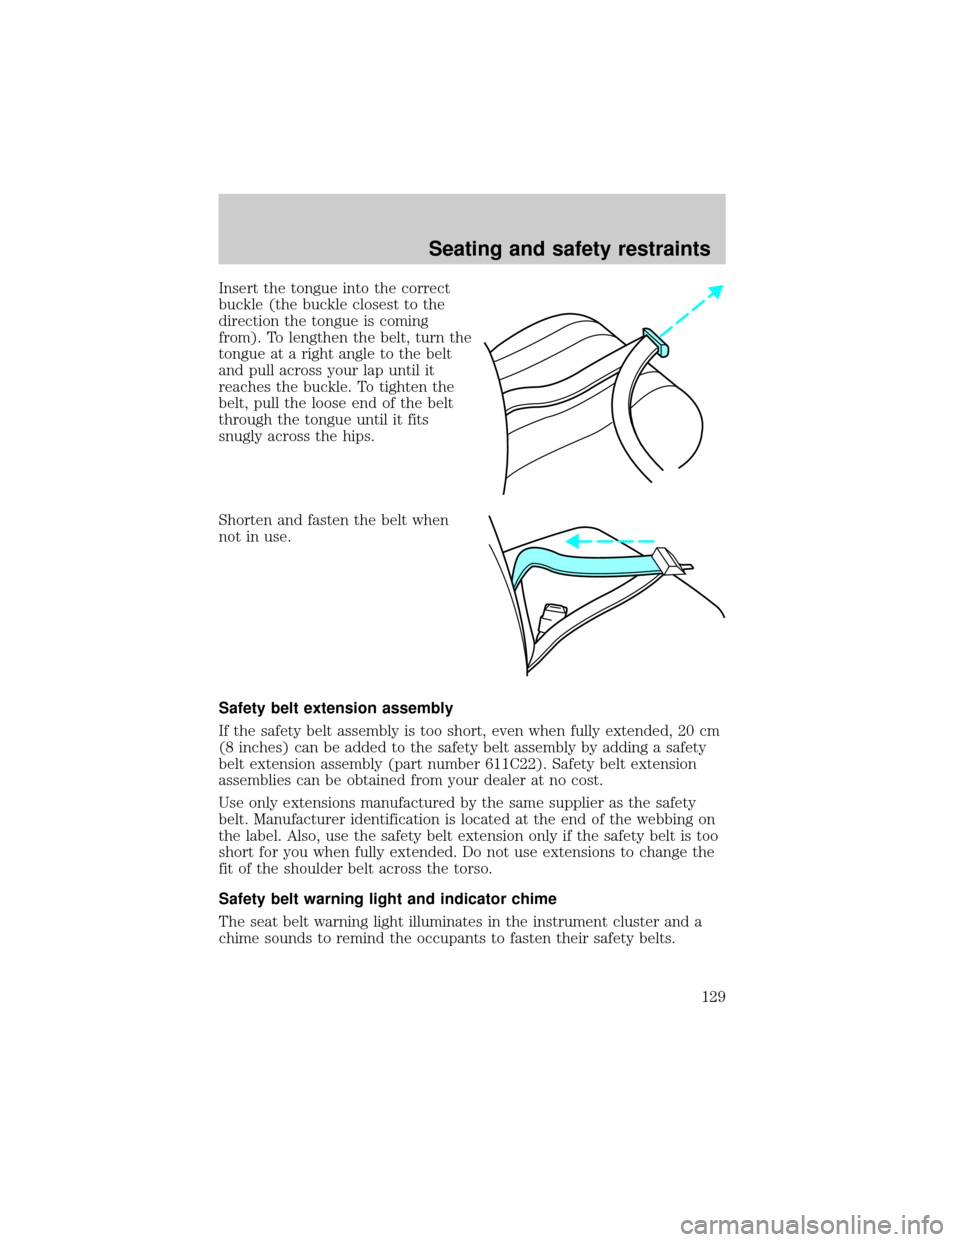
Insert the tongue into the correct
buckle (the buckle closest to the
direction the tongue is coming
from). To lengthen the belt, turn the
tongue at a right angle to the belt
and pull across your lap until it
reaches the buckle. To tighten the
belt, pull the loose end of the belt
through the tongue until it fits
snugly across the hips.
Shorten and fasten the belt when
not in use.
Safety belt extension assembly
If the safety belt assembly is too short, even when fully extended, 20 cm
(8 inches) can be added to the safety belt assembly by adding a safety
belt extension assembly (part number 611C22). Safety belt extension
assemblies can be obtained from your dealer at no cost.
Use only extensions manufactured by the same supplier as the safety
belt. Manufacturer identification is located at the end of the webbing on
the label. Also, use the safety belt extension only if the safety belt is too
short for you when fully extended. Do not use extensions to change the
fit of the shoulder belt across the torso.
Safety belt warning light and indicator chime
The seat belt warning light illuminates in the instrument cluster and a
chime sounds to remind the occupants to fasten their safety belts.
Seating and safety restraints
129
Page 141 of 264

Installing child safety seats in the lap belt seating positions
1. Lengthen the lap belt. To lengthen the belt, hold the tongue so that its
bottom is perpendicular to the direction of webbing while sliding the
tongue up the webbing.
2. Place the child safety seat in the center seating position.
3. Route the tongue and webbing through the child seat according to the
child seat manufacturer's instructions.
4. Insert the belt tongue into the proper buckle for the center seating
position until you hear a snap and feel it latch. Make sure the tongue is
securely fastened to the buckle by pulling on tongue.
5. Push down on the child seat while pulling on the loose end of the lap
belt webbing to tighten the belt.
6. Before placing the child into the child seat, forcibly tilt the child seat
from side to side and in forward direction to make sure that the seat is
held securely in place. If the child seat moves excessively, repeat steps 5
through 6, or properly install the child seat in a different position.
Attaching safety seats with tether straps
Some manufacturers make safety seats that include a tether strap that
goes over the back of the vehicle seat and attaches to an anchoring
point. Other manufacturers offer the tether strap as an accessory.
Contact the manufacturer of your child safety seat for information about
ordering a tether strap.
Children should be placed in the rear in an appropriate child
safety seat that is properly secured to the vehicle.
Rear-facing infant seats must always be secured in the rear seat.
In vehicles without a rear seat, a rear-facing infant seat should
be secured in the front seat only if your vehicle does not have a
passenger side air bag or your vehicle is equipped with a passenger air
bag deactivate switch and the switch is turned to ªOFF.º
When using forward-facing child safety seats in vehicles with
only two seating positions so the forward-facing child safety seat
cannot be placed in the rear of the vehicle, move the passenger seat as
far back from the instrument panel as possible.
Seating and safety restraints
141
Page 147 of 264

Third row bench in second row position
To attach a tether strap to a lap/shoulder belt:
1. Route the tether strap under the
head restraint and between the
head restraint supports.
2. Hook the tether strap hook into
the large hole at the end of the seat
belt tongue of the lap/shoulder belt
directly behind the child seat
position.
3. Adjust the tether strap length until the hook is about one foot behind
the seatback.
4. Pull the shoulder belt until all of the belt is fully extended and a click
is heard. At this time the belt is in automatic locking mode (child
restraint mode).
5. Let the retractor wind up the slack from the lap/shoulder belt. A
clicking sound should be heard as the belt retracts, indicating that the
retractor is in automatic locking mode. Tighten the tether strap to
remove any slack.
6. Before placing a child in the child restraint, use force to tilt the child
restraint from side to side and tug it forward to make sure it is securely
held in place.
7. Check that the retractor is in automatic locking mode by trying to pull
more belt out of the retractor. If you cannot pull any more belt webbing
out of the retractor, the belt is in automatic locking mode.
8. Check to make sure the child restraint is properly secured prior to
each use. If the belt is not locked, repeat steps 4 through 7.
For additional important safety information on the proper use of
seatbelts, child seats and infant seats, please read the entireSeating
and safety restraintschapter in this owner's guide.
Seating and safety restraints
147
Page 162 of 264
automatic overdrive transaxle. When your vehicle cruises at a constant
speed for any length of time, this fourth gear will increase your fuel
economy.
Overdrive may not be appropriate
for certain terrains. If the transaxle
shifts back and forth between third
and fourth gears while you are
driving hilly roads or if your vehicle
requires additional power for climbing hills, press the O/D OFF switch.
Each time the vehicle is started, the transaxle will automatically return
to normal overdrive mode.
If your vehicle is on an extremely slippery surface, the Transaxle Control
Module may receive a signal indicating a rapid increase or decrease in
wheel speed. When the module detects this condition, it will limit the
transaxle operation to Third and Reverse gears. This reduces tire
slippage and protects the transaxle. The transaxle will operate normally
in Reverse, but will lack power during acceleration in Drive.
If this happens;
1. Stop your vehicle as soon as possible.
2. Turn the ignition off for three seconds.
3. Restart the vehicle.
If the condition still exists, contact your dealer as soon as possible.
If the O/D OFF indicator light is flashing on and off repeatedly when the
vehicle is started or does not come on when the O/D OFF control is
pressed, there may be a transaxle electronic system malfunction. You
should contact your dealer as soon as possible or damage to the
transaxle could occur.
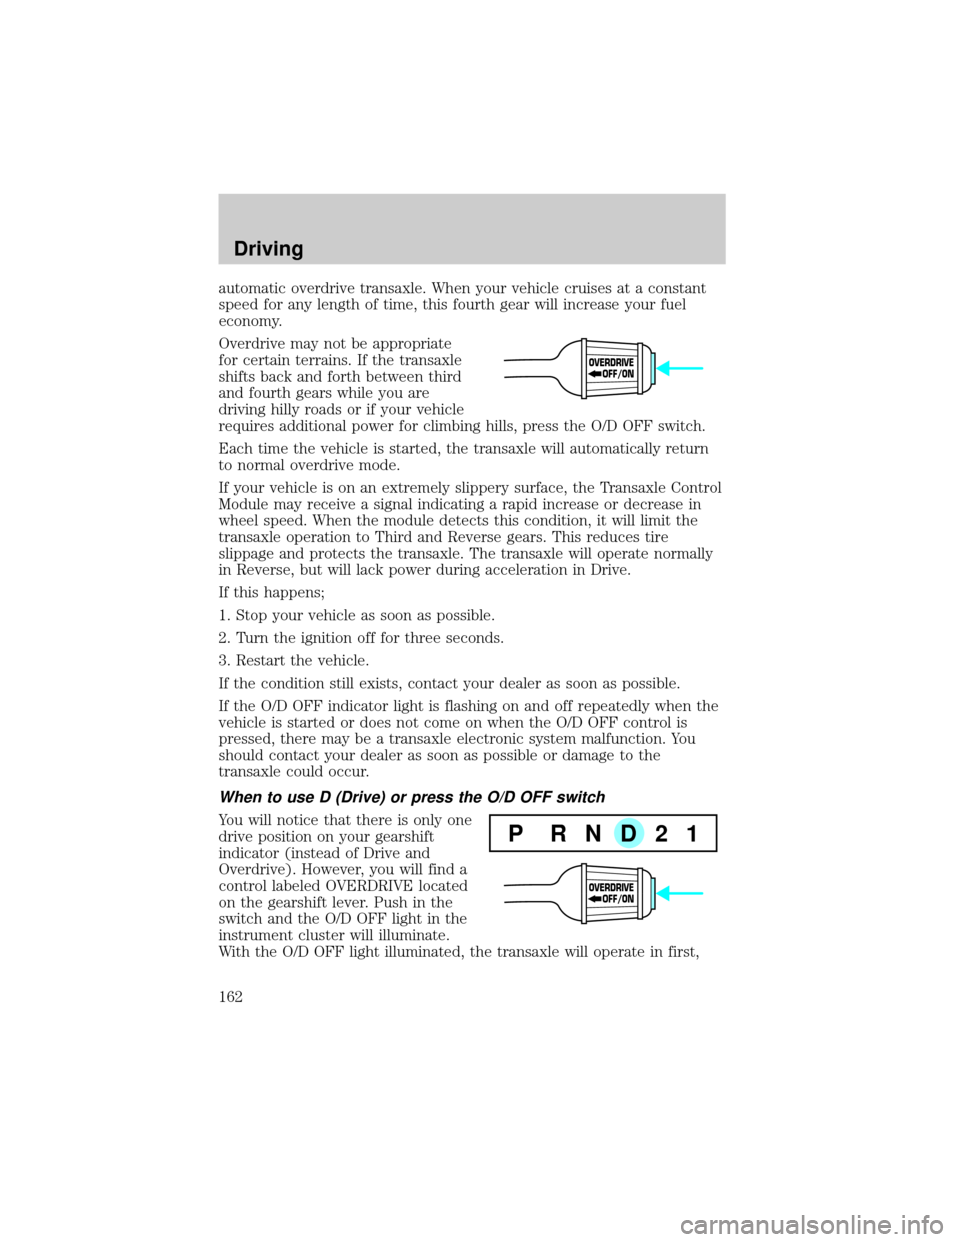
When to use D (Drive) or press the O/D OFF switch
You will notice that there is only one
drive position on your gearshift
indicator (instead of Drive and
Overdrive). However, you will find a
control labeled OVERDRIVE located
on the gearshift lever. Push in the
switch and the O/D OFF light in the
instrument cluster will illuminate.
With the O/D OFF light illuminated, the transaxle will operate in first,
OVERDRIVE
OFF/ON
P RND21
OVERDRIVE
OFF/ON
Driving
162
Page 238 of 264
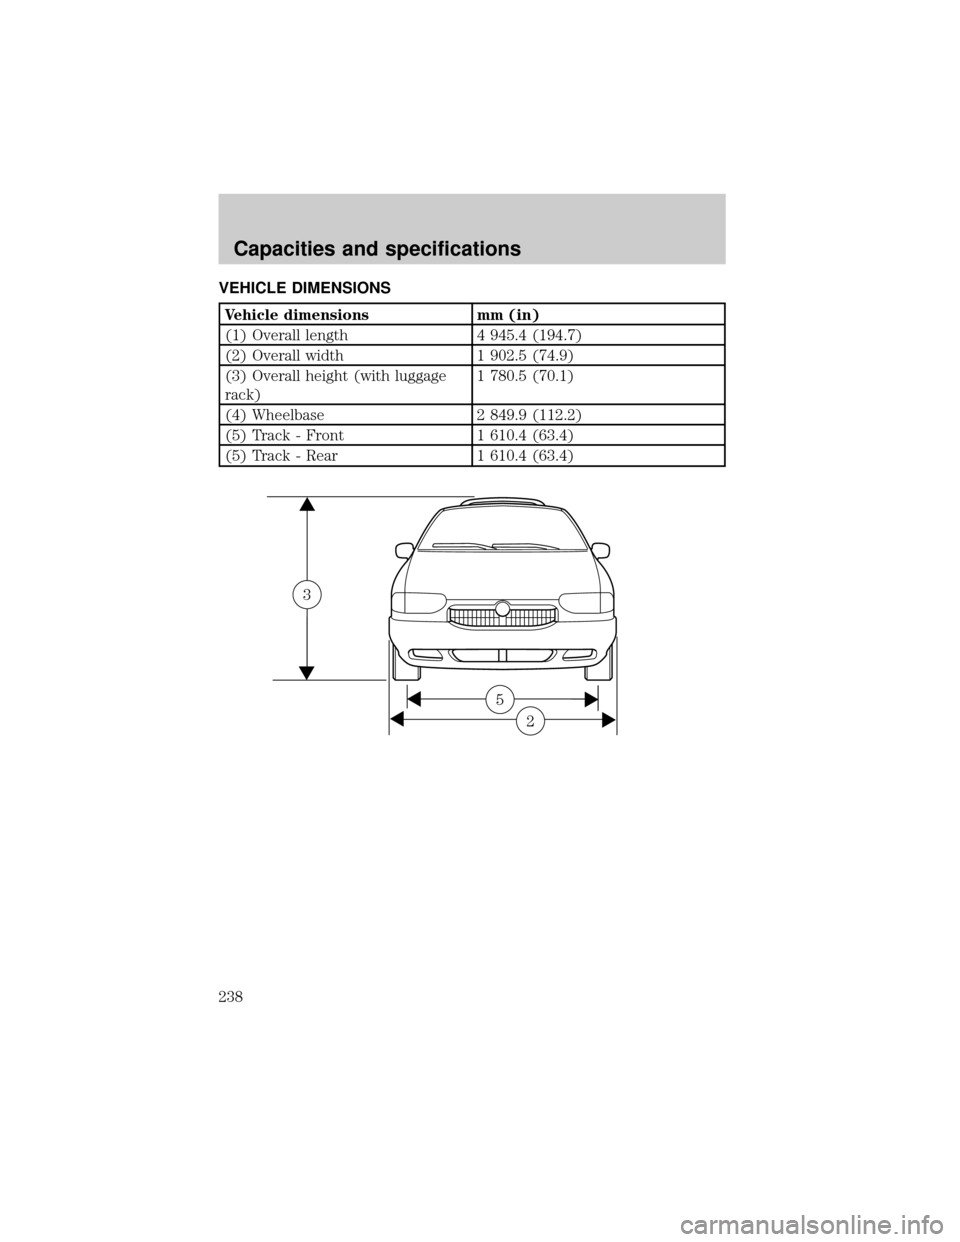
VEHICLE DIMENSIONS
Vehicle dimensions mm (in)
(1) Overall length 4 945.4 (194.7)
(2) Overall width 1 902.5 (74.9)
(3) Overall height (with luggage
rack)1 780.5 (70.1)
(4) Wheelbase 2 849.9 (112.2)
(5) Track - Front 1 610.4 (63.4)
(5) Track - Rear 1 610.4 (63.4)
2
5
3
Capacities and specifications
238