warning Mercury Villager 1999 s User Guide
[x] Cancel search | Manufacturer: MERCURY, Model Year: 1999, Model line: Villager, Model: Mercury Villager 1999Pages: 264, PDF Size: 2.19 MB
Page 136 of 264
Never let a passenger hold a child on his or her lap while the
vehicle is moving. The passenger cannot protect the child from
injury in a collision.
Always follow the instructions and warnings that come with any infant or
child restraint you might use.
When possible, always place children under age 12 in the rear seat of
your vehicle. Accident statistics suggest that children are safer when
properly restrained in the rear seating positions than in the front seating
position.
Children and safety belts
If the child is the proper size, restrain the child in a safety seat.
Children who are too large for child safety seats (as specified by your
child safety seat manufacturer) should always wear safety belts.
Follow all the important safety restraint and air bag precautions that
apply to adult passengers in your vehicle.
If the shoulder belt portion of a combination lap and shoulder belt can
be positioned so it does not cross or rest in front of the child's face or
neck, the child should wear the lap and shoulder belt. Moving the child
closer to the center of the vehicle may help provide a good shoulder belt
fit.
Do not leave children, unreliable adults, or pets unattended in
your vehicle.
To improve the fit of lap and shoulder belts on children who have
outgrown child safety seats, Ford recommends use of a belt-positioning
booster seat that is labelled as conforming to all Federal motor vehicle
safety standards. Belt-positioning booster seats raise the child and
provide a shorter, firmer seating cushion that encourages safer seating
posture and better fit of lap and shoulder belts on the child.
A belt-positioning booster should be used if the shoulder belt rests in
front of the child's face or neck, or if the lap belt does not fit snugly on
both thighs, or if the thighs are too short to let the child sit all the way
back on the seat cushion when the lower legs hang over the edge of the
seat cushion. You may wish to discuss the special needs of your child
with your pediatrician.
Seating and safety restraints
136
Page 150 of 264

4. Read all information and warnings
on the child seat cushion and
shoulder safety belt. The child seat
is to be used only by children who:
²are at least one year old
²weigh between 10 and 27 kg (22
and 60 lbs.)
²shoulders must be below the
shoulder harness slots
5. If connected, squeeze the top and the bottom of the right half of the
chest clip and pull to separate both halves and unbuckle the two safety
belt tongues from the crotch belt buckle.
6. Place the child on the child seat and position the shoulder belts over
each shoulder.
7. Insert either the left or the right
safety belt tongue into the single
opening of the crotch safety belt
buckle (it doesn't matter which
tongue is inserted first). Insert other
tongue. The color green must
appear in the indicator window on
the crotch safety belt buckle when
buckled. Allow belts to retract and
fit snugly.
8. Fasten both halves of the chest
clip below the child's shoulders and
adjust it to comfortably hold the
shoulder belts in place on the child's
chest. The color green must appear
in the indicator window when fastened.
9. Pull the shoulder belts toward you to make sure the crotch safety belt
buckle is properly fastened and the retractor is locked.
Seating and safety restraints
150
Page 157 of 264
BRAKES
Your service brakes are self-adjusting. Refer to the scheduled
maintenance guide for scheduled maintenance.
Occasional brake noise is normal and often does not indicate a
performance concern with the vehicle's brake system. In normal
operation, automotive brake systems may emit occasional or intermittent
squeal or groan noises when the brakes are applied. Such noises are
usually heard during the first few brake applications in the morning;
however, they may be heard at any time while braking and can be
aggravated by environmental conditions such as cold, heat, moisture,
road dust, salt or mud. If a ªmetal-to-metal,º ªcontinuous grindingº or
ªcontinuous squealº sound is present while braking, the brake linings
may be worn-out and should be inspected by a qualified service
technician.
Anti-lock brake system (ABS) (if equipped)
On vehicles equipped with an anti-lock braking system (ABS), a noise
from the hydraulic pump motor and pulsation in the pedal may be
observed during ABS braking events. Pedal pulsation coupled with noise
while braking under panic conditions or on loose gravel, bumps, wet or
snowy roads is normal and indicates proper functioning of the vehicle's
anti-lock brake system. The ABS performs a self-check at approximately
17 km/h (10 mph) after you start the engine and begin to drive away. A
brief mechanical noise may be heard during this test. This is normal. If a
malfunction is found, the ABS warning light will come on. If the vehicle
has continuous vibration or shudder in the steering wheel while braking,
the vehicle should be inspected by a qualified service technician.
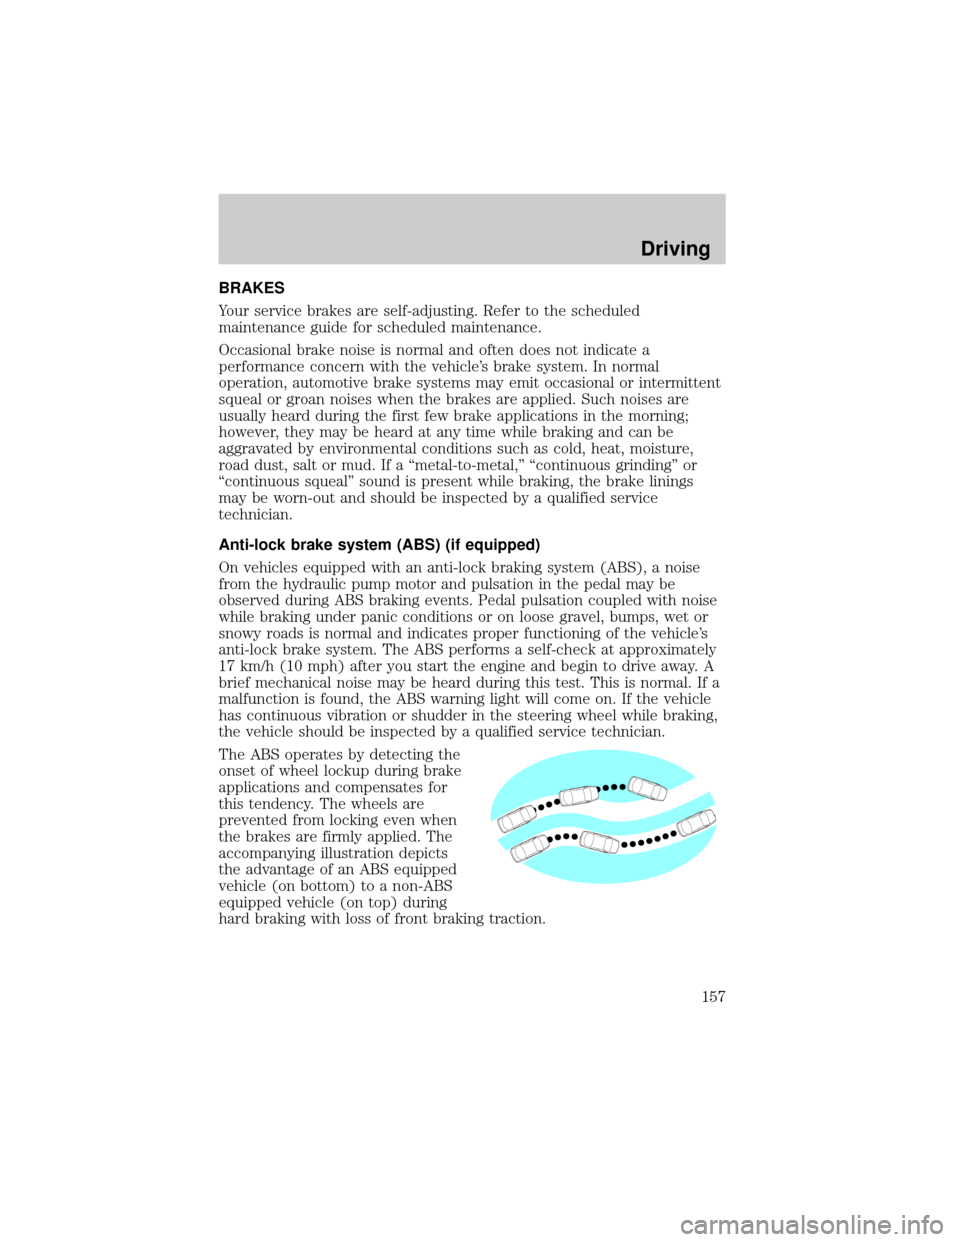
The ABS operates by detecting the
onset of wheel lockup during brake
applications and compensates for
this tendency. The wheels are
prevented from locking even when
the brakes are firmly applied. The
accompanying illustration depicts
the advantage of an ABS equipped
vehicle (on bottom) to a non-ABS
equipped vehicle (on top) during
hard braking with loss of front braking traction.
Driving
157
Page 158 of 264
ABS warning lamp
The
ABSwarning lamp in the instrument cluster momentarily illuminates
when the ignition is turned to the ON position. If the light does not
illuminate momentarily at start up, remains on or continues to flash, the
ABS needs to be serviced.
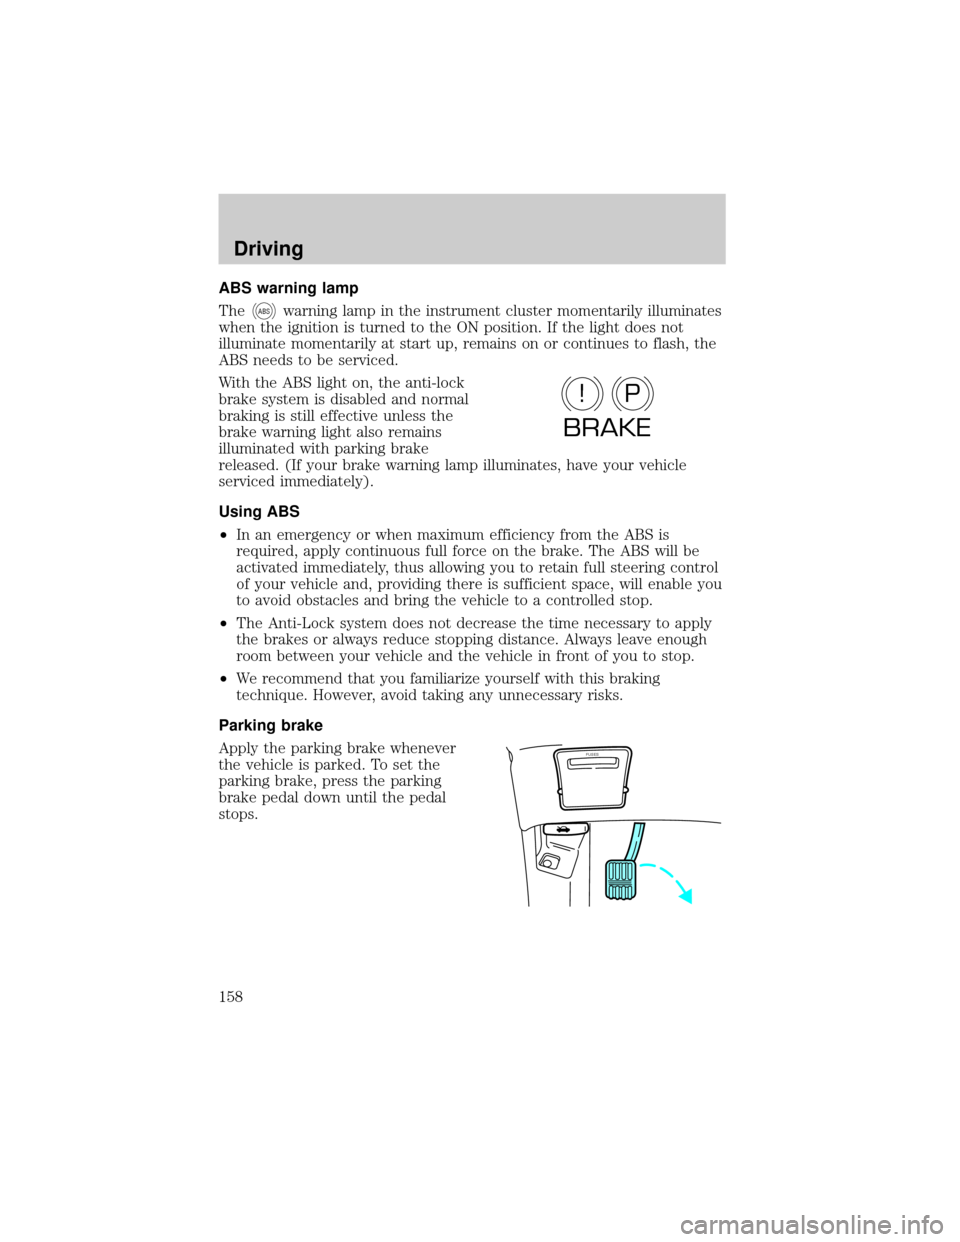
With the ABS light on, the anti-lock
brake system is disabled and normal
braking is still effective unless the
brake warning light also remains
illuminated with parking brake
released. (If your brake warning lamp illuminates, have your vehicle
serviced immediately).
Using ABS
²In an emergency or when maximum efficiency from the ABS is
required, apply continuous full force on the brake. The ABS will be
activated immediately, thus allowing you to retain full steering control
of your vehicle and, providing there is sufficient space, will enable you
to avoid obstacles and bring the vehicle to a controlled stop.
²The Anti-Lock system does not decrease the time necessary to apply
the brakes or always reduce stopping distance. Always leave enough
room between your vehicle and the vehicle in front of you to stop.
²We recommend that you familiarize yourself with this braking
technique. However, avoid taking any unnecessary risks.
Parking brake
Apply the parking brake whenever
the vehicle is parked. To set the
parking brake, press the parking
brake pedal down until the pedal
stops.
P!
BRAKE
FUSES
Driving
158
Page 159 of 264
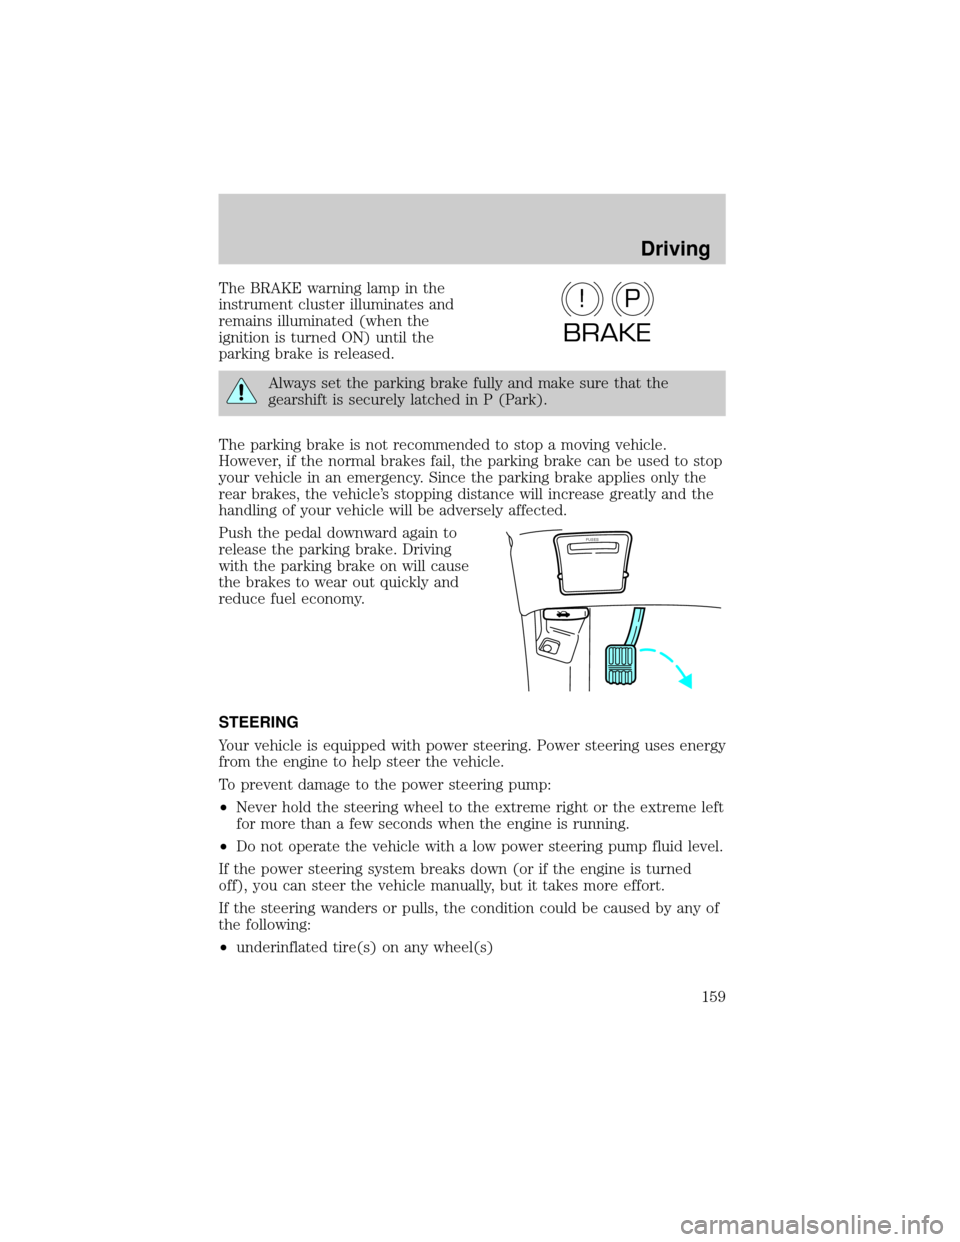
The BRAKE warning lamp in the
instrument cluster illuminates and
remains illuminated (when the
ignition is turned ON) until the
parking brake is released.
Always set the parking brake fully and make sure that the
gearshift is securely latched in P (Park).
The parking brake is not recommended to stop a moving vehicle.
However, if the normal brakes fail, the parking brake can be used to stop
your vehicle in an emergency. Since the parking brake applies only the
rear brakes, the vehicle's stopping distance will increase greatly and the
handling of your vehicle will be adversely affected.
Push the pedal downward again to
release the parking brake. Driving
with the parking brake on will cause
the brakes to wear out quickly and
reduce fuel economy.
STEERING
Your vehicle is equipped with power steering. Power steering uses energy
from the engine to help steer the vehicle.
To prevent damage to the power steering pump:
²Never hold the steering wheel to the extreme right or the extreme left
for more than a few seconds when the engine is running.
²Do not operate the vehicle with a low power steering pump fluid level.
If the power steering system breaks down (or if the engine is turned
off), you can steer the vehicle manually, but it takes more effort.
If the steering wanders or pulls, the condition could be caused by any of
the following:
²underinflated tire(s) on any wheel(s)
P!
BRAKE
FUSES
Driving
159
Page 160 of 264
²high crown in center of road
²high crosswinds
²wheels out of alignment
²loose or worn components in steering linkage
AUTOMATIC TRANSAXLE OPERATION
Brake-shift interlock
This vehicle is equipped with a brake-shift interlock feature that prevents
the gearshift lever from being moved from P (Park) unless the brake
pedal is depressed.
If you cannot move the gearshift lever out of P (Park) with the brake
pedal depressed:
1. Apply the parking brake, turn ignition key to OFF/LOCK, then remove
the key.
2. Insert the key and turn it to ACC. Apply the brake pedal and shift to
N (Neutral).
3. Start the vehicle.
Do not drive your vehicle until you verify that the brakelamps
are working.
If your vehicle gets stuck in mud or snow it may be rocked out by
shifting from forward and reverse gears, stopping between shifts, in a
steady pattern. Press lightly on the accelerator in each gear.
Do not rock the vehicle for more than a few minutes. The
transmission and tires may be damaged or the engine may
overheat.
Always set the parking brake fully and make sure the gearshift is
latched in P (Park). Turn off the ignition whenever you leave
your vehicle.
If the parking brake is fully released, but the brake warning lamp
remains illuminated, the brakes may not be working properly.
See your dealer or a qualified service technician.
Driving
160
Page 175 of 264
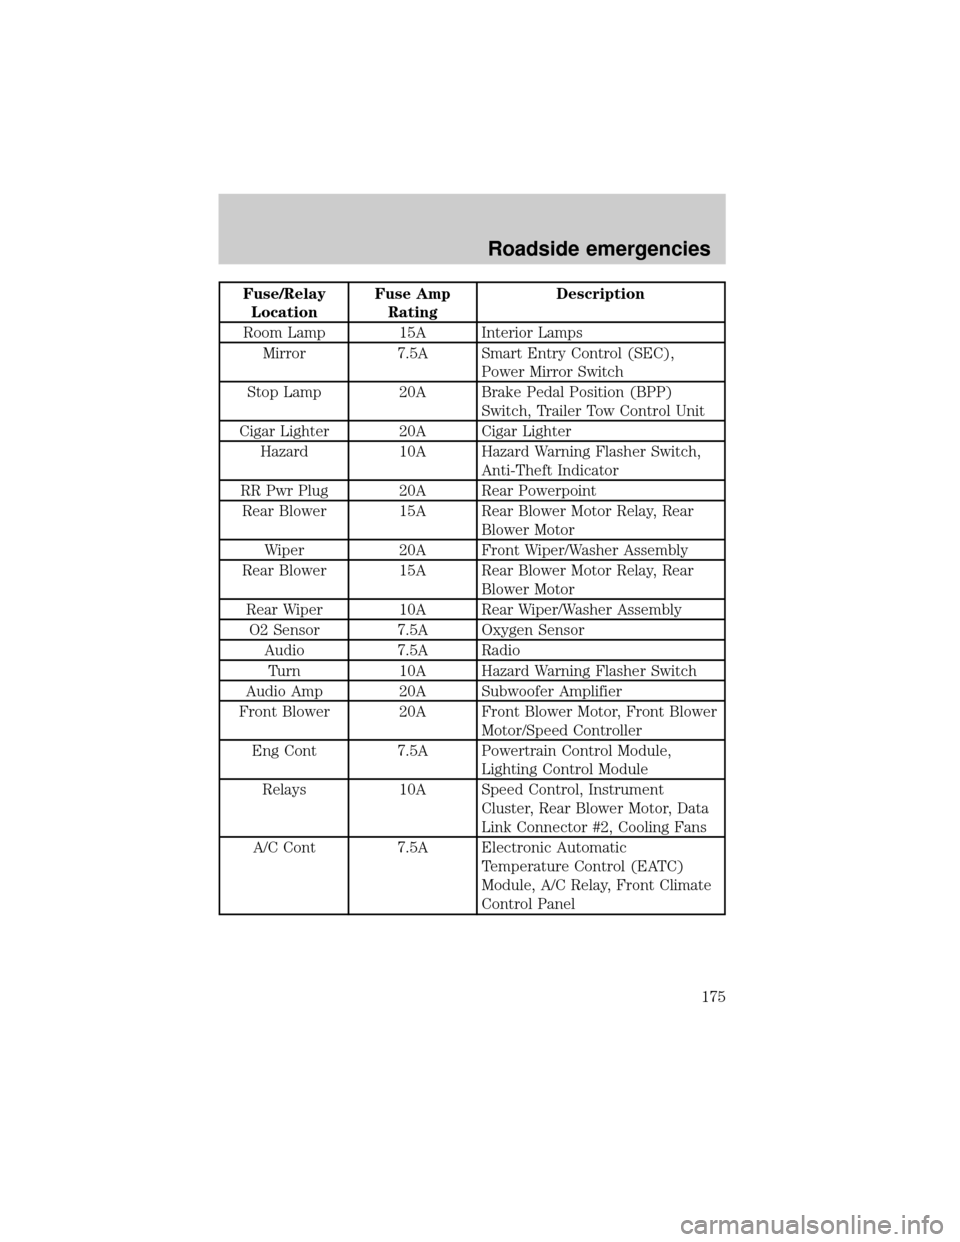
Fuse/Relay
LocationFuse Amp
RatingDescription
Room Lamp 15A Interior Lamps
Mirror 7.5A Smart Entry Control (SEC),
Power Mirror Switch
Stop Lamp 20A Brake Pedal Position (BPP)
Switch, Trailer Tow Control Unit
Cigar Lighter 20A Cigar Lighter
Hazard 10A Hazard Warning Flasher Switch,
Anti-Theft Indicator
RR Pwr Plug 20A Rear Powerpoint
Rear Blower 15A Rear Blower Motor Relay, Rear
Blower Motor
Wiper 20A Front Wiper/Washer Assembly
Rear Blower 15A Rear Blower Motor Relay, Rear
Blower Motor
Rear Wiper 10A Rear Wiper/Washer Assembly
O2 Sensor 7.5A Oxygen Sensor
Audio 7.5A Radio
Turn 10A Hazard Warning Flasher Switch
Audio Amp 20A Subwoofer Amplifier
Front Blower 20A Front Blower Motor, Front Blower
Motor/Speed Controller
Eng Cont 7.5A Powertrain Control Module,
Lighting Control Module
Relays 10A Speed Control, Instrument
Cluster, Rear Blower Motor, Data
Link Connector #2, Cooling Fans
A/C Cont 7.5A Electronic Automatic
Temperature Control (EATC)
Module, A/C Relay, Front Climate
Control Panel
Roadside emergencies
175
Page 201 of 264
To avoid scalding hot steam or coolant from being released from
the engine cooling system, never remove the radiator cap while
the engine is running or hot. Failure to follow this warning may result
in damage to the engine's cooling system and possible severe personal
injury.
If you must remove the radiator cap, follow these steps to avoid personal
injury:
1. Before you remove the cap, turn the engine off and let it cool.
2. When the engine is cool, wrap a thick cloth around the cap. Slowly
turn cap counterclockwise until pressure begins to release.
3. Step back while the pressure releases.
4. When you are sure that all the pressure has been released, use the
cloth to turn it counterclockwise and remove the cap.
Recycled engine coolant
Ford Motor Company recommends the use of recycled engine coolant
produced by Ford-approved processes.
Not all coolant recycling processes produce coolant which meets Ford
specification ESE-M97B44-A, and use of such coolant may harm engine
and cooling system components.
Always dispose of used automotive fluids in a responsible manner.
Follow your community's regulations and standards for recycling and
disposing of automotive fluids.
Coolant refill capacity
To find out how much fluid your vehicle's cooling system can hold, refer
toRefill capacitiesin theCapacities and specificationschapter.
Fill your engine coolant reservoir as outlined inAdding engine coolant
in this chapter.
Severe winter climate
If you drive in extremely cold climates (less than ±36ÉC [±34ÉF]), it may
be necessary to increase the coolant concentration above 50%. Refer to
the chart on the coolant container to ensure the coolant concentration in
your vehicle is such that the coolant will not freeze at the temperature
level in which you drive during winter months.
Maintenance and care
201
Page 224 of 264
The scheduled maintenance items listed in the Scheduled Maintenance
Guide are essential to the life and performance of your vehicle and to its
emissions system.
If other than Ford, Motorcraft or Ford-authorized parts are used for
maintenance replacements or for service of components affecting
emission control, such non-Ford parts should be equivalent to genuine
Ford Motor Company parts in performance and durability.
Do not park, idle, or drive your vehicle in dry grass or other dry
ground cover. The emission system heats up the engine
compartment and exhaust system, which can start a fire.
Illumination of the ªService Engine Soonº light, charging system warning
light or the temperature warning light, fluid leaks, strange odors, smoke
or loss of engine power, could indicate that the emission control system
is not working properly.
Exhaust leaks may result in entry of harmful and potentially
lethal fumes into the passenger compartment.
Do not make any unauthorized changes to your vehicle or engine. By
law, vehicle owners and anyone who manufactures, repairs, services,
sells, leases, trades vehicles, or supervises a fleet of vehicles are not
permitted to intentionally remove an emission control device or prevent
it from working. Information about your vehicle's emission system is on
the Vehicle Emission Control Information Decal located on or near the
engine. This decal identifies engine displacement and gives some tune up
specifications.
Please consult your ªWarranty Guideº for complete emission warranty
information.
Readiness for Inspection/Maintenance (I/M) testing
In some localities, it may be a legal requirement to pass an I/M test of
the on-board diagnostics system. If your ªCheck Engine/Service Engine
Soonº light is on, refer to the description in theWarning Lights and
Chimessection of theInstrumentationchapter. Your vehicle may not
pass the I/M test with the ªCheck Engine/Service Engine Soonº light on.
If the vehicle's powertrain system or its battery has just been serviced,
the on-board diagnostics system is reset to a ªnot ready for I/M testº
Maintenance and care
224
Page 255 of 264

Accessory delay ..........................90
Air bag supplemental restraint
system ........................................131
and child safety seats ............133
description ..............................131
disposal ....................................135
driver air bag ..........................133
indicator light ......................6,135
operation .................................133
passenger air bag ...................133
Air cleaner filter .........204,205,235
Air conditioning ..........................21
automatic temperature
control system ..........................29
Air filter, cabin ..........................207
Anti-theft system ......................104
arming the system ..................104
disarming a triggered
system .....................................105
disarming an untriggered
system .....................................105
Automatic transaxle .................160
driving with .............................161
fluid, refill capacities ..............235
fluid, specification ..................237
Battery .......................................205
acid, treating emergencies .....205
charging system warning
light ..............................................6
jumping a disabled battery ....185
maintenance-free ....................205
replacement, specifications ...235
servicing ..................................205
Brakes ........................................157
anti-lock ............................157,158
anti-lock brake system (ABS)
warning light ........................8,158
brake warning light ....................7
fluid, checking and adding ....197
fluid, refill capacities ..............235
fluid, specifications ..........236,237
lubricant specifications ...236,237parking ....................................158
shift interlock ..........................160
Break-in period .............................2
Capacities for refilling fluids ....235
Cargo cover ...............................108
Cargo net ............................107,108
CD changer .................................76
Child safety restraints ..............136
child safety belts ....................136
child safety seats ....................137
Child safety seats ......................137
attaching with tether straps ..141
built-in child seat ...................137
in front seat ............................138
in rear seat .......................138,141
tether anchorage hardware ...143
Cleaning your vehicle ...............230
built-in child seat .....148,151,234
engine compartment ..............232
exterior .............................231,233
exterior lamps .........................233
instrument panel ....................233
interior ..............................233,234
mirrors .....................................234
plastic parts ............................232
safety belts ..............................234
washing ....................................230
waxing .....................................231
wheels ......................................231
windows ..................................234
wiper blades ............................233
Clock ..................................47,59,71
Console
overhead ...............................97,98
Controls ........................93,94,95,96
power seat ...............................111
steering column ........................85
Coolant ...............................198,201
checking and adding ..............199
refill capacities .................201,235
specifications ...................236,237
Customer Assistance ................241
Index
255