air filter Mercury Villager 2000 Owner's Manuals
[x] Cancel search | Manufacturer: MERCURY, Model Year: 2000, Model line: Villager, Model: Mercury Villager 2000Pages: 256, PDF Size: 2.21 MB
Page 5 of 256
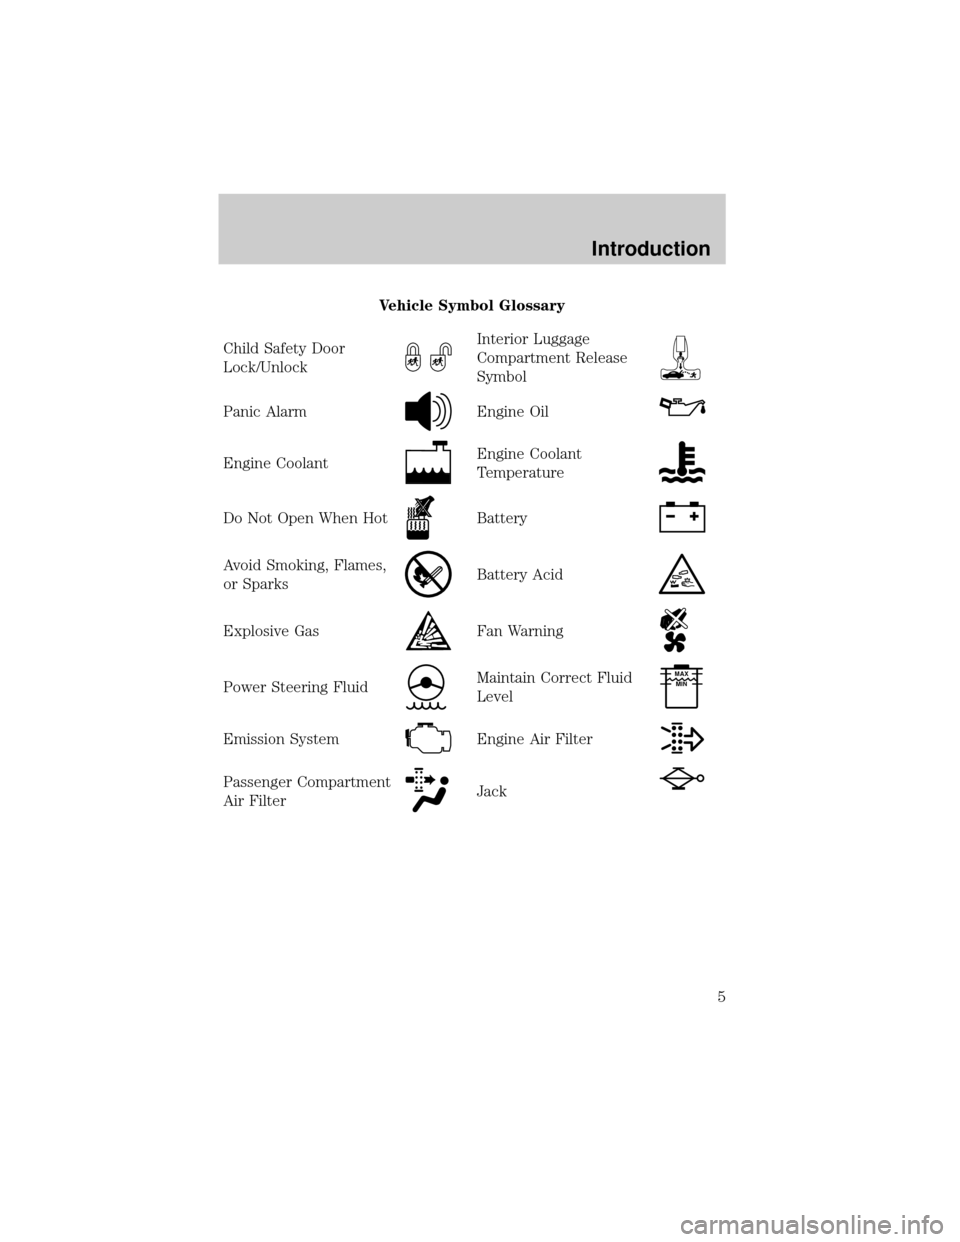
Vehicle Symbol Glossary
Child Safety Door
Lock/Unlock
Interior Luggage
Compartment Release
Symbol
Panic AlarmEngine Oil
Engine CoolantEngine Coolant
Temperature
Do Not Open When HotBattery
Avoid Smoking, Flames,
or SparksBattery Acid
Explosive GasFan Warning
Power Steering FluidMaintain Correct Fluid
LevelMAX
MIN
Emission SystemEngine Air Filter
Passenger Compartment
Air FilterJack
Introduction
5
Page 26 of 256
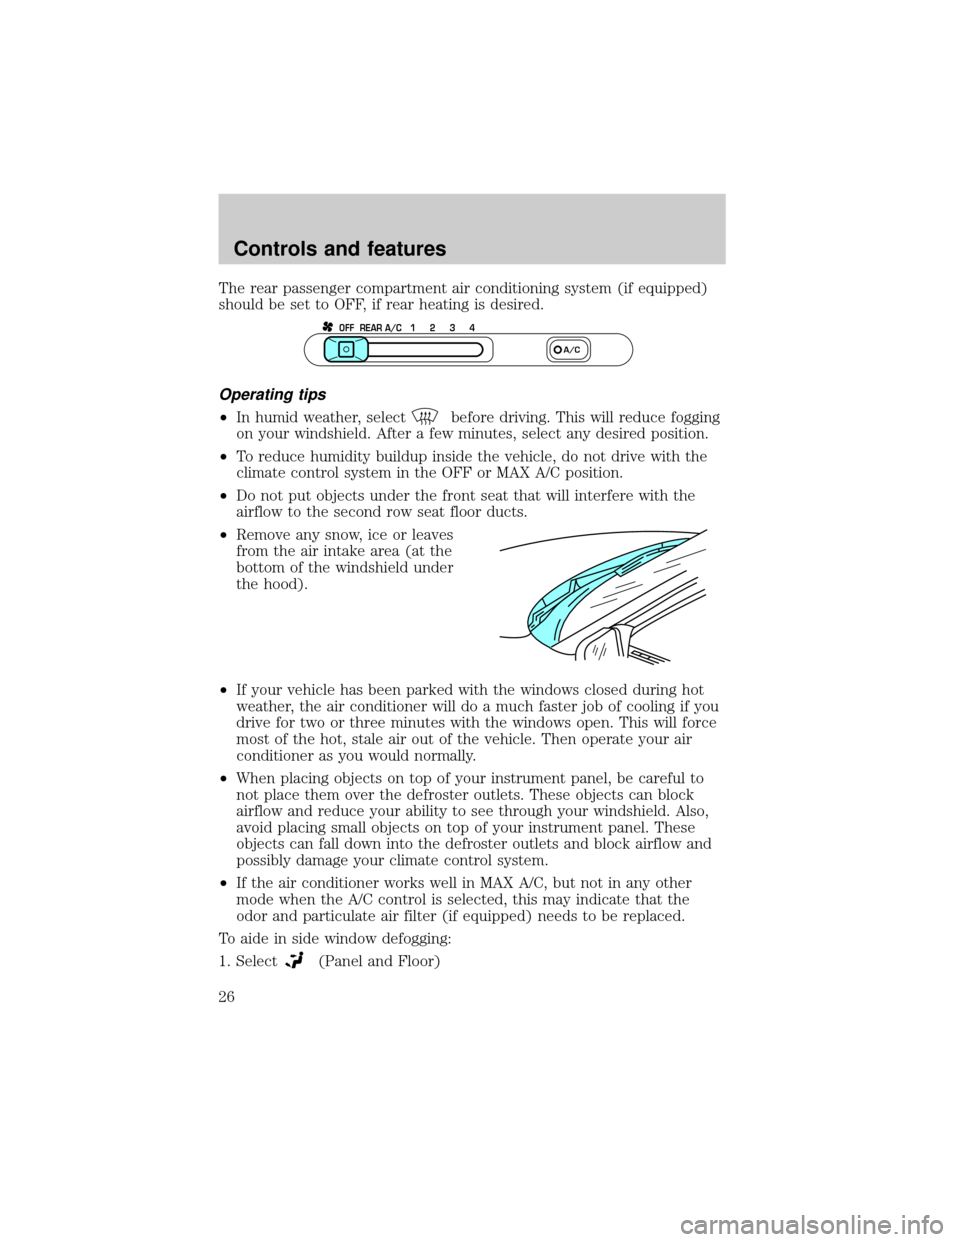
The rear passenger compartment air conditioning system (if equipped)
should be set to OFF, if rear heating is desired.
Operating tips
²In humid weather, selectbefore driving. This will reduce fogging
on your windshield. After a few minutes, select any desired position.
²To reduce humidity buildup inside the vehicle, do not drive with the
climate control system in the OFF or MAX A/C position.
²Do not put objects under the front seat that will interfere with the
airflow to the second row seat floor ducts.
²Remove any snow, ice or leaves
from the air intake area (at the
bottom of the windshield under
the hood).
²If your vehicle has been parked with the windows closed during hot
weather, the air conditioner will do a much faster job of cooling if you
drive for two or three minutes with the windows open. This will force
most of the hot, stale air out of the vehicle. Then operate your air
conditioner as you would normally.
²When placing objects on top of your instrument panel, be careful to
not place them over the defroster outlets. These objects can block
airflow and reduce your ability to see through your windshield. Also,
avoid placing small objects on top of your instrument panel. These
objects can fall down into the defroster outlets and block airflow and
possibly damage your climate control system.
²If the air conditioner works well in MAX A/C, but not in any other
mode when the A/C control is selected, this may indicate that the
odor and particulate air filter (if equipped) needs to be replaced.
To aide in side window defogging:
1. Select
(Panel and Floor)
OFF REAR A/C 1 2 3 4
A/C
Controls and features
26
Page 36 of 256
²To reduce humidity buildup inside the vehicle, don't drive with the
climate control system in the OFF position.
²Don't put objects under the front seat that will interfere with the
airflow to the second row seat floor ducts.
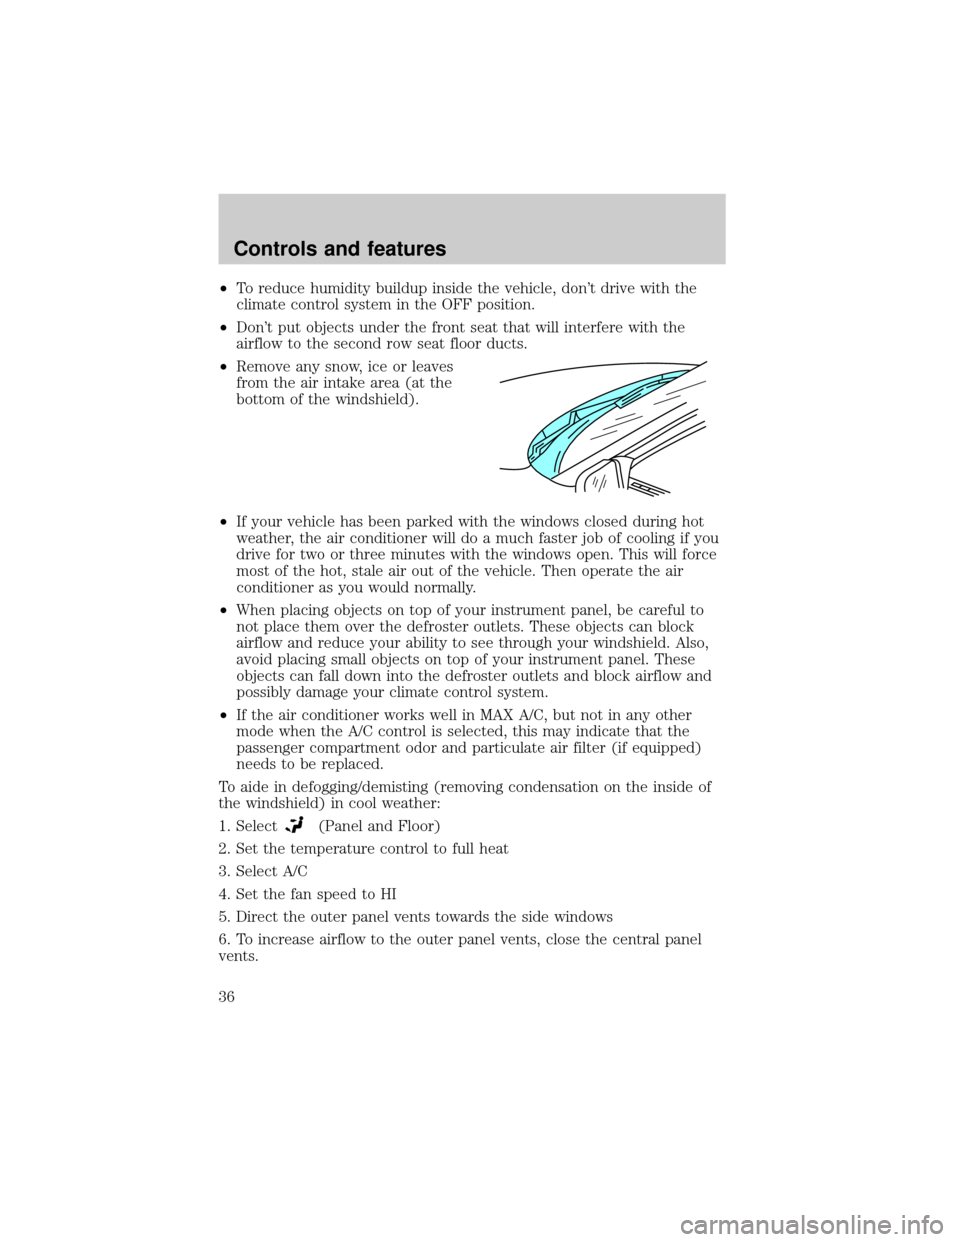
²Remove any snow, ice or leaves
from the air intake area (at the
bottom of the windshield).
²If your vehicle has been parked with the windows closed during hot
weather, the air conditioner will do a much faster job of cooling if you
drive for two or three minutes with the windows open. This will force
most of the hot, stale air out of the vehicle. Then operate the air
conditioner as you would normally.
²When placing objects on top of your instrument panel, be careful to
not place them over the defroster outlets. These objects can block
airflow and reduce your ability to see through your windshield. Also,
avoid placing small objects on top of your instrument panel. These
objects can fall down into the defroster outlets and block airflow and
possibly damage your climate control system.
²If the air conditioner works well in MAX A/C, but not in any other
mode when the A/C control is selected, this may indicate that the
passenger compartment odor and particulate air filter (if equipped)
needs to be replaced.
To aide in defogging/demisting (removing condensation on the inside of
the windshield) in cool weather:
1. Select
(Panel and Floor)
2. Set the temperature control to full heat
3. Select A/C
4. Set the fan speed to HI
5. Direct the outer panel vents towards the side windows
6. To increase airflow to the outer panel vents, close the central panel
vents.
Controls and features
36
Page 188 of 256
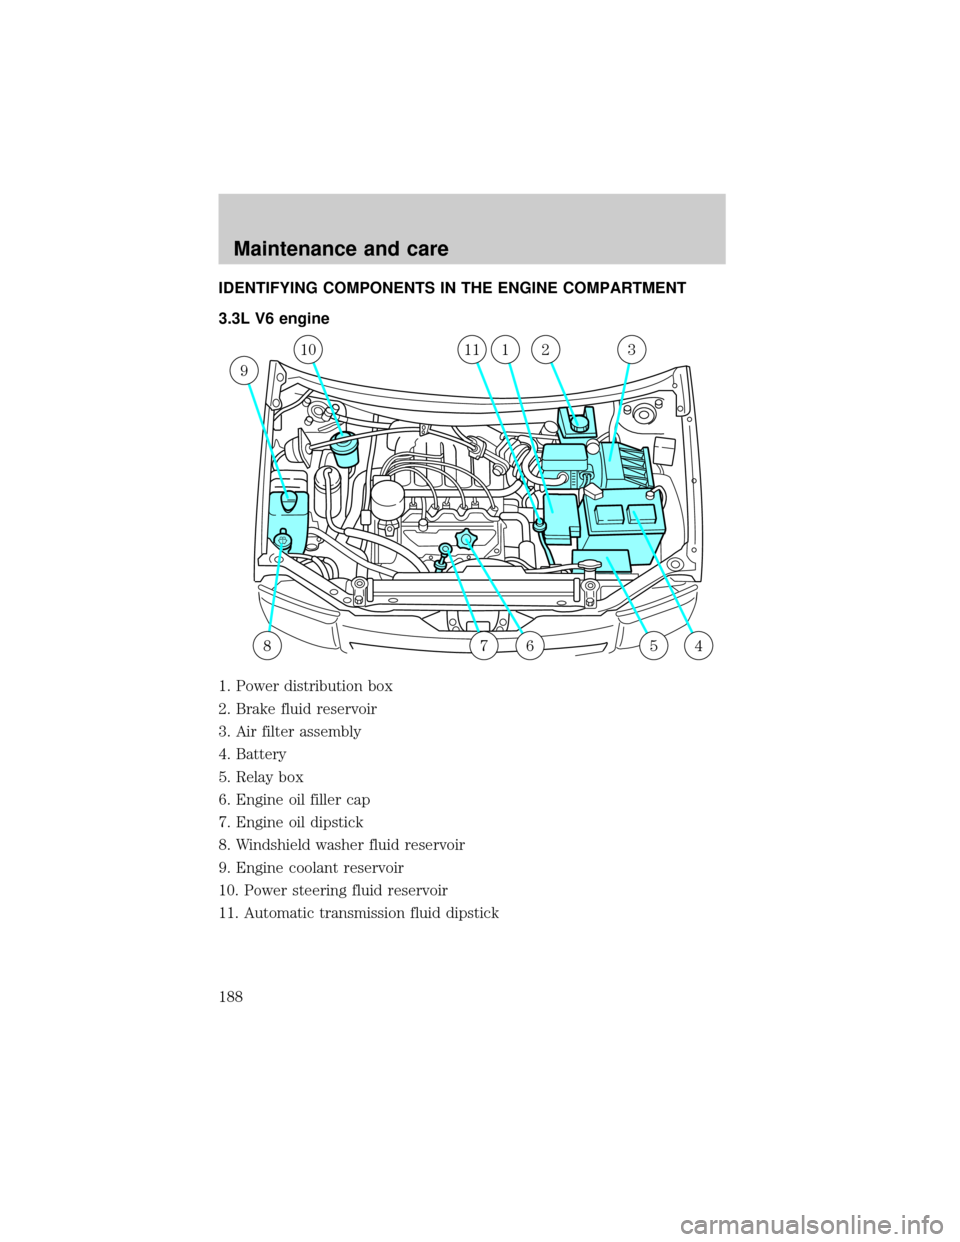
IDENTIFYING COMPONENTS IN THE ENGINE COMPARTMENT
3.3L V6 engine
1. Power distribution box
2. Brake fluid reservoir
3. Air filter assembly
4. Battery
5. Relay box
6. Engine oil filler cap
7. Engine oil dipstick
8. Windshield washer fluid reservoir
9. Engine coolant reservoir
10. Power steering fluid reservoir
11. Automatic transmission fluid dipstick
9
45678
1011123
Maintenance and care
188
Page 200 of 256
![Mercury Villager 2000 Owners Manuals The transmission fluid should be in
this range if at normal operating
temperature (66ÉC-77ÉC
[150ÉF-170ÉF]).
High fluid level
Fluid levels above the safe range
may result in transaxle failure. An
Mercury Villager 2000 Owners Manuals The transmission fluid should be in
this range if at normal operating
temperature (66ÉC-77ÉC
[150ÉF-170ÉF]).
High fluid level
Fluid levels above the safe range
may result in transaxle failure. An](/img/33/11171/w960_11171-199.png)
The transmission fluid should be in
this range if at normal operating
temperature (66ÉC-77ÉC
[150ÉF-170ÉF]).
High fluid level
Fluid levels above the safe range
may result in transaxle failure. An
overfill condition of transmission
fluid may cause shift and/or
engagement concerns and/or
possible damage.
High fluid levels can be caused by an overheating condition.
Adjusting automatic transmission fluid levels
Before adding any fluid, make sure the correct type is used. The type of
fluid used is normally indicated on the dipstick and also in the
Lubricant specificationssection in theCapacities and specifications
chapter.
Use of a non-approved automatic transmission fluid may cause
internal transaxle component damage.
If necessary, add fluid in 250 mL (1/2 pint) increments through the filler
tube until the level is correct.
If an overfill occurs, excess fluid
should be removed by a qualified
technician.
An overfill condition of
transmission fluid may cause
shift and/or engagement concerns and/or possible damage.
AIR FILTER MAINTENANCE
Refer to the Scheduled Maintenance Guide for the appropriate intervals
for changing the air filter element.
When changing the air filter element, use only the Motorcraft air filter
element listed. Refer toMotorcraft Part Numbersin theCapacities and
specificationschapter.
HOT
HOT
HOT
Maintenance and care
200
Page 201 of 256
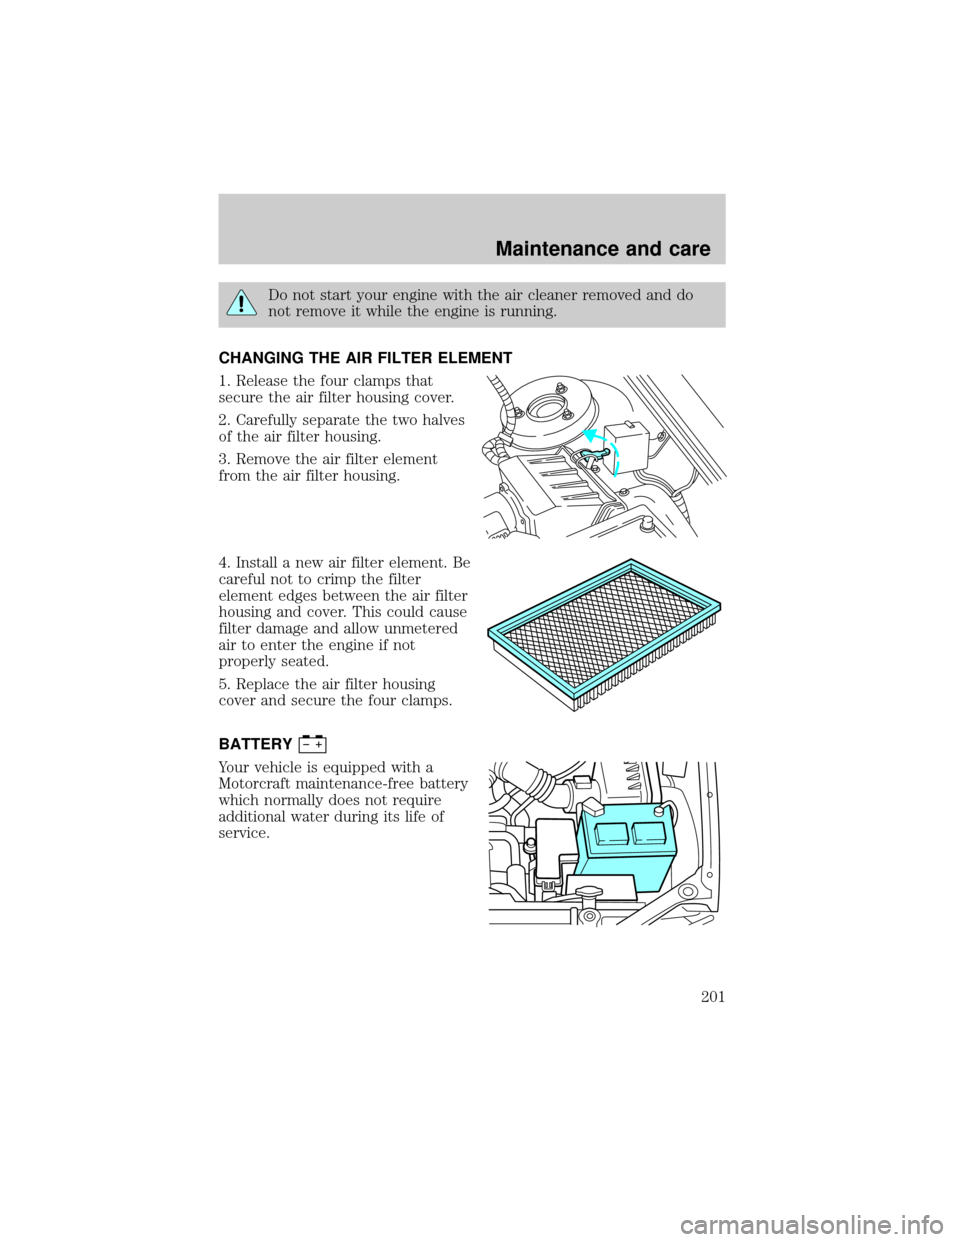
Do not start your engine with the air cleaner removed and do
not remove it while the engine is running.
CHANGING THE AIR FILTER ELEMENT
1. Release the four clamps that
secure the air filter housing cover.
2. Carefully separate the two halves
of the air filter housing.
3. Remove the air filter element
from the air filter housing.
4. Install a new air filter element. Be
careful not to crimp the filter
element edges between the air filter
housing and cover. This could cause
filter damage and allow unmetered
air to enter the engine if not
properly seated.
5. Replace the air filter housing
cover and secure the four clamps.
BATTERY
Your vehicle is equipped with a
Motorcraft maintenance-free battery
which normally does not require
additional water during its life of
service.
Maintenance and care
201
Page 204 of 256
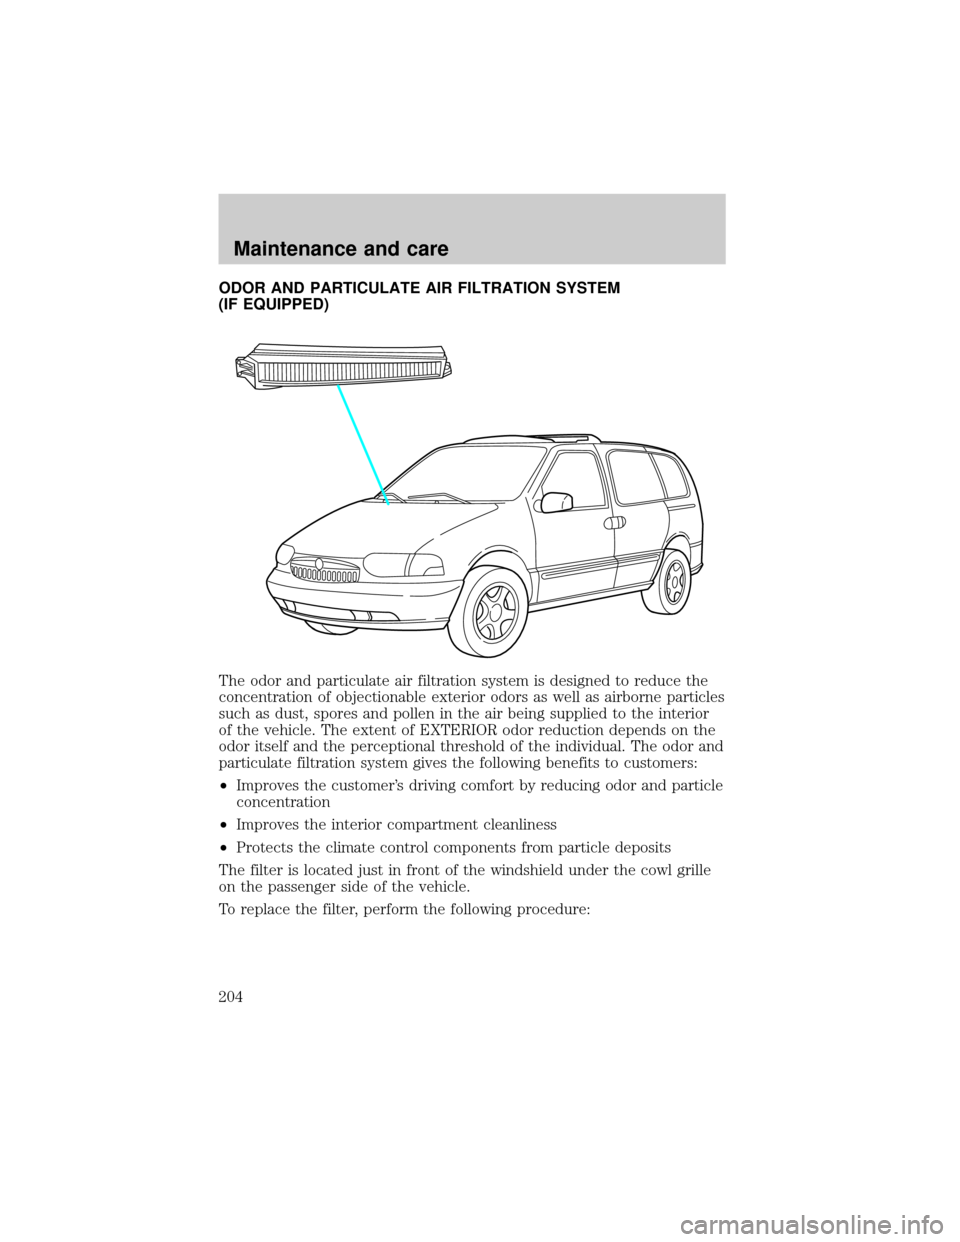
ODOR AND PARTICULATE AIR FILTRATION SYSTEM
(IF EQUIPPED)
The odor and particulate air filtration system is designed to reduce the
concentration of objectionable exterior odors as well as airborne particles
such as dust, spores and pollen in the air being supplied to the interior
of the vehicle. The extent of EXTERIOR odor reduction depends on the
odor itself and the perceptional threshold of the individual. The odor and
particulate filtration system gives the following benefits to customers:
²Improves the customer's driving comfort by reducing odor and particle
concentration
²Improves the interior compartment cleanliness
²Protects the climate control components from particle deposits
The filter is located just in front of the windshield under the cowl grille
on the passenger side of the vehicle.
To replace the filter, perform the following procedure:
Maintenance and care
204
Page 206 of 256

5. Disconnect the windshield washer
hose at the Y connector at the rear
corner of the engine compartment.
6. Lift the cowl grille from the vehicle.
7. Locate the cabin air filter on the passenger side of the vehicle.
8. Remove four (4) screws from the top surface of the cabin air filter top
cover.
9. Remove the cover.
Maintenance and care
206
Page 233 of 256
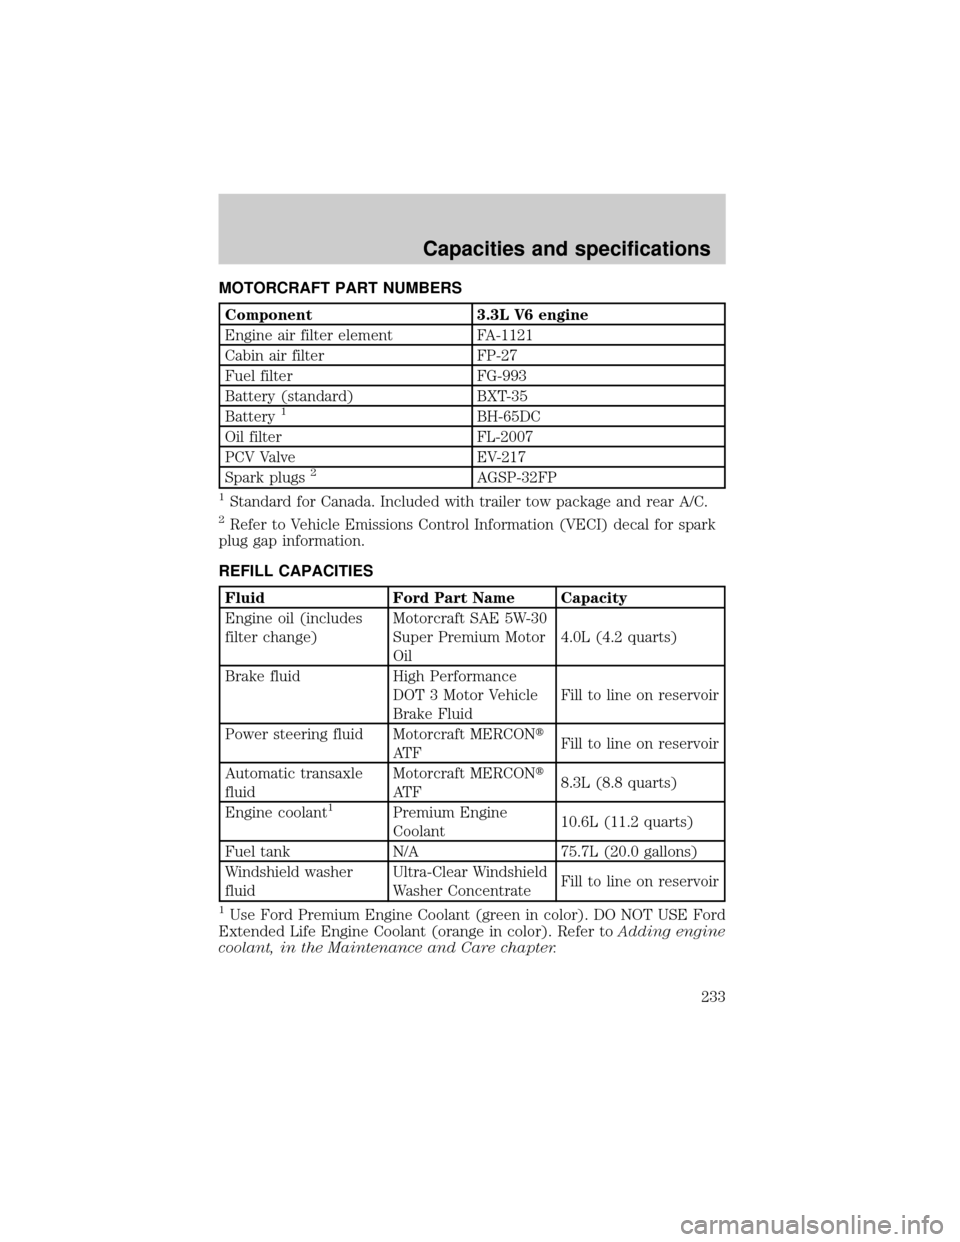
MOTORCRAFT PART NUMBERS
Component 3.3L V6 engine
Engine air filter element FA-1121
Cabin air filter FP-27
Fuel filter FG-993
Battery (standard) BXT-35
Battery
1BH-65DC
Oil filter FL-2007
PCV Valve EV-217
Spark plugs
2AGSP-32FP
1Standard for Canada. Included with trailer tow package and rear A/C.
2Refer to Vehicle Emissions Control Information (VECI) decal for spark
plug gap information.
REFILL CAPACITIES
Fluid Ford Part Name Capacity
Engine oil (includes
filter change)Motorcraft SAE 5W-30
Super Premium Motor
Oil4.0L (4.2 quarts)
Brake fluid High Performance
DOT 3 Motor Vehicle
Brake FluidFill to line on reservoir
Power steering fluid Motorcraft MERCONt
AT FFill to line on reservoir
Automatic transaxle
fluidMotorcraft MERCONt
AT F8.3L (8.8 quarts)
Engine coolant
1Premium Engine
Coolant10.6L (11.2 quarts)
Fuel tank N/A 75.7L (20.0 gallons)
Windshield washer
fluidUltra-Clear Windshield
Washer ConcentrateFill to line on reservoir
1Use Ford Premium Engine Coolant (green in color). DO NOT USE Ford
Extended Life Engine Coolant (orange in color). Refer toAdding engine
coolant, in the Maintenance and Care chapter.
Capacities and specifications
233
Page 251 of 256

Accessory delay ..........................91
Air bag supplemental
restraint system .................132,133
and child safety seats ............134
description ..............................133
disposal ....................................137
driver air bag ..........................135
indicator light ......................8,136
operation .................................135
passenger air bag ...................135
Air cleaner filter .........200,201,233
Air conditioning ..........................22
automatic temperature
control system ..........................29
Air filter, cabin ..........................204
Antifreeze
(see Engine coolant) ................194
Anti-lock brake system
(see Brakes) .......................152,153
Anti-theft system ......................105
arming the system ..................105
disarming a
triggered system .....................107
disarming an untriggered
system .....................................107
Audio system (see Radio) .........40
Automatic transaxle .................155
driving with .............................156
fluid, adding ............................198
fluid, checking ........................198
fluid, refill capacities ..............233
fluid, specification ..................235
Auxiliary power point .................81
Axle
lubricant specifications ..........234
Battery .......................................201
acid, treating emergencies .....201
charging system warning light ..8
jumping a disabled battery ....180
maintenance-free ....................201
replacement, specifications ...233
servicing ..................................201Brakes ........................................152
anti-lock ............................152,153
anti-lock brake system
(ABS) warning light ..........10,153
brake warning light ....................9
fluid, checking and adding ....192
fluid, refill capacities ..............233
fluid, specifications ..........234,235
lubricant specifications ...234,235
parking ....................................153
shift interlock ..........................155
Break-in period .............................3
Capacities for refilling fluids ....233
Cargo cover ...............................110
Cargo net ............................109,110
CD changer .................................77
Certification Label ....................237
Child safety restraints ..............137
child safety belts ....................137
Child safety seats ......................138
in front seat ............................140
in rear seat .......................140,142
tether anchorage hardware ...144
Cleaning your vehicle ...............227
built-in child seat ...................232
engine compartment ..............229
exterior .............................228,229
exterior lamps .........................229
instrument panel ....................231
instrument panel lens ............231
interior ..............................231,232
mirrors .....................................229
plastic parts ............................229
safety belts ..............................232
washing ....................................227
waxing .....................................228
wheels ......................................228
windows ..................................231
wiper blades ............................230
woodtone trim ........................231
Climate control (see Air
conditioning or Heating) ............22
Index
251