change wheel Mercury Villager 2000 Owner's Manuals
[x] Cancel search | Manufacturer: MERCURY, Model Year: 2000, Model line: Villager, Model: Mercury Villager 2000Pages: 256, PDF Size: 2.21 MB
Page 178 of 256

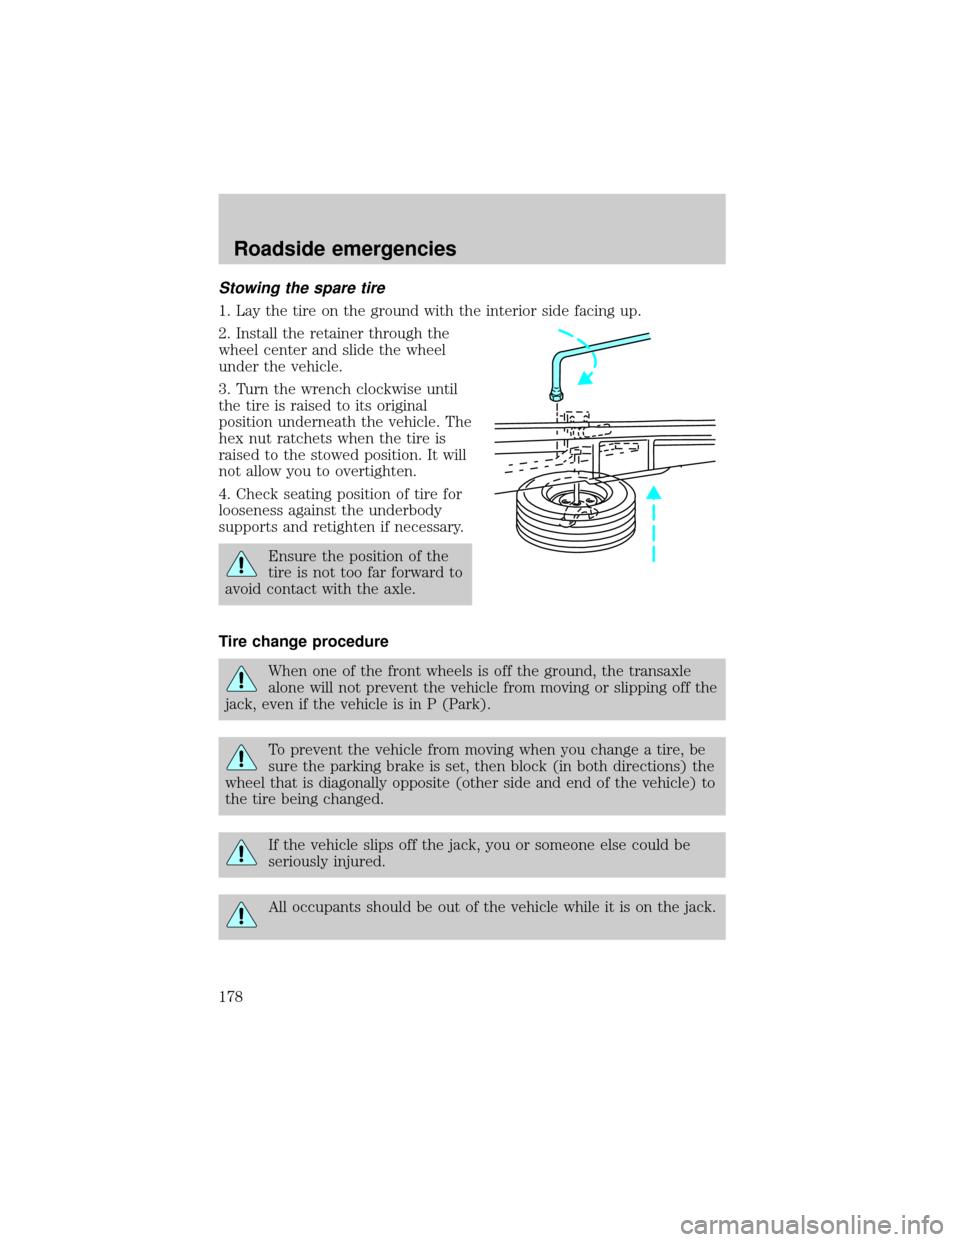
Stowing the spare tire
1. Lay the tire on the ground with the interior side facing up.
2. Install the retainer through the
wheel center and slide the wheel
under the vehicle.
3. Turn the wrench clockwise until
the tire is raised to its original
position underneath the vehicle. The
hex nut ratchets when the tire is
raised to the stowed position. It will
not allow you to overtighten.
4. Check seating position of tire for
looseness against the underbody
supports and retighten if necessary.
Ensure the position of the
tire is not too far forward to
avoid contact with the axle.
Tire change procedure
When one of the front wheels is off the ground, the transaxle
alone will not prevent the vehicle from moving or slipping off the
jack, even if the vehicle is in P (Park).
To prevent the vehicle from moving when you change a tire, be
sure the parking brake is set, then block (in both directions) the
wheel that is diagonally opposite (other side and end of the vehicle) to
the tire being changed.
If the vehicle slips off the jack, you or someone else could be
seriously injured.
All occupants should be out of the vehicle while it is on the jack.
Roadside emergencies
178
Page 198 of 256

²refer to the chart on the coolant container to ensure the
coolant concentration in your vehicle will provide adequate
protection at the temperatures in which you drive.
Vehicles driven year-round in non-extreme climates should use a 50/50
mixture of engine coolant and distilled water for optimum cooling system
and engine protection.
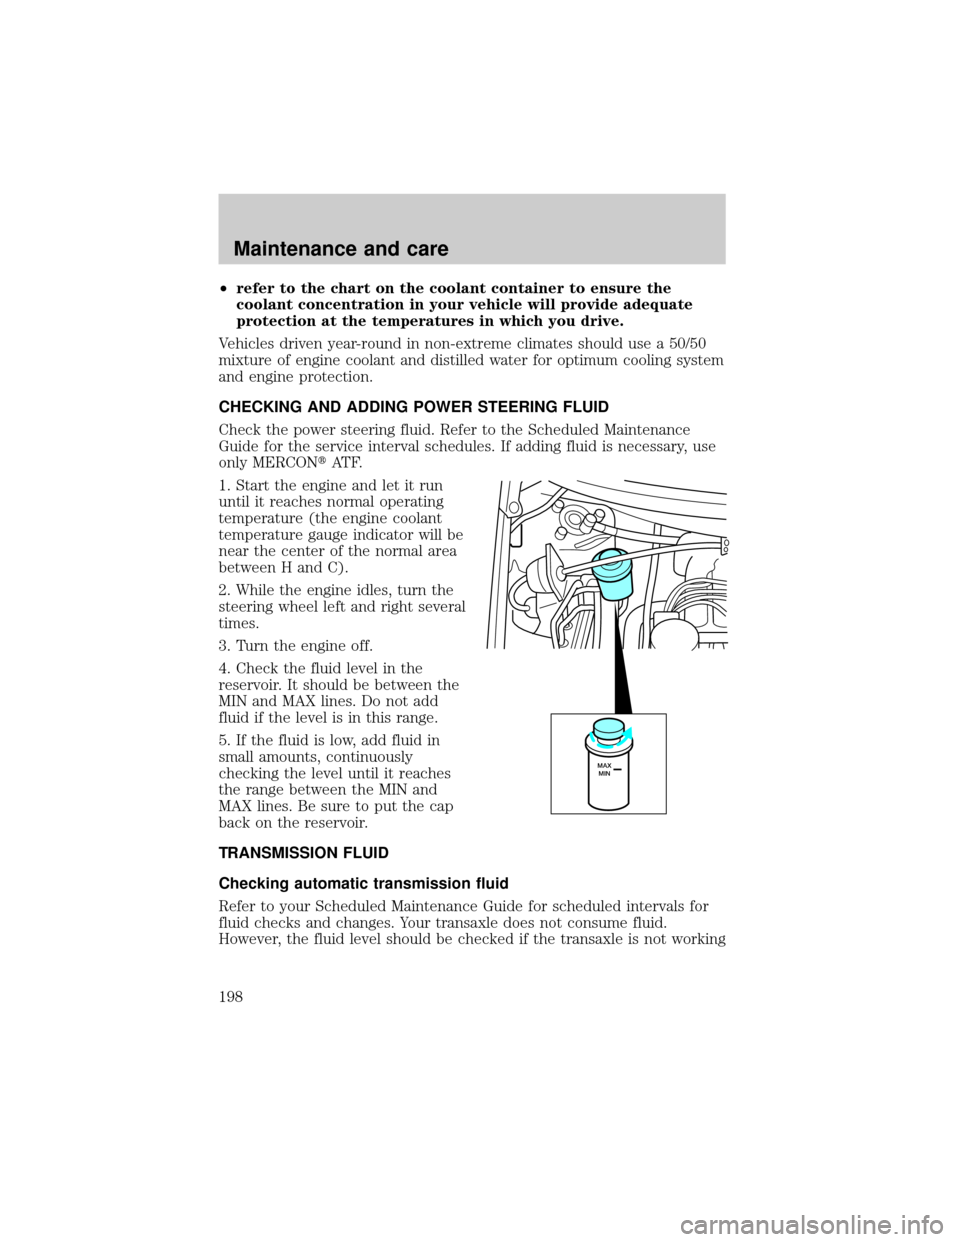
CHECKING AND ADDING POWER STEERING FLUID
Check the power steering fluid. Refer to the Scheduled Maintenance
Guide for the service interval schedules. If adding fluid is necessary, use
only MERCONtAT F.
1. Start the engine and let it run
until it reaches normal operating
temperature (the engine coolant
temperature gauge indicator will be
near the center of the normal area
between H and C).
2. While the engine idles, turn the
steering wheel left and right several
times.
3. Turn the engine off.
4. Check the fluid level in the
reservoir. It should be between the
MIN and MAX lines. Do not add
fluid if the level is in this range.
5. If the fluid is low, add fluid in
small amounts, continuously
checking the level until it reaches
the range between the MIN and
MAX lines. Be sure to put the cap
back on the reservoir.
TRANSMISSION FLUID
Checking automatic transmission fluid
Refer to your Scheduled Maintenance Guide for scheduled intervals for
fluid checks and changes. Your transaxle does not consume fluid.
However, the fluid level should be checked if the transaxle is not working
MAX
MIN
Maintenance and care
198
Page 219 of 256

Driving style Ð good driving and fuel economy habits
Give consideration to the lists that follow and you may be able to change
a number of variables and improve your fuel economy.
Habits
²Smooth, moderate operation can yield up to 10% savings in fuel.
²Steady speeds without stopping will usually give the best fuel
economy.
²Idling for long periods of time (greater than one minute) may waste
fuel.
²Anticipate stopping; slowing down may eliminate the need to stop.
²Sudden or hard accelerations may reduce fuel economy.
²Slow down gradually.
²Driving at reasonable speeds (traveling at 88 km/h [55 mph] uses 15%
less fuel than traveling at 105 km/h [65 mph]).
²Revving the engine before turning it off may reduce fuel economy.
²Using the air conditioner or defroster may reduce fuel economy.
²You may want to turn off the speed control in hilly terrain if
unnecessary shifting between third and fourth gear occurs.
Unnecessary shifting of this type could result in reduced fuel
economy.
²Warming up a vehicle on cold mornings is not required and may
reduce fuel economy.
²Resting your foot on the brake pedal while driving may reduce fuel
economy.
²Combine errands and minimize stop-and-go driving.
Maintenance
²Keep tires properly inflated and use only recommended size.
²Operating a vehicle with the wheels out of alignment will reduce fuel
economy.
²Use recommended engine oil. Refer toLubricant Specifications.
²Perform all regularly scheduled maintenance items. Follow the
recommended maintenance schedule and owner maintenance checks
found in your vehicle Scheduled Maintenance Guide.
Maintenance and care
219
Page 251 of 256

Accessory delay ..........................91
Air bag supplemental
restraint system .................132,133
and child safety seats ............134
description ..............................133
disposal ....................................137
driver air bag ..........................135
indicator light ......................8,136
operation .................................135
passenger air bag ...................135
Air cleaner filter .........200,201,233
Air conditioning ..........................22
automatic temperature
control system ..........................29
Air filter, cabin ..........................204
Antifreeze
(see Engine coolant) ................194
Anti-lock brake system
(see Brakes) .......................152,153
Anti-theft system ......................105
arming the system ..................105
disarming a
triggered system .....................107
disarming an untriggered
system .....................................107
Audio system (see Radio) .........40
Automatic transaxle .................155
driving with .............................156
fluid, adding ............................198
fluid, checking ........................198
fluid, refill capacities ..............233
fluid, specification ..................235
Auxiliary power point .................81
Axle
lubricant specifications ..........234
Battery .......................................201
acid, treating emergencies .....201
charging system warning light ..8
jumping a disabled battery ....180
maintenance-free ....................201
replacement, specifications ...233
servicing ..................................201Brakes ........................................152
anti-lock ............................152,153
anti-lock brake system
(ABS) warning light ..........10,153
brake warning light ....................9
fluid, checking and adding ....192
fluid, refill capacities ..............233
fluid, specifications ..........234,235
lubricant specifications ...234,235
parking ....................................153
shift interlock ..........................155
Break-in period .............................3
Capacities for refilling fluids ....233
Cargo cover ...............................110
Cargo net ............................109,110
CD changer .................................77
Certification Label ....................237
Child safety restraints ..............137
child safety belts ....................137
Child safety seats ......................138
in front seat ............................140
in rear seat .......................140,142
tether anchorage hardware ...144
Cleaning your vehicle ...............227
built-in child seat ...................232
engine compartment ..............229
exterior .............................228,229
exterior lamps .........................229
instrument panel ....................231
instrument panel lens ............231
interior ..............................231,232
mirrors .....................................229
plastic parts ............................229
safety belts ..............................232
washing ....................................227
waxing .....................................228
wheels ......................................228
windows ..................................231
wiper blades ............................230
woodtone trim ........................231
Climate control (see Air
conditioning or Heating) ............22
Index
251