spare wheel Mercury Villager 2002 Owner's Manuals
[x] Cancel search | Manufacturer: MERCURY, Model Year: 2002, Model line: Villager, Model: Mercury Villager 2002Pages: 256, PDF Size: 1.91 MB
Page 183 of 256

Temporary spare tire information
Your vehicle may have a temporary or conventional size spare tire. The
temporary spare tire for your vehicle is labeled as such. It is smaller than
a regular tire and is designed for emergency use only. Replace this tire
with a full-size tire as soon as possible.
If you use the temporary spare tire continuously or do not follow
these precautions, the tire could fail, causing you to lose control
of the vehicle, possibly injuring yourself or others.
When driving with the temporary spare tiredo not:
•exceed 80 km/h (50 mph) under any circumstances
•load the vehicle beyond maximum vehicle load rating listed on the
Certification Label
•tow a trailer
•use tire chains
•drive through an automatic car wash, because of the vehicle’s reduced
ground clearance
•try to repair the temporary spare tire or remove it from its wheel
•use the wheel for any other type of vehicle
Location of the spare tire and tools
The spare tire and tools for your vehicle are stowed in the following
locations:
Item Location
Spare tire Under the vehicle, just forward of
the rear bumper
Jack assembly Under the third row bench seat in
the tool bag
Removing the jack and tools
1. Lift the 3rd row seat cushion.
2. Remove the jack assembly from the bag under the seat.
Roadside Emergencies
183
Page 186 of 256

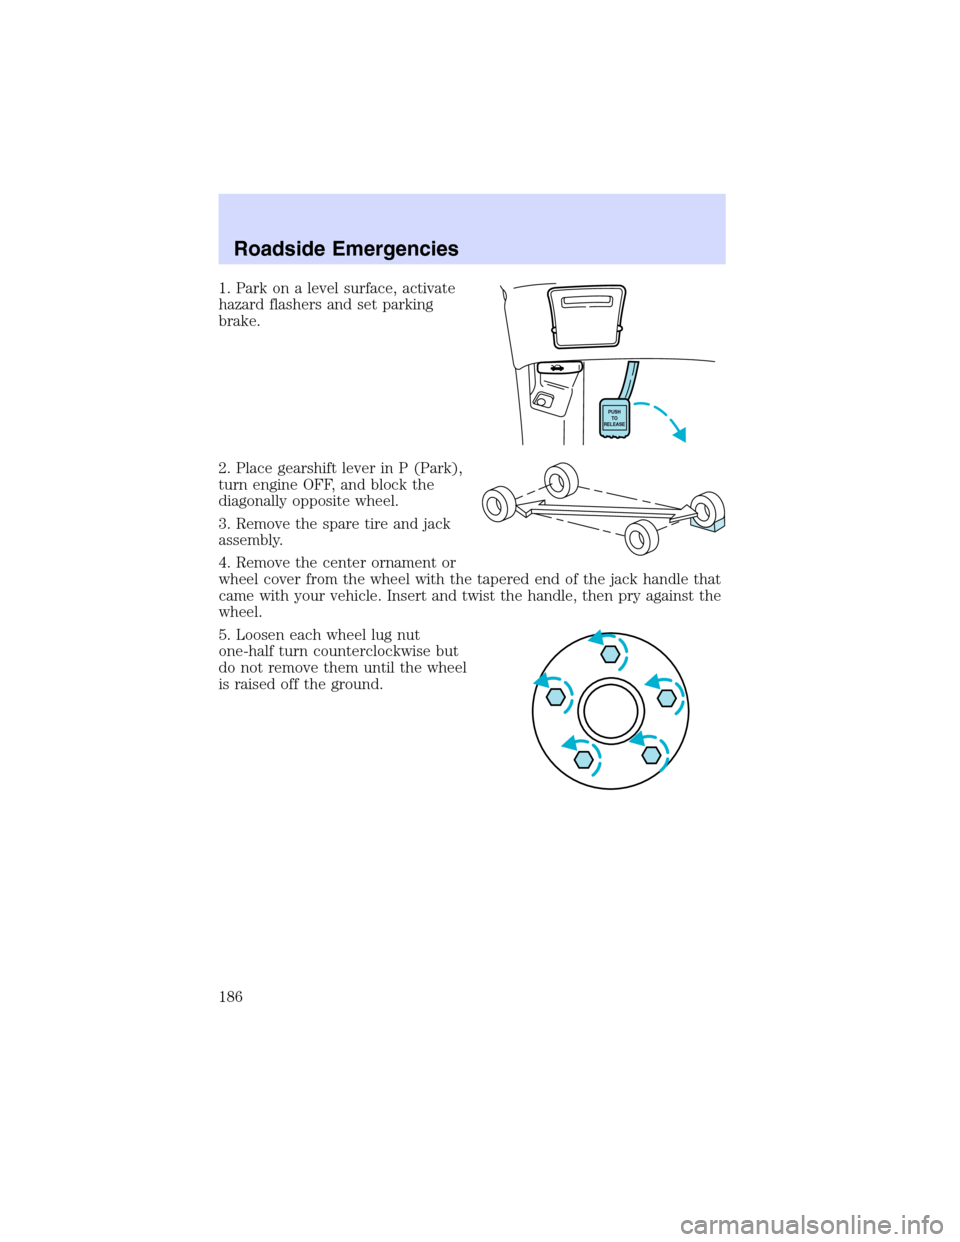
1. Park on a level surface, activate
hazard flashers and set parking
brake.
2. Place gearshift lever in P (Park),
turn engine OFF, and block the
diagonally opposite wheel.
3. Remove the spare tire and jack
assembly.
4. Remove the center ornament or
wheel cover from the wheel with the tapered end of the jack handle that
came with your vehicle. Insert and twist the handle, then pry against the
wheel.
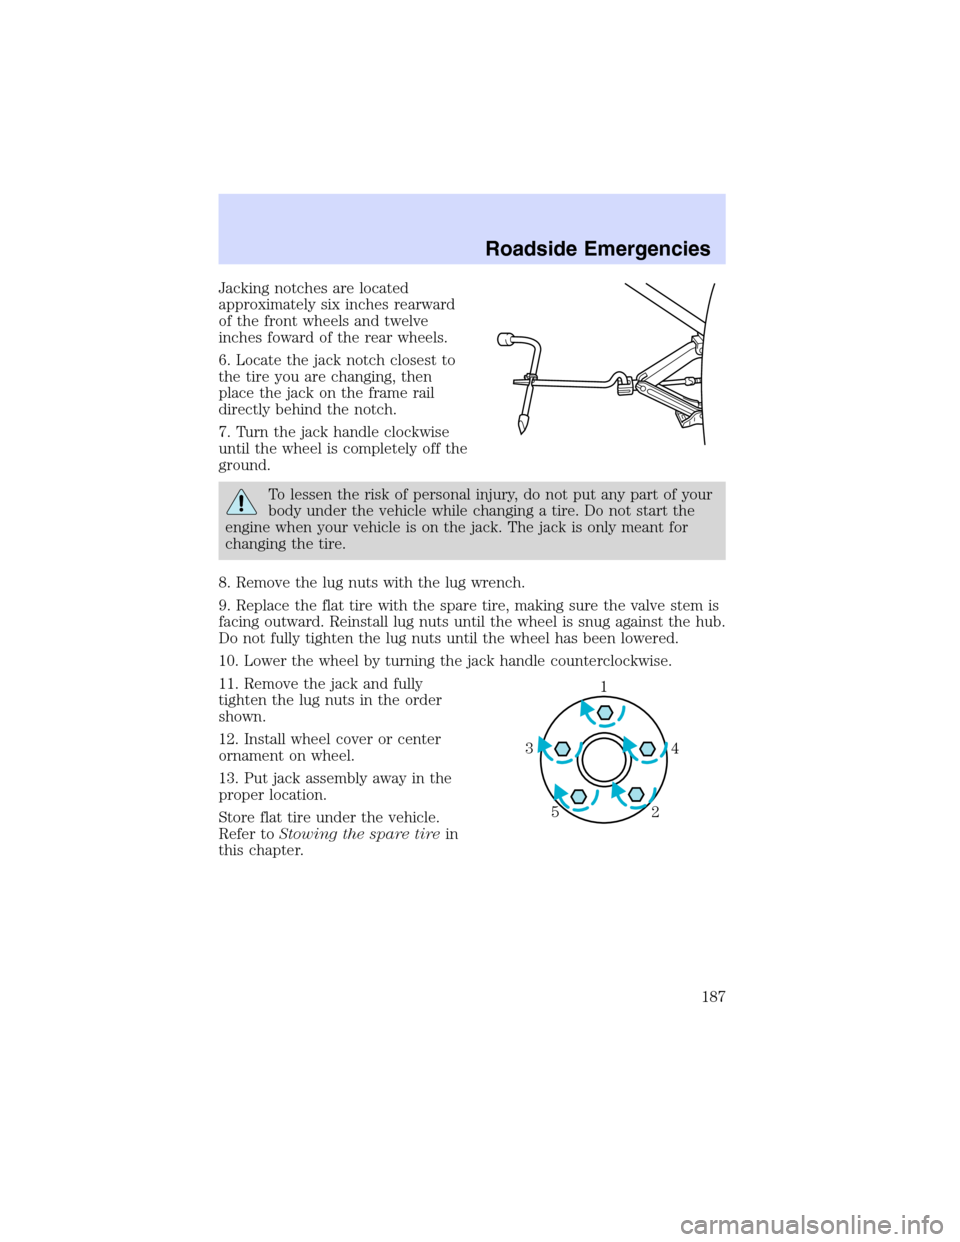
5. Loosen each wheel lug nut
one-half turn counterclockwise but
do not remove them until the wheel
is raised off the ground.
PUSH
TO
RELEASE
Roadside Emergencies
186
Page 187 of 256

Jacking notches are located
approximately six inches rearward
of the front wheels and twelve
inches foward of the rear wheels.
6. Locate the jack notch closest to
the tire you are changing, then
place the jack on the frame rail
directly behind the notch.
7. Turn the jack handle clockwise
until the wheel is completely off the
ground.
To lessen the risk of personal injury, do not put any part of your
body under the vehicle while changing a tire. Do not start the
engine when your vehicle is on the jack. The jack is only meant for
changing the tire.
8. Remove the lug nuts with the lug wrench.
9. Replace the flat tire with the spare tire, making sure the valve stem is
facing outward. Reinstall lug nuts until the wheel is snug against the hub.
Do not fully tighten the lug nuts until the wheel has been lowered.
10. Lower the wheel by turning the jack handle counterclockwise.
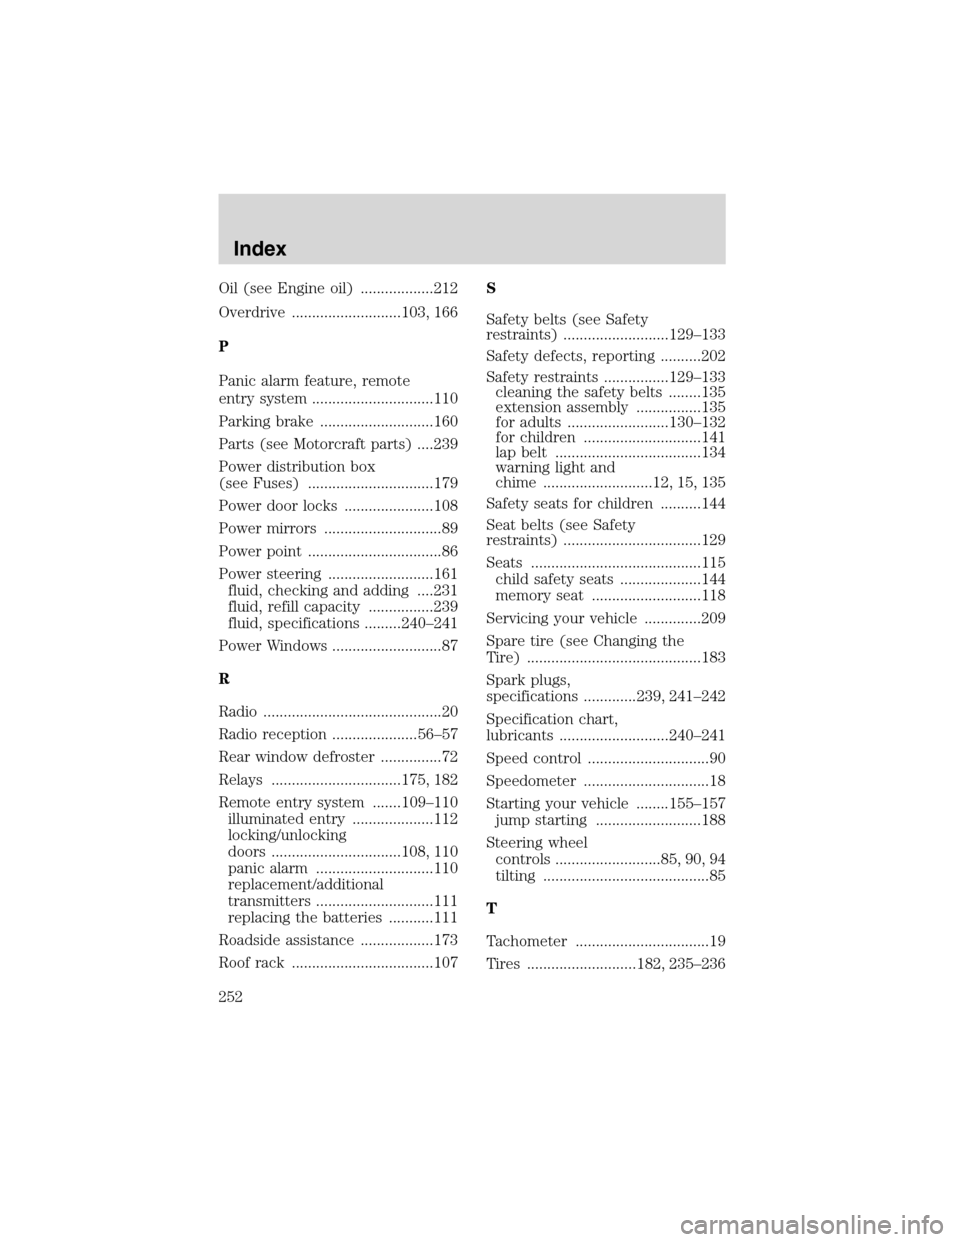
11. Remove the jack and fully
tighten the lug nuts in the order
shown.
12. Install wheel cover or center
ornament on wheel.
13. Put jack assembly away in the
proper location.
Store flat tire under the vehicle.
Refer toStowing the spare tirein
this chapter.
1
4 3
2 5
Roadside Emergencies
187
Page 252 of 256

Oil (see Engine oil) ..................212
Overdrive ...........................103, 166
P
Panic alarm feature, remote
entry system ..............................110
Parking brake ............................160
Parts (see Motorcraft parts) ....239
Power distribution box
(see Fuses) ...............................179
Power door locks ......................108
Power mirrors .............................89
Power point .................................86
Power steering ..........................161
fluid, checking and adding ....231
fluid, refill capacity ................239
fluid, specifications .........240–241
Power Windows ...........................87
R
Radio ............................................20
Radio reception .....................56–57
Rear window defroster ...............72
Relays ................................175, 182
Remote entry system .......109–110
illuminated entry ....................112
locking/unlocking
doors ................................108, 110
panic alarm .............................110
replacement/additional
transmitters .............................111
replacing the batteries ...........111
Roadside assistance ..................173
Roof rack ...................................107S
Safety belts (see Safety
restraints) ..........................129–133
Safety defects, reporting ..........202
Safety restraints ................129–133
cleaning the safety belts ........135
extension assembly ................135
for adults .........................130–132
for children .............................141
lap belt ....................................134
warning light and
chime ...........................12, 15, 135
Safety seats for children ..........144
Seat belts (see Safety
restraints) ..................................129
Seats ..........................................115
child safety seats ....................144
memory seat ...........................118
Servicing your vehicle ..............209
Spare tire (see Changing the
Tire) ...........................................183
Spark plugs,
specifications .............239, 241–242
Specification chart,
lubricants ...........................240–241
Speed control ..............................90
Speedometer ...............................18
Starting your vehicle ........155–157
jump starting ..........................188
Steering wheel
controls ..........................85, 90, 94
tilting .........................................85
T
Tachometer .................................19
Tires ...........................182, 235–236
Index
252