remote start MINI 3 door 2014 Owner's Manual
[x] Cancel search | Manufacturer: MINI, Model Year: 2014, Model line: 3 door, Model: MINI 3 door 2014Pages: 240, PDF Size: 11.05 MB
Page 39 of 240
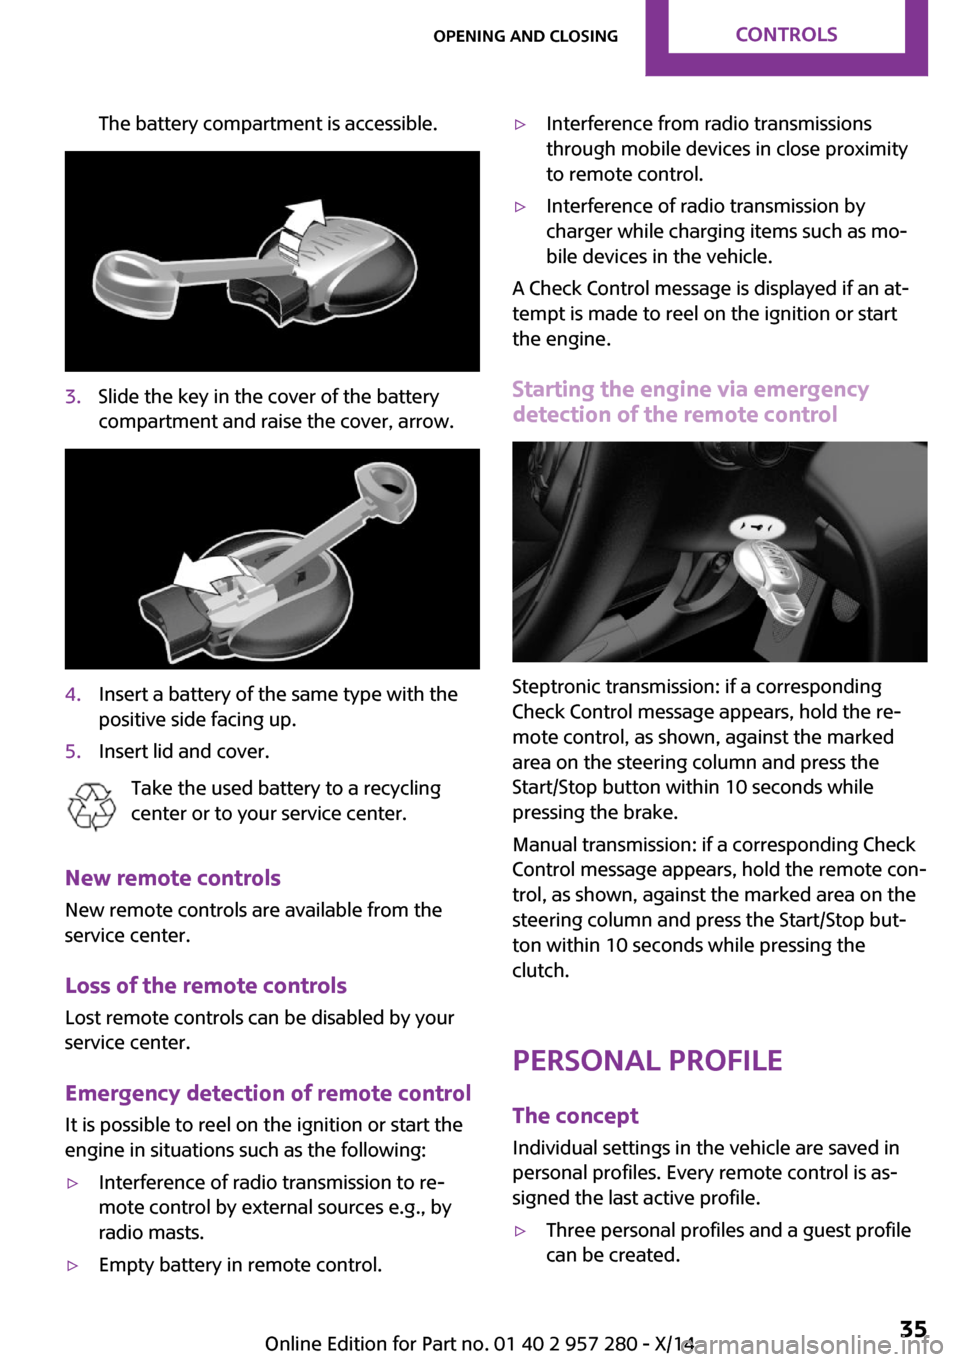
The battery compartment is accessible.3.Slide the key in the cover of the battery
compartment and raise the cover, arrow.4.Insert a battery of the same type with the
positive side facing up.5.Insert lid and cover.
Take the used battery to a recycling
center or to your service center.
New remote controls
New remote controls are available from the
service center.
Loss of the remote controls Lost remote controls can be disabled by your
service center.
Emergency detection of remote control
It is possible to reel on the ignition or start the
engine in situations such as the following:
▷Interference of radio transmission to re‐
mote control by external sources e.g., by
radio masts.▷Empty battery in remote control.▷Interference from radio transmissions
through mobile devices in close proximity
to remote control.▷Interference of radio transmission by
charger while charging items such as mo‐
bile devices in the vehicle.
A Check Control message is displayed if an at‐
tempt is made to reel on the ignition or start
the engine.
Starting the engine via emergencydetection of the remote control
Steptronic transmission: if a corresponding
Check Control message appears, hold the re‐
mote control, as shown, against the marked
area on the steering column and press the
Start/Stop button within 10 seconds while
pressing the brake.
Manual transmission: if a corresponding Check
Control message appears, hold the remote con‐
trol, as shown, against the marked area on the
steering column and press the Start/Stop but‐
ton within 10 seconds while pressing the
clutch.
Personal Profile The concept
Individual settings in the vehicle are saved in
personal profiles. Every remote control is as‐
signed the last active profile.
▷Three personal profiles and a guest profile
can be created.Seite 35Opening and closingCONTROLS35
Online Edition for Part no. 01 40 2 957 280 - X/14
Page 41 of 240
Existing settings and contacts are overwritten
with the imported profile.1. "Settings"2."Profiles"3."Import profile"4."USB device"
Using the guest profile
The guest profile is for individual settings that
are saved in none of the three personal profiles.
This can be useful for drivers who are using the
vehicle temporarily and do not have their own
profile.
1. "Settings"2."Profiles"3."Guest"4.Adjust the settings.
The guest profile cannot be renamed. It is not
assigned to the current remote control.
Display profile list during start The profile list can be displayed during each
start to select the desired profile.
1. "Settings"2."Profiles"3.Open "Options".4."Display user list at startup"
Using the remote con‐
trol
Note Take the remote control with you
People or animals left unattended in a
parked vehicle can lock the doors from the in‐
side. Always take the remote control with you
when leaving the vehicle so that the vehicle
can then be opened from the outside. ◀
Unlocking
Press button on the remote control.▷The vehicle is unlocked.▷Interior lamps and courtesy lamps are acti‐
vated. This function is not available, if the
interior lamps were switched off manually.▷The welcome lamps are switched on, if this
function was activated.▷Exterior mirrors folded through convenient
closing are folded open.
On 3-door models:
Press button on the remote control
twice.
When the door is opened, the window is low‐
ered to make it easier to enter the vehicle.
You can set how the vehicle is to be unlocked.
Create the settings, refer to page 42.
The alarm system, refer to page 43, is dis‐
armed.
Convenient opening Press and hold this button on the re‐
mote control after unlocking.
The windows and the glass sunroof are opened,
as long as the button on the remote control is
pressed.
Locking Press button on the remote control.
Locking from the outside
Do not lock the vehicle from the outside
with people inside the car, as the vehicle can‐
not be unlocked from inside without special
knowledge. ◀
The alarm system, refer to page 43, is armed.
Seite 37Opening and closingCONTROLS37
Online Edition for Part no. 01 40 2 957 280 - X/14
Page 44 of 240
TailgateOpening
When the tailgate is opened, make sure there is
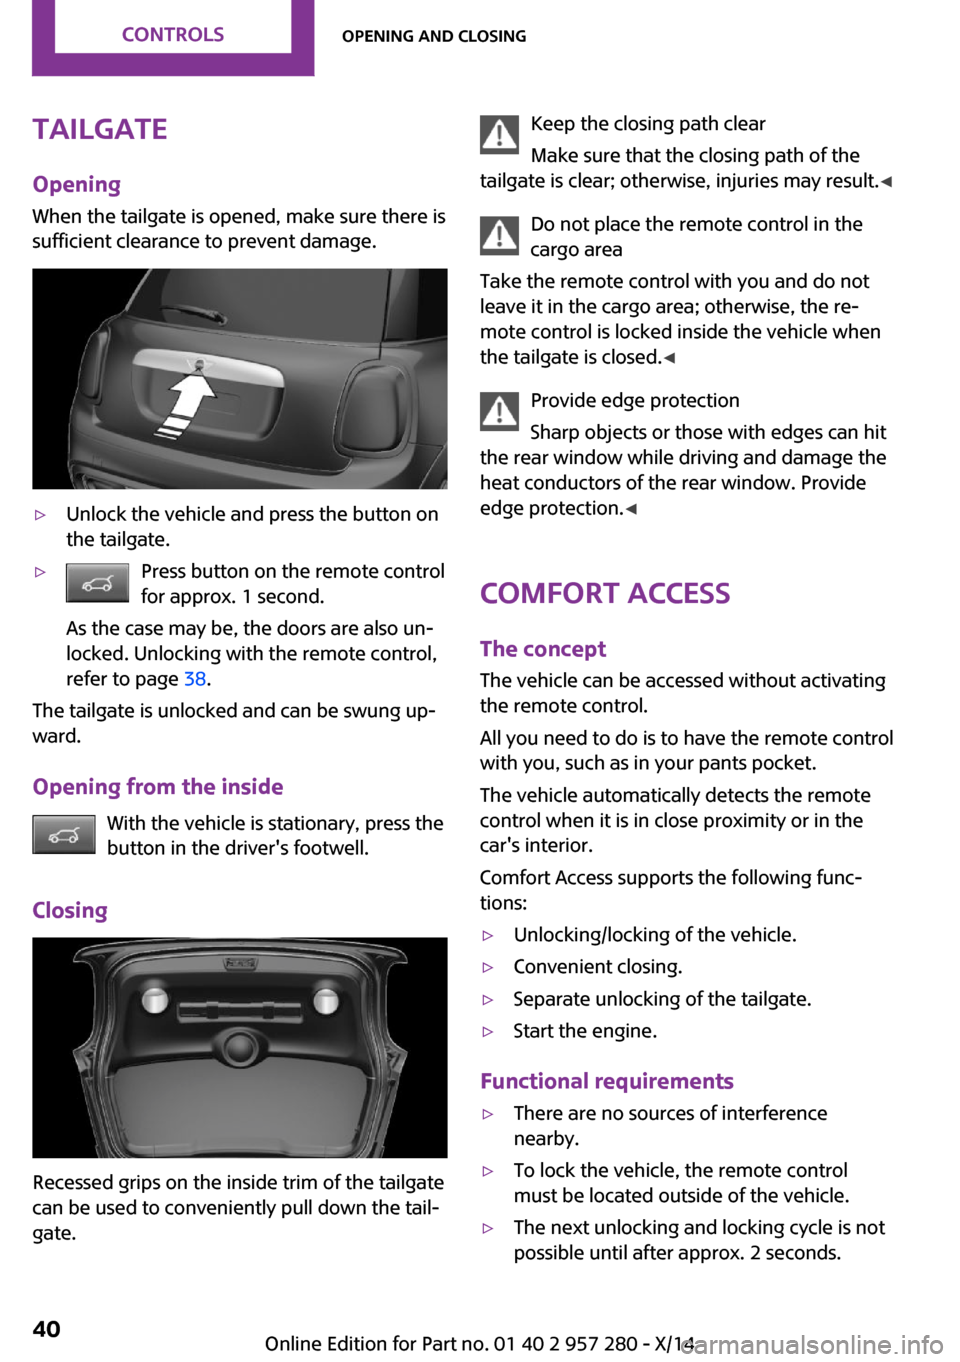
sufficient clearance to prevent damage.▷Unlock the vehicle and press the button on
the tailgate.▷Press button on the remote control
for approx. 1 second.
As the case may be, the doors are also un‐
locked. Unlocking with the remote control,
refer to page 38.
The tailgate is unlocked and can be swung up‐
ward.
Opening from the inside With the vehicle is stationary, press the
button in the driver's footwell.
Closing
Recessed grips on the inside trim of the tailgate
can be used to conveniently pull down the tail‐
gate.
Keep the closing path clear
Make sure that the closing path of the
tailgate is clear; otherwise, injuries may result. ◀
Do not place the remote control in the
cargo area
Take the remote control with you and do not
leave it in the cargo area; otherwise, the re‐
mote control is locked inside the vehicle when
the tailgate is closed. ◀
Provide edge protection
Sharp objects or those with edges can hit
the rear window while driving and damage the
heat conductors of the rear window. Provide
edge protection. ◀
Comfort Access The concept
The vehicle can be accessed without activating
the remote control.
All you need to do is to have the remote control
with you, such as in your pants pocket.
The vehicle automatically detects the remote
control when it is in close proximity or in the
car's interior.
Comfort Access supports the following func‐
tions:▷Unlocking/locking of the vehicle.▷Convenient closing.▷Separate unlocking of the tailgate.▷Start the engine.
Functional requirements
▷There are no sources of interference
nearby.▷To lock the vehicle, the remote control
must be located outside of the vehicle.▷The next unlocking and locking cycle is not
possible until after approx. 2 seconds.Seite 40CONTROLSOpening and closing40
Online Edition for Part no. 01 40 2 957 280 - X/14
Page 45 of 240
▷The engine can only be started if the re‐
mote control is in the vehicle.
Unlocking
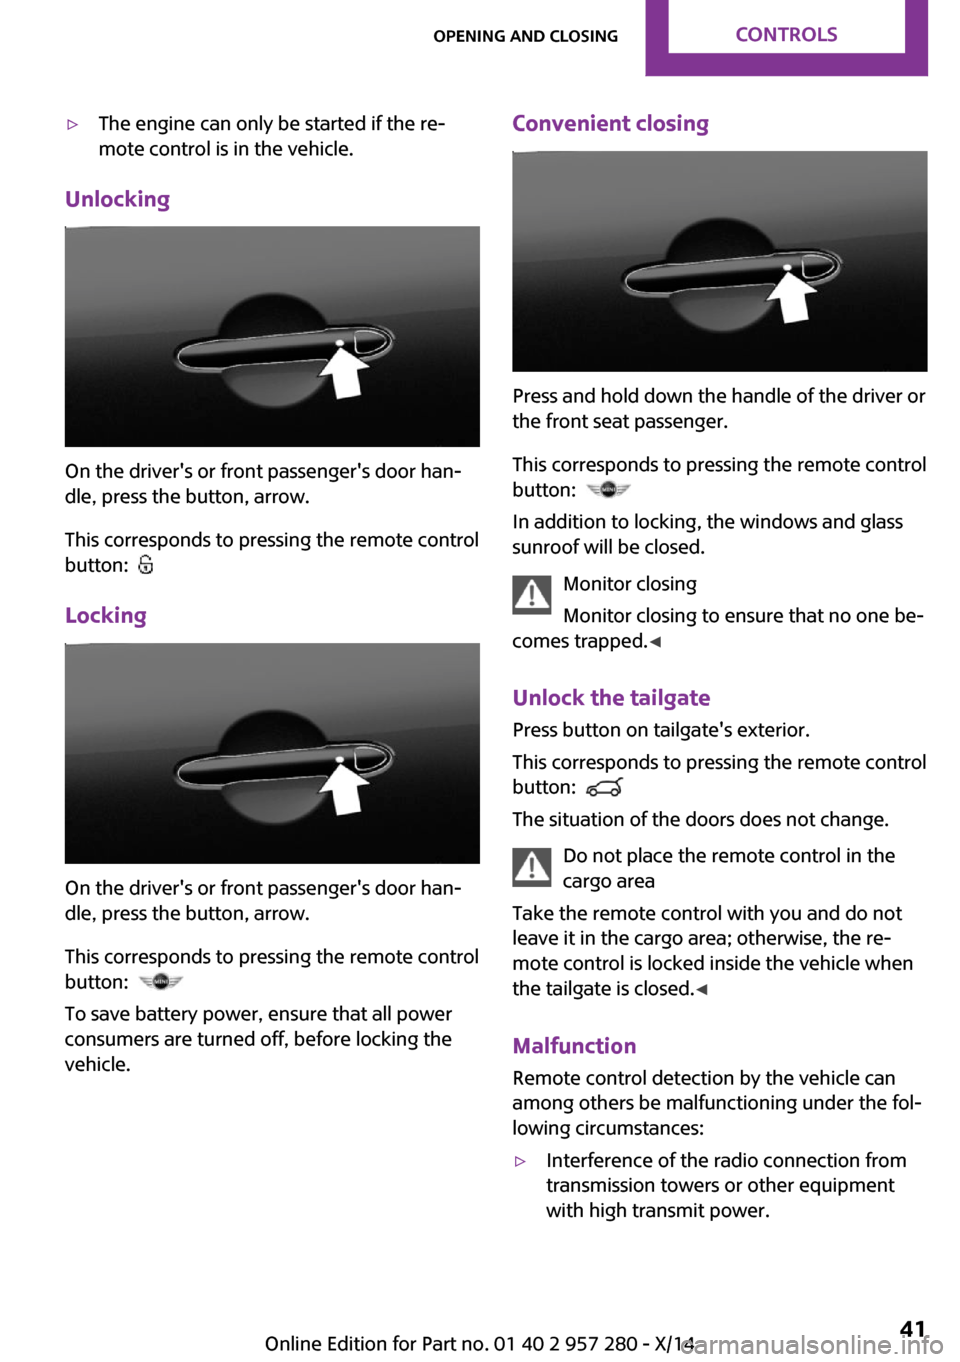
On the driver's or front passenger's door han‐
dle, press the button, arrow.
This corresponds to pressing the remote control
button:
Locking
On the driver's or front passenger's door han‐
dle, press the button, arrow.
This corresponds to pressing the remote control
button:
To save battery power, ensure that all power
consumers are turned off, before locking the
vehicle.
Convenient closing
Press and hold down the handle of the driver or
the front seat passenger.
This corresponds to pressing the remote control
button:
In addition to locking, the windows and glass
sunroof will be closed.
Monitor closing
Monitor closing to ensure that no one be‐
comes trapped. ◀
Unlock the tailgate Press button on tailgate's exterior.
This corresponds to pressing the remote control
button:
The situation of the doors does not change.
Do not place the remote control in the
cargo area
Take the remote control with you and do not
leave it in the cargo area; otherwise, the re‐
mote control is locked inside the vehicle when
the tailgate is closed. ◀
Malfunction Remote control detection by the vehicle can
among others be malfunctioning under the fol‐
lowing circumstances:
▷Interference of the radio connection from
transmission towers or other equipment
with high transmit power.Seite 41Opening and closingCONTROLS41
Online Edition for Part no. 01 40 2 957 280 - X/14
Page 46 of 240
▷Shielding of the remote control due to
metal objects.▷Interference of the radio connection from
mobile phones or other electronic devices
in direct proximity.
Do not transport the remote control together
with metal objects or electronic devices.
In the case of a malfunction, unlock and lock
the vehicle using the buttons of the remote
control or using the integrated key, refer to
page 39.
Adjusting Unlocking The settings are saved in the active profile. Per‐
sonal Profile, refer to page 35.
Doors
1. "Settings"2."Doors/key"3. Select the symbol.4.Select the desired function.▷"Driver's door only"
Only the driver's door and the fuel filler
flap are unlocked. Pressing again un‐
locks the entire vehicle.▷"All doors"
The entire vehicle is unlocked.▷On 3-door models:
"Comfort access"
The entire vehicle is unlocked. Pressing
again lowers the window when the
door is subsequently opened.Tailgate
Depending on optional features and country
version, this setting is not offered in some
cases.1. "Settings"2."Doors/key"3. Select the symbol.4.Select the desired function.▷"Tailgate"
Only the tailgate is unlocked.▷"Tailgate + door(s)"
The tailgate and the doors are un‐
locked.
Locking
The settings are saved in the active profile. Per‐
sonal Profile, refer to page 35.
1. "Settings"2."Doors/key"3.Select desired setting.▷"Lock if no door is opened"
The vehicle locks automatically after a
short period of time if no door is
opened.▷"Lock after start driving"
The vehicle locks automatically after
you drive off.
Confirmation signals from the vehicle
1."Settings"2."Doors/key"3.Select desired setting.▷"Acoustic sig. lock/unlock"
Unlocking is signaled by one honk of
the horn.▷"Flash when lock/unlock"
Unlocking is signaled by two flashes,
locking by one.Seite 42CONTROLSOpening and closing42
Online Edition for Part no. 01 40 2 957 280 - X/14
Page 65 of 240
Some electronic systems/power consumers re‐
main ready for operation.
Radio ready state switches off automatically:▷After approx. 8 minutes.▷When the vehicle is locked using the central
locking system.▷Shortly before the battery is discharged
completely, so that the engine can still be
started.
The radio-ready state remains active if, e.g., the
ignition is automatically switched off for the fol‐
lowing reasons:
▷Opening or closing the driver's door.▷Unfastening of the driver's safety belt.▷When automatically switching from low
beams to parking lights.
Starting the engine
General information Enclosed areas
Do not let the engine run in enclosed
areas, since breathing in exhaust fumes may
lead to loss of consciousness and death. The
exhaust gases contain carbon monoxide, an
odorless and colorless but highly toxic gas. ◀
Unattended vehicle
Do not leave the vehicle unattended with
the engine running; doing so poses a risk of
danger.
Before leaving the vehicle with the engine run‐
ning, set the parking brake and place the trans‐
mission in selector lever position P or N to pre‐
vent the vehicle from moving. ◀
Repeated starting in quick succession
Avoid trying to start the vehicle repeat‐
edly and in quick succession. Otherwise, the
fuel is not burned or is inadequately burned,
posing a risk of overheating and damage to the
catalytic converter. ◀
Do not wait for the engine to warm-up while
the vehicle remains stationary. Start driving at
moderate engine speeds.
Steptronic transmission
Starting the engine1.Depress the brake pedal.2.Engage selector lever position P or N.3.Press the Start/Stop button.
The ignition is activated automatically for a cer‐
tain time and is stopped as soon as the engine
starts.
Manual transmission
Starting the engine
1.Depress the brake pedal.2.Press on the clutch pedal and shift to neu‐
tral.3.Press the Start/Stop button.
The ignition is activated automatically for a cer‐
tain time and is stopped as soon as the engine
starts.
Engine stop
General information Take the remote control with you
Take the remote control with you when
leaving the vehicle so that children, e.g., cannot
start the engine. ◀
Apply parking brake and further secure
the vehicle if needed.
Set the parking brake firmly when parking; oth‐
erwise, the vehicle could roll. On steep upward
and downward inclines, further secure the ve‐
Seite 61DrivingCONTROLS61
Online Edition for Part no. 01 40 2 957 280 - X/14
Page 142 of 240
3.Hold the hand-held transmitter for the sys‐
tem to be controlled approx. 1 to 3 in/2.5
to 8 cm away from the buttons of the inte‐
rior rearview mirror. The required distance
depends on the manual transmitter.4.Simultaneously press and hold the button
of the desired function on the hand-held
transmitter and the button to be program‐
med on the interior rearview mirror. The
LED on the interior rearview mirror will be‐
gin flashing slowly.5.Release both buttons as soon as the LED
flashes more rapidly. The LED flashing
faster indicates that the button on the inte‐
rior rearview mirror has been programmed.
If the LED does not flash faster after at least
60 seconds, change the distance between
the interior rearview mirror and the hand-
held transmitter and repeat the step. Sev‐
eral more attempts at different distances
may be necessary. Wait at least 15 seconds
between attempts.6.To program other functions on other but‐
tons, repeat steps 3 to 5.
The systems can be controlled using the interior
rearview mirror buttons.
Special feature of the alternating-code
wireless system
If you are unable to operate the system after
repeated programming, please check if the sys‐
tem to be controlled features an alternating-
code system.
Read the system's operating manual, or press
the programmed button on the interior rear‐
view mirror longer. If the LED on the interior
rearview mirror starts flashing rapidly and then
stays lit constantly for 2 seconds, the system
features an alternating-code system. Flashing
and continuous illumination of the LED will re‐
peat for approximately 20 seconds.
For systems with an alternating-code system,
the Universal Integrated Remote Control and
the system also have to be synchronized.
Please read the operating manual to find out
how to synchronize the system.
Synchronizing is easier with the aid of a second
person.
To synchronize:1.Park the vehicle within range of the re‐
mote-controlled system.2.Program the relevant button on the interior
rearview mirror as described.3.Locate and press the synchronizing button
on the system being programmed. You
have approx. 30 seconds for the next step.4.Hold down the programmed button on the
interior rearview mirror for approximately
3 seconds and then release it. If necessary,
repeat this step up to three times in order
to finish synchronization. Once synchroni‐
zation is complete, the programmed func‐
tion will be carried out.
Reprogramming individual buttons
1.Switch on the ignition.2.Press and hold the interior rearview mirror
button to be programmed.3.As soon as the interior rearview mirror LED
starts flashing slowly, hold the hand-held
transmitter for the system to be controlled
approx. 1 to 3 in/2.5 to 8 cm away from the
buttons of the interior rearview mirror. The
required distance depends on the manual
transmitter.4.Likewise, press and hold the button of the
desired function on the hand-held trans‐
mitter.5.Release both buttons as soon as the interior
rearview mirror LED flashes more rapidly.
The LED flashing faster indicates that the
button on the interior rearview mirror has
been programmed. The system can then be
controlled by the button on the interior
rearview mirror.
If the LED does not flash faster after at least
60 seconds, change the distance and re‐Seite 138CONTROLSInterior equipment138
Online Edition for Part no. 01 40 2 957 280 - X/14
Page 143 of 240
peat the step. Several more attempts at dif‐
ferent distances may be necessary. Wait at
least 15 seconds between attempts.
Controls
Before operation
Before operating a system using the uni‐
versal garage door opener, ensure that there
are no people, animals, or objects within the
range of movement of the remote-controlled
system; otherwise, there is a risk of injury or
damage.
Also follow the safety instructions of the hand-
held transmitter. ◀
The system, such as the garage door, can be
operated using the button on the interior rear‐
view mirror while the engine is running or
when the ignition is started. To do this, hold
down the button within receiving range of the
system until the function is activated. The inte‐
rior rearview mirror LED stays lit while the wire‐
less signal is being transmitted.
Deleting stored functions
Press and hold the left and right button on the
interior rearview mirror simultaneously for ap‐
proximately 20 seconds until the LED flashes
rapidly. All stored functions are deleted. The
functions cannot be deleted individually.
Digital compass
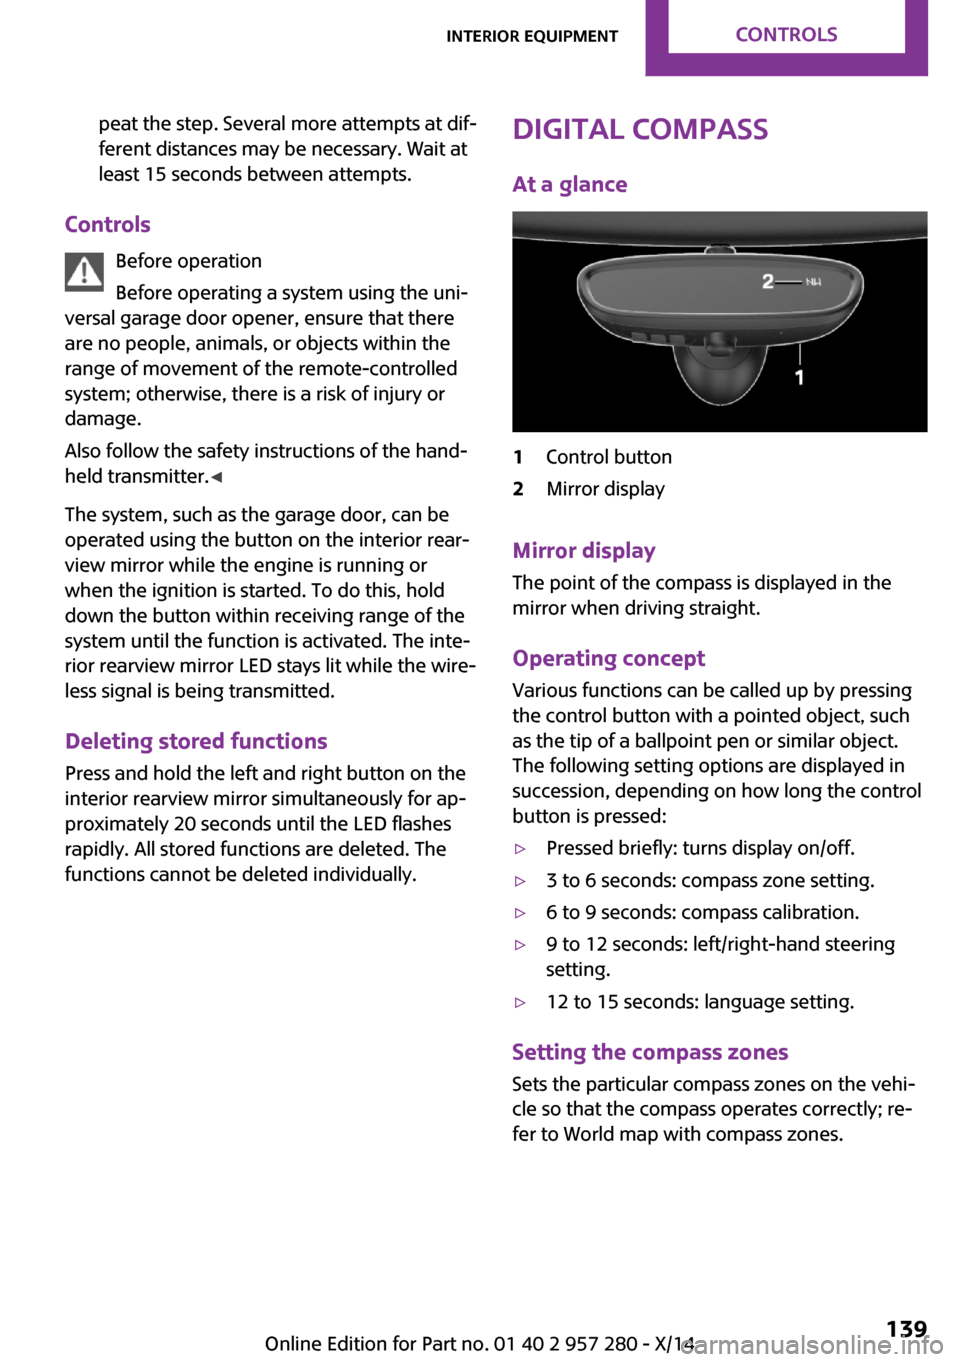
At a glance1Control button2Mirror display
Mirror displayThe point of the compass is displayed in the
mirror when driving straight.
Operating concept Various functions can be called up by pressing
the control button with a pointed object, such
as the tip of a ballpoint pen or similar object.
The following setting options are displayed in
succession, depending on how long the control
button is pressed:
▷Pressed briefly: turns display on/off.▷3 to 6 seconds: compass zone setting.▷6 to 9 seconds: compass calibration.▷9 to 12 seconds: left/right-hand steering
setting.▷12 to 15 seconds: language setting.
Setting the compass zones
Sets the particular compass zones on the vehi‐
cle so that the compass operates correctly; re‐
fer to World map with compass zones.
Seite 139Interior equipmentCONTROLS139
Online Edition for Part no. 01 40 2 957 280 - X/14
Page 232 of 240
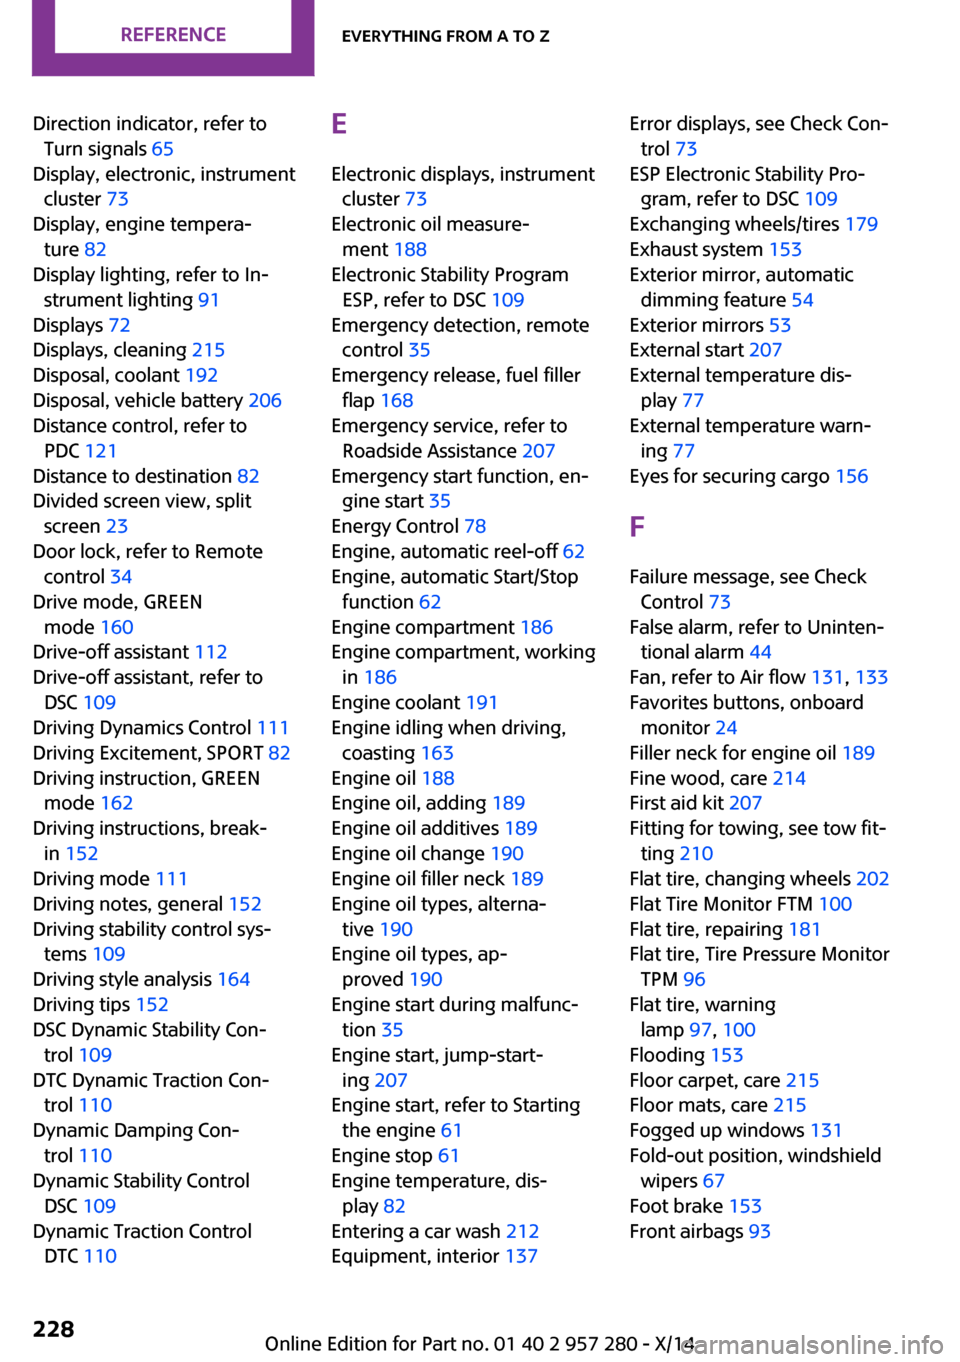
Direction indicator, refer toTurn signals 65
Display, electronic, instrument cluster 73
Display, engine tempera‐ ture 82
Display lighting, refer to In‐ strument lighting 91
Displays 72
Displays, cleaning 215
Disposal, coolant 192
Disposal, vehicle battery 206
Distance control, refer to PDC 121
Distance to destination 82
Divided screen view, split screen 23
Door lock, refer to Remote control 34
Drive mode, GREEN mode 160
Drive-off assistant 112
Drive-off assistant, refer to DSC 109
Driving Dynamics Control 111
Driving Excitement, SPORT 82
Driving instruction, GREEN mode 162
Driving instructions, break- in 152
Driving mode 111
Driving notes, general 152
Driving stability control sys‐ tems 109
Driving style analysis 164
Driving tips 152
DSC Dynamic Stability Con‐ trol 109
DTC Dynamic Traction Con‐ trol 110
Dynamic Damping Con‐ trol 110
Dynamic Stability Control DSC 109
Dynamic Traction Control DTC 110 E
Electronic displays, instrument cluster 73
Electronic oil measure‐ ment 188
Electronic Stability Program ESP, refer to DSC 109
Emergency detection, remote control 35
Emergency release, fuel filler flap 168
Emergency service, refer to Roadside Assistance 207
Emergency start function, en‐ gine start 35
Energy Control 78
Engine, automatic reel-off 62
Engine, automatic Start/Stop function 62
Engine compartment 186
Engine compartment, working in 186
Engine coolant 191
Engine idling when driving, coasting 163
Engine oil 188
Engine oil, adding 189
Engine oil additives 189
Engine oil change 190
Engine oil filler neck 189
Engine oil types, alterna‐ tive 190
Engine oil types, ap‐ proved 190
Engine start during malfunc‐ tion 35
Engine start, jump-start‐ ing 207
Engine start, refer to Starting the engine 61
Engine stop 61
Engine temperature, dis‐ play 82
Entering a car wash 212
Equipment, interior 137 Error displays, see Check Con‐
trol 73
ESP Electronic Stability Pro‐ gram, refer to DSC 109
Exchanging wheels/tires 179
Exhaust system 153
Exterior mirror, automatic dimming feature 54
Exterior mirrors 53
External start 207
External temperature dis‐ play 77
External temperature warn‐ ing 77
Eyes for securing cargo 156
F Failure message, see Check Control 73
False alarm, refer to Uninten‐ tional alarm 44
Fan, refer to Air flow 131, 133
Favorites buttons, onboard monitor 24
Filler neck for engine oil 189
Fine wood, care 214
First aid kit 207
Fitting for towing, see tow fit‐ ting 210
Flat tire, changing wheels 202
Flat Tire Monitor FTM 100
Flat tire, repairing 181
Flat tire, Tire Pressure Monitor TPM 96
Flat tire, warning lamp 97, 100
Flooding 153
Floor carpet, care 215
Floor mats, care 215
Fogged up windows 131
Fold-out position, windshield wipers 67
Foot brake 153
Front airbags 93 Seite 228REFERENCEEverything from A to Z228
Online Edition for Part no. 01 40 2 957 280 - X/14
Page 233 of 240
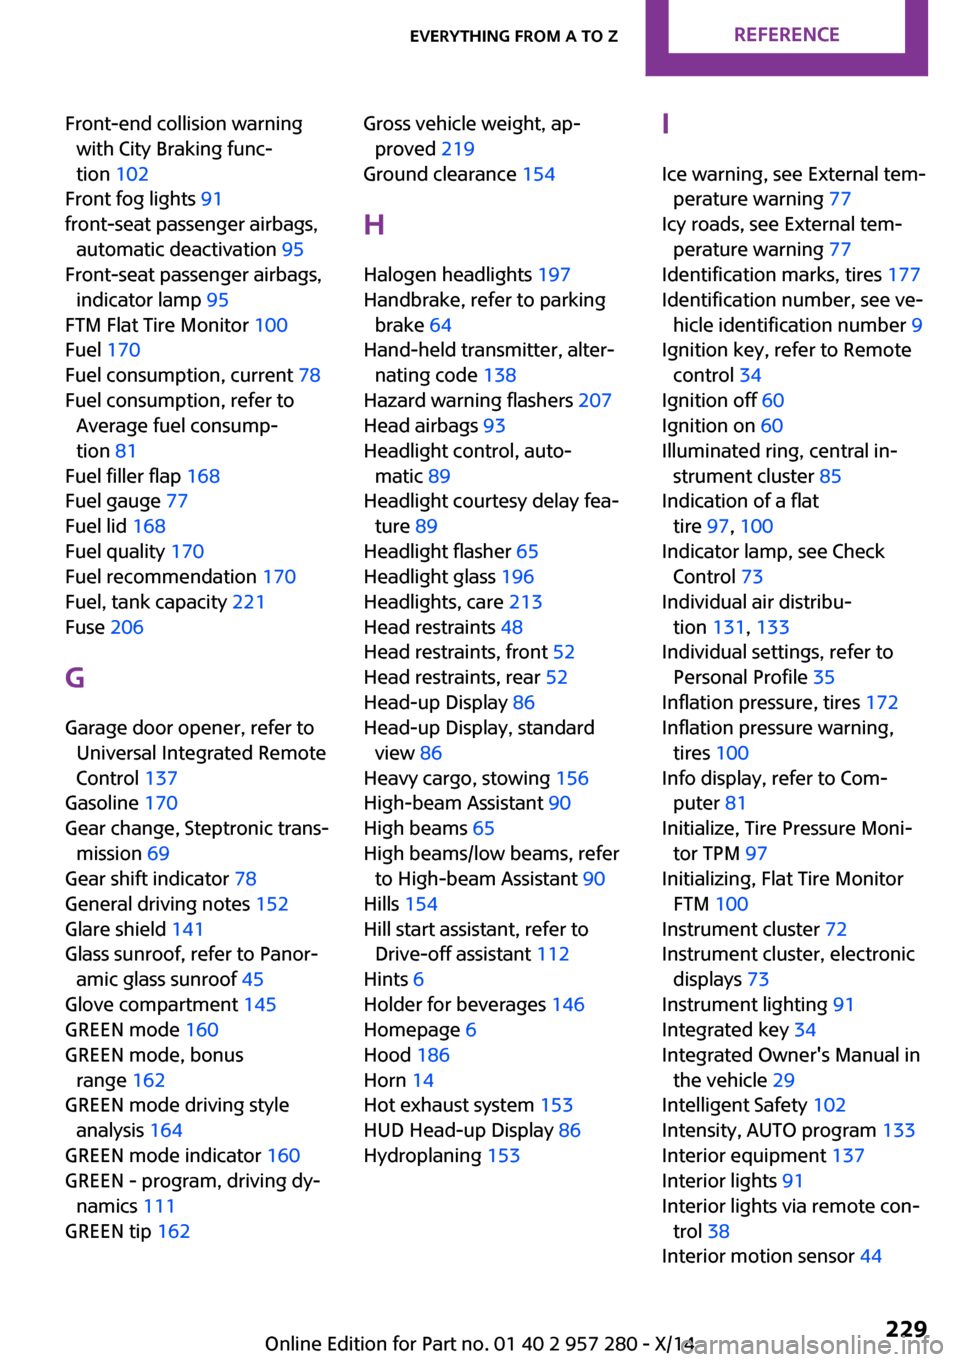
Front-end collision warningwith City Braking func‐
tion 102
Front fog lights 91
front-seat passenger airbags, automatic deactivation 95
Front-seat passenger airbags, indicator lamp 95
FTM Flat Tire Monitor 100
Fuel 170
Fuel consumption, current 78
Fuel consumption, refer to Average fuel consump‐
tion 81
Fuel filler flap 168
Fuel gauge 77
Fuel lid 168
Fuel quality 170
Fuel recommendation 170
Fuel, tank capacity 221
Fuse 206
G Garage door opener, refer to Universal Integrated Remote
Control 137
Gasoline 170
Gear change, Steptronic trans‐ mission 69
Gear shift indicator 78
General driving notes 152
Glare shield 141
Glass sunroof, refer to Panor‐ amic glass sunroof 45
Glove compartment 145
GREEN mode 160
GREEN mode, bonus range 162
GREEN mode driving style analysis 164
GREEN mode indicator 160
GREEN - program, driving dy‐ namics 111
GREEN tip 162 Gross vehicle weight, ap‐
proved 219
Ground clearance 154
H Halogen headlights 197
Handbrake, refer to parking brake 64
Hand-held transmitter, alter‐ nating code 138
Hazard warning flashers 207
Head airbags 93
Headlight control, auto‐ matic 89
Headlight courtesy delay fea‐ ture 89
Headlight flasher 65
Headlight glass 196
Headlights, care 213
Head restraints 48
Head restraints, front 52
Head restraints, rear 52
Head-up Display 86
Head-up Display, standard view 86
Heavy cargo, stowing 156
High-beam Assistant 90
High beams 65
High beams/low beams, refer to High-beam Assistant 90
Hills 154
Hill start assistant, refer to Drive-off assistant 112
Hints 6
Holder for beverages 146
Homepage 6
Hood 186
Horn 14
Hot exhaust system 153
HUD Head-up Display 86
Hydroplaning 153 I
Ice warning, see External tem‐ perature warning 77
Icy roads, see External tem‐ perature warning 77
Identification marks, tires 177
Identification number, see ve‐ hicle identification number 9
Ignition key, refer to Remote control 34
Ignition off 60
Ignition on 60
Illuminated ring, central in‐ strument cluster 85
Indication of a flat tire 97, 100
Indicator lamp, see Check Control 73
Individual air distribu‐ tion 131, 133
Individual settings, refer to Personal Profile 35
Inflation pressure, tires 172
Inflation pressure warning, tires 100
Info display, refer to Com‐ puter 81
Initialize, Tire Pressure Moni‐ tor TPM 97
Initializing, Flat Tire Monitor FTM 100
Instrument cluster 72
Instrument cluster, electronic displays 73
Instrument lighting 91
Integrated key 34
Integrated Owner's Manual in the vehicle 29
Intelligent Safety 102
Intensity, AUTO program 133
Interior equipment 137
Interior lights 91
Interior lights via remote con‐ trol 38
Interior motion sensor 44 Seite 229Everything from A to ZREFERENCE229
Online Edition for Part no. 01 40 2 957 280 - X/14