remove seats MINI 3 door 2014 Owner's Manual
[x] Cancel search | Manufacturer: MINI, Model Year: 2014, Model line: 3 door, Model: MINI 3 door 2014Pages: 240, PDF Size: 11.05 MB
Page 56 of 240

Front head restraintsCorrectly adjusted head restraint
A correctly adjusted head restraint reduces the
risk of injury to cervical vertebrae in the event
of an accident.
Adjusting the head restraint
Adjust the head restraints of all occupied
seats properly; otherwise, there is an increased
risk of injury in an accident. ◀
Height
Adjust the head restraint so that its center is approximately at ear level.
Distance
Adjust the distance so that the head restraint is
as close as possible to the back of the head.
If necessary, adjust the distance by adjusting
the tilt of the backrest.
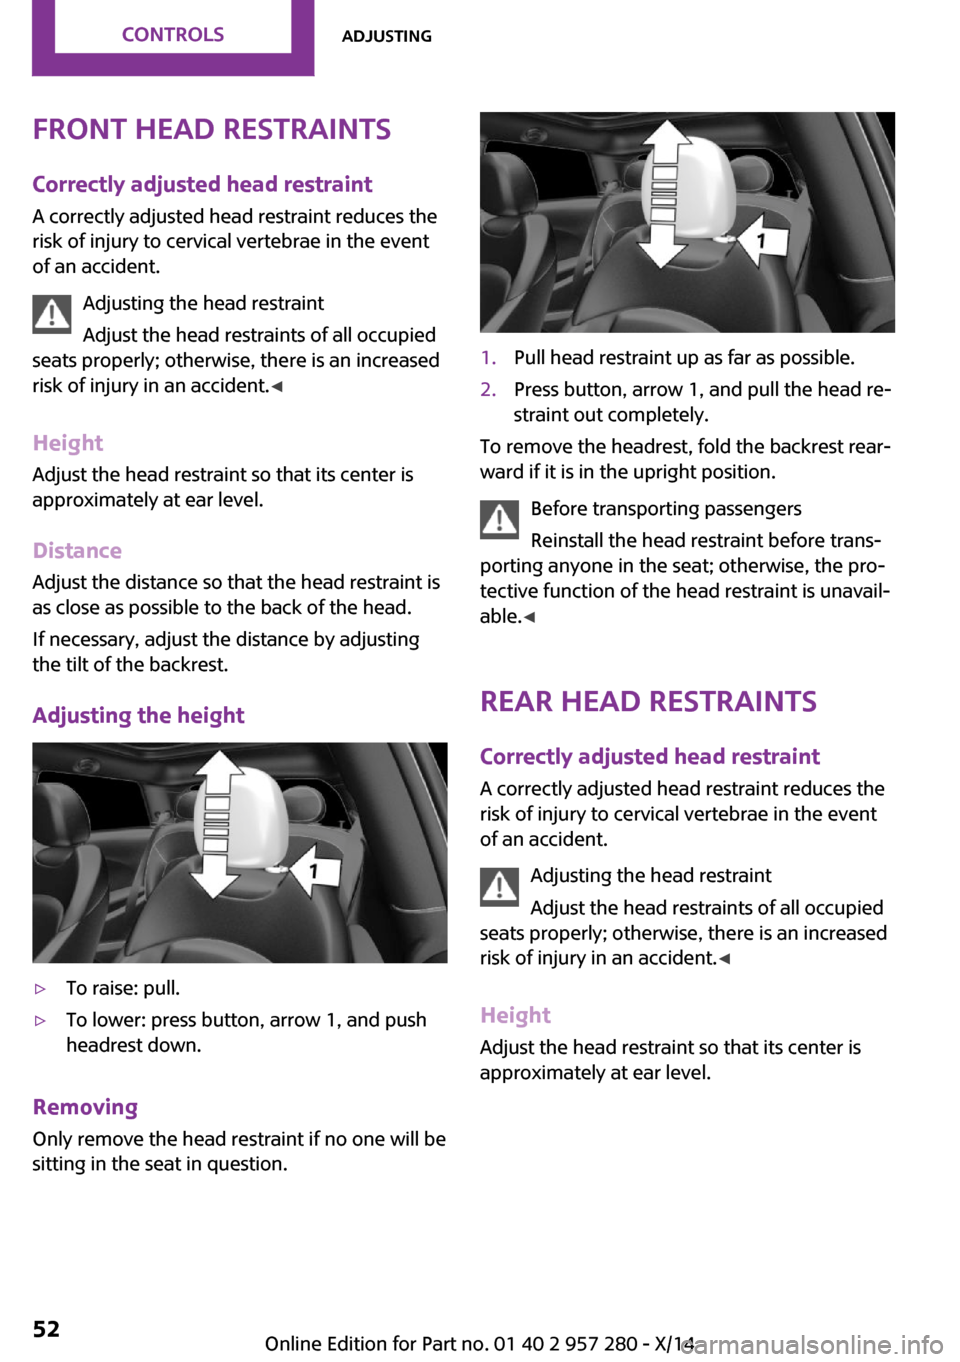
Adjusting the height▷To raise: pull.▷To lower: press button, arrow 1, and push
headrest down.
Removing
Only remove the head restraint if no one will be
sitting in the seat in question.
1.Pull head restraint up as far as possible.2.Press button, arrow 1, and pull the head re‐
straint out completely.
To remove the headrest, fold the backrest rear‐
ward if it is in the upright position.
Before transporting passengers
Reinstall the head restraint before trans‐
porting anyone in the seat; otherwise, the pro‐
tective function of the head restraint is unavail‐
able. ◀
Rear head restraints
Correctly adjusted head restraint
A correctly adjusted head restraint reduces the
risk of injury to cervical vertebrae in the event
of an accident.
Adjusting the head restraint
Adjust the head restraints of all occupied
seats properly; otherwise, there is an increased
risk of injury in an accident. ◀
Height Adjust the head restraint so that its center isapproximately at ear level.
Seite 52CONTROLSAdjusting52
Online Edition for Part no. 01 40 2 957 280 - X/14
Page 98 of 240

Ejection MitigationThe system consists of an extension of the head
airbag system and is a kind of curtain. The sys‐
tem is activated under certain conditions in the
event of a rollover accident, and should help to
prevent the vehicle occupant from being
thrown out of the vehicle.
Knee airbag
The knee airbag supports the legs in a frontal
impact.
Protective action
Airbags are not triggered in every impact situa‐
tion, e.g., in less severe accidents or rear-end
collisions.
Information on how to ensure the opti‐
mal protective effect of the airbags▷Keep at a distance from the airbags.▷Always grasp the steering wheel on the
steering wheel rim, holding your hands at
the 3 o'clock and 9 o'clock positions, to
keep the risk of injury to your hands or
arms as low as possible when the airbag is
triggered.▷There should be no person, animals, or ob‐
jects between an airbag and a person.▷Do not use the cover of the front airbag on
the front passenger side as a storage area.▷Dashboard and windshield on the front
passenger side must stay clear - do not at‐
tach adhesive labels or coverings and do
not attach brackets or cables, e. g., for GPS
devices or' mobile phones.▷Make sure that the front passenger is sitting
correctly, i.e., keeps his or her feet and legs
in the footwell; otherwise, leg injuries might
occur when front airbag is activated.▷Do not place slip covers, seat cushions or
other objects on the front passenger seat
that are not approved specifically for seats
with integrated side airbags.▷Do not hang pieces of clothing, such as
jackets, over the backrests.▷Make sure that occupants keep their heads
away from the side airbag and do not rest
against the head airbag; otherwise, injuries
might occur when airbag is activated.▷Do not remove the airbag system.▷Do not remove the steering wheel.▷Do not apply adhesive materials to the air‐
bag cover panels, do not cover them or
modify them in any way.▷Never modify either the individual compo‐
nents or the wiring in the airbag system.
This also applies to steering wheel covers,
the dashboard, the seats, the roof pillars
and the sides of the roofliner. ◀
Even when you follow all instructions very
closely, injury from contact with the airbags
cannot be ruled out in certain situations.
The ignition and inflation noise may lead to
short-term and, in most cases, temporary hear‐
ing impairment in sensitive individuals.
Malfunction, deactivation and after de‐
ploying the airbags
Do not touch the individual components imme‐
diately after the system has been triggered;
otherwise, you may risk burns.
Only have the airbags checked, repaired or dis‐
mantled and the airbag generator scrapped by
the service center or an authorized repair shop
for handling explosives.
Non-professional attempts to service the sys‐
tem could lead to failure in an emergency or
unintentional activation of the airbag - both
may lead to injury. ◀
Warnings and information on the airbags are
also found on the sun visors.
Seite 94CONTROLSSafety94
Online Edition for Part no. 01 40 2 957 280 - X/14
Page 151 of 240

Front
In the center console.Rear
On 3-door models: in front of the rear seats and
in the and in the side armrests.
On 5-door models: in front of the rear seats.
Clothes hooks The clothes hooks are located above the side
windows in the rear.
Do not obstruct view
When suspending clothing from the
hooks, ensure that it will not obstruct the driv‐
er's view. ◀
No heavy objects
Do not hang heavy objects from the
hooks; otherwise, they may present a danger
to passengers during braking and evasive ma‐
neuvers. ◀
Storage space under
cargo floor panel
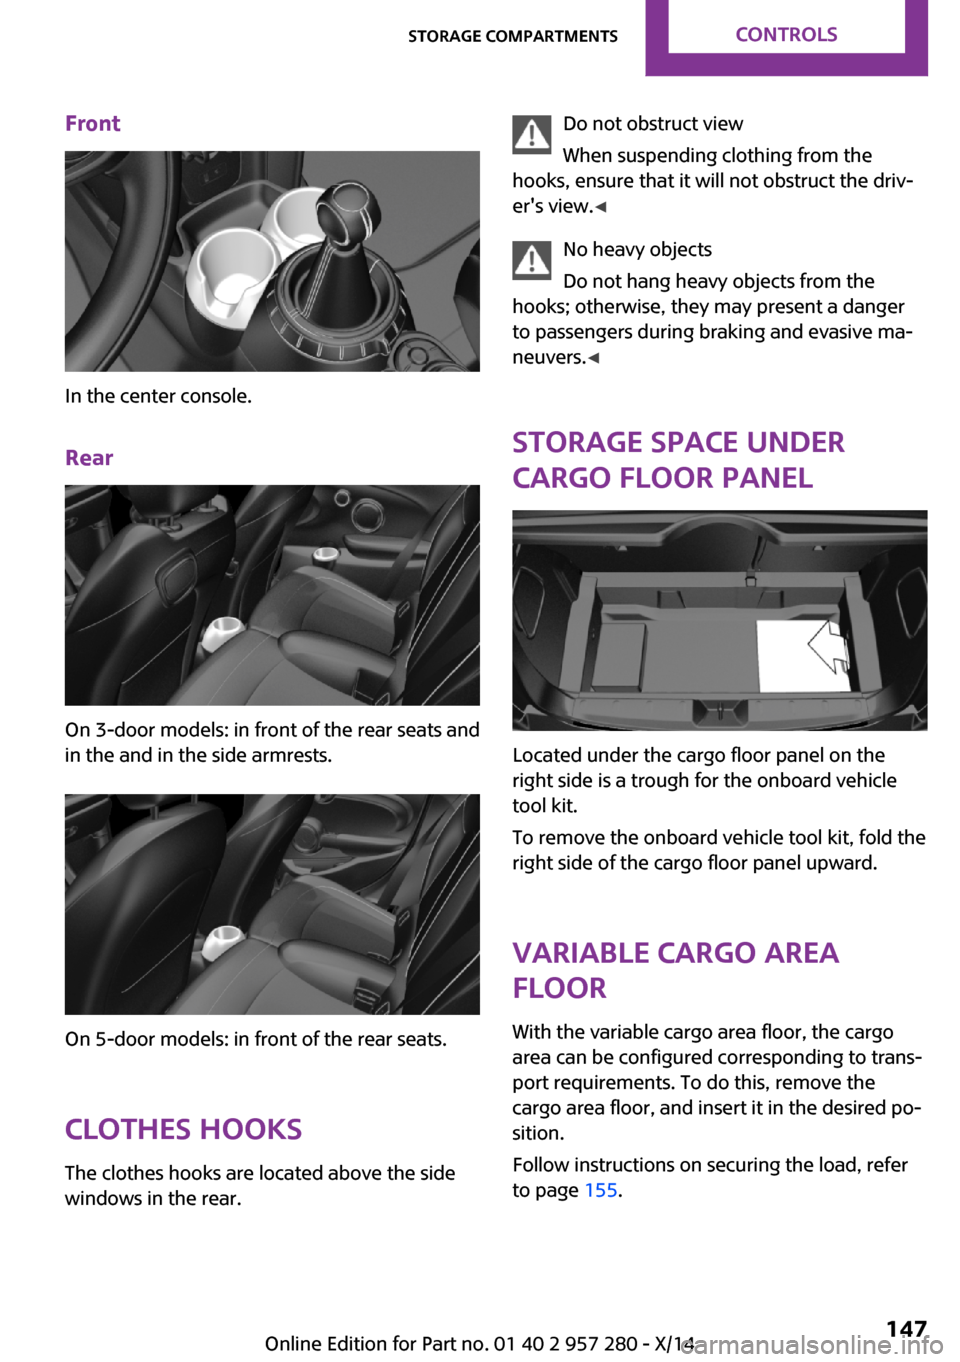
Located under the cargo floor panel on the
right side is a trough for the onboard vehicle
tool kit.
To remove the onboard vehicle tool kit, fold the
right side of the cargo floor panel upward.
Variable cargo areafloor
With the variable cargo area floor, the cargo
area can be configured corresponding to trans‐
port requirements. To do this, remove the
cargo area floor, and insert it in the desired po‐
sition.
Follow instructions on securing the load, refer
to page 155.
Seite 147Storage compartmentsCONTROLS147
Online Edition for Part no. 01 40 2 957 280 - X/14