steering MINI 3 door 2015 Service Manual
[x] Cancel search | Manufacturer: MINI, Model Year: 2015, Model line: 3 door, Model: MINI 3 door 2015Pages: 248, PDF Size: 5.43 MB
Page 207 of 248
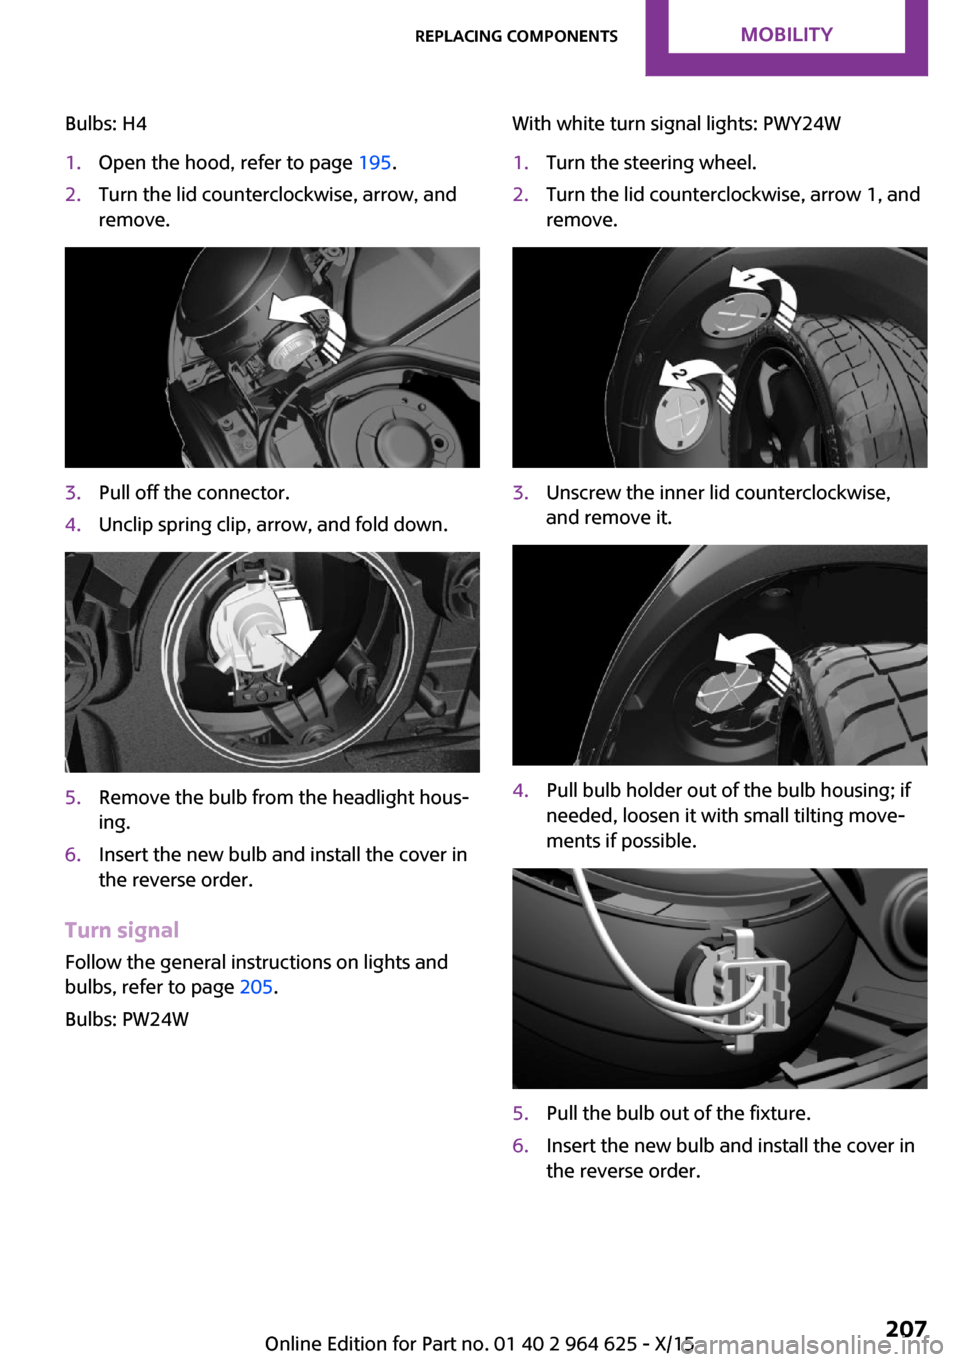
Bulbs: H41.Open the hood, refer to page 195.2.Turn the lid counterclockwise, arrow, and
remove.3.Pull off the connector.4.Unclip spring clip, arrow, and fold down.5.Remove the bulb from the headlight hous‐
ing.6.Insert the new bulb and install the cover in
the reverse order.
Turn signal
Follow the general instructions on lights and
bulbs, refer to page 205.
Bulbs: PW24W
With white turn signal lights: PWY24W1.Turn the steering wheel.2.Turn the lid counterclockwise, arrow 1, and
remove.3.Unscrew the inner lid counterclockwise,
and remove it.4.Pull bulb holder out of the bulb housing; if
needed, loosen it with small tilting move‐
ments if possible.5.Pull the bulb out of the fixture.6.Insert the new bulb and install the cover in
the reverse order.Seite 207Replacing componentsMOBILITY207
Online Edition for Part no. 01 40 2 964 625 - X/15
Page 208 of 248
LED parking lights/LED fog lightsFollow the general instructions on lights and
bulbs, refer to page 205.
The lights feature LED technology. In the case
of a malfunction, contact a dealer’s service cen‐
ter or another qualified service center or repair
shop.
Parking lights/fog lights/daytime
running lights
Follow the general instructions on lights and
bulbs, refer to page 205.
Bulbs:▷Parking lights for halogen headlights: W5W
Parking lights for LED headlights: W5W NBV▷Daytime running light: PSX24W▷Fog lamp: H8
Replacing the bulbs
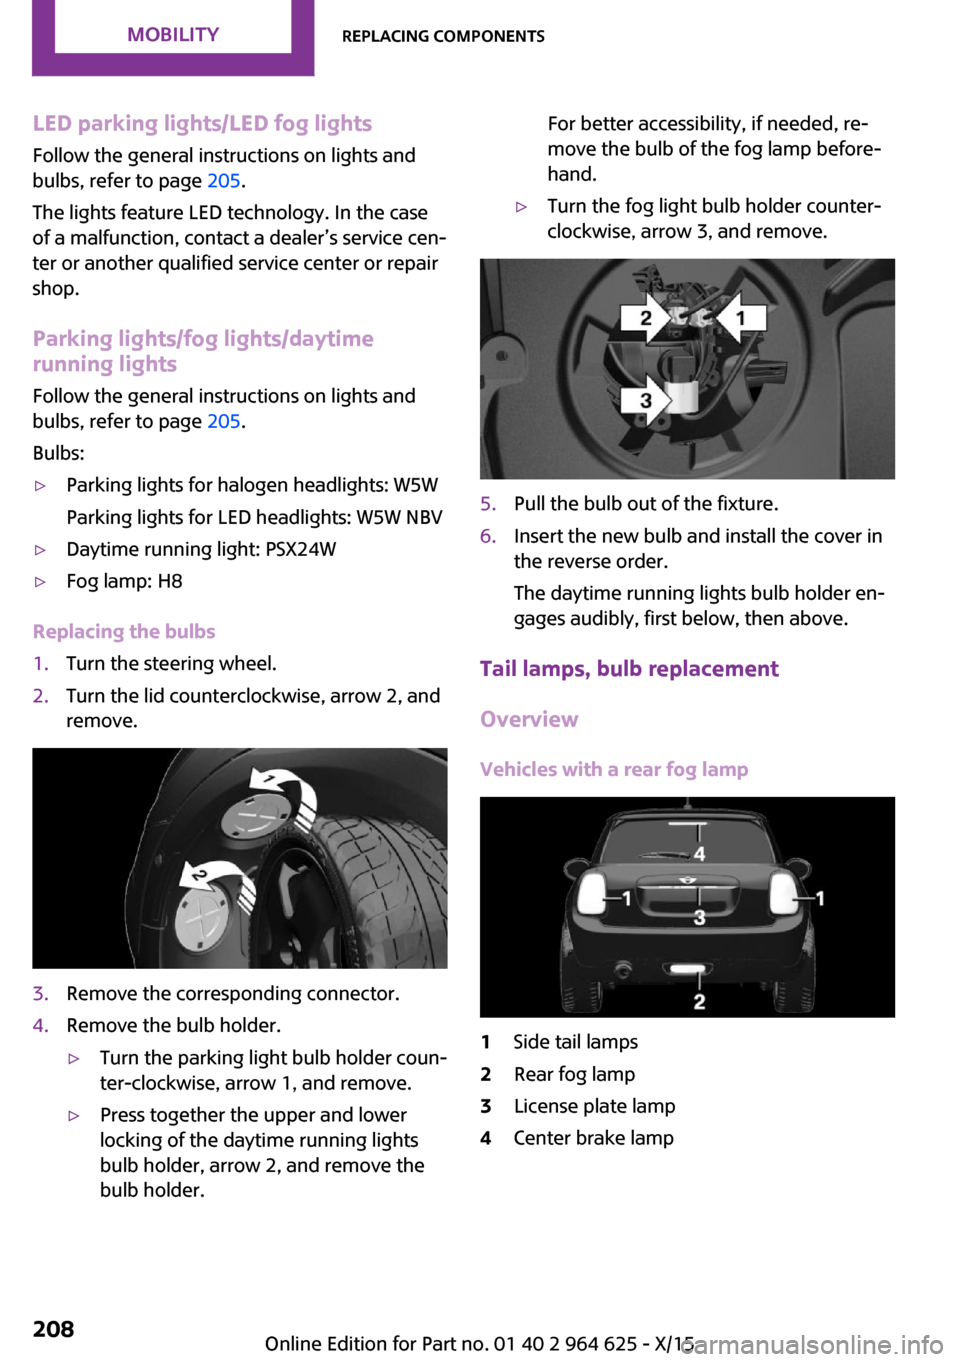
1.Turn the steering wheel.2.Turn the lid counterclockwise, arrow 2, and
remove.3.Remove the corresponding connector.4.Remove the bulb holder.▷Turn the parking light bulb holder coun‐
ter-clockwise, arrow 1, and remove.▷Press together the upper and lower
locking of the daytime running lights
bulb holder, arrow 2, and remove the
bulb holder.For better accessibility, if needed, re‐
move the bulb of the fog lamp before‐
hand.▷Turn the fog light bulb holder counter-
clockwise, arrow 3, and remove.5.Pull the bulb out of the fixture.6.Insert the new bulb and install the cover in
the reverse order.
The daytime running lights bulb holder en‐
gages audibly, first below, then above.
Tail lamps, bulb replacement
Overview
Vehicles with a rear fog lamp
1Side tail lamps2Rear fog lamp3License plate lamp4Center brake lampSeite 208MOBILITYReplacing components208
Online Edition for Part no. 01 40 2 964 625 - X/15
Page 214 of 248
The nonworking wheel cannot be stored in
the emergency wheel bracket because of
its size.3.Check tire inflation pressure at the next op‐
portunity and correct as needed.4.Reinitialize the Flat Tire Monitor, refer to
page 107.
Reinitialize the Tire Pressure Monitor, refer
to page 104.5.Check to make sure the lug bolts are tight
with a calibrated torque wrench.
Driving with emergency wheel
WARNING
The emergency wheel has particular di‐
mensions. When driving with an emergency wheel, changed driving properties may occur at
higher speeds, for example reduced lane stabil‐
ity when braking, longer braking distance and
changed self-steering properties in the limit
area. There is risk of an accident. Drive moder‐
ately and do not exceed a speed of
50 mph/80 km/h. ◀
After the trip with emergency wheel Have the following work performed only by a
dealer's service center or another qualified
service center or repair shop.
1.Replace the damaged tires as soon as pos‐
sible.2.Replace the emergency wheel with a new
wheel.3.Have the tray with the emergency wheel
installed.
Vehicle battery
Maintenance
The battery is maintenance-free.
The added amount of acid is sufficient for the
service life of the battery.
More information about the battery can be re‐
quested from a dealer’s service center or an‐
other qualified service center or repair shop.
Battery replacement CAUTION
Vehicle batteries that are not compatible
can damage vehicle systems and impair vehicle
functions. There is a risk of personal and prop‐
erty damage. Only vehicle batteries that are
compatible with your vehicle type should be in‐
stalled in your vehicle. Information on compati‐
ble vehicle batteries is available at your dealer’s
service center. ◀
After a battery replacement, the manufacturer
of your vehicle recommends that the vehicle
battery be registered on the vehicle by a
dealer’s service center or another qualified
service center or repair shop to ensure that all
comfort features are fully available and that
any Check Control messages of these comfort
features are no longer displayed.
Charging the battery
General information
Make sure that the battery is always sufficiently
charged to guarantee that the battery remains
usable for its full service life.
The battery may need to be charged in the fol‐
lowing cases:▷When making frequent short-distance
drives.▷If the vehicle is not used for more than a
month.▷Steptronic transmission: when parked for
long periods of time in selector lever posi‐
tion D, R or N.Seite 214MOBILITYReplacing components214
Online Edition for Part no. 01 40 2 964 625 - X/15
Page 219 of 248
▷Do not tow the vehicle with the rear axle
tilted, as the front wheels could turn.▷When the engine is stopped, there is no
power assist. Consequently, more force
needs to be applied when braking and
steering.▷Larger steering wheel movements are re‐
quired.▷The towing vehicle must not be lighter than
the vehicle being towed; otherwise, it will
not be possible to control the vehicle's re‐
sponse.▷Do not exceed a towing speed of
30 mph/50 km/h.▷Do not exceed a towing distance of
30 miles/50 km.
Tow truck
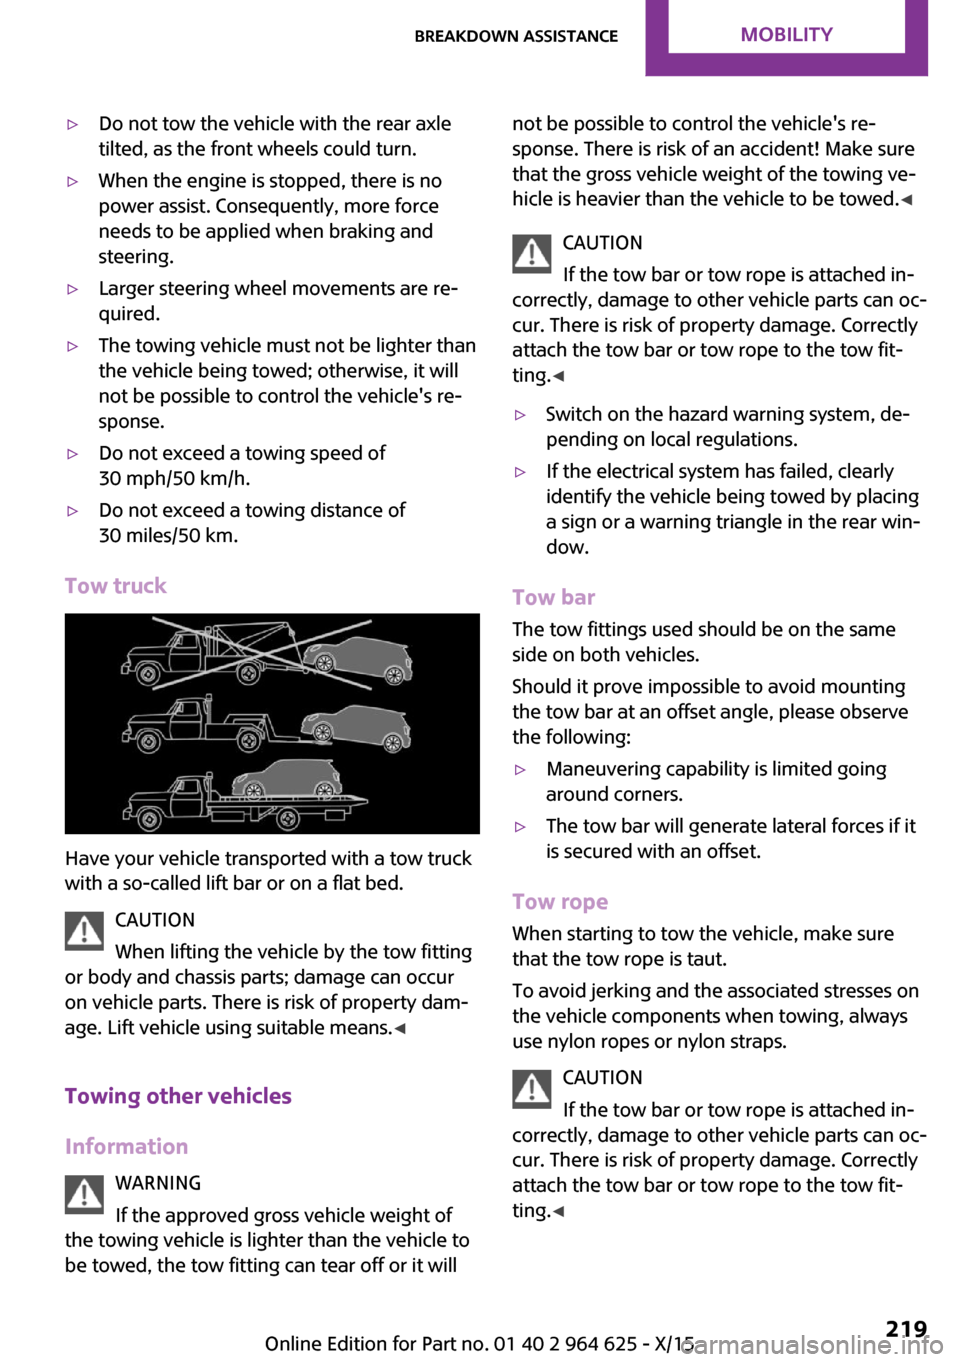
Have your vehicle transported with a tow truck
with a so-called lift bar or on a flat bed.
CAUTION
When lifting the vehicle by the tow fitting
or body and chassis parts; damage can occur
on vehicle parts. There is risk of property dam‐
age. Lift vehicle using suitable means. ◀
Towing other vehicles
Information WARNING
If the approved gross vehicle weight of
the towing vehicle is lighter than the vehicle to
be towed, the tow fitting can tear off or it will
not be possible to control the vehicle's re‐
sponse. There is risk of an accident! Make sure
that the gross vehicle weight of the towing ve‐
hicle is heavier than the vehicle to be towed. ◀
CAUTION
If the tow bar or tow rope is attached in‐
correctly, damage to other vehicle parts can oc‐
cur. There is risk of property damage. Correctly
attach the tow bar or tow rope to the tow fit‐
ting. ◀▷Switch on the hazard warning system, de‐
pending on local regulations.▷If the electrical system has failed, clearly
identify the vehicle being towed by placing
a sign or a warning triangle in the rear win‐
dow.
Tow bar
The tow fittings used should be on the same
side on both vehicles.
Should it prove impossible to avoid mounting
the tow bar at an offset angle, please observe
the following:
▷Maneuvering capability is limited going
around corners.▷The tow bar will generate lateral forces if it
is secured with an offset.
Tow rope
When starting to tow the vehicle, make sure
that the tow rope is taut.
To avoid jerking and the associated stresses on
the vehicle components when towing, always
use nylon ropes or nylon straps.
CAUTION
If the tow bar or tow rope is attached in‐
correctly, damage to other vehicle parts can oc‐ cur. There is risk of property damage. Correctly
attach the tow bar or tow rope to the tow fit‐ ting. ◀
Seite 219Breakdown assistanceMOBILITY219
Online Edition for Part no. 01 40 2 964 625 - X/15
Page 238 of 248
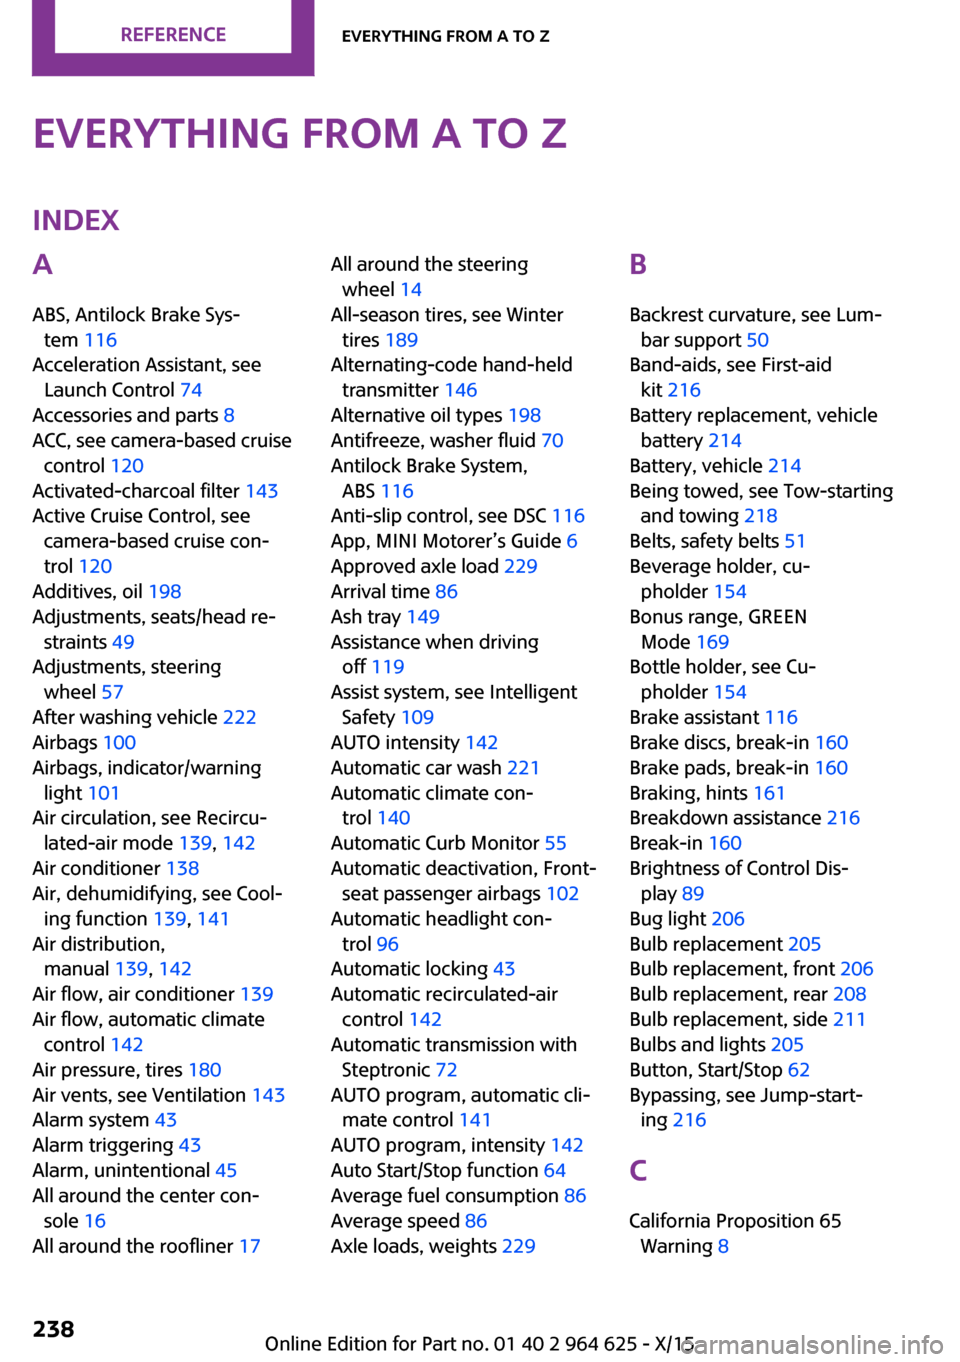
Everything from A to ZIndexA
ABS, Antilock Brake Sys‐ tem 116
Acceleration Assistant, see Launch Control 74
Accessories and parts 8
ACC, see camera-based cruise control 120
Activated-charcoal filter 143
Active Cruise Control, see camera-based cruise con‐
trol 120
Additives, oil 198
Adjustments, seats/head re‐ straints 49
Adjustments, steering wheel 57
After washing vehicle 222
Airbags 100
Airbags, indicator/warning light 101
Air circulation, see Recircu‐ lated-air mode 139, 142
Air conditioner 138
Air, dehumidifying, see Cool‐ ing function 139, 141
Air distribution, manual 139, 142
Air flow, air conditioner 139
Air flow, automatic climate control 142
Air pressure, tires 180
Air vents, see Ventilation 143
Alarm system 43
Alarm triggering 43
Alarm, unintentional 45
All around the center con‐ sole 16
All around the roofliner 17 All around the steering
wheel 14
All-season tires, see Winter tires 189
Alternating-code hand-held transmitter 146
Alternative oil types 198
Antifreeze, washer fluid 70
Antilock Brake System, ABS 116
Anti-slip control, see DSC 116
App, MINI Motorer’s Guide 6
Approved axle load 229
Arrival time 86
Ash tray 149
Assistance when driving off 119
Assist system, see Intelligent Safety 109
AUTO intensity 142
Automatic car wash 221
Automatic climate con‐ trol 140
Automatic Curb Monitor 55
Automatic deactivation, Front- seat passenger airbags 102
Automatic headlight con‐ trol 96
Automatic locking 43
Automatic recirculated-air control 142
Automatic transmission with Steptronic 72
AUTO program, automatic cli‐ mate control 141
AUTO program, intensity 142
Auto Start/Stop function 64
Average fuel consumption 86
Average speed 86
Axle loads, weights 229 B
Backrest curvature, see Lum‐ bar support 50
Band-aids, see First-aid kit 216
Battery replacement, vehicle battery 214
Battery, vehicle 214
Being towed, see Tow-starting and towing 218
Belts, safety belts 51
Beverage holder, cu‐ pholder 154
Bonus range, GREEN Mode 169
Bottle holder, see Cu‐ pholder 154
Brake assistant 116
Brake discs, break-in 160
Brake pads, break-in 160
Braking, hints 161
Breakdown assistance 216
Break-in 160
Brightness of Control Dis‐ play 89
Bug light 206
Bulb replacement 205
Bulb replacement, front 206
Bulb replacement, rear 208
Bulb replacement, side 211
Bulbs and lights 205
Button, Start/Stop 62
Bypassing, see Jump-start‐ ing 216
C
California Proposition 65 Warning 8 Seite 238REFERENCEEverything from A to Z238
Online Edition for Part no. 01 40 2 964 625 - X/15
Page 243 of 248
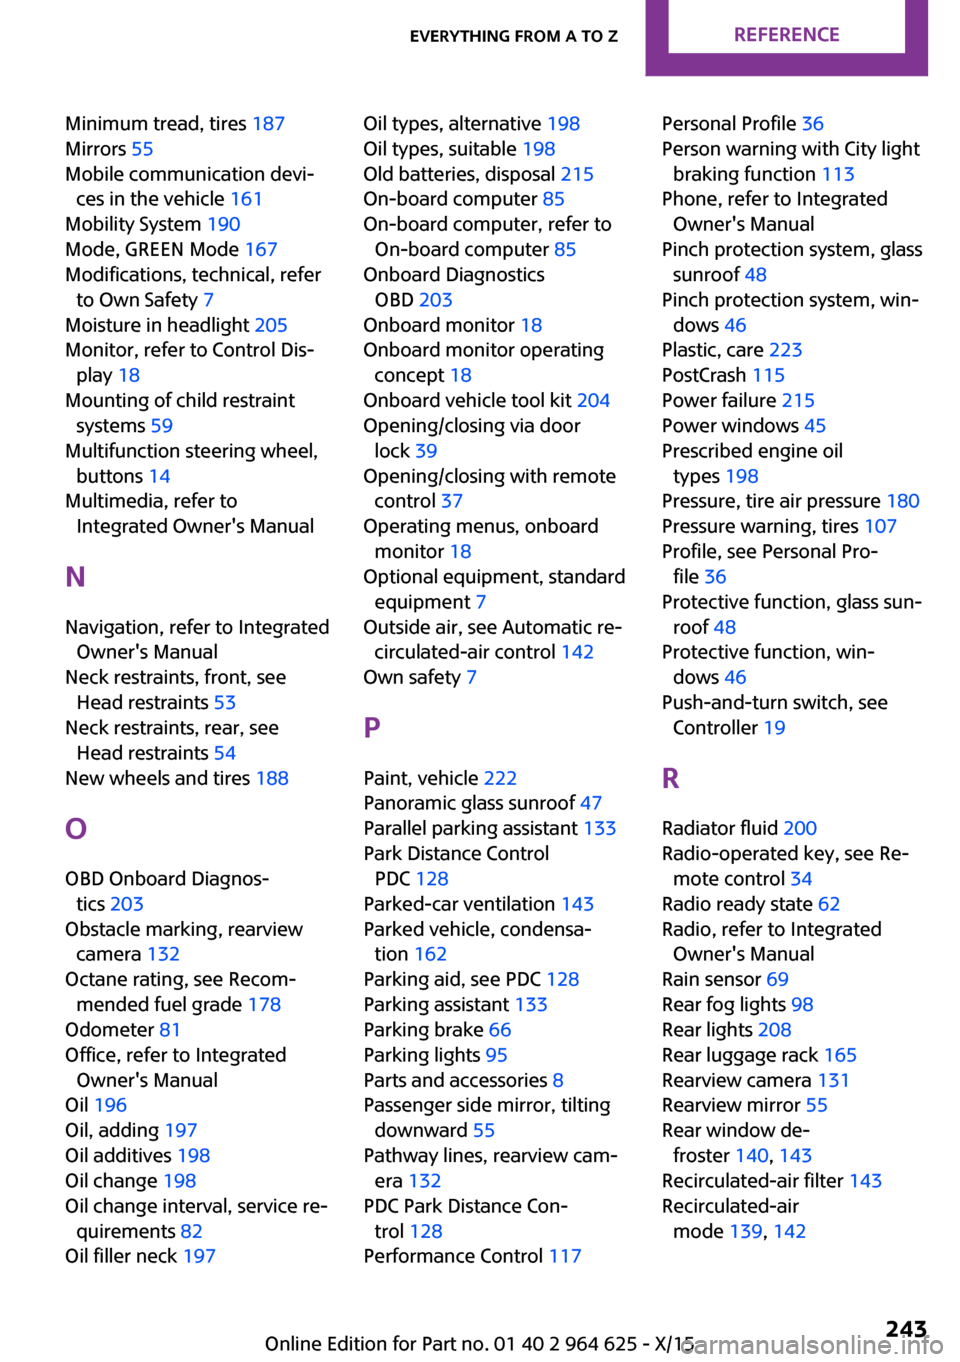
Minimum tread, tires 187
Mirrors 55
Mobile communication devi‐ ces in the vehicle 161
Mobility System 190
Mode, GREEN Mode 167
Modifications, technical, refer to Own Safety 7
Moisture in headlight 205
Monitor, refer to Control Dis‐ play 18
Mounting of child restraint systems 59
Multifunction steering wheel, buttons 14
Multimedia, refer to Integrated Owner's Manual
N Navigation, refer to Integrated Owner's Manual
Neck restraints, front, see Head restraints 53
Neck restraints, rear, see Head restraints 54
New wheels and tires 188
O OBD Onboard Diagnos‐ tics 203
Obstacle marking, rearview camera 132
Octane rating, see Recom‐ mended fuel grade 178
Odometer 81
Office, refer to Integrated Owner's Manual
Oil 196
Oil, adding 197
Oil additives 198
Oil change 198
Oil change interval, service re‐ quirements 82
Oil filler neck 197 Oil types, alternative 198
Oil types, suitable 198
Old batteries, disposal 215
On-board computer 85
On-board computer, refer to On-board computer 85
Onboard Diagnostics OBD 203
Onboard monitor 18
Onboard monitor operating concept 18
Onboard vehicle tool kit 204
Opening/closing via door lock 39
Opening/closing with remote control 37
Operating menus, onboard monitor 18
Optional equipment, standard equipment 7
Outside air, see Automatic re‐ circulated-air control 142
Own safety 7
P
Paint, vehicle 222
Panoramic glass sunroof 47
Parallel parking assistant 133
Park Distance Control PDC 128
Parked-car ventilation 143
Parked vehicle, condensa‐ tion 162
Parking aid, see PDC 128
Parking assistant 133
Parking brake 66
Parking lights 95
Parts and accessories 8
Passenger side mirror, tilting downward 55
Pathway lines, rearview cam‐ era 132
PDC Park Distance Con‐ trol 128
Performance Control 117 Personal Profile 36
Person warning with City light braking function 113
Phone, refer to Integrated Owner's Manual
Pinch protection system, glass sunroof 48
Pinch protection system, win‐ dows 46
Plastic, care 223
PostCrash 115
Power failure 215
Power windows 45
Prescribed engine oil types 198
Pressure, tire air pressure 180
Pressure warning, tires 107
Profile, see Personal Pro‐ file 36
Protective function, glass sun‐ roof 48
Protective function, win‐ dows 46
Push-and-turn switch, see Controller 19
R
Radiator fluid 200
Radio-operated key, see Re‐ mote control 34
Radio ready state 62
Radio, refer to Integrated Owner's Manual
Rain sensor 69
Rear fog lights 98
Rear lights 208
Rear luggage rack 165
Rearview camera 131
Rearview mirror 55
Rear window de‐ froster 140, 143
Recirculated-air filter 143
Recirculated-air mode 139, 142 Seite 243Everything from A to ZREFERENCE243
Online Edition for Part no. 01 40 2 964 625 - X/15
Page 244 of 248
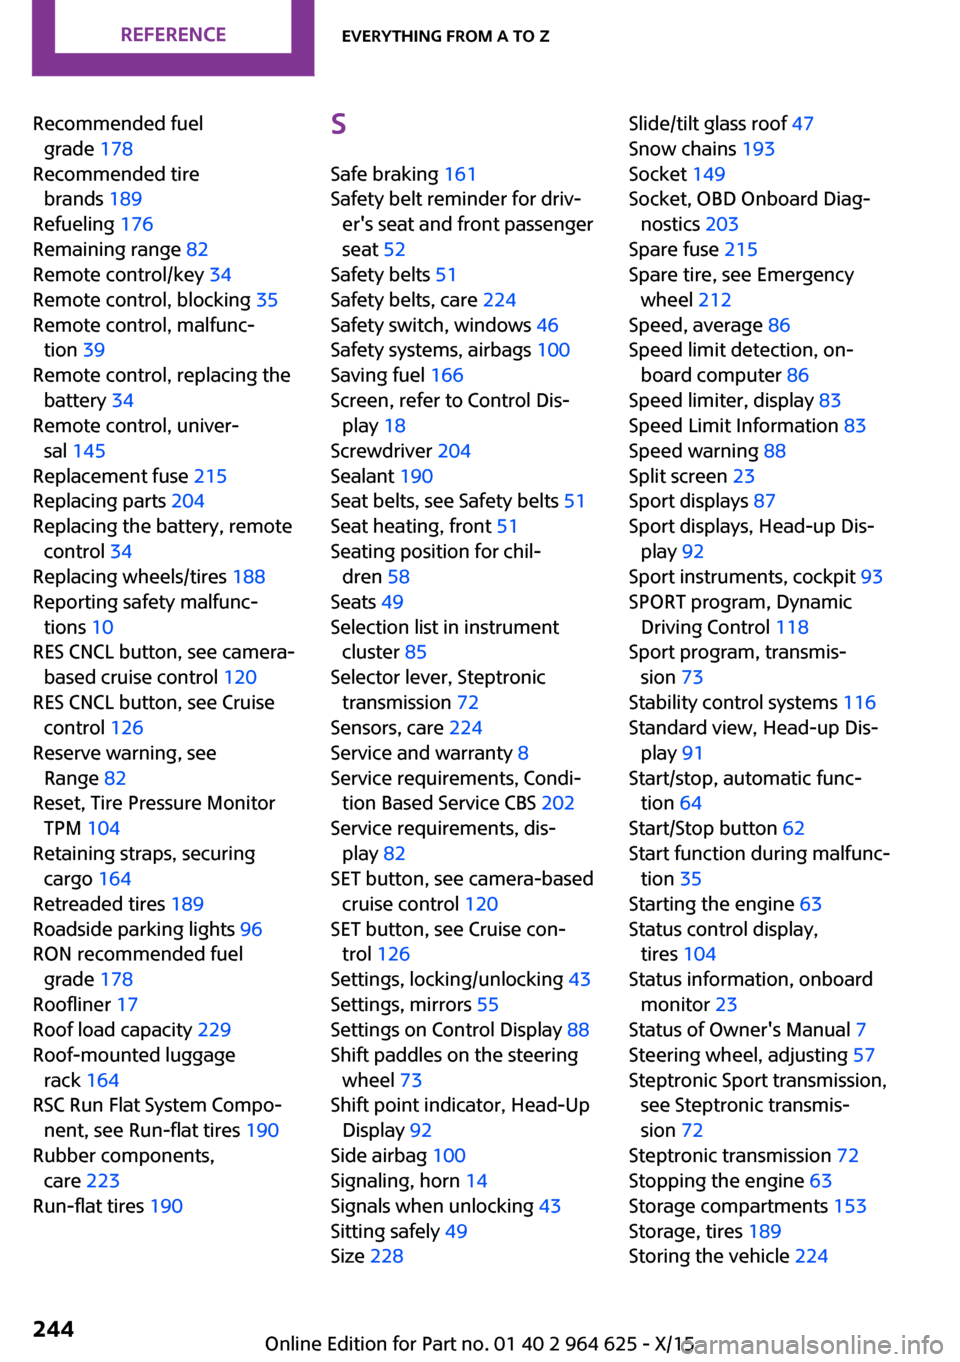
Recommended fuelgrade 178
Recommended tire brands 189
Refueling 176
Remaining range 82
Remote control/key 34
Remote control, blocking 35
Remote control, malfunc‐ tion 39
Remote control, replacing the battery 34
Remote control, univer‐ sal 145
Replacement fuse 215
Replacing parts 204
Replacing the battery, remote control 34
Replacing wheels/tires 188
Reporting safety malfunc‐ tions 10
RES CNCL button, see camera- based cruise control 120
RES CNCL button, see Cruise control 126
Reserve warning, see Range 82
Reset, Tire Pressure Monitor TPM 104
Retaining straps, securing cargo 164
Retreaded tires 189
Roadside parking lights 96
RON recommended fuel grade 178
Roofliner 17
Roof load capacity 229
Roof-mounted luggage rack 164
RSC Run Flat System Compo‐ nent, see Run-flat tires 190
Rubber components, care 223
Run-flat tires 190 S
Safe braking 161
Safety belt reminder for driv‐ er's seat and front passenger
seat 52
Safety belts 51
Safety belts, care 224
Safety switch, windows 46
Safety systems, airbags 100
Saving fuel 166
Screen, refer to Control Dis‐ play 18
Screwdriver 204
Sealant 190
Seat belts, see Safety belts 51
Seat heating, front 51
Seating position for chil‐ dren 58
Seats 49
Selection list in instrument cluster 85
Selector lever, Steptronic transmission 72
Sensors, care 224
Service and warranty 8
Service requirements, Condi‐ tion Based Service CBS 202
Service requirements, dis‐ play 82
SET button, see camera-based cruise control 120
SET button, see Cruise con‐ trol 126
Settings, locking/unlocking 43
Settings, mirrors 55
Settings on Control Display 88
Shift paddles on the steering wheel 73
Shift point indicator, Head-Up Display 92
Side airbag 100
Signaling, horn 14
Signals when unlocking 43
Sitting safely 49
Size 228 Slide/tilt glass roof 47
Snow chains 193
Socket 149
Socket, OBD Onboard Diag‐ nostics 203
Spare fuse 215
Spare tire, see Emergency wheel 212
Speed, average 86
Speed limit detection, on‐ board computer 86
Speed limiter, display 83
Speed Limit Information 83
Speed warning 88
Split screen 23
Sport displays 87
Sport displays, Head-up Dis‐ play 92
Sport instruments, cockpit 93
SPORT program, Dynamic Driving Control 118
Sport program, transmis‐ sion 73
Stability control systems 116
Standard view, Head-up Dis‐ play 91
Start/stop, automatic func‐ tion 64
Start/Stop button 62
Start function during malfunc‐ tion 35
Starting the engine 63
Status control display, tires 104
Status information, onboard monitor 23
Status of Owner's Manual 7
Steering wheel, adjusting 57
Steptronic Sport transmission, see Steptronic transmis‐
sion 72
Steptronic transmission 72
Stopping the engine 63
Storage compartments 153
Storage, tires 189
Storing the vehicle 224 Seite 244REFERENCEEverything from A to Z244
Online Edition for Part no. 01 40 2 964 625 - X/15