wheel MINI 5 door 2015 Owner's Manua
[x] Cancel search | Manufacturer: MINI, Model Year: 2015, Model line: 5 door, Model: MINI 5 door 2015Pages: 248, PDF Size: 5.43 MB
Page 5 of 248
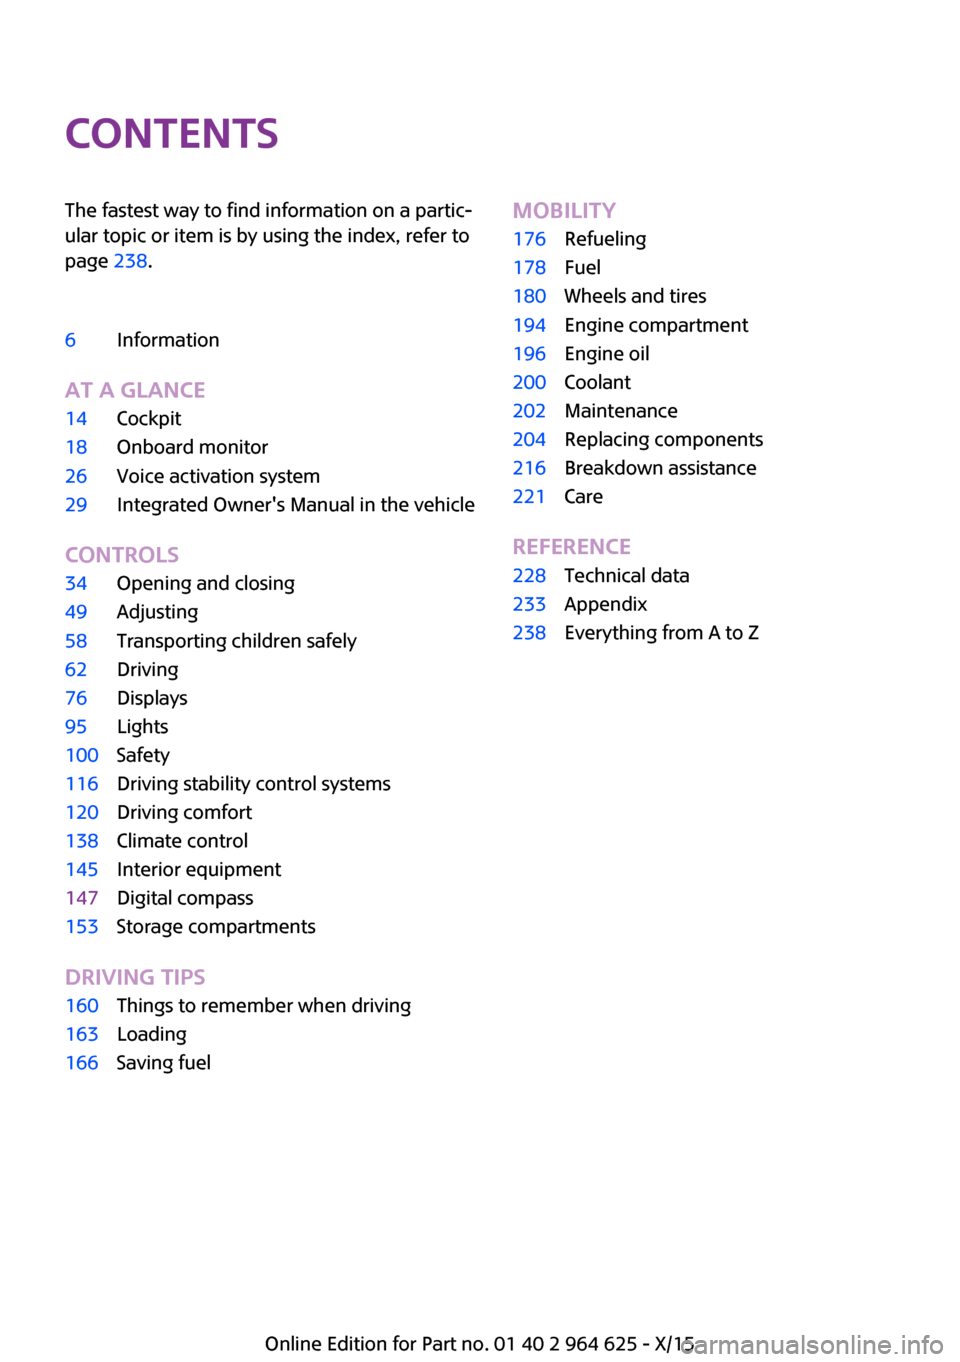
ContentsThe fastest way to find information on a partic‐
ular topic or item is by using the index, refer to
page 238.6Information
AT A GLANCE
14Cockpit18Onboard monitor26Voice activation system29Integrated Owner's Manual in the vehicle
CONTROLS
34Opening and closing49Adjusting58Transporting children safely62Driving76Displays95Lights100Safety116Driving stability control systems120Driving comfort138Climate control145Interior equipment147Digital compass153Storage compartments
DRIVING TIPS
160Things to remember when driving163Loading166Saving fuelMOBILITY176Refueling178Fuel180Wheels and tires194Engine compartment196Engine oil200Coolant202Maintenance204Replacing components216Breakdown assistance221Care
REFERENCE
228Technical data233Appendix238Everything from A to Z
Online Edition for Part no. 01 40 2 964 625 - X/15
Page 9 of 248
Maintenance
Maintain the vehicle regularly to sustain the
road safety, operational reliability and the New
Vehicle Limited Warranty.
Specifications for required maintenance meas‐
ures:▷MINI Maintenance system▷Service and Warranty Information Booklet
for US models▷Warranty and Service Guide Booklet for
Canadian models
If the vehicle is not maintained according to
these specifications, this could result in serious
damage to the vehicle. Such damage is not
covered by the MINI New Vehicle Limited War‐
ranty.
Data memory
Many electronic components on your vehicle
are equipped with data memories that tempo‐
rarily or permanently store technical informa‐
tion about the condition of the vehicle, events
and faults. This technical information generally
records the state of a component, a module, a
system or the environment:
▷Operating mode of system components, fill
levels for instance.▷Status messages for the vehicle and from its
individual components, e.g., wheel rotation
speed/vehicle speed, deceleration, trans‐
verse acceleration.▷Malfunctions and faults in important system
components, e.g., lights and brakes.▷Responses by the vehicle to special situa‐
tions such as airbag deployment or engag‐
ing the stability control system.▷Ambient conditions, such as temperature.
This data is purely technical in nature and is
used to detect and correct faults and to opti‐
mize vehicle functions. Motion profiles over
routes traveled cannot be created from this
data. When service offerings are used, e.g., re‐
pair services, service processes, warranty
claims, quality assurance, this technical infor‐
mation can be read out from the event and
fault memories by employees of a dealer’s
service center or another qualified service cen‐
ter or repair shop, including the manufacturer,
using special diagnostic tools. You can obtain
further information there if you need it. After
an error is corrected, the information in the
fault memory is deleted or overwritten on a
continuous basis.
With the vehicle in use there are situations
where you can associate these technical data
with individuals if combined with other infor‐
mation, e.g., an accident report, damage to the
vehicle, eye witness accounts — possibly with
the assistance of an expert.
Additional functions that are contractually
agreed with the customer - such as vehicle
emergency locating - you can transmit certain
vehicle data from the vehicle.
Event Data Recorder EDR
This vehicle is equipped with an event data re‐
corder EDR. The main purpose of an EDR is to
record, in certain crash or near crash-like situa‐
tions, such as an air bag deployment or hitting
a road obstacle, data that will assist in under‐
standing how a vehicle’s systems performed.
The EDR is designed to record data related to
vehicle dynamics and safety systems for a short
period of time, typically 30 seconds or less.
The EDR in this vehicle is designed to record
such data as:▷How various systems in your vehicle were
operating.▷Whether or not the driver and passenger
safety belts were fastened.▷How far, if at all, the driver was depressing
the accelerator and/or brake pedal.▷How fast the vehicle was traveling.Seite 9Information9
Online Edition for Part no. 01 40 2 964 625 - X/15
Page 14 of 248
CockpitVehicle features and op‐
tions
This chapter describes all standard, country-
specific and optional features offered with the
series. It also describes features that are notnecessarily available in your car, e. g., due to
the selected options or country versions. This
also applies to safety-related functions and sys‐
tems. The respectively applicable country provi‐
sions must be observed when using the respec‐
tive features and systems.
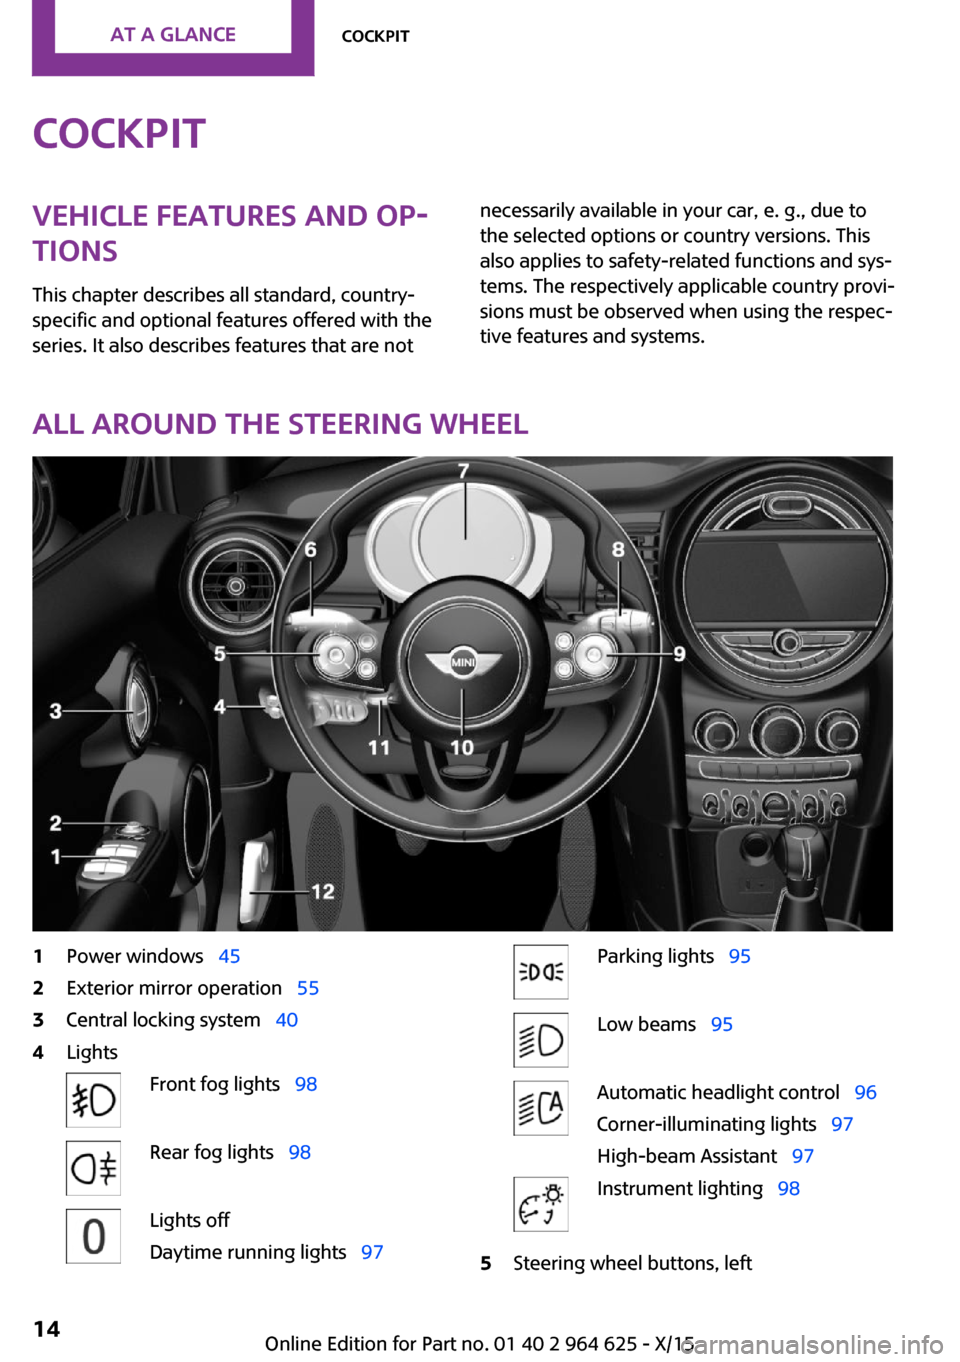
All around the steering wheel
1Power windows 452Exterior mirror operation 553Central locking system 404LightsFront fog lights 98Rear fog lights 98Lights off
Daytime running lights 97Parking lights 95Low beams 95Automatic headlight control 96
Corner-illuminating lights 97
High-beam Assistant 97Instrument lighting 985Steering wheel buttons, leftSeite 14AT A GLANCECockpit14
Online Edition for Part no. 01 40 2 964 625 - X/15
Page 15 of 248
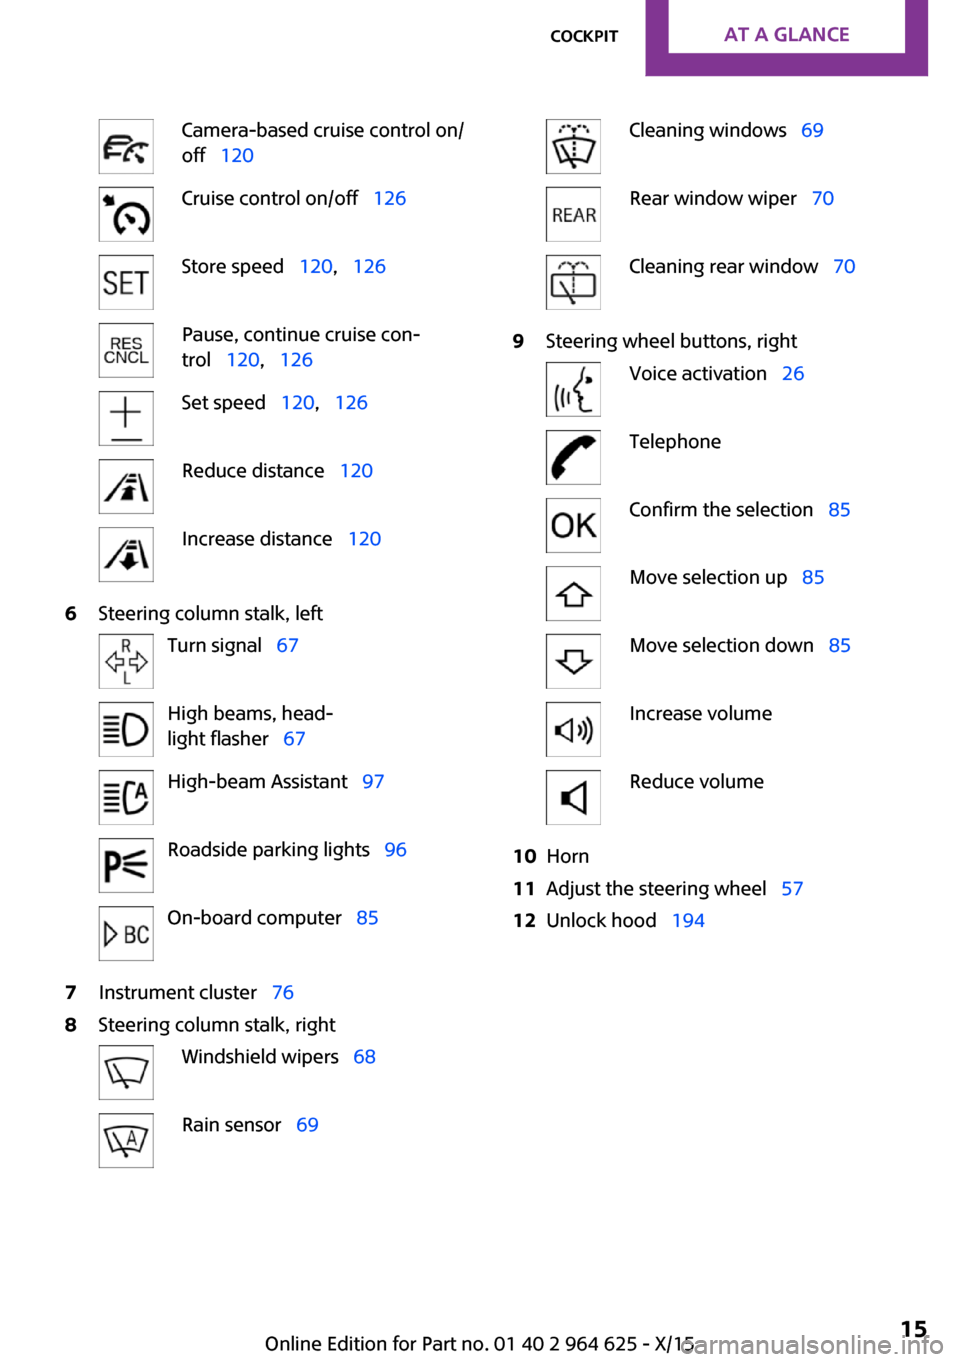
Camera-based cruise control on/
off 120Cruise control on/off 126Store speed 120, 126Pause, continue cruise con‐
trol 120, 126Set speed 120, 126Reduce distance 120Increase distance 1206Steering column stalk, leftTurn signal 67High beams, head‐
light flasher 67High-beam Assistant 97Roadside parking lights 96On-board computer 857Instrument cluster 768Steering column stalk, rightWindshield wipers 68Rain sensor 69Cleaning windows 69Rear window wiper 70Cleaning rear window 709Steering wheel buttons, rightVoice activation 26TelephoneConfirm the selection 85Move selection up 85Move selection down 85Increase volumeReduce volume10Horn11Adjust the steering wheel 5712Unlock hood 194Seite 15CockpitAT A GLANCE15
Online Edition for Part no. 01 40 2 964 625 - X/15
Page 26 of 248
Voice activation systemVehicle features and op‐
tions
This chapter describes all standard, country-
specific and optional features offered with the
series. It also describes features that are not
necessarily available in your car, e. g., due to
the selected options or country versions. This
also applies to safety-related functions and sys‐
tems. The respectively applicable country provi‐
sions must be observed when using the respec‐
tive features and systems.
The concept▷Most functions displayed on the Control
Display can be operated by voice com‐
mands via the voice activation system. The
system supports you with announcements
during input.▷Functions that can only be used when the
vehicle is stationary cannot be used via the
voice activation system.▷The system uses a special microphone on
the driver's side.▷›...‹ Verbal instructions in the Owner's
Manual to use with the voice activation sys‐
tem.
Requirements
Via the Control Display, set a language that is
also supported by the voice activation system
so that the spoken commands can be identi‐
fied.
Set the language, refer to page 89.
Using voice activation
Activating the voice activation system1. Press button on the steering wheel.2.Wait for the signal.3.Say the command.
A command that is recognized by the voice
activation system is announced and dis‐
played in the instrument cluster.
This symbol in the instrument cluster indi‐
cates that the voice activation system is active.
If no other commands are available, operate
the function via the onboard monitor.
Terminating the voice activation
system
Briefly press the button on the steering
wheel or ›Cancel‹.
Possible commands
Most menu items on the Control Display can be
voiced as commands.
The available commands depend on the menu
that is currently displayed on the Control Dis‐
play.
There are short commands for many functions.
You may select lists such as phone lists via
voice activation. Read these lists out loud ex‐
actly as they show in the respective list.
Having possible commands read aloud You can have available commands read out
loud for you: ›Voice commands‹
E. g. if the
"Settings" menu is displayed, the
commands for the settings are read out loud.
Seite 26AT A GLANCEVoice activation system26
Online Edition for Part no. 01 40 2 964 625 - X/15
Page 27 of 248
Executing functions using short
commands
Execute functions on the main menu via short
commands. It almost doesn't matter which
menu item is selected, e.g., ›Vehicle status‹.
Help dialog for the voice activation
system
Calling up help dialog: ›Help‹
Additional commands for the help dialog:▷›Help with examples‹: announces informa‐
tion about the current operating options
and the most important commands for
them.▷›Help with voice activation‹: information
about the principle of operation for the
voice activation system is announced.
One example: opening the
tone settings
Via the main menu
The commands of the menu items are spoken
just as they are selected via the controller.
1.Turn on the Entertainment sound output if
needed.2. Press button on the steering wheel.3.›Radio‹4.›Tone‹
Via short command
The desired tone settings can also be started
via a short command.
1.Turn on the Entertainment sound output if
needed.2. Press button on the steering wheel.3.›Tone‹Setting the voice dialog
Set system to standard dialog or use a short
version.
The short version of the voice dialog plays back short messages in abbreviated form.
On the Control Display:1. "Settings"2."Language/Units"3."Speech type:"4.Select setting.
Adjusting the volume
Turn the volume button during the spoken in‐
structions until the desired volume is set.
▷The volume remains constant even if the
volume of other audio sources is changed.▷The volume is stored for the profile cur‐
rently used.
Information on Emer‐
gency Requests
Do not use the voice activation system to ini‐tiate an Emergency Request. In stressful situa‐
tions, the voice and vocal pitch can change.
This can unnecessarily delay the establishment
of a phone connection.
Environmental condi‐
tions
▷Say the commands, numbers, and letters
smoothly and with normal volume, empha‐
sis, and speed.▷Always say commands in the language of
the voice activation system.▷Keep the doors, windows, and glass sun‐
roof closed to prevent noise interference.Seite 27Voice activation systemAT A GLANCE27
Online Edition for Part no. 01 40 2 964 625 - X/15
Page 43 of 248
▷Interference of the radio connection from
mobile phones or other electronic devices
in direct proximity.
Do not transport the remote control together
with metal objects or electronic devices.
In the case of a malfunction, unlock and lock
the vehicle using the buttons of the remote
control or using the integrated key, refer to
page 39.
Adjusting Unlocking The settings are saved in the active profile. Per‐
sonal Profile, refer to page 36.
Doors
1. "Settings"2."Doors/key"3. Select the symbol.4.Select the desired function.▷"Driver's door only"
Only the driver's door and the fuel filler
flap are unlocked. Pressing again un‐
locks the entire vehicle.▷"All doors"
The entire vehicle is unlocked.
Tailgate
Depending on optional features and country
version, this setting is not offered in some
cases.
1. "Settings"2."Doors/key"3. Select the symbol.4.Select the desired function.▷"Tailgate"
Only the tailgate is unlocked.▷"Tailgate + door(s)"The tailgate and the doors are un‐
locked.
Locking
The settings are saved in the active profile. Per‐
sonal Profile, refer to page 36.
1. "Settings"2."Doors/key"3.Select desired setting.▷"Lock if no door is opened"
The vehicle locks automatically after a
short period of time if no door is
opened after unlocking.▷"Lock after start driving"
The vehicle locks automatically after
you drive off.
Confirmation signals from the vehicle
1. "Settings"2."Doors/key"3.Select desired setting.▷With alarm system:
"Acoustic sig. lock/unlock"
Unlocking is signaled by one honk of
the horn.▷"Flash when lock/unlock"
Unlocking is signaled by two flashes,
locking by one.
Alarm system
The concept
When the vehicle is locked, the vehicle alarm
system responds to:
▷Opening a door, the hood or the tailgate.▷Movements in the vehicle interior.▷Changes in the vehicle tilt, e. g., during at‐
tempts at stealing a wheel or when towing
the car.Seite 43Opening and closingCONTROLS43
Online Edition for Part no. 01 40 2 964 625 - X/15
Page 44 of 248
▷Disconnected battery voltage.
The alarm system briefly signals tampering:
▷Acoustic alarm.▷By switching on the hazard warning system.▷By flashing the daytime running lights.
Switching on and offWhen you lock or unlock the vehicle, either
with the remote control or with Comfort Access,
the alarm system is switched on and off at the same time.
Door lock with the alarm system
switched on
The alarm system is triggered when the door is
opened, when the vehicle is unlocked via the
door lock.
Switching off the alarm, refer to page 45.
Tailgate with the alarm system
switched on
The tailgate can be opened even when the
alarm system is switched on.
After the tailgate is closed, it is locked and
monitored again when the doors are locked.
The hazard warning system flashes once.
Panic mode
You can trigger the alarm system if you find
yourself in a dangerous situation.
Press button on the remote control for
at least 3 seconds.
To switch off the alarm: press any button.
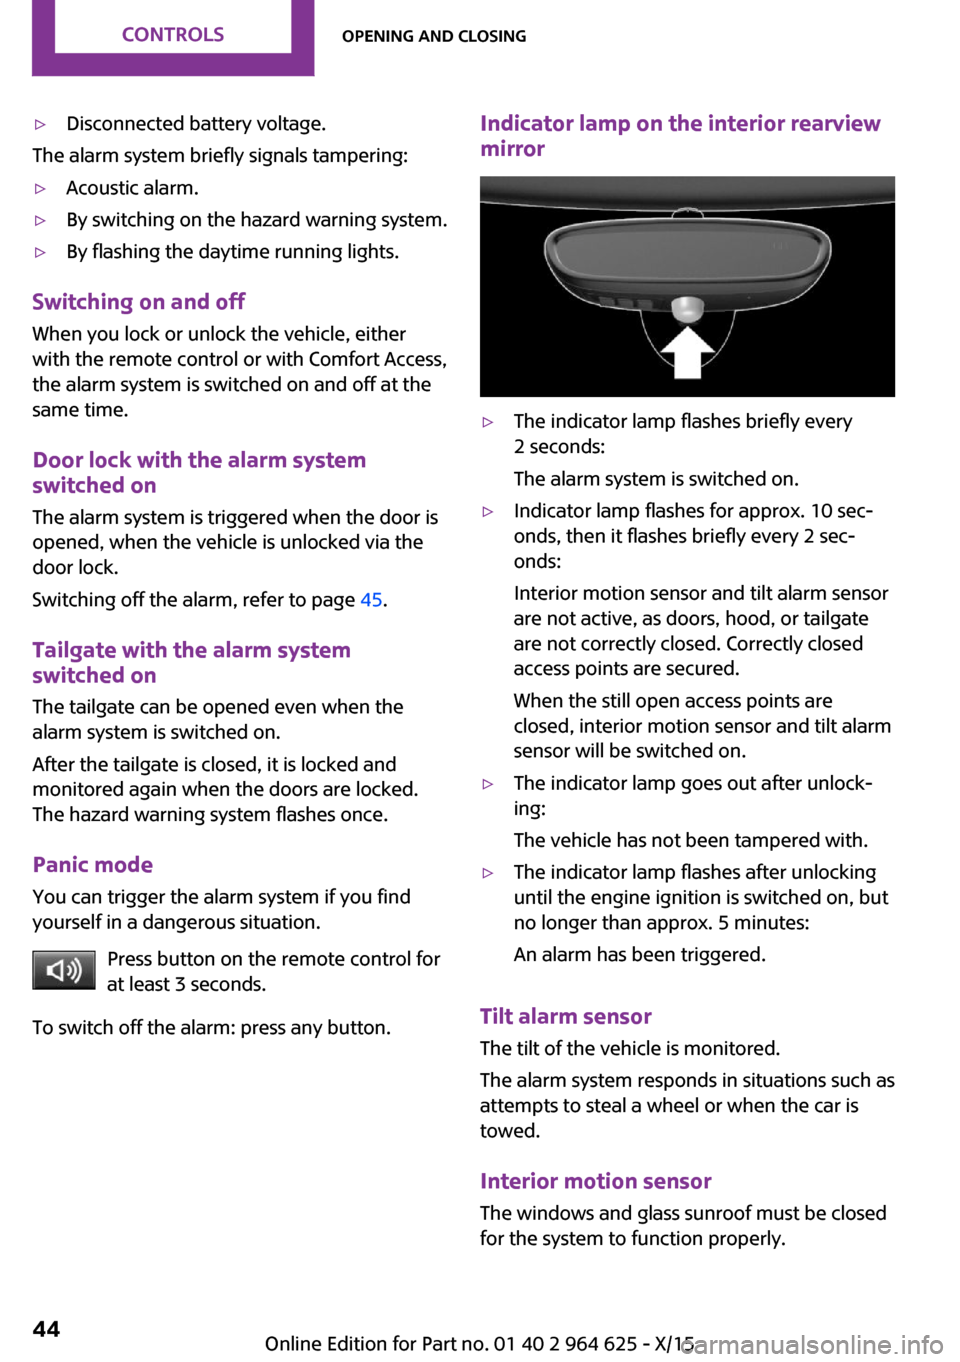
Indicator lamp on the interior rearview
mirror▷The indicator lamp flashes briefly every
2 seconds:
The alarm system is switched on.▷Indicator lamp flashes for approx. 10 sec‐
onds, then it flashes briefly every 2 sec‐
onds:
Interior motion sensor and tilt alarm sensor
are not active, as doors, hood, or tailgate
are not correctly closed. Correctly closed
access points are secured.
When the still open access points are
closed, interior motion sensor and tilt alarm
sensor will be switched on.▷The indicator lamp goes out after unlock‐
ing:
The vehicle has not been tampered with.▷The indicator lamp flashes after unlocking
until the engine ignition is switched on, but
no longer than approx. 5 minutes:
An alarm has been triggered.
Tilt alarm sensor The tilt of the vehicle is monitored.
The alarm system responds in situations such as
attempts to steal a wheel or when the car is
towed.
Interior motion sensor The windows and glass sunroof must be closed
for the system to function properly.
Seite 44CONTROLSOpening and closing44
Online Edition for Part no. 01 40 2 964 625 - X/15
Page 50 of 248
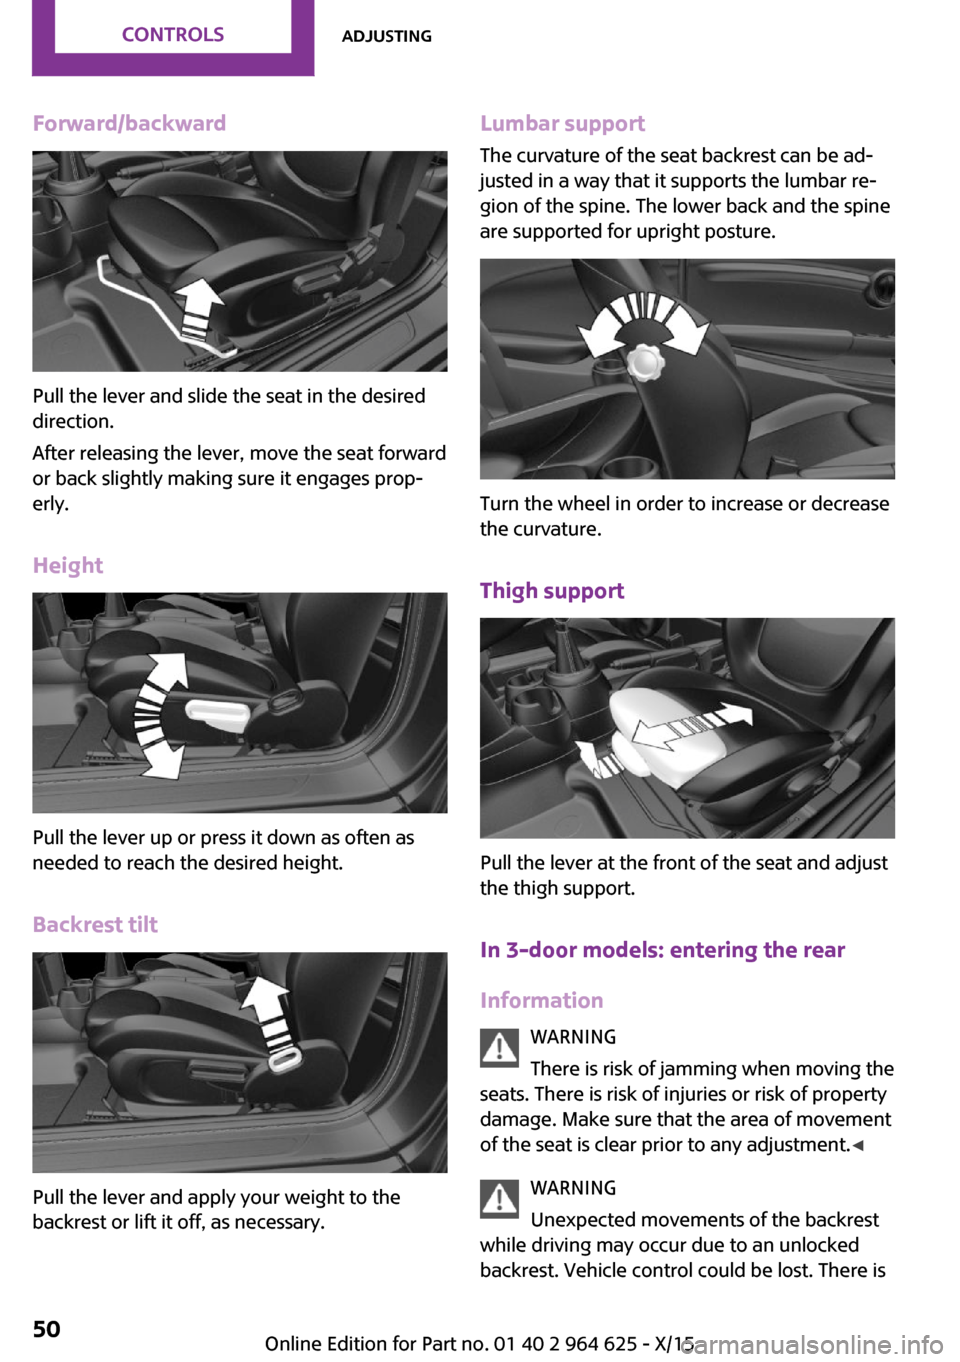
Forward/backward
Pull the lever and slide the seat in the desired
direction.
After releasing the lever, move the seat forward
or back slightly making sure it engages prop‐
erly.
Height
Pull the lever up or press it down as often as
needed to reach the desired height.
Backrest tilt
Pull the lever and apply your weight to the
backrest or lift it off, as necessary.
Lumbar support
The curvature of the seat backrest can be ad‐
justed in a way that it supports the lumbar re‐
gion of the spine. The lower back and the spine
are supported for upright posture.
Turn the wheel in order to increase or decrease
the curvature.
Thigh support
Pull the lever at the front of the seat and adjust
the thigh support.
In 3-door models: entering the rearInformation WARNING
There is risk of jamming when moving the
seats. There is risk of injuries or risk of property
damage. Make sure that the area of movement
of the seat is clear prior to any adjustment. ◀
WARNING
Unexpected movements of the backrest
while driving may occur due to an unlocked
backrest. Vehicle control could be lost. There is
Seite 50CONTROLSAdjusting50
Online Edition for Part no. 01 40 2 964 625 - X/15
Page 57 of 248
▷In the mirror glass.▷On the back of the mirror.
Functional requirements
▷Keep the photocells clean.▷Do not cover the area between the inside
rearview mirror and the windshield.
Steering wheel
Information WARNING
Steering wheel adjustments while driving
can lead to unexpected steering wheel move‐
ments. Vehicle control could be lost. There is
risk of an accident. Adjust the steering wheel
while the vehicle is stationary only. ◀
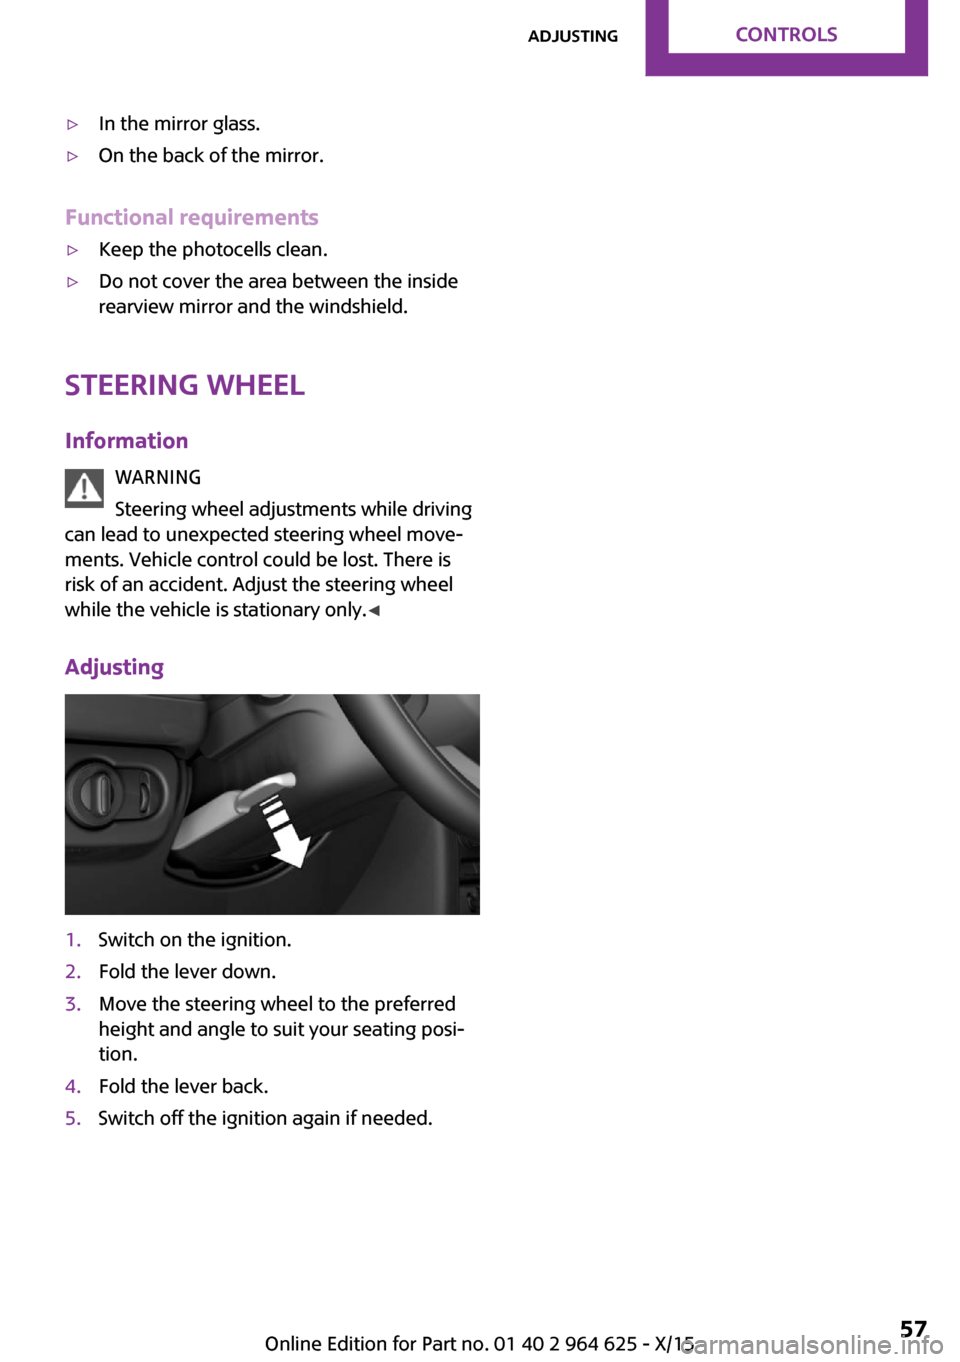
Adjusting
1.Switch on the ignition.2.Fold the lever down.3.Move the steering wheel to the preferred
height and angle to suit your seating posi‐
tion.4.Fold the lever back.5.Switch off the ignition again if needed.Seite 57AdjustingCONTROLS57
Online Edition for Part no. 01 40 2 964 625 - X/15