service MINI Clubman 2009 (Mini Connected) User Guide
[x] Cancel search | Manufacturer: MINI, Model Year: 2009, Model line: Clubman, Model: MINI Clubman 2009Pages: 218, PDF Size: 3.69 MB
Page 90 of 218
Climate
88
Rear window defroster
The defroster is switched off auto-
matically after a certain time.
Depending on your vehicle's equip-
ment, the upper wires serve as an
antenna and are not part of the rear window
defroster.
Defrosting windows and removing
condensation
Quickly removes ice and condensa-
tion from the windshield and front
side windows.
For this purpose, also switch on the
cooling function.
The windshield heating
* is switched on auto-
matically.
Windshield heating*
The windshield heating is switched
off automatically after a certain
time.
Cooling function
When the cooling function is on,
the air is cooled, dried, then
reheated according to the temper-
ature setting. This function is only
available while the engine is running.
The cooling function helps prevent condensa-
tion on the windows or removes it quickly.
Depending on the weather, the windshield may
fog over briefly when the engine is started. The
recirculated-air mode may be switched on auto-
matically.
The cooling function is automatically switched
on along with the AUTO program. The passenger
compartment can only be cooled while the
engine is running.
Microfilter/activated-charcoal filter
The microfilter captures dust and pollen. The
activated-charcoal filter provides additional pro-
tection by filtering gaseous pollutants from the
outside air. Your MINI Dealer replaces this com-bined filter as a standard part of your scheduled
maintenance.
You can call up further information in the service
requirements display, page60.
Ventilation
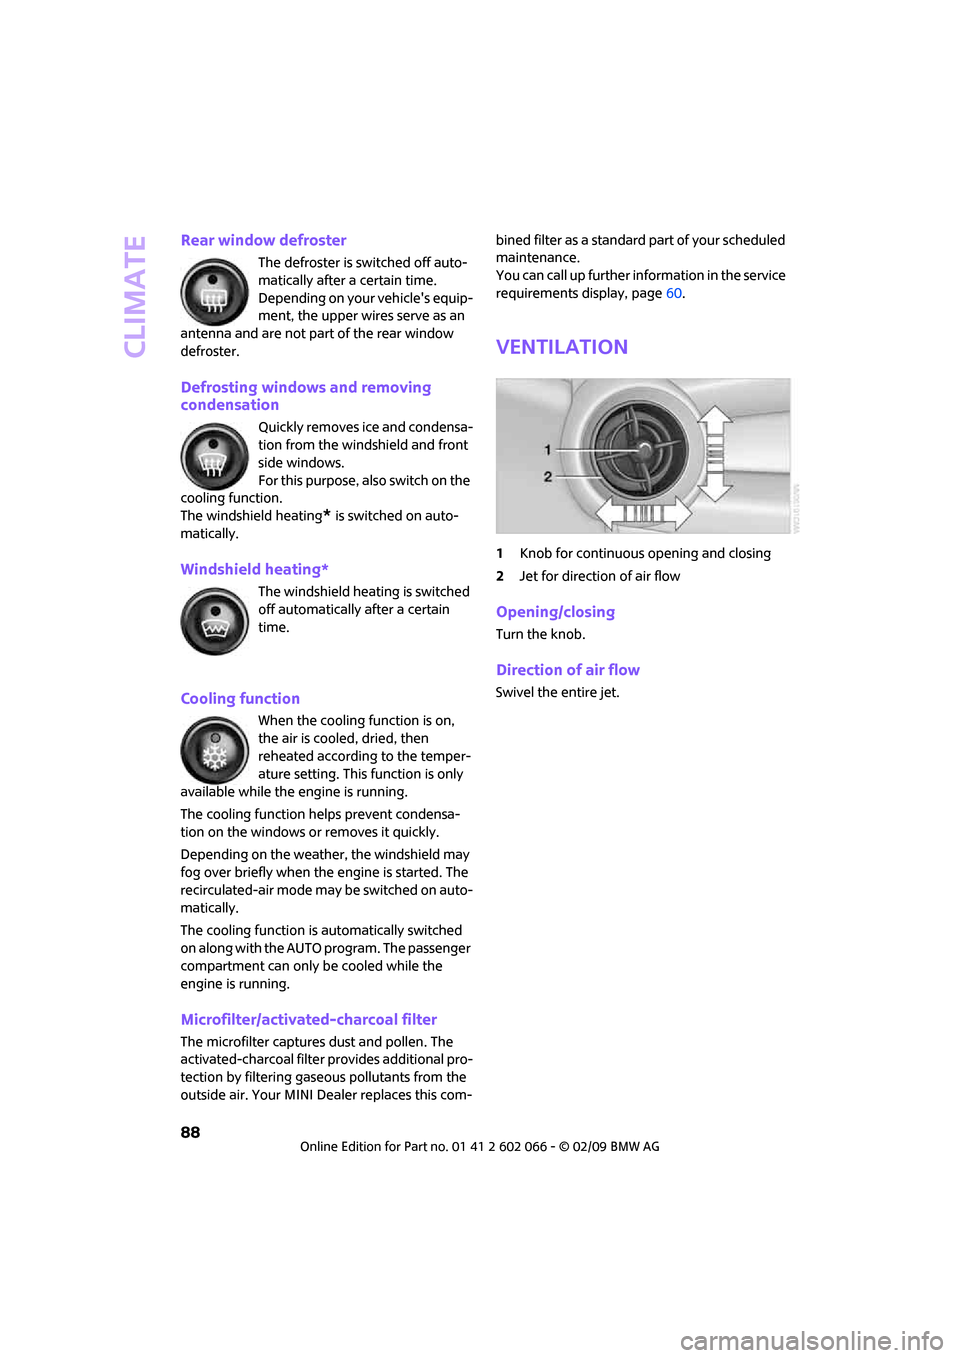
1Knob for continuous opening and closing
2Jet for direction of air flow
Opening/closing
Turn the knob.
Direction of air flow
Swivel the entire jet.
Page 98 of 218
Things to remember when driving
96
Things to remember when driving
Break-in period
Moving parts need breaking-in time to adjust to
each other. Please follow the instructions below
in order to achieve the optimal service life and
economy of operation for your vehicle.
Engine and differential
Always obey all official speed limits.
Up to 1,200 miles/2,000 km
Drive at varying engine and road speeds, but do
not exceed the following:
>Gasoline engine
4,500 rpm or 100 mph/160 km/h
Avoid full-throttle operation and use of the
transmission's kick-down mode.
After driving 1,200 miles/2,000 km
Engine and vehicle speeds can be gradually
increased.
Tires
Due to technical factors associated with their
manufacture, tires do not achieve their full trac-
tion potential until after an initial break-in
period. Therefore, drive cautiously during the
first 200 miles/300 km.
Brake system
Brakes require an initial break-in period of
approx. 300 miles/500 km to achieve optimized
contact and wear patterns between brake pads
and rotors. Drive cautiously during this break-in
period.
Clutch
The function of the clutch reaches its optimal
level only after a distance driven of approx.
300 miles/500 km. During this break-in period,
engage the clutch gently.
Following part replacement
The same break-in procedures should be
observed if any of the components mentioned
above have to be renewed in the course of the
vehicle's operating life.
General driving notes
Close splitdoor
Drive the vehicle only when the splitdoor
is closed. Otherwise, exhaust fumes could
penetrate the interior of the vehicle.<
If special circumstances make it absolutely nec-
essary to drive with the splitdoor open:
1.Close all windows and the glass sunroof.
2.Switch off the recirculated-air mode and sig-
nificantly increase the air flow rate of the
automatic climate control, page87.
Hot exhaust system
In all vehicles, extremely high tempera-
tures are generated in the exhaust sys-
tem. Do not remove the heat shields installed
adjacent to various sections of the exhaust sys-
tem, and never apply undercoating to them.
When driving, standing at idle and while park-
ing, take care to avoid possible contact between
the hot exhaust system and any highly flamma-
ble materials such as hay, leaves, grass, etc. Such
contact could lead to a fire, with the risk of seri-
ous personal injuries and property damage. Do
not touch hot exhaust tail pipes. Otherwise
there is a risk of burns.<
Hydroplaning
When driving on wet or slushy roads,
reduce road speed. If you do not, a wedge
of water can form between tires and road sur-
face. This situation, known as hydroplaning, can
cause partial or complete loss of tire contact
with the road surface, so that the car cannot be
steered or braked properly.<
Page 104 of 218
Things to remember when driving
102
Avoid high engine speeds
Use first gear only for driving off. In second and
higher gears, accelerate smoothly to a suitable
engine and road speed. In doing so, avoid high
engine speeds and shift up early.
When you reach your desired traveling speed,
shift to the highest suitable gear and drive at
constant speed.
As a rule: driving at low engine speeds lowers
fuel consumption and reduces wear.
Coasting
When approaching a red traffic light, take your
foot off the accelerator and let the vehicle coast
to a halt in the highest suitable gear.
On a downhill gradient, take your foot off the
accelerator and let the vehicle coast in a suit-
able gear.
Fuel supply is shut off automatically when the
vehicle is coasting.
Switch off the engine during
lengthy stops
Switch off the engine when stopping for lengthy
periods, e.g. at traffic lights, railroad crossings or
in traffic congestions.
Have the vehicle serviced
Have your vehicle serviced regularly to achieve
good economy and a long vehicle life. The man-
ufacturer of your MINI recommends having the
vehicle serviced by a MINI Dealer. Also note the
MINI Maintenance System, page170.
Page 152 of 218
USB-audio interface
150
USB-audio interface
Connections for
external devices
An external audio device or USB device can
be connected to the USB-audio interface, for
example:
>MP3 player
>USB memory stick
>iPod/iPhone
>Suitable mobile phone
If they are supported by the USB-audio inter-
face, these devices can be controlled using the
onboard monitor.
If the mobile phone has a music player connec-
tion, connect the mobile phone using the snap-
in adapter, refer to the separate Owner's Man-
ual. Audio playback is only possible if there is no
device connected to the USB-audio interface.
The standard audio formats, e.g. MP3, WMA,
WAV (PCM) and AAC, and playlists in the M3U
format can be played.
Due the variety of audio devices and iPods on
the market, it cannot be guaranteed that every
device will be operable on the vehicle.
Ask your MINI Service which audio devices,
mobile phones or USB devices are suitable.
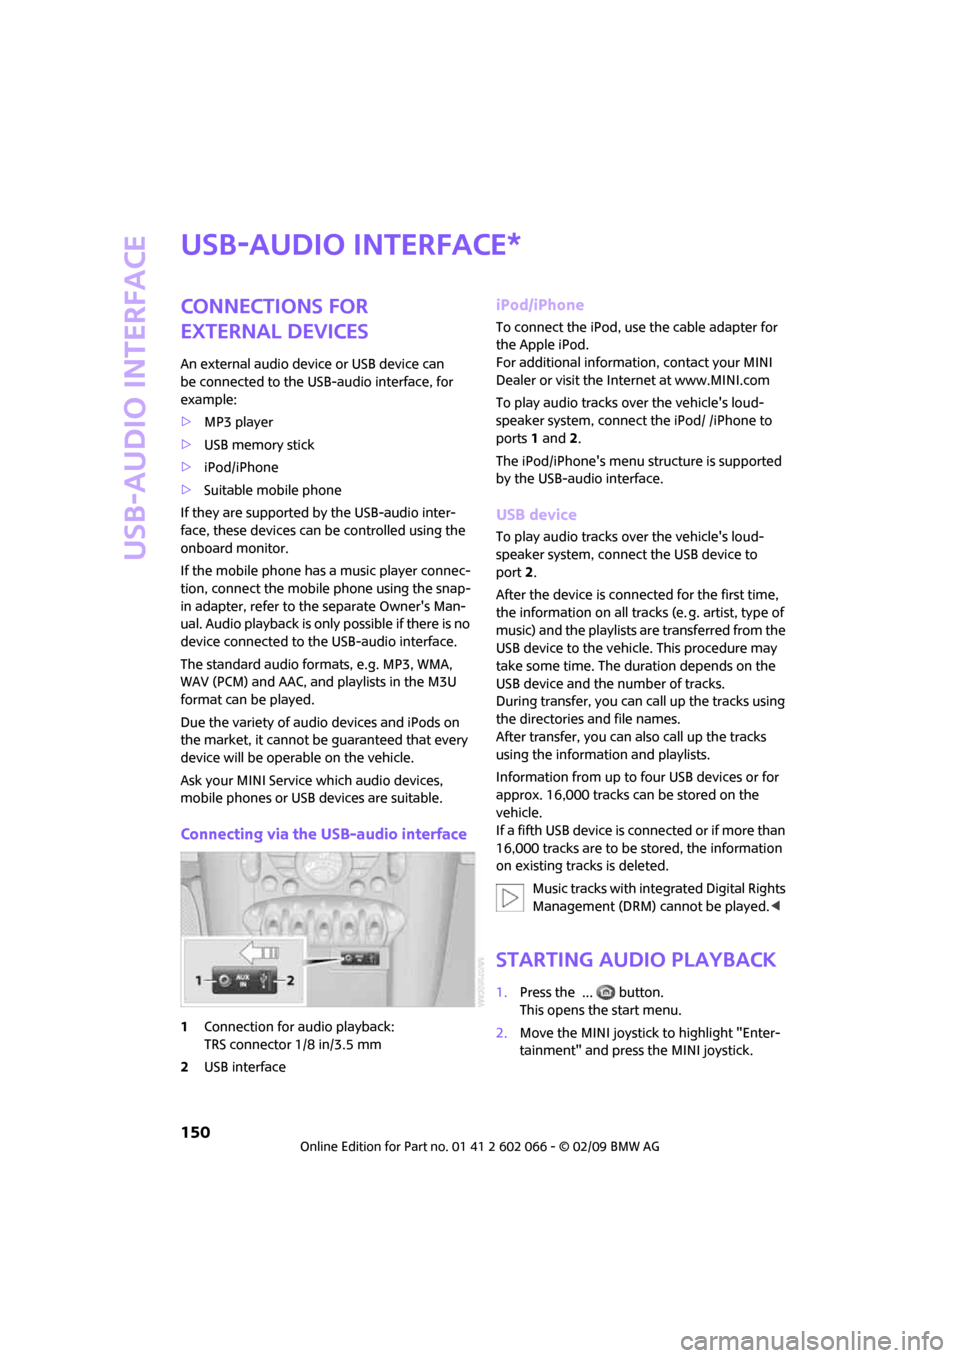
Connecting via the USB-audio interface
1Connection for audio playback:
TRS connector 1/8 in/3.5 mm
2USB interface
iPod/iPhone
To connect the iPod, use the cable adapter for
the Apple iPod.
For additional information, contact your MINI
Dealer or visit the Internet at www.MINI.com
To play audio tracks over the vehicle's loud-
speaker system, connect the iPod/ /iPhone to
ports 1 and 2.
The iPod/iPhone's menu structure is supported
by the USB-audio interface.
USB device
To play audio tracks over the vehicle's loud-
speaker system, connect the USB device to
port2.
After the device is connected for the first time,
the information on all tracks (e. g. artist, type of
music) and the playlists are transferred from the
USB device to the vehicle. This procedure may
take some time. The duration depends on the
USB device and the number of tracks.
During transfer, you can call up the tracks using
the directories and file names.
After transfer, you can also call up the tracks
using the information and playlists.
Information from up to four USB devices or for
approx. 16,000 tracks can be stored on the
vehicle.
If a fifth USB device is connected or if more than
16,000 tracks are to be stored, the information
on existing tracks is deleted.
Music tracks with integrated Digital Rights
Management (DRM) cannot be played.<
Starting audio playback
1.Press the ... button.
This opens the start menu.
2.Move the MINI joystick to highlight "Enter-
tainment" and press the MINI joystick.
*
Page 160 of 218
Wheels and tires
158
Wheels and tires
Tire inflation pressures
Information for your safety
It is not merely the tires' service life, but also
driving comfort and, to a great extent, driving
safety that depend on the condition of the
tires and the maintenance of the specified tire
pressure.
Checking pressure
Check the tire inflation pressure regularly
and correct it, if necessary: at least twice a
month and before starting long trips. If you fail
to observe this precaution you may be driving
on tires with incorrect tire pressures, a condition
that can not only compromise your vehicle's
driving stability, but also lead to tire damage and
the risk of an accident. Do not drive with
deflated, i.e. flat tires, except when using Run-
Flat Tires. A flat tire will seriously impair your
vehicle's handling and braking response.
Attempts to drive on a flat tire can lead to loss of
control over the vehicle.<
Check the tire inflation pressures only on cold
tires. This means after a maximum of 1.25 miles/
2 km driving or when the vehicle has been
parked for at least 2 hours. When tires are warm,
the tire inflation pressure is higher.
After adjusting the tire inflation pressure,
reinitialize the flat tire monitor, page74,
or reset the tire pressure control, page76.<
Checking the tire inflation pressure of
the compact tire*
To check the inflation pressure, fold up the level
load floor. Remove the onboard tool kit and the
space-saver spare tire, refer to page183.
Inflation pressure specifications
The tables below provide all the correct inflation
pressures for the specified tire sizes at ambient
temperature.The tire inflation pressures apply to the
tire sizes approved and the tire brands
recommended by the manufacturer of your
MINI. Your MINI Dealer will be glad to ad-
vise you.<
For correct identification of the right tire infla-
tion pressures, observe the following:
>Tire sizes for your vehicle
>Load conditions
>Maximum allowable driving speed
Tire inflation pressures for driving up to
100 mph or 160 km/h
For normal driving speeds of up to 100 mph or
160 km/h and to achieve optimum driving com-
fort, adjust pressures to the respective tire infla-
tion pressures listed on the following pages in
the columns for traveling speeds up to a maxi-
mum of 100 mph or 160 km/h.
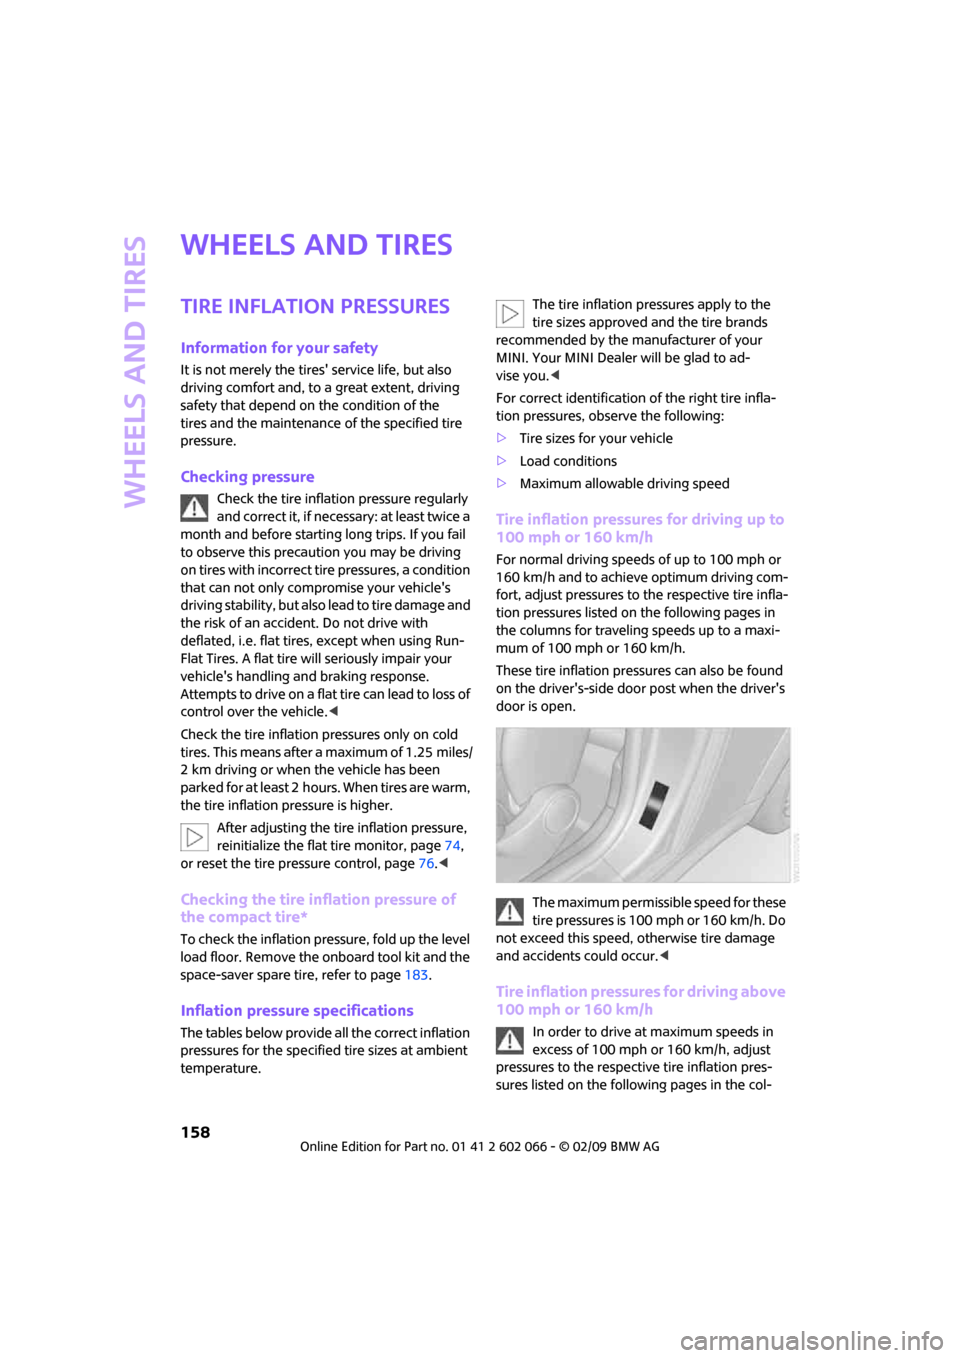
These tire inflation pressures can also be found
on the driver's-side door post when the driver's
door is open.
The maximum permissible speed for these
tire pressures is 100 mph or 160 km/h. Do
not exceed this speed, otherwise tire damage
and accidents could occur.<
Tire inflation pressures for driving above
100 mph or 160 km/h
In order to drive at maximum speeds in
excess of 100 mph or 160 km/h, adjust
pressures to the respective tire inflation pres-
sures listed on the following pages in the col-
Page 164 of 218
Wheels and tires
162
Tire coding
Knowledge of the labeling on the side of the
tire makes it easier to identify and choose the
right tires.
Tire size
Speed code letter
Q = up to 100 mph or 160 km/h
T = up to 118 mph or 190 km/h
H = up to 131 mph or 210 km/h
V = up to 150 mph or 240 km/h
W = up to 167 mph or 270 km/h
Y = up to 186 mph or 300 km/h
Tire Identification Number
Tires with DOT codes meet the guidelines of the
US Department of Transportation.
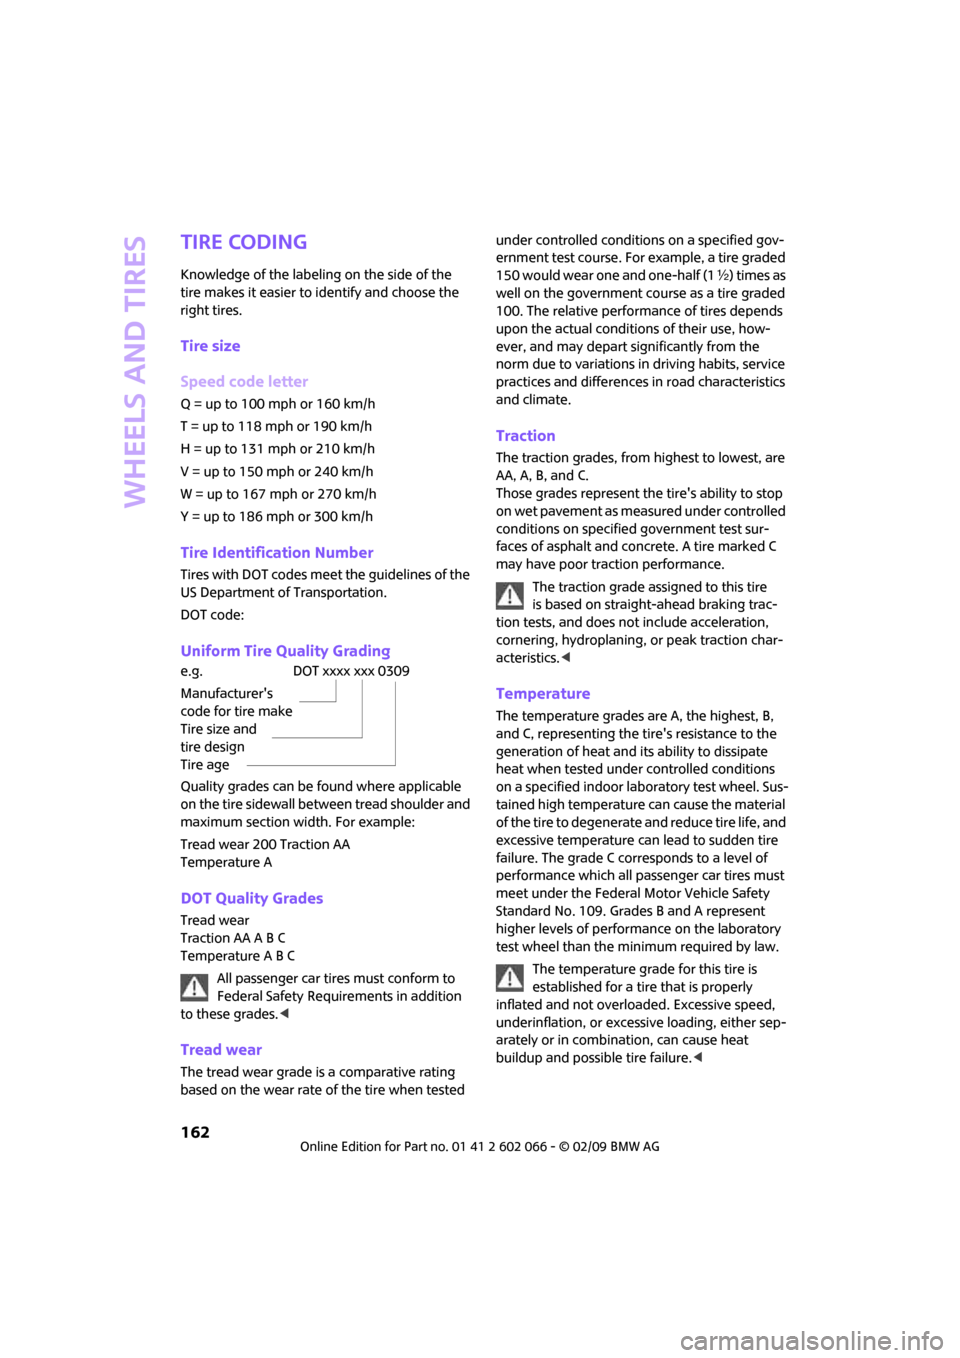
DOT code:
Uniform Tire Quality Grading
Quality grades can be found where applicable
on the tire sidewall between tread shoulder and
maximum section width. For example:
Tread wear 200 Traction AA
Temperature A
DOT Quality Grades
Tread wear
Traction AA A B C
Temperature A B C
All passenger car tires must conform to
Federal Safety Requirements in addition
to these grades.<
Tread wear
The tread wear grade is a comparative rating
based on the wear rate of the tire when tested under controlled conditions on a specified gov-
ernment test course. For example, a tire graded
150 would wear one and one-half (1γ) times as
well on the government course as a tire graded
100. The relative performance of tires depends
upon the actual conditions of their use, how-
ever, and may depart significantly from the
norm due to variations in driving habits, service
practices and differences in road characteristics
and climate.
Traction
The traction grades, from highest to lowest, are
AA, A, B, and C.
Those grades represent the tire's ability to stop
on wet pavement as measured under controlled
conditions on specified government test sur-
faces of asphalt and concrete. A tire marked C
may have poor traction performance.
The traction grade assigned to this tire
is based on straight-ahead braking trac-
tion tests, and does not include acceleration,
cornering, hydroplaning, or peak traction char-
acteristics.<
Temperature
The temperature grades are A, the highest, B,
and C, representing the tire's resistance to the
generation of heat and its ability to dissipate
heat when tested under controlled conditions
on a specified indoor laboratory test wheel. Sus-
tained high temperature can cause the material
of the tire to degenerate and reduce tire life, and
excessive temperature can lead to sudden tire
failure. The grade C corresponds to a level of
performance which all passenger car tires must
meet under the Federal Motor Vehicle Safety
Standard No. 109. Grades B and A represent
higher levels of performance on the laboratory
test wheel than the minimum required by law.
The temperature grade for this tire is
established for a tire that is properly
inflated and not overloaded. Excessive speed,
underinflation, or excessive loading, either sep-
arately or in combination, can cause heat
buildup and possible tire failure.<
e.g.
Manufacturer's
code for tire make
Tire size and
tire design
Tire ageDOT xxxx xxx 0309
Page 170 of 218
Under the bonnet
168
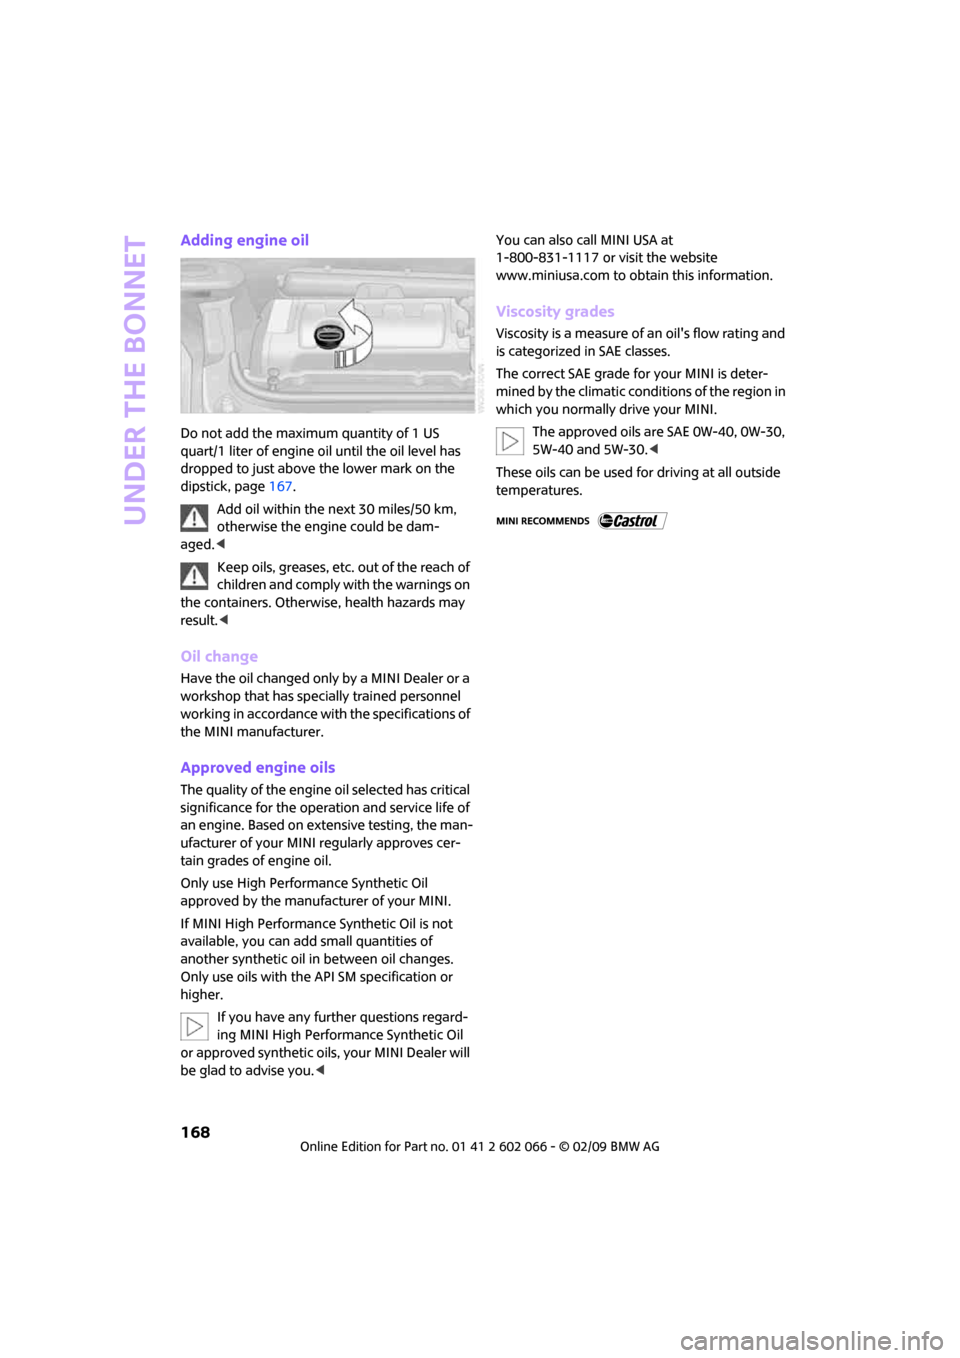
Adding engine oil
Do not add the maximum quantity of 1 US
quart/1 liter of engine oil until the oil level has
dropped to just above the lower mark on the
dipstick, page167.
Add oil within the next 30 miles/50 km,
otherwise the engine could be dam-
aged.<
Keep oils, greases, etc. out of the reach of
children and comply with the warnings on
the containers. Otherwise, health hazards may
result.<
Oil change
Have the oil changed only by a MINI Dealer or a
workshop that has specially trained personnel
working in accordance with the specifications of
the MINI manufacturer.
Approved engine oils
The quality of the engine oil selected has critical
significance for the operation and service life of
an engine. Based on extensive testing, the man-
ufacturer of your MINI regularly approves cer-
tain grades of engine oil.
Only use High Performance Synthetic Oil
approved by the manufacturer of your MINI.
If MINI High Performance Synthetic Oil is not
available, you can add small quantities of
another synthetic oil in between oil changes.
Only use oils with the API SM specification or
higher.
If you have any further questions regard-
ing MINI High Performance Synthetic Oil
or approved synthetic oils, your MINI Dealer will
be glad to advise you.
www.miniusa.com to obtain this information.
Viscosity grades
Viscosity is a measure of an oil's flow rating and
is categorized in SAE classes.
The correct SAE grade for your MINI is deter-
mined by the climatic conditions of the region in
which you normally drive your MINI.
The approved oils are SAE 0W-40, 0W-30,
5W-40 and 5W-30.<
These oils can be used for driving at all outside
temperatures.
Page 172 of 218
Maintenance
170
Maintenance
MINI Maintenance System
The MINI Maintenance System supports the
preservation of the traffic and operating safety
of your MINI. The objective is to optimize efforts
with respect to minimal vehicle maintenance
costs.
If and when you come to sell your MINI, a com-
prehensive record of servicing will prove a signif-
icant benefit.
Condition Based Service CBS
Sensors and special algorithms take the different
driving conditions of your MINI into account.
Condition Based Service uses this to determine
the current and future service requirements. By
letting you define a service and maintenance
regimen that reflects your own individual
requirements, the system builds the basis for
trouble-free driving.
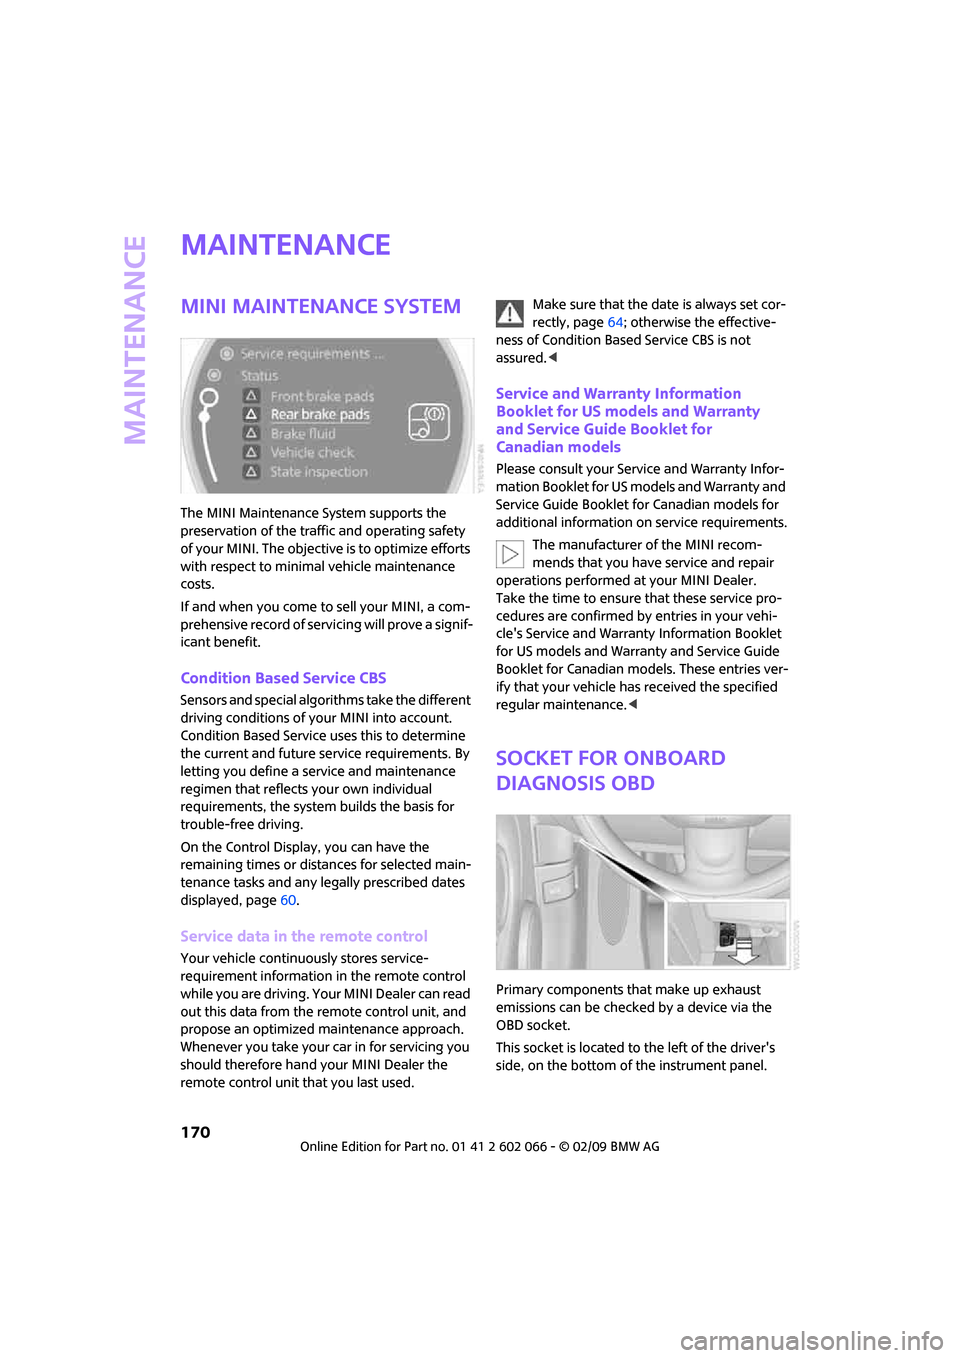
On the Control Display, you can have the
remaining times or distances for selected main-
tenance tasks and any legally prescribed dates
displayed, page60.
Service data in the remote control
Your vehicle continuously stores service-
requirement information in the remote control
while you are driving. Your MINI Dealer can read
out this data from the remote control unit, and
propose an optimized maintenance approach.
Whenever you take your car in for servicing you
should therefore hand your MINI Dealer the
remote control unit that you last used.Make sure that the date is always set cor-
rectly, page64; otherwise the effective-
ness of Condition Based Service CBS is not
assured.<
Service and Warranty Information
Booklet for US models and Warranty
and Service Guide Booklet for
Canadian models
Please consult your Service and Warranty Infor-
mation Booklet for US models and Warranty and
Service Guide Booklet for Canadian models for
additional information on service requirements.
The manufacturer of the MINI recom-
mends that you have service and repair
operations performed at your MINI Dealer.
Take the time to ensure that these service pro-
cedures are confirmed by entries in your vehi-
cle's Service and Warranty Information Booklet
for US models and Warranty and Service Guide
Booklet for Canadian models. These entries ver-
ify that your vehicle has received the specified
regular maintenance.<
Socket for Onboard
Diagnosis OBD
Primary components that make up exhaust
emissions can be checked by a device via the
OBD socket.
This socket is located to the left of the driver's
side, on the bottom of the instrument panel.
Page 174 of 218
Care
172
Care
Car-care products
Regular cleaning and care helps to maintain the
value of your MINI.
The manufacturer of your MINI recommends
using manufacturer-approved products to clean
and care for your vehicle.
MINI Service would be pleased to advise you
on cleaning and care products and services for
your MINI.
The ingredients of original MINI CareProd-
ucts have been tested, and the products
have been tested in the laboratory and in prac-
tice. They offer optimum care and protection for
your vehicle.<
Do not use any cleansers containing
alcohol or solvents as these may cause
damage.<
Cleaning agents may contain hazardous
or health-damaging substances. Follow
the warning and hazard instructions on the
packaging. For interior cleaning, always open
the doors or windows of the vehicle.
Do not use any products that are not intended
for cleaning the vehicle.<
External care
Washing your vehicle
Especially during the winter months the
vehicle should be frequently washed. Dirt
and road salt can damage the vehicle.<
After washing the vehicle, apply the
brakes briefly to dry them, otherwise
water can reduce braking efficiency over the
short term and the brake rotors can corrode.<
Car washes
Preference should be given to cloth car washes.Do not use automatic high-pressure car
washes, otherwise water may drip into the
vehicle around the windows.<
Before driving into the car wash, check if the sys-
tem is suitable for your MINI. Observe the fol-
lowing points:
>Dimensions of the vehicle, page193
>If necessary: Fold in the outside mirrors,
page40.
>Maximum permissible tire width
Avoid car washes with tracks higher than
4 in/10 cm, otherwise the chassis could be
damaged.<
Preparations for driving into the car wash:
>Unscrew the rod antenna.
>Deactivate the rain sensor
* to prevent unin-
tentional wiping.
>Deactivate the rear window wiper
* and pro-
tect it from damage. Ask the car wash oper-
ator about measures that can be taken to
protect the wipers.
>Remove additional attachments, e.g. spoil-
ers or telephone antennas, if there is a pos-
sibility that they could be damaged.
Automatic transmission
Before driving into the car wash, make sure that
the vehicle can roll:
1.Place the remote control, even with conve-
nient access, in the ignition lock.
2.Move the selector lever to position N.
3.Release the parking brake.
4.Switch off the engine.
5.Insert the remote control in the ignition lock
so that the vehicle can roll.
Steam jets/high-pressure washers
When using steam jets or high-pressure
washers, ensure that you maintain a suffi-
cient distance to the vehicle and do not exceed a
Page 178 of 218
Replacing components
176
Replacing components
Onboard tool kit
Your vehicle comes with an onboard tool kit that
varies with the equipment version; it is stored
underneath the level load floor.
>Mobility System with onboard tool kit and
tire change set
*180
>Tire change set with onboard tool kit for
space-saver spare tire182
Wiper blades
Changing the front wiper blades
1.Fold up the wiper arm.
2.Position the wiper blade horizontally.
3.Press the securing spring, arrow.
4.Unhook the wiper blade toward the
windshield.
5.Pull the wiper blade past the wiper arm
toward the top.
6.Insert the new wiper blade.
7.Press into position until you hear it engage.8.Fold down the wiper arm.
To avoid damage, make sure that the
wiper arms are against the windshield
before you open the bonnet.<
Changing the rear wiper blade
1.Fold out the wiper arm and hold it.
2.Press together the locking spring, arrow 1,
and fold out the wiper blade.
3.Pull the wiper blade away from and out of
the catch mechanism, arrow 2.
4.Press the new wiper blade into the fixture
until it engages audibly.
Lamps and bulbs
Lamps and bulbs make an essential contribution
to vehicle safety. They should, therefore, be
handled carefully. The manufacturer of your
MINI recommends having your MINI Dealer per-
form any work that you do not feel competent to
perform yourself or that is not described here.
Never touch the glass of new bulbs with
your bare fingers, as even minute
amounts of contamination will burn into the
bulb's surface and reduce its service life. Use a
clean tissue, cloth or something similar, or hold
the bulb by its base.<
You can obtain a selection of replacement bulbs
at your MINI Dealer.
When working on electrical systems,
always begin by switching off the con-