change wheel MINI Clubman 2010 (Mini Connected) User Guide
[x] Cancel search | Manufacturer: MINI, Model Year: 2010, Model line: Clubman, Model: MINI Clubman 2010Pages: 218, PDF Size: 3.97 MB
Page 113 of 218
MOBILITYAT A GLANCE CONTROLS DRIVING TIPS ENTERTAINMENT
111
NAVIGATION REFERENCE
5.If necessary, enter more letters.
The list gradually grows smaller each time
you enter a new letter.
6.Change to the list of street names and select
the street name in the corresponding town/
city.
Entering a house number
You can enter all house numbers that are stored
for the street on the navigation DVD.
1.Select "House number".
2.To enter the house number:
Select the digits individually.
3.Move the highlight marker to the third field
from the top. Select the house number.
You can only enter house numbers that are
stored for the street on the navigation DVD.
Starting destination guidance with
manual destination entry
>Select "Start guidance".
Destination guidance starts immediately.
>If you do not want to start destination guid-
ance right away:
Select "Add to destination list".
The destination is stored in the destination
list, page115.
Entering a destination by
voice commands*
You can enter a desired destination via the voice
activation system. During the destination input,
you can switch between voice entry and entry
via the onboard monitor at any time. To do so,
reactivate the voice activation system if neces-
sary.
You can have the possible commands
read aloud via {Options}.<
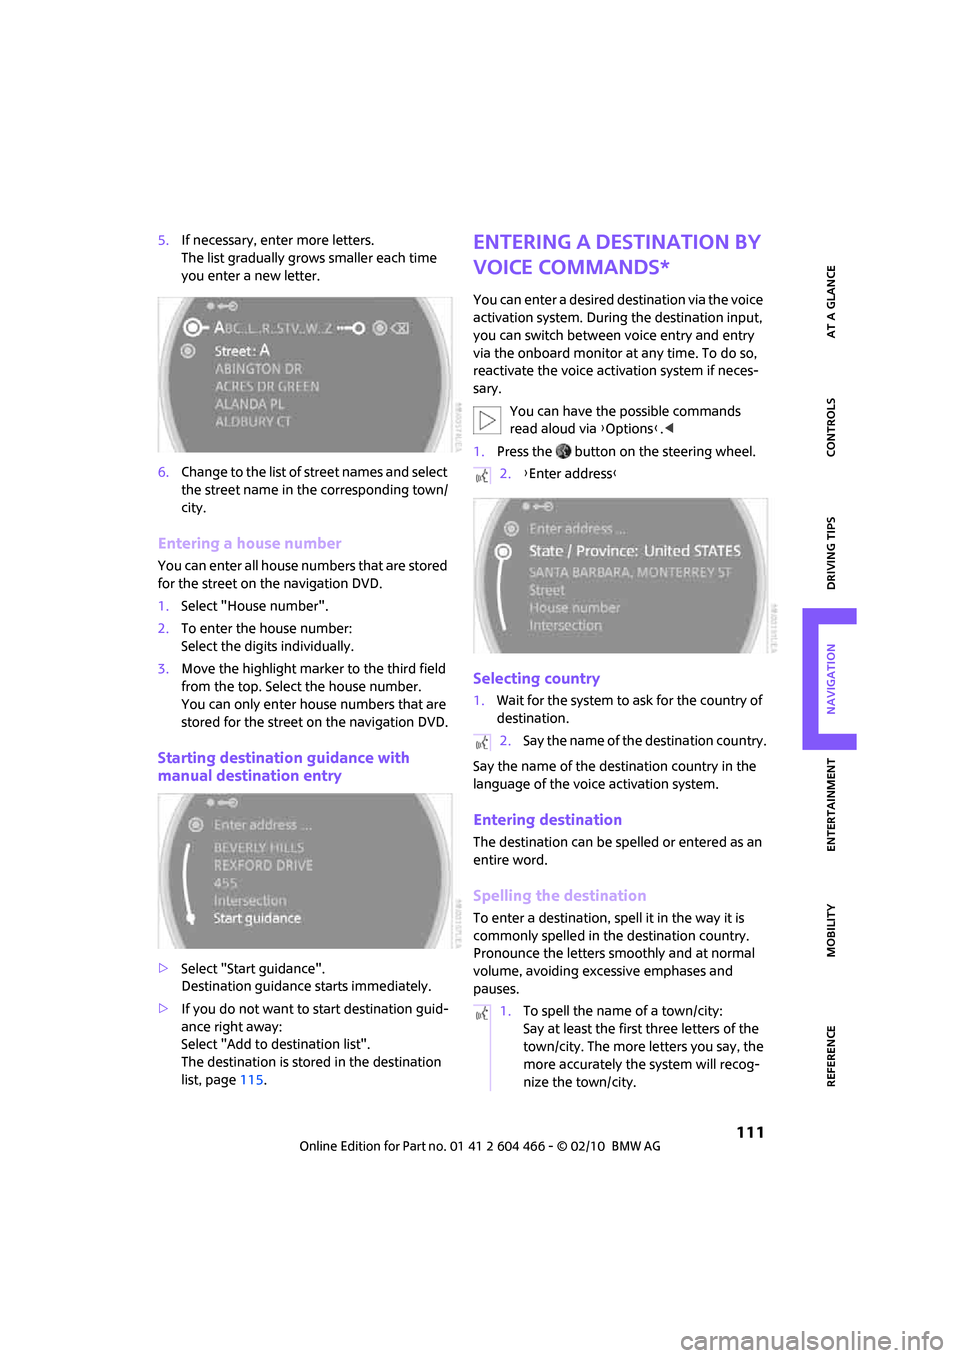
1.Press the button on the steering wheel.
Selecting country
1.Wait for the system to ask for the country of
destination.
Say the name of the destination country in the
language of the voice activation system.
Entering destination
The destination can be spelled or entered as an
entire word.
Spelling the destination
To enter a destination, spell it in the way it is
commonly spelled in the destination country.
Pronounce the letters smoothly and at normal
volume, avoiding excessive emphases and
pauses.
2.{Enter address}
2.Say the name of the destination country.
1.To spell the name of a town/city:
Say at least the first three letters of the
town/city. The more letters you say, the
more accurately the system will recog-
nize the town/city.
Page 134 of 218
On/off and settings
132
On/off and settings
The following audio sources have shared con-
trols and settings options:
>Radio
>CD player
>CD changer
*
Controls
The audio sources can be operated using:
>Buttons near the CD player
>Onboard monitor
>Buttons
on steering wheel, page11
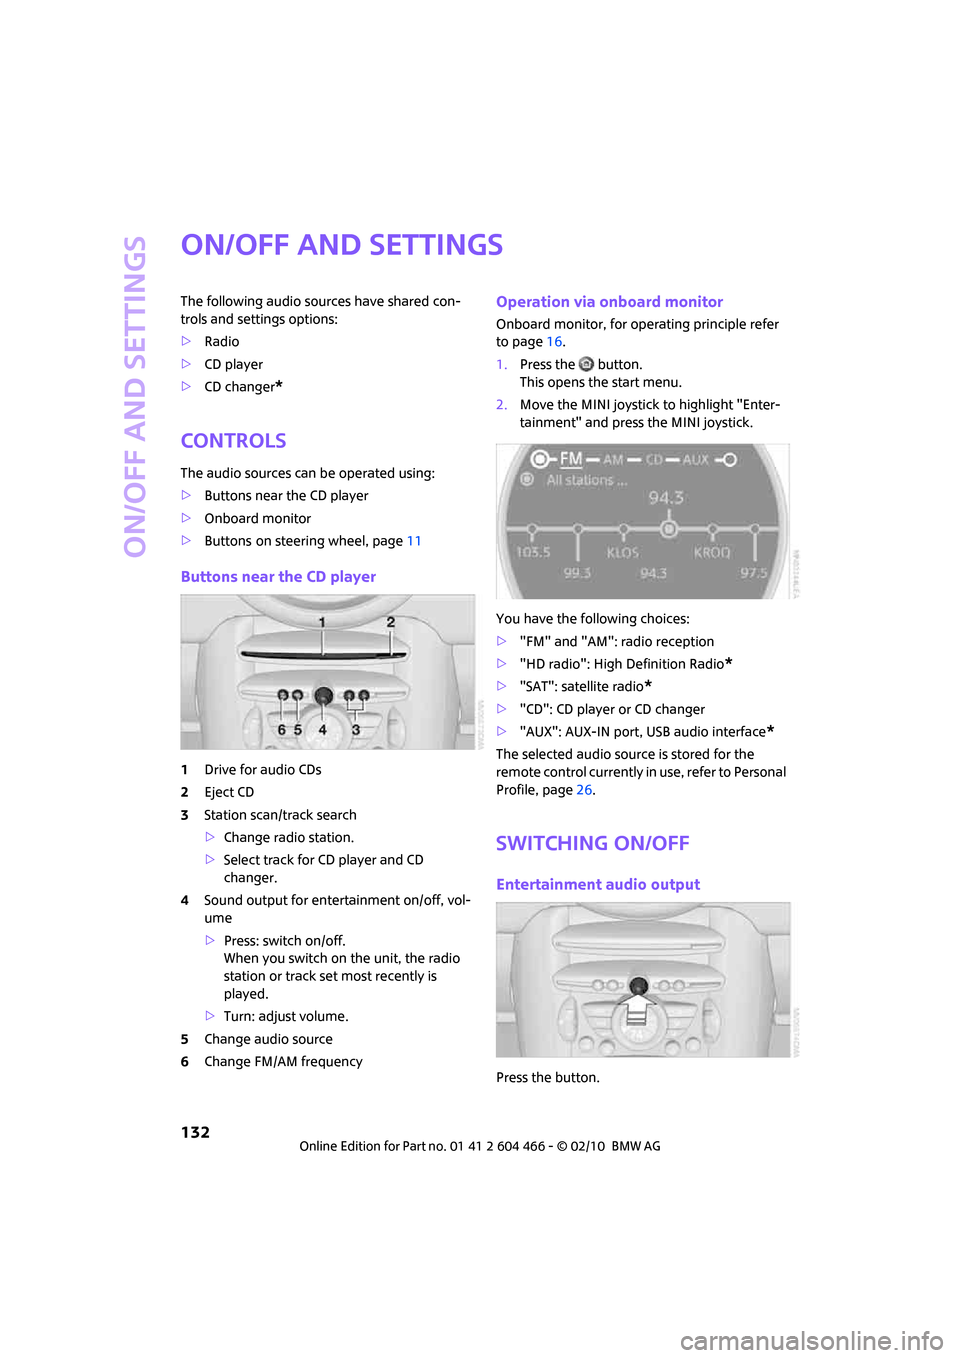
Buttons near the CD player
1Drive for audio CDs
2Eject CD
3Station scan/track search
>Change radio station.
>Select track for CD player and CD
changer.
4Sound output for entertainment on/off, vol-
ume
>Press: switch on/off.
When you switch on the unit, the radio
station or track set most recently is
played.
>Turn: adjust volume.
5Change audio source
6Change FM/AM frequency
Operation via onboard monitor
Onboard monitor, for operating principle refer
to page16.
1.Press the button.
This opens the start menu.
2.Move the MINI joystick to highlight "Enter-
tainment" and press the MINI joystick.
You have the following choices:
>"FM" and "AM": radio reception
>"HD radio": High Definition Radio
*
>"SAT": satellite radio*
>"CD": CD player or CD changer
>"AUX": AUX-IN port, USB audio interface
*
The selected audio source is stored for the
remote control currently in use, refer to Personal
Profile, page26.
Switching on/off
Entertainment audio output
Press the button.
Page 137 of 218
MOBILITYAT A GLANCE CONTROLS DRIVING TIPS ENTERTAINMENT
135
NAVIGATION REFERENCE
Radio
Your radio provides reception of the FM and AM
wavebands.
Listening to the radio
Press the button if the sound output is switched
off.
Onboard monitor, for operating principle refer
to page16.
1.Press the button.
This opens the start menu.
2.Move the MINI joystick to highlight "Enter-
tainment" and press the MINI joystick.
3.If necessary, move the highlight marker to
the uppermost field. Select "FM" or "AM".
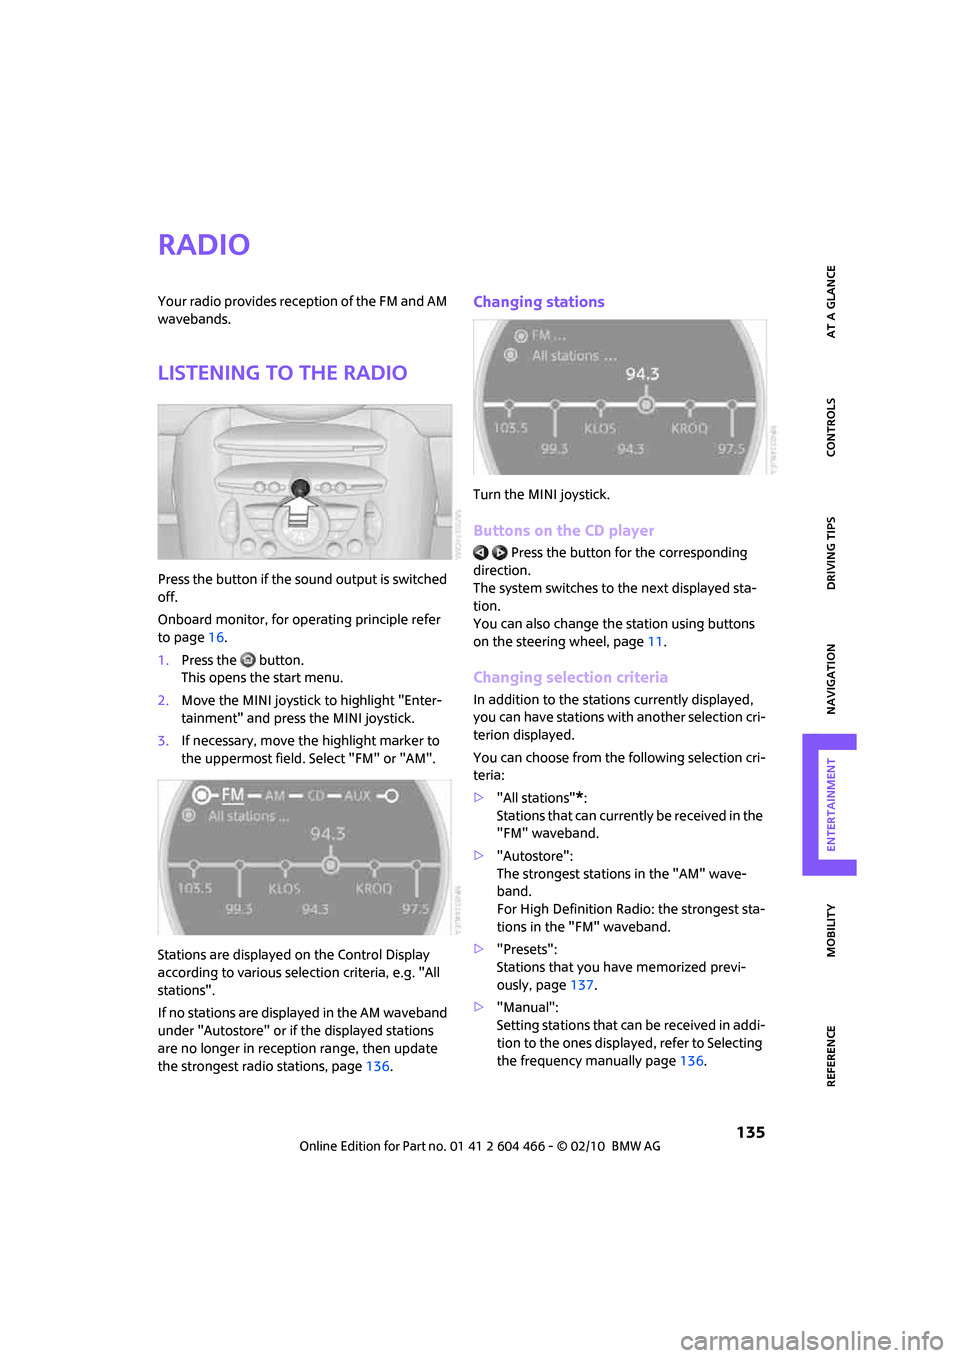
Stations are displayed on the Control Display
according to various selection criteria, e.g. "All
stations".
If no stations are displayed in the AM waveband
under "Autostore" or if the displayed stations
are no longer in reception range, then update
the strongest radio stations, page136.
Changing stations
Turn the MINI joystick.
Buttons on the CD player
Press the button for the corresponding
direction.
The system switches to the next displayed sta-
tion.
You can also change the station using buttons
on the steering wheel, page11.
Changing selection criteria
In addition to the stations currently displayed,
you can have stations with another selection cri-
terion displayed.
You can choose from the following selection cri-
teria:
>"All stations"
*:
Stations that can currently be received in the
"FM" waveband.
>"Autostore":
The strongest stations in the "AM" wave-
band.
For High Definition Radio: the strongest sta-
tions in the "FM" waveband.
>"Presets":
Stations that you have memorized previ-
ously, page137.
>"Manual":
Setting stations that can be received in addi-
tion to the ones displayed, refer to Selecting
the frequency manually page136.
Page 141 of 218
MOBILITYAT A GLANCE CONTROLS DRIVING TIPS ENTERTAINMENT
139
NAVIGATION REFERENCE
Some stations do not transmit the digital and
analog signals simultaneously. If you are in an
area in which digital reception of the selected
station is not possible continuously, reception
will alternate between analog and digital. This
can cause repetitions or interruptions. In this
case it may be preferable to switch off digital
reception.
Selecting programs of a digital station*
Some stations broadcast several programs on a
single frequency. To select one of these pro-
grams:
1.Select "FM" or "AM".
2.Select "Manual".
3.Select a station that can be received digi-
tally.
This symbol is displayed in the status line
when a station is received digitally.
4. Change to the next program of the
digital station using the buttons on the radio
or steering wheel.
Updating digitally receivable stations
If on a longer journey you move out of the
reception range of the stations originally
received, you can update the list of stations
received with the strongest signals.
1.Select "FM" or "AM".
2.Move the highlight marker to the second
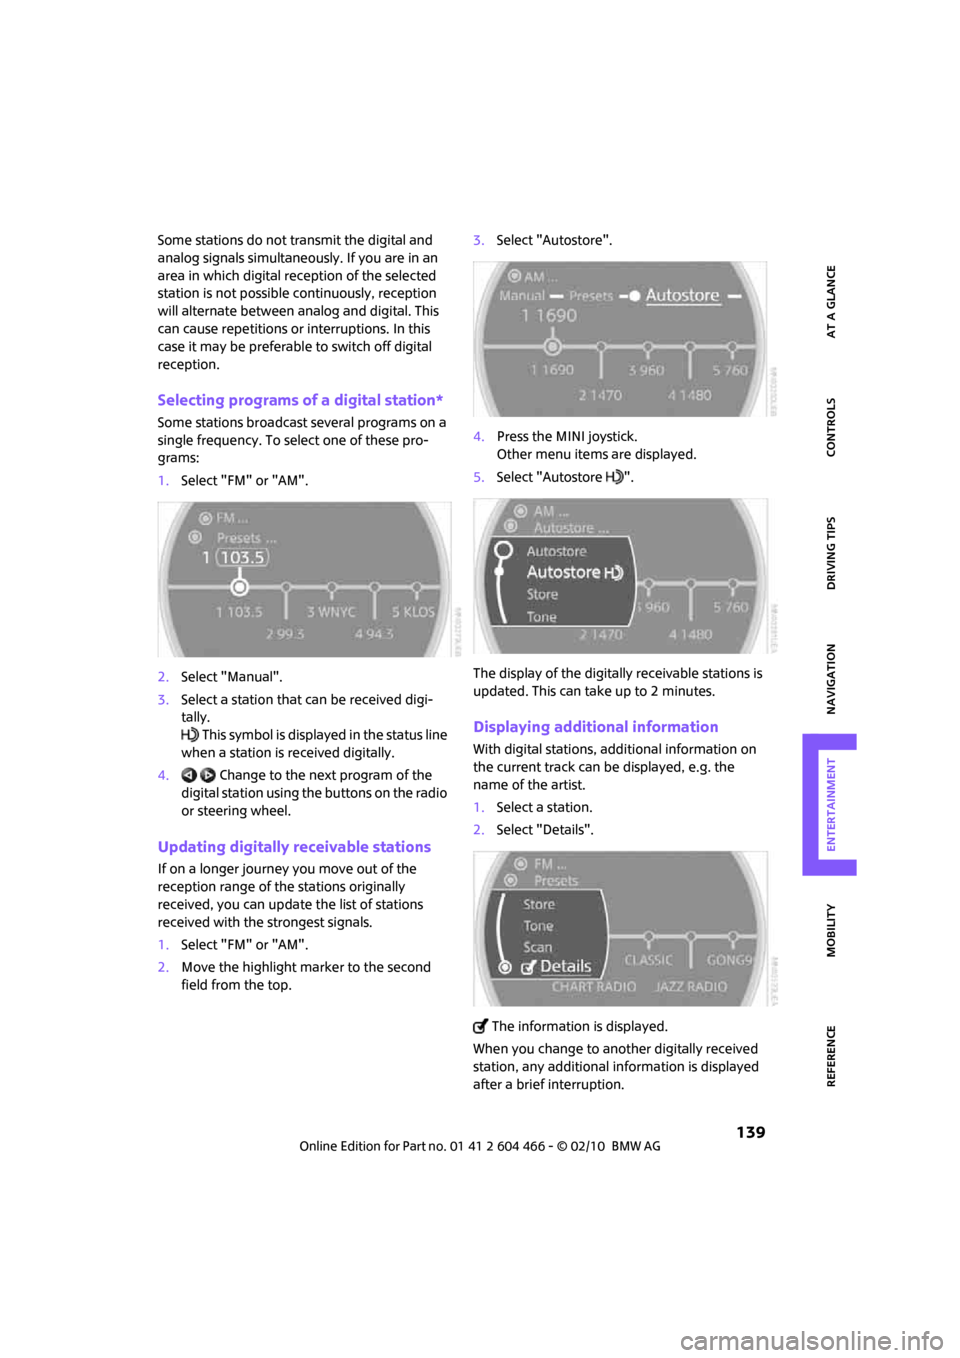
field from the top.3.Select "Autostore".
4.Press the MINI joystick.
Other menu items are displayed.
5.Select "Autostore ".
The display of the digitally receivable stations is
updated. This can take up to 2 minutes.
Displaying additional information
With digital stations, additional information on
the current track can be displayed, e.g. the
name of the artist.
1.Select a station.
2.Select "Details".
The information is displayed.
When you change to another digitally received
station, any additional information is displayed
after a brief interruption.
Page 146 of 218
CD player and CD changer
144
Selecting a track
Buttons on the CD player
Press the button for the desired direction
repeatedly until the desired track on the current
CD is reached.
Playback of the CD starts at the beginning of the
track. The track is displayed on the Control Dis-
play.
You can also change the track using the buttons
on the steering wheel, page11.
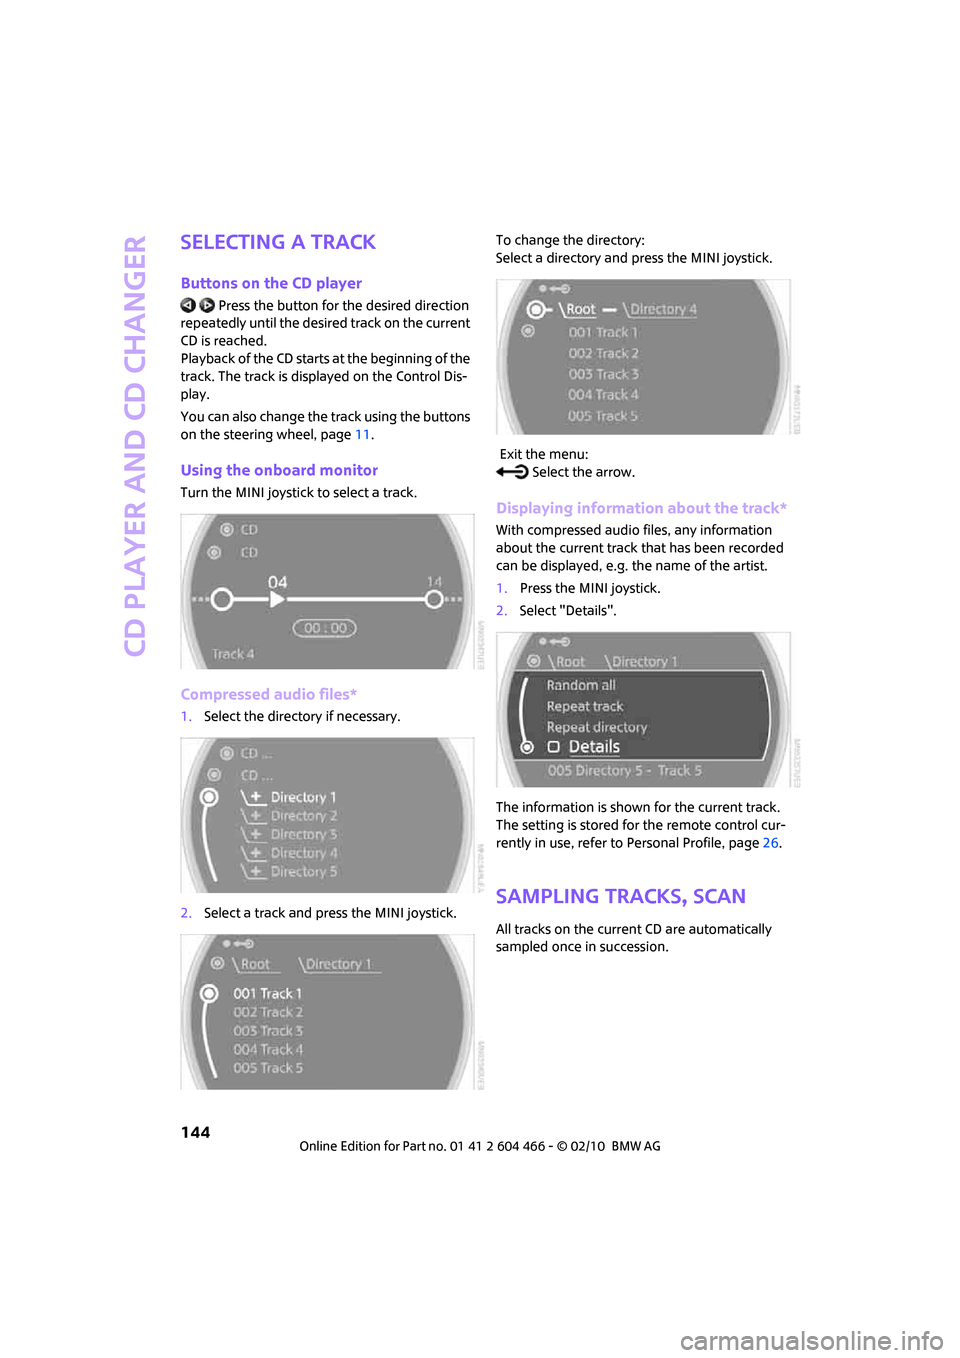
Using the onboard monitor
Turn the MINI joystick to select a track.
Compressed audio files*
1.Select the directory if necessary.
2.Select a track and press the MINI joystick.To change the directory:
Select a directory and press the MINI joystick.
Exit the menu:
Select the arrow.
Displaying information about the track*
With compressed audio files, any information
about the current track that has been recorded
can be displayed, e.g. the name of the artist.
1.Press the MINI joystick.
2.Select "Details".
The information is shown for the current track.
The setting is stored for the remote control cur-
rently in use, refer to Personal Profile, page26.
Sampling tracks, Scan
All tracks on the current CD are automatically
sampled once in succession.
Page 168 of 218
Wheels and tires
166
When properly used, these tires meet the high-
est standards in terms of safety and handling
characteristics.
Run-flat tires*
When mounting new tires or changing over from
summer to winter tires and vice versa, mount
run-flat tires for your own safety. Keep in mind
that no space-saver spare tire is available in the
event of a flat. Your MINI dealer will be glad to
advise you.
Special characteristics of winter tires
The manufacturer of MINI recommends the use
of winter tires on snowy roads or if temperatures
drop below 457/ +76. Although all-season
M+S tires provide better winter traction than
summer tires, they generally fail to provide the
same levels of cold-weather performance as
winter tires.
Pay attention to speed
Always comply with the speed limit for the
winter tires mounted on your car; failure
to do so could result in tire damage and acci-
dents.<
If the car is capable of speeds higher than that
permitted for the winter tires, a label stating the
maximum permitted speed for the mounted
tires must be displayed in your field of view. Spe-
cialist tire dealers and your MINI dealer can sup-
ply these labels.
Storage
Always store wheels and tires in a cool, dry place
with as little exposure to light as possible.
Always protect tires against all contact with oil,
grease and fuels.
Do not exceed the maximum tire inflation pres-
sure indicated on the sidewall of the tire.
Swapping wheels among the axles
Depending on the individual use, front and rear
tires may exhibit different wear and tear.
In order to maintain an even wear and tear, the
wheels may be rotated between the axles. Your
MINI dealer will be glad to advise you.Always check the inflation pressure after the tire
rotation, if necessary change the pressure.
Snow chains*
Only certain types of fine-link snow chains have
been tested by the manufacturer of your MINI,
classified as road-safe and recommended. Con-
tact your MINI dealer for more details.
Only attach snow chains in pairs to the front
wheels with the following tires.
>175/65 R 15 M+S
>175/60 R 16 M+S
John Cooper Works:
>185/50 R 17 86 H M+S XL RSC
Observe the manufacturer's instructions when
mounting snow chains. Do not exceed a speed
of 30 mph or 50 km/h.
Do not initialize the Flat Tire Monitor if
snow chains are mounted; otherwise, the
instrument might issue an incorrect reading.
When driving with snow chains, it can be useful
to briefly deactivate the DSC or activate the DTC,
refer to page72.<
Page 175 of 218
MOBILITYAT A GLANCE CONTROLS DRIVING TIPS ENTERTAINMENT
173
NAVIGATION REFERENCE
If the distance is too close, the pressure too high,
or the temperature too high, parts of the vehicle
can be damaged, or water can penetrate.
Observe the operating instructions for high-
pressure washers.<
Do not spray sensors such as Park Dis-
tance Control with high-pressure washers
for a long time or at a distance of less than 1 ft/
30 cm.<
Manual washing
Use a great deal of water and, if necessary, car
shampoo when washing your car by hand. Clean
the vehicle with a sponge or a washing brush
applying a slight amount of pressure.
Before cleaning the windshield, deacti-
vate the rain sensor or turn off the ignition
to prevent unintentional wiping.<
Observe local regulations regarding wash-
ing vehicles by hand.<
Headlamps
Do not wipe dry and do not use abrasive or cor-
rosive cleaning agents. Remove dirt and con-
tamination, such as insects, by soaking with
shampoo and then washing with plenty of
water.
Do not remove accumulated ice and snow with
an ice scraper; use window deicers instead.
Windows
Clean the outside and inside of the windows and
mirrors with a window cleaner.
Do not clean the mirrors with cleaners
containing quartz.<
Wiper blades
Clean with soapy water and change regularly to
prevent the formation of streaks.
Wax, preservatives and dirt on the win-
dows cause streaks when the windshield
wipers are on, and can cause premature wear of
the wiper blades and interfere with the rain sen-
sor.<
Paintwork, care
Regular care helps your vehicle retain its value
and protects the paint from the long-term
effects of aggressive substances.
In some regions, environmental factors can
affect the vehicle paintwork and damage it. It is
therefore important to adjust the frequency and
extent of vehicle care correspondingly.
Immediately remove aggressive materials such
as spilled fuel, oil, grease, brake fluid, tree sap or
bird droppings to prevent damage to the paint-
work.
Removing paintwork damage
Depending on the severity of the damage,
immediately repair stone damage or
scratches to prevent rusting.<
The manufacturer of the MINI recommends
repairing paint damage professionally according
to factory specifications with original MINI
paints.
Preservation
Preservation is necessary when water no longer
beads on the clean paint surface. To preserve
the paint, only use preservatives that contain
carnauba or synthetic waxes.
Rubber seals
Only treat with water or rubber care products.
Do not use silicon sprays or other silicon-
containing care products on rubber seals;
otherwise, noise and damage could occur.<
Chrome parts*
Carefully clean vehicle parts such as the radiator
grill and door handles with copious quantities of
water and, if necessary, a shampoo additive,
especially when contaminated with road salt.
For additional treatment, use chrome polish.
Light-alloy wheels*
The system produces brake dust that collects on
the light alloy wheels. Clean them regularly with
acid-free wheel cleaner.
Page 182 of 218
Replacing components
180
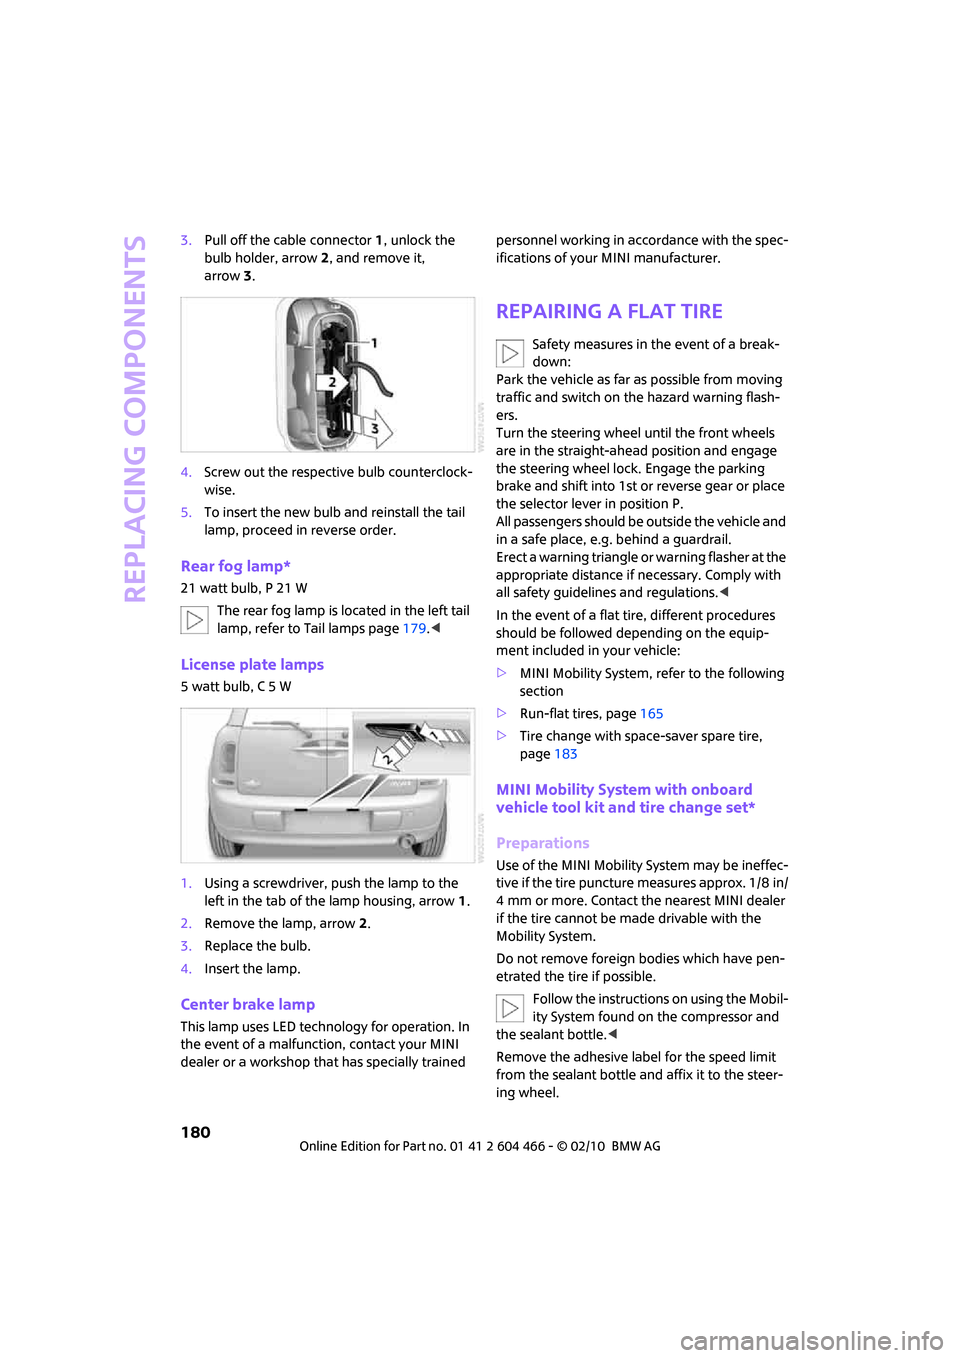
3.Pull off the cable connector 1, unlock the
bulb holder, arrow2, and remove it,
arrow3.
4.Screw out the respective bulb counterclock-
wise.
5.To insert the new bulb and reinstall the tail
lamp, proceed in reverse order.
Rear fog lamp*
21 watt bulb, P 21 W
The rear fog lamp is located in the left tail
lamp, refer to Tail lamps page179.<
License plate lamps
5 watt bulb, C 5 W
1.Using a screwdriver, push the lamp to the
left in the tab of the lamp housing, arrow1.
2.Remove the lamp, arrow 2.
3.Replace the bulb.
4.Insert the lamp.
Center brake lamp
This lamp uses LED technology for operation. In
the event of a malfunction, contact your MINI
dealer or a workshop that has specially trained personnel working in accordance with the spec-
ifications of your MINI manufacturer.
Repairing a flat tire
Safety measures in the event of a break-
down:
Park the vehicle as far as possible from moving
traffic and switch on the hazard warning flash-
ers.
Turn the steering wheel until the front wheels
are in the straight-ahead position and engage
the steering wheel lock. Engage the parking
brake and shift into 1st or reverse gear or place
the selector lever in position P.
All passengers should be outside the vehicle and
in a safe place, e.g. behind a guardrail.
Erect a warning triangle or warning flasher at the
appropriate distance if necessary. Comply with
all safety guidelines and regulations.<
In the event of a flat tire, different procedures
should be followed depending on the equip-
ment included in your vehicle:
>MINI Mobility System, refer to the following
section
>Run-flat tires, page165
>Tire change with space-saver spare tire,
page183
MINI Mobility System with onboard
vehicle tool kit and tire change set*
Preparations
Use of the MINI Mobility System may be ineffec-
tive if the tire puncture measures approx. 1/8 in/
4 mm or more. Contact the nearest MINI dealer
if the tire cannot be made drivable with the
Mobility System.
Do not remove foreign bodies which have pen-
etrated the tire if possible.
Follow the instructions on using the Mobil-
ity System found on the compressor and
the sealant bottle.<
Remove the adhesive label for the speed limit
from the sealant bottle and affix it to the steer-
ing wheel.
Page 183 of 218
MOBILITYAT A GLANCE CONTROLS DRIVING TIPS ENTERTAINMENT
181
NAVIGATION REFERENCE
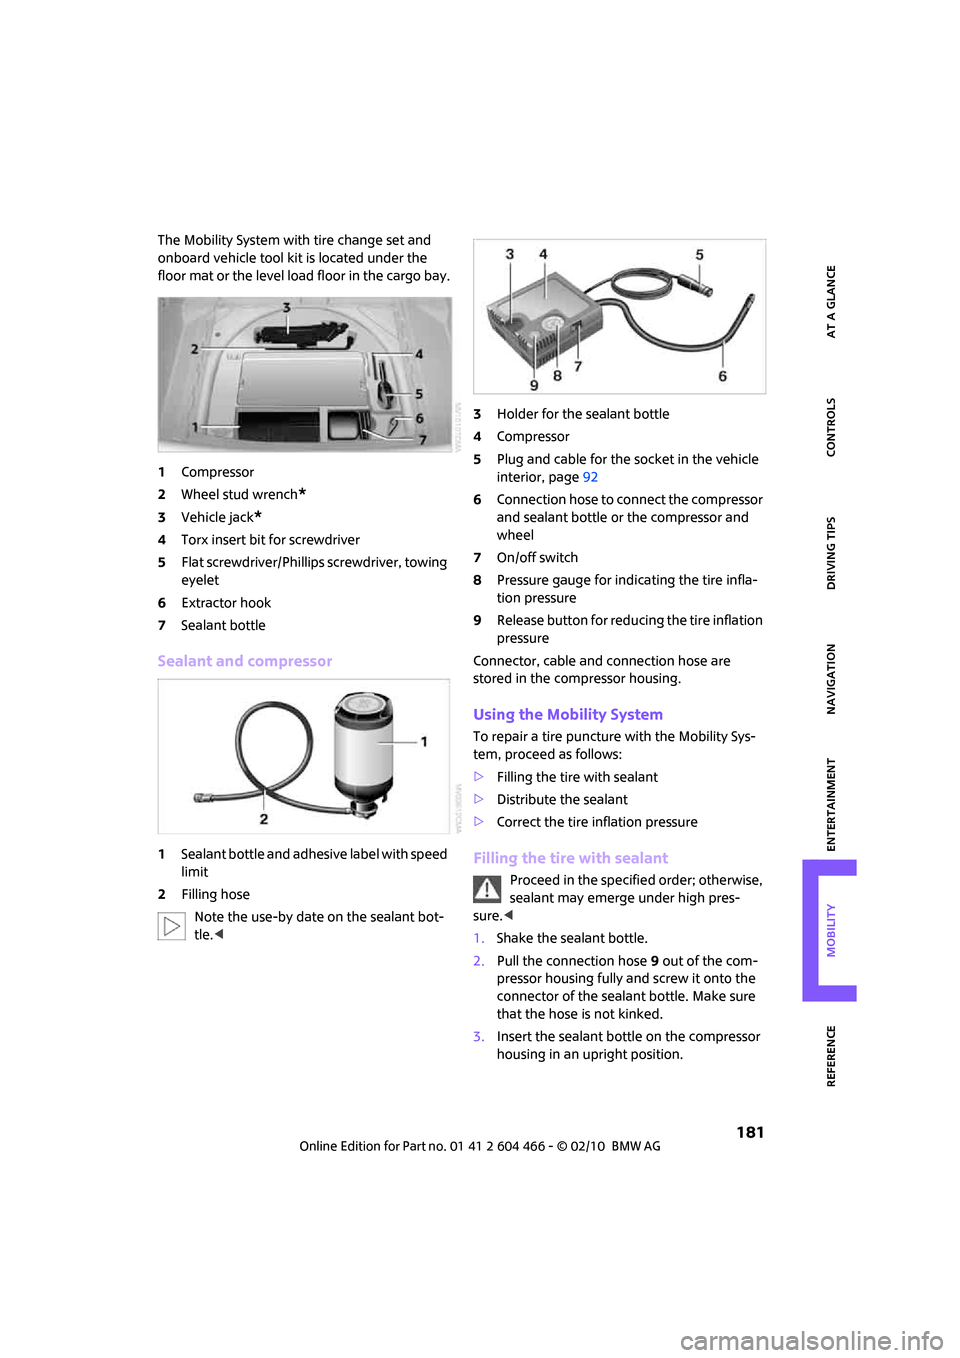
The Mobility System with tire change set and
onboard vehicle tool kit is located under the
floor mat or the level load floor in the cargo bay.
1Compressor
2Wheel stud wrench
*
3Vehicle jack*
4Torx insert bit for screwdriver
5Flat screwdriver/Phillips screwdriver, towing
eyelet
6Extractor hook
7Sealant bottle
Sealant and compressor
1Sealant bottle and adhesive label with speed
limit
2Filling hose
Note the use-by date on the sealant bot-
tle.<3Holder for the sealant bottle
4Compressor
5Plug and cable for the socket in the vehicle
interior, page92
6Connection hose to connect the compressor
and sealant bottle or the compressor and
wheel
7On/off switch
8Pressure gauge for indicating the tire infla-
tion pressure
9Release button for reducing the tire inflation
pressure
Connector, cable and connection hose are
stored in the compressor housing.
Using the Mobility System
To repair a tire puncture with the Mobility Sys-
tem, proceed as follows:
>Filling the tire with sealant
>Distribute the sealant
>Correct the tire inflation pressure
Filling the tire with sealant
Proceed in the specified order; otherwise,
sealant may emerge under high pres-
sure.<
1.Shake the sealant bottle.
2.Pull the connection hose9 out of the com-
pressor housing fully and screw it onto the
connector of the sealant bottle. Make sure
that the hose is not kinked.
3.Insert the sealant bottle on the compressor
housing in an upright position.
Page 185 of 218
MOBILITYAT A GLANCE CONTROLS DRIVING TIPS ENTERTAINMENT
183
NAVIGATION REFERENCE
If an inflation pressure of 26 psi/180 kPa still
cannot be reached, the tire is too heavily dam-
aged. Contact the nearest MINI dealer.<
Driving on
Do not exceed the permitted maximum
speed of 50 mph/80 km/h; doing so may
result in an accident.<
Replace the defective tire as soon as possible
and have the new wheel/tire assembly bal-
anced.
Have the Mobility System refilled.
Changing wheels
Space-saver spare tire*
To change a space-saver spare tire, proceed as
follows:
>Remove the space-saver spare tire,
page183
>Prepare for tire change, page184
>Jack up vehicle, page184
>Mount space-saver spare tire, page184
>Tighten lug bolts, page184
>Drive with space-saver spare tire, page183
Tire change set for a space-saver spare
tire*
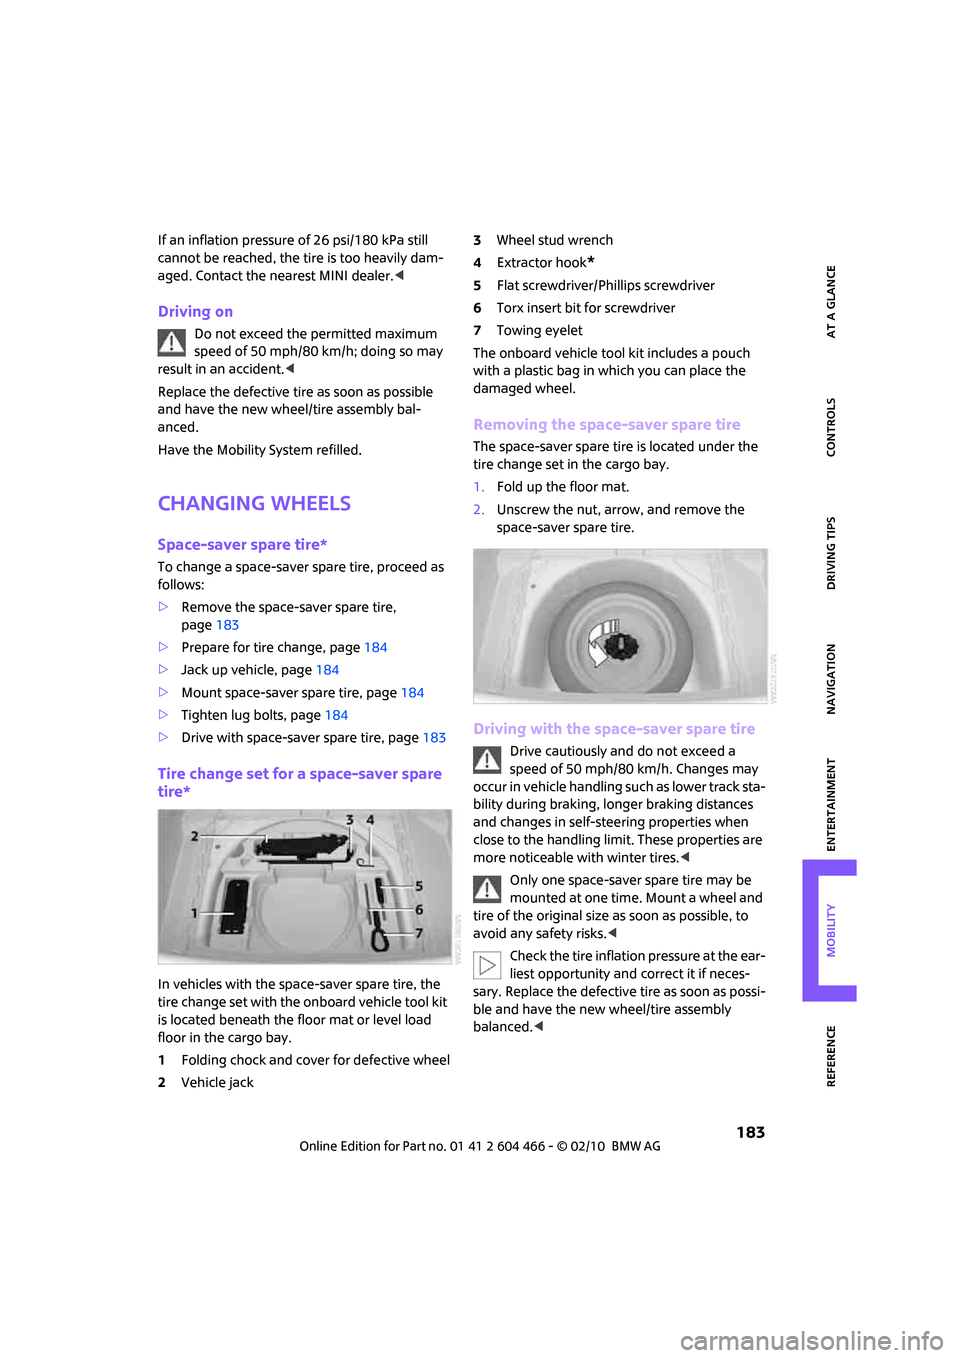
In vehicles with the space-saver spare tire, the
tire change set with the onboard vehicle tool kit
is located beneath the floor mat or level load
floor in the cargo bay.
1Folding chock and cover for defective wheel
2Vehicle jack3Wheel stud wrench
4Extractor hook
*
5Flat screwdriver/Phillips screwdriver
6Torx insert bit for screwdriver
7Towing eyelet
The onboard vehicle tool kit includes a pouch
with a plastic bag in which you can place the
damaged wheel.
Removing the space-saver spare tire
The space-saver spare tire is located under the
tire change set in the cargo bay.
1.Fold up the floor mat.
2.Unscrew the nut, arrow, and remove the
space-saver spare tire.
Driving with the space-saver spare tire
Drive cautiously and do not exceed a
speed of 50 mph/80 km/h. Changes may
occur in vehicle handling such as lower track sta-
bility during braking, longer braking distances
and changes in self-steering properties when
close to the handling limit. These properties are
more noticeable with winter tires.<
Only one space-saver spare tire may be
mounted at one time. Mount a wheel and
tire of the original size as soon as possible, to
avoid any safety risks.<
Check the tire inflation pressure at the ear-
liest opportunity and correct it if neces-
sary. Replace the defective tire as soon as possi-
ble and have the new wheel/tire assembly
balanced.<