remote start MINI Clubman 2010 (Mini Connected) User Guide
[x] Cancel search | Manufacturer: MINI, Model Year: 2010, Model line: Clubman, Model: MINI Clubman 2010Pages: 218, PDF Size: 3.97 MB
Page 70 of 218
Controls overview
68
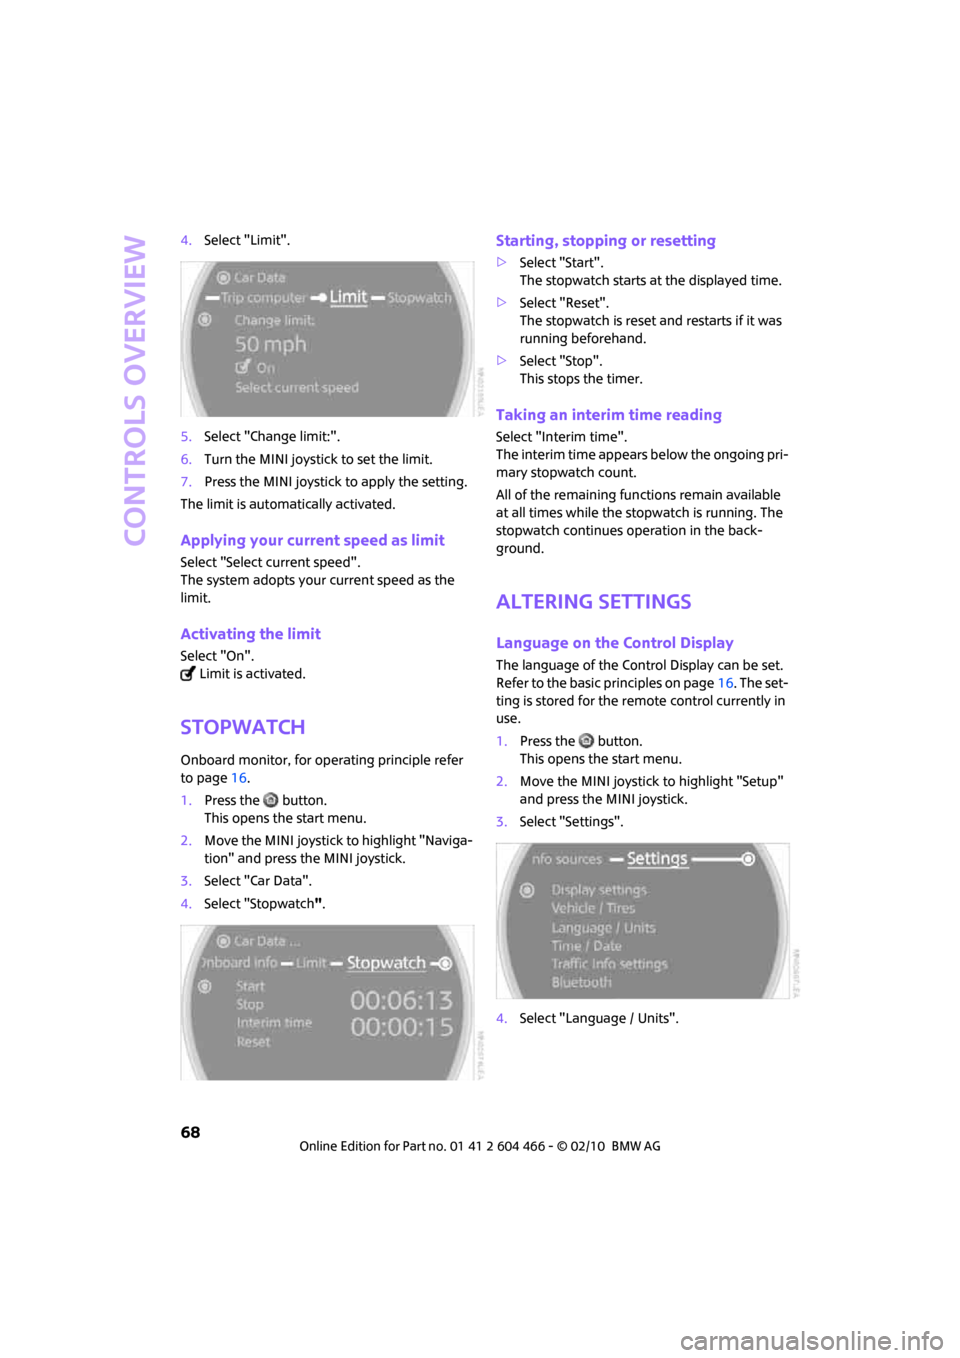
4.Select "Limit".
5.Select "Change limit:".
6.Turn the MINI joystick to set the limit.
7.Press the MINI joystick to apply the setting.
The limit is automatically activated.
Applying your current speed as limit
Select "Select current speed".
The system adopts your current speed as the
limit.
Activating the limit
Select "On".
Limit is activated.
Stopwatch
Onboard monitor, for operating principle refer
to page16.
1.Press the button.
This opens the start menu.
2.Move the MINI joystick to highlight "Naviga-
tion" and press the MINI joystick.
3.Select "Car Data".
4.Select "Stopwatch".
Starting, stopping or resetting
>Select "Start".
The stopwatch starts at the displayed time.
>Select "Reset".
The stopwatch is reset and restarts if it was
running beforehand.
>Select "Stop".
This stops the timer.
Taking an interim time reading
Select "Interim time".
The interim time appears below the ongoing pri-
mary stopwatch count.
All of the remaining functions remain available
at all times while the stopwatch is running. The
stopwatch continues operation in the back-
ground.
Altering settings
Language on the Control Display
The language of the Control Display can be set.
Refer to the basic principles on page16. The set-
ting is stored for the remote control currently in
use.
1.Press the button.
This opens the start menu.
2.Move the MINI joystick to highlight "Setup"
and press the MINI joystick.
3.Select "Settings".
4.Select "Language / Units".
Page 71 of 218
MOBILITYAT A GLANCE CONTROLS DRIVING TIPS ENTERTAINMENT
69
NAVIGATION REFERENCE
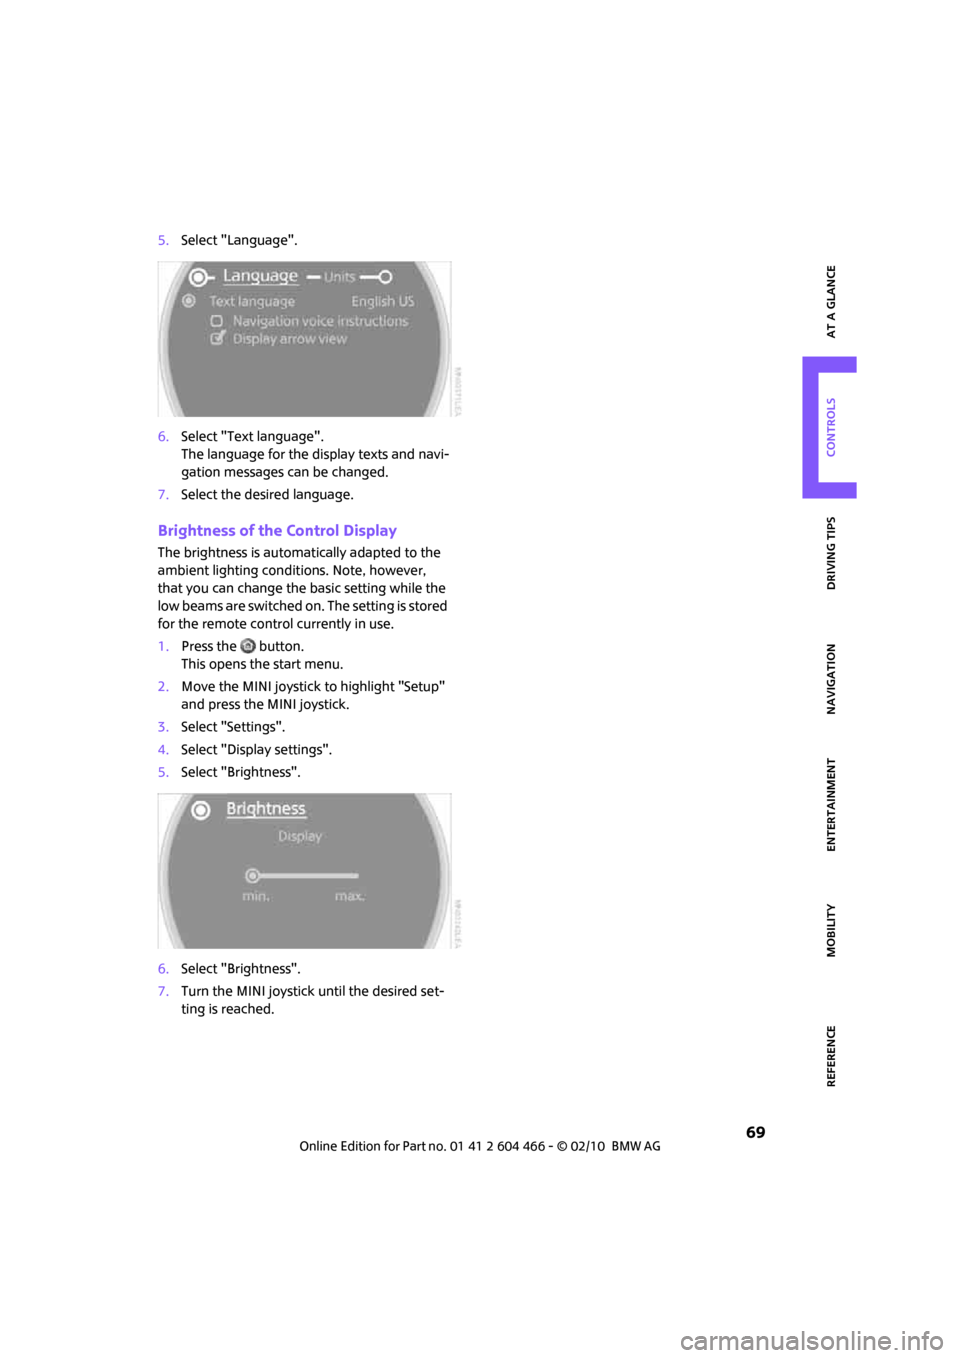
5.Select "Language".
6.Select "Text language".
The language for the display texts and navi-
gation messages can be changed.
7.Select the desired language.
Brightness of the Control Display
The brightness is automatically adapted to the
ambient lighting conditions. Note, however,
that you can change the basic setting while the
low beams are switched on. The setting is stored
for the remote control currently in use.
1.Press the button.
This opens the start menu.
2.Move the MINI joystick to highlight "Setup"
and press the MINI joystick.
3.Select "Settings".
4.Select "Display settings".
5.Select "Brightness".
6.Select "Brightness".
7.Turn the MINI joystick until the desired set-
ting is reached.
Page 83 of 218
MOBILITYAT A GLANCE CONTROLS DRIVING TIPS ENTERTAINMENT
81
NAVIGATION REFERENCE
Lamps
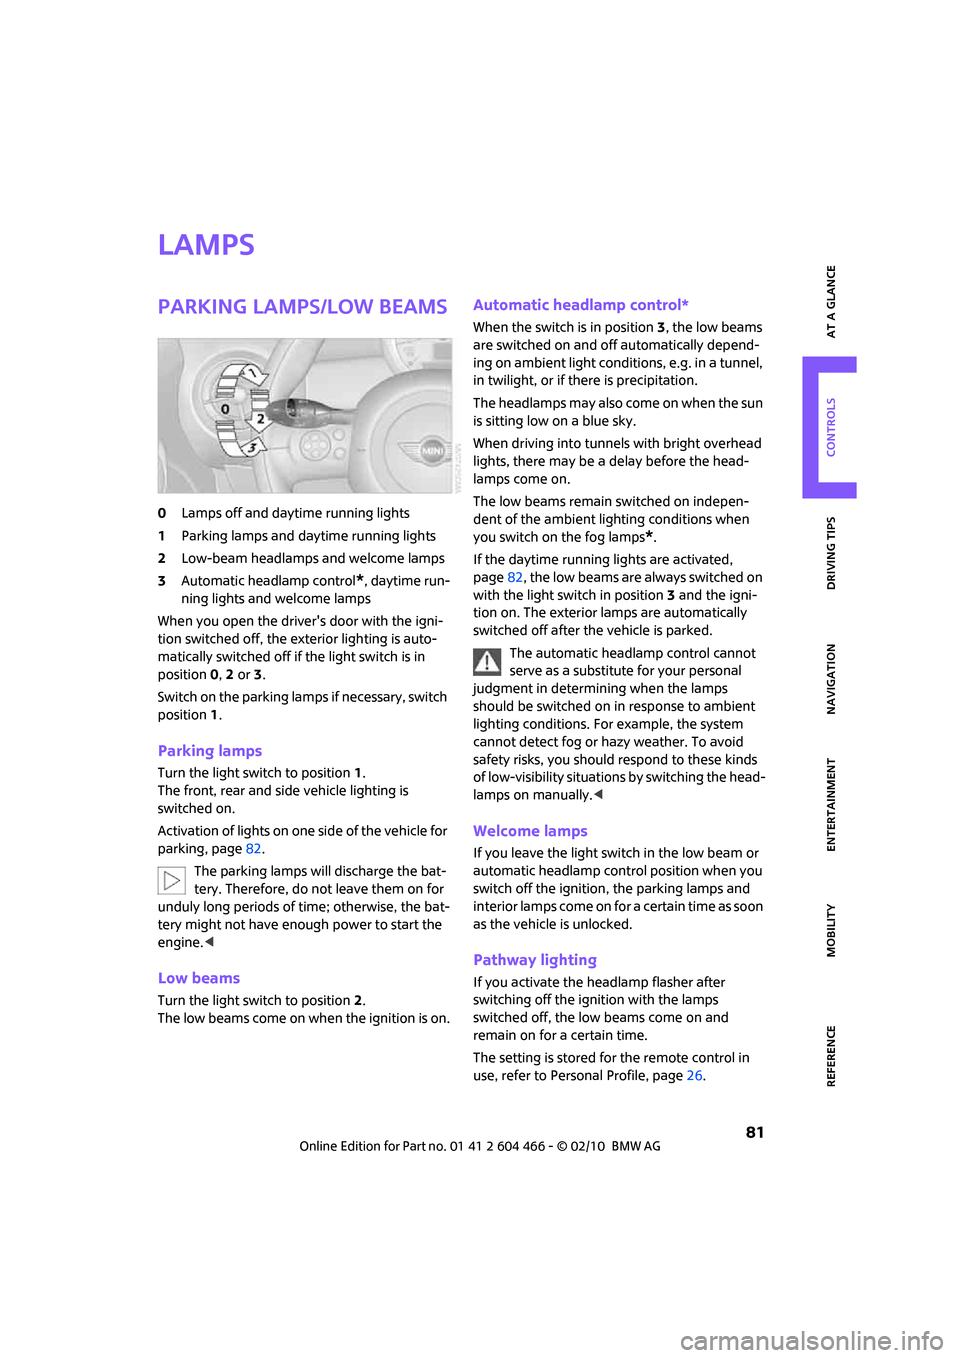
Parking lamps/low beams
0Lamps off and daytime running lights
1Parking lamps and daytime running lights
2Low-beam headlamps and welcome lamps
3Automatic headlamp control
*, daytime run-
ning lights and welcome lamps
When you open the driver's door with the igni-
tion switched off, the exterior lighting is auto-
matically switched off if the light switch is in
position 0, 2 or 3.
Switch on the parking lamps if necessary, switch
position 1.
Parking lamps
Turn the light switch to position 1.
The front, rear and side vehicle lighting is
switched on.
Activation of lights on one side of the vehicle for
parking, page82.
The parking lamps will discharge the bat-
tery. Therefore, do not leave them on for
unduly long periods of time; otherwise, the bat-
tery might not have enough power to start the
engine.<
Low beams
Turn the light switch to position 2.
The low beams come on when the ignition is on.
Automatic headlamp control*
When the switch is in position3, the low beams
are switched on and off automatically depend-
ing on ambient light conditions, e.g. in a tunnel,
in twilight, or if there is precipitation.
The headlamps may also come on when the sun
is sitting low on a blue sky.
When driving into tunnels with bright overhead
lights, there may be a delay before the head-
lamps come on.
The low beams remain switched on indepen-
dent of the ambient lighting conditions when
you switch on the fog lamps
*.
If the daytime running lights are activated,
page82, the low beams are always switched on
with the light switch in position 3 and the igni-
tion on. The exterior lamps are automatically
switched off after the vehicle is parked.
The automatic headlamp control cannot
serve as a substitute for your personal
judgment in determining when the lamps
should be switched on in response to ambient
lighting conditions. For example, the system
cannot detect fog or hazy weather. To avoid
safety risks, you should respond to these kinds
of low-visibility situations by switching the head-
lamps on manually.<
Welcome lamps
If you leave the light switch in the low beam or
automatic headlamp control position when you
switch off the ignition, the parking lamps and
interior lamps come on for a certain time as soon
as the vehicle is unlocked.
Pathway lighting
If you activate the headlamp flasher after
switching off the ignition with the lamps
switched off, the low beams come on and
remain on for a certain time.
The setting is stored for the remote control in
use, refer to Personal Profile, page26.
Page 84 of 218
Lamps
82
Setting the duration or deactivating the
function
1.Press the button.
This opens the start menu.
2.Move the MINI joystick to highlight "Setup"
and press the MINI joystick.
3.Select "Settings".
4.Select "Vehicle and tires".
5.Select "Lighting".
6.Select "Pathway lighting".
7.Turn the MINI joystick to select the corre-
sponding duration.
8.Press the MINI joystick to apply the setting.
Daytime running lights*
The light switch can remain in the lamps off,
parking lamps or automatic headlamp control
*
position.
In the lamps off position, the exterior lighting is
automatically switched off after the vehicle is
parked. In the parking lamps position, the park-
ing lamps will stay on after the ignition is
switched off.
Switch on the parking lamps separately if
needed.
Activating/deactivating daytime
running lights
The setting is stored for the remote control in
use, refer to Personal Profile, page26.
1.Press the button.
This opens the start menu.
2.Move the MINI joystick to highlight "Setup"
and press the MINI joystick.
3.Select "Settings".4.Select "Vehicle and tires".
5.Select "Lighting".
6.Select "Daytime running lamps".
The daytime running lights are switched on.
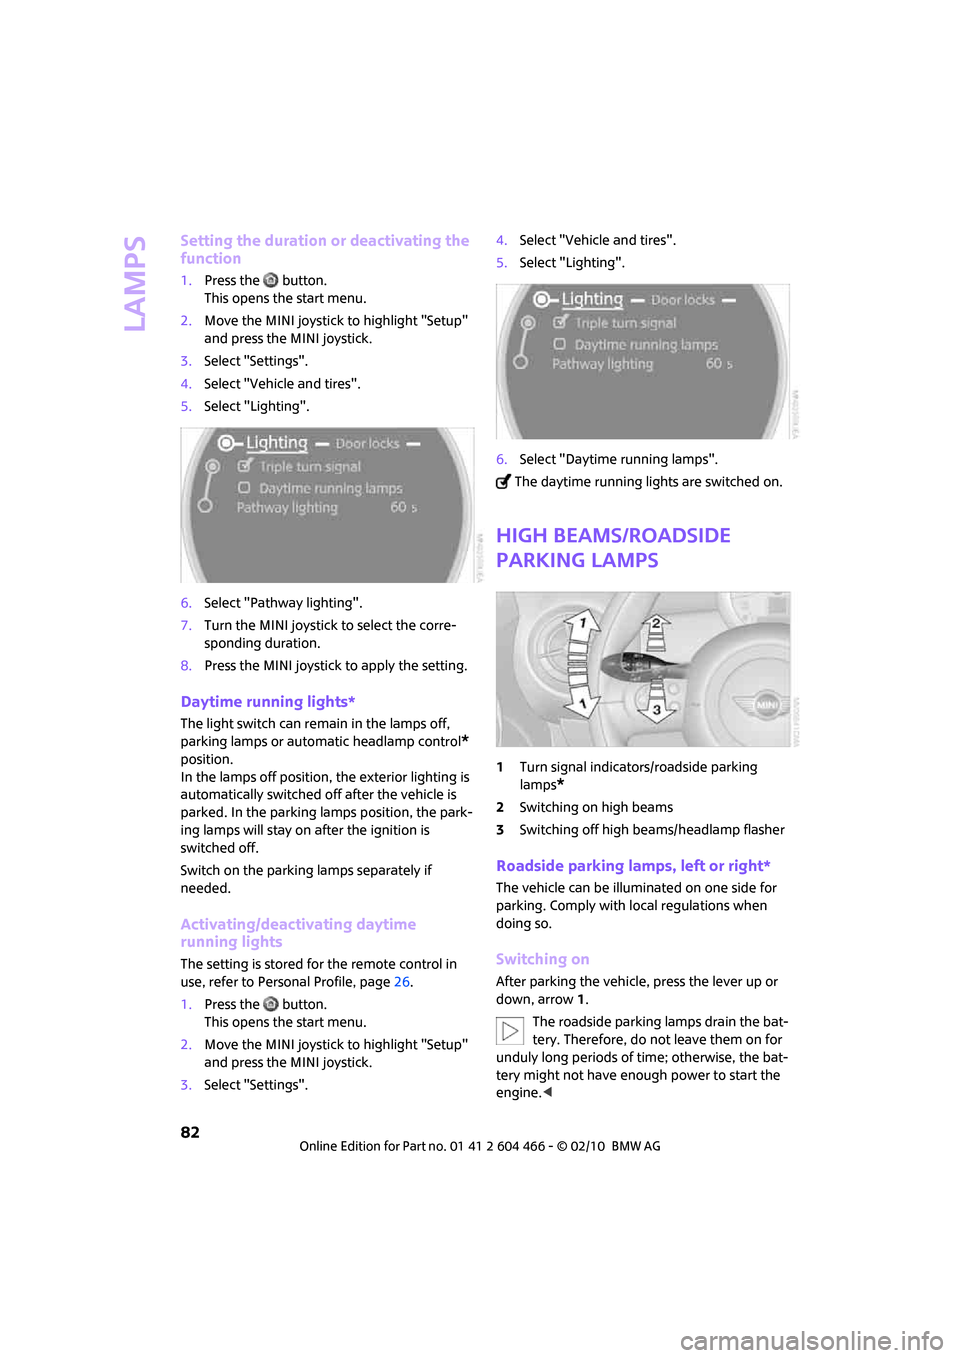
High beams/roadside
parking lamps
1Turn signal indicators/roadside parking
lamps
*
2Switching on high beams
3Switching off high beams/headlamp flasher
Roadside parking lamps, left or right*
The vehicle can be illuminated on one side for
parking. Comply with local regulations when
doing so.
Switching on
After parking the vehicle, press the lever up or
down, arrow 1.
The roadside parking lamps drain the bat-
tery. Therefore, do not leave them on for
unduly long periods of time; otherwise, the bat-
tery might not have enough power to start the
engine.<
Page 88 of 218
Climate
86
Automatic climate
control
Comfortable interior climate
AUTO program6 offers the ideal air distribution
and air flow rate for almost all conditions, refer
to AUTO program below. All you need to do is
select an interior temperature which is comfort-
able for you.
The following sections inform you in detail about
how to adjust the settings.
Most settings are stored for the remote control
currently in use, refer also to Personal Profile set-
tings on page26.
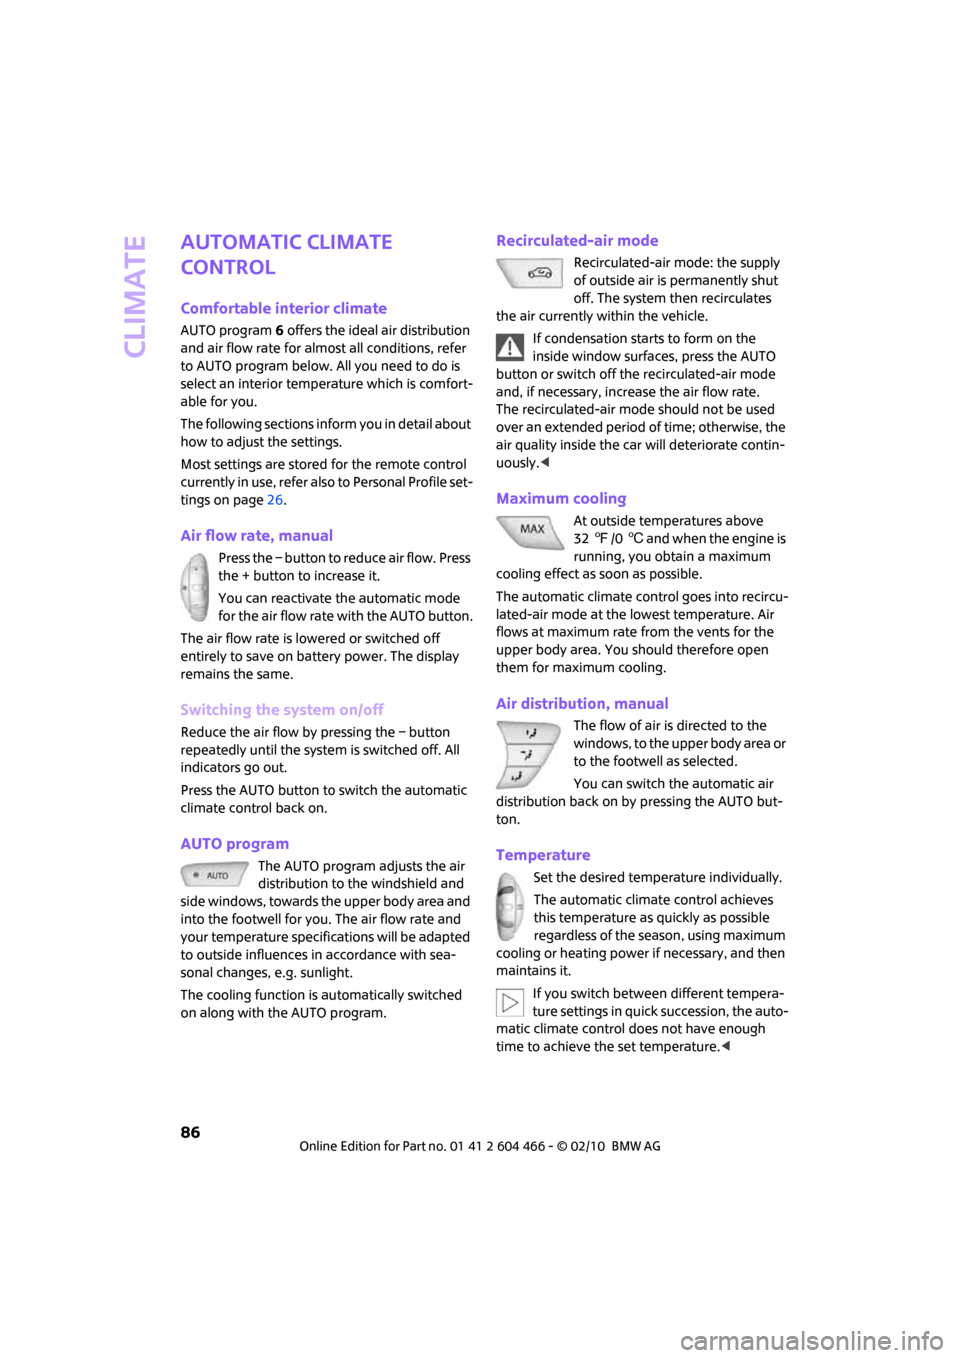
Air flow rate, manual
Press the – button to reduce air flow. Press
the + button to increase it.
You can reactivate the automatic mode
for the air flow rate with the AUTO button.
The air flow rate is lowered or switched off
entirely to save on battery power. The display
remains the same.
Switching the system on/off
Reduce the air flow by pressing the – button
repeatedly until the system is switched off. All
indicators go out.
Press the AUTO button to switch the automatic
climate control back on.
AUTO program
The AUTO program adjusts the air
distribution to the windshield and
side windows, towards the upper body area and
into the footwell for you. The air flow rate and
your temperature specifications will be adapted
to outside influences in accordance with sea-
sonal changes, e.g. sunlight.
The cooling function is automatically switched
on along with the AUTO program.
Recirculated-air mode
Recirculated-air mode: the supply
of outside air is permanently shut
off. The system then recirculates
the air currently within the vehicle.
If condensation starts to form on the
inside window surfaces, press the AUTO
button or switch off the recirculated-air mode
and, if necessary, increase the air flow rate.
The recirculated-air mode should not be used
over an extended period of time; otherwise, the
air quality inside the car will deteriorate contin-
uously.<
Maximum cooling
At outside temperatures above
327/06 and when the engine is
running, you obtain a maximum
cooling effect as soon as possible.
The automatic climate control goes into recircu-
lated-air mode at the lowest temperature. Air
flows at maximum rate from the vents for the
upper body area. You should therefore open
them for maximum cooling.
Air distribution, manual
The flow of air is directed to the
windows, to the upper body area or
to the footwell as selected.
You can switch the automatic air
distribution back on by pressing the AUTO but-
ton.
Temperature
Set the desired temperature individually.
The automatic climate control achieves
this temperature as quickly as possible
regardless of the season, using maximum
cooling or heating power if necessary, and then
maintains it.
If you switch between different tempera-
ture settings in quick succession, the auto-
matic climate control does not have enough
time to achieve the set temperature.<
Page 90 of 218
Practical interior accessories
88
Practical interior accessories
Integrated universal
remote control*
The concept
The integrated universal remote control can
replace as many as three hand-held transmitters
for various remote-controlled devices, such as
garage and gate openers and lighting systems.
The integrated universal remote control regis-
ters and stores signals from the original hand-
held transmitters.
The signal of an original hand-held transmitter
can be programmed on one of the three mem-
ory buttons1. The system in question can then
be operated by means of the programmed
memory button1. The LED2 flashes to confirm
transmission of the signal.
If you decide to sell your vehicle one day, in the
interest of your own security, remember to clear
the stored programs before the vehicle leaves
your possession, page89.
To prevent possible damage or injury,
before programming or using the inte-
grated universal remote control, always inspect
the immediate area to make certain that no
people, animals or objects are within the pivot-
ing or travel range of the device being operated.
Comply also with the safety instructions supplied
with the original hand-held transmitter.<
Checking compatibility
If this symbol appears on the package
or in the instructions supplied with the
original hand-held transmitter, you can
assume that the radio remote control device is
compatible with the integrated universal remote
control.
For additional information, please contact your
MINI dealer or call: 1-800-355-3515.
You can also obtain information on the Internet
at:
www.MINI.com orwww.homelink.com
HomeLink is a registered trademark of Johnson
Controls, Inc.
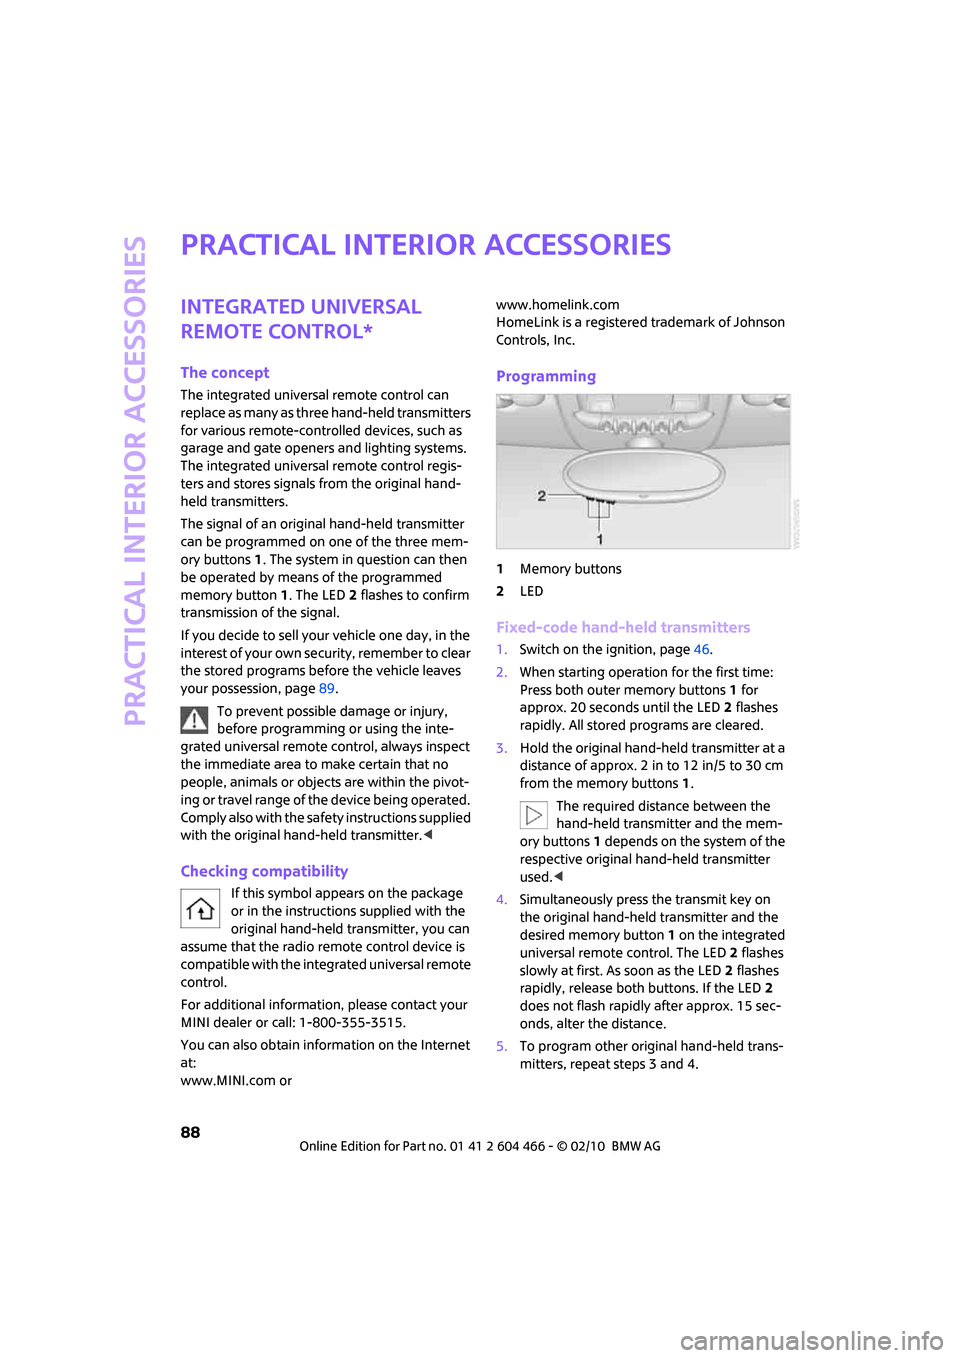
Programming
1Memory buttons
2LED
Fixed-code hand-held transmitters
1.Switch on the ignition, page46.
2.When starting operation for the first time:
Press both outer memory buttons1 for
approx. 20 seconds until the LED2 flashes
rapidly. All stored programs are cleared.
3.Hold the original hand-held transmitter at a
distance of approx. 2 in to 12 in/5 to 30 cm
from the memory buttons1.
The required distance between the
hand-held transmitter and the mem-
ory buttons1 depends on the system of the
respective original hand-held transmitter
used.<
4.Simultaneously press the transmit key on
the original hand-held transmitter and the
desired memory button 1 on the integrated
universal remote control. The LED 2 flashes
slowly at first. As soon as the LED2 flashes
rapidly, release both buttons. If the LED2
does not flash rapidly after approx. 15 sec-
onds, alter the distance.
5.To program other original hand-held trans-
mitters, repeat steps 3 and 4.
Page 126 of 218
Destination guidance
124
This volume is independent of the volume of the
audio sources.
The setting is stored for the remote control cur-
rently in use.
Changing a route
Taking detours
During destination guidance, you can revise the
navigation system's route recommendations to
avoid particular stretches of road. Enter the
number of miles/kilometers that you want to
travel before returning to the original route.
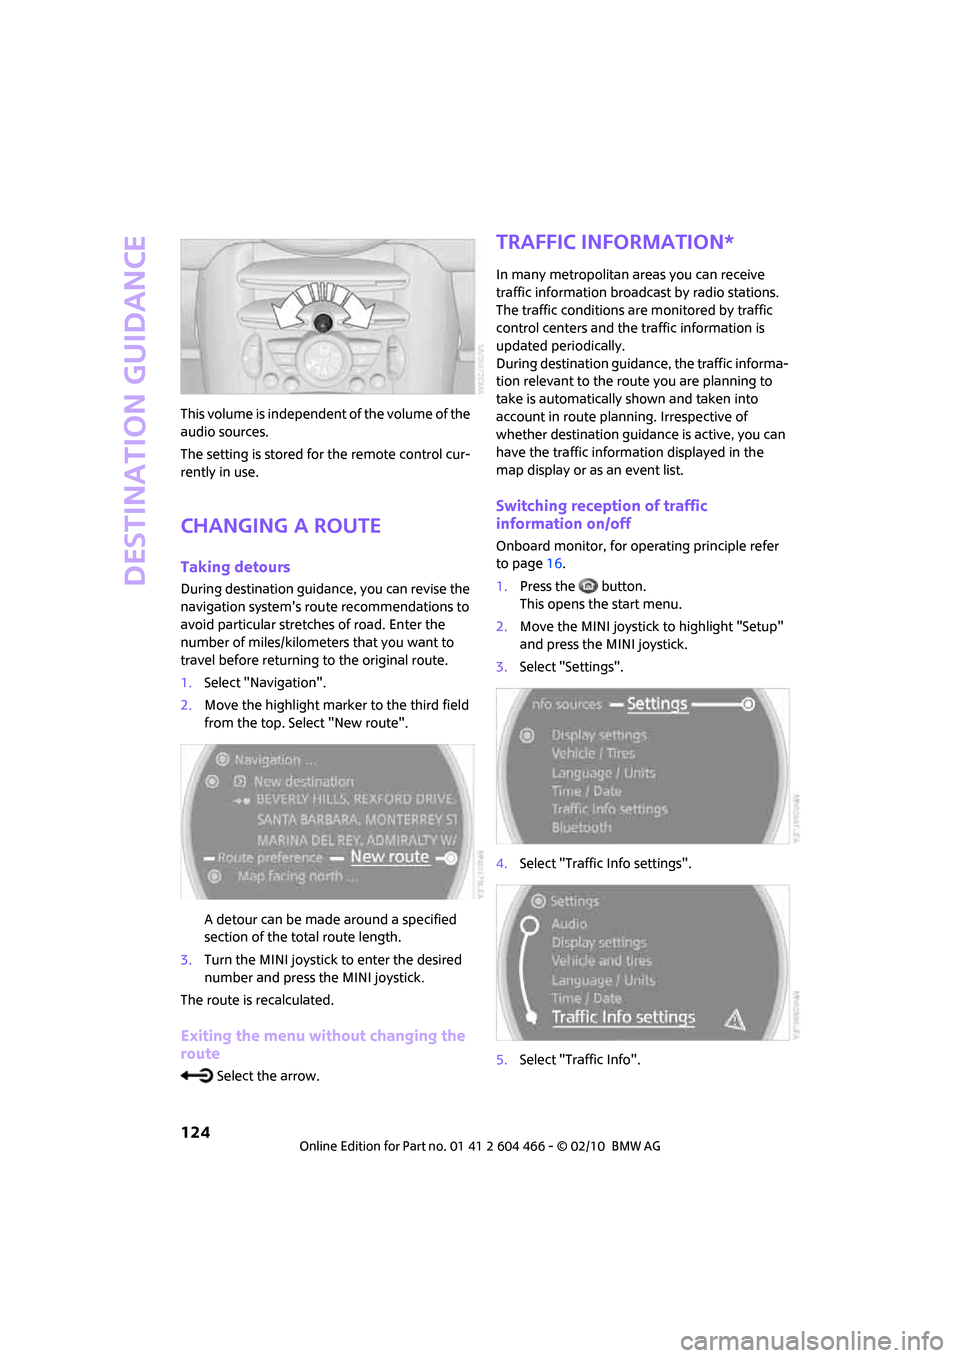
1.Select "Navigation".
2.Move the highlight marker to the third field
from the top. Select "New route".
A detour can be made around a specified
section of the total route length.
3.Turn the MINI joystick to enter the desired
number and press the MINI joystick.
The route is recalculated.
Exiting the menu without changing the
route
Select the arrow.
Traffic information*
In many metropolitan areas you can receive
traffic information broadcast by radio stations.
The traffic conditions are monitored by traffic
control centers and the traffic information is
updated periodically.
During destination guidance, the traffic informa-
tion relevant to the route you are planning to
take is automatically shown and taken into
account in route planning. Irrespective of
whether destination guidance is active, you can
have the traffic information displayed in the
map display or as an event list.
Switching reception of traffic
information on/off
Onboard monitor, for operating principle refer
to page16.
1.Press the button.
This opens the start menu.
2.Move the MINI joystick to highlight "Setup"
and press the MINI joystick.
3.Select "Settings".
4.Select "Traffic Info settings".
5.Select "Traffic Info".
Page 134 of 218
On/off and settings
132
On/off and settings
The following audio sources have shared con-
trols and settings options:
>Radio
>CD player
>CD changer
*
Controls
The audio sources can be operated using:
>Buttons near the CD player
>Onboard monitor
>Buttons
on steering wheel, page11
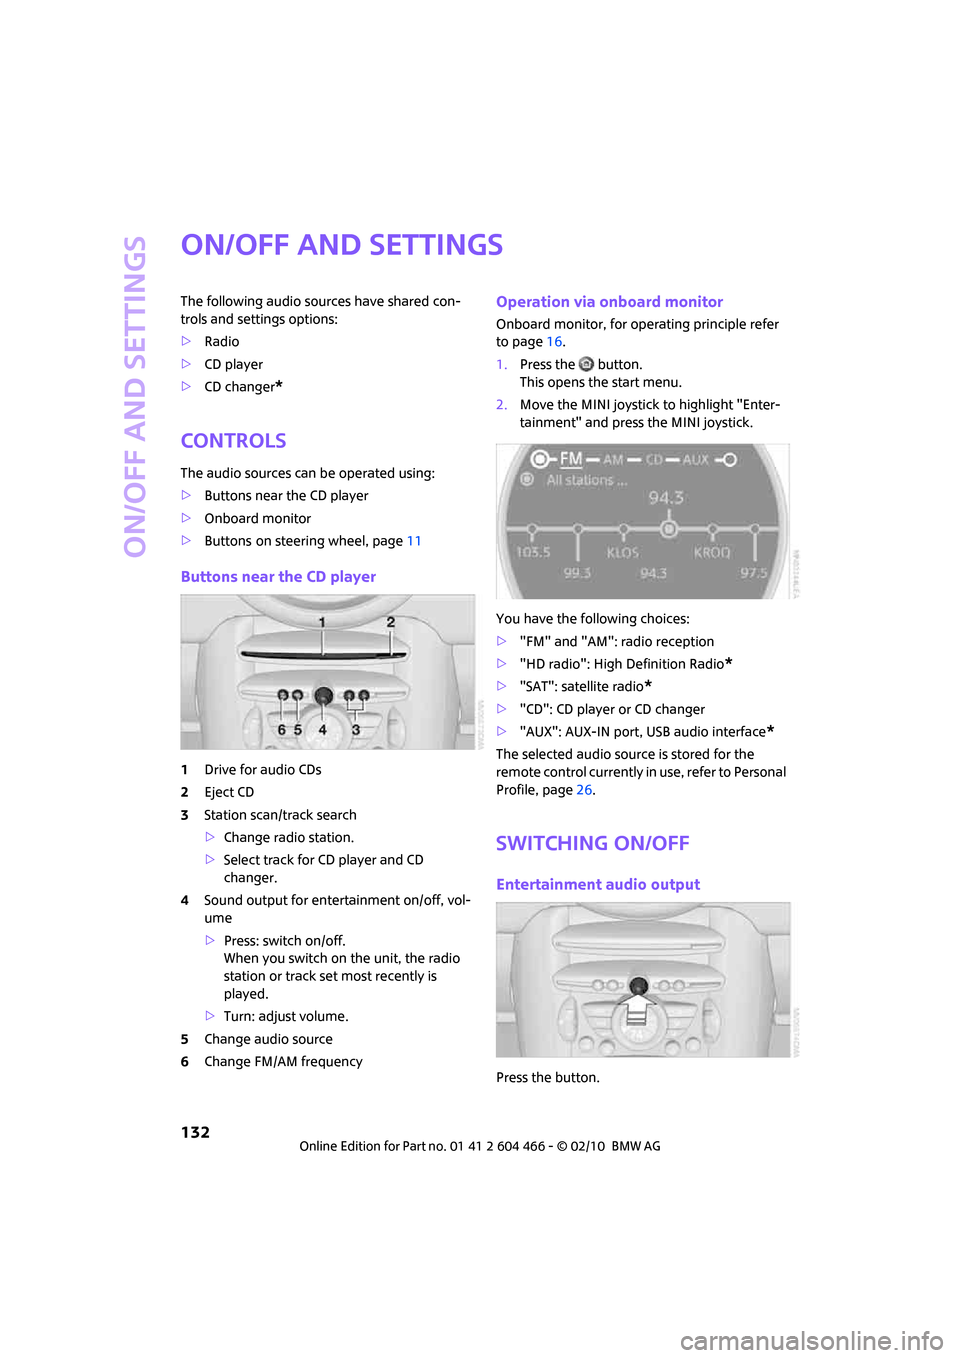
Buttons near the CD player
1Drive for audio CDs
2Eject CD
3Station scan/track search
>Change radio station.
>Select track for CD player and CD
changer.
4Sound output for entertainment on/off, vol-
ume
>Press: switch on/off.
When you switch on the unit, the radio
station or track set most recently is
played.
>Turn: adjust volume.
5Change audio source
6Change FM/AM frequency
Operation via onboard monitor
Onboard monitor, for operating principle refer
to page16.
1.Press the button.
This opens the start menu.
2.Move the MINI joystick to highlight "Enter-
tainment" and press the MINI joystick.
You have the following choices:
>"FM" and "AM": radio reception
>"HD radio": High Definition Radio
*
>"SAT": satellite radio*
>"CD": CD player or CD changer
>"AUX": AUX-IN port, USB audio interface
*
The selected audio source is stored for the
remote control currently in use, refer to Personal
Profile, page26.
Switching on/off
Entertainment audio output
Press the button.
Page 135 of 218
MOBILITYAT A GLANCE CONTROLS DRIVING TIPS ENTERTAINMENT
133
NAVIGATION REFERENCE
T h is s y m bo l a t t h e l o w e r e d g e o f t h e C o n t r o l
Display indicates that the audio output has been
switched off.
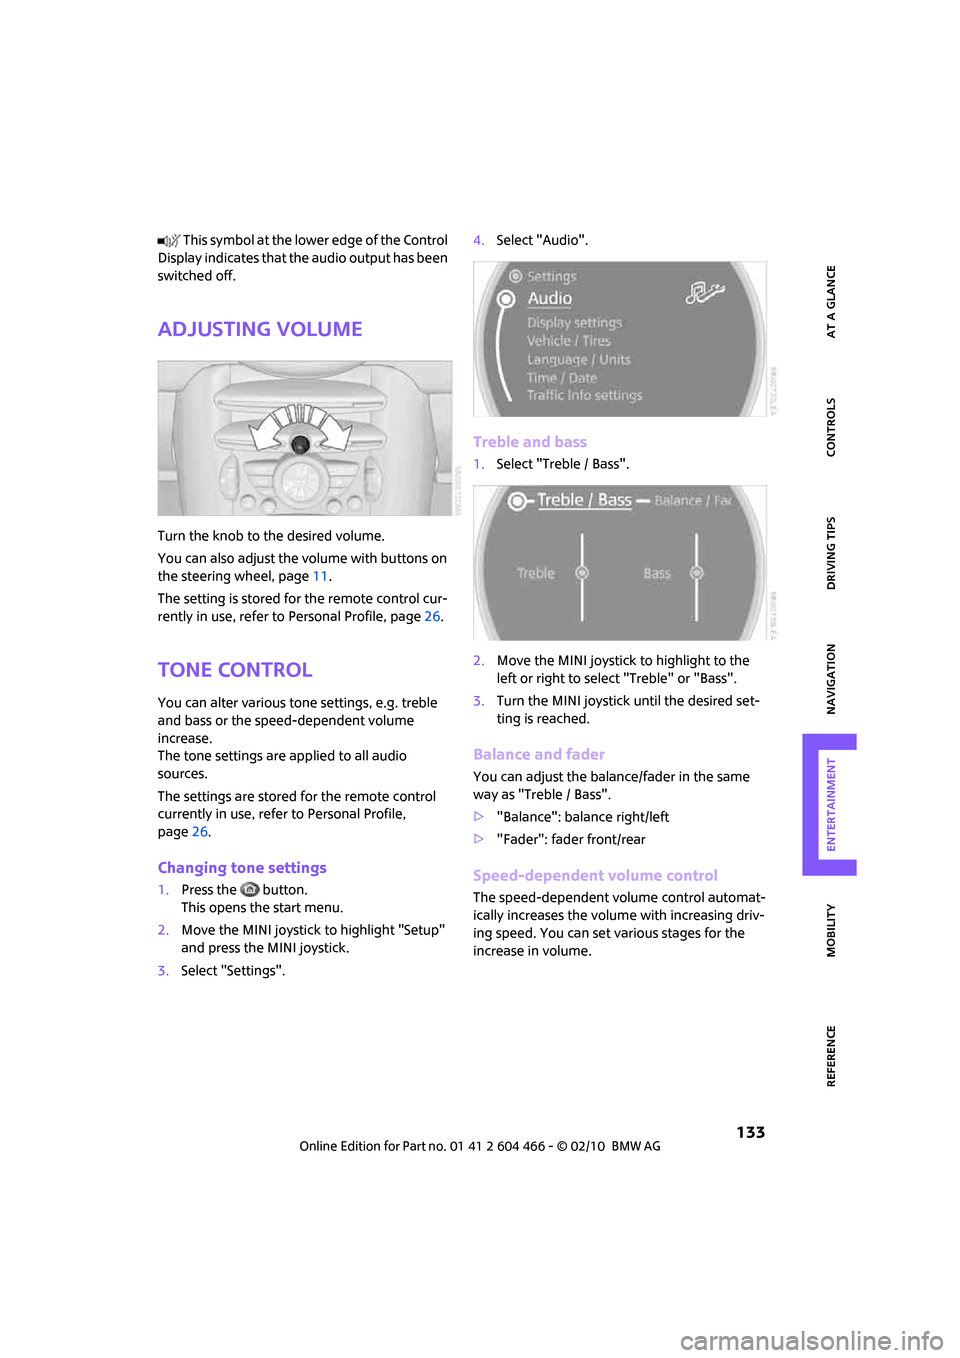
Adjusting volume
Turn the knob to the desired volume.
You can also adjust the volume with buttons on
the steering wheel, page11.
The setting is stored for the remote control cur-
rently in use, refer to Personal Profile, page26.
Tone control
You can alter various tone settings, e.g. treble
and bass or the speed-dependent volume
increase.
The tone settings are applied to all audio
sources.
The settings are stored for the remote control
currently in use, refer to Personal Profile,
page26.
Changing tone settings
1.Press the button.
This opens the start menu.
2.Move the MINI joystick to highlight "Setup"
and press the MINI joystick.
3.Select "Settings".4.Select "Audio".
Treble and bass
1.Select "Treble / Bass".
2.Move the MINI joystick to highlight to the
left or right to select "Treble" or "Bass".
3.Turn the MINI joystick until the desired set-
ting is reached.
Balance and fader
You can adjust the balance/fader in the same
way as "Treble / Bass".
>"Balance": balance right/left
>"Fader": fader front/rear
Speed-dependent volume control
The speed-dependent volume control automat-
ically increases the volume with increasing driv-
ing speed. You can set various stages for the
increase in volume.
Page 140 of 218
Radio
138
Radio Data System RDS
Radio stations in the FM waveband can broad-
cast additional information, e. g. the station
name, using RDS. If the reception conditions are
good, the station names are shown on the Con-
trol Display. Where reception is poor or in the
event of interference, it may take some time
before the station names will appear in the dis-
play.
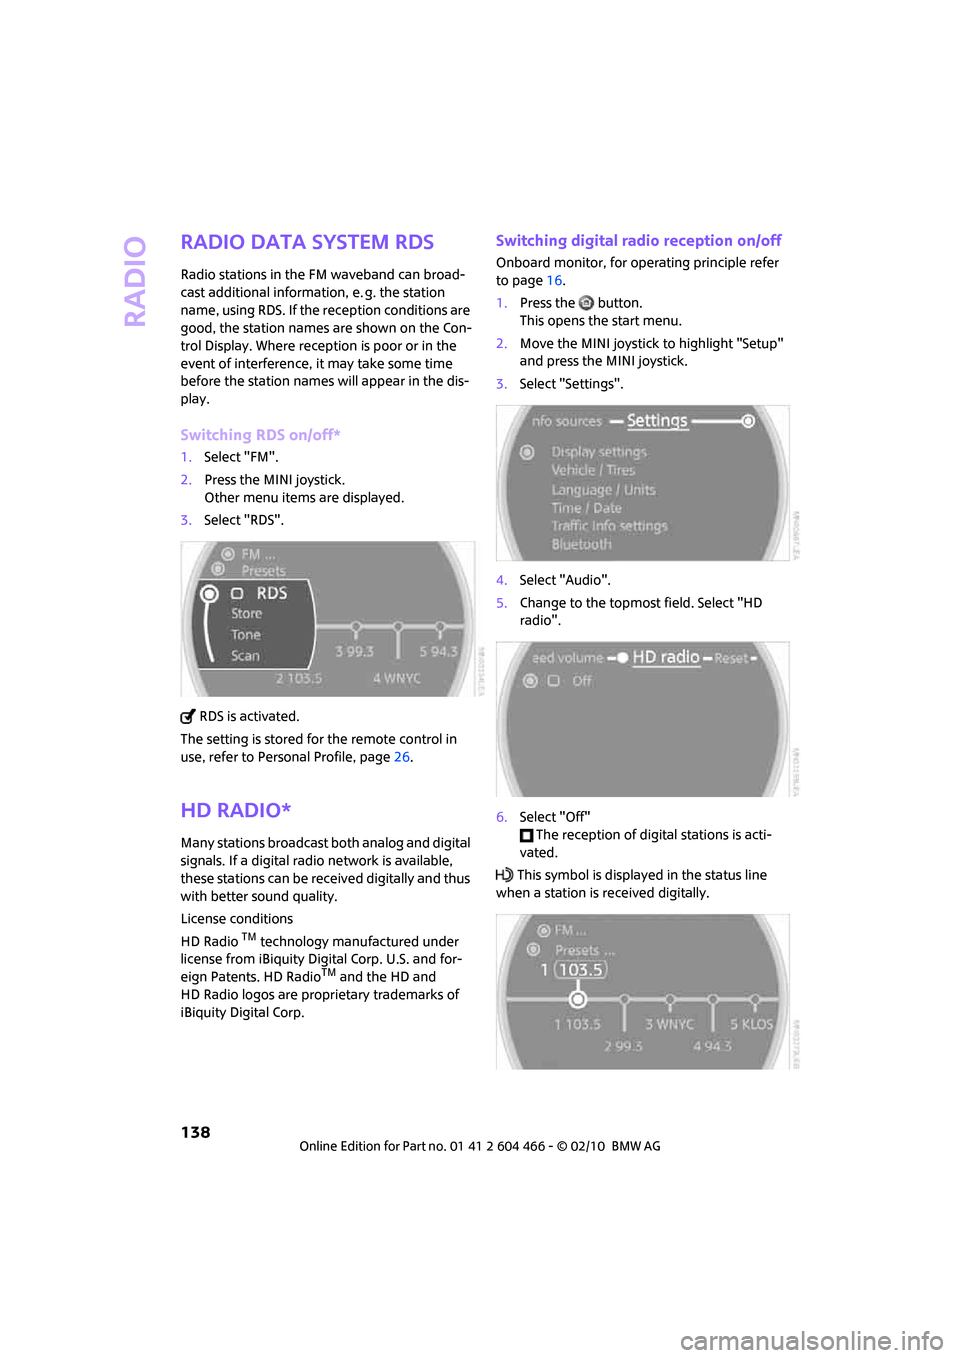
Switching RDS on/off*
1.Select "FM".
2.Press the MINI joystick.
Other menu items are displayed.
3.Select "RDS".
RDS is activated.
The setting is stored for the remote control in
use, refer to Personal Profile, page26.
HD Radio*
Many stations broadcast both analog and digital
signals. If a digital radio network is available,
these stations can be received digitally and thus
with better sound quality.
License conditions
HD Radio
TM technology manufactured under
license from iBiquity Digital Corp. U.S. and for-
eign Patents. HD Radio
TM and the HD and
HD Radio logos are proprietary trademarks of
iBiquity Digital Corp.
Switching digital radio reception on/off
Onboard monitor, for operating principle refer
to page16.
1.Press the button.
This opens the start menu.
2.Move the MINI joystick to highlight "Setup"
and press the MINI joystick.
3.Select "Settings".
4.Select "Audio".
5.Change to the topmost field. Select "HD
radio".
6.Select "Off"
The reception of digital stations is acti-
vated.
This symbol is displayed in the status line
when a station is received digitally.